
Generative artificial intelligence is a highly contested topic in the art world. On the one hand, there’s the technology that saves hours of editing on changes they would have been making manually anyway. On the other hand, many AI programs are based on images scraped from the internet without regard to copyright. Despite the controversy, many major software companies are integrating new features based on GAI. Luminar Neo is one of those programs.
Neo is a newer program that is built around several AI tools with the goal of allowing photographers to spend more time behind the camera than behind the computer. This includes portrait edits like skin smoothing and teeth whitening with automatic masking, but it also includes special effects and even things like AI-suggested crops. I spent some time working with Luminar Neo to see precisely what the software can do — and if any ethical boundaries are crossed.
Table of Contents
The Big Picture
Luminar Neo is AI-streamlined editing software. The program puts time-consuming special effects and local edits at a level accessible for beginners and busy professionals on a time crunch. Its wide range of AI masking tools can be integrated into presets themselves, so one tap on the preset can add anything from teeth whitening in portraits to light rays on landscapes. And that’s all in addition to things like color and contrast adjustments. While the software includes basic tools like exposure, eraser, and color editing, its biggest draw is the special effects that are easy to apply, mask, and customize.
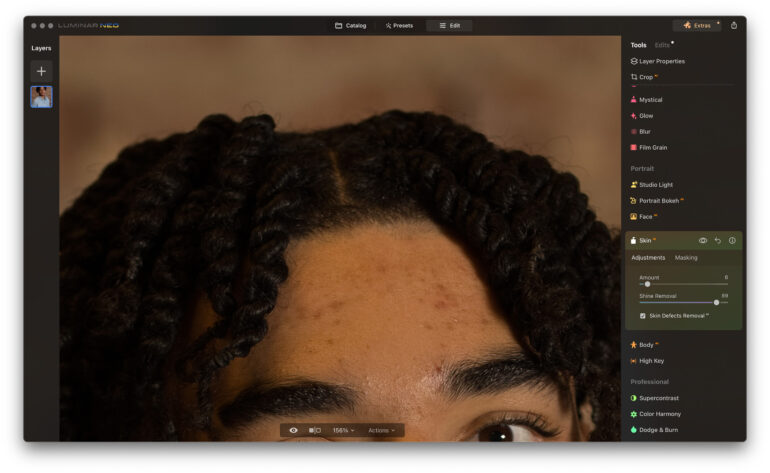
While the AI tools streamline many tasks, others are less so. Any portrait effects are applied to everyone in a group photo, for example, and manual masking is needed to individualize them. The AI-based skin defect removal didn’t work consistently across different skin tones. Some of the built-in presets also include body shape adjustments that not everyone wants or needs. It lacks the camera-specific RAW color profiles that come ready with other programs.
Luminar Neo has several excellent special effects and quick AI tools wrapped in a beginner-friendly platform. I would recommend it for beginners who don’t want to mess with time-consuming edits and as an add-on for quickly applying special effects. However, there are a few missing features and ethical gray areas that would prevent me personally from switching over. I’m giving Luminar Neo three out of five stars.
Pros
- Easy to use
- AI speeds up several types of edits
- Create your own presets that include local adjustments like teeth whitening and creative effects like sun rays
- Built-in creative effects like light leaks and bokeh sparkles
- Ability to customize with masks
- Uncrop with GenExpand and smart erasing with GenErase
Cons
- Portrait edits are applied to everyone in groups or couples’ photography
- Skin defect removal doesn’t work on darker skin
- GenSwap was seldom photorealistic
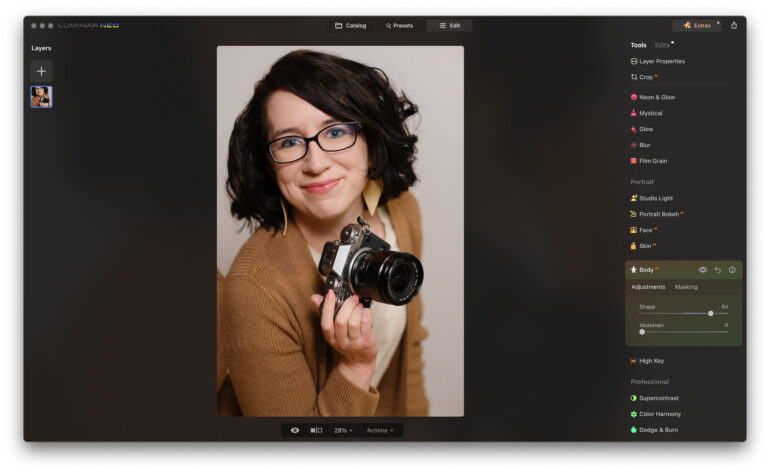
- Several presets have built-in body adjustments (and not everyone wants or needs to be skinnier)
- Raw photos are automatically developed when applying a non-RAW edit
- GenSwap was difficult to get realistic results with
- Export doesn’t have as many options, such as renaming or adding watermarks
Gear Used
I tested version 1.17.0 of Luminar Neo on a 2021 MacBook Pro with an M1 processor. The laptop is my own; the software was provided by Skylum for review purposes.
Innovations
There are a number of different image editing programs out there. Many of them now include some sort of AI-based technology. But Luminar AI leans heavily into AI with the goal of allowing photographers to spend less time on edits and allowing beginners to tackle traditionally challenging adjustments. The newest additions to Luminar Neo’s arsenal of tools are generative AI tools: GenErase, GenSwap, and GenExpand.
The new generative tools use Stable Diffusion but also incorporate other databases as well. “We’re using different diffusion models organized in a single pipeline that yields the best results achievable with today’s technologies,” said Dmytro Mykhalchuk, VP of Engineering & Product. “This means we are not limited to the use of Stable Diffusion alone, but SD possesses several very important attributes. First of all, the quality of the results is better compared to many other models. Second, it has a rapidly growing community, which is particularly important. This is because vendors such as Nvidia invest in optimizing their hardware and software specifically for the family of these models. This investment has made it possible for Skylum to collaborate with Nvidia and improve our performance by up to 25%.”
Stable Diffusion is one of the AI databases at the center of copyright lawsuits, as this database uses images scraped from the internet. Earlier this year, Getty brought a lawsuit against the AI model after it generated recognizable watermarks. While many visual artists feel that using copyrighted images to train software doesn’t fall under fair use, Stable Diffusion is a popular model used by other image editors, including Adobe Photoshop.
All three features are aided by in-software tips, such as trying to erase just one thing at a time. These generative tools also typically take a few minutes to run whereas other adjustments are better measured in seconds. It also requires an internet connection to run.
GenErase
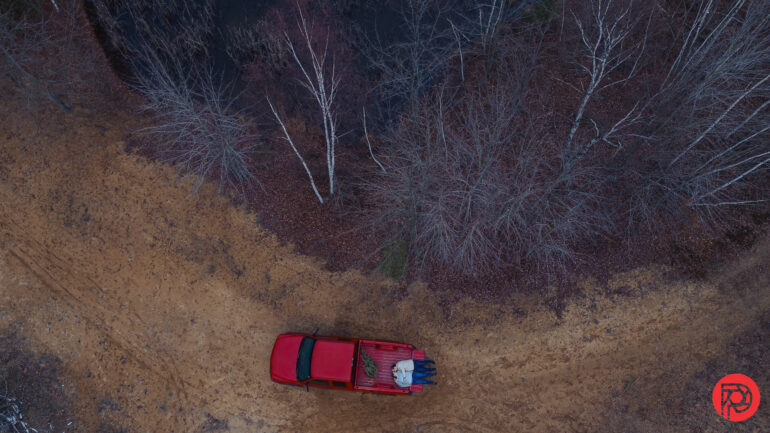
The GenErase tool is arguably the most usable option in the new feature list. It does a fairly good job of cleaning up an image. For example, it removed a jacket and light stand from a drone photo and acne from a portrait. However, it does work best when removing only one object at a time. That means for simple fixes like acne, a healing brush is typically faster since the GenErase takes a few minutes to run. The GenErase is the better option when you need to match a surrounding pattern or don’t have an exact replica to clone from somewhere else on the image.
GenExpand
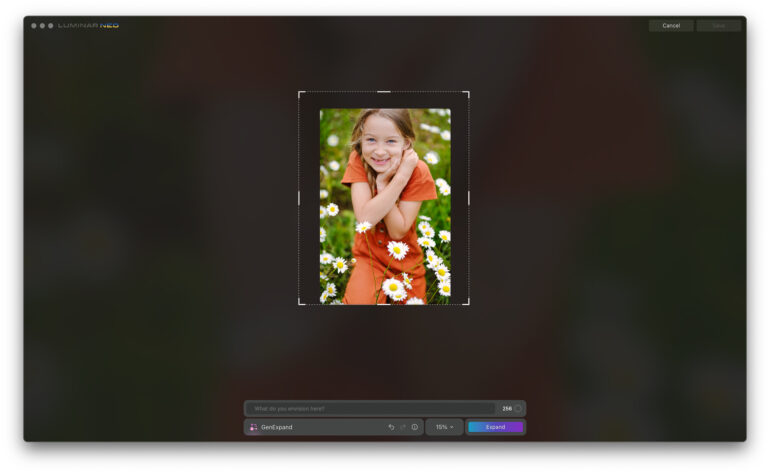
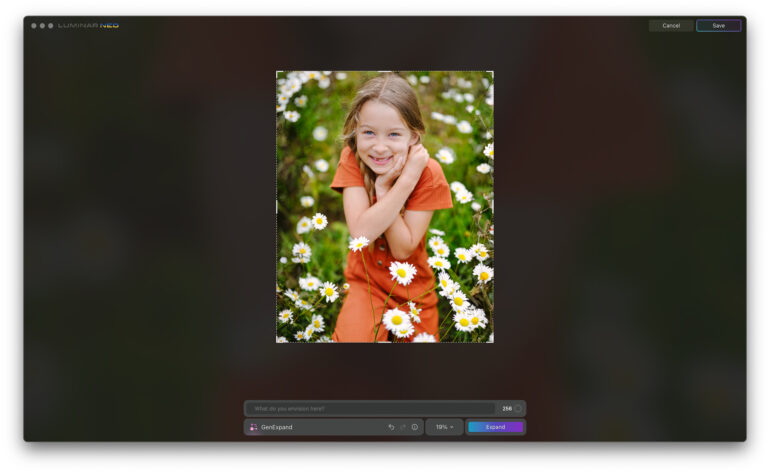
GenExpand essentially allows you to re-crop an image. Many photographers know the pain of wanting to print a specific size, only to realize the image doesn’t work with that aspect ratio. The tool is fairly simple — drag the sides to enlarge the image, then type in a prompt or leave it blank to generate based on the surroundings.
It worked very well on a portrait with a natural background of a field of flowers. However, it didn’t recreate man-made objects well. For example, the results of attempting to expand on a photo of a boat and another of a dock produced poor results. Like the GenErase, it works best if you do one side of the image at a time rather than trying to add multiple sides at once.
GenSwap
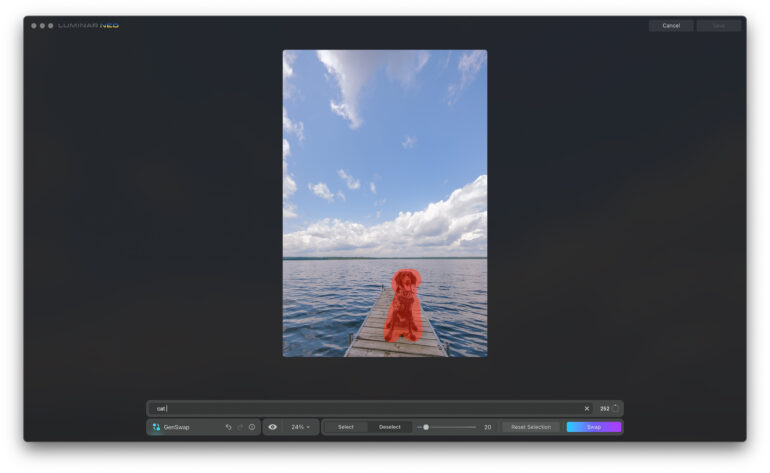
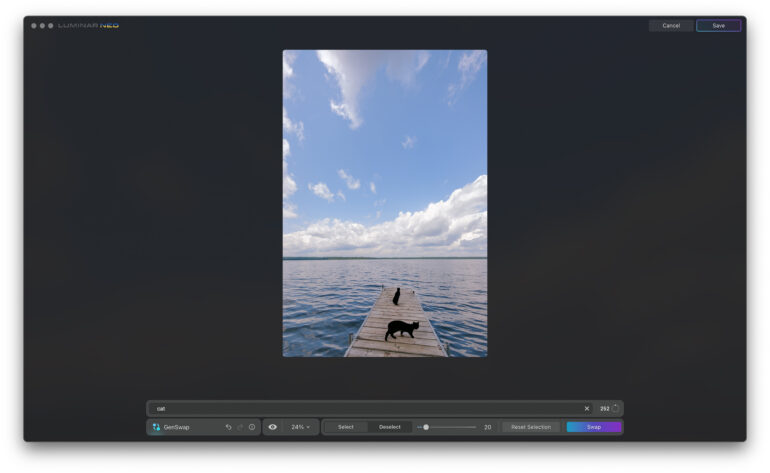

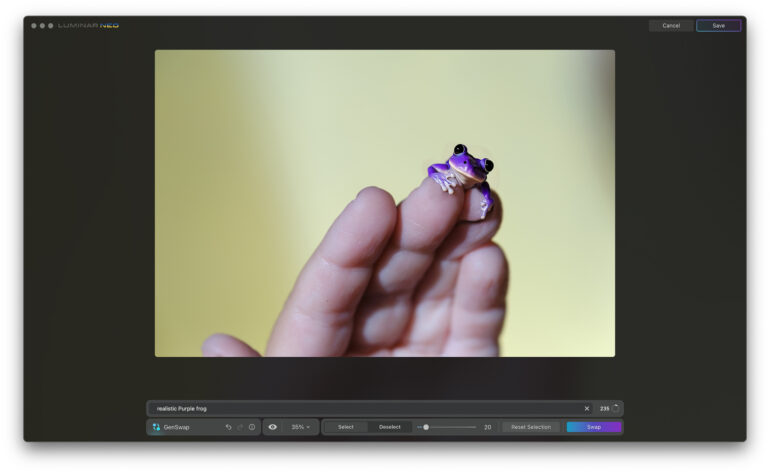
GenSwap replaces an object in a photo with an entirely different one. I was unable to get good results with the images that I tried. The replacement objects were rarely photorealistic. When I attempted to replace a frog with one of a different color, the newly generated amphibian looked like clip art. (It also added a 6th finger, though AI is still notoriously bad at hands). I tried to swap out a dog with a cat, and the system repeatedly generated two cats instead of one with eyes that could induce nightmares. Swapping out a diamond engagement ring for a men’s band was more photorealistic, but the size was off. The only acceptable result I was able to generate was swapping out a small quarter moon for a full moon.
Ease of Use
Luminar Neo is organized into three main sections: catalog, preset, and edit. The organization works pretty well, though the generative tools are in the catalog section when you would expect them to be in the edit section.
Catalog
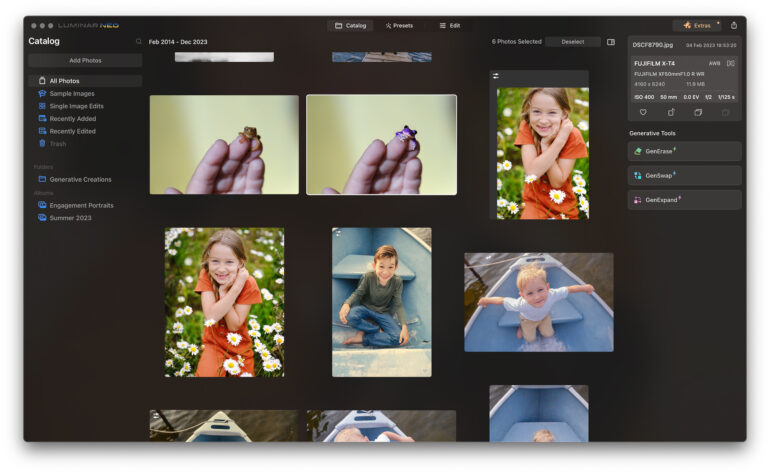
The catalog tab is a straightforward way to organize your images. You can add an entire folder of images from the hard drive at once, and it will appear under the folder section. If you want to create an organizational structure that differs from the hard drive folders, you can instead use albums.
On the right, you’ll see metadata plus buttons for each generative AI tool, which open in a pop-up window. Generative images are saved separately, so you don’t overwrite the original file, and they are also automatically added to a folder called Generative Creations.
Preset
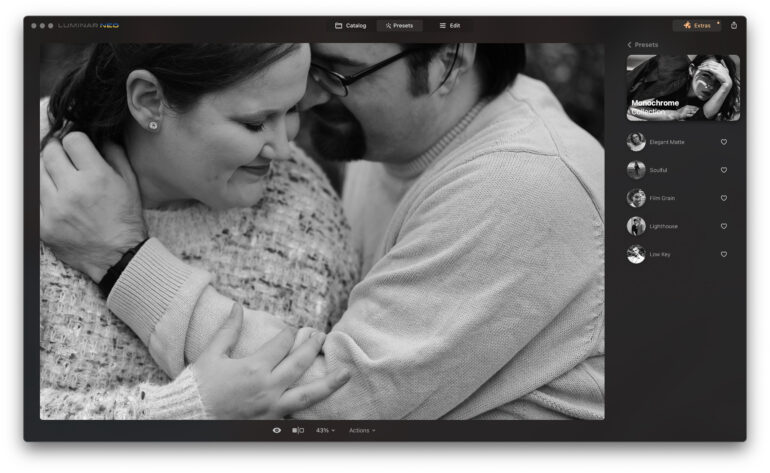
The second main part of Luminar Neo is the presets tab. Here, you can find image editing formulas to automatically apply to new images. Along with adjustments for things like color and contrast, these presets can also include AI-supported edits from the Edit tab, including things like teeth whitening and skin softening. This can be a huge time-saver and is different from other platforms. Lightroom, for example, creates presets from all the sliders, but if you want to apply things like teeth whitening to multiple images, you have to use the AI masking on one image, make the changes, and then sync the remaining images. Luminar Neo builds all of that into the preset itself. Photographers can edit images to their style, save it as a preset, and then apply it to every new image, which is a big time-saver.
However, there is a downside to that methodology. Some of the presets with Luminar Neo include the software’s body AI. Altering the shape of someone’s body isn’t among every photographer’s ethical guidelines, including mine. Even then, when photographing an athlete, the thinning edit has the opposite effect, creating a less flattering portrait when muscle mass is desired.
Edit
The edit tab contains a sidebar full of all the different editing options. Some are fairly standard, like exposure, contrast, and sharpening. Sadly, the RAW Develop tab doesn’t have the camera’s built-in profiles, so I lost the Fujifilm color profile option. You can upload custom DCPs, but the camera profiles aren’t integrated automatically like with Lightroom and Capture One. The other downside to working with RAW files is that the image “develops” once you leave the Develop RAW tool. If you apply other edits, you can still go back, but you won’t see the other adjustments in the Develop RAW tool.
Once an edit is applied, it moves to the Edits sub-tab. If you want to increase or decrease the strength of an edit, for example, you’ll need to go find it in the Edits tab. This is also how you undo part of the edit.
Images can be exported from the file menu. The option to resize is available, but it lacks features like adding a watermark and renaming the files. (I re-imported the watermarked samples here into Lightroom.)
Image Quality
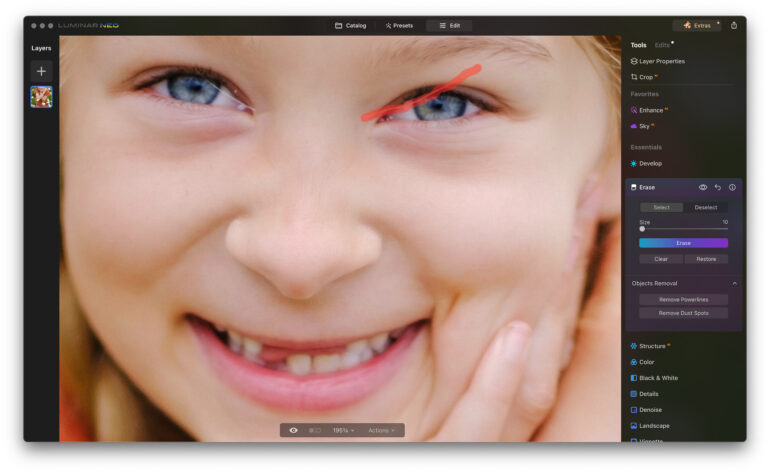
While Luminar Neo contains a lot of the usual tools photographers can find from pretty much any program, the software has a long list of special effects. Yes, those special effects could also be done with Photoshop, but they’re a bit faster and simpler inside Neo. The Essentials sub-category contains all the usual culprits, like exposure adjustments and color editing, along with an AI-based structure tool to adjust detail and clarity. There’s also an erase tool. This worked fairly well to remove a flyaway hair across the face, but it worked best done in sections.
The Creative sub-category is where much of the fun resides. Some of the key tools include:
- ReLight AI is a tool to adjust the lighting of the image. This uses depth mapping to adjust the close brightness and the far brightness. For example, you can increase the near brightness and reduce the far brightness to look like flash was used, though it won’t do things like add catchlights and shadows on the face.
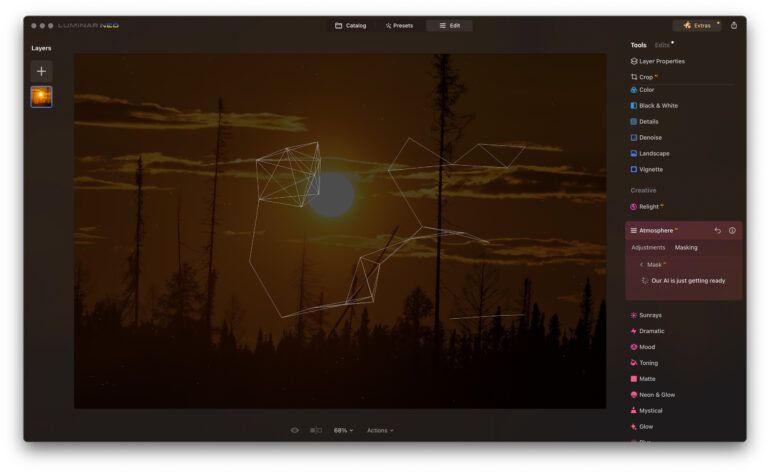
- Atmosphere AI allows you to add fog and haze to a photograph. I had a bit of a hard time getting it to look like real fog, but it can work for certain images.
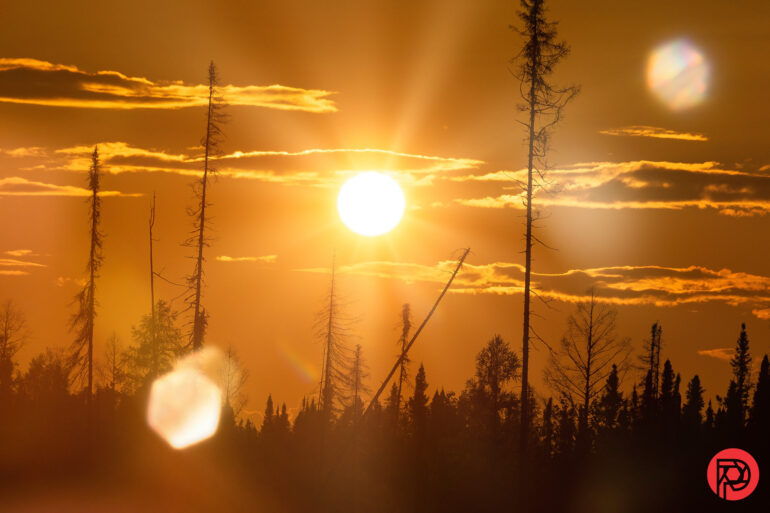
- Sun rays is one of my favorites, allowing you to add light rays to any photo by dragging and dropping a sun onto the image and using sliders to adjust things like the warmth and number of rays. This works best if you have an image that already has a bit of sun in it; it just needs more rays.
- Blur: allows editors to add motion, Gaussian, twisted, or tilt-shift blur using masking, including AI-powered masking.
- Film grain is self-explanatory, but it is still one of my favorites.
The portrait sub-category has tools designed for images of people. Again though, these effects will automatically apply to every person in the photo without manually adjusting the masking, so it’s not quite as quick working with group photos.
- Studio light is another tool to adjust the lighting in portraits. This one I found wasn’t super intuitive and was difficult to get started with without a tutorial. There is the option to add patterned light here, like blinds or lace.
- Portrait Bokeh AI adds more background blur using AI masking.
- Face AI can slim the face, enhance the eyes, add color to the lips, or whiten the teeth. The AI masking seemed to work fairly well and makes quick work of tasks like whitening teeth across multiple images.
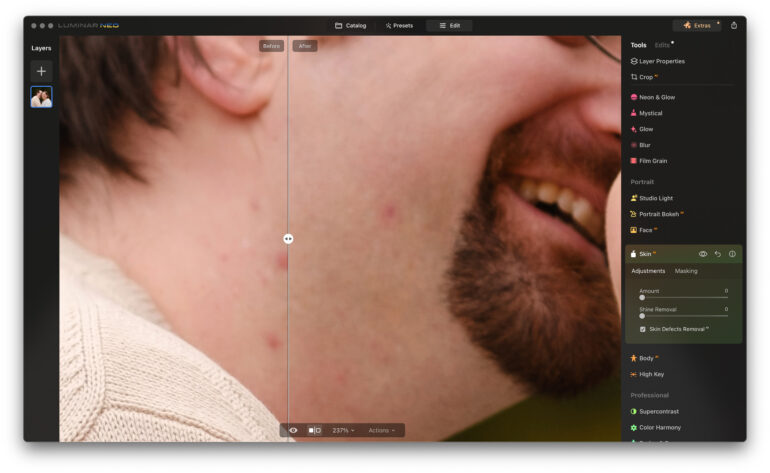
- Skin AI is AI-based skin softening and shine removal. There’s also a checkmark to remove skin defects, but this only works with red spots. That’s great for leaving freckles and moles intact, but means it doesn’t work well on darker skin where acne can be more brown than red.
- Body AI has two sliders. The shape slider narrows the entire body. Ethics aside, this works when used sparingly, but if you have a headshot where part of the shoulder is cropped off, the software replicates the shoulder at the edge. The abdomen slider is like taking a Photoshop pucker or contract Perspective Warp tool over the stomach. Sometimes, that works, but it also messes with patterned shirts and sometimes skews the surrounding areas a bit.
The final sub-category is Professional, where a few more advanced tools reside. Here, you’ll find Color Harmony with things like warmth and split color. There are also tools for super-contrast and local adjustments sit here as well, including dodge and burn and clone.
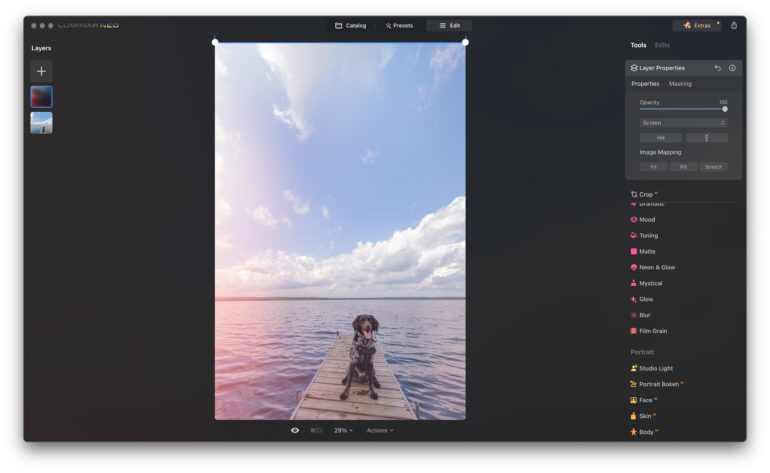
On the left side of the software sits the layers button. These aren’t really the same things as Photoshop layers. The layers here are special effects, which fall into four categories: flares, light leaks, sparklers, and stardust bokeh. When done right they can appear realistic, but you’ll need the correct type of photo — a lens flare won’t look realistic on a photo taken on an overcast day, and sparklers look best in a photo taken in the dark. These can be customized with masking, and there’s the option to download more as well.
Who Should Buy It?
There are three main reasons that Luminar Neo stands out from other software. The first is the ability to create presets that include special effects like sun rays as well as AI masking such as teeth whitening. Those can then be applied to other photos with just a few clicks. The second reason is the special effects that are typically faster than creating a similar look in Photoshop. The third reason is simply that the program makes complex edits easier for beginners.
However, there are several reasons that I personally won’t be switching over. The first is that the software lacks built-in RAW profiles — using Fujifilm’s color profiles saves me too much time in color editing to use software that doesn’t have that option. (There are custom profiles you can import, but who has time for that?). The second is that it’s difficult to use those AI-portrait editing tools for images of couples and groups. While Lightroom’s AI masking has a few more steps involved, I can pick and choose which person to apply the teeth whitening to. The final reason is more personal. My editing philosophy is to correct temporary flaws like acne. I will also correct things that are exaggerated in photos that didn’t come across that way in person, such as whitening teeth after warming up the rest of the photo. That philosophy means I wouldn’t use many of Luminar NEO’s most time-saving tools.
I would recommend Luminar Neo more as a tool for applying special effects after starting all the color edits in Lightroom or Capture One. I would also recommend it to beginners, but with some hesitation, as beginners tend to overdo their edits, and that’s easy to do when Neo makes editing easy. Beginners are going to have to be able to take a step back and determine if they took the edit too far — most sliders should be used with smaller adjustments.
Tech Specs and Main Features
Skylum lists these new features for Luminar Neo 1.17.0:
- GenErase: A next-generation Erase tool that not only removes unwanted distractions from your images, but also intelligently replaces those areas using content-aware AI tools, providing a focused and distraction-free composition. This feature preserves the integrity of your photos by filling in the gaps with textures and other elements using AI to match the surrounding area. GenErase can seamlessly remove objects such as trash, street signs, utility poles, vehicles, graffiti, crowds, and more to preserve the beauty of the composition.
- GenExpand: A revolutionary tool that empowers users to break free from traditional aspect ratios and add a new dimension to their original compositions. With GenExpand, you can effortlessly extend the boundaries of your photos, whether you’re creating panoramic landscapes for vast mountain ranges, serene lakes, etc. or want to give your favorite images more breathing room to stand out against a beautifully balanced background.
- GenSwap: This technology allows photographers to change the image composition by replacing or swapping objects or seamlessly adding new details generated by AI according to the user’s prompt. GenSwap allows you to also enhance images by adding elements such as trees, animals, and more, transforming your photos into mesmerizing visuals. For example, change an unpleasant tree for a better looking one, add a bird to the sky, or drop a stone in the desert to make the photo complete.
The Phoblographer may receive affiliate compensation for products purchased using links in this blog posted.
Get rid of the ads!
Did you enjoy reading this article as much as we enjoyed writing it? There's a way to support us and our reporting, getting ad-free navigation and more as a bonus. Subscribe to us for less than a coffee per month —just $3.99— or take advantage of our yearly subscription with a hefty discount for only $25.- An ad-free experience
- A free mystery box for Lightroom or Capture One
- All the books in our store
- 20% discount on Capture One
- 30% discount on Imalume Photo Theft Protection
- 20% off Herbs and Kettle Tea Company.
- 20% off your order from MPIX printing services.
- 5% off Viltrox Products via their eCommerce store.
- 10% off all film developing, printing and scanning services from Blue Moon Camera and Machine
- 15% off 7Artisans products: The lens and accessory maker is offering a sweet discount for Phoblographer's readers.