
Many Gen X and Y photographers who still have negatives and slides of their family photos and holidays would like a simple digitizing solution today. And with film photography still gaining traction among Gen Z, getting those analog photos scanned so they can be uploaded to social media right away seems to be the need of the hour. It’s less about printing for them and more about getting it out on the internet for the world to see. Times change, and companies should adapt to the changing needs of photographers. The Kodak Slide N Scan 7″ Max Film Scanner shows it isn’t neglecting the requirements of current and past analog photographers.
As a family, whenever we took photos using analog cameras, we intended to print them. Which is why we sparingly used film back then. Granny still has loads of albums from my childhood and before, stored away safely. The avid photographer that he was, Granddad printed his photos as much as he could. But he shot a lot more than the rest of the family did together. There are hundreds of slides and negatives from his many decades of photography that we can’t locate the prints for. She doesn’t do much photography these days, but my aunt has been looking for a convenient solution to get Granddad’s photos scanned as a digital backup.
Table of Contents
The Big Picture
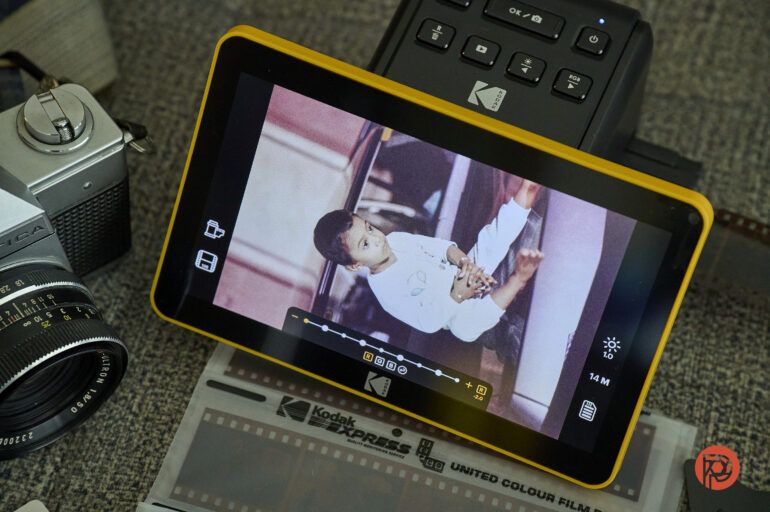
The Kodak Slide N Scan Digital Film Scanner 7″ Max is a handy product for quickly scanning negatives and slides. Scan results are usually sharp. The scanner’s brightness is adjustable, as are RGB values, to get a better white balance for your scanned image. 35mm negative scanning can be achieved pretty speedily once you get the hang of it. Slide scanning takes a bit more precision and patience to get pleasing results. A large tiltable 7-inch screen makes it much easier to look at those negatives before scanning them.
While it might do the job for most, pro photographers might opt for a more professional setup for their scans. The Slide N Scan seems to be aimed more at folks looking to digitize negatives and slides of their past. It’s a great product to use on a rainy day to make a digital backup of those old negatives. It’s also fun to hook up to your TV and run a slideshow of the scans for when your family is visiting. The scanning process has a short learning curve; scans take less than a second to get saved to the SD card if no color or brightness adjustments are needed.
It’ll do the job for some, but it’s not without key flaws. I hope these will be fixed in a future version of this product. Some might be able to be ironed out with firmware updates. The Kodak Slide N Scan 7″ Max Film Scanner gets two out of five stars from me.
Pros
- Really quick to scan once you click the button
- Choose between 13 and 22-megapixel resolution scans.
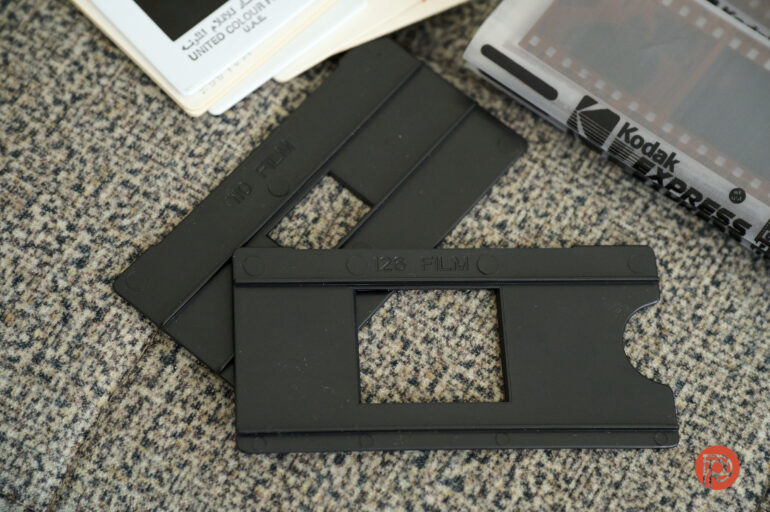
- Holders are specially cut for 135, 110, and 126 film color and black-and-white negatives as well as 50mm (it’s more commonly known as 35mm) slides.
- Large tiltable 7-inch LCD screen. WYSIWYG (for the most part)
- A cleaning brush and USB-C cable included
- Mini HDMI port to connect scanner display to your TV
- Holders help keep negative strips perfectly flat.
- It can even be powered off a computer (if you don’t have access to a power port)
- There’s a date stamp feature that allows you to set a date for the scanned file. This way your digital scan can have the date when the analog image was originally shot.
- You can upload images directly from the scanner (with the SD card still inside it) if the scanner is connected to your computer via the USB-C cable.
Cons
- Brightness and Color adjustment options should have been via dials, not buttons.
- Color adjustment settings on the scanner are tough to understand for photographers who aren’t very technical about photography and editing.
- Slide scanning is frustrating at first. The lack of a sliding tray inside the holder makes it difficult to precisely align a slide without poking at it with another slide.
- Images get cropped off on the sides (when scanning negatives in landscape mode). And there’s some slight cropping at the top and bottom too.
- The 22-megapixel scan option is an interpolated enlargement from a 13-megapixel scan. Dedicated image enlarging software might do a better job at upscaling your scans.
- The digital timestamp can only be set as far back as 1980. Really Kodak?
- This really should have been a touch-screen LCD that also allows you to zoom in and inspect negatives or even scanned images closely.
Gear Used
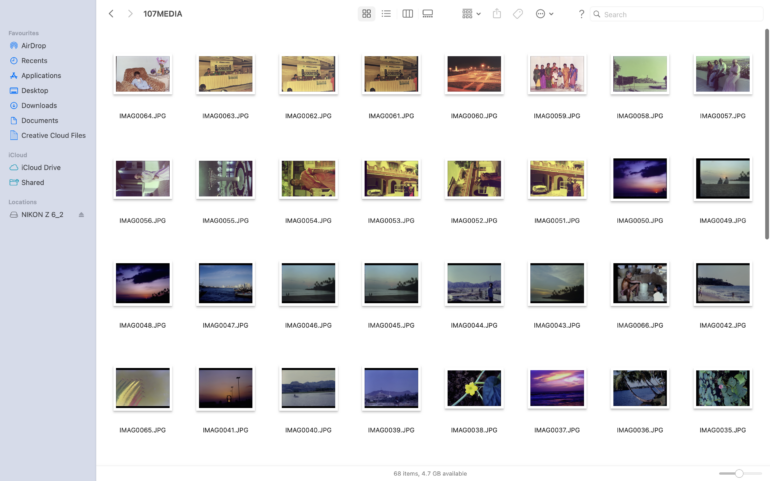
I tested the Kodak Slide N Scan Digital Film Scanner 7″ Max model with a Sandis Ultra 16GB SD card and my M1 Macbook Air laptop.
Innovations
Scanning a frame takes less than a second once you’ve placed your negative or slide correctly and applied the necessary brightness and color corrections. It’s almost like pressing a shutter release button. If only the slide scanning process could be as fast too.
Ergonomics

When you open up the box and take the scanner out, you’re greeted with the familiar yellow and black Kodak color scheme. The screen size is noticeably bigger than the rest of the scanning unit, but it’s not heavy at all.
The tilting screen is a handy addition to this scanner. Especially since the LCD isn’t an anti-glare kind.
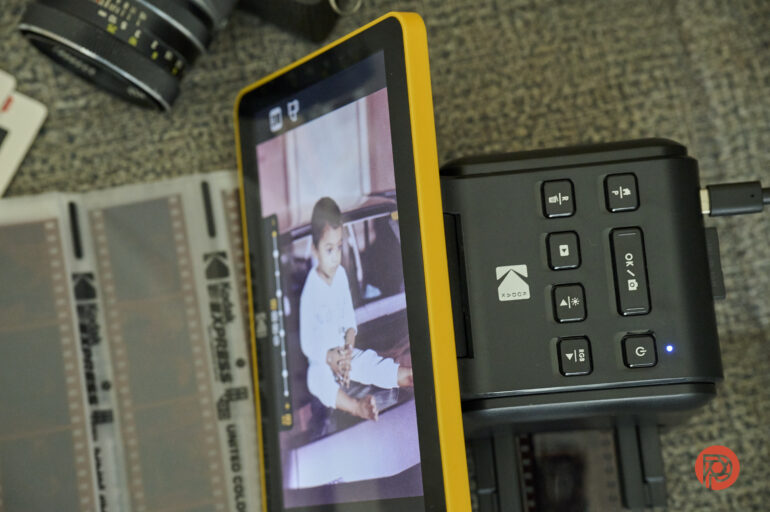
At the rear are the HDMI and USB-C ports and the SD card slot. You can plug the USB-C cable into your smartphone charger, your computer’s USB-A port, or even a power bank. Don’t be fooled by the images on Kodak’s website; the maximum sized SD card you can use with the Kodak Slide N Scan is 32GB.
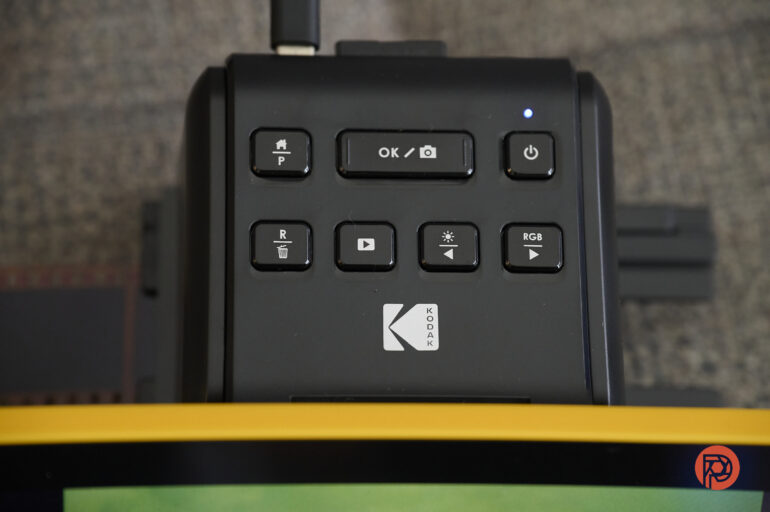
The two rows of buttons at the top are where you’ll spend a lot of time with this scanner.
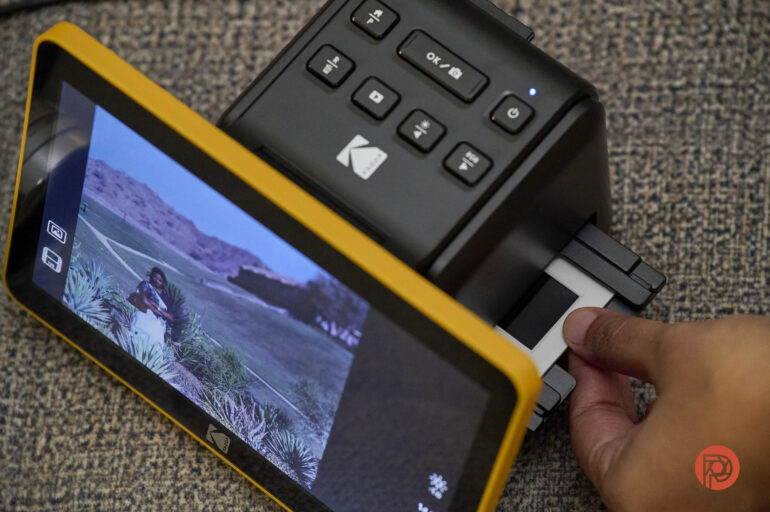
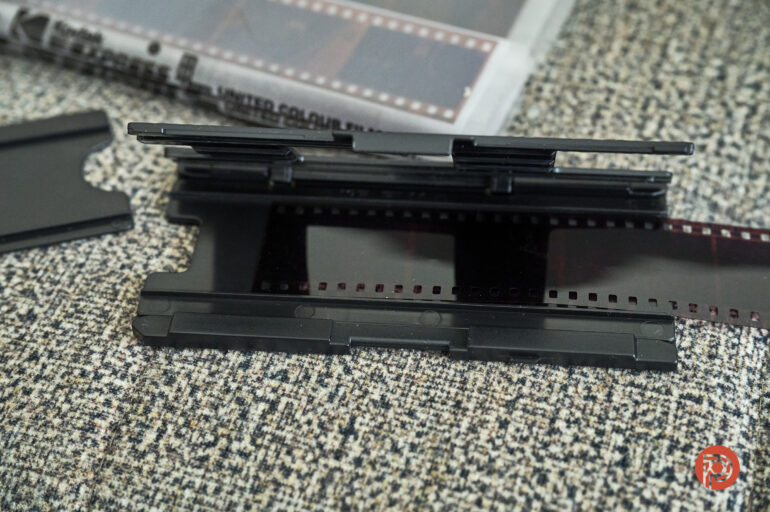
You get a plastic 135 slide holder (which acts as the base holder) and plastic 135, 126 and 110 film adapters to go with this. I was often worried the locking mechanism would snap or break when I shut the holder over the adapters I was using with it.
While 35mm negative scanning is easy enough, slide scanning is time-consuming. Because your slide disappears once it’s in the holder, you have to gingerly push it in place with another slide. And if you push too far, you need to push at it from the other side. I wish Kodak had thought of some mechanism for moving individual slides into place without juggling this way. If you’ve got many slides you hoped to digitize using this scanner, be prepared to spend a lot of time doing that.
Build Quality
The Kodak Slide N Scan is all plastic, but the main scanner unit and LCD seem like they can take a few knocks. It’s the film adapters that worry me. I feel like they may snap easily if they aren’t handled properly. And I am not sure they’d retain shape if kept in harsh sunlight. But that’s just a feeling maybe.
The buttons have solid tactile feedback when you push them, and I didn’t encounter any false presses during my scanner testing. But having just 5 buttons for adjustments is confusing as most buttons perform different tasks depending on which menu mode you’re in.
The LCD can be tilted to 5 different angles for your viewing comfort.
Main Features
Film Type Setting
Pick between 50mm Slide, Color Negative, or Black and White Negative options here. Each option has 3 sub-options – 135, 110, and 126 film.
Scanning
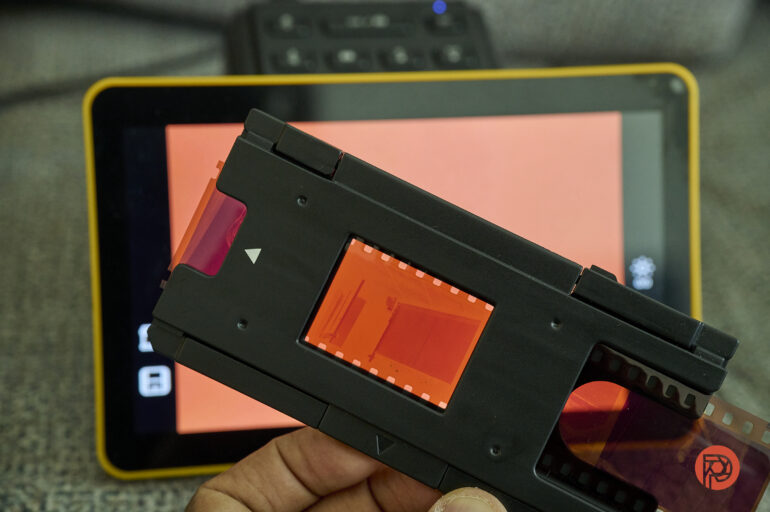
No scanning happens without the use of the 135 Slide holder, also known as the main holder. This can be used without any adapters for scanning slides. You can open up this holder to place a slide in there. You can also insert the slide in from the right once the holder has been correctly slotted into the scanner.
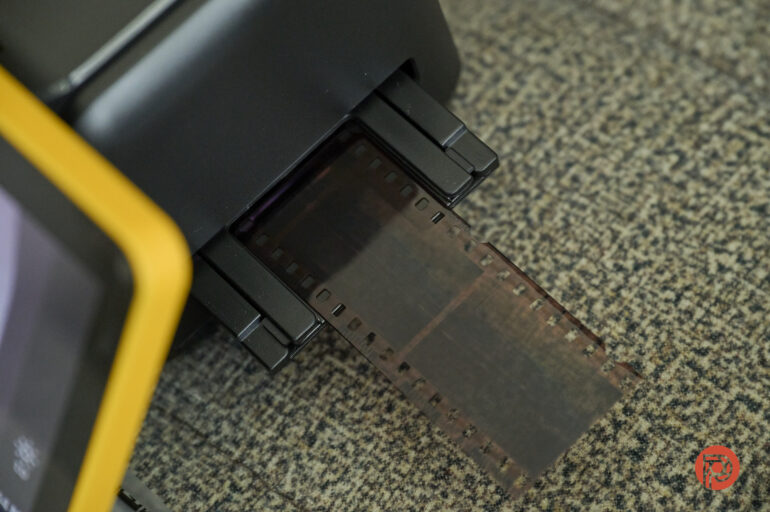
If you intend to scan negatives, insert the appropriate plastic adapters inside the main holder first. After doing this, slide the main holder into the scanner, then you can feed your negative strip from the right. The holders help to keep the negative strip flat and correctly aligned.
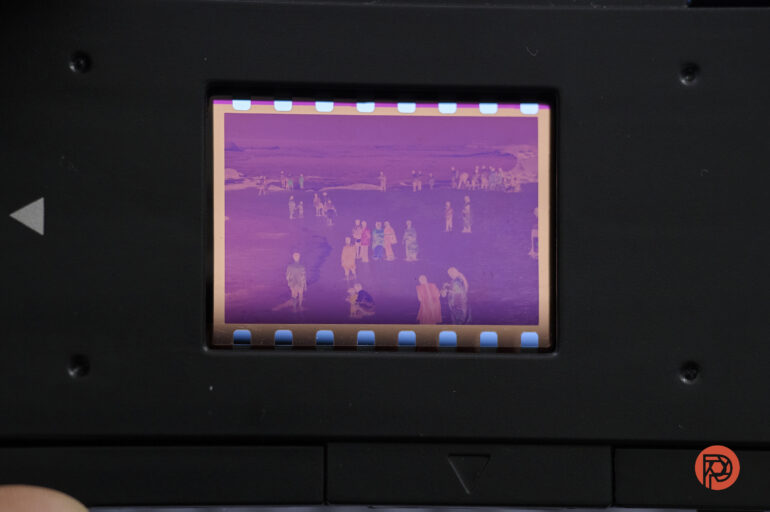
Positioning Negatives Is Tricky
You’ll see the negative converted into positive in real-time on the LCD. But this is also where I found an issue with the scanning process. The LCD has two large black bars on the right and left of the screen. These showcase the current scan format, negative size, brightness setting, and scan resolution. Now the main holder hits an end point when it’s slid into the scanner, indicating it’s perfectly in place to accept a strip of film. But because the blank portions between the negative frames become black when inverted by the scanner, and the holder itself is black, you often find yourself sliding the strip too much to the left at first. Then you start to see your image getting pushed out of the frame, and you slide it back. This really ends up making you often have to micro-adjust your positioning.
A thin white or yellow strip on the inner side of these black bars would have made aligning the negative frames much easier.
What Crop Is This?


There is also noticeable cropping on the sides of the image. Use the slider above to view the images that are two scans of the same image. The first scan was taken with the left of the frame aligned to the left black bar of the LCD. Notice how the person on the right (seen in the 2nd image) is missing in the first. There’s also a lot more of the coastline in the top right of the 2nd image. You have to compromise with each scan to decide which portion of the frame you want to be left out. I’m shocked that this scanner doesn’t scan the entire 35mm frame, especially when the holders are specifically designed for various formats.
Looking at the main holder with a 35mm strip inside, it shows that the cutout is larger than the image frame, and you can clearly see the sprocket holes here. So when I’ve chosen the right film format menu option, why does it crop the image while scanning? There’s no mention in the instruction manual that cropping would happen during scans.
Color and Brightness Adjustment Buttons Test Your Patience
My biggest gripe with this product is the color and brightness settings. For starters, there’s no auto white balance or color correction option. This would have made life a lot easier for most folks whom this product is targeted at. Secondly, brightness and the RGB color adjustments aren’t fluid. They only have 9 different levels that they can be set to. Brightness levels are still easy enough to adjust. It’s the color adjustment that confuses you often. You must go in sequence to adjust them, using the Play button as a switch to jump between them.
Most folks won’t ever be able to figure out the right combination of settings on the R, G, and B values to get the correct white balance that accurately reflects the scene. It’s a lot easier to just get the brightness alone right and then take the scanned image into Photoshop for white balance correction. Even if you knew how to do this, three or four small dedicated dials on the side of the scanner would have been much more user-friendly to adjust these settings.
RGB Settings Seem To Reset If You Click The Brightness Button

If I went to adjust the brightness after dialing in RGB settings, the white balance would suddenly change. It’s like the scanner would reset the RGB values to the ones set last time. I would have to click the RGB button once more for it to recall the RGB values I had just set before adjusting the brightness.

I’d recommend adjusting brightness first and then RGB; otherwise, the scanner sometimes returns to the previous RGB settings. Or you have to click the RGB button once more to recall this after adjusting brightness. This is definitely a bug that needs fixing.
Date and Time Stamp
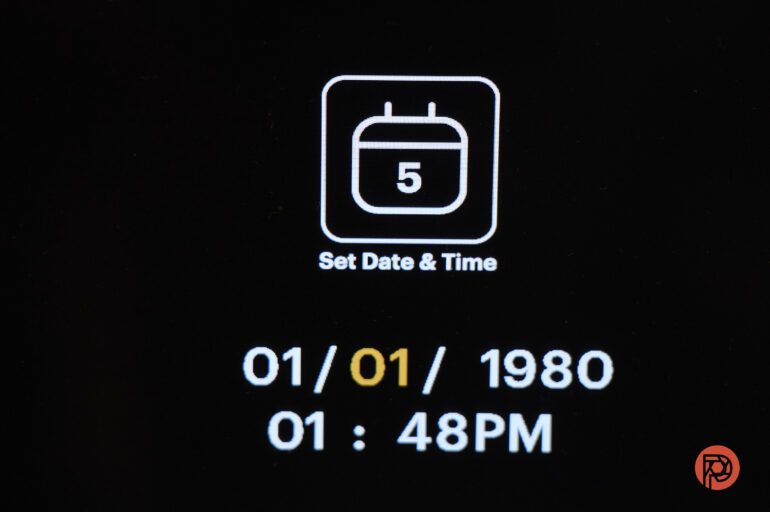
Kodak’s R&D team clearly didn’t think this one through. For starters, holding down the arrow keys doesn’t change any date or time parameters. You have to manually press the button repeatedly to cycle through the date. January 1, 1980 is the earliest possible date you can set.
The whole point of this feature is to set the date and time value in the EXIF data on the scanned jpeg. That way, this doesn’t need to reflect the scanned date but can show the date the original analog image was taken on, thus making image cataloging easier on your computer. But by limiting it to not go earlier than 1980, Kodak really has made this feature unusable for a lot of negatives I have to digitize
Gallery
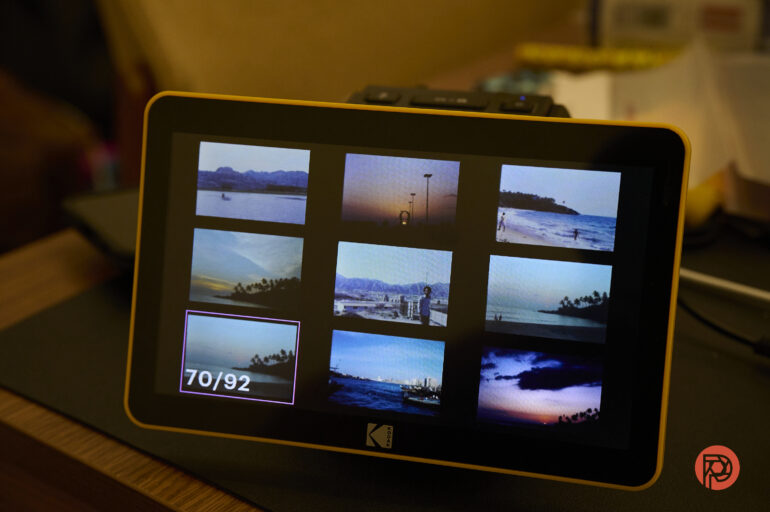
In this feature, you can use the Kodak Slide N Scan as a digital photo frame that plays back the scanned images from the SD card as a slideshow.
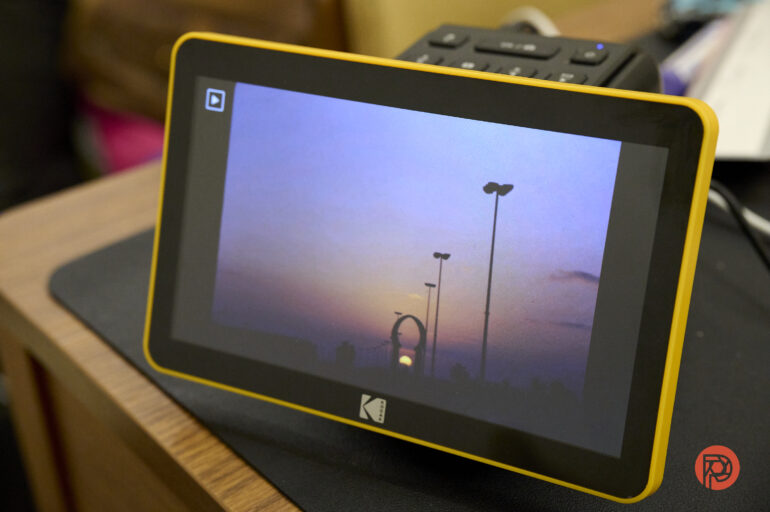
Connect it to your TV if you’d like for a larger viewing experience.
USB Upload
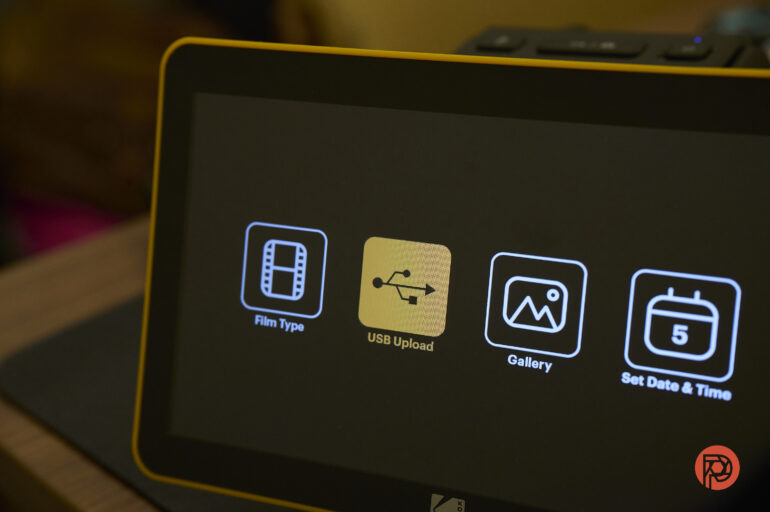
If the scanner is connected to your computer, you can quickly copy over the files from the SD while it’s still connected. It shows up as a drive, just as it would if you took the SD card from the scanner and put it into your computer’s card reader slot.
Just remember to eject the drive on your computer before hitting the Home button on the scanner.
Scanned Image Samples
Unedited


Edited


Who Should Buy The Kodak Slide N Scan 7″ Max?
While the scanner bills itself as a one-stop solution for amateur photographers of the analog era to digitize their images quickly, it does take some effort to get it to work in the best possible way for you. You have to remember to change the date stamp settings each time you want to scan a set of images from a new time period. I can’t see a way to turn off the date stamp option. Adjusting the color settings to get the white balance right is something you may not always get right. Trust me, it’s much faster to do this in Photoshop later. Many of my images looked greener than they should have when scanned. I do wish Kodak had provided software for those purchasing the Kodak Slide N Scan scanner to color correct the scans in a better way on their computers.
I will probably stick to my Negative Supply Basic and Pro Kits to continue with my scan archival project. The Kodak Slide N Scan scanner doesn’t allow me as significant a degree of control with the color corrections as I’d have liked. I honestly expected better from this model. I can’t see pro photographers opting for this solution over using a macro lens on their camera with a dedicated film strip holder and backlight.
Tech Specs
Taken from the Kodak website:
- Compatible with 50mm slides [135, 110, 126], color negative films [135, 110, 126] and b&w negative films [135, 110, 126]
- Interface: USB 2.0
- Image sensor: 13-megapixel CMOS
- Resolution: 13MP/22MP (interpolation)
- Power: from computer USB port, 5V/1A power adapter (not included), power bank
- Dimensions: 4.41” d x 6.69” w x 4.45” h
- Weight: 16.9 oz.
- Please note you must have an SD card to operate this unit. it is NOT Included
- Please note a HDMI Cable is NOT Included – It can be purchased separately.
The Phoblographer may receive affiliate compensation for products purchased using links in this blog post.
Get rid of the ads!
Did you enjoy reading this article as much as we enjoyed writing it? There's a way to support us and our reporting, getting ad-free navigation and more as a bonus. Subscribe to us for less than a coffee per month —just $3.99— or take advantage of our yearly subscription with a hefty discount for only $25.- An ad-free experience
- A free mystery box for Lightroom or Capture One
- All the books in our store
- 20% discount on Capture One
- 30% discount on Imalume Photo Theft Protection
- 20% off Herbs and Kettle Tea Company.
- 20% off your order from MPIX printing services.
- 5% off Viltrox Products via their eCommerce store.
- 10% off all film developing, printing and scanning services from Blue Moon Camera and Machine
- 15% off 7Artisans products: The lens and accessory maker is offering a sweet discount for Phoblographer's readers.