
DJI’s Mini series skirts many regulations around drone flight — but there are a lot of limitations to flying a lightweight drone, including lower wind resistance. The DJI Air 3 decreases the portability yet increases the reliability. The mid-tier drone has similar main camera specs to the cheaper Mini 3. But, the Air 3 carries a second camera — equivalent to a 70mm view — and more flight features like omini-directional obstacle avoidance.
But is it worth paying a few hundred dollars more and following more regulations for extra wind resistance and a second camera? For photographers that can’t yet afford the Micro Four Thirds DJI Mavic 3, the DJI Air 3 offers a dual camera plus the ability to detect objects from every direction and the option to save a drone position for recall later — while remaining under half the cost of the more advanced Mavic 3.
Table of Contents
The Big Picture
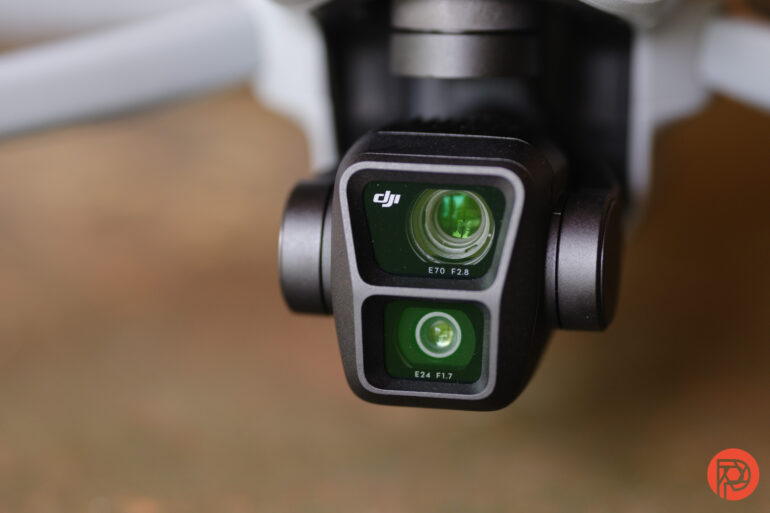
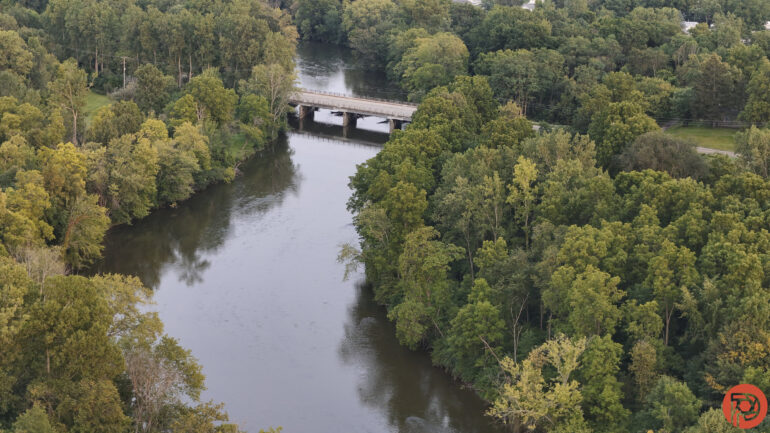
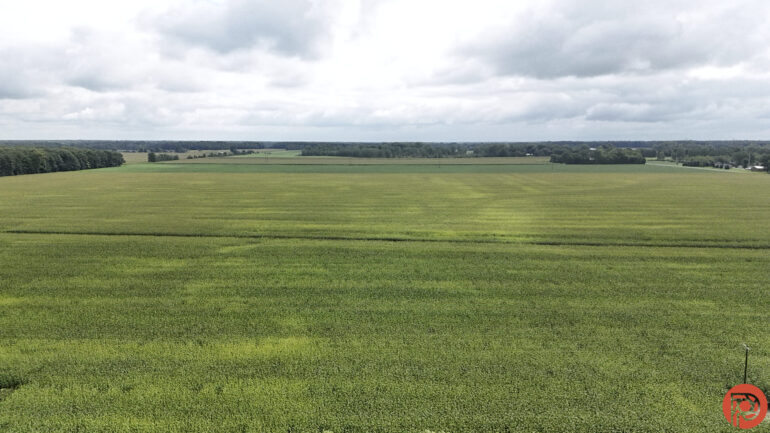
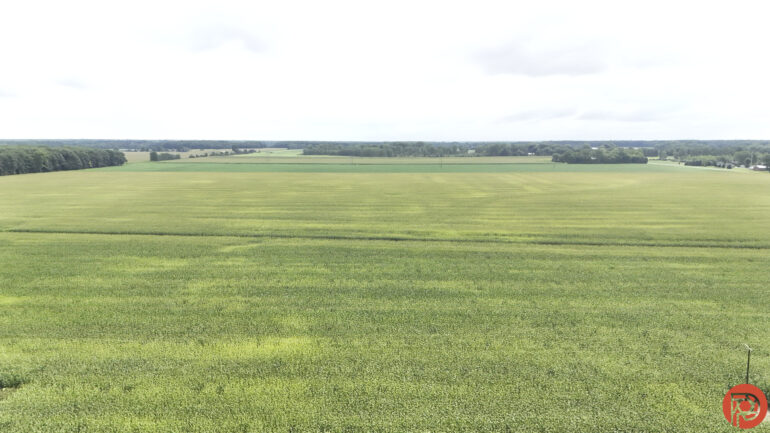
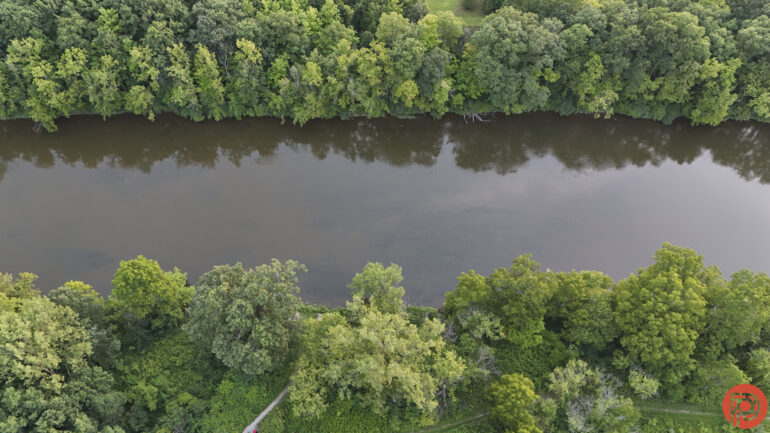
The DJI Air 3 doesn’t upgrade the Mini 3 camera — but it does add a second one. That gives the Air 3 a 24mm equivalent f1.7 and a 70mm equivalent f2.8, both with 1/1.3-inch sensors capable of shooting 12 or 48-megapixel images. While the sensor is small, the images have a surprising amount of flexibility in post. The added 70mm view allows the drone to get in close when flying closer isn’t safe or feasible — or simply to save time or add a little bit of depth. The drone is also more capable in stronger wind. The quadcopter can avoid obstacles in more directions than the Mini 3. And new to the Air series, Waypoints allows for not just pre-planned flight paths, but saving a flight position in order to repeat a photo, such as for before and afters or following a subject through multiple seasons.
While the enhancements are great to see, the Air 3 doesn’t have a jump in image quality over cheaper drones like the Mini 3 — just an increase in flexibility with that second camera. Images are good, but the 48-megapixel mode on the smaller sensor shouldn’t be held to the same expectations as larger sensor cameras. Details are muddled, and if ISOs more than 100 are needed, switching to the 12-megapixel mode is the best option. The trade-off for that second camera is a larger drone.
On the one hand, the Air 3 has twice the cameras but doesn’t double the price. On the other hand, the main camera delivers similar quality, and stepping up to the Mavic 3 delivers a much steeper difference in the resulting images. I’m giving the DJI Air 3 four out of five stars.
Pros
- 24 and 70mm equivalent dual cameras
- Quad Bayer sensor allows for 12-megapixel or 48-megapixel images without ghosting
- Higher wind resistance than the Mini series
- Withstands temps down to 14 degrees F
- Omni-directional obstacle detection
- It has decent battery life that’s actually better than the Mavic 3
- Includes Waypoints
Cons
- Pricey
- The main camera is the same as the cheaper Mini 3 with a 1/1.3” sensor
- Larger and heavier than the Mini series
- The small sensor means the 48-megapixel mode should really be kept at base ISO
Gear Used
I used the DJI Air 3 with the RC 2 and the Fly More kit. The review unit was a short-term loan provided by DJI.
Innovations
The DJI Air 3 is the compromise between the pro but pricey DJI Mavic 3 and the tiny, affordable DJI Mini 3. The mid-level drone, however, feels more like a mishmash of DJI’s existing features than something entirely innovative. It has a slightly faster ascent speed and a slightly longer battery life than the Mavic 3. The DJI Air 3 has the same main camera with a 1/1.3” sensor and 24mm equivalent lens as the cheaper Mini, but it adds a second camera with the same size sensor and a 70mm equivalent lens. That’s an improvement over the Mavic Air 2’s 1/2-inch sensor but a slight drop from the Air 2S’ one-inch. But while the main camera is the same, the Air 3 has several flight features that the Mini series doesn’t offer, including waypoints — the first in the Air series — and features like omnidirectional obstacle avoidance and the higher wind resistance similar to the Mavic series. Video specs improve over the Mini, including higher frame rates for 4K and more color and D-Log options.
Ergonomics
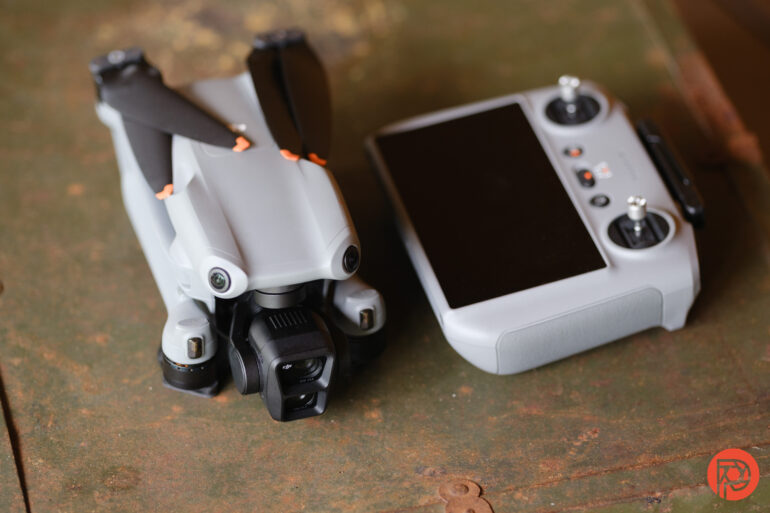
Like its feature list, the DJI Air 3 sits between the Mini and Mavic series size-wise. The drone weighs 720g, which is far too heavy to skirt the simpler regulations for drones under 250g. In the U.S., it’s not just the required registration — commercial pilots can fly drones under 250g over people without added steps. That’s also a significant weight jump over the Air 2S, but the previous drone had a single camera. Photographers will need a small messenger bag or half a full-size backpack to stash the drone — which feels a little larger than a 70-200mm f2.8 lens — plus the controller and extra batteries. Folded, it’s a little over eight inches long.
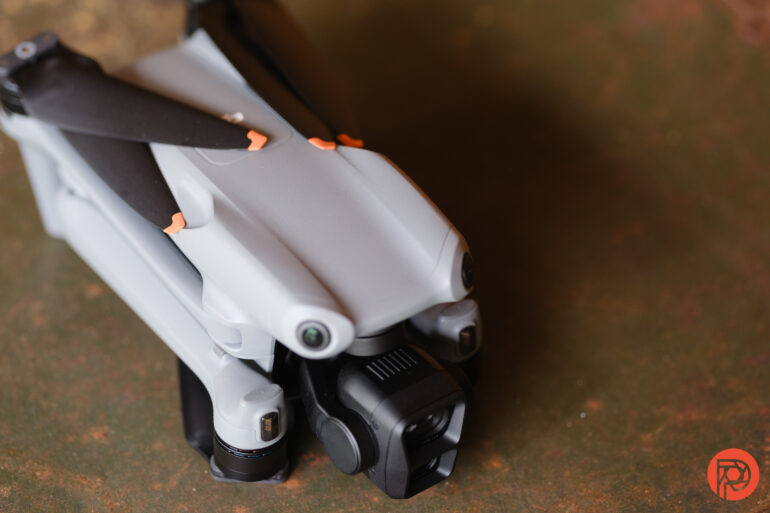
To unfold the drone, the front arms pull forward first, then the back arms pull downward. Order matters since the front arms have a longer plastic piece to hold the drone off the ground, which gets in the way of the rear arms.
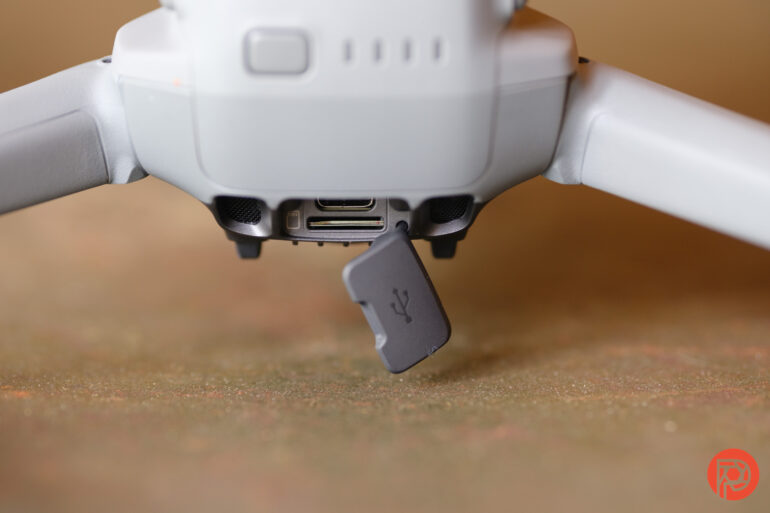
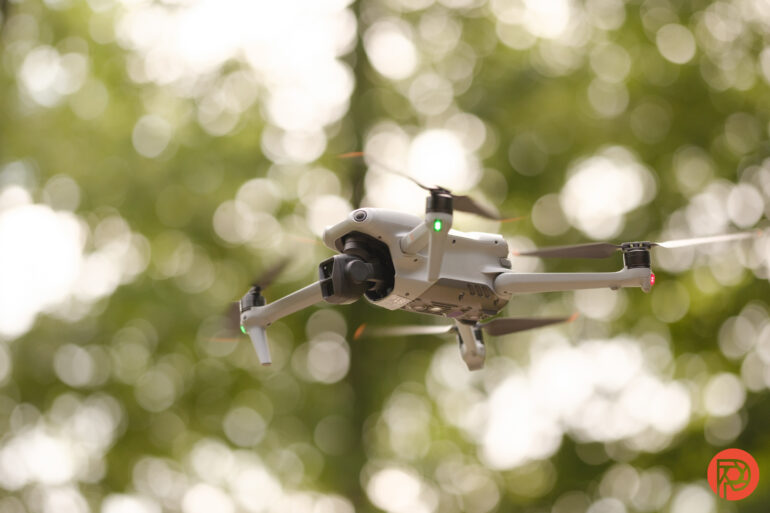
The front of the drone houses the gimbal with the two cameras. The rear holds the battery plus a little hatch for the microSD and USB-C ports. Explore the rest of the drone and you’ll find a few tiny cameras that look like bug eyes — these provide data to the obstacle detection system.
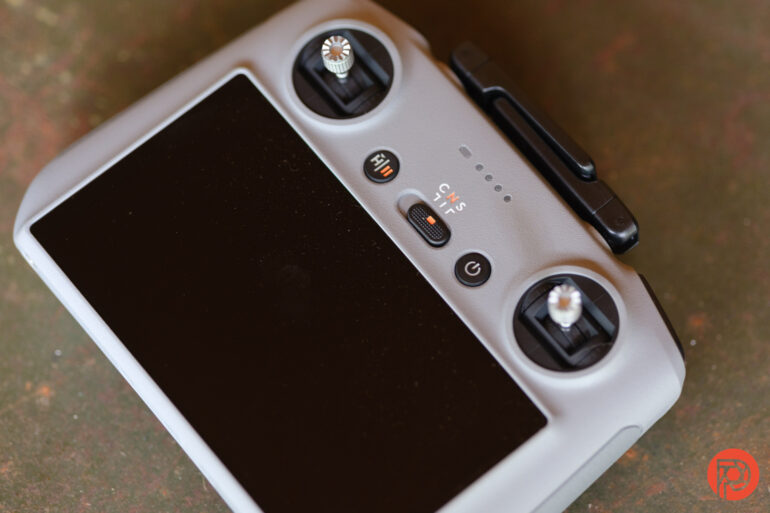
The DJI Air 3 ships with either the DJI RC-N2 or the DJI RC 2, depending on which kit you purchase. Both controllers are the same as the options paired with DJI’s other current model drones. The RC-N2 requires a smartphone and the DJI Fly app to display the live feed, while the RC 2 has the screen built-in. The latter is nice because there’s one less thing to ensure is fully charged; the former is nice because JPEGs are automatically already on your smartphone.
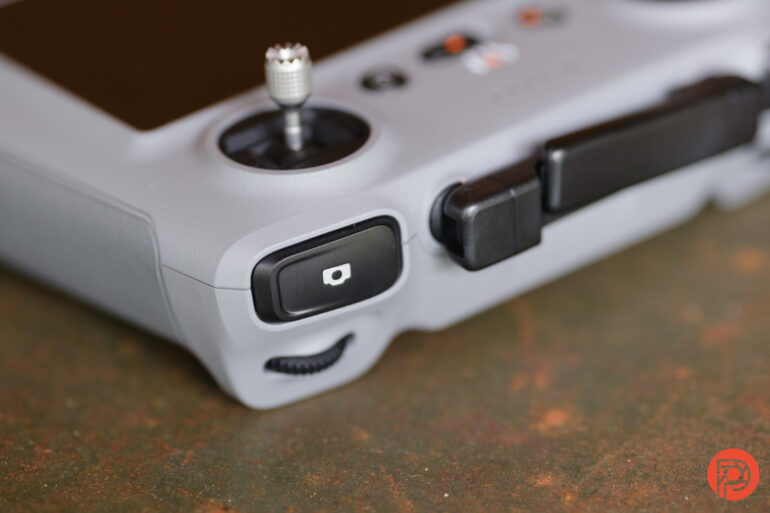
The controls are a comfortable, game-like layout. The two joysticks fly the drone while the index fingers rest on shortcuts to take a photo or start a video. Just under those buttons are two dials that control the gimbal and where the camera is pointed. Two custom buttons rest near where your middle fingers wrap around the grip. Above the screen on the front is a mode switch for flight speed, a return to home or pause button, and an on/off button. The remainder of the controls and settings are accessed on the screen.
Build Quality
One of the reasons to choose the Air 3 over the Mini 3 when both house the same main cameras, is that the large size allows the Air 3 to put up with a bit more. The drone has a wind resistance rated at 12 m/s, which is a little more than 26 miles per hour. The larger drone isn’t going to get pushed around as much as the Mini, which is rated for about 22 miles per hour winds.
Pushing beyond the 250g limit that the Mini tries to stay under, the Air 3 also feels like it is built with a bit sturdier plastic — it feels less chintzy. Of course, plastic is plastic, and a fall from 400 feet is going to be detrimental to either drone. But the Air 3 looks like it might be able to handle a rougher landing a bit better than the Mini series.
Like nearly every drone, the DJI Air 3 can’t fly in rain or extreme cold. With a temperature rating of -10 C or 14 F, pilots can still get some snowy shots safely with the Air 3.
Autofocus
Because of the small sensor and aerial view, autofocus is rarely an issue with consumer drones. Not because drones are great at autofocusing but because there’s a wide margin for error, unlike full-frame cameras and telephoto lenses. The Air 3 is no exception — I didn’t have any issues with getting the portraits and landscape photos that I took sharply focused. However, the 3x lens does have a little bit of depth of field, so be sure to tap on the screen where you want the focus to be.
Ease of Use
While the DJI Air 3 isn’t the company’s most affordable entry-level drone, the quadcopter has a feature that may draw beginners away from the budget Mini: omnidirectional obstacle sensing. Where the Mini 3 has just downward sensors and the Mini 3 Pro forward, back, and down, the Air 3 can sense obstacles on all sides as well as above and below the drone. That’s going to give beginners more peace of mind since alerts flash on the screen when coming too close to an object, and the drone will also avoid obstacles in programmed flight patterns. Of course, that can also create a false sense of confidence since the detection system is limited to certain speeds and sizes of obstacles, and something like a thin tree branch could still spell trouble.
There are a few more options and settings on the Air 3 than the Mini series, but with some time, new pilots can still easily get their bearings with the Air 3. The DJI Fly app walks through the controls and safety checks before the first flight and even limits things like altitude and speed for new flyers.
One of my favorite things about DJI is that the safeguards make it harder to unintentionally break the law. Geofencing keeps new pilots from accidentally flying into airports, for example. It’s not foolproof — it doesn’t prevent flight in national wildlife refuges or other locally named No Drone Zones, and it’s possible to go into the settings and increase the maximum altitude more than 400 feet. But there are a few helpful safeguards for new pilots. The app will even alert pilots when a manned aircraft is in the area — though I did visually see the aircraft once several minutes before the app warned me of its presence.
While beginners can ease into the Air 3, there are a lot of tools tucked into different menus. Basic flight and photos is straightforward. But expect to do some digging and practice to learn the drone’s more advanced features.
One of the new features that the Air 3 offers that the predecessor did not is Waypoints. This is an option to program flight paths rather than flying manually with the joysticks. While Waypoints is more of a video tool than one for artists, there are a few reasons photographers may be excited about the feature. Waypoints also allow you to save the drone’s position to recall later. That makes it easier to do things like take the same photo in all four seasons or take before and after images. Waypoints are reasonably easy to use — while flying the drone, tap the C1 button on the back of the controller to save that position. Once all the points are saved, hit play on the Waypoint, and the drone will automatically fly through those preset positions, including the gimbal location.
Metering
Auto exposure tends to be less reliable on drones simply because the aerial view and reflections from the sun can result in over or underexposing things like sidewalks and lakes. Auto exposure will work in some scenarios, but in many scenarios, pilots will want to at least use exposure compensation to ensure the highlights aren’t overexposed. The DNG files are significantly darker than the JPEG and the preview on the screen, but since shadows are easier to recover than highlights, this isn’t terrible, just something for pilots to be aware of.
Image quality
DJI does something a bit out of the ordinary with their sensors — or, at least, something that’s more common with smartphones than cameras. The DJI Air 3 is capable of taking both 12-megapixel and 48-megapixel images from the same sensor. That’s because it uses a Quad Bayer sensor with four pixels behind each color instead of a single pixel. In the default 12-megapixel mode, all four of those pixels act as one pixel, which is better for working in limited light. In 48-megapixel mode, each pixel is used separately for higher resolution but less light-gathering capabilities. Having both is a great option to prioritize if resolution or low noise is most important. The Quad Bayer design doesn’t suffer from ghosting like a composite would, though there are a few limitations. The higher resolution mode doesn’t support options like auto exposure bracketing, shutter speeds are more limited, and requires more time between shots.
The DJI Air 3 has similar specs on the primary camera of the Mini 3 Pro — you aren’t getting a big difference in image quality for the price difference. You are getting a second camera with a 70mm equivalent focal length so you can get closer shots when safety, line of sight, or time prevents the drone from just physically flying closer. Both sensors are a 1/1.3, with the wide angle lens fixed at f1.7 and the longer at f2.8.
While the smaller sensor on the Air 3 wouldn’t be terribly impressive on a regular camera because drones seldom fly at night or indoors, there are fewer issues. Background blur also isn’t something that’s typically really desirable in aerial photographs either. But there’s lots to criticize, too. 48 megapixels is just too much on such a small sensor, and the high-resolution mode should be kept at ISO 100, while details aren’t quite what you’d expect for such a high resolution. Can you get better images with the Mavic 3’s Micro Four Thirds sensor? Absolutely. But there are still a lot of possibilities with this more affordable drone.
High ISO Images
Due to restrictions to flights at night and indoors, low light image quality isn’t as huge of an issue with drones as it is with cameras. Plus, the camera is mounted on a gimbal, so there’s more wiggle room with the shutter speed too. Even flying at sunset, I rarely need to go above ISO 200. In fact, due to the fixed aperture of the lenses, I couldn’t really test the slow shutter speeds because an ND filter is a must to prevent overexposure, even at sunset. That’s a good thing because the DJI Air 3 starts to show its smaller sensor when looking at the high ISO images. When higher ISOs are necessary, using the 12-megapixel mode rather than the 48 is a must.
In the 12-megapixel mode, noise is detectable at 100 percent beginning at ISO 800, though you can work with higher ISOs if you’re not going to pixel peep. At ISO 6400, the highest available, the image looks so muddled that it feels like it’s out of focus.
In the 48-megapixel mode, the pixel sites are pretty small, and noise tends to muddle more of the fine details quickly, even when working with lower ISOs. At ISO 100 and 48 megapixels, I could zoom in on the image a lot more. But you’ll be disappointed if you’re expecting the same level of detail that a 48-megapixel mirrorless can capture. The 48-megapixel mode should really be kept at ISO 100, as noise jumps quickly. Even at ISO 100, there’s not a lot of noise, but the details do feel a bit more muddled than I would have expected.
RAW File Versatility
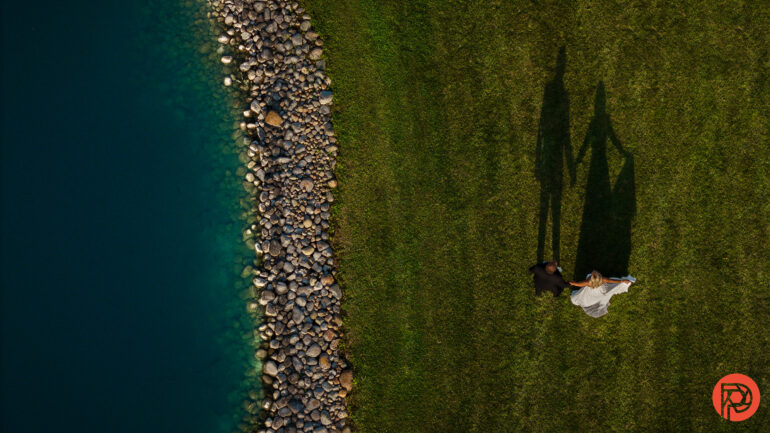
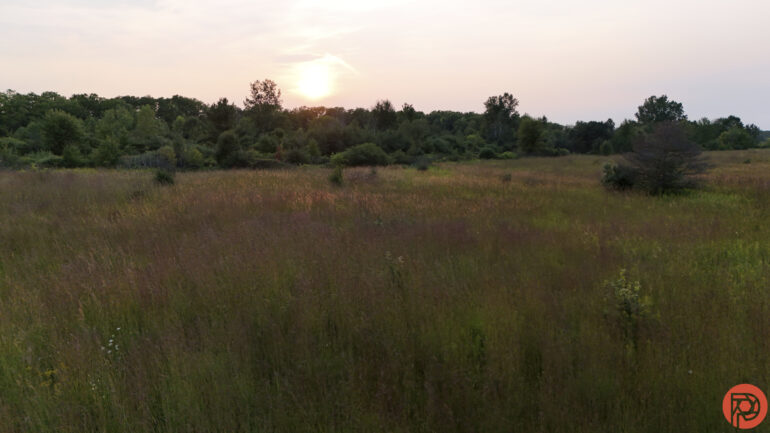
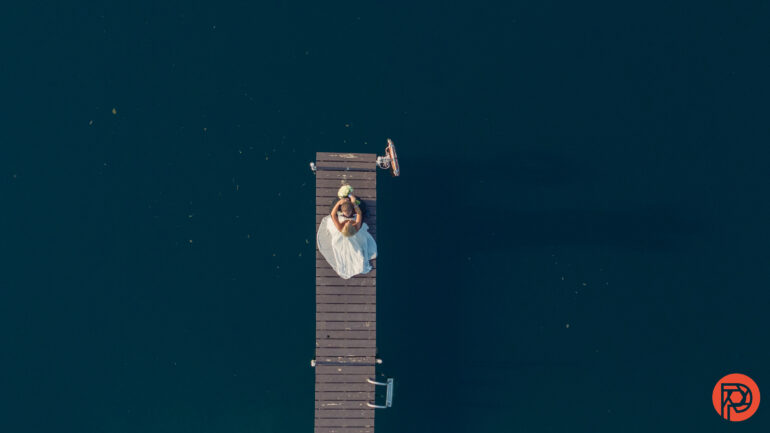
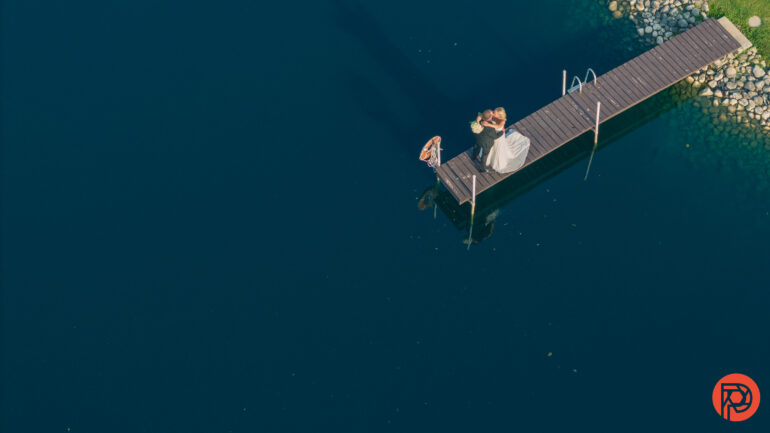
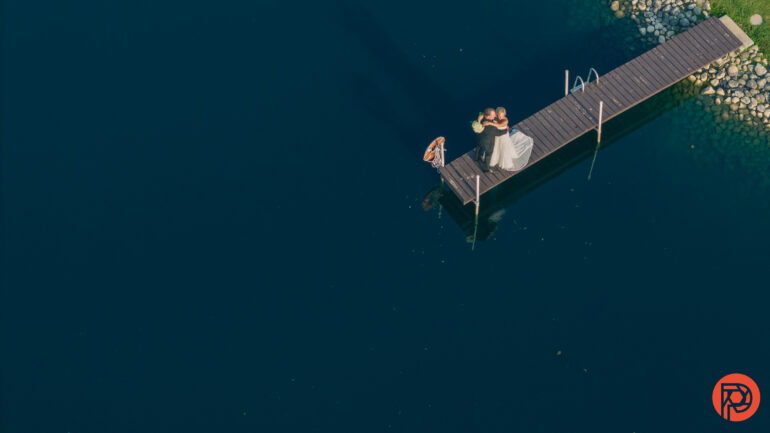
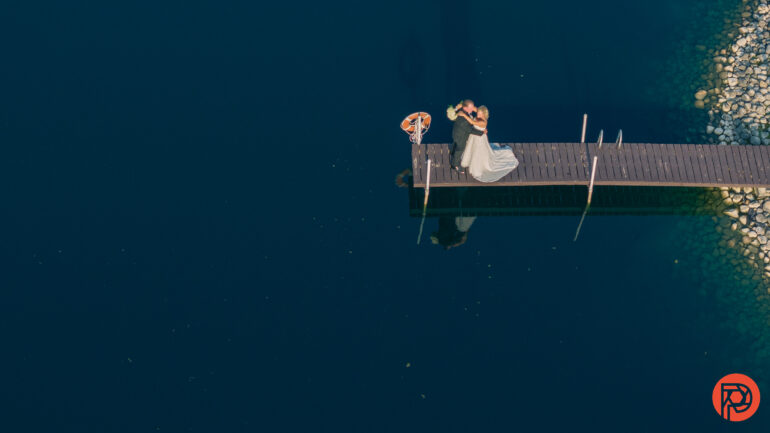
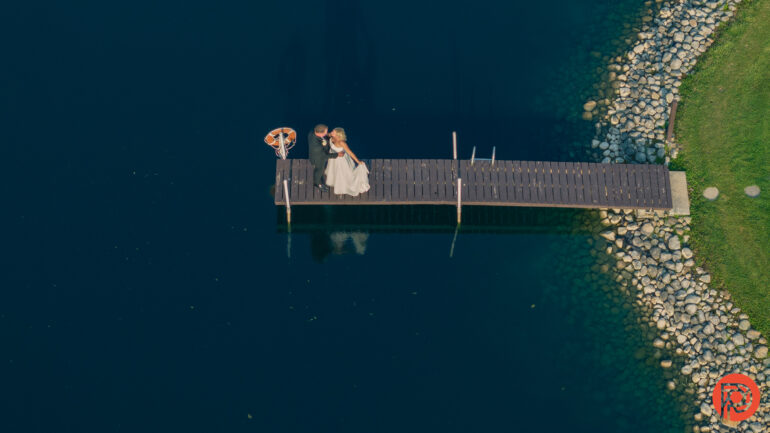
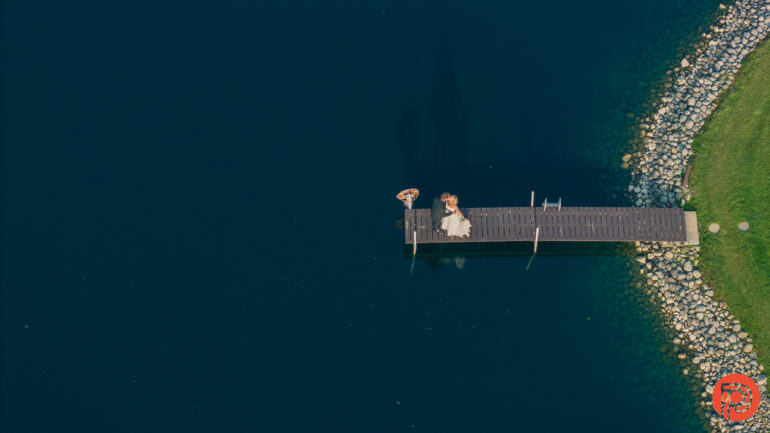
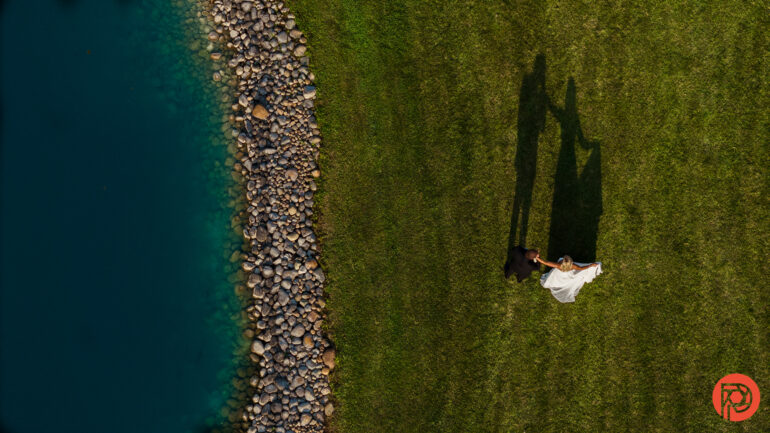
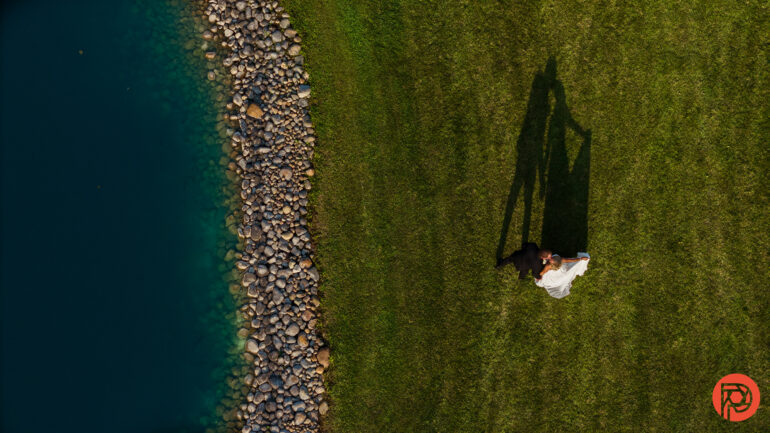
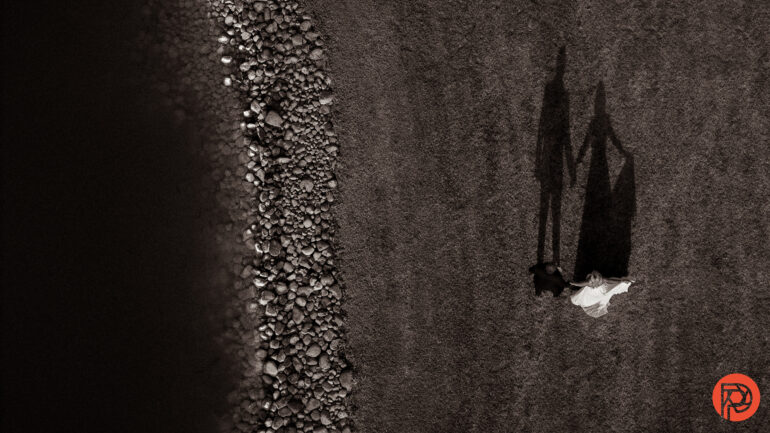
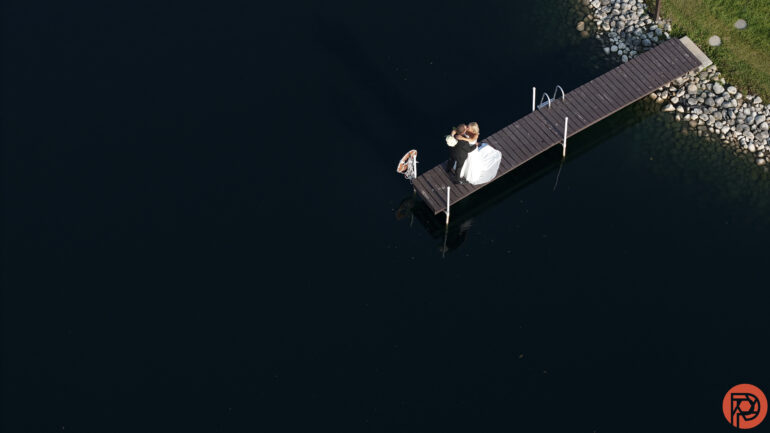
The DNGs from the Air 3 are significantly darker than JPGs, which can make getting an accurate exposure in-camera a more significant challenge. But, I was pleasantly surprised at how much I could pull out of the DNG files, considering the smaller sensor on the drone. In this image above, I was worried that I had overexposed the bride’s dress so much that I wouldn’t be able to recover those highlights. But I was able to get back all of those details. Then, I pulled up the shadows because this pond had a really pretty blue color in real life that was rendered black in the image. I was pleasantly surprised that I was not only able to bring back that blue color easily, but I could also see little fish at the edge of the pond after recovering those shadows as well.
Sharpness
Images from the DJI Air 3 are sharp but feel more like the sharpness of a good smartphone camera rather than the sharpness of some mirrorless lens-camera combos. Using the 48-megapixel mode, I didn’t think the details popped quite like I was hoping. There’s a bit of noise to contend with, even at ISO 100, because that’s a lot of pixels on a pretty small sensor. That said, being able to distinguish every leaf from a birds-eye view would probably be visually overwhelming anyway.
The higher resolution 48-megapixel files have more flexibility to crop in post, as well as to make larger prints. But the level of detail doesn’t jump up as much as the difference between 12 and 48 megapixels on a larger sensor. Expect the sort of image quality that you’d get from a 48-megapixel smartphone. If you’re expecting the same quality as a 48-megapixel mirrorless camera, you’ll be disappointed.
Lens Character
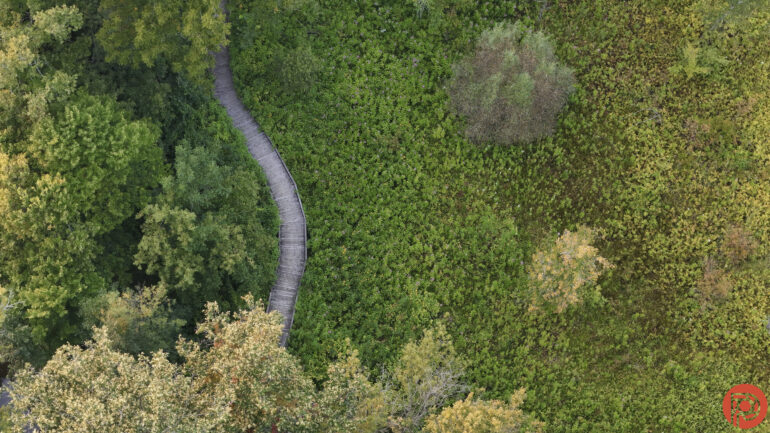
The lenses on the Air 3 are designed to be pretty clean and technical. I didn’t find any annoying colored fringing or weird ghosting. But, sadly, I couldn’t create a fun flare by placing the sun on the edge of the frame either. But, like most drones, the character is going to come from the unique perspectives that you’re able to achieve from the air.
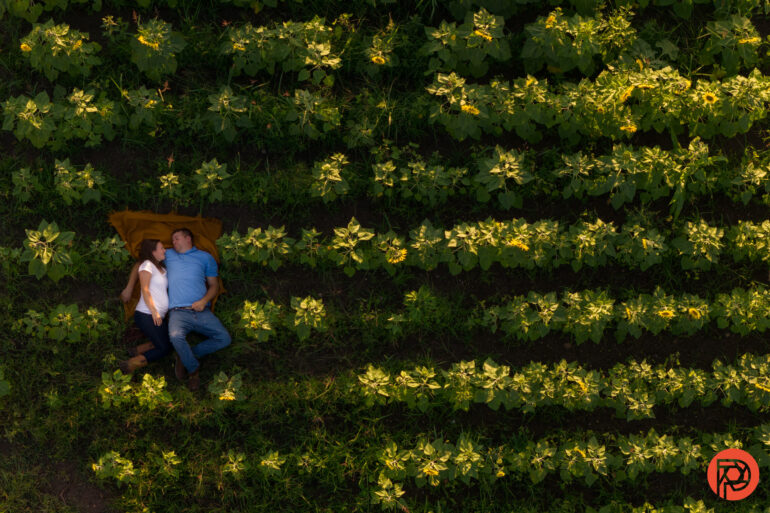
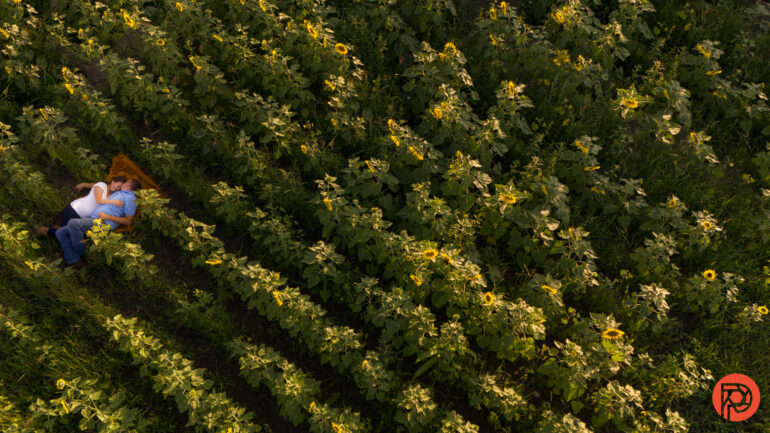
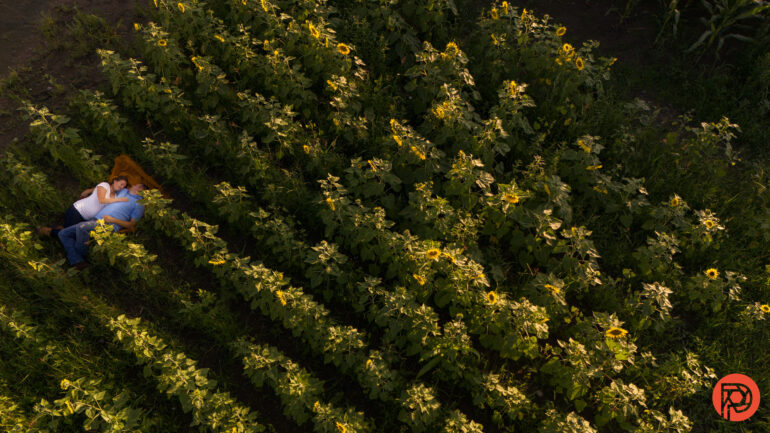
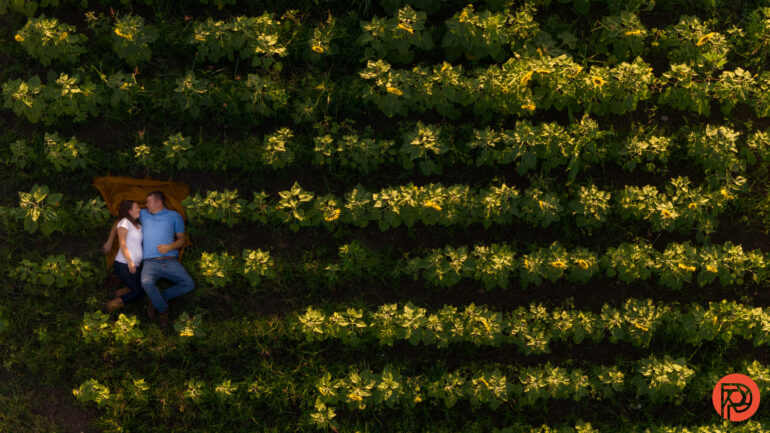
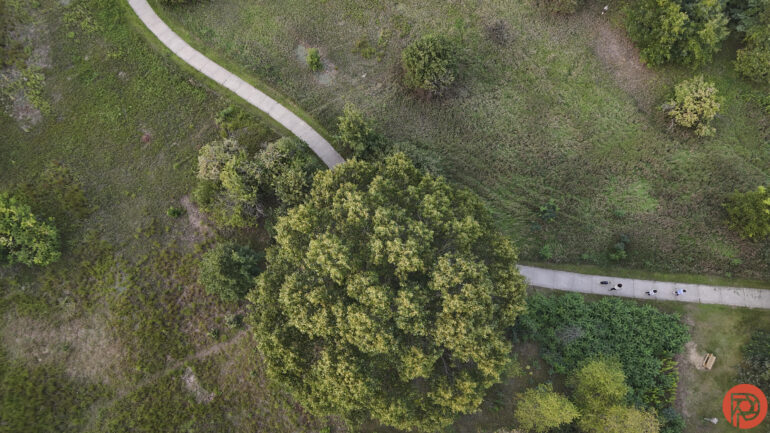
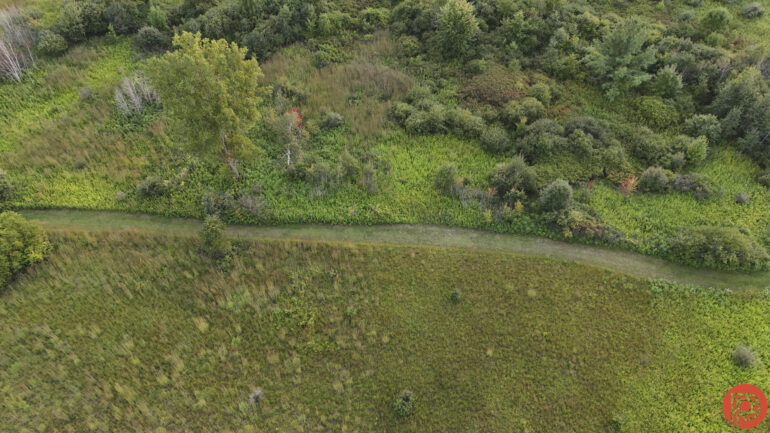
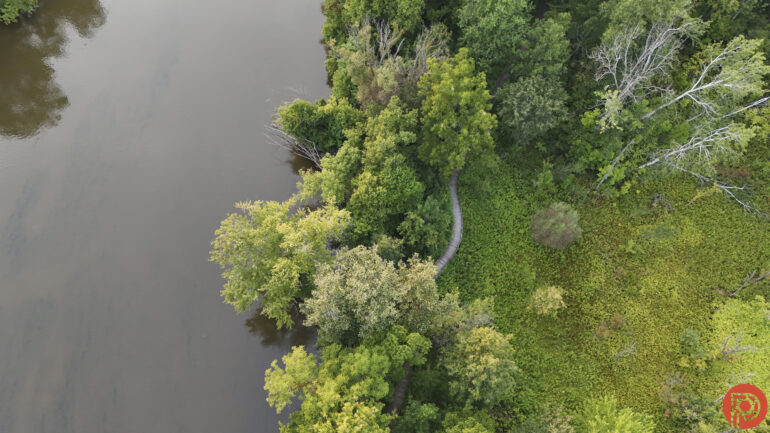
Extra Image Samples
From day one, the Phoblographer has been huge on transparency with our audience. Nothing from this review is sponsored. Further, lots of folks will post reviews and show lots of editing in the photos. The problem then becomes that anyone and everyone can do the same thing. You’re not showing what the lens can do. So we have a whole section in our Extra Image Samples area to show off edited and unedited photos. From this, you can make a decision for yourself.
Edited


Unedited


Who should buy it?
The DJI Air 3 is an oddity in that, while it’s roughly $350 more than the Mini 3 Pro, the main camera is the same. Instead of a boost in image quality, what photographers get with the pricier drone is a secondary camera with a 70mm equivalent lens plus a slew of additional flight features, including better wind resistance, omnidirectional obstacle avoidance, better battery life and the ability to recall drone positions or pre-program flights with Waypoints.
If you want a drone that’s easy to use and relatively inexpensive yet has full obstacle avoidance, good wind resistance, and battery life, plus has both 24mm and 70mm equivalent views and a few more video features, buy the DJI Air 3. If simplicity and cost is more important to you, than opt for the Mini 3 or Mini 3 Pro. And finally, if you want a lot of detail and good low-light quality, save up a little longer and go with the Mavic 3.
Tech Specs
LensRentals lists the following tech specs for the DJI Air 3:
- Brand: DJI
- Image Sensor: 1/1.3”-Type CMOS
- Sensor Resolution: Effective: 48 Megapixel
- Focal Length: 24mm (35mm Equivalent)
- Field of View: 82°
- Maximum Aperture: f/1.7
- Minimum Focus Distance: 3.3’
- ISO Sensitivity: Video 100 to 12,800, Photo 100 to 6400
- Shutter Speed: 1/16000 to 2 Seconds
- Internal Recording Modes H.264/H.265/MP4/MPEG-4 AVC
- 3840 × 2160 at 23.98/25/29.97/47.95/50/59.94/100 fps
- 1920 × 1080p at 23.98/25/29.97/47.95/50/59.94/100/200 fps
- 1512 × 2688 at 23.98/25/29.97/47.95/50/59.94 fps
- 1080 × 1920 at 23.98/25/29.97/47.95/50/59.94 fps
- Broadcast Resolution: None
- Still Image Support: DNG / JPEG (8064 × 6048)
- Internal Storage: 8 GB
- Media/Memory Card Slot: Single Slot: microSD/microSDHC/microSDXC [U3/V30 or Faster Recommended]
- Photo Modes
- Auto-Exposure Bracketing (AEB)
- Burst Shooting
- Interval
- Single Shot
- Item Type Drone
- Maximum Horizontal Speed: 68.9 ft/s
- Maximum Ascent Speed: 32.8 ft/s
- Maximum Descent Speed: 32.8 ft/s
- Maximum Wind Resistance: 39.4 ft/s
- Maximum Flight Time: 46 Minutes
- Maximum Hover Time: 42 Minutes
- Maximum Tilt Angle: 35°
- Hovering Accuracy Vision Positioning: Vertical: ±0.3’ / 0.1 m, Horizontal: ±1.0’ / 0.3 m
- GNSS: Vertical: ±1.6’ / 0.5 m
- High-Precision Positioning System: Horizontal: ±1.6’ / 0.5 m
Get rid of the ads!
Did you enjoy reading this article as much as we enjoyed writing it? There's a way to support us and our reporting, getting ad-free navigation and more as a bonus. Subscribe to us for less than a coffee per month —just $3.99— or take advantage of our yearly subscription with a hefty discount for only $25.- An ad-free experience
- A free mystery box for Lightroom or Capture One
- All the books in our store
- 20% discount on Capture One
- 30% discount on Imalume Photo Theft Protection
- 20% off Herbs and Kettle Tea Company.
- 20% off your order from MPIX printing services.
- 5% off Viltrox Products via their eCommerce store.
- 10% off all film developing, printing and scanning services from Blue Moon Camera and Machine
- 15% off 7Artisans products: The lens and accessory maker is offering a sweet discount for Phoblographer's readers.