
Last Updated on 08/17/2023 by Chris Gampat
Are three cameras better than one? A lot of smartphones think so — but so does DJI. The new DJI Mavic 3 Pro has three lens-sensor combos where the drone without the Pro in the name has just two. But DJI isn’t trying to fake bokeh. Instead, the three cameras that give the DJI Mavic 3 Pro a bug-eye look allow aerial photographers to get in closer when flying close isn’t safe and even create some real background compression with a 166mm equivalent lens.
But, who is the DJI Mavic 3 Pro for? Is it worth $450 more than the original DJI Mavic 3? I took the newest DJI quadcopter for a few test flights to find out.
Table of Contents
The Big Picture
With one more camera and lens combos than the original, the DJI Mavic 3 Pro is a versatile quadcopter for aerial photographers. The Micro Four Thirds camera with a 24mm equivalent lens is still the one that’s going to get the most use — and produces really nice images. But, for time crunches, safety, or more background compression, there’s a 70mm or a 166mm lens to play with.
While the DJI Mavic 3 Pro isn’t one of the company’s beginner-aimed Mini drones, it’s still fairly easy to learn how to fly. The control system and app are the same used in DJI’s other drones. Obstacle avoidance sensors cover every direction, which could actually make it a little easier to fly than a Mini series drone. The 43-minute battery life also leaves more time to play around and try more perspectives or fly a little further.
While most images look pretty great, the main camera does occasionally suffer from some purple fringing around highlights. The 166mm camera also has the image quality more of a Mini series drone and not one that sells for more than $2,000. And while the larger drone allows for more wind resistance, the higher weight class falls under more legal restrictions.
The DJI Mavic 3 Pro is a great option for many photographers. I’m giving it four out of five stars.
Pros
- Omnidirectional obstacle avoidance
- 43-minute battery life is great for drones
- Micro Four Thirds main camera with an f2.8-11 variable aperture lens
- Great image quality coming from the 24mm and 70mm equivalent lenses
- Versatile RAW files
- Gray color is sometimes more visible than off-white
- DJI RC Pro controller (optional upgrade) has a joystick that makes adjusting camera settings easier
Cons
- Some purple fringing around highlights
- 166mm equivalent image quality is just okay
- Heavier weight requires registration and has more limitations, including flight over people
- Pricey
Gear Used
I tested the Cine Premium Combo variation of the Mavic 3 Pro. This version adds 1 TB of SSD storage and Apple ProRes Support and pairs the drone with the DJI RC Pro remote. The image quality will be identical to the basic Mavic 3 Pro, but there are some minor variations that come with adding the internal SSD, including a slightly heavier weight.
Innovations
The Mavic 3 Pro is more of an addition to the Mavic 3 than a completely new, innovative drone. The Mavic 3 Pro adds a new 70mm equivalent f2.8 lens on a 1/1.3-inch sensor, where the drone without the Pro in the name has just two cameras. The 166mm equivalent tele camera is also upgraded to a wider f3.4 aperture. The added camera adds a little more weight, dropping three minutes off the battery life.
Ergonomics
The quadcopter folds down for storage, making it just over nine inches long and under four inches wide. The drone will take up the space of a large lens, but by the time you add the controller and extra batteries, you’ll need a small messenger bag or a few slots inside a larger backpack.
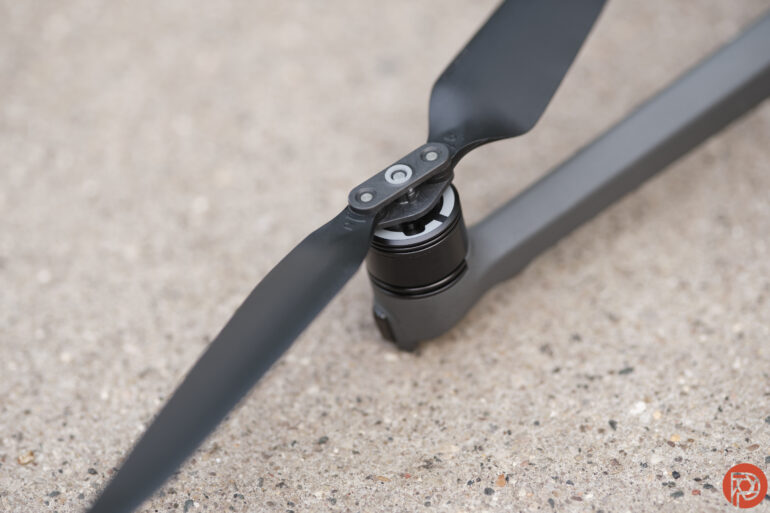
The front arms unfold first, pulling them out to the front of the drone. The rear arms unfold last, pulling down from the drone’s body. The drone needs to be extended in that order — and folded in the opposite order — or the front arms get in the way of the rear arms.
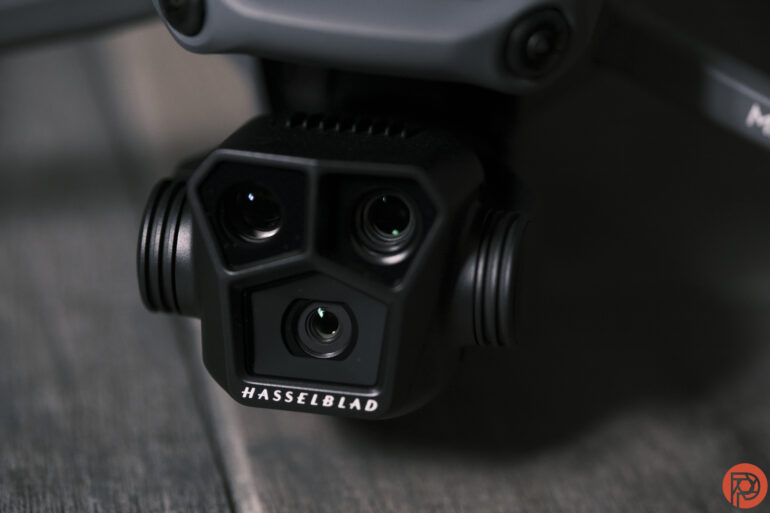
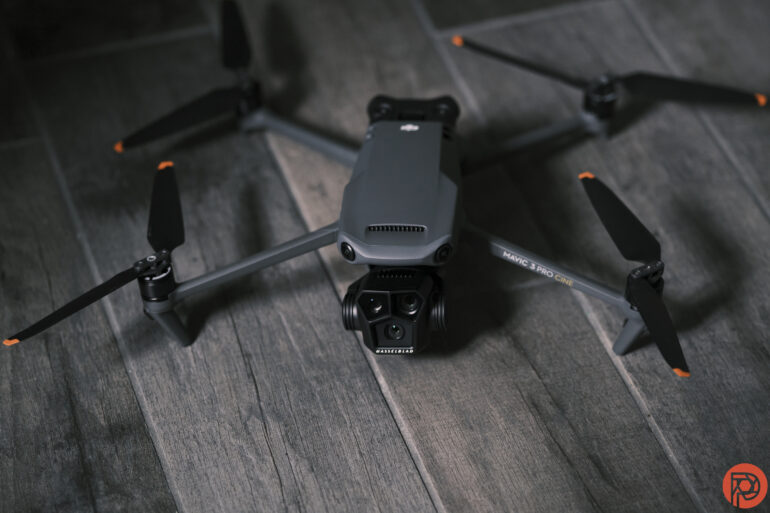
The front of the DJI Mavic 3 Pro looks a bit like a bug’s eye because the drone houses three cameras on a gimbal. You can also find a few other “eyes” throughout, housing sensors for the obstacle avoidance system. There are two at the front, two at the top rear, two at the back, and two underneath the drone.
The battery slides in at the rear of the drone. Above that, a miniature door hides a micro SD card slot and a USB-C port.
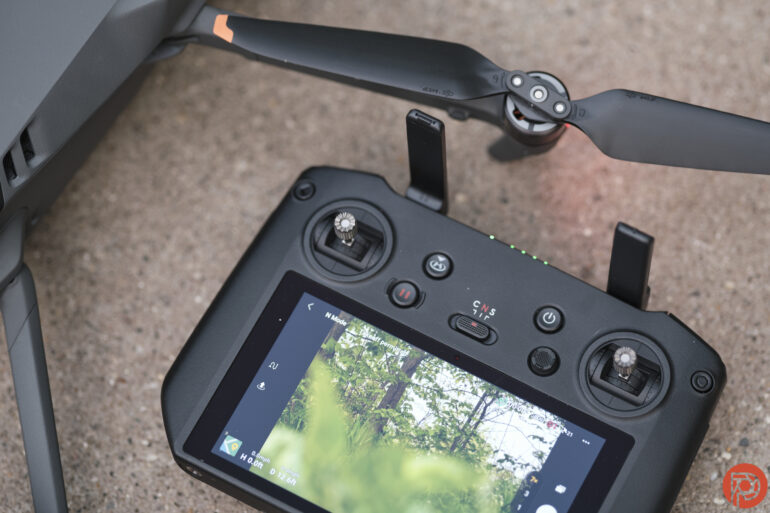
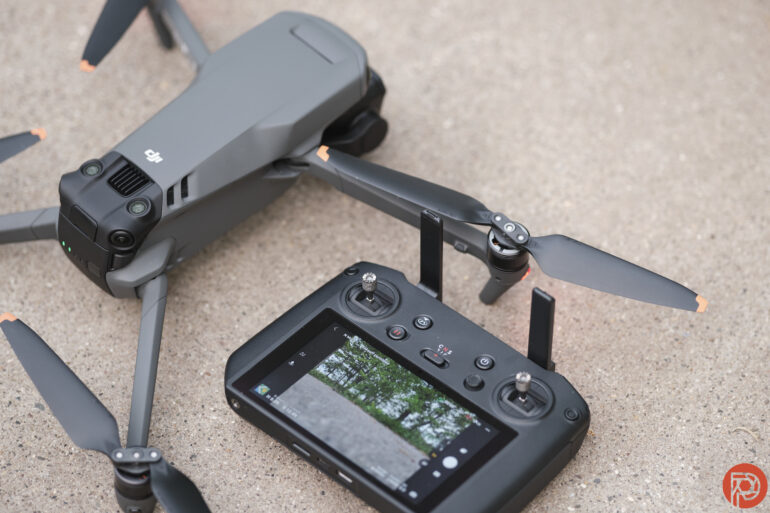
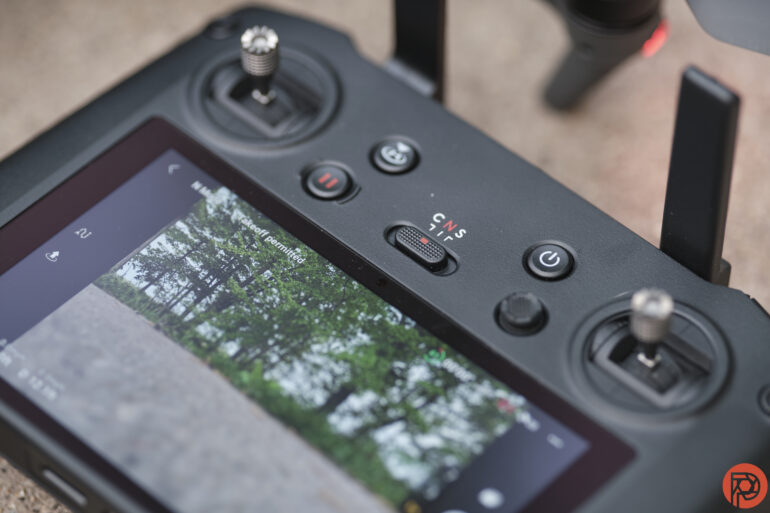
The drone ships with either the DJI RC or the DJI RC Pro, depending on your chosen kit. Both controllers have a comfortable control scheme with two joysticks, two gimbal control wheels, shortcut buttons to take a photo, start/stop a video, pause the flight, and return home, and two customizable buttons underneath. The RC Pro also has a joystick that can quickly adjust the exposure value, change the gimbal mode, lock the exposure, or bring up the menu. The RC Pro also has an unfolding antenna that the DJI RC doesn’t have.
Build Quality
Because weight plays a key role in performance, most drones are made with plastic. The DJI Mavic 3 Pro is no exception. It does, however, feel a bit sturdier than the Mini series. Is it going to survive a 400-foot drop from the sky? Probably not. But it does feel less fragile when pulling it in and out of a camera bag.
The drone is rated for 12 m/s wind resistance, about 26 miles per hour. That’s about 3 mph more than the Mini series is made to handle, partly due to the Mavic 3 Pro’s larger size. The quadcopter is rated for 14° to 104° F temperatures. There’s a built-in fan that I could hear after landing in an 80-degree day, but I didn’t experience any issues with overheating.
What I really love about the build, however, is the color. The charcoal is easier to spot against a backdrop of sky than the off-white of the Mini series. The off-white would be easier to see in dim lighting, but the lights will be more visible in these scenarios. Frankly, a neon orange would make tracking the drone through the sky even easier, but charcoal is a compromise between visibility and looking too garish.
Focusing
Small drones typically have such a wide depth of field that focusing is rarely ever an issue. But, with the Micro Four Thirds camera and f2.8 lens, the primary camera has some depth of field that means less room for focusing errors. At the same time, the 166mm equivalent tele lens can also create some background blur, which opens up more potential for focusing errors.
Focusing on the DJI Mavic 3 Pro feels similar to other drones I’ve tested — the focus feels more like a smartphone than a mirrorless camera. That’s fine for most aerial-type shots, but photographers looking to shoot action should know there is a slight pause between tapping the screen to focus and when the shot is actually taken.
Ease of Use
As a DJI Mini 2 pilot, I found jumping into the larger Mavic 3 Pro seamless. DJI’s smaller drone series is a little less daunting for beginners because of the smaller size and price point. But the controls are actually quite similar, and after a quick on-screen tutorial, I was ready to fly. The transition would be even more seamless with the DJI RC, as the RC Pro had a few new controls that I needed to explore.
While I think the Mini series is still the best option for total beginners, serious photographers that know their way around a camera but haven’t yet flown a drone could still consider the Mavic 3 Pro. The controls are very similar to the Mini series; there are just more of them. But those familiar with camera terminology will understand those added controls.
As with any drone, new pilots should familiarize themselves with drone safety and local laws. With a weight above 250g, the drone will need to be registered in the U.S. Drones in this weight class also require extra steps to legally fly over people under Part 107 regulations in the U.S.
What’s going to make the DJI Mavic 3 Pro even easier to fly is the obstacle avoidance system. While some cheaper drones don’t cover every direction, the Mavic 3 Pro covers forward, backward, up, down, and lateral movements. Every obstacle detection system is limited to certain speeds and the size of the obstacle, so pilot diligence is still essential. But the obstacle detection system is extremely helpful when using automated flight, such as pre-programmed video flight patterns. The sensors are also helpful when using the Return To Home, which can be automatically activated when the battery hits a certain level.
Metering
I find drones need to underexpose a bit more than shooting with two feet on the ground. That’s because, from an aerial view, there are often a lot of brightly colored or shiny objects that can quickly become overblown highlights. For this reason, I didn’t spend much time in auto — I needed the Pro mode to at least push the EV compensation down a bit. That said, the RAW files are considerably darker than the JPEGs, which helps a bit when edits are already planned.
Image Quality
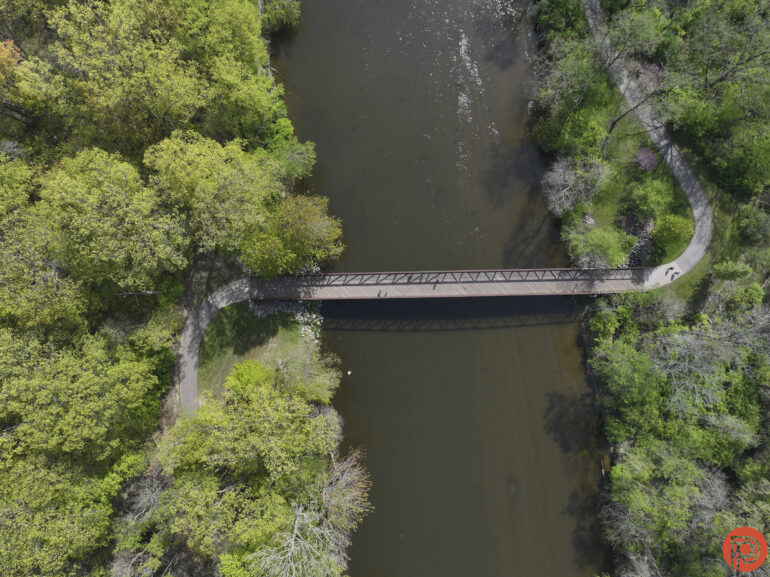
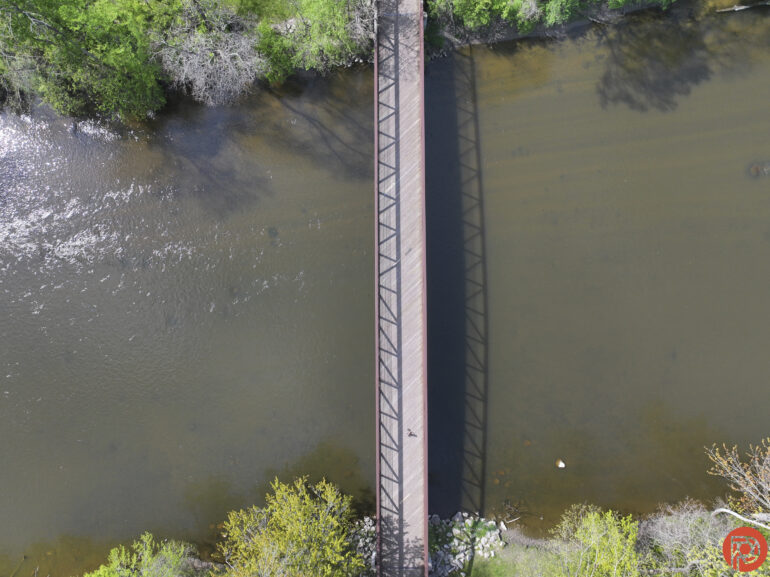
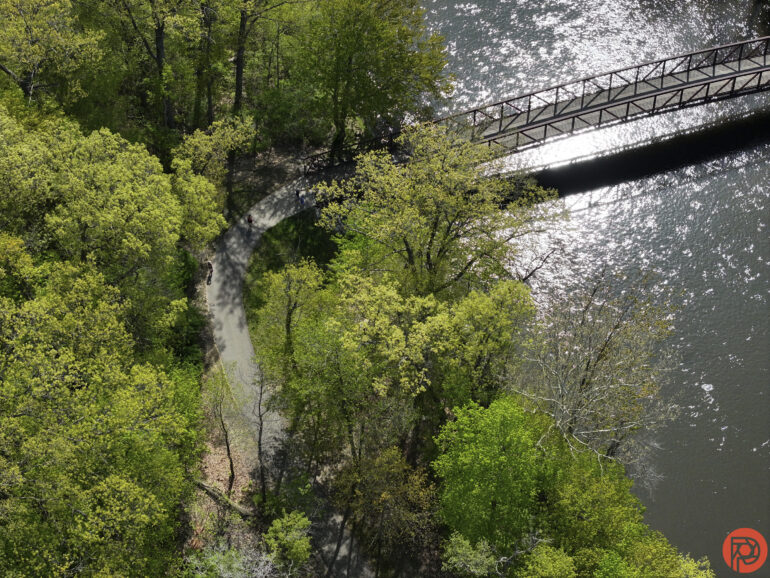
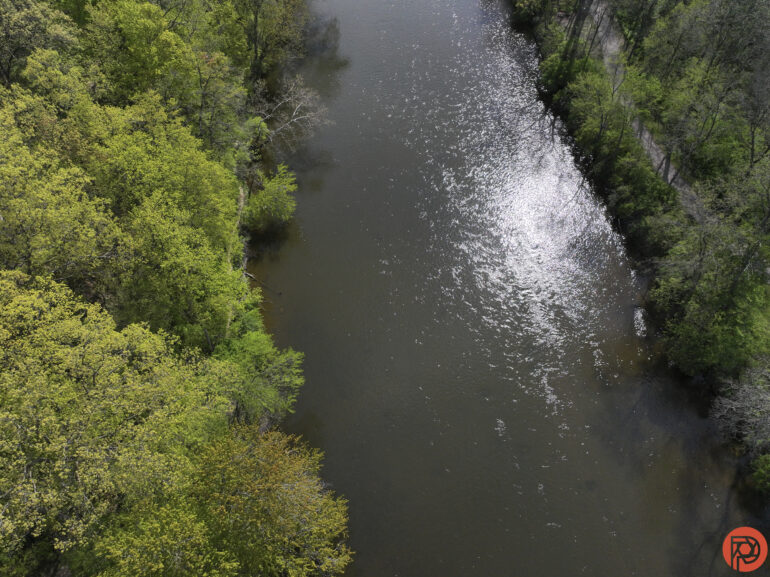
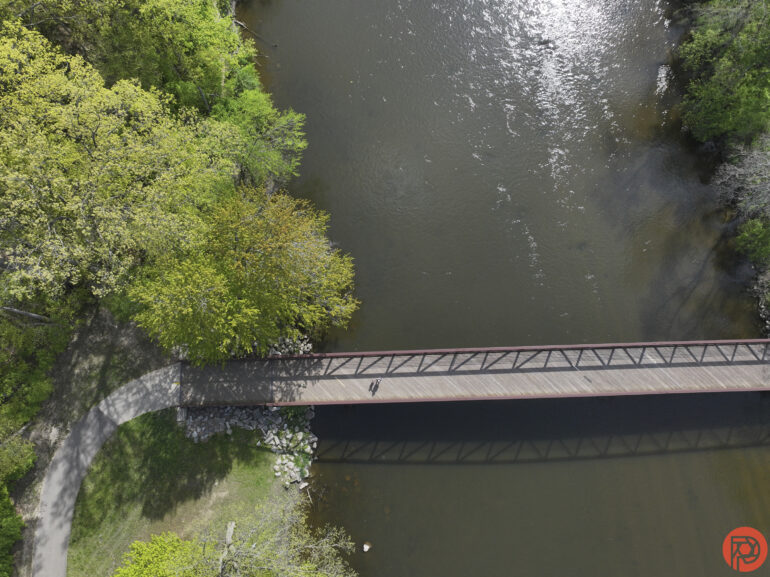
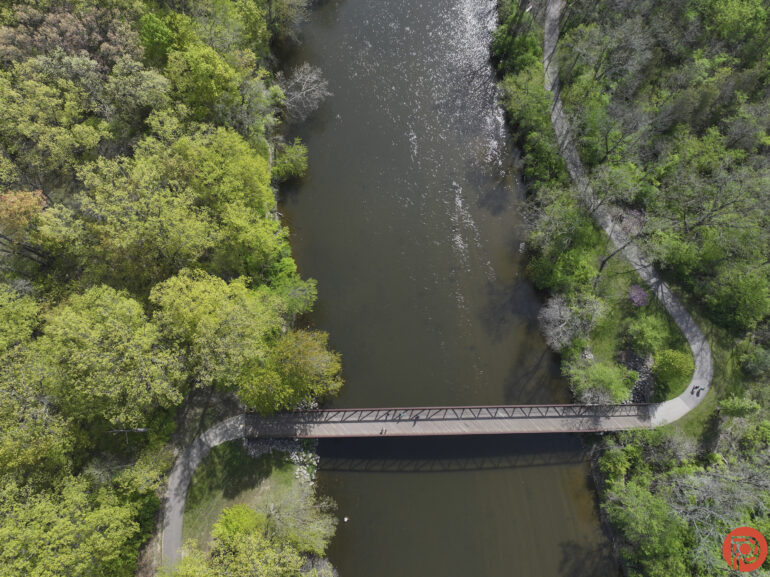
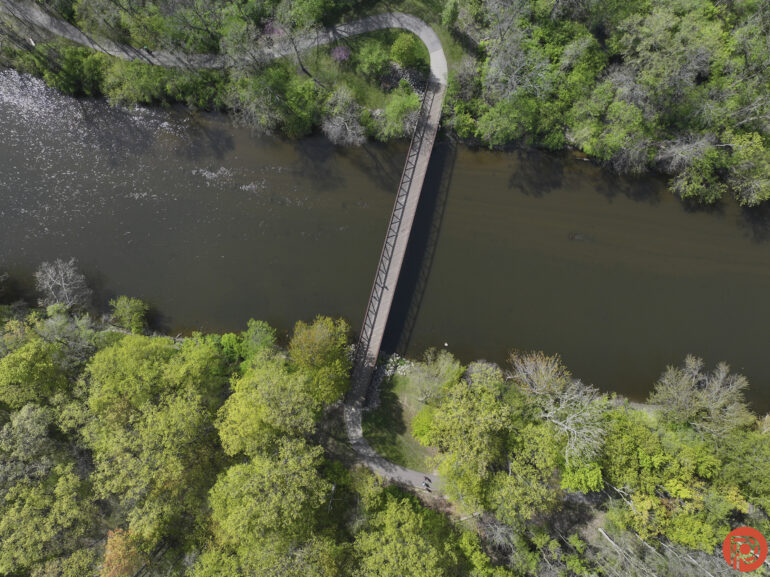
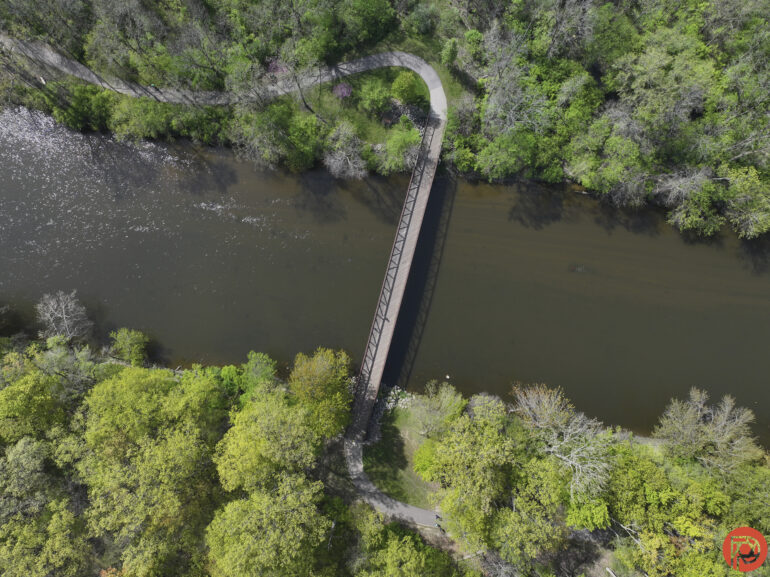
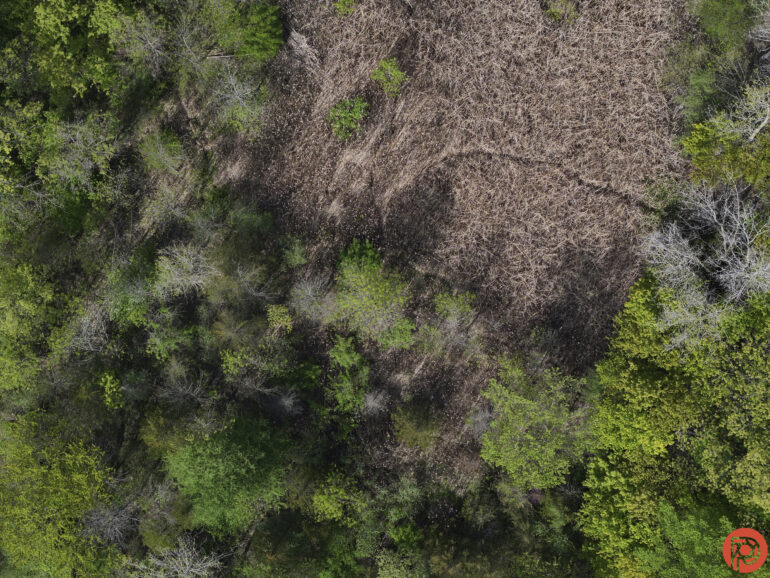
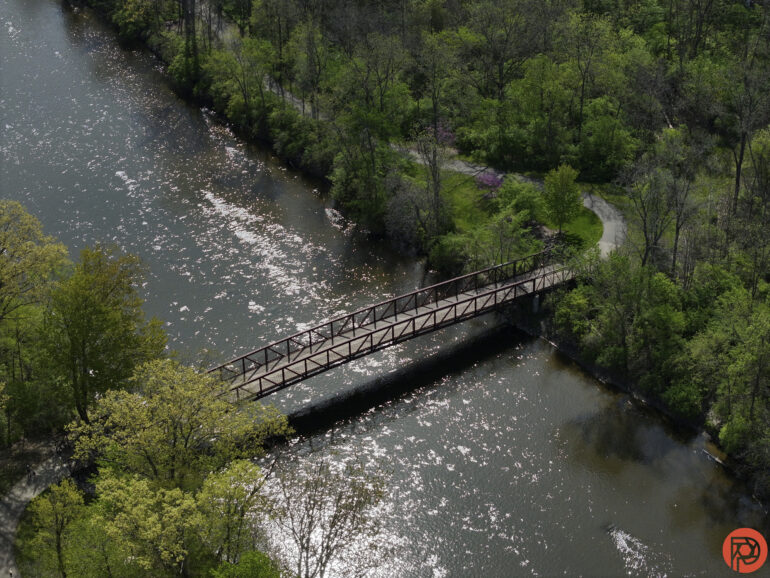
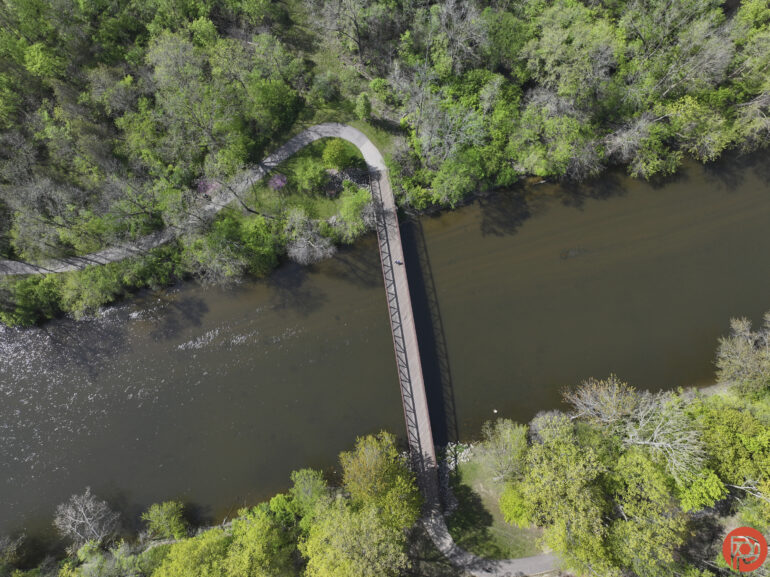
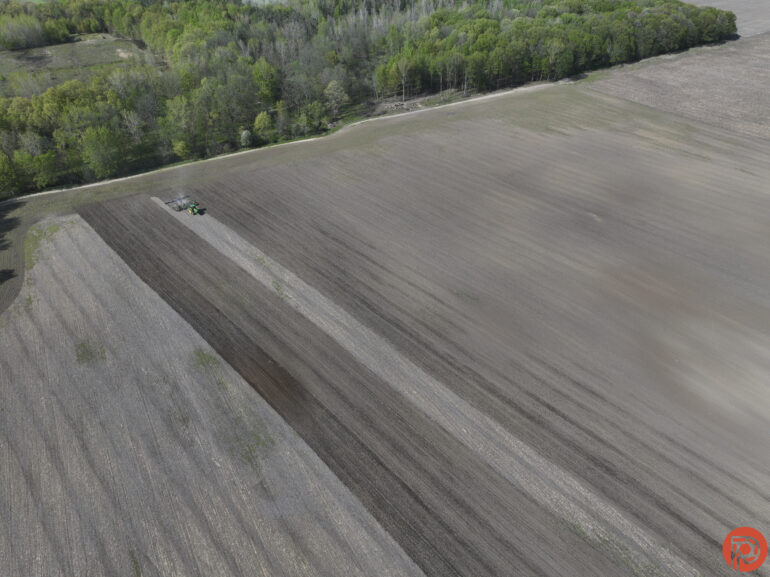
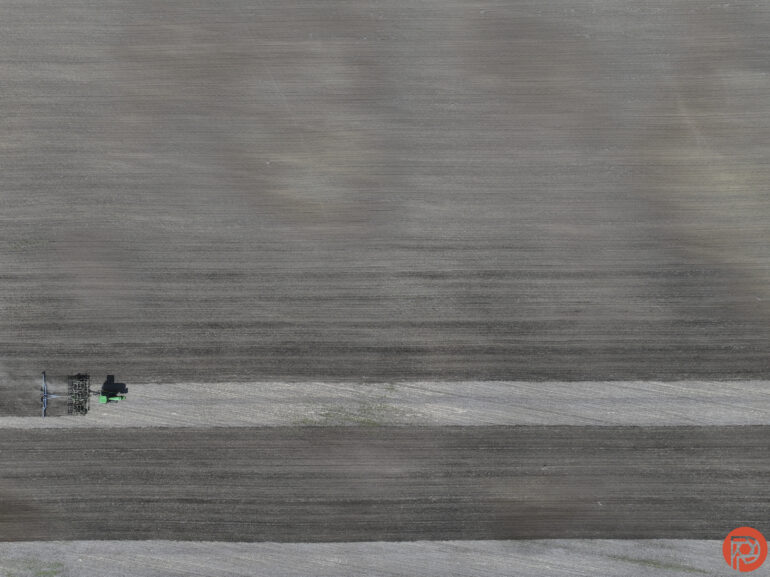
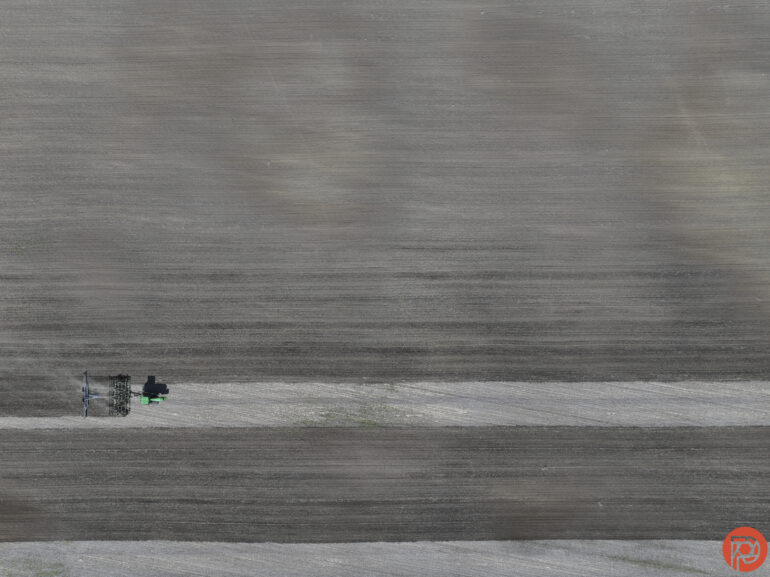
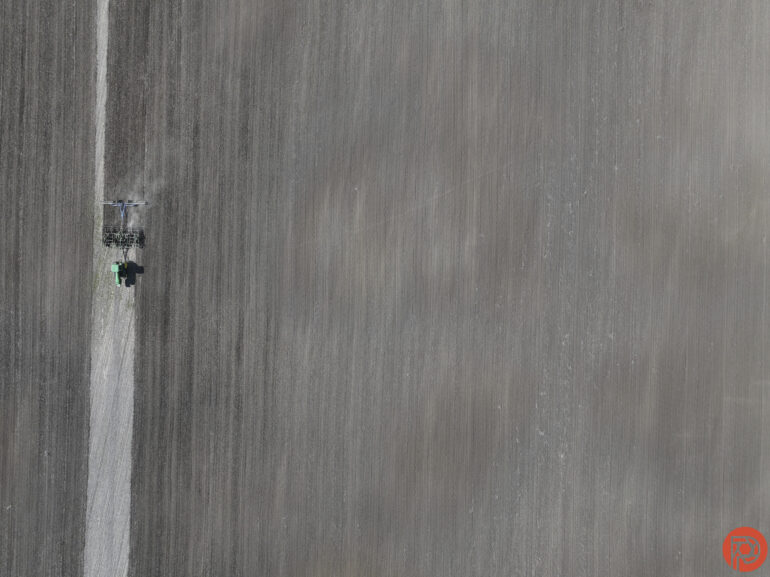
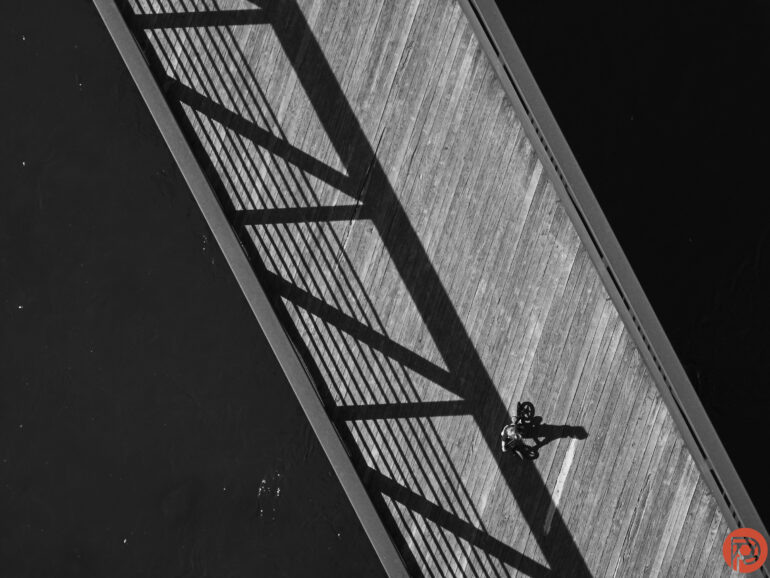
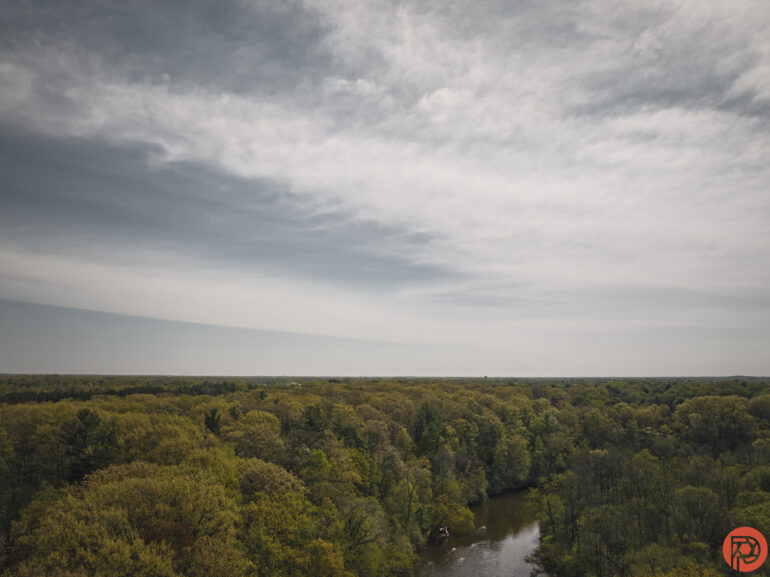
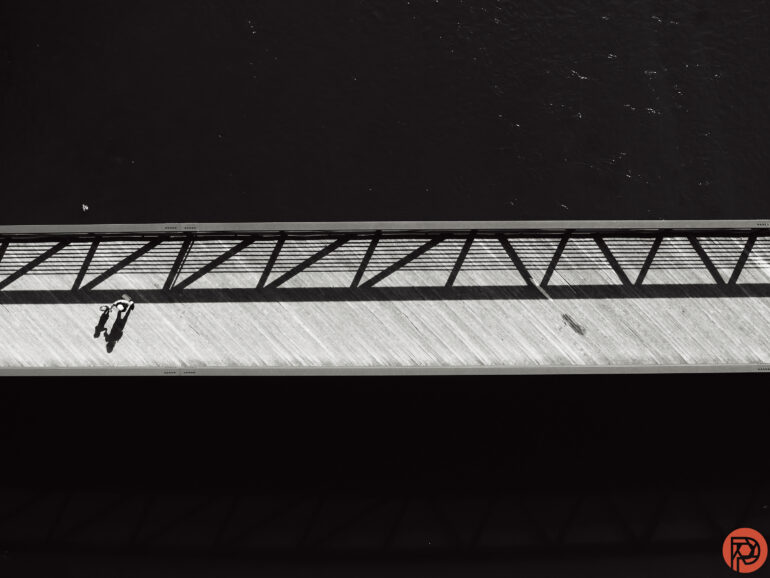
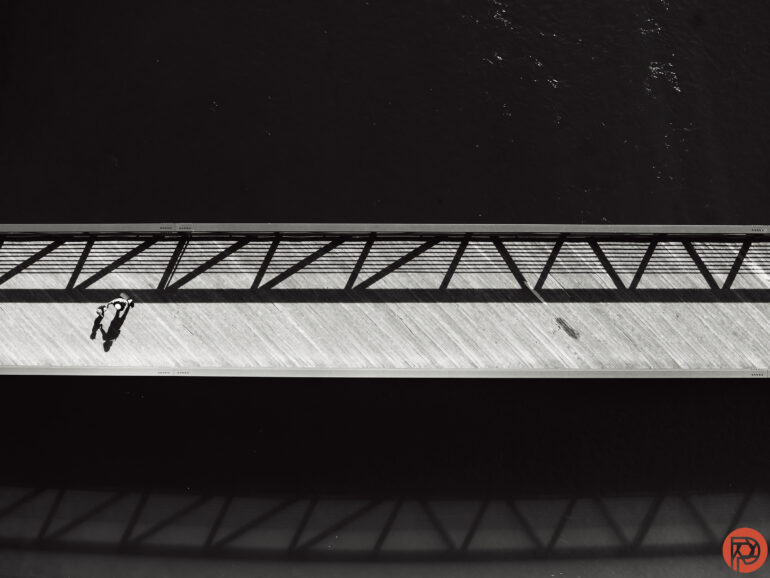
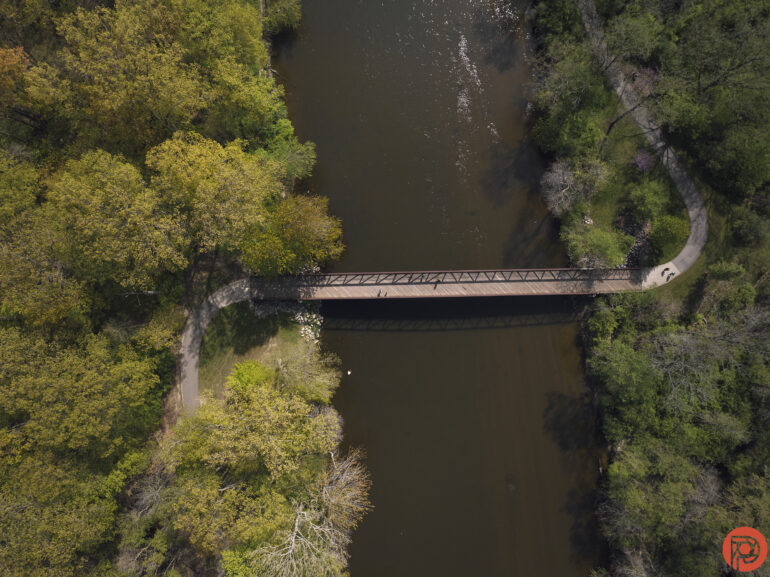
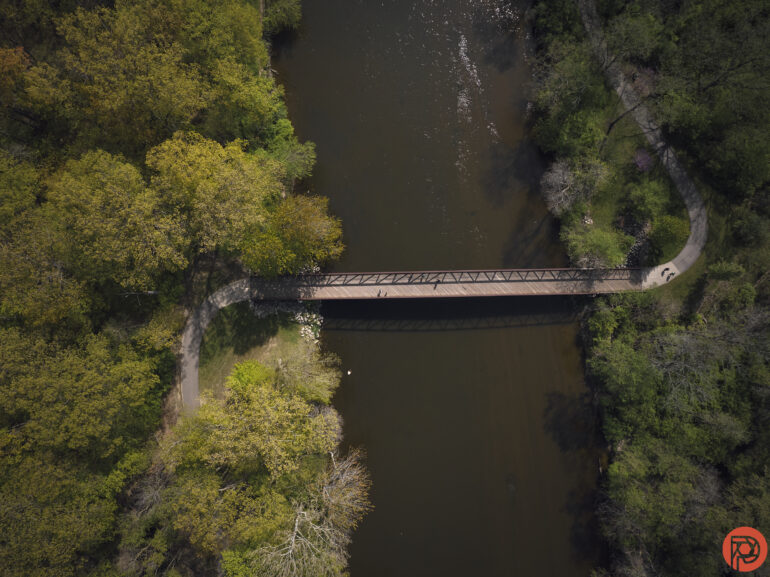
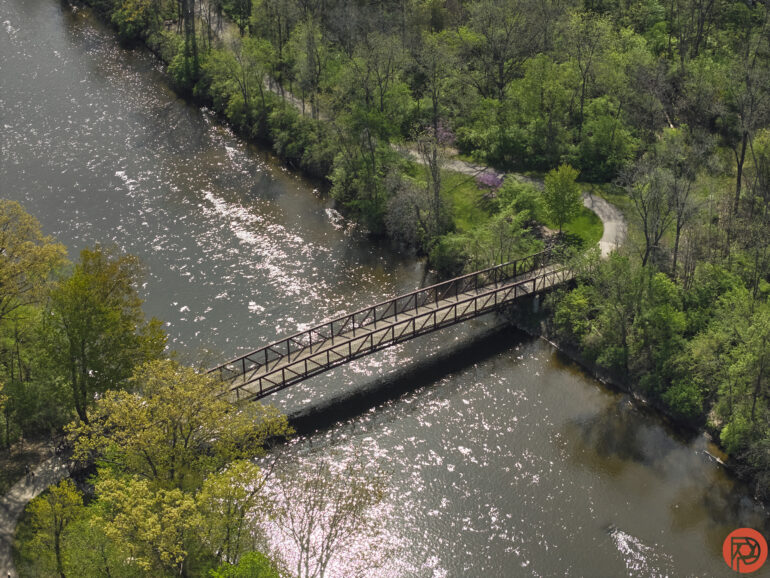
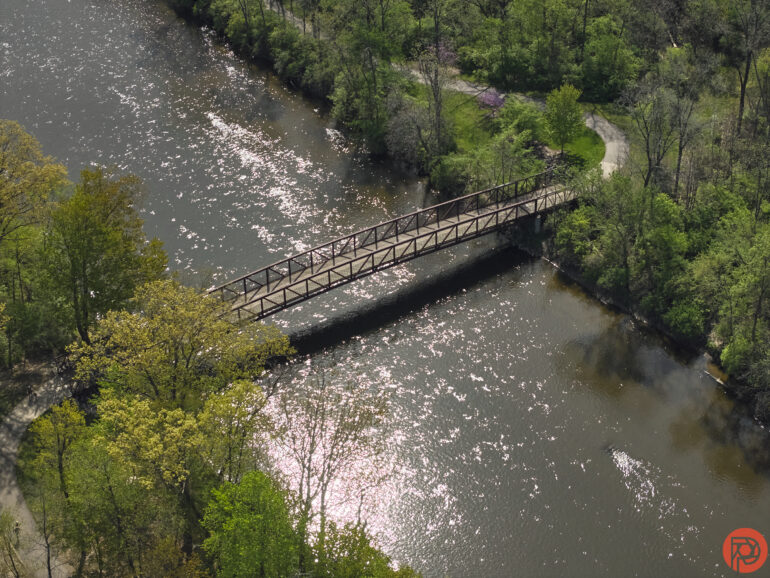
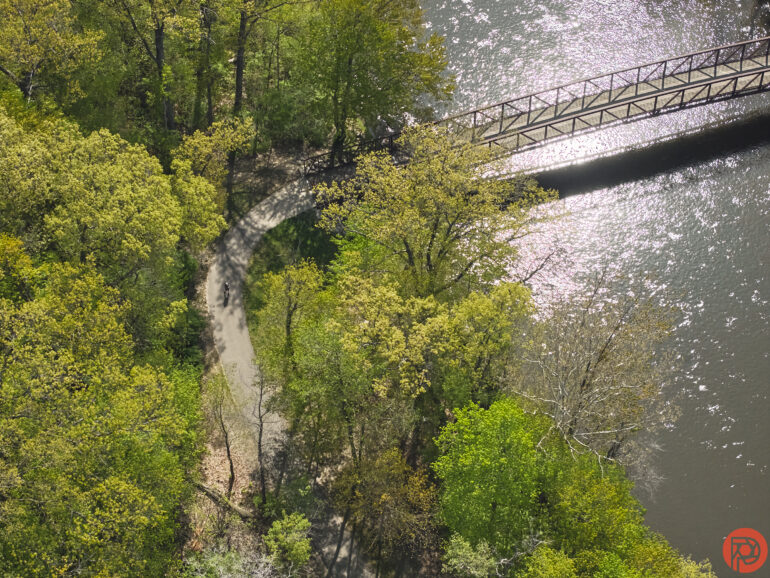
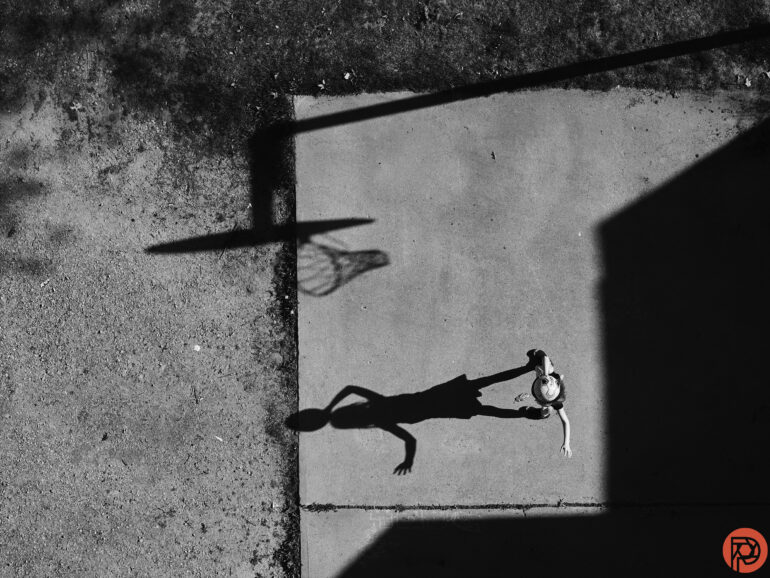
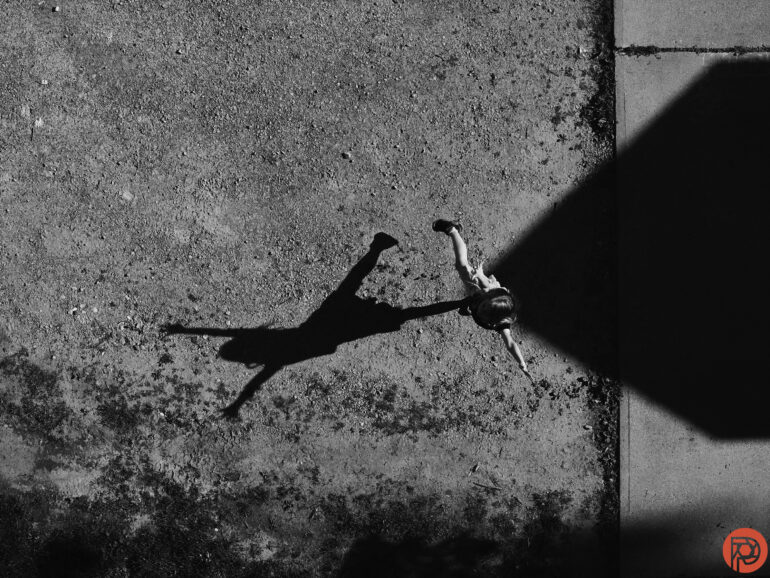
The three different lens lengths on the DJI Mavic 3 Pro allow for more variety in a shorter time frame, and getting up close when flying closer isn’t safe. Take a look at the variety the three lenses offer when keeping the drone at the same altitude:
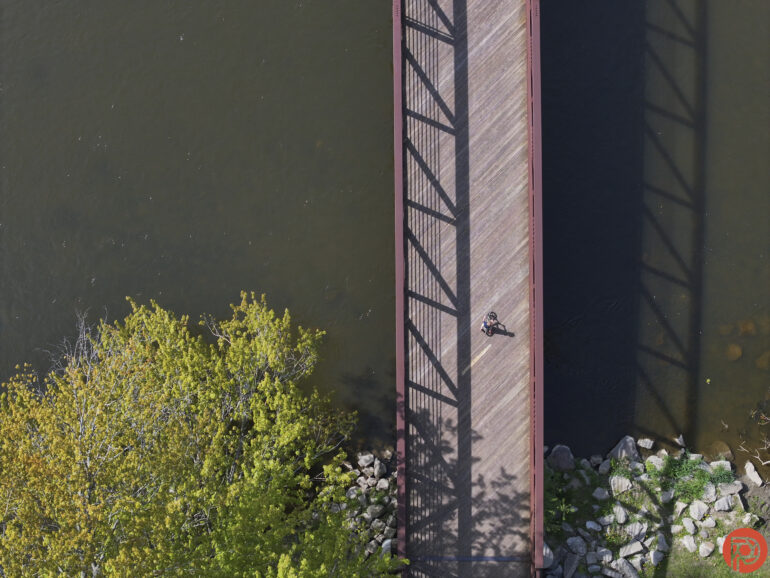
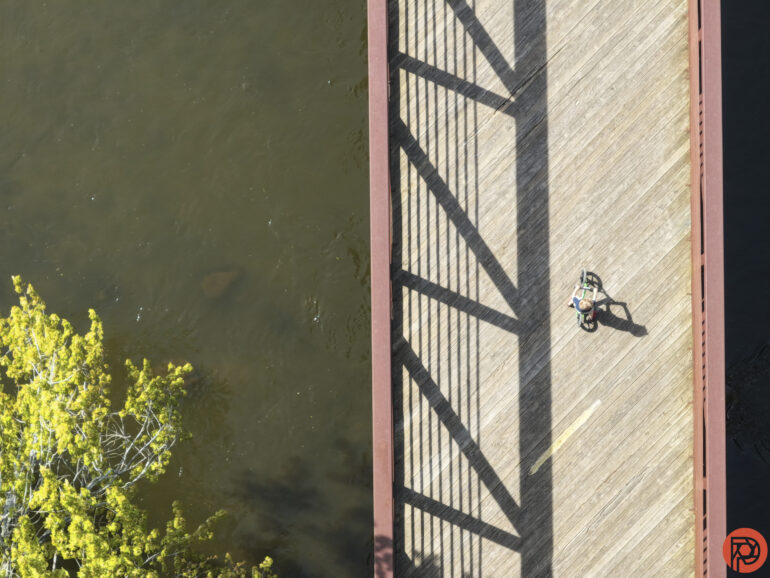
The 70mm lens-sensor combo creates a cleaner image than the 166mm camera, so it’s a particularly nice addition that the original Mavic 3 doesn’t offer. That versatility is a great tool, but the highest image quality still comes from the main Micro Four Thirds camera.
JPEG Quality
JPEGs from the DJI Mavic 3 Pro are sharp, bright, and colorful. Naturally, the Micro Four Thirds main camera produces the cleanest images. With its smaller sensor, the 70mm equivalent camera still produces a pretty clean image with accurate color. Image quality degrades the most on the 166mm equivalent lens, which isn’t quite as sharp and sometimes has a green tint. Because of the different sensor and aperture sizes involved, it’s important to remember to adjust the camera settings when shooting manually.
High ISO Output
The image quality degrades dramatically once the main camera hits ISO 1600. I would still use shots at ISO 1600 if necessary, but ISO 3200 and 6400, the maximum the drone allows, are best avoided. That’s less of an issue on a drone than on a camera — since drone flights after dark typically require specialized lights, most flights are done in daylight and outdoors. And, with a gimbal, the shutter speed can often be pushed low.
As the sensor size decreases, noise increases. There’s a little more degradation at ISO 1600 with the 70mm camera, but I think ISO 1600 is still okay if there are no plans for cropping. On the 166mm camera, I would keep that to ISO 800 or less, as the details degrade much faster.
RAW File Versatility
The DNGs files are darker than JPEGs without any retouching. Erring on the side of being too dark is better than too light, of course, particularly since aerial views tend to have a lot of highlights that can blow out quickly on a sunny day. The Micro Four Thirds sensor allows for more wiggle room than smaller sensors — I was able to bring the shadows up by a few stops without creating too much noise or distortion in post. Highlights can be brought down quite a bit to, but like with any camera, once those highlights are pure white, they are impossible to recover.
Lens Quality
Flipping back and forth between JPEGs and DNGs makes a few things easily apparent. The first is some vignetting and wide-angle lens distortion on the main camera that is corrected automatically on JPEGs. The distortions are less obvious on the longer lenses. The vignetting is easy to correct on RAW files.
The lenses catch some occasional purple fringing, giving the specular highlights a purple tint. This can be corrected to some degree in the RAW files, but some overexposed spots retain a bit of a purple hue to them. That, of course, makes preventing the highlights from blowing out while shooting even more essential.
I also couldn’t get the lenses to create any artistic flare like I was hoping for. But, the hazy shooting conditions during my review could have hindered the potential for flare.
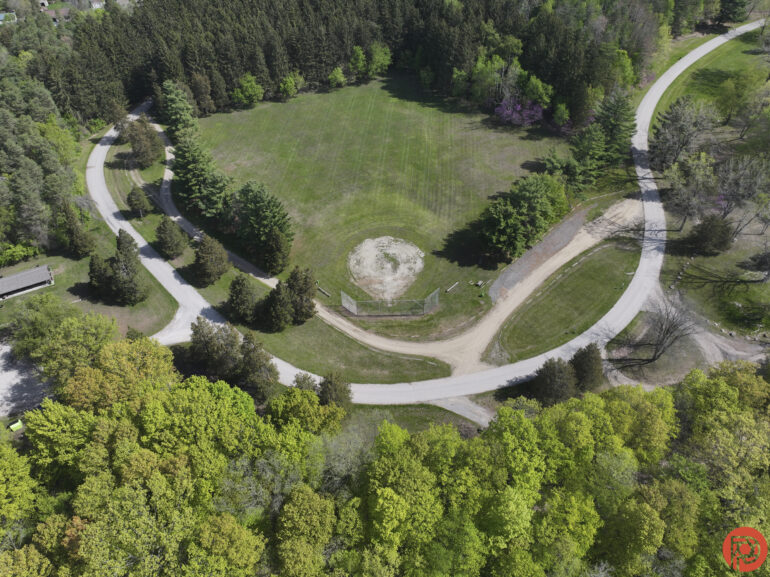
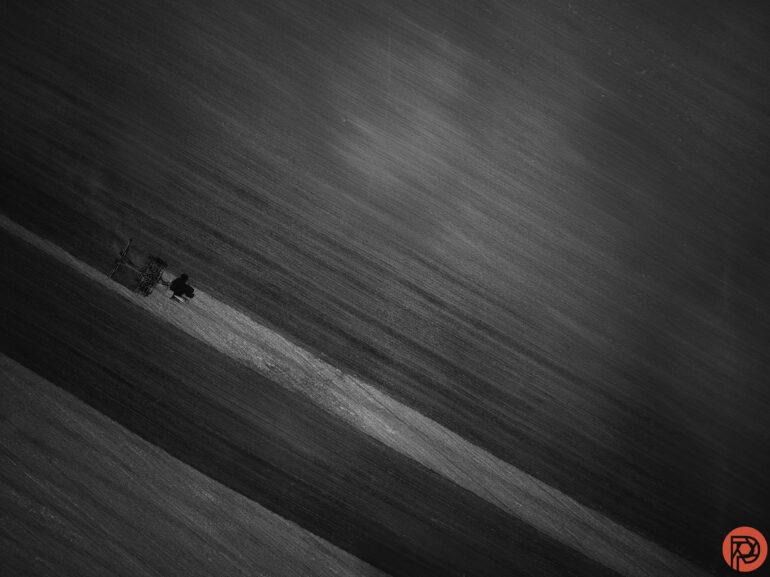
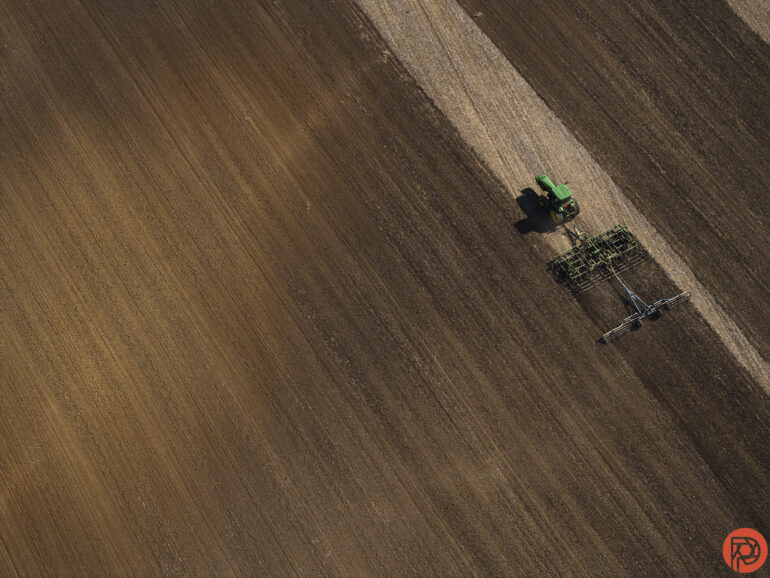
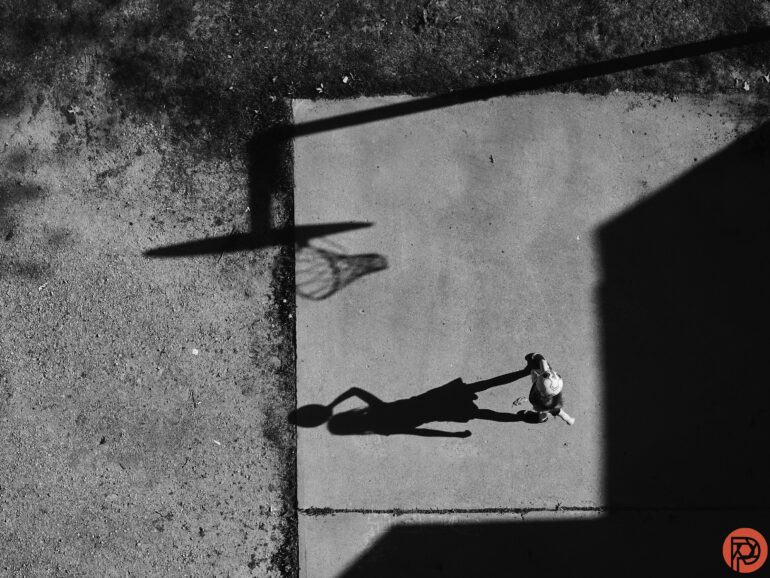
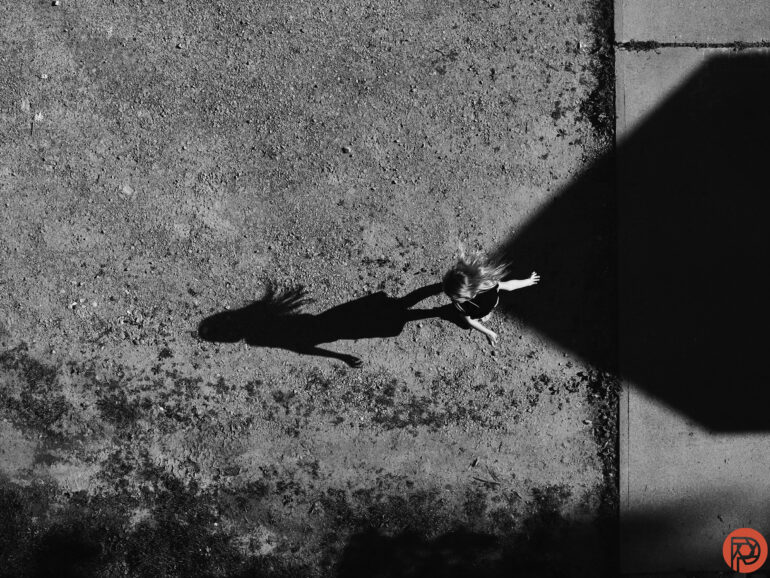
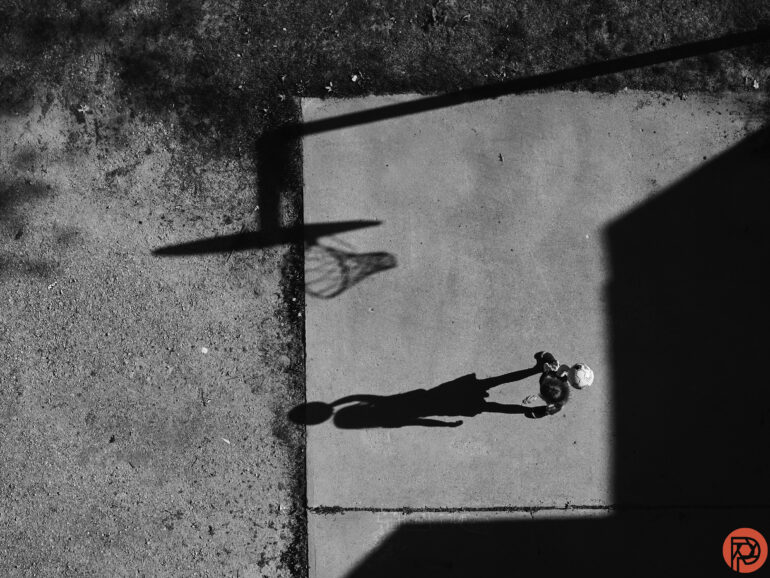
Extra Image Samples
From day one, The Phoblographer has been huge on transparency with our audience. Nothing from this review is sponsored. Further, lots of folks will post reviews and show lots of editing in the photos. The problem then becomes that anyone and everyone can do the same thing. They’re not showing what the lens can do. So we have a section in our Extra Image Samples area to show edited and unedited photos. From this, you can make a decision for yourself.
Unedited

Edited


Who Should Buy It?
The DJI Mavic 3 Pro is a versatile quadcopter for serious aerial photographers. The larger sensor on the main camera produces clean JPEGs and sharp DNG files with lots of editing flexibility. While larger, it’s not much harder than flying a drone from DJI’s Mini series, with a very similar experience. The obstacle avoidance sensors will help avoid crashes while also easing pilot anxiety and increasing trust in the drone’s automated flight patterns, including automatically returning to home when the battery is low or the link is lost.
The main reasons not to buy the DJI Mavic 3 Pro is simply the size and price. It needs to be registered in the U.S., and while that $5 registration isn’t a big deal, commercial pilots in the U.S. need a Declaration of Compliance to fly a drone of this size over people. Personally, my anxiety when flying increases in correlation to the cost of the drone (DJI Care, though, really helps negate some of this). The basic kit starts at $2,199. Some photographers may also find some occasional purple fringing annoying.
Is the extra 70mm lens worth paying $450 more than the Mavic 3? For landscape photographers, probably not. Where the 70mm lens — the one not on the original — comes in handy is when flying closer isn’t safe. I liked using the 70mm for aerial portraits. The 24mm lens required flying a little closer than I would have liked. The 70mm allows more time for the person to move if something were to happen. Alternately, the three lenses can be helpful in getting a variety of shots within a limited time frame.
Do owners of the DJI Mavic 3 need to upgrade? Probably not, unless that 70mm equivalent lens is really needed. The main camera is the same, and that’s the one that will get the most use. But, for pilots that need to pick up a new quadcopter, I think it’s a really great option.
Tech Specs
These key tech specs are taken from DJI’s list of complete specifications:
Aircraft
- Takeoff Weight: Mavic 3 Pro: 958 g, Mavic 3 Pro Cine: 963 g
- Dimensions
- Folded (without propellers): 231.1×98×95.4 mm (L×W×H)
- Unfolded (without propellers): 347.5×290.8×107.7 mm (L×W×H)
- Max Ascent Speed: 8 m/s
- Max Descent Speed: 6 m/s
- Max Horizontal Speed (at sea level, no wind): 21 m/s
- Max Takeoff Altitude: 6000 m
- Max Flight Time: 43 minutes
- Measured in a controlled test environment. Specific test conditions are as follows: flying at a constant speed of 32.4 kph in a windless environment at sea level, with APAS off, AirSense off, camera parameters set to 1080p/24fps, video mode off, and from 100% battery level until 0%. Results may vary depending on the environment, actual use, and firmware version.
- Max Hovering Time: 37 minutes
- Measured in a controlled test environment. Specific test conditions are as follows: hovering in a windless environment at sea level, with APAS off, AirSense off, camera parameters set to 1080p/24fps, video mode off, and from 100% battery level until 0%. Results may vary depending on the environment, actual use, and firmware version.
- Max Flight Distance: 28 km
- Max Wind Speed Resistance: 12 m/s
- Max Tilt Angle: 35°
- Operating Temperature: -10° to 40° C (14° to 104° F)
- Internal Storage: Mavic 3 Pro: 8 GB (approx. 7.9GB available space); Mavic 3 Pro Cine: 1 TB (approx. 934.8GB available space)
Camera
- Image Sensor
- Hasselblad Camera: 4/3 CMOS, Effective Pixels: 20 MP
- Medium Tele Camera: 1/1.3″ CMOS, Effective Pixels: 48 MP
- Tele Camera: 1/2″ CMOS, Effective Pixels: 12 MP
- Lens
- Hasselblad Camera
- FOV: 84°
- Format Equivalent: 24mm,
- Aperture: f/2.8-f/11
- Focus: 1 m to ∞
- Hasselblad Camera
- Medium Tele Camera
- FOV: 35°
- Format Equivalent: 70mm
- Aperture: f/2.8
- Focus: 3 m to ∞
- Tele Camera
- FOV: 15°
- Format Equivalent: 166mm
- Aperture: f/3.4
- Focus: 3 m to ∞
- ISO Range
- Video: Normal and Slow Motion: 100-6400 (Normal), 400-1600 (D-Log), 100-1600 (D-Log M), 100-1600 (HLG). Night: 800-12800 (Normal)
- Photo: 100-6400
- Shutter Speed
- Hasselblad Camera: 8-1/8000 s
- Medium Tele Camera: 2-1/8000 s
- Tele Camera: 2-1/8000 s
- Max Image Size
- Hasselblad Camera: 5280×3956
- Medium Tele Camera: 8064×6048
- Tele Camera: 4000×3000
- Still Photography Modes
- Hasselblad Camera
- Single Shot: 20 MP
- Burst Shooting: 20 MP, 3/5/7 frames
- Automatic Exposure Bracketing (AEB): 20 MP, 3/5 frames at 0.7 EV step
- Timed: 20 MP, 2/3/5/7/10/15/20/30/60 s
- Hasselblad Camera
- Medium Tele Camera
- Single Shot: 12 MP or 48 MP
- Burst Shooting: 12 MP or 48 MP, 3/5/7 frames
- Automatic Exposure Bracketing (AEB): 12 MP or 48 MP, 3/5 frames at 0.7 EV step
- Timed: 12 MP: 2/3/5/7/10/15/20/30/60 s; 48 MP: 7/10/15/20/30/60 s
- Tele Camera
- Single Shot: 12 MP
- Burst Shooting: 12 MP, 3/5/7 frames
- Automatic Exposure Bracketing (AEB): 12 MP, 3/5 frames at 0.7 EV step
- Timed: 12 MP, 2/3/5/7/10/15/20/30/60 s
- Photo Format: JPEG/DNG (RAW)
Gimbal
- Stabilization: 3-axis mechanical gimbal (tilt, roll, pan)
- Mechanical Range
- Tilt: -140° to 50°
- Roll: -50° to 50°
- Pan: -23° to 23°
- Controllable Range
- Tilt: -90° to 35°
- Pan: -5° to 5°
- Max Control Speed (tilt): 100°/s
Sensing
- Sensing Type: Omnidirectional binocular vision system, supplemented with an infrared sensor at the bottom of the aircraft
- Forward
- Measurement Range: 0.5-20 m
- Detection Range: 0.5-200 m
- Effective Sensing Speed: Flight Speed ≤ 15 m/s
- FOV: Horizontal 90°, Vertical 103°
- Backward Measurement Range: 0.5-16 m
- Effective Sensing Speed: Flight Speed ≤ 12 m/s
- FOV: Horizontal 90°, Vertical 103°
- Lateral
- Measurement Range: 0.5-25 m
- Effective Sensing Speed:
- Flight Speed ≤ 15 m/s
- FOV: Horizontal 90°, Vertical 85°
- Upward
- Measurement Range: 0.2-10 m
- Effective Sensing Speed:
- Flight Speed ≤ 6 m/s
- FOV: Front and Back 100°, Left and Right 90°
- Downward
- Measurement Range: 0.3-18 m
- Effective Sensing Speed:
- Flight Speed ≤ 6 m/s
- FOV: Front and Back 130°, Left and Right 160°
- Operating Environment
- Forward, Backward, Left, Right, and Upward: surfaces with discernible patterns and adequate lighting (lux > 15)
- Downward: surfaces with discernible patterns, diffuse reflectivity > 20% (e.g. walls, trees, people), and adequate lighting (lux > 15)
Battery
- Charging Temperature: 5° to 40° C (41° to 104° F)
- Charging Time: Approx. 96 minutes, Use the included data cable of the DJI 65W Portable Charger: Approx. 70 minutes, Use the DJI 100W USB-C Power Adapter and DJI Mavic 3 Series 100W Battery Charging Hub.
The Phoblographer may receive affiliate compensation for products purchased using links in this blog post.
Get rid of the ads!
Did you enjoy reading this article as much as we enjoyed writing it? There's a way to support us and our reporting, getting ad-free navigation and more as a bonus. Subscribe to us for less than a coffee per month —just $3.99— or take advantage of our yearly subscription with a hefty discount for only $25.- An ad-free experience
- A free mystery box for Lightroom or Capture One
- All the books in our store
- 20% discount on Capture One
- 30% discount on Imalume Photo Theft Protection
- 20% off Herbs and Kettle Tea Company.
- 20% off your order from MPIX printing services.
- 5% off Viltrox Products via their eCommerce store.
- 10% off all film developing, printing and scanning services from Blue Moon Camera and Machine
- 15% off 7Artisans products: The lens and accessory maker is offering a sweet discount for Phoblographer's readers.