
Before you dive into this article, keep in mind that I’m not saying Photoshop is bad. I’m saying photo editors that I refuse to call photographers are using it in an incredibly misleading way. And further, if you’re sick of our ads, please download our app on iOS and Android, where you can subscribe to get our content ad-free. With that quick aside, I want to go further on Arts and Culture Editor Dan Ginn’s piece that we previously published. If you’ve read our site for a while, you know I’m a huge fan of No Photoshop. In fact, I’m even bigger on transparency and authenticity. Let me explain.
Let’s start with this site’s reviews, and then I’ll get into artists and photographers. When I began The Phoblographer, there were various camps of how camera, lens, and lighting reviews should be conducted. DPReview, Imaging Resource, and others believed the images should be unedited. Recently, DPReview even changed its policy on this. They championed no editing to give readers the most honest idea of what the camera can do. But the truth is most photographers spend time editing in Lightroom, Capture One, or Photoshop. So when I started The Phoblographer, we did precisely that: edited photos while also showing images that weren’t edited.
Then, we only allowed basic edits from the Basic editing panel in Lightroom for a while. After a few years, I started to look around at the YouTube world and saw what I felt was excessive photoshopping. So for a while, I doubled down on authenticity and again told our entire staff that there should be no edits. Except for a staffer who’s been long let go, there weren’t any edits (and I’d caught them too late) done to photographs in our reviews. Then, we went into our current phase of delivering our images to you, both edited and unedited. This lets photographers make a reasonable decision and see that the clean files can do one thing, but a photographer can do another.
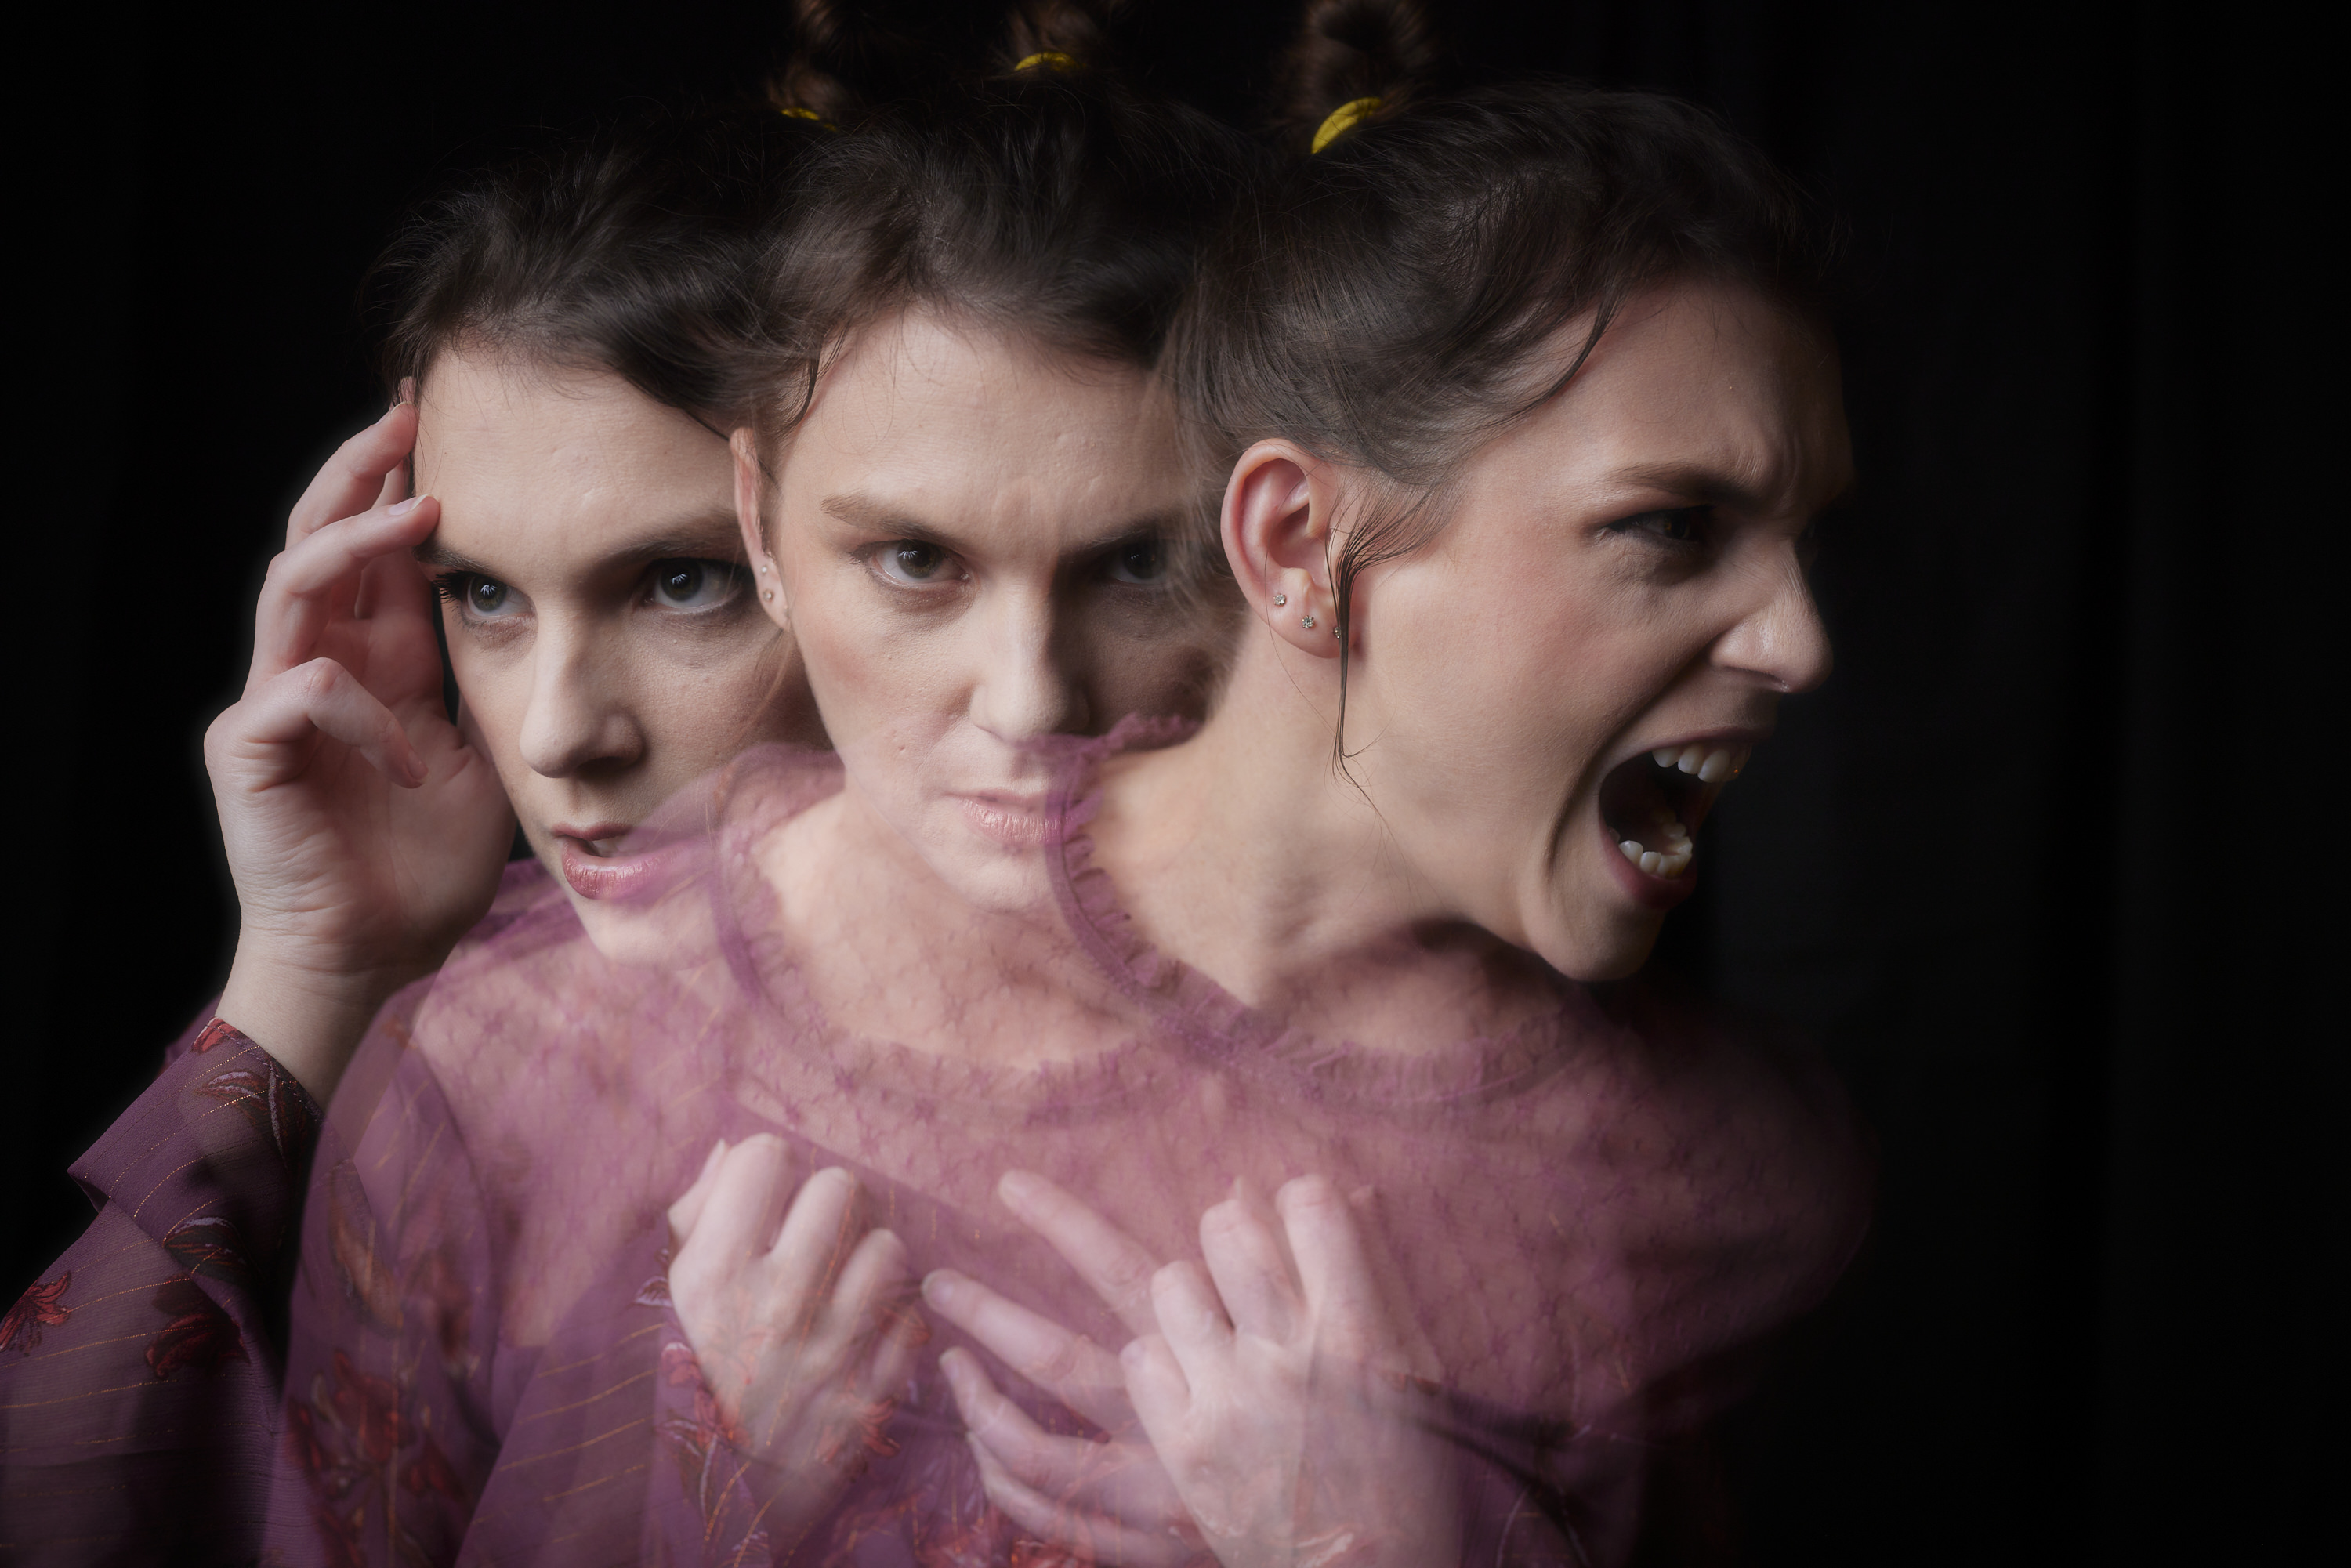
During this entire time, I searched for ways to make photos better in camera. You can see a lot of these experiments on my personal website. I opted for multiple exposures in-camera vs. Photoshop layering. In fact, the multiple exposure above was done in-camera. I also created in-camera paintings. And more and more, the idea of authenticity permeates through our work.
Now, what’s authenticity, you ask? It has to do with being 100% transparent about our photos. If an image is a composite, we’d label it as such. But lots of folks on Instagram, Behance, Tumblr, Flickr, Reddit, and social media groups don’t label their images as composites.
A photo composite is not a photograph, it’s a composite. Some people who are marketed as photographers are not photographers, they’re photo compositors. I don’t care that photo composites have been done since the beginning of photography. The point has to do with ease of entry. For people to have done them years ago, they needed to have many special skills and do a lot of work. These days, a high school junior can probably retouch skin better than you can. AI has made it more accessible. As the barrier of entry has gotten lower, the standards need to be set higher.
So then, what is a photograph? I’ve got a personal rule, and I’ve got rules for what I believe should be considered photographs. If the final exported file is 80% the original image, then it’s a photograph. This means basic retouching with ethics in mind, standard adjustments in one direction or another, etc. For our Creating the Photograph series, the recent post by Brandon Casey is a composite.
Here’s what he said:
“This shot actually required a fair bit of post-processing to achieve the final result. I moved all three images from Lightroom into Photoshop. The first thing I needed to do was mask my son into the long exposure frame of the rocket. Once I had him masked in, I moved on to correcting the colors on him to match that of the long exposure frame since the temperature output in the flash units is significantly different than the light emitting from the rocket.
While in the field, I set up the main light to recreate the light which would have come from the rocket, a secondary light to recreate the full moon overhead, and a third light right of camera to act as a slight fill. This definitely helped but wasn’t a hundred percent there, so after balancing the colors, I did some dodging and burning on him in order to shape the light in a way that the rocket would have. After I had him blend into the frame with the rocket, the next step was to fix the stars. We see the stars as perfect little pinpoints while we watch a rocket launch. However, during the long exposure, these little pinpoints turn into star trails. To fix this, I usually find a clear section of sky and capture a frame just of the stars.
Once in Photoshop, I’ll use the healing brush to remove all the star trails from the long exposure frame. Then on the frame that I took with just the stars, I’ll adjust the contrast to brighten the stars, and darken the sky. Then change the layer blend mode to lighten in order to hide the dark sky and only let the stars show. Lastly, with a layer mask and brush, I blend the stars back in where they need to be. After everything is done, I save the final blended image back into Lightroom where I make my color grading adjustment to my style, which is the last thing I do.”
When you think about that, then you see how it’s a composite. Alternatively, Meg Loeks created a photograph. Here’s her post-production process:
“I use Adobe Creative Cloud to edit my images. In Lightroom, I straightened my frame then did basic white balance correction to remove some of the warmth and magenta in the SOOC. I increased exposure on daughter, added contrast, and applied a radial filter to add haze to my Profoto light. Then I brought the image into Photoshop and altered the greens and yellows a little by creating hue/saturation layers.”
You can see her before and after shot in the previously linked blog post. The two are monumentally different. And they should be labeled as such. Why does it matter? Because people look at composites and photoshopped images and think they’re real. Think about all the retouching issues that happen. If you’ve ever bought Aerie underwear, then you have to get behind what I’m saying. If you’ve ever seen the Northern Lights and then looked at photos of them, you have to understand what I’m saying. This is why photography without Photoshop is brilliant; it finds a way to make the Northern Lights pop without post-production. It’s exciting because you don’t need to sit it front of a computer for hours. And it’s important because humanity needs to try harder to standout from what AI can create.
I think the future of photography needs to be paved with authenticity, and we all need to be a part of it. More importantly, it means learning the skills in-camera and learning to do it all without Photoshop.
Get rid of the ads!
Did you enjoy reading this article as much as we enjoyed writing it? There's a way to support us and our reporting, getting ad-free navigation and more as a bonus. Subscribe to us for less than a coffee per month —just $3.99— or take advantage of our yearly subscription with a hefty discount for only $25.- An ad-free experience
- A free mystery box for Lightroom or Capture One
- All the books in our store
- 20% discount on Capture One
- 30% discount on Imalume Photo Theft Protection
- 20% off Herbs and Kettle Tea Company.
- 20% off your order from MPIX printing services.
- 5% off Viltrox Products via their eCommerce store.
- 10% off all film developing, printing and scanning services from Blue Moon Camera and Machine
- 15% off 7Artisans products: The lens and accessory maker is offering a sweet discount for Phoblographer's readers.