Fact: art inspires art. It’s true! When we featured photographer Tarryn Goldman a while back, you folks adored her work. And today, she’s back with something else. She’s done a series called “Submerged” where she drew inspiration from things that are, well, submerged! Playing with water in photos is always fun. But when you add things like ink, creative freedom, and light to them, they become something different. We asked Tarryn to be part of our Creating the Photograph series to show you how she did it!
Creating the Photograph is an original series where photographers share how they created an image with lighting and minimal post-production use. The series has a heavy emphasis on teaching how to light. Want to be featured? Here’s how to submit.
Table of Contents
The Concept
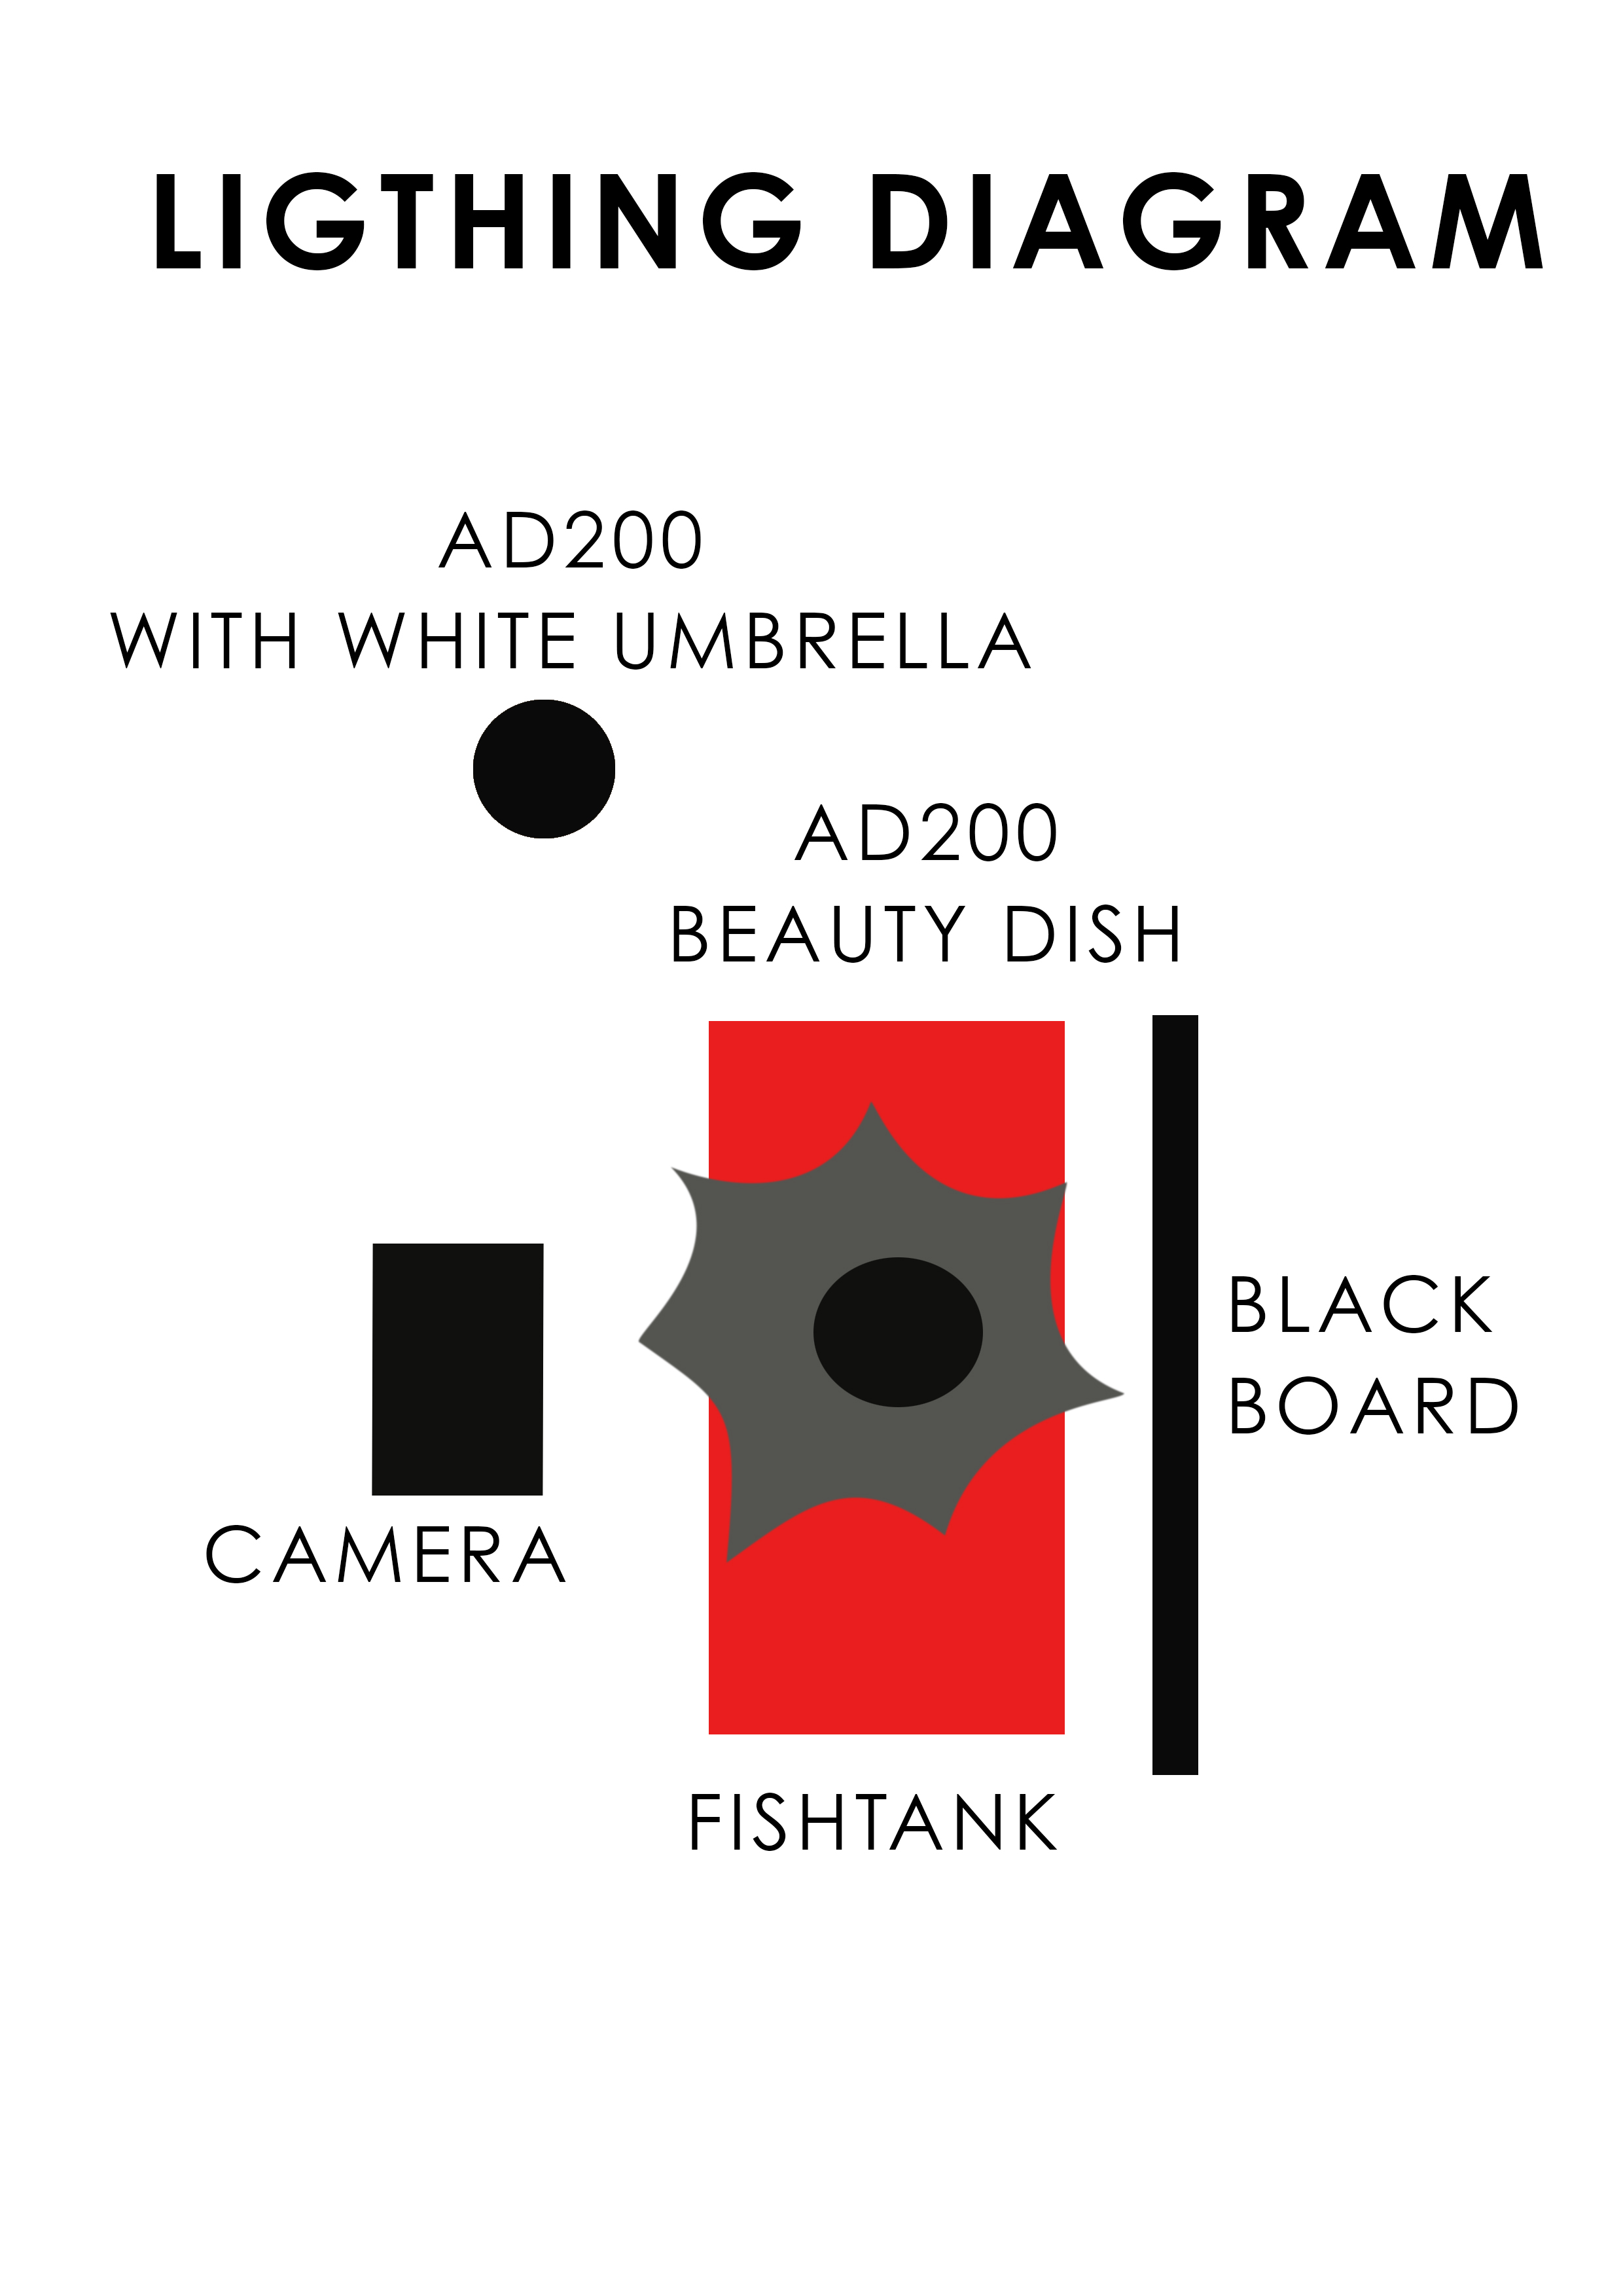
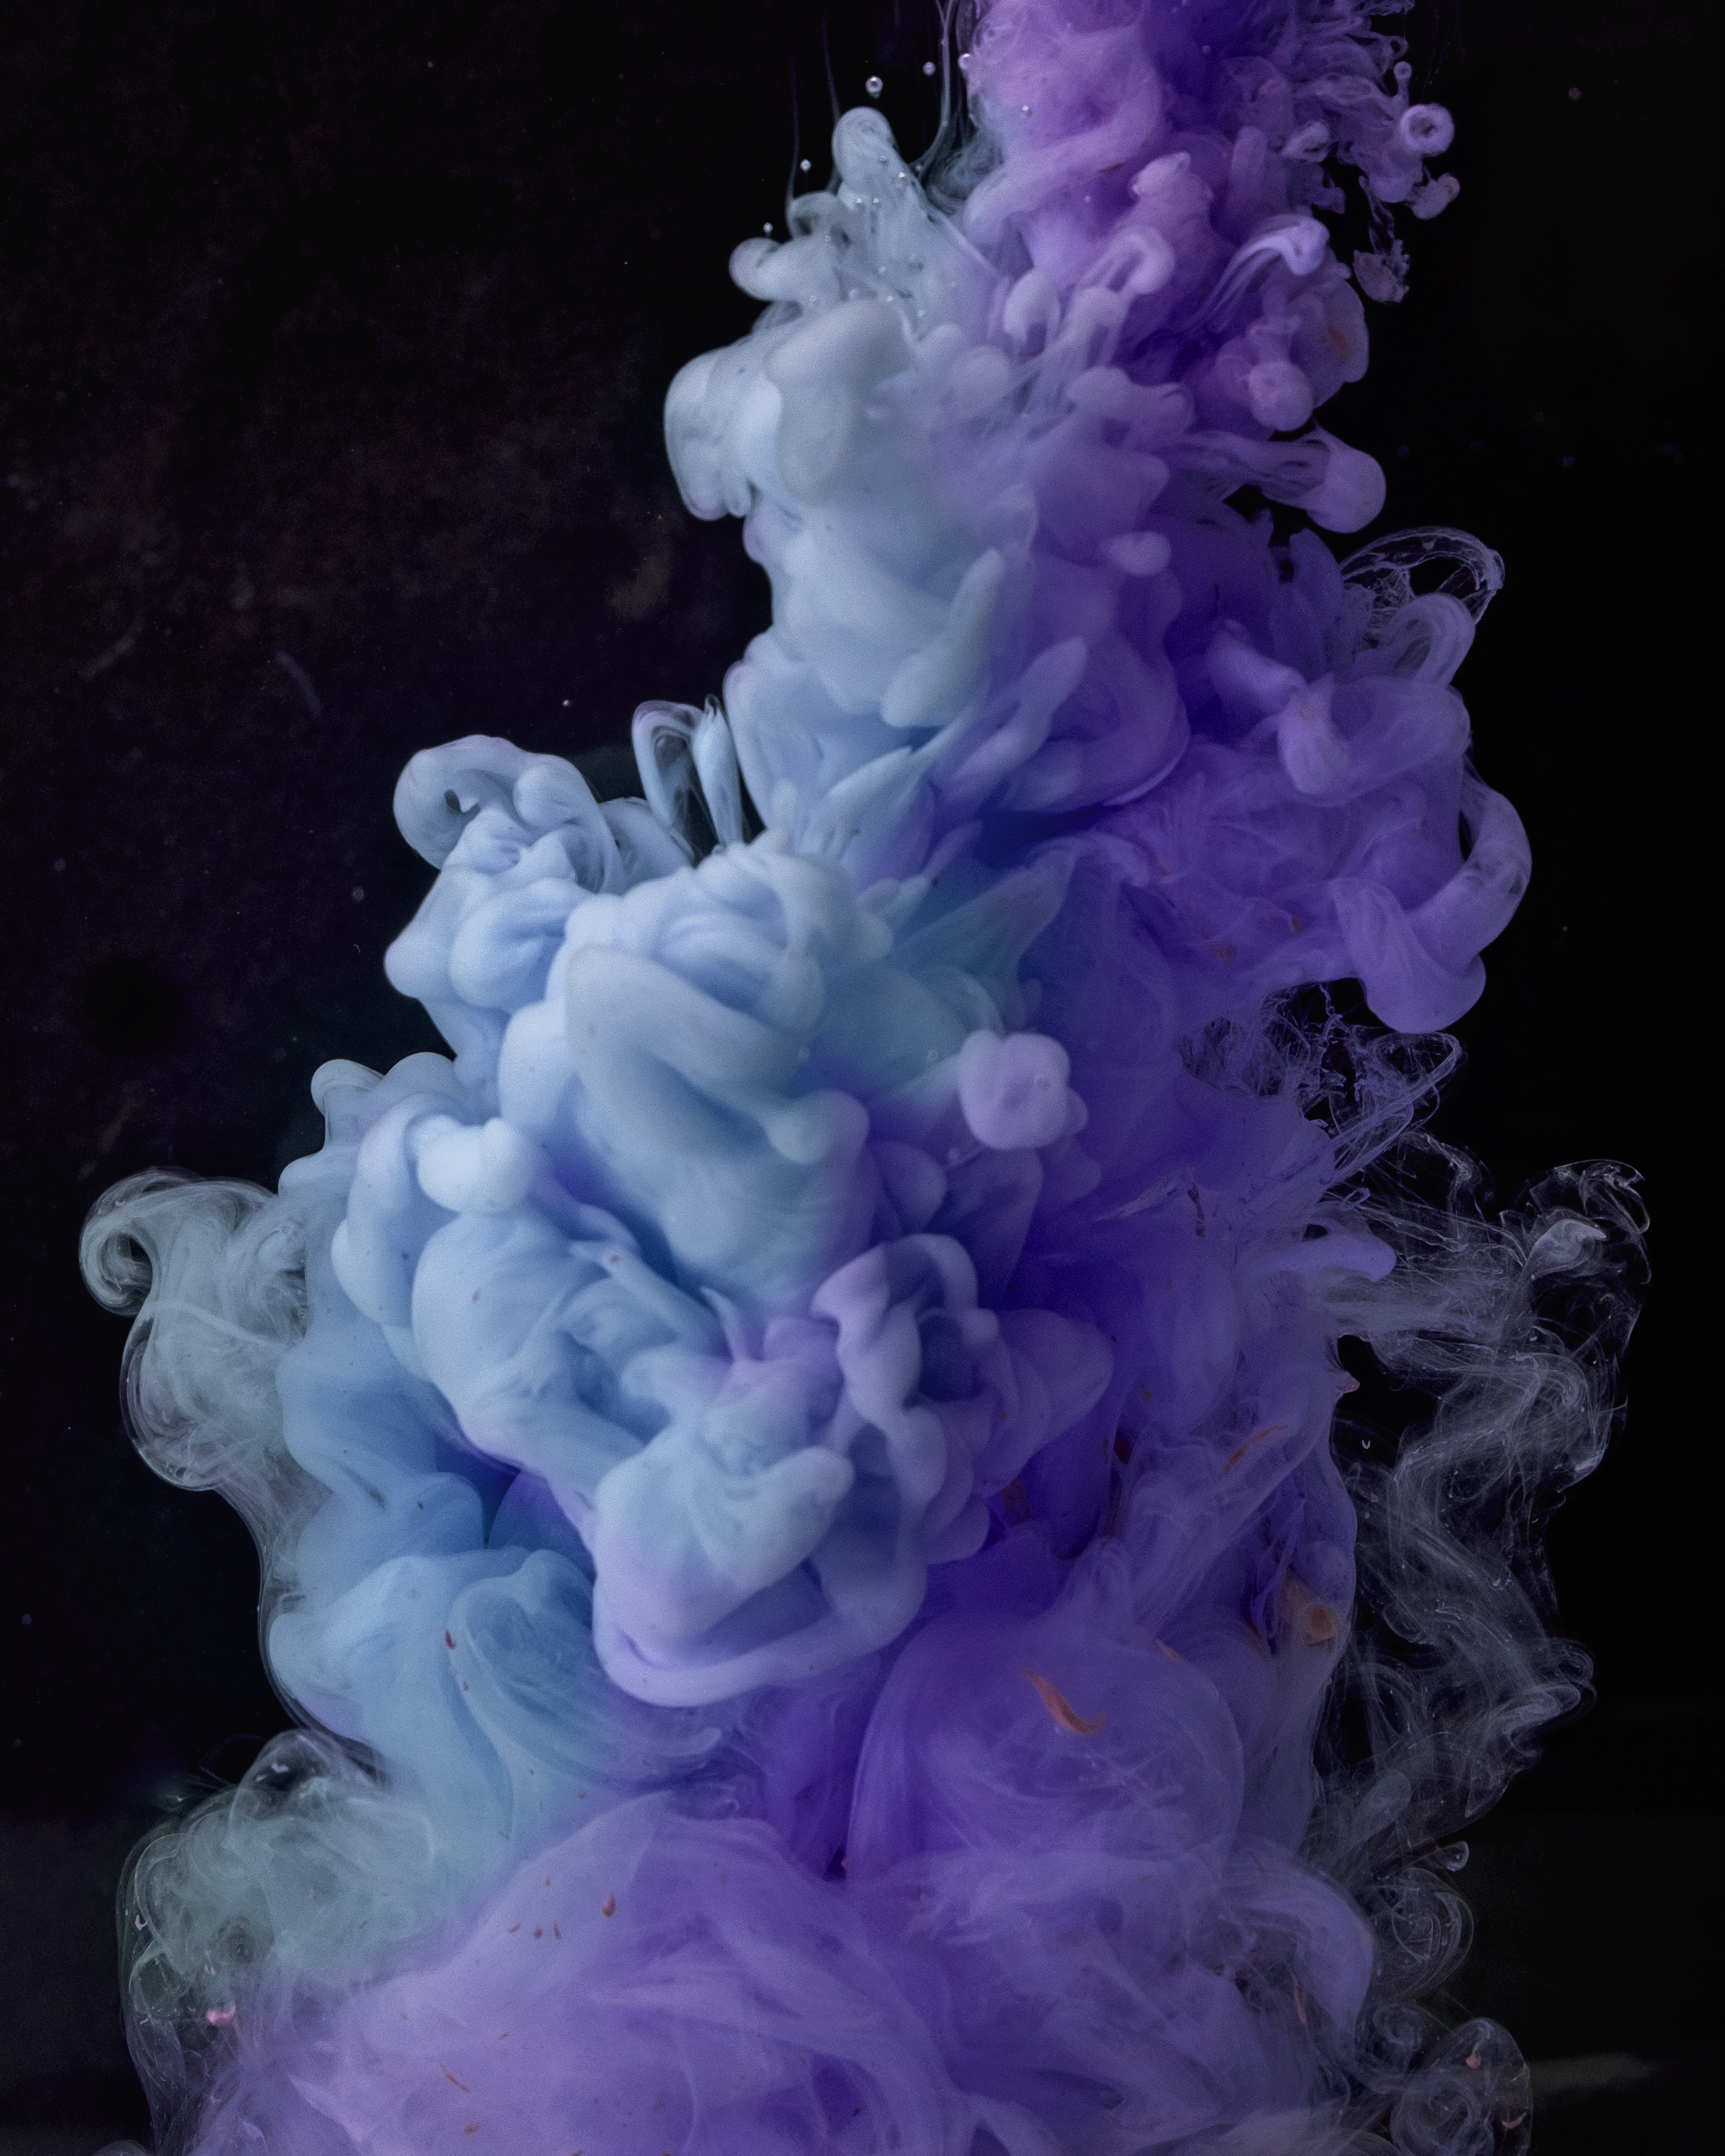
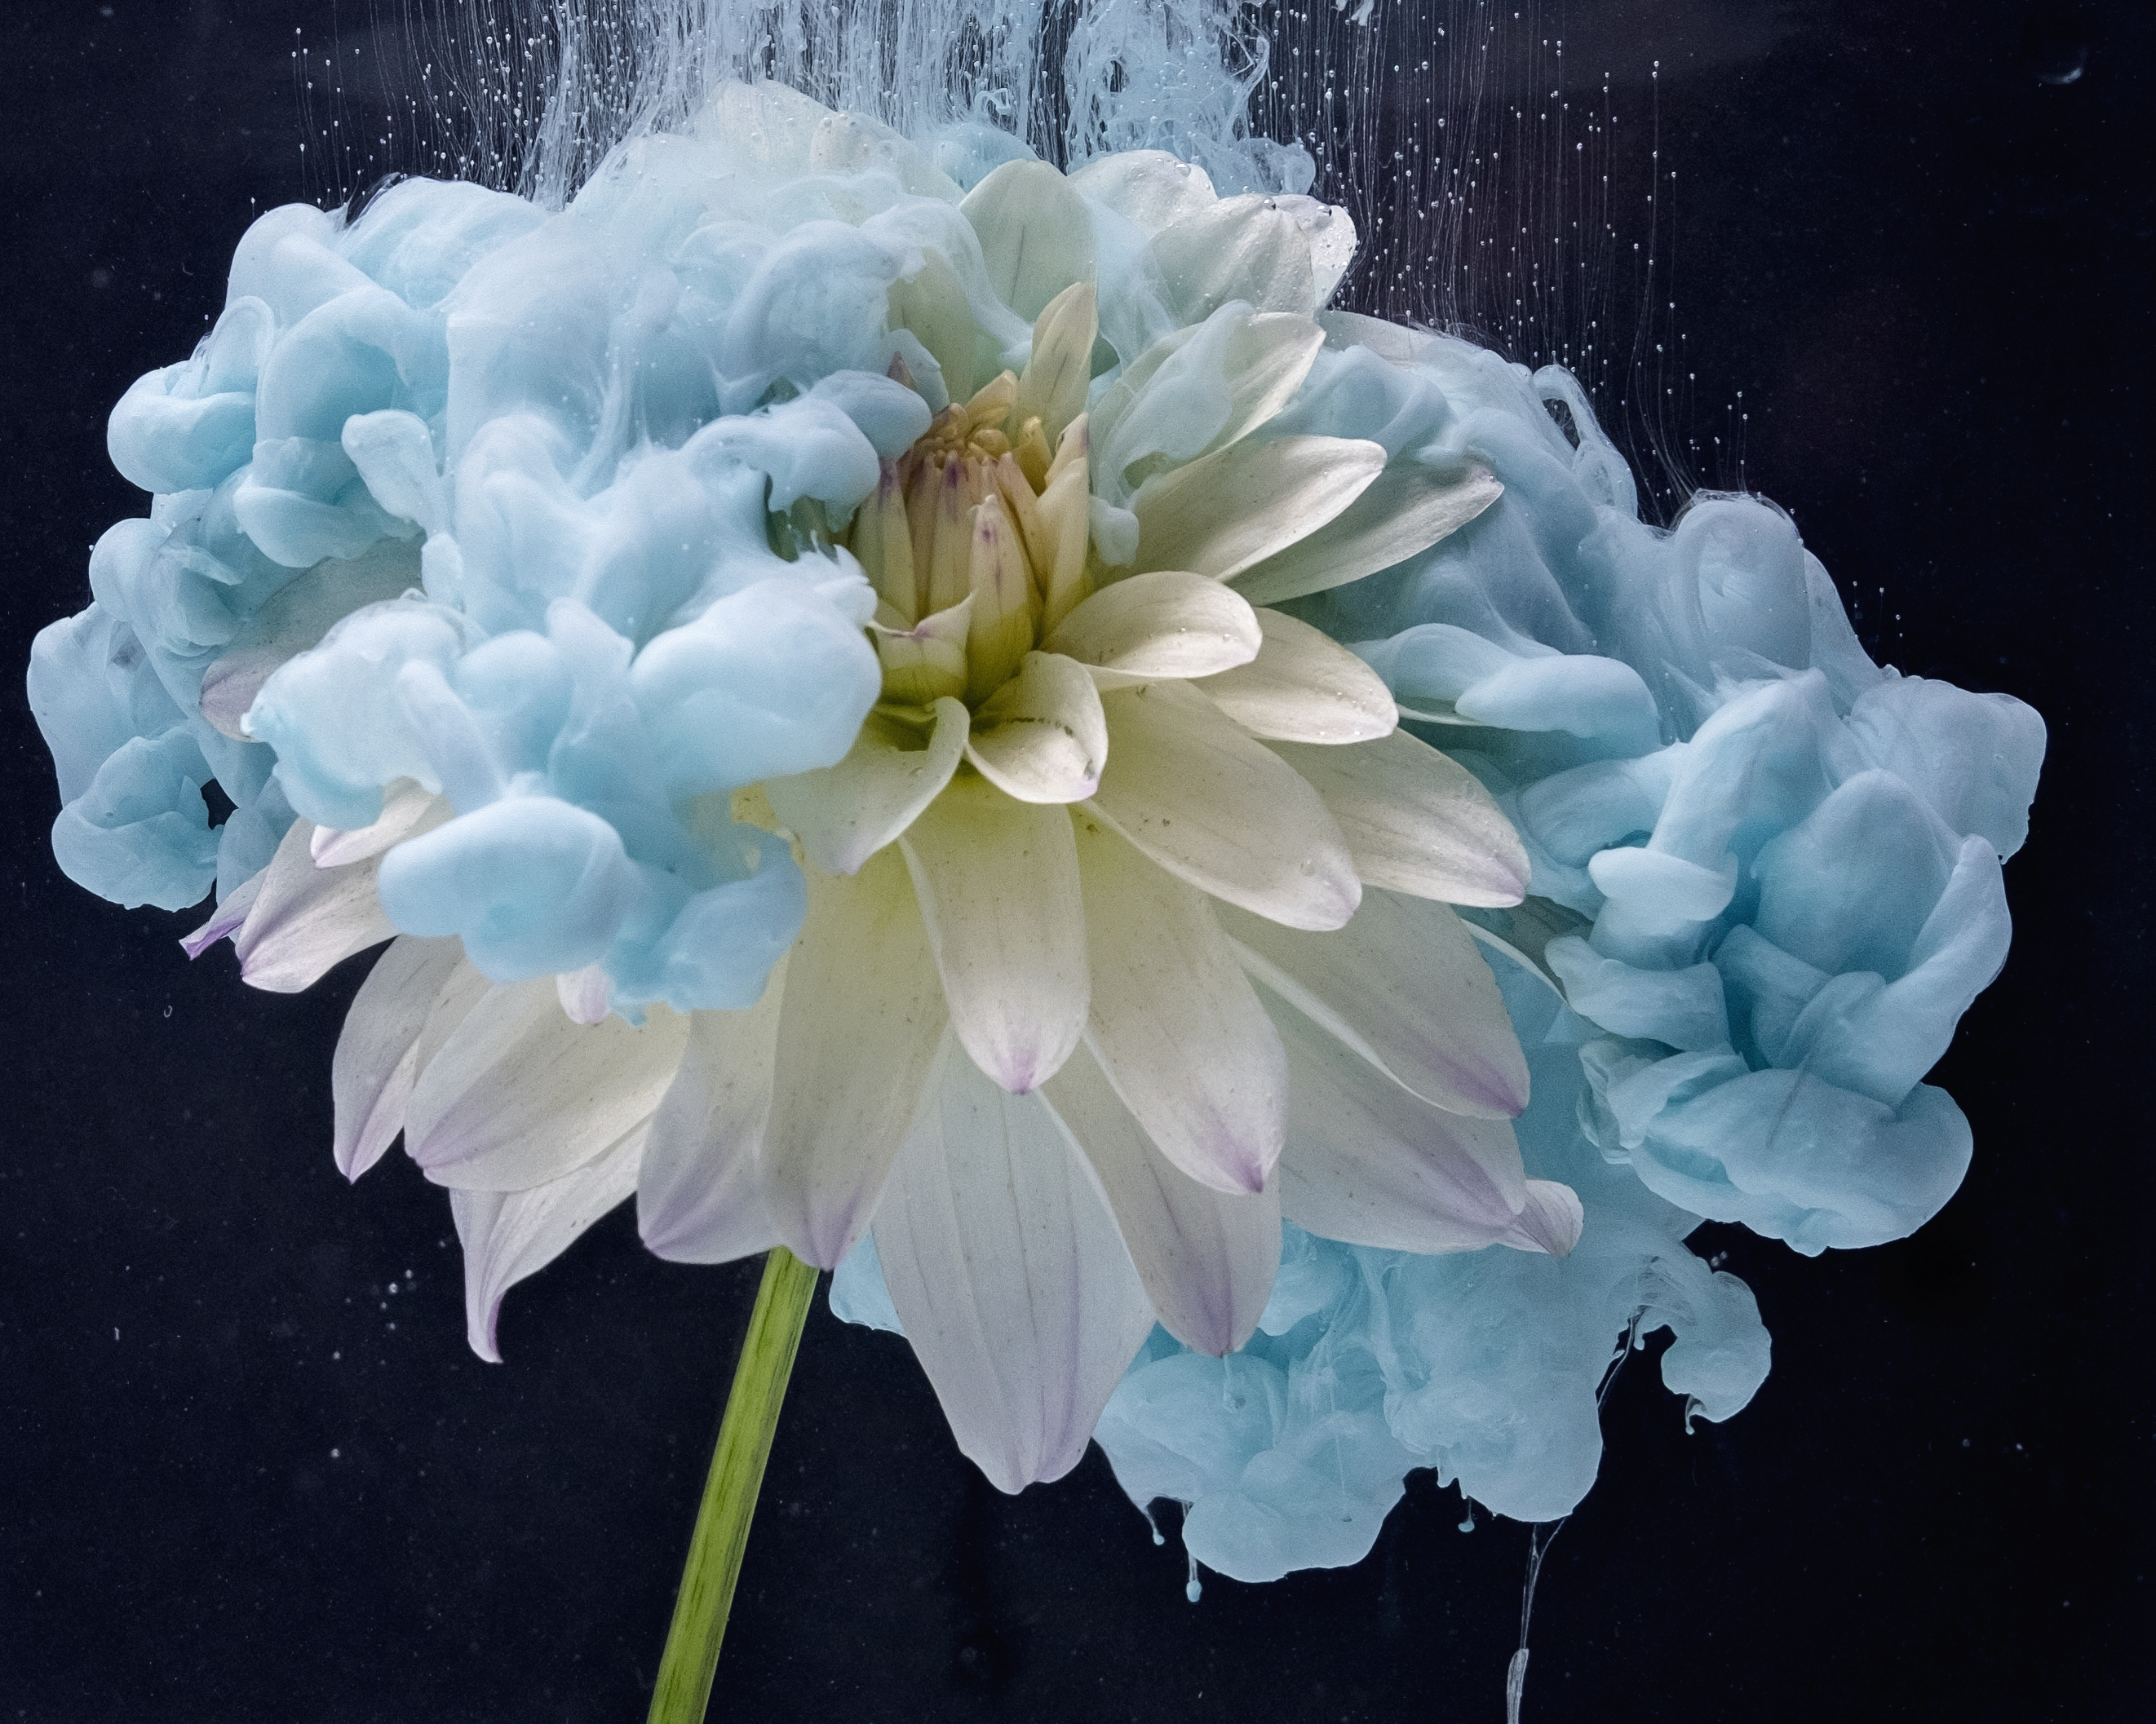
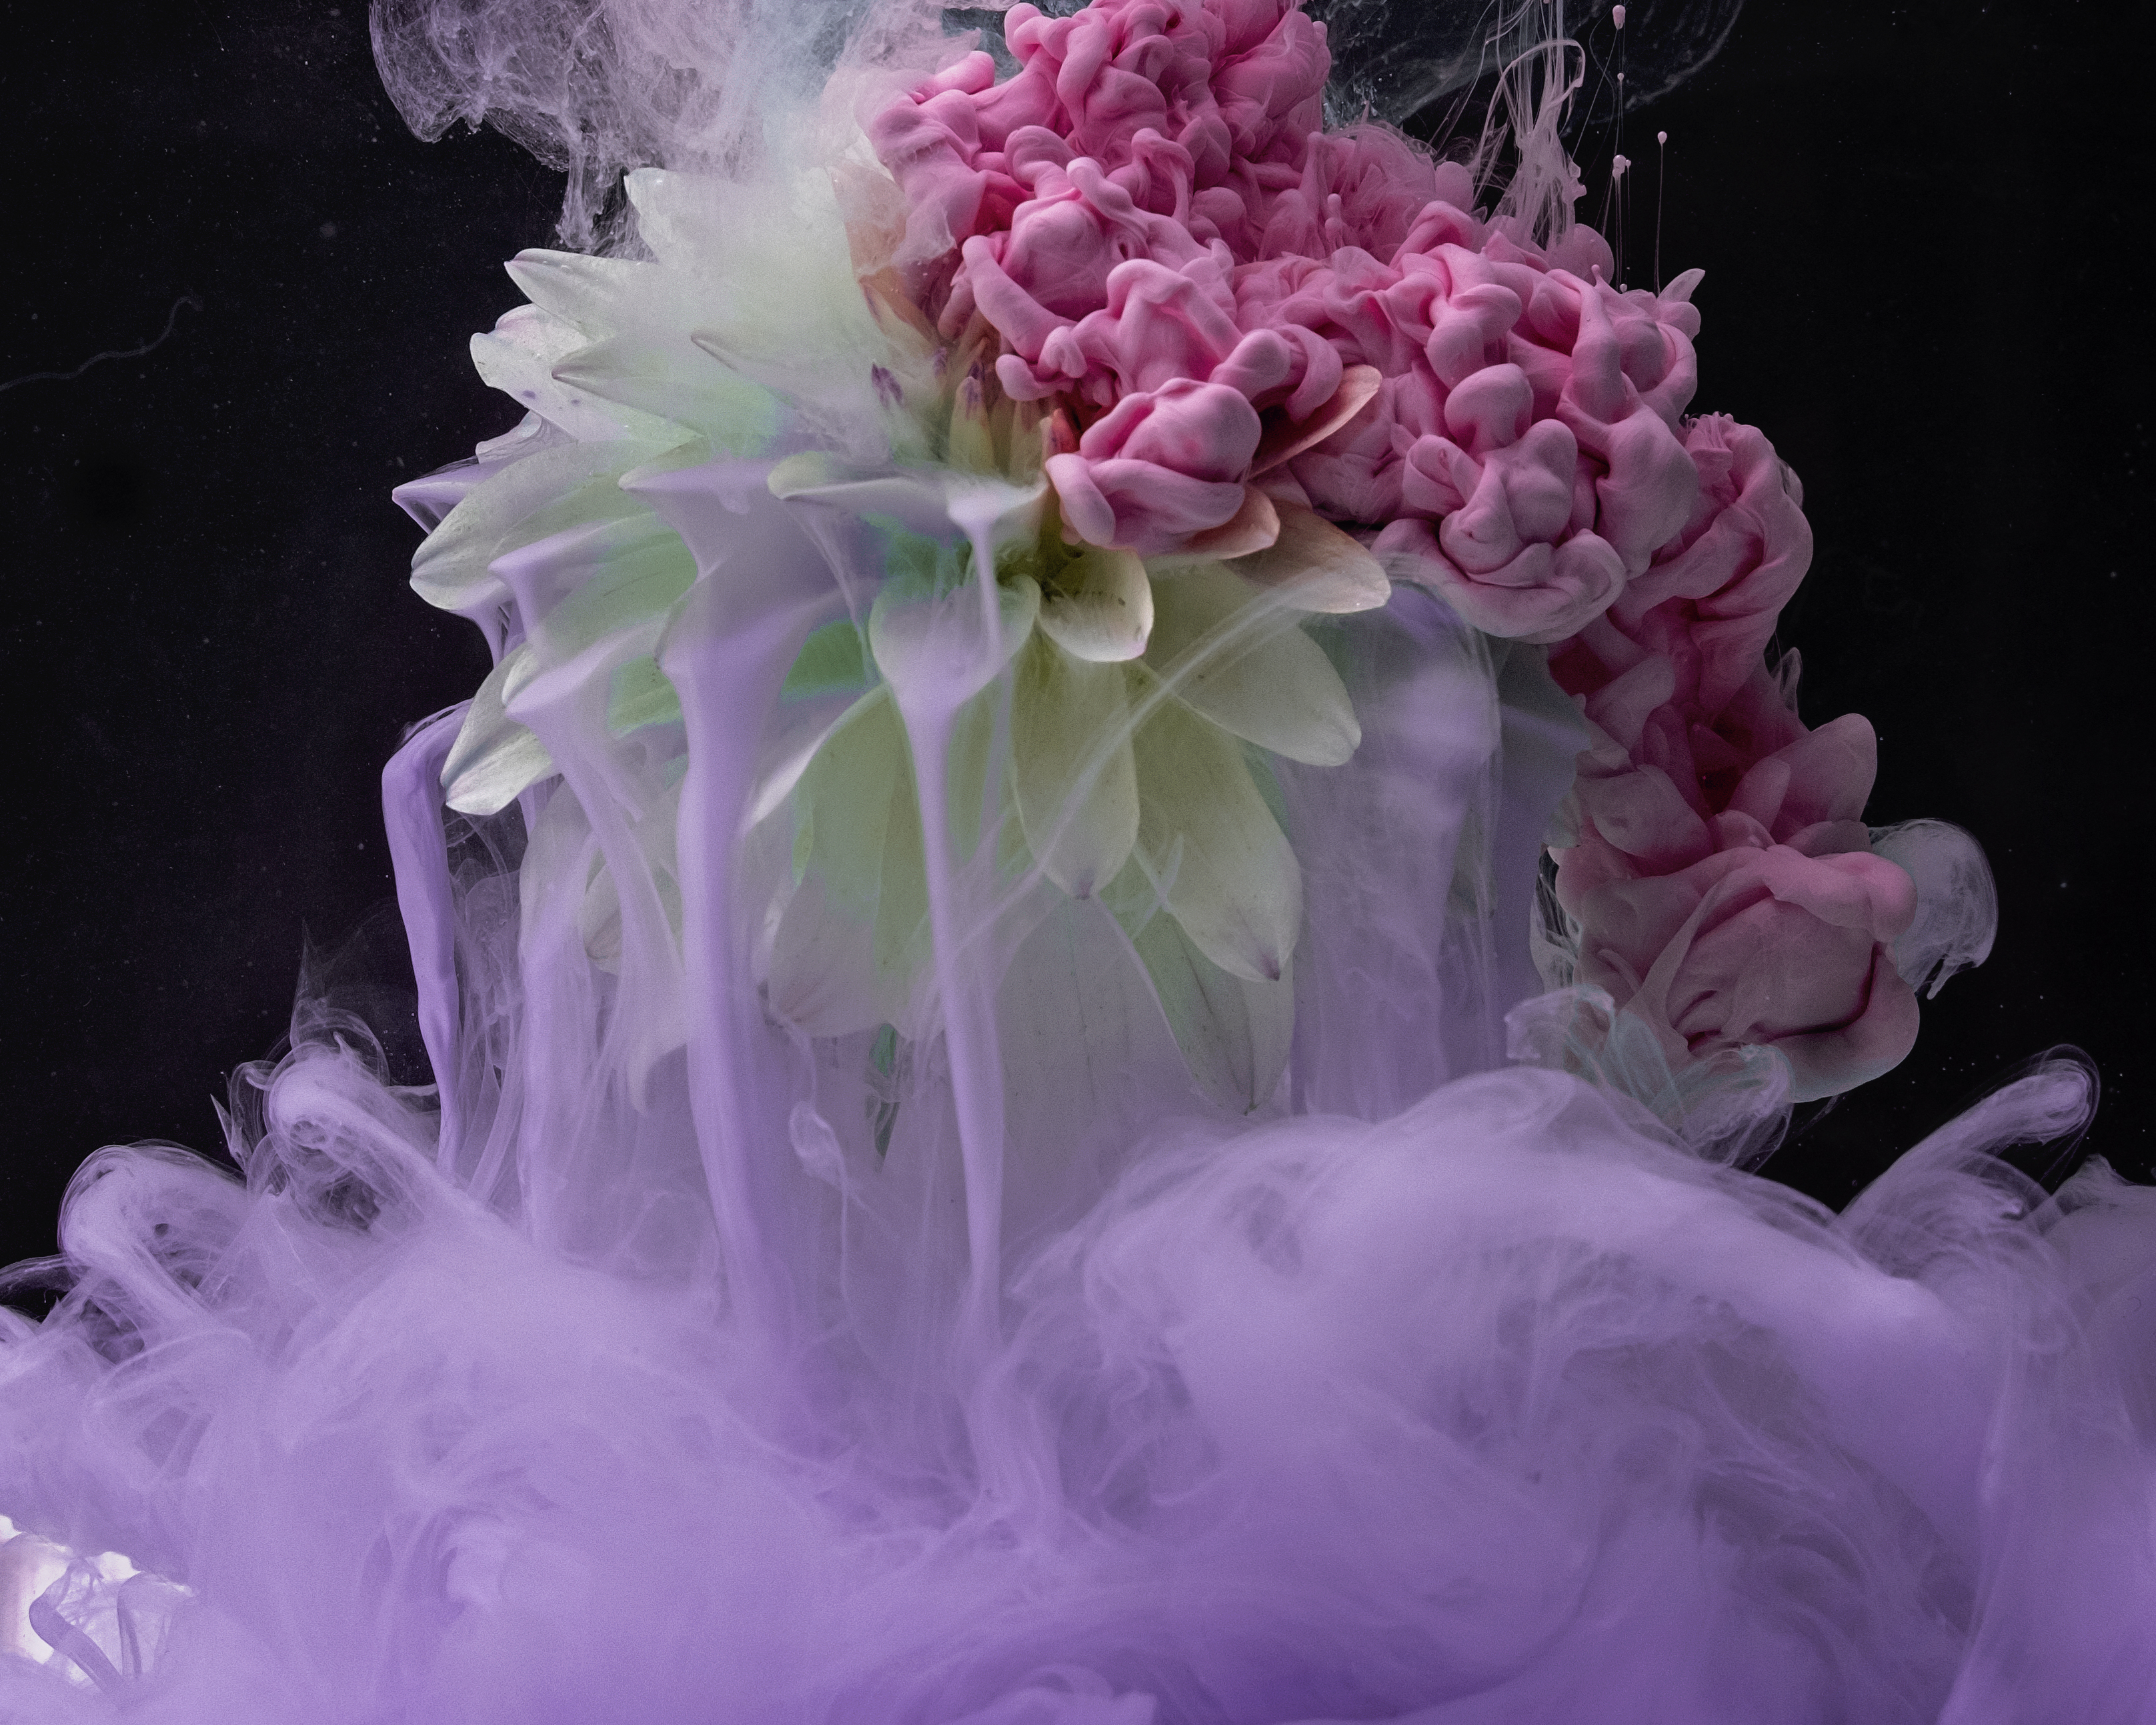
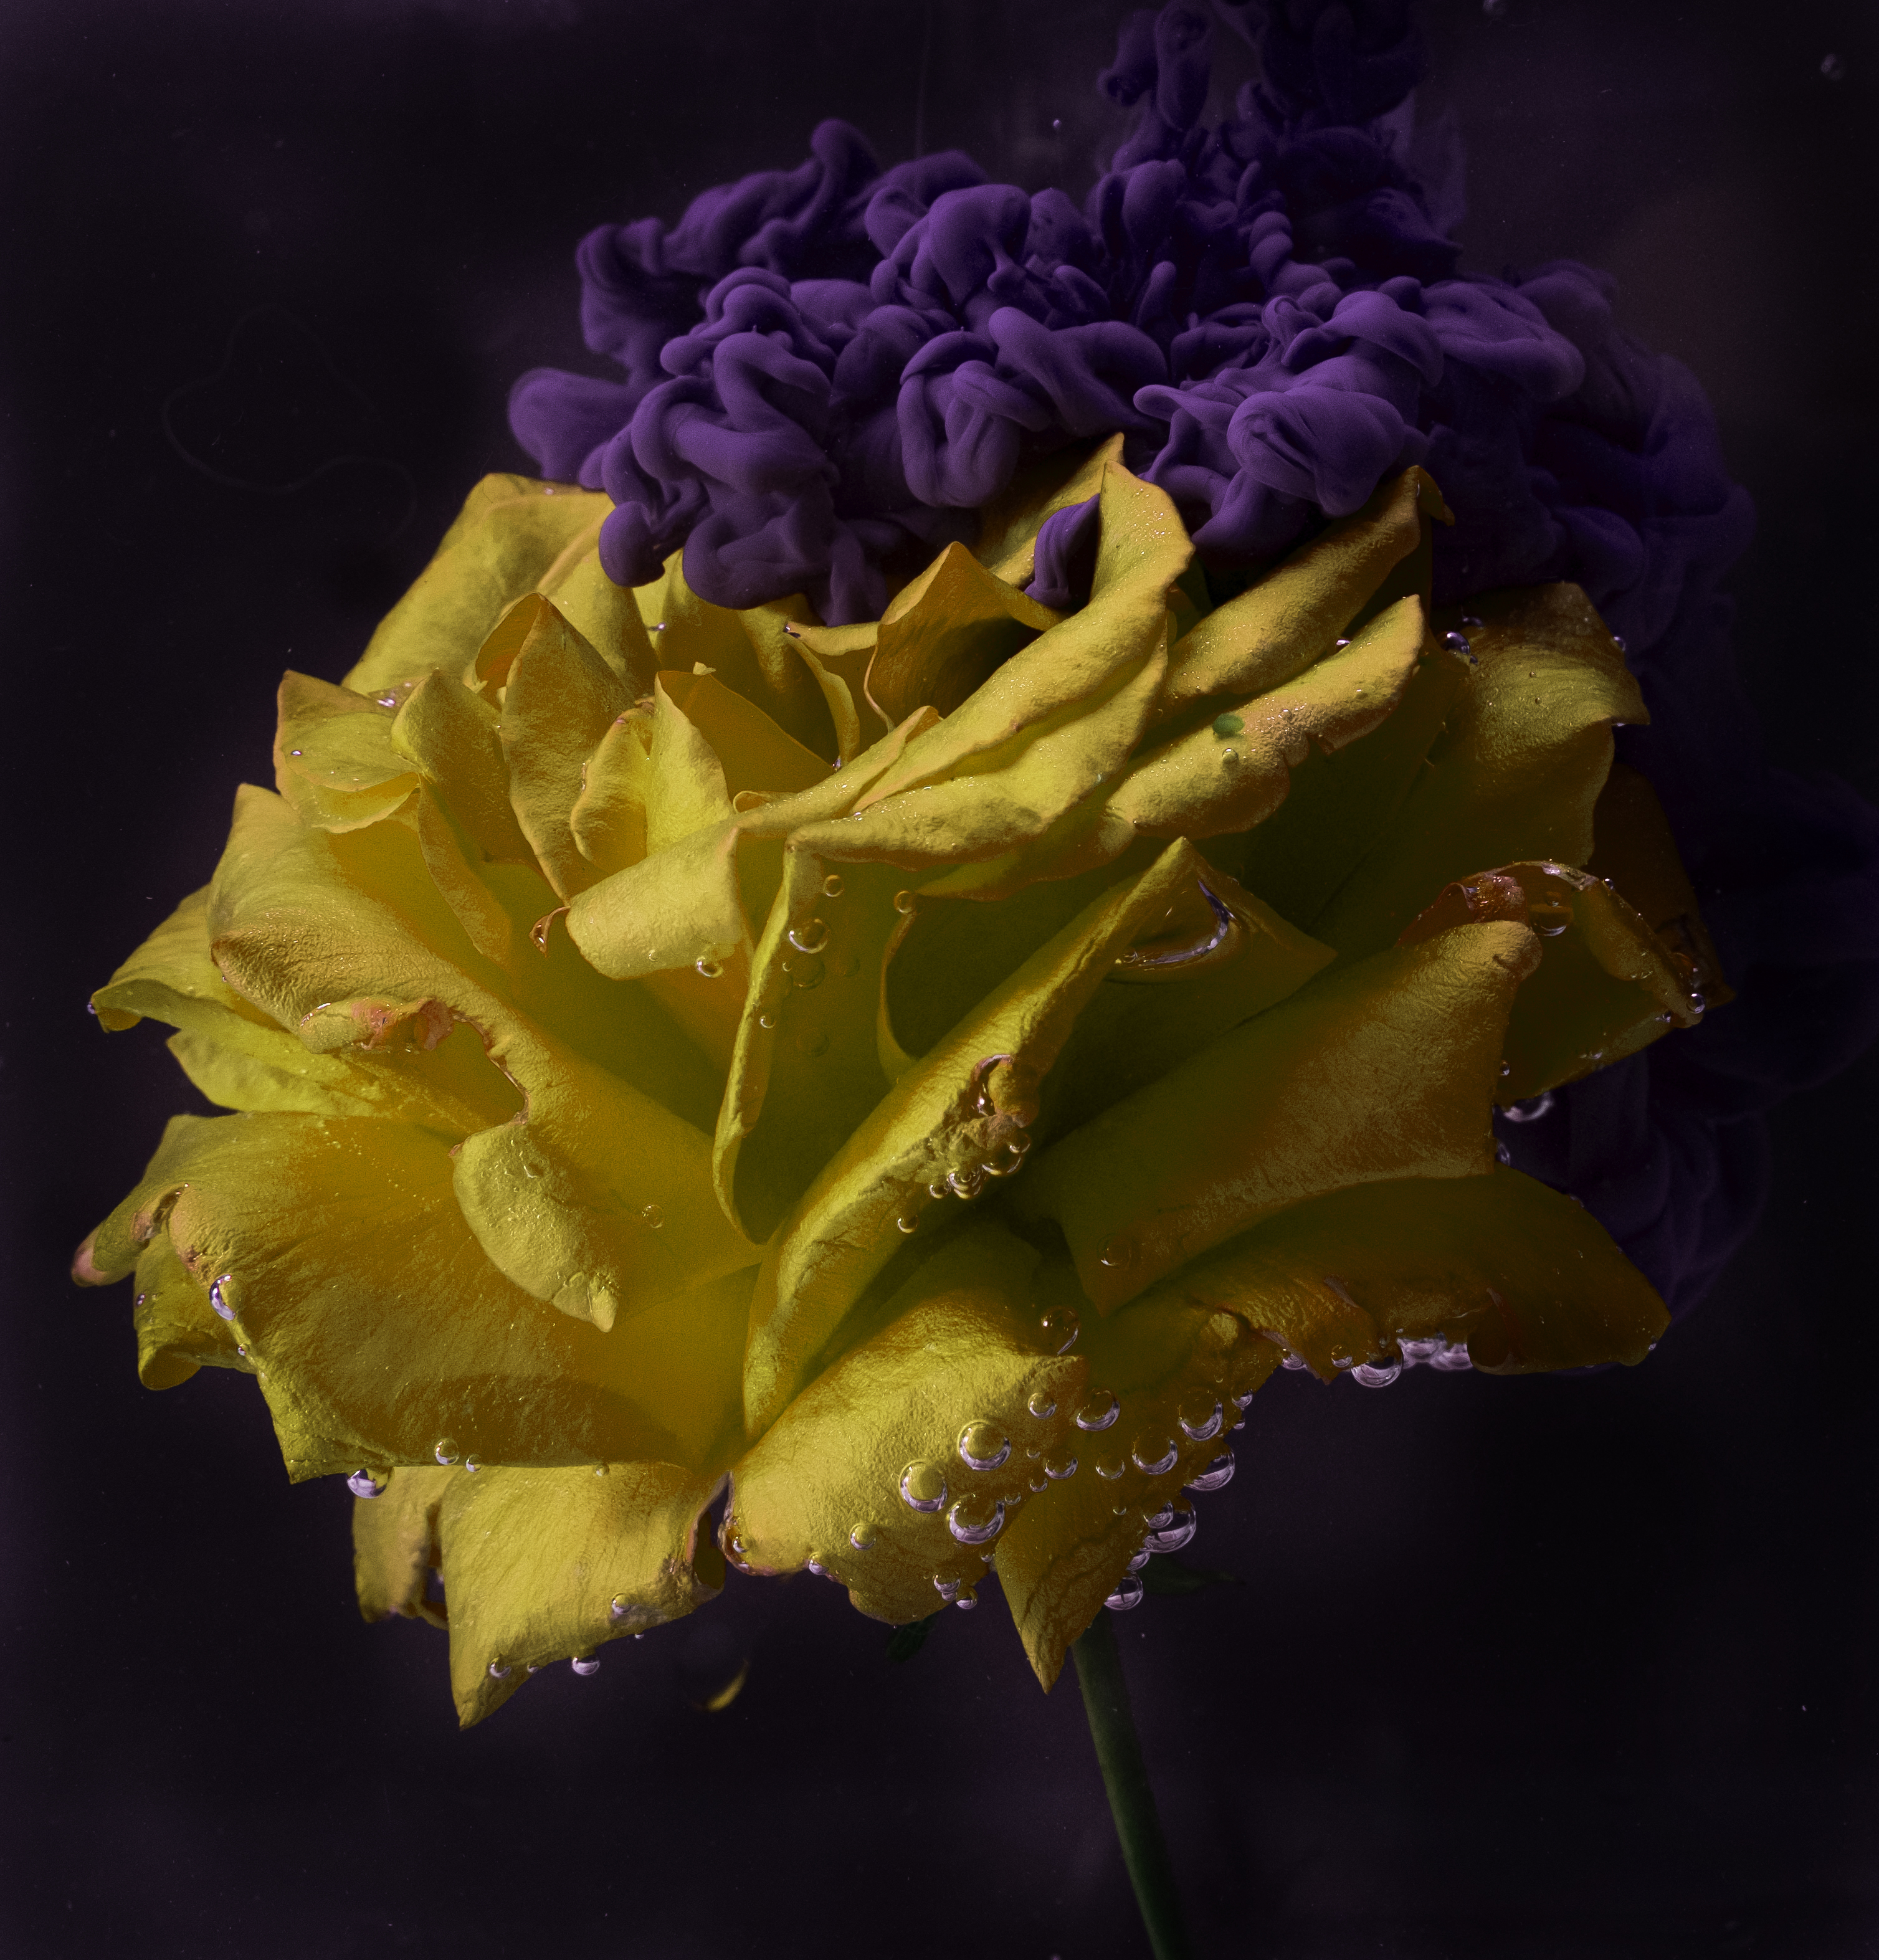
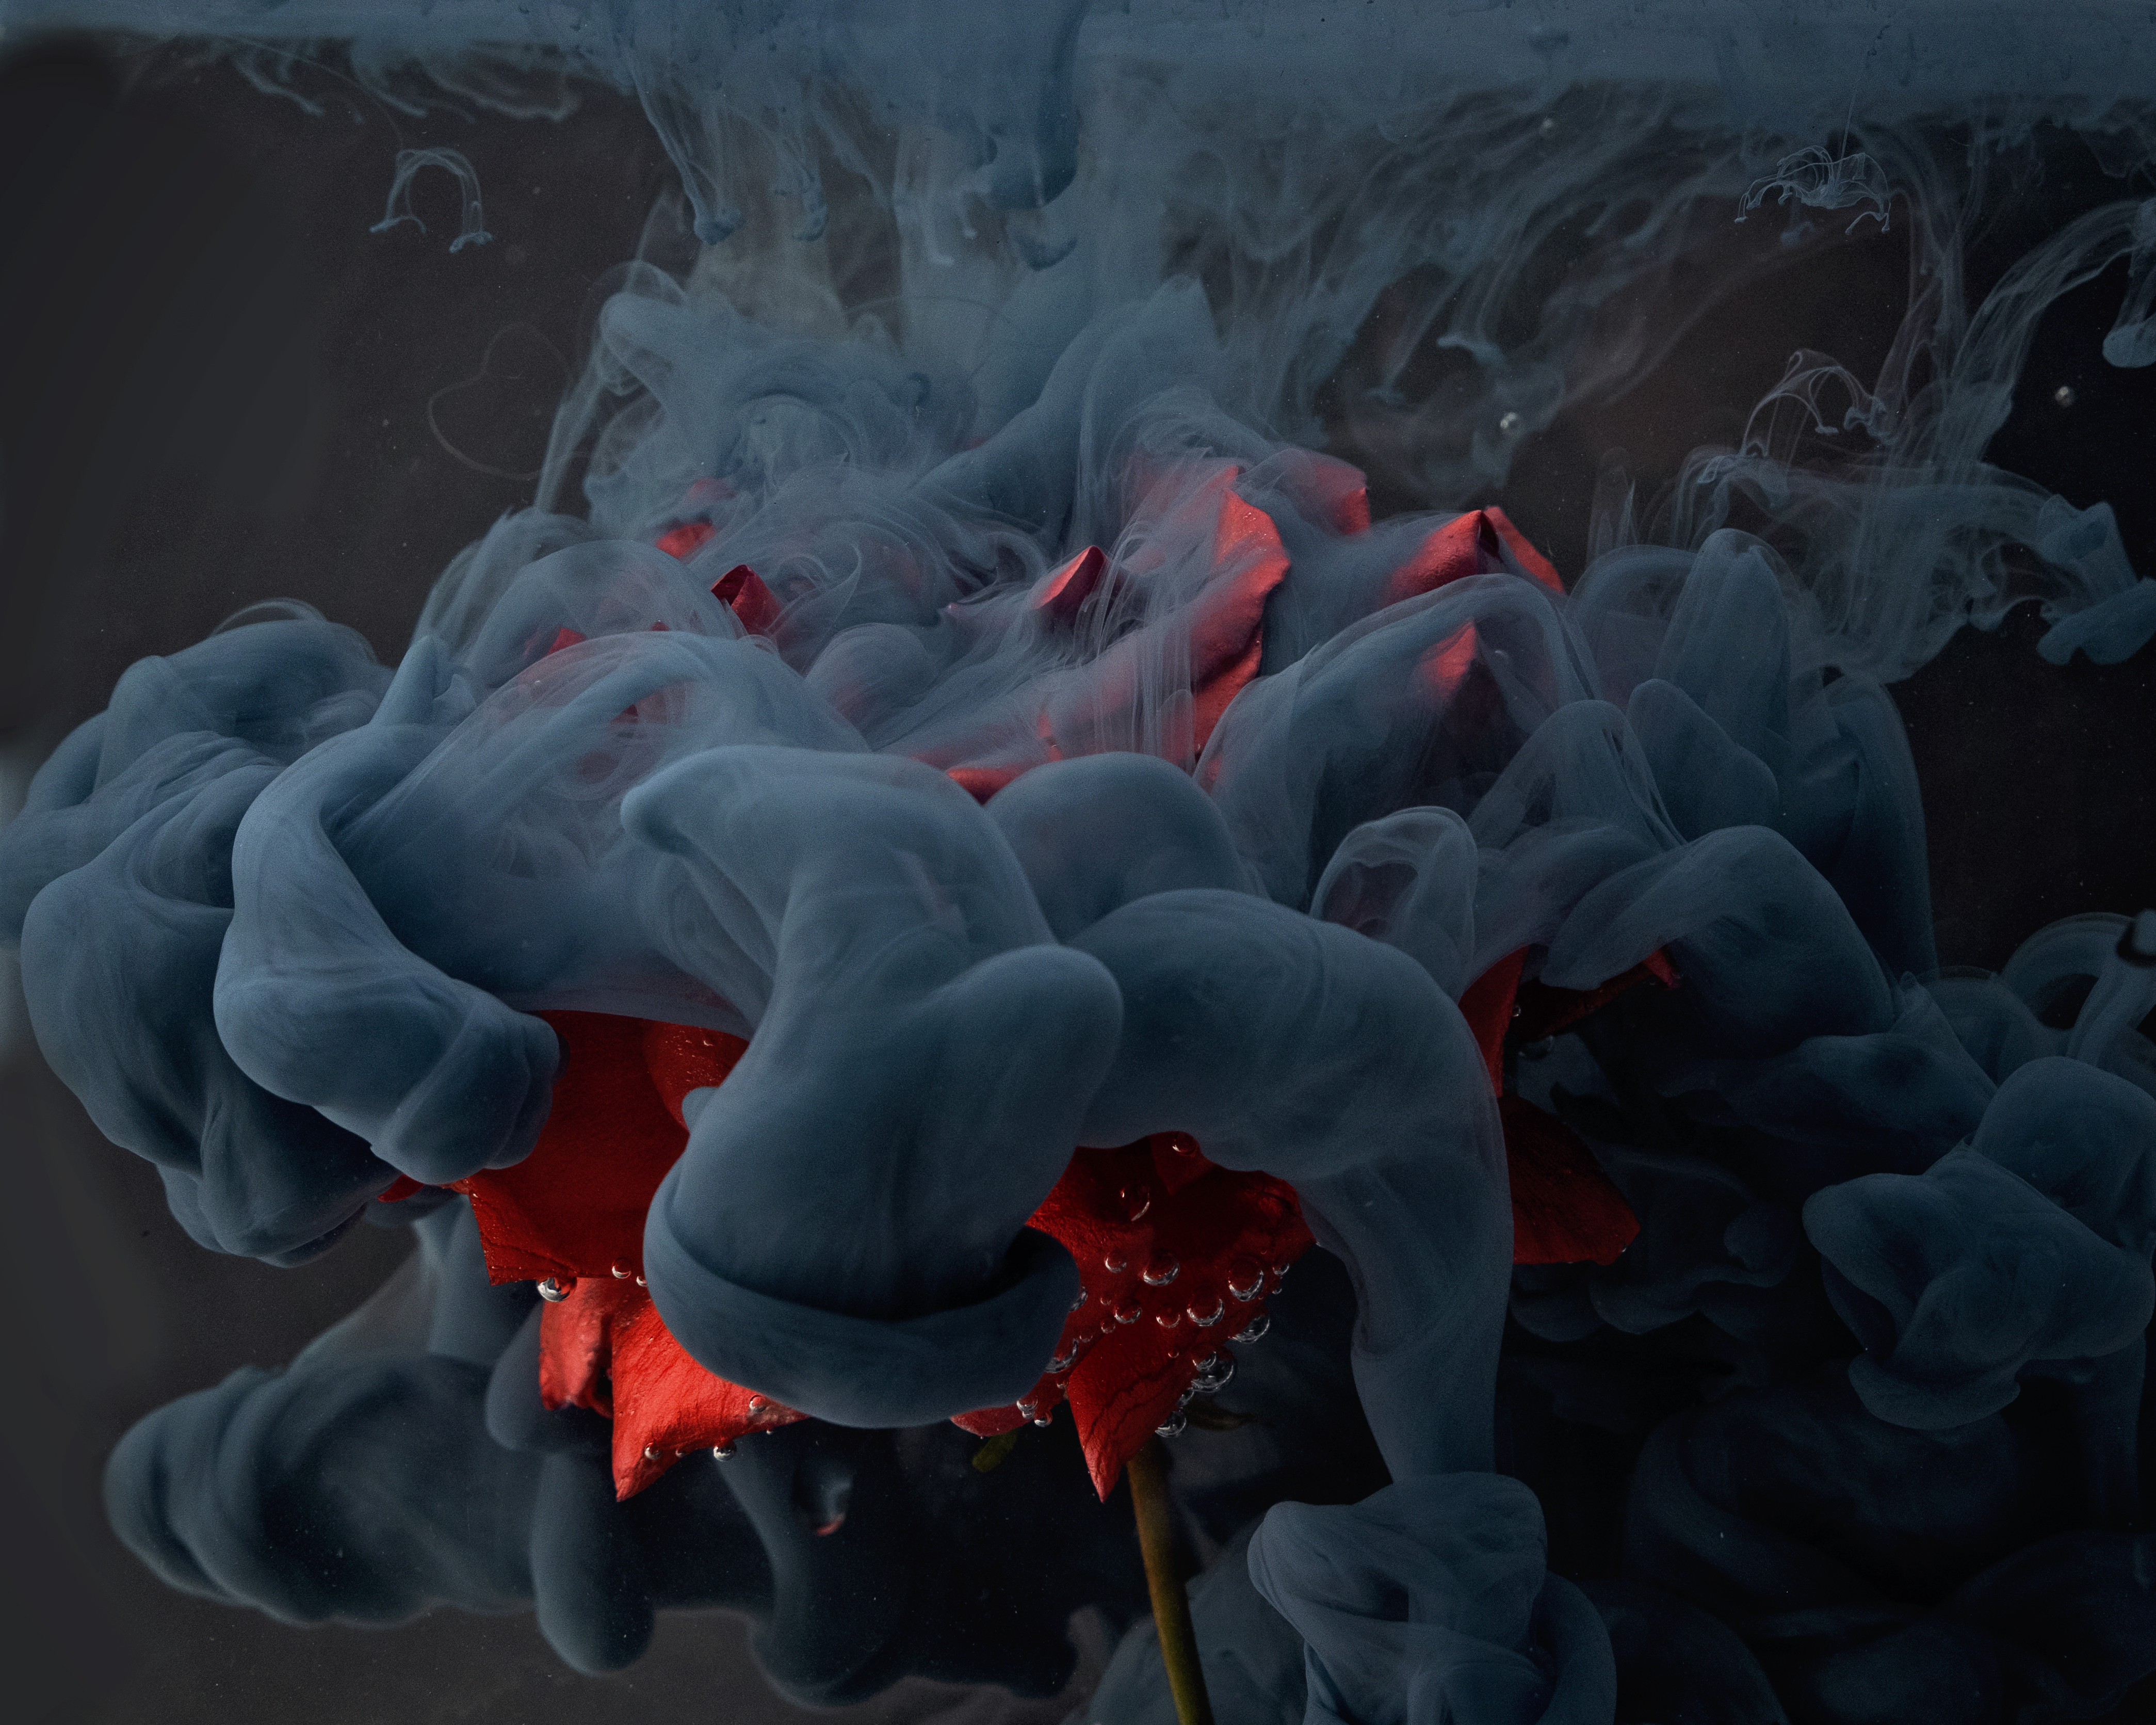
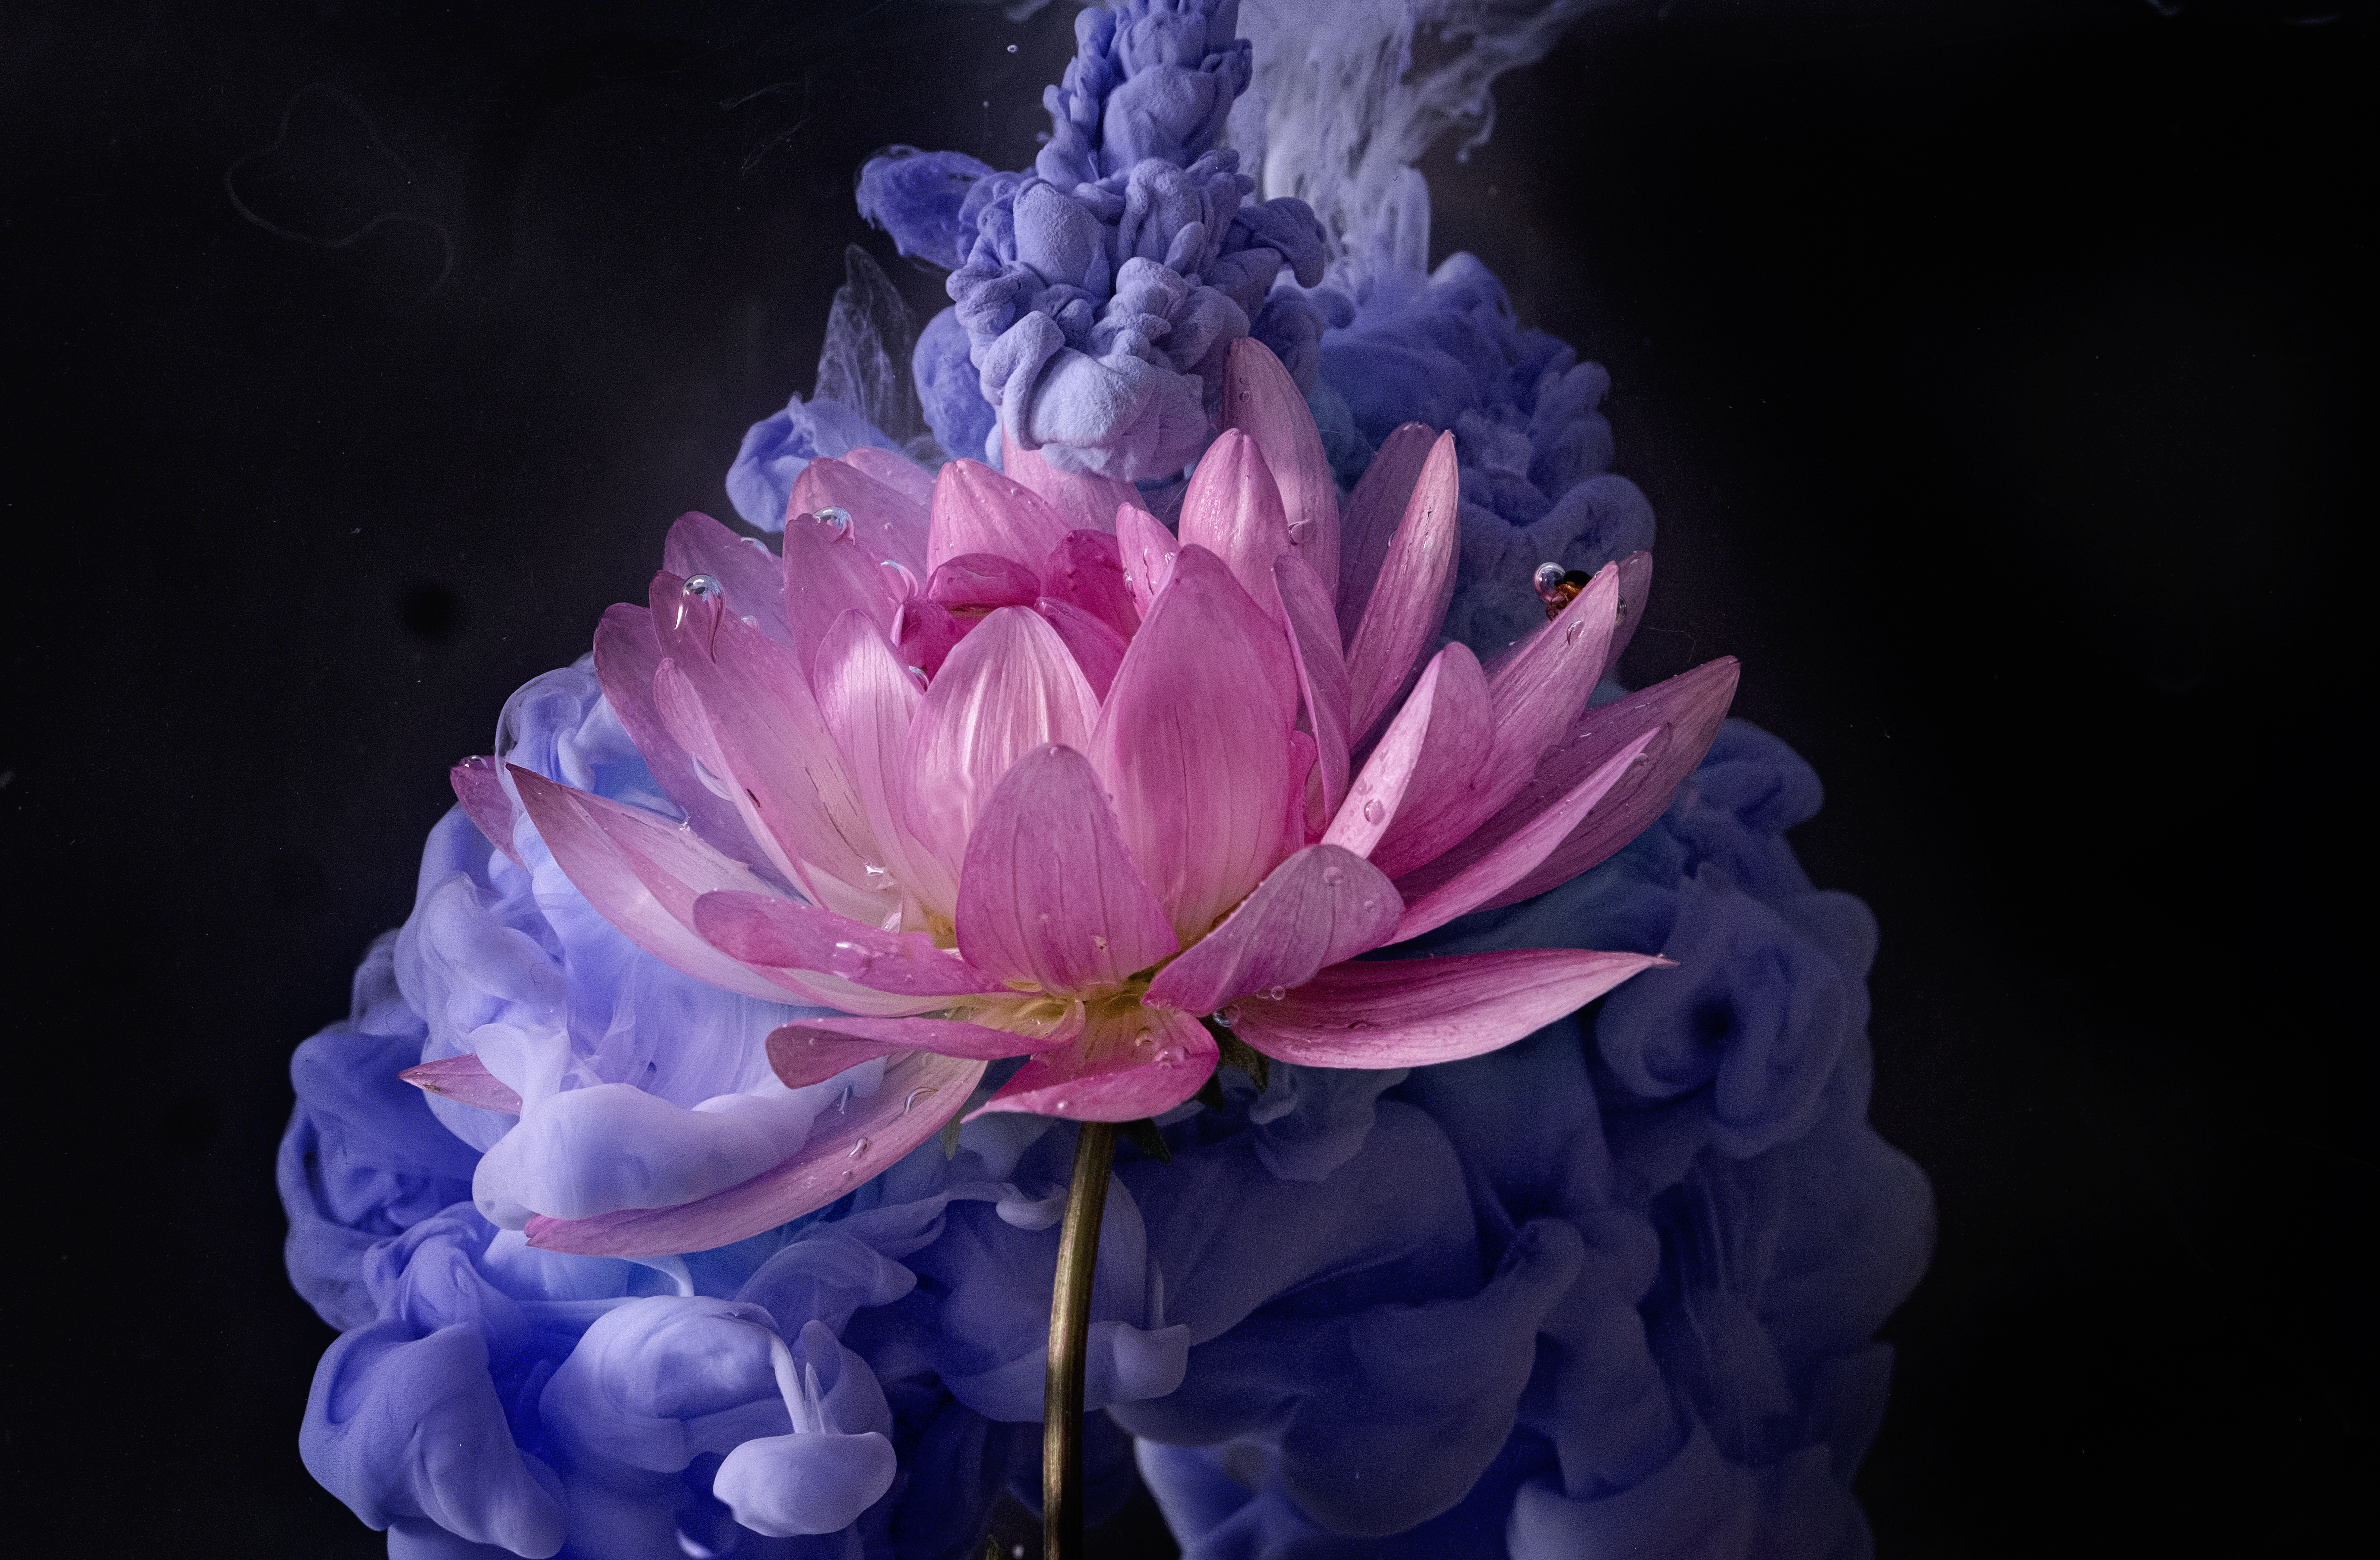
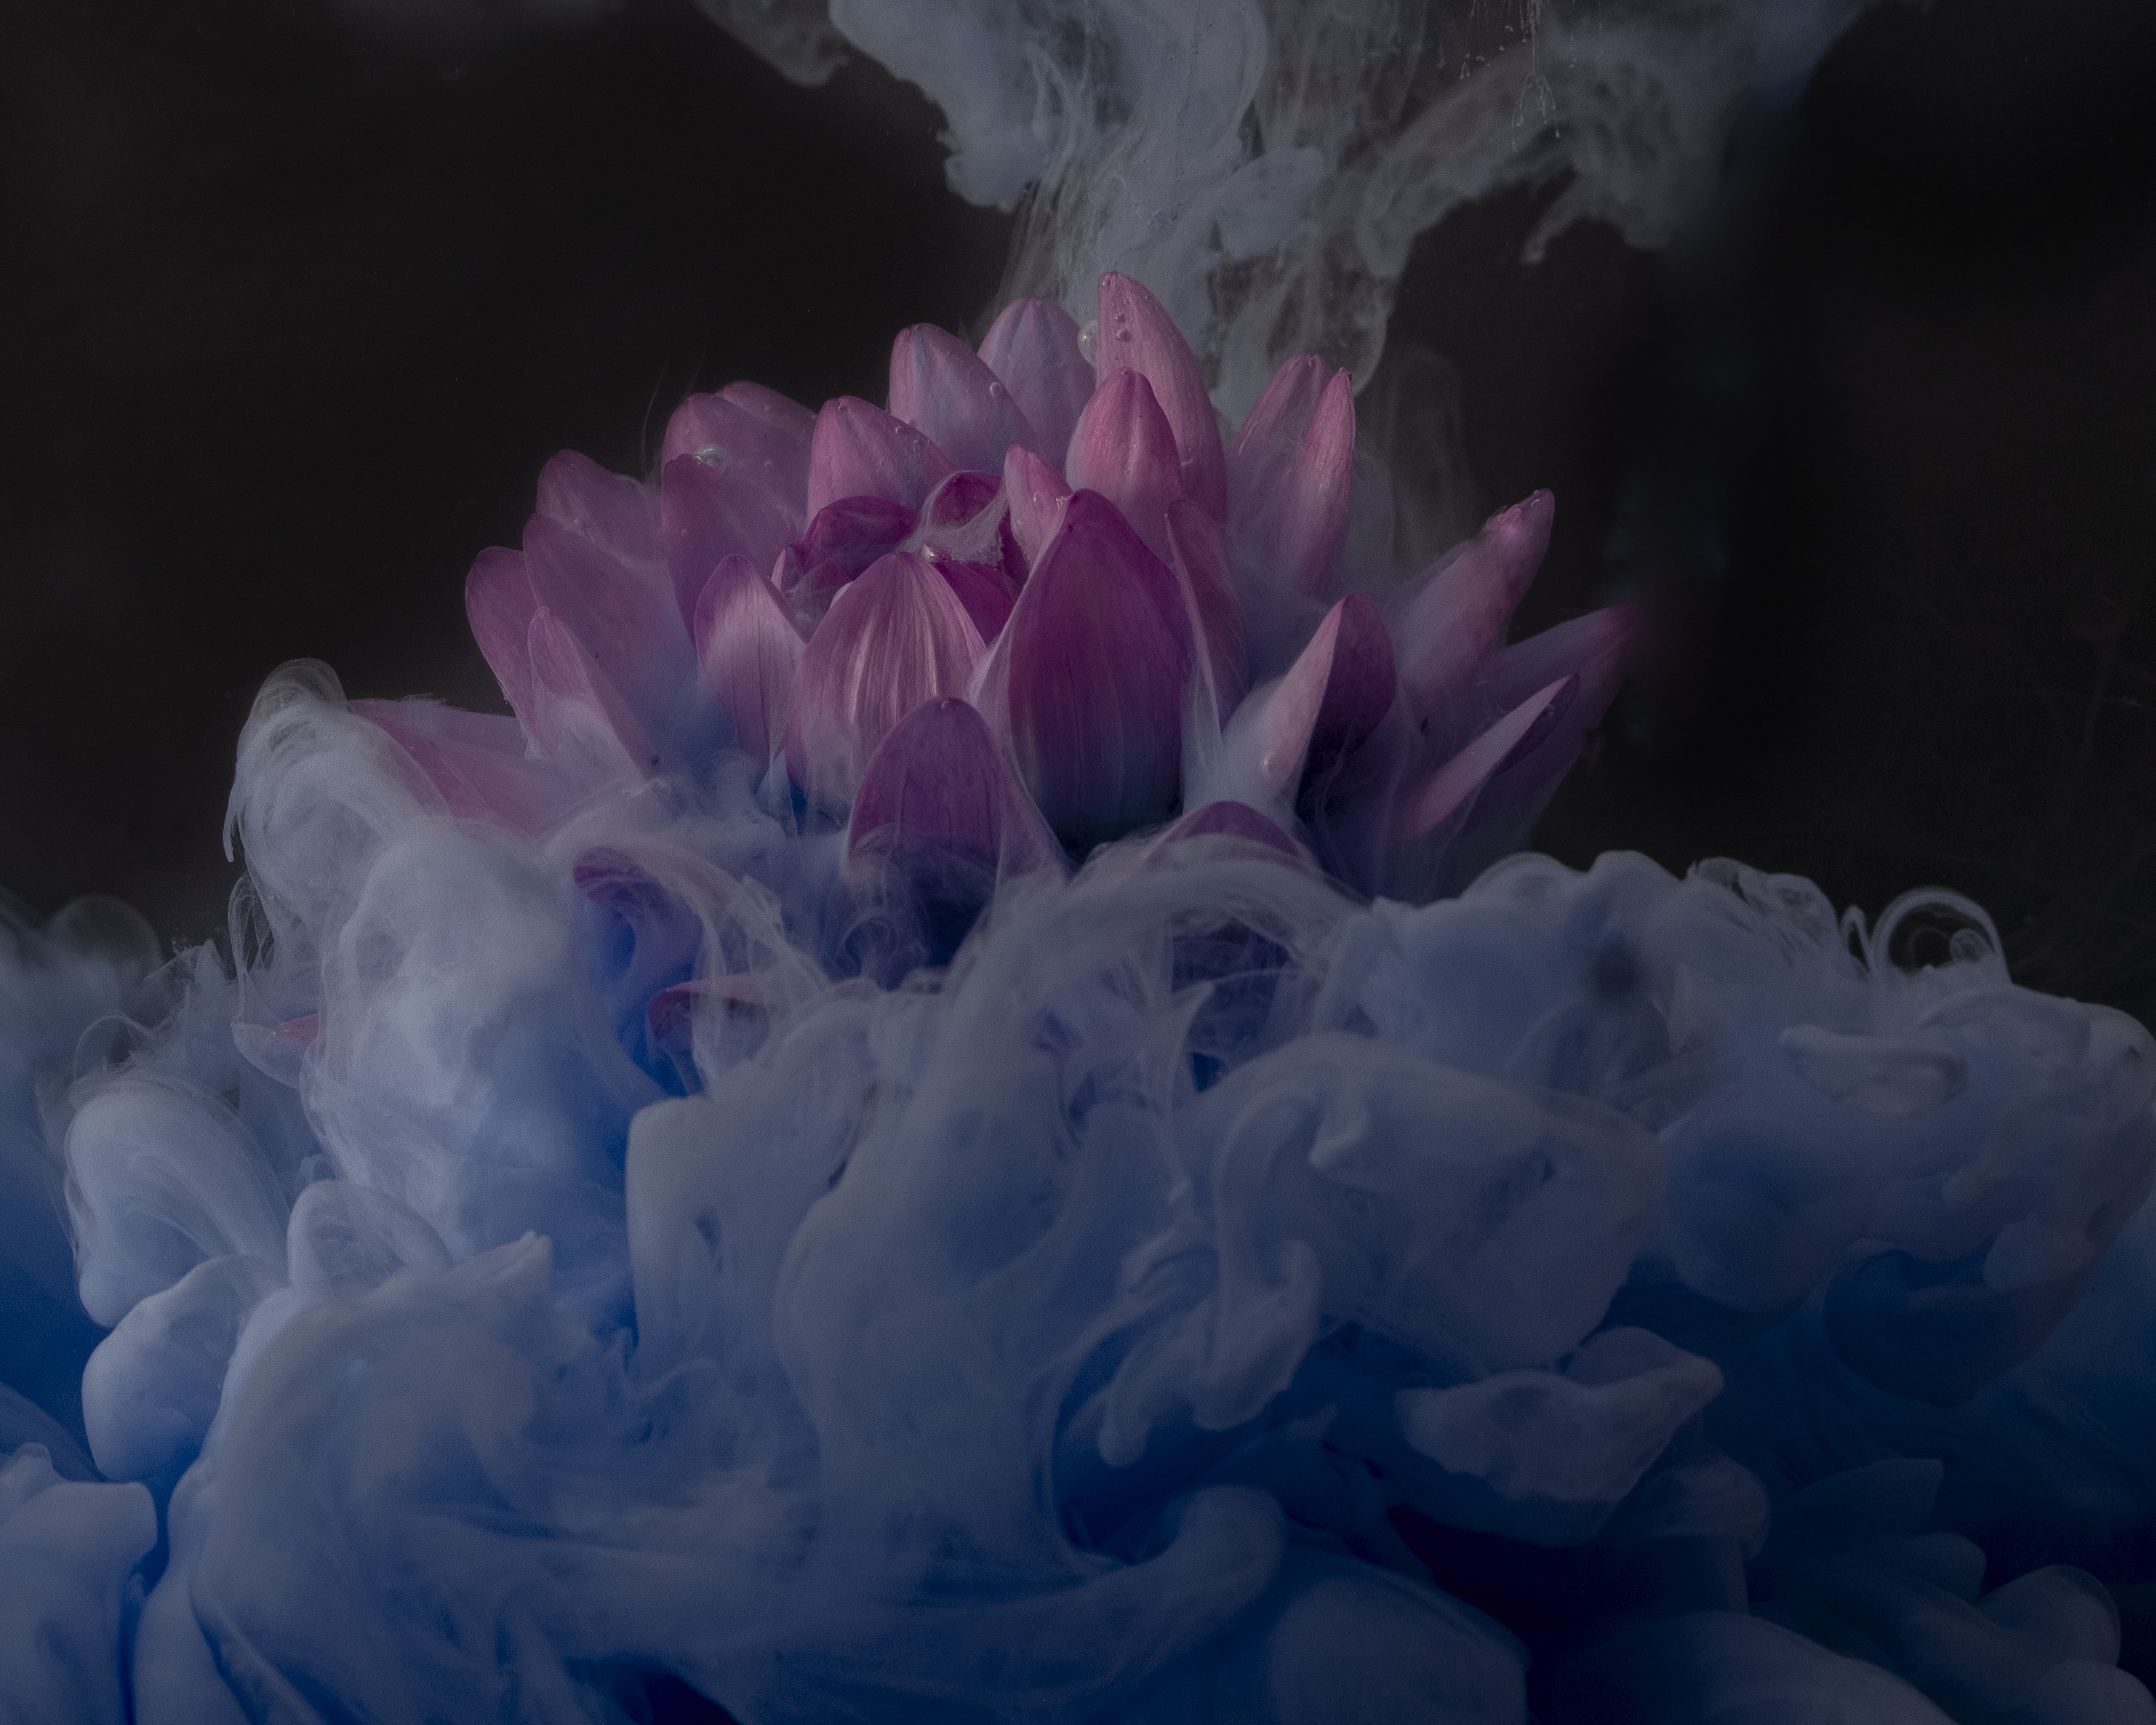
Ever since I started photography I have always loved those images of submerged things like fruit or hands, punching through the water. They always look so crisp! I recently found an old fish tank at a second-hand store and I figured this would be the perfect opportunity to give it a try. My idea was to have paint or ink floating through the water but I also wanted to have something to let the paint swirl around, that’s where the flowers come in. Once I had figured out the right consistency for the paint through trial and error, the games began.
The Gear
- Fuji XT2
- Zeiss 32mm f1.8 Touit
- Godox AD200 X 2
- Godox T2 trigger
- White umbrella
- Foldup beauty dish modifier.
The Shoot
During the shoot, it was just basically trial and error. I was trying a whole bunch of different things submerged underwater and different colors of paint. Once I felt like I had the lighting right, I was just having fun. There are a few tips I can pass on if you are interested in recreating this image.
1. Try to find the smallest fish tank you can. It takes a lot of water to fill it up and then every time you take one shot with the paint, you have to empty it and refill it again. I ended up having a big bucket next to me where I could pour out the dirty water and I used that as secondary water for my garden. You just have to let the paint settle on the bottom before you use it.
2. Rather than having a gazillion different colors of paint concentrate on the tones of paint. I really found that the greatest impact for contrast tended to be the paints with a very different tone to my flower.
3. If the glare on the side of the tank is throwing you, just move your light around a little. It’s also pretty straightforward to take care of in post.
4. Lay a towel down when you work. No matter how hard you try, you WILL land up with water on the floor.
Post-Production
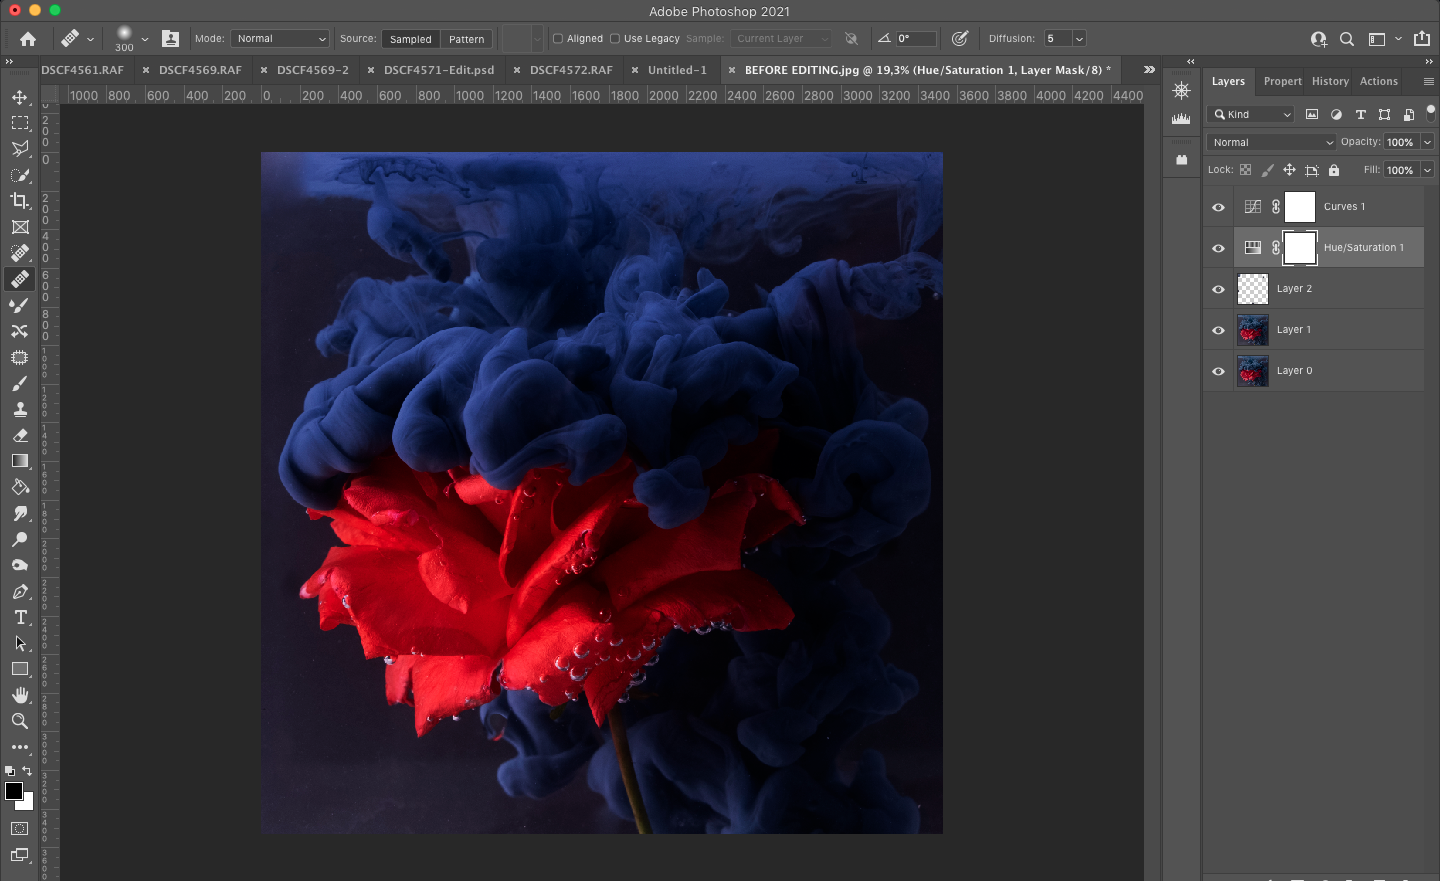
There really isn’t much to do in post. I generally clean up the image, so any little specs on the glass that the camera picks up, or any little air bubbles that look out of place. Then because of the glare from the light on the glass, I like to darken the image using curves. And then I crop the image to a square because I think it makes the most sense aesthetically. And that’s it. It’s pretty straightforward.
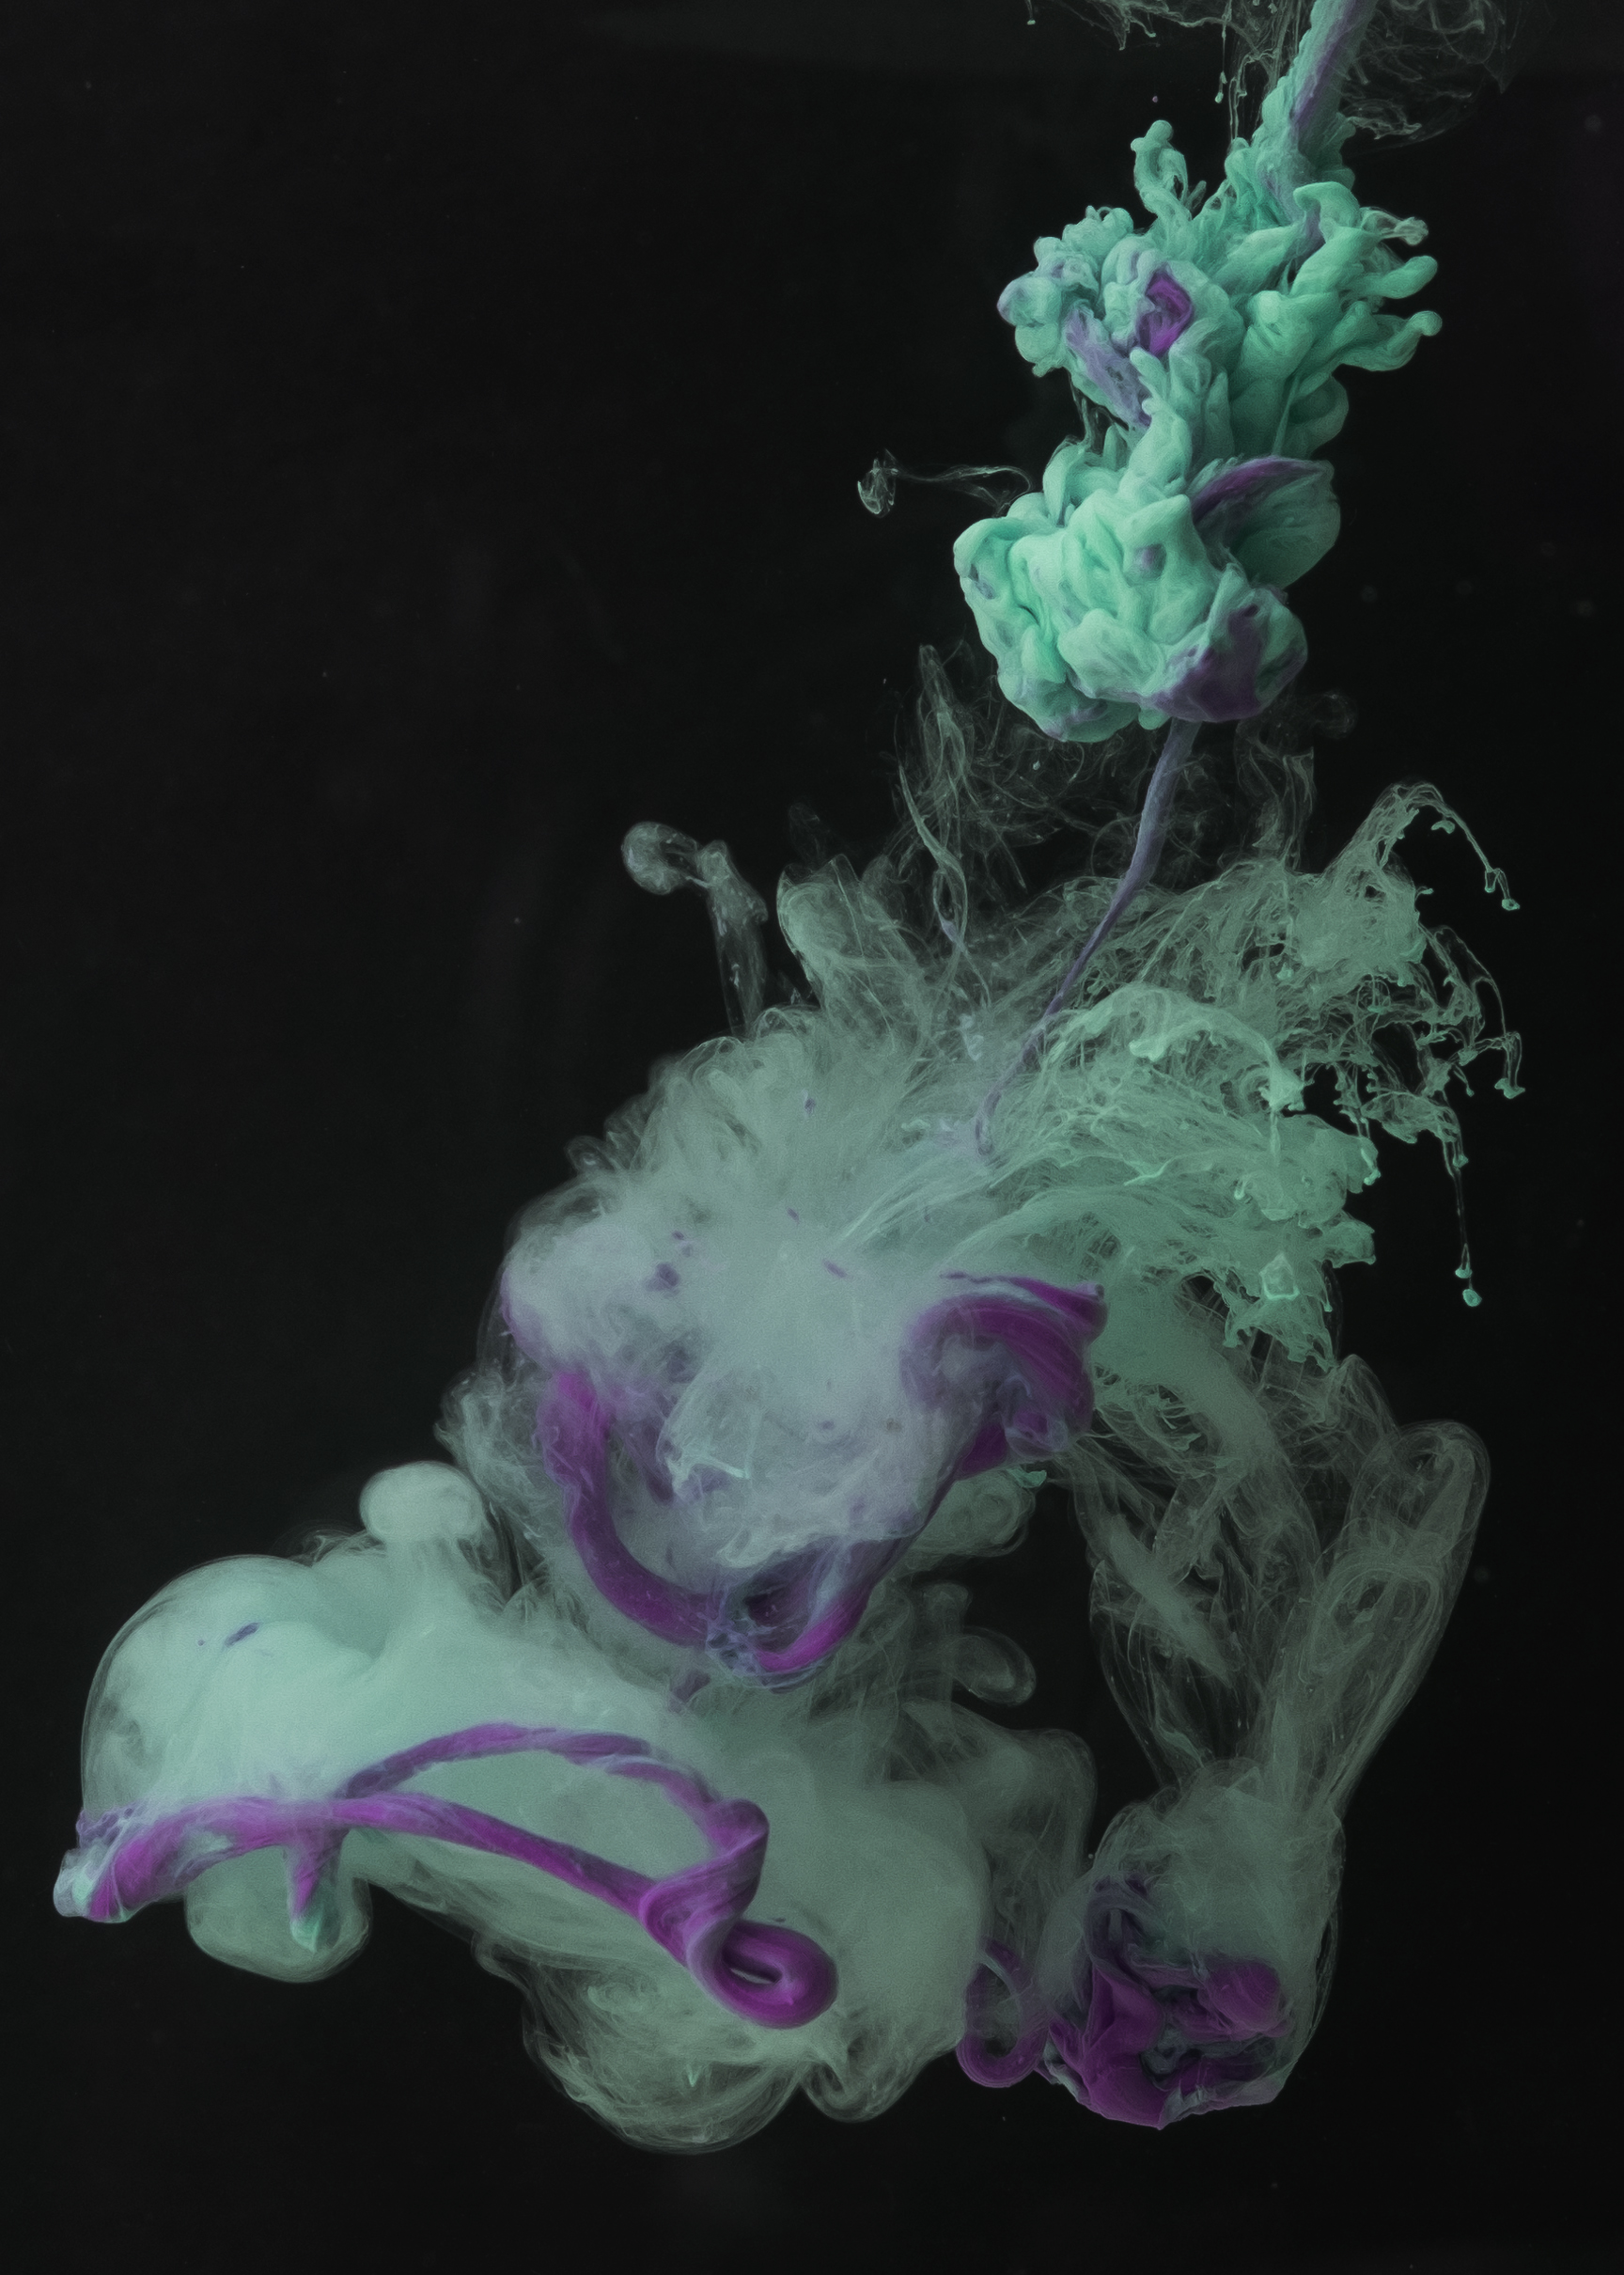
Final Photos
Before Editing
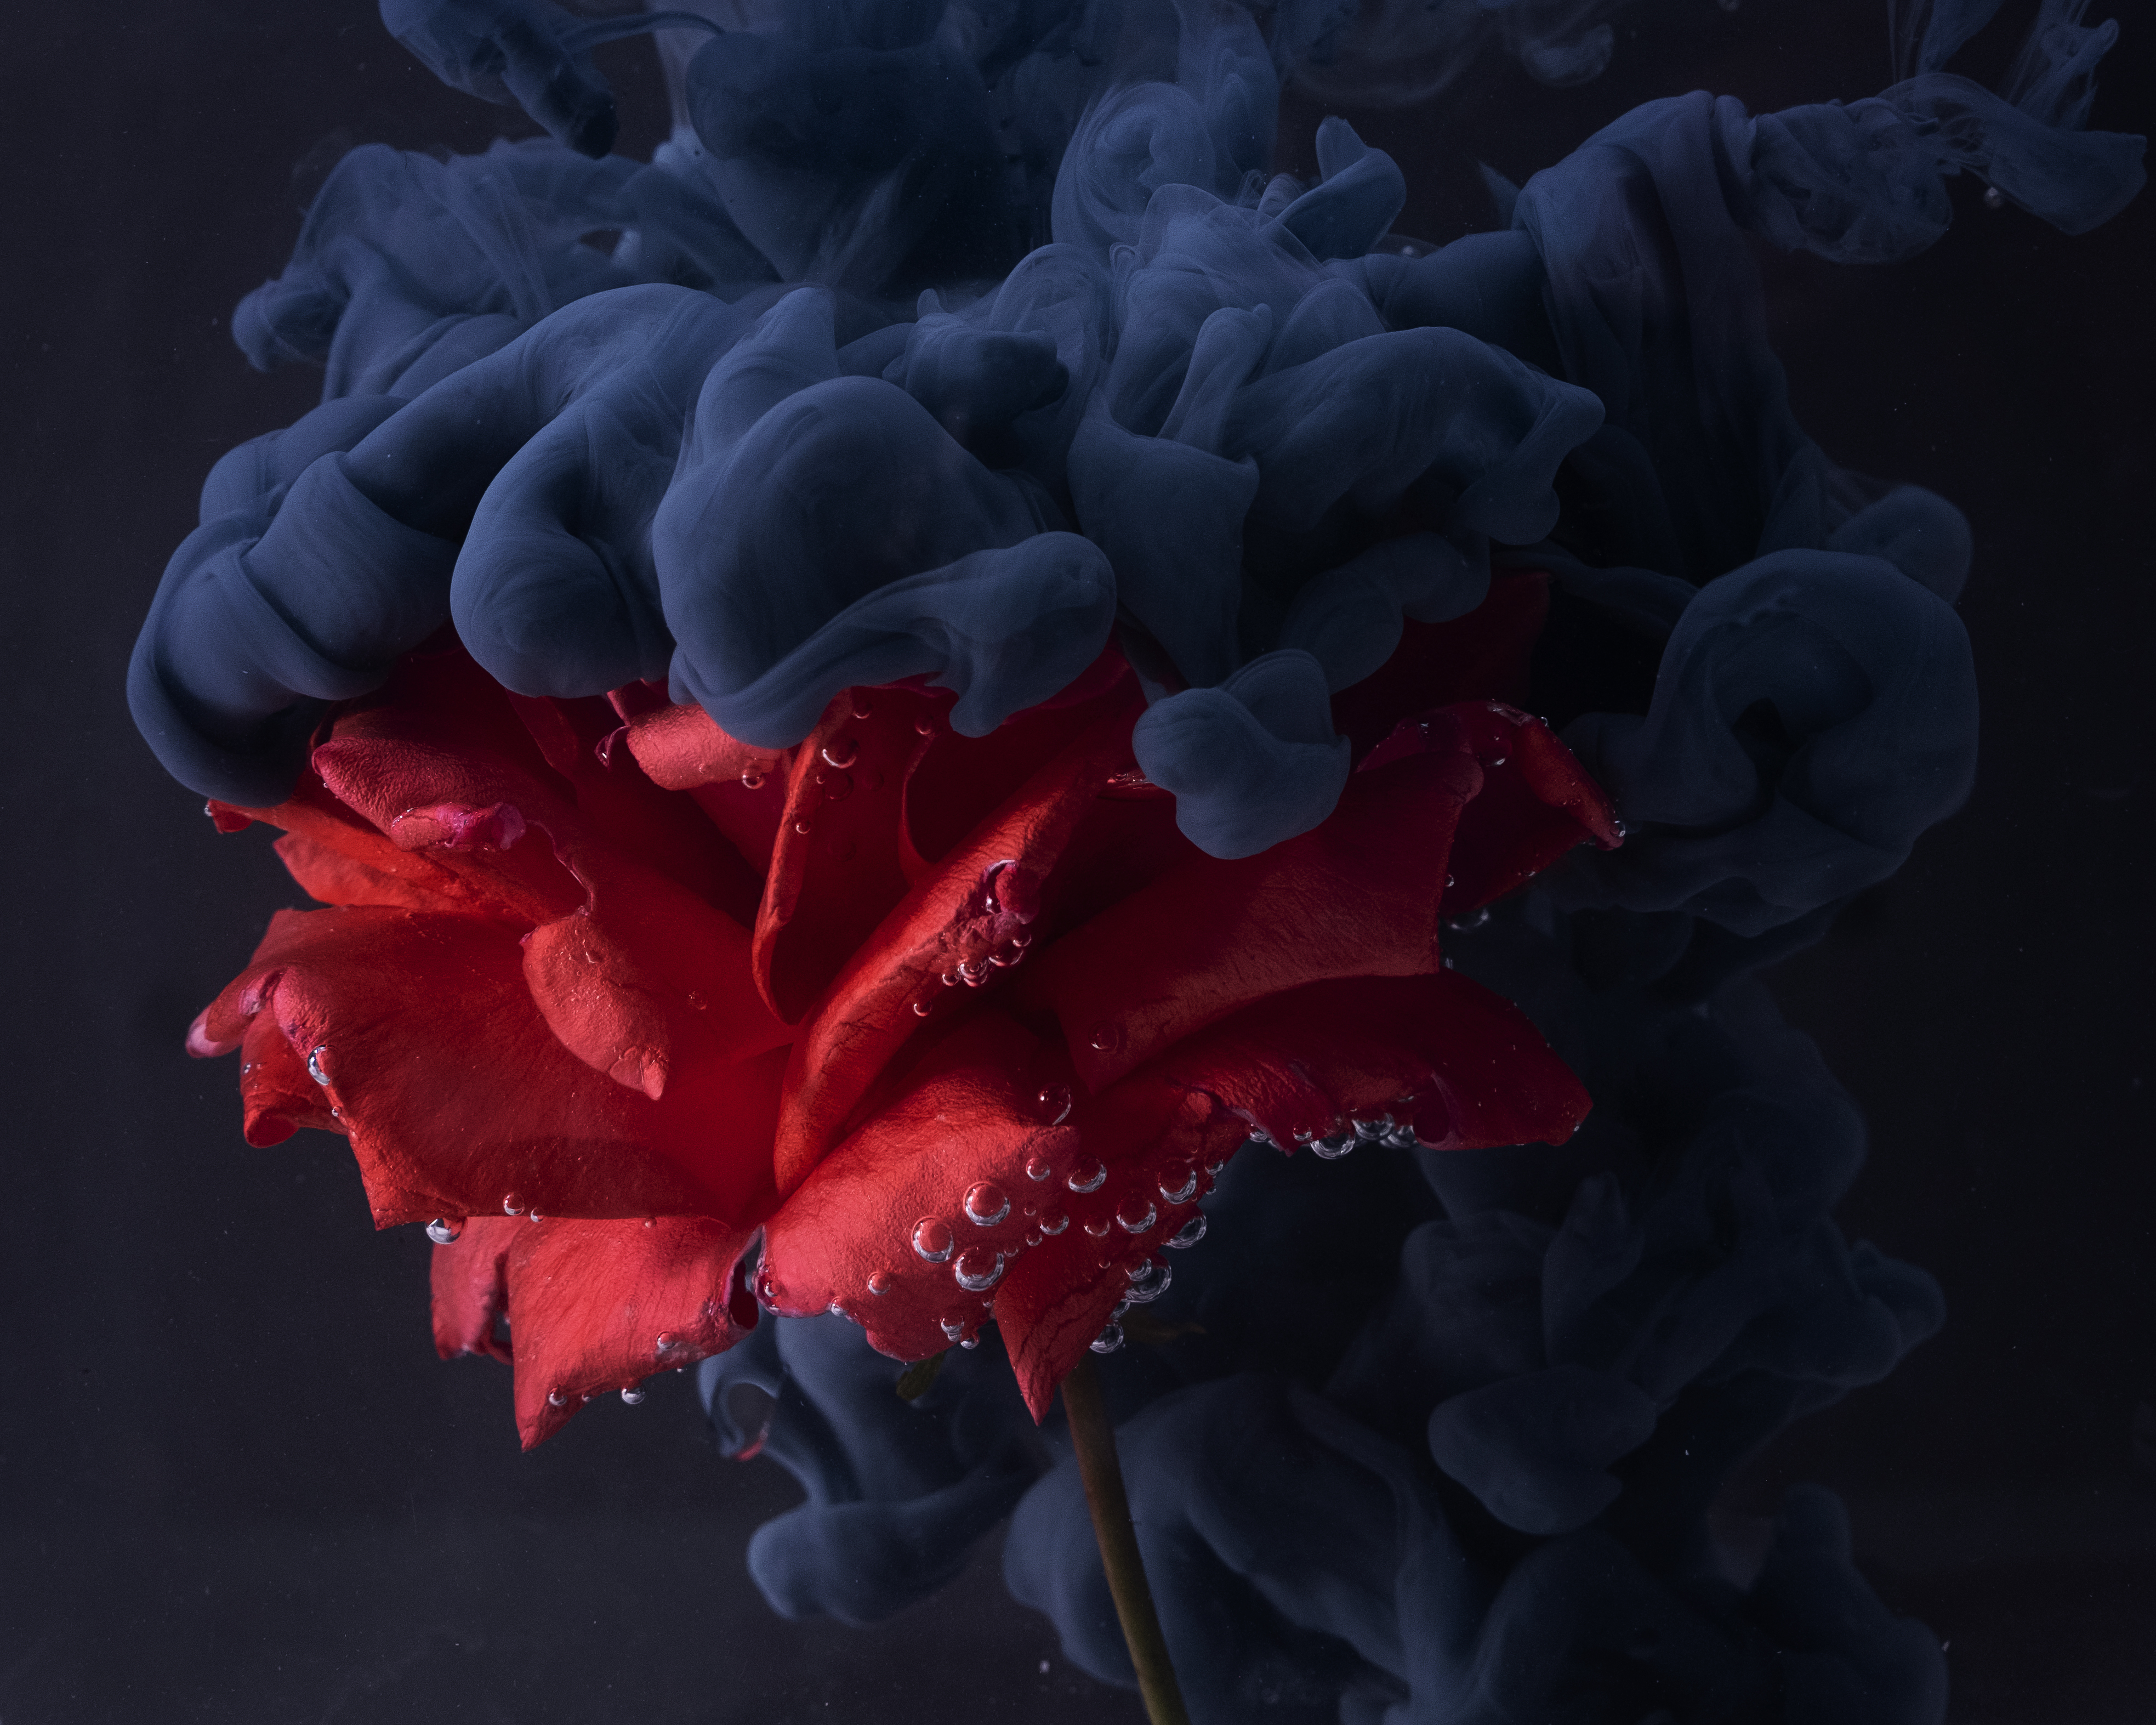
After Editing

All images by Tarryn Goldman. Used with permission. Be sure to check out her website and her Instagram.
Photos from Submerged by Tarryn Goldman


Get rid of the ads!
Did you enjoy reading this article as much as we enjoyed writing it? There's a way to support us and our reporting, getting ad-free navigation and more as a bonus. Subscribe to us for less than a coffee per month —just $3.99— or take advantage of our yearly subscription with a hefty discount for only $25.- An ad-free experience
- A free mystery box for Lightroom or Capture One
- All the books in our store
- 20% discount on Capture One
- 30% discount on Imalume Photo Theft Protection
- 20% off Herbs and Kettle Tea Company.
- 20% off your order from MPIX printing services.
- 5% off Viltrox Products via their eCommerce store.
- 10% off all film developing, printing and scanning services from Blue Moon Camera and Machine
- 15% off 7Artisans products: The lens and accessory maker is offering a sweet discount for Phoblographer's readers.