
Named after the 17th-century Dutch master painter, Rembrandt lighting is a popular portrait lighting technique that can create very pleasing results.
When it comes to portrait lighting techniques, there are a ton of variations to choose from. For many portrait photographers, Rembrandt lighting is among one of the most popular. The technique is named after Rembrandt Harmenszoon van Rijn, the prodigious 17th-century Dutch master painter whose portraiture subjects frequently showcased this telltale lighting pattern. In our latest original infographic, we will be exploring what Rembrandt lightning is and how you can utilize it in your next portrait shoot.
Rembrandt Lighting: A Primer
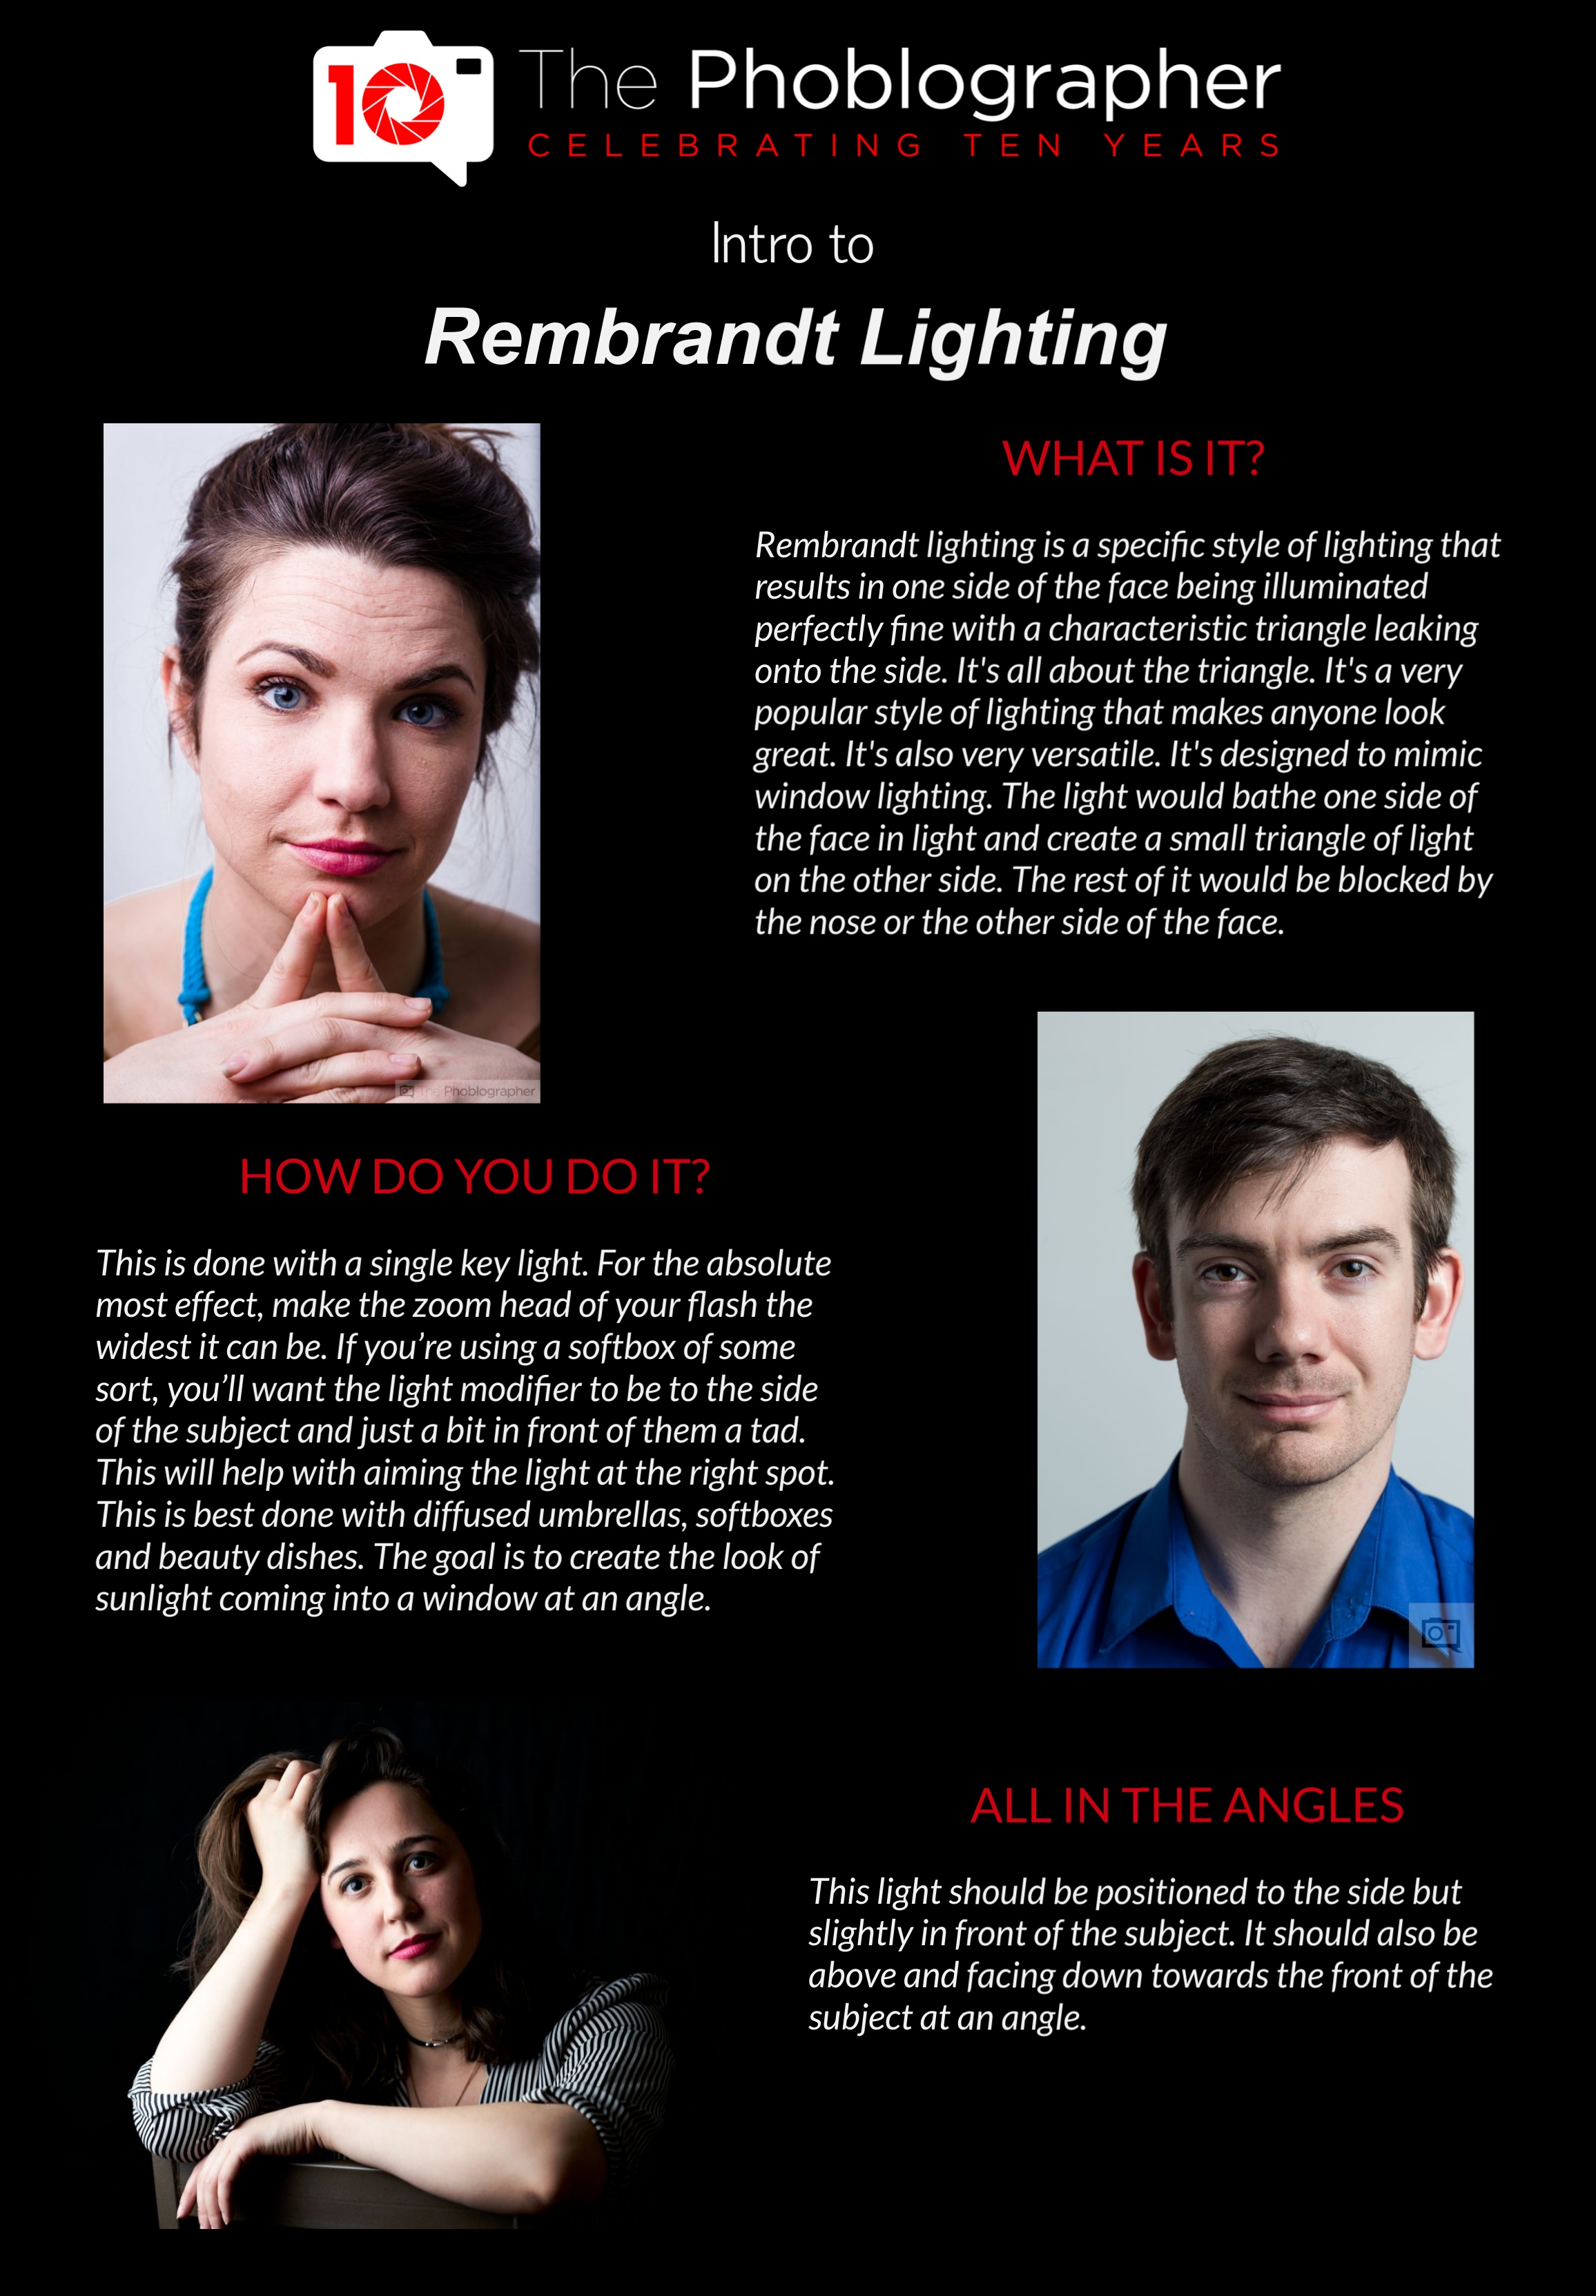
Rembrandt lighting is a lighting technique that draws upon the principle of chiaroscuro: the use of contrasts in lighting to lend a sense of dimensionality to your images. It’s one of the most popular portrait lighting techniques due to the fact that it works well across many different face types. A subject lit using Rembrandt lighting is characterized by the following:
- one side of the subject’s face is perfectly illuminated
- most of the opposite side of the subject’s face will be in the shadows aside from an upside-down triangle of light that illuminates a portion of the subject’s cheek
When done properly, Rembrandt lighting can resemble window light and lends a natural look to your portraits. This makes sense, as that was the only source of light that was consistently available during Rembrandt’s time with the exception of candlelight.
Work that Triangle
Now that the history lesson is out of the way, let’s talk about how you can apply Rembrandt lighting to your portraiture work. Luckily, Rembrandt lighting requires only a minimal amount of equipment, making it one of the easiest portrait lighting techniques to pull off (and likely contributing to its popularity). All you’ll really need is a single key light, but make sure it’s diffused for the best results. We’d recommend using a studio strobe diffused with a softbox, beauty dish, or shoot-through umbrella for consistency and fast recycle times. Alternatively, a diffused speedlite can also do the trick. You can even get by using diffused hot lights as if that’s the only light source you have available.
Position your key light to the side of your subject, and angle it at roughly 45 degrees. You’ll want to raise the key light so that it’s aimed at your subject at a slight angle as well. This is to mimic the angle of window light. When you’re ready to begin photographing your subject, position yourself directly in front of your subject and have them face the key light slightly. If done correctly, you’ll see the telltale Rembrandt triangle on the side of your subject’s face furthest away from the key light. Don’t be afraid to adjust your subject’s head position if necessary. If you’re going for a more contrasty and dramatic look, consider adding a grid to your key light to control the spread of light. or a negative fill (such as a sheet of duvetyne or large black poster board) on the shadow side of your subject. You can also position a reflector facing the shadow side of your subject’s face to fill in some of the shadows for a less dramatic final image.
Get rid of the ads!
Did you enjoy reading this article as much as we enjoyed writing it? There's a way to support us and our reporting, getting ad-free navigation and more as a bonus. Subscribe to us for less than a coffee per month —just $3.99— or take advantage of our yearly subscription with a hefty discount for only $25.- An ad-free experience
- A free mystery box for Lightroom or Capture One
- All the books in our store
- 20% discount on Capture One
- 30% discount on Imalume Photo Theft Protection
- 20% off Herbs and Kettle Tea Company.
- 20% off your order from MPIX printing services.
- 5% off Viltrox Products via their eCommerce store.
- 10% off all film developing, printing and scanning services from Blue Moon Camera and Machine
- 15% off 7Artisans products: The lens and accessory maker is offering a sweet discount for Phoblographer's readers.