
Want more Useful Photography Tips? Click Here.
Lots of photographers will teach you tutorials about how to get more details out of a scene in post-production. But the truth is that you don’t need it. Instead, we believe in the philosophy of getting rid of the problem to begin with. Lots of you who use Adobe Lightroom know about using the Dehaze tool and all it does. Indeed, when it launched it really was pretty innovative, and in some ways it can still prove very useful. But to be honest, you don’t need it. Instead, there’s a little thing that photographers have been using for years to get rid of haze, boost color, and enhance clarity right in camera.
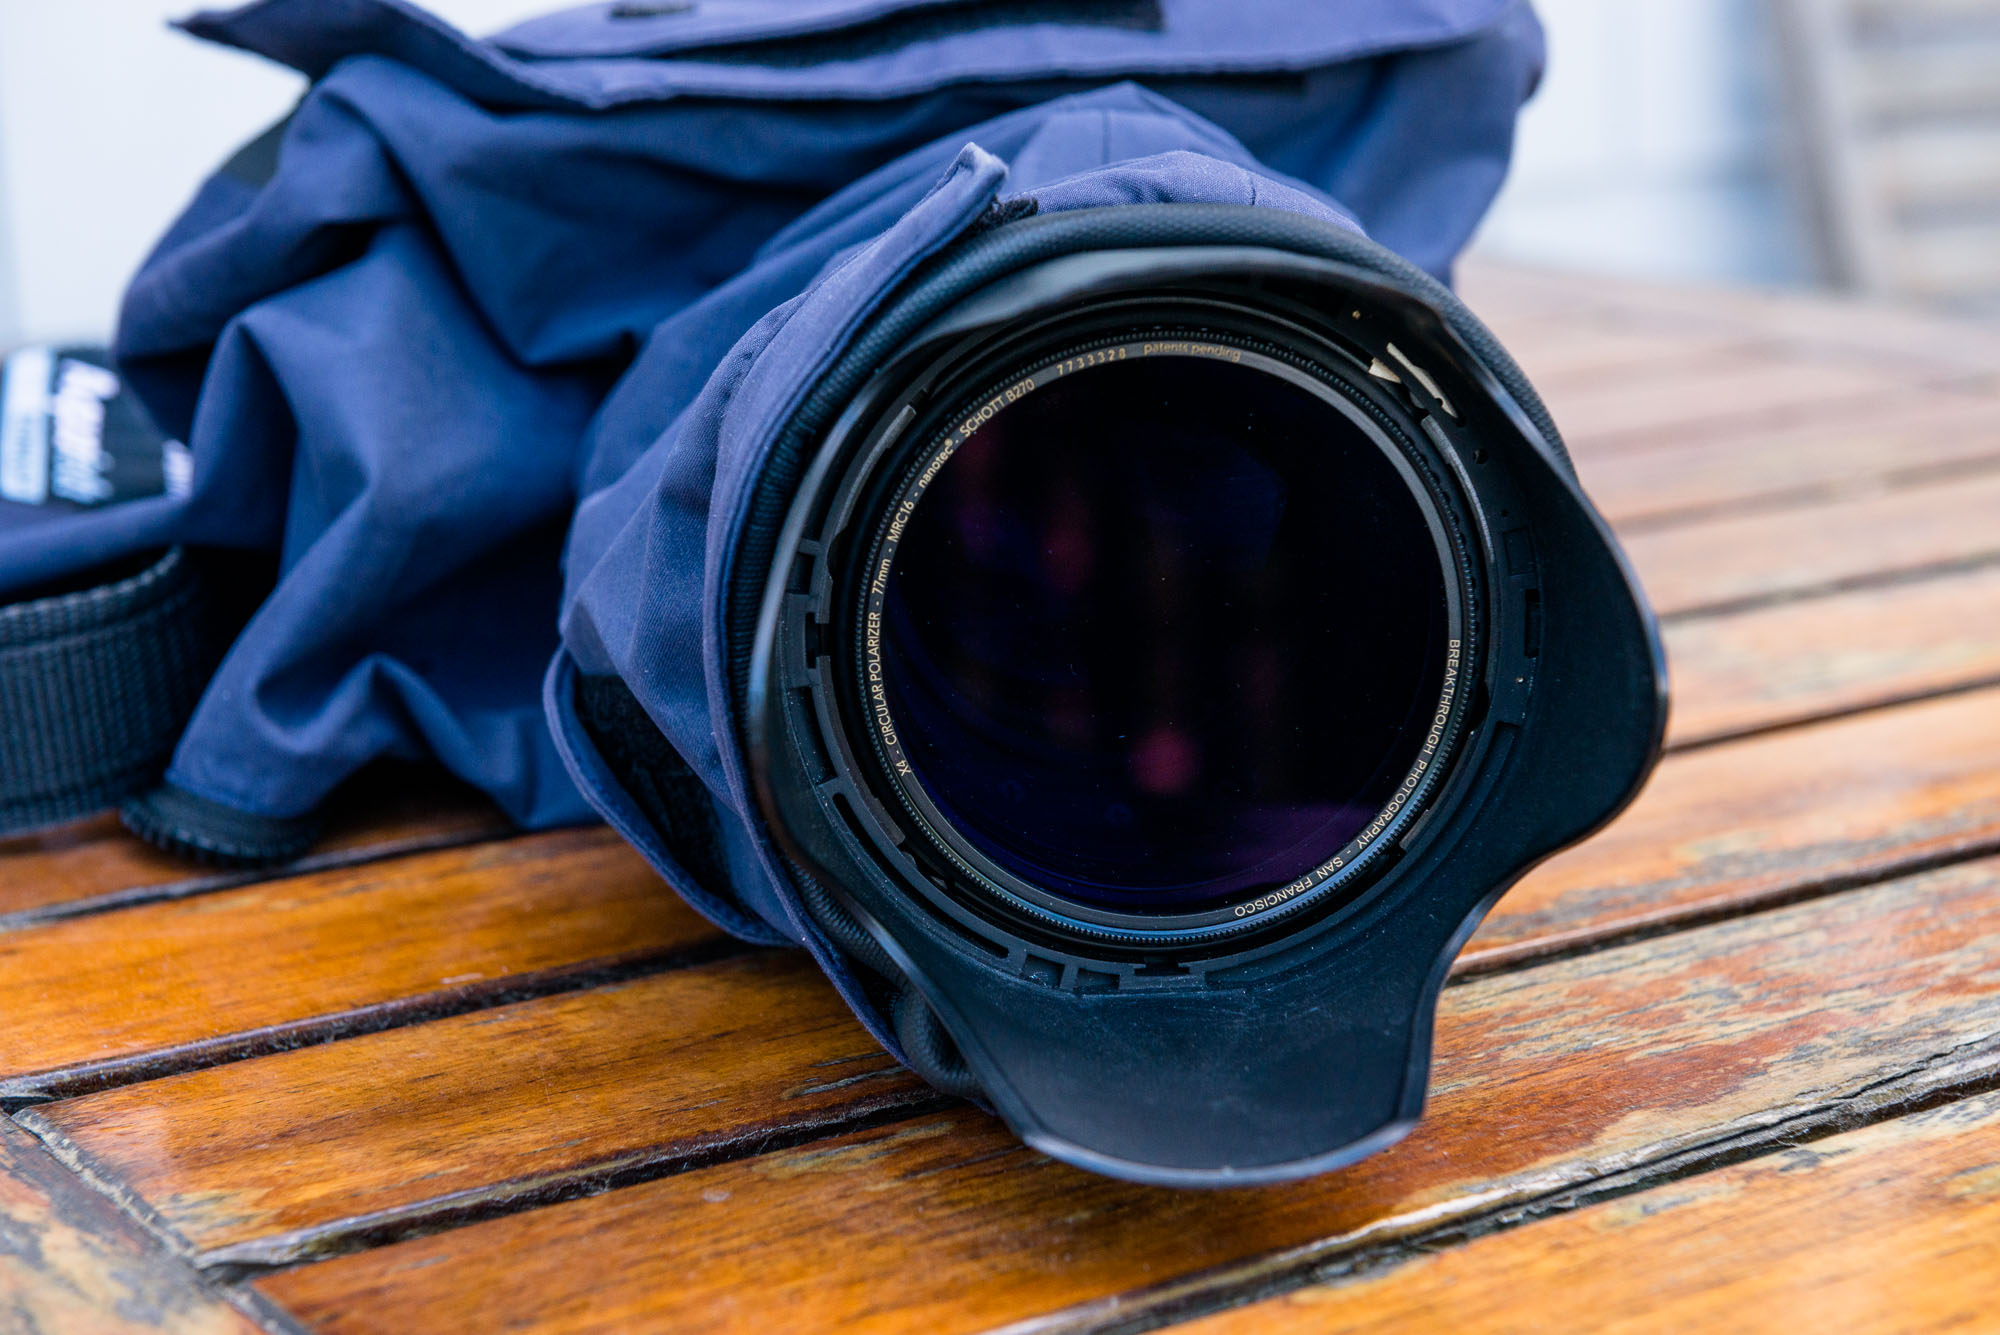
The key to all of this is a simple tool: a Polarizer. Specifically, circular polarizers help you to dial in just the right amount of dehaze that you wish in the same way that the slider would in Lightroom. Does it mean that you need to carry one more thing on you? Sure. But alternatively, you could just always have it stuck to the front of your camera’s lens. It’s like dehaze but in real life! Make sure you’re using a circular polarizer and not a polarizer/ND filter combo. If you have an ND built in then you’re going to cut down on available light. That could, in turn, affect the autofocus negatively. Instead, just have the polarizer.
Using a circular Polarizer, you’ll be able to cut down on glare in the same way that polarizing sunglasses do. The difference is that the coatings on polarizing film and glasses don’t work anywhere as well as a dedicated filter. Further, ensuring that your filter is clean will get you the most details in your photo. The extra added benefit is even better coloring. You’ll make portraits pop, landscapes shine with color, find details in seascapes, and so much more.
Get rid of the ads!
Did you enjoy reading this article as much as we enjoyed writing it? There's a way to support us and our reporting, getting ad-free navigation and more as a bonus. Subscribe to us for less than a coffee per month —just $3.99— or take advantage of our yearly subscription with a hefty discount for only $25.- An ad-free experience
- A free mystery box for Lightroom or Capture One
- All the books in our store
- 20% discount on Capture One
- 30% discount on Imalume Photo Theft Protection
- 20% off Herbs and Kettle Tea Company.
- 20% off your order from MPIX printing services.
- 5% off Viltrox Products via their eCommerce store.
- 10% off all film developing, printing and scanning services from Blue Moon Camera and Machine
- 15% off 7Artisans products: The lens and accessory maker is offering a sweet discount for Phoblographer's readers.