
Last Updated on 01/28/2020 by Mark Beckenbach
Whether you’re a novice who is picking up a camera for the first time and want to get the lay of the land, or a pro in need of a refresher, this handy guide has you covered on photography terms.
So, you just received a new camera as a gift during the winter holidays. Or, perhaps you finally decided to take your interest in photography to the next level and graduated from your phone to a dedicated camera. You’ve taken the camera out of the box, but have no idea how to make sense of all the different dials and buttons. What do all the settings and photography terms mean? If you’re feeling a bit overwhelmed, take a deep breath. It’s going to be OK! We’ve all been there.
In this guide, we’ll be covering the Top 10 photography terms to help you make sense of the brave new world of photography you’ve embarked upon. Familiarization with these terms is essential to your journey with photography. Let’s get started.
Table of Contents
Aperture
Also referred to as an F stop when it comes to photography terms, the aperture value refers to the amount of light that a lens allows to reach the camera sensor. Aperture values also determine how much of your image is in focus. To the uninitiated, the way photographers refer to aperture or F stop values can sometimes be confusing and counter-intuitive. When referring to an F stop value that corresponds to a small number (f1.4 for example), it is considered to be a large or wide aperture. Conversely, a large F stop value (such as f16) is referred to as small or narrow aperture. The smaller the F stop number is, the more light is transmitted through the lens onto the camera sensor, and more of the resulting image will be out of focus. Aperture, ISO, and Shutter Speed comprise what is known as the Exposure Triangle. You can select your desired Aperture setting and let your camera figure out the other settings when shooting in Aperture Priority mode.
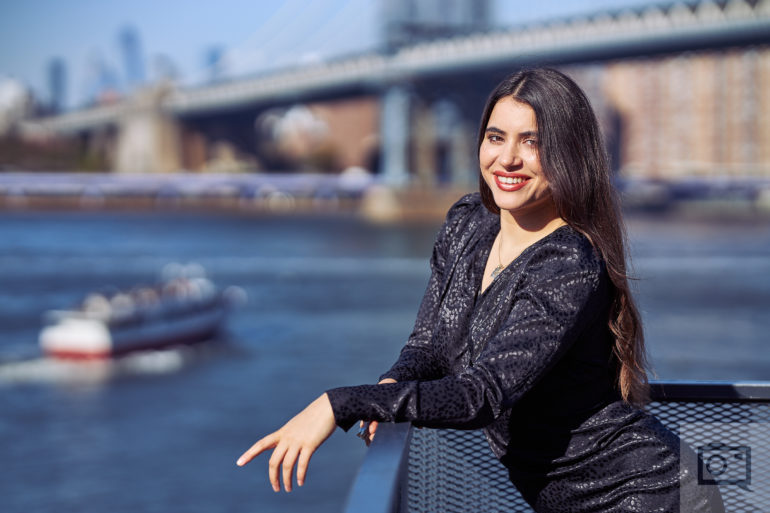
Here’s an example of an image shot using a wide aperture. Note the blurry background which helps to isolate the subject that is in focus. This is often a desirable effect with portrait photography.
Below are some examples of common Aperture settings:
f1.4
Enables high shutter speeds, not much is in focus.
f2.8
Enables almost as high shutter speeds, more is in focus. Great for portraits.
f11
Requires the use of slower shutter speeds, with much more of the entire image being in focus.
f22
You’ll need to shoot at the slowest of shutter speeds. Everything you point your lens at should be in focus. Best used with a flash unless there are tons of bright available bright light. Some lenses don’t even stop down to f22.
ISO
With respect to photography, ISO colloquially refers to the international standard (governed by the International Organisation for Standardisation) used to measure a camera’s light sensitivity. The higher the ISO value, the more light-sensitive a camera is. Back in the film days, your camera’s light sensitivity was determined by the film you were using. In most cases, you were locked into that sensitivity until you are finished with the roll of film. Digital cameras allow you to adjust the light sensitivity on the fly, and as you increase the ISO, the amount of digital noise will decrease in your images. Shooting at a camera’s base ISO rating will tend to produce the cleanest results. While you can raise the ISO in low light situations to capture an image, the increase in digital noise inevitably leads to a final image that becomes unusable. Raising a camera’s ISO will also allow you to shoot at faster shutter speeds. If you’re in a situation where the lighting conditions are changing constantly, you may find it useful to set your camera to Auto ISO so that your camera will determine the light sensitivity for you from one shot to the next.
For the curious, ASA is another variant of ISO that you should be familiar with when memorizing photography terms.
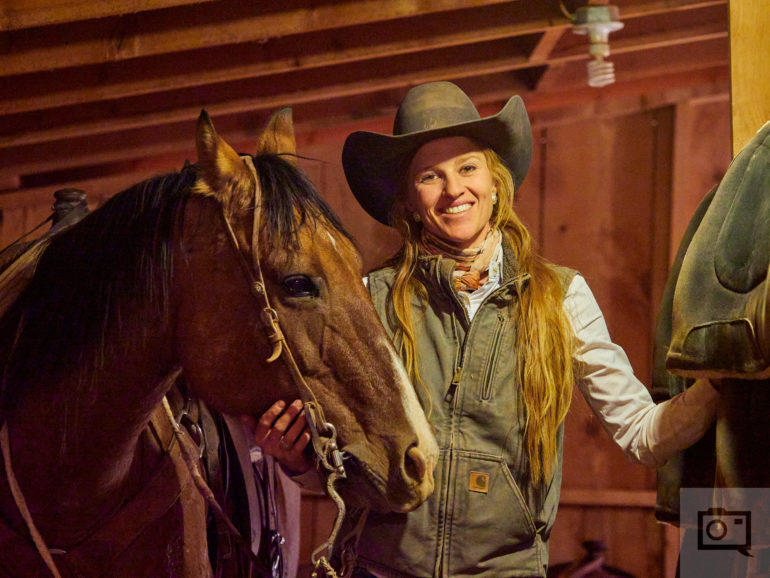
Here’s an image captured inside a very dark stable at ISO 6400. The higher light sensitivity made it possible to create this image in an otherwise very dimly lit space. Note the color noise throughout the image.
Here are some examples of common ISO settings:
ISO 100
This is the base ISO for many digital cameras on the market, suitable for brightly lit outdoor scenes. The resulting images show no discernible noise.
ISO 400
Great for shooting during twilight. You’ll start to notice some slight noise in the resulting images, but nothing distracting.
ISO 1600
Suitable for low light environments or high-speed shooting scenarios where you’re looking to freeze fast-moving action. Noise is clearly visible in the final images, but still perfectly usable.
ISO 6400
Appropriate for environments with very little light or scenarios involving high-speed action. Images are noticeably noisy. While some cameras boast ridiculously high maximum ISO ratings, ISO 6400 is usually the limit before you’ll start to produce images that are basically unusable due to excessive noise.
Shutter Speed
Shutter Speed refers to the duration your camera’s shutter remains open so that the camera’s sensor can capture light information. The brighter a scene is, the less time (shorter and faster Shutter Speeds) is required for your camera to record enough light in order to produce a properly exposed image. Inversely, darker scenes will require more time (longer and slower Shutter Speeds). Shutter Speeds are generally measured in fractions or multiples of seconds. You can select your desired Shutter Speed setting and let your camera figure out the rest when shooting in Shutter Priority mode.
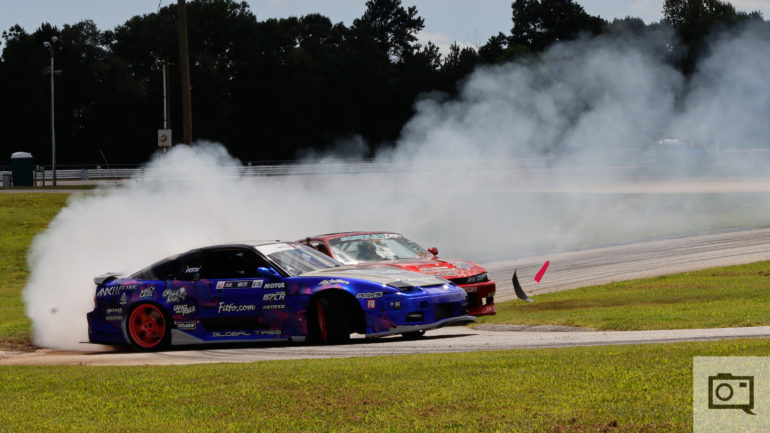
In order to capture these fast moving drift cars, fast shutter speeds are required.
Here are some examples of common Shutter Speed settings to further your understanding the photography terms:
1/15: one-fifteenth of one second
1/1000: one-thousandth of one second
1”: one second
15”: fifteen seconds
The longer the shutter speed, the more motion that will be captured. You will need to remain very still, otherwise, the resulting images will appear blurry. This is particularly useful when capturing nighttime scenes or long exposures. The faster the shutter speed, the less motion will be captured. This is great for capturing fast-moving objects like sports or birds in flight.
Depth of Field
Depth of Field describes the range of distance within which objects will appear in focus. You can control the amount of Depth of Field by adjusting your F stop settings. The larger the F stop number, the larger the Depth of Field range is and more things will appear in focus.
Check out this handy Cheat Sheet on Depth of Field!
Exposure
Exposure can be used to describe a number of different things with respect to photography. It can be used to describe the amount of light your camera has recorded a la your shutter speed (i.e. a 15″ exposure). It can also be used as a unit of measure when referring to the number of images captured. You can capture a single exposure when pressing your camera’s shutter release, while some cameras allow you to capture multiple exposures where a group of images is captured and layered into a single image. In situations where you want your final image to appear brighter or darker than what your camera’s meter determines the scene should be captured at, you can utilize the “Exposure Compensation” feature on your camera to override the built-in meter. As you can see, the use of Exposure is highly dependent on the context. Aperture, ISO, and Shutter Speed combine to form what is known as the “Exposure Triangle.” Changing one of them affects the other two.

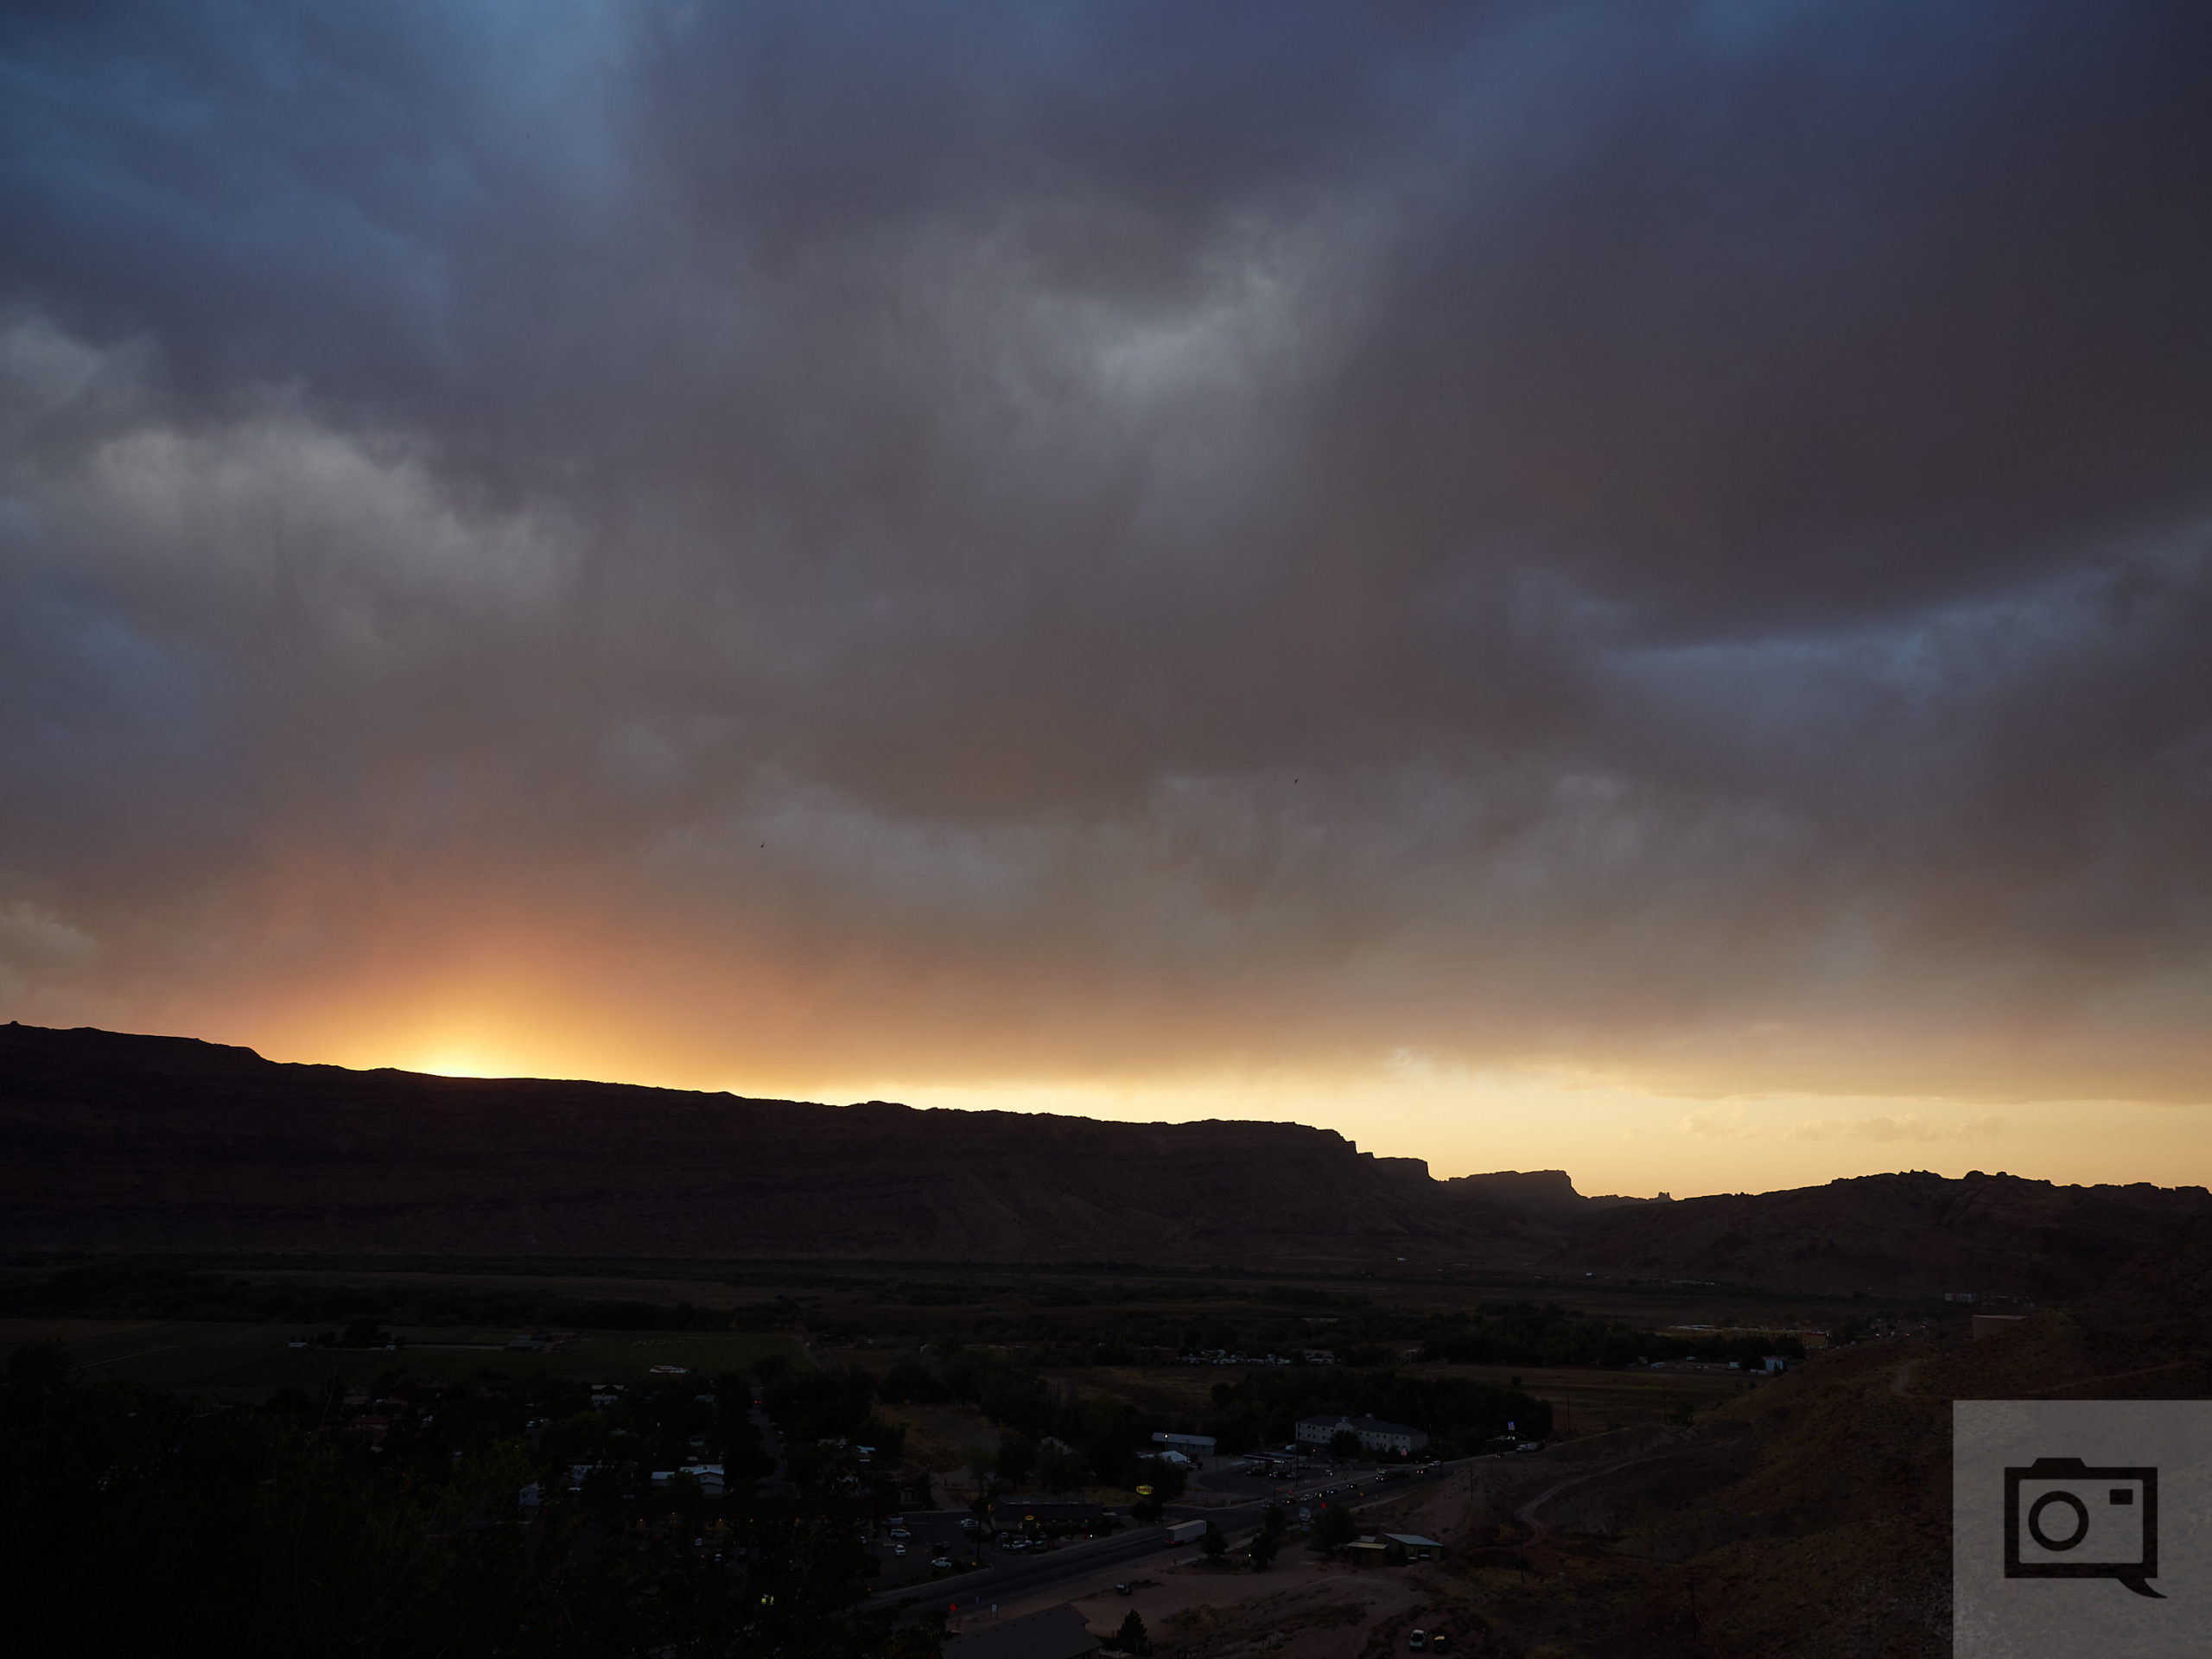
Here’s an example of a long exposure image. Note the star trails and the blurry clouds in the sky.
Focus
Within the realm of photography, focus is generally used to define two things:
- The point at which light converges through the camera lens in order to create an image where objects within a focal plane are clearly defined and visible. This is typically identified by green boxes on the back of your camera’s screen when you depress the shutter. The wider your aperture (the smaller the f number is), the shallower your focal plane will be and fewer objects within your image will be in focus.
- The act of adjusting the focal plane in order for your intended subject to appear clearly defined within your image. Autofocus is when you let your camera determine this for you, while Manual Focus is where you’re making the necessary adjustments yourself.
In many genres of photography, it is often desirable for objects other than your intended subject to appear out of focus. This out of focus area is affectionately referred to as “bokeh” (pronounced “bow·kei”).

Here’s an example of a portrait where objects in background appear out of focus. This helps to isolate the subject from the rest of the scene so that they stand out from distracting elements that may otherwise fill the frame.
Some cameras and lenses lack any autofocusing capabilities (typically older film cameras or manual only models), while point and shoot cameras tend to have very little manual adjustments possible. There are many different autofocusing modes. What you’ll have access to is determined by what your equipment is capable of. Here are some of the standard focusing modes that you’ll find on most Mirrorless Cameras and DSLRs (the names may vary slightly between one manufacturer to the next):
- Single Shot AF: Your camera will autofocus on a singular subject or a defined focal point. Typically used for stationary or slow-moving subjects.
- Continuous AF: Best suited for subjects that are constantly in motion, i.e. cars or animals. Your camera will continuously assess where your subject is and adjust the focus accordingly. Some cameras will have additional continuous modes called Tracking AF modes which are designed to maintain focus on a particular moving subject.
- Automatic AF: This lets your camera decide between Single Shot AF and Continuous AF.
- Manual Focus: You’re making all of the adjustments yourself to determine what objects will appear clearly within your image.
- DMF: Stands for Direct Manual Focus. Think of this as a hybrid between Autofocus and Manual Focus. You’re able to manually fine-tune what’s in focus after your camera’s autofocus system has confirmed focus on an object.
Manual
When you’re shooting in manual, you are controlling every aspect of how your camera behaves. You can manipulate the Aperture, Shutter Speed, ISO, and so much more. Switching to “M” on your camera’s mode dial will put you into Manual mode.
RAW
You’ve probably heard people saying that you should shoot RAW. What the heck does that even mean? Most images we see on the web are usually JPEGs, which is the format that most cameras uses by default. Higher-end cameras allow you to capture images into RAW files which are much larger files that contain tons of information and gives you a lot of editing options during post-processing. Think of RAW files as a digital version of a film negative.

Unprocessed image from Straight Out Of Camera RAW file 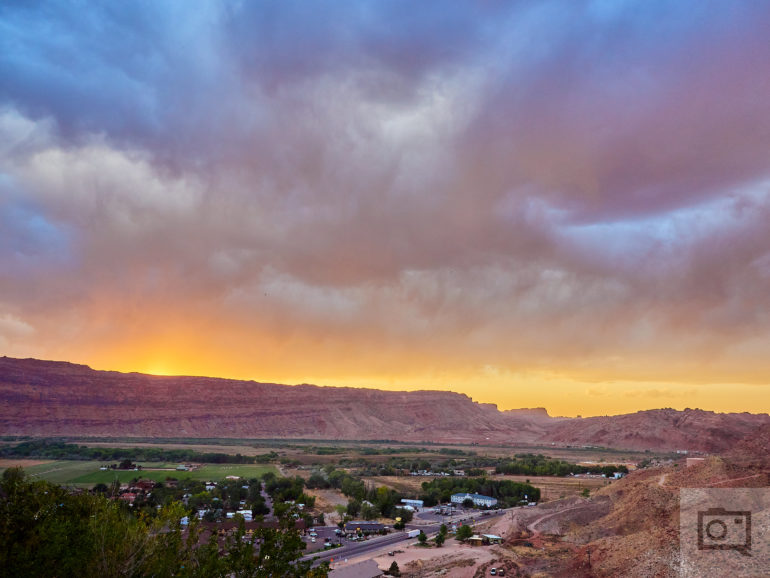
Final image processed using the same RAW file

Each camera company typically utilizes its own proprietary RAW file format:
- Canon uses *.cr2 or *.cr3
- Fujifilm uses *.raf
- Nikon uses *.nef
- Olympus uses *.orf
- Panasonic uses *.rw2
- Pentax uses *.pef
- Sony uses *.arw
- Adobe and Leica use *.dng
Rule of Thirds
Perhaps one of the most important photography terms has to do with how you compose your scene. The Rule of Thirds describes the principle of dividing up an image into three rows as well as three columns. It is one of the most commonly used composition tools in photography. Most digital cameras have the option to display a Rule of Thirds grid within the Electronic Viewfinder as well as the rear LCD. Instead of placing your subject dead center within your image, try aligning one of the lines separating the rows or columns, or placing the subject in the proximity where the lines intersect. This makes for much more interesting images.

An example of using the rule of thirds as well as selective focus to define depth.
White Balance
White balance is something that became commonplace amongst photography terms when digital came along. Back in the analog days, the ability to change your camera’s white balance on the fly was nonexistent. Whatever the white balance was on the roll of film you were shooting with was the one you were stuck with for the duration of that roll. There were exceptions to this (such as medium format cameras with interchangeable backs), but that’s beyond the scope of this particular guide.
Modern digital cameras are set to Auto White Balance by default, meaning that your camera will detect the color temperature of the lighting in the environment you’re photographing and attempt to compensate accordingly so that the resulting image will look “normal.” While most cameras are capable of producing reasonably accurate results when shooting in Auto White Balance, it’s still far from foolproof. On occasion, you may notice color casts in your image that don’t accurately represent what you saw with your naked eye when shooting in Auto White Balance. In these situations, you may want to manually lock your camera’s white balance to Daylight or Tungsten depending on where you’re shooting. In general, Daylight white balance is 5,500K to 5,600K while Tungsten white balance is 3,200K.
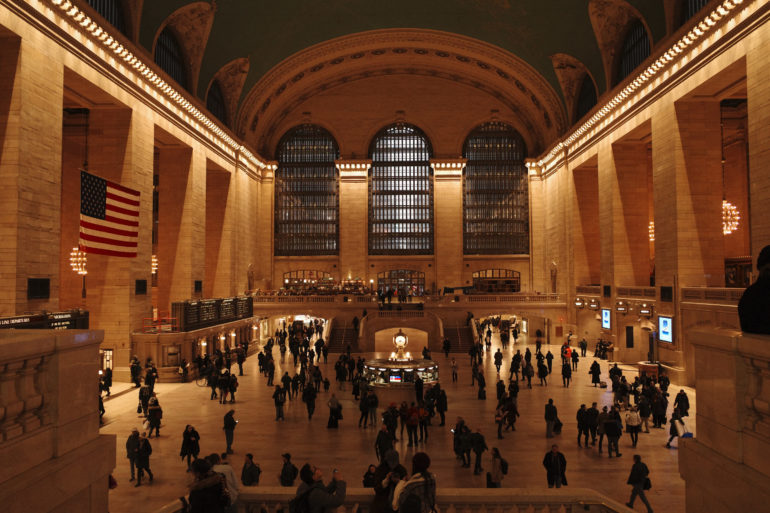
Daylight white balance 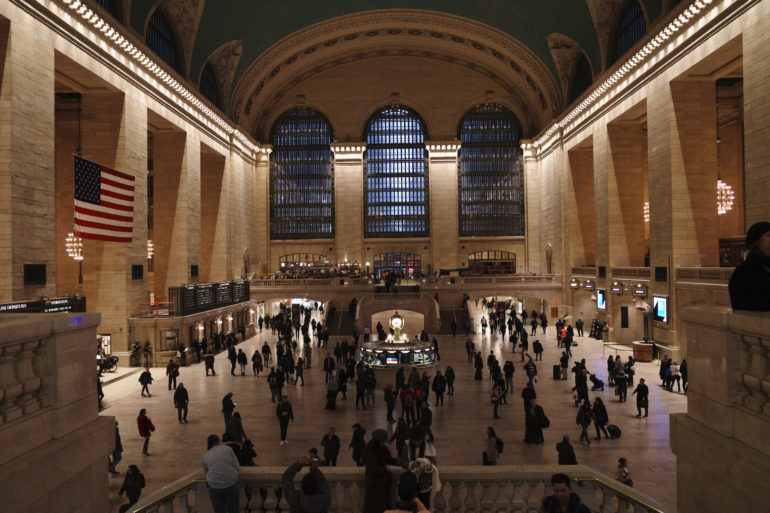
Tungsten white balance


Get rid of the ads!
Did you enjoy reading this article as much as we enjoyed writing it? There's a way to support us and our reporting, getting ad-free navigation and more as a bonus. Subscribe to us for less than a coffee per month —just $3.99— or take advantage of our yearly subscription with a hefty discount for only $25.- An ad-free experience
- A free mystery box for Lightroom or Capture One
- All the books in our store
- 20% discount on Capture One
- 30% discount on Imalume Photo Theft Protection
- 20% off Herbs and Kettle Tea Company.
- 20% off your order from MPIX printing services.
- 5% off Viltrox Products via their eCommerce store.
- 10% off all film developing, printing and scanning services from Blue Moon Camera and Machine
- 15% off 7Artisans products: The lens and accessory maker is offering a sweet discount for Phoblographer's readers.