
Last Updated on 06/30/2019 by Mark Beckenbach
Lighting is crucial when using a lightbox. Learn how to get it right with this cheat sheet.
Whether you have a product shoot planned or want to do some still life snaps, a lightbox will help you do the job right. However, if you’re new to it, proper lighting is one of the first things you’ll have to learn. Fortunately, we found a cheat sheet by Pare and Focus (link now unavailable) that should make it easy for you.
Lightboxes are essential tools for creating the beautiful and professional looking product shots you see in catalogs and online shops. It’s important to master using one if you’re planning to get into commercial photography. If you’re just getting started and want to practice, you can just make your own light box with some simple materials. Once you have that ready, refer to the infographic below to get started with the shooting process. It’s divided into two parts: how to use lights and the camera settings for shooting lightbox photos.
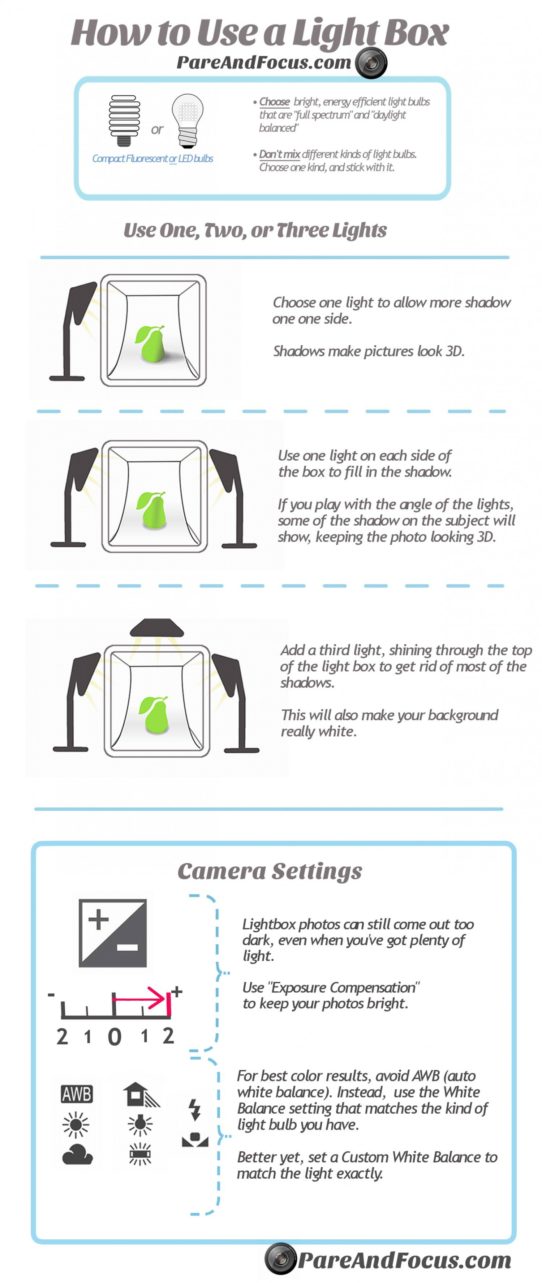
The cheat sheet recommends using compact fluorescent or LED light bulbs. Make sure to get bright, energy-efficient bulbs that are full spectrum and daylight balanced. Also, don’t mix different kinds of light bulbs or you’ll get uneven and inconsistent lighting.
Next, we are shown different ways to illuminate the lightbox using one, two, or three light sources. By placing one light on one side of the lightbox, we get more shadows on the other side, making the image look 3D. Using one light on each side of the box fills in the shadow. But if we experiment with the angle of the lights, we can still get some shadows that will keep the 3D appearance of the subject. Adding a third light through the top of the lightbox allows us to eliminate most of the shadows and also make the background appear white. Experiment with all lighting techniques on your shoot to see which suits your subject best.
Lastly, the simple cheat sheet includes some camera settings which are easy to keep in mind. To get a clean, bright look for product shots, use Exposure Compensation to add one or two stops. For best color results, don’t use the Auto White Balance option, but instead use the white balance setting that matches your choice of a light bulb. Using custom white balance to accurately match the light is also recommended.
Infographic spotted on Reddit
Get rid of the ads!
Did you enjoy reading this article as much as we enjoyed writing it? There's a way to support us and our reporting, getting ad-free navigation and more as a bonus. Subscribe to us for less than a coffee per month —just $3.99— or take advantage of our yearly subscription with a hefty discount for only $25.- An ad-free experience
- A free mystery box for Lightroom or Capture One
- All the books in our store
- 20% discount on Capture One
- 30% discount on Imalume Photo Theft Protection
- 20% off Herbs and Kettle Tea Company.
- 20% off your order from MPIX printing services.
- 5% off Viltrox Products via their eCommerce store.
- 10% off all film developing, printing and scanning services from Blue Moon Camera and Machine
- 15% off 7Artisans products: The lens and accessory maker is offering a sweet discount for Phoblographer's readers.