
Last Updated on 03/17/2023 by Lara Carretero
With Kodak Aerochrome still one of the most enigmatic yet sought after emulsions today, we couldn’t help but ask Doug Golupski to tell us how he works with this film to create stunning landscape snaps.
“If you understand how to shoot slide film, Aerochrome is no different,” Doug Golupski said on the common misconception that Aerochrome is a fragile film that requires special treatment. It is indeed a special infrared film, as his stunning results, and many before him, show us. His Kodak Aerochrome snaps are among the best we’ve seen, so we thought it was only proper to put them on spotlight — and ask him more about his tips and tricks for making the most out of this film. If you’ve ever wanted to grab some rolls but also felt afraid of wasting them, this interview feature should be an insightful resource for you.
Phoblographer: Can you tell us something about yourself and what you do?
Doug Golupski: I spent most of my life around the beaches of Southern California. I have been a Safety and Controls Engineer for a food equipment manufacturing company for the last 13 years.
Phoblographer: When did you begin shooting and what made you get into the kind of photography you do now?
Golupski: I started shooting film when I was 14 years old (the early ’90s), beginning with Kodak fun savers then quickly graduating to a Pentax ME which I shot with through most of the high school. During high school, we had field studies that took the class out to the desert and the Sierra Nevada range that sparked my love for landscape photography. Poorly trying to mimic landscape icon Galen Rowell, I spent a lot of years exploring the desert and mountains.
Getting into my early 20’s I was working for Gateway Computers when the dot com bubble burst and I lost my job. Financial hardship at that time forced me to sell all my gear so I was a camera less for about four years. Flash forward to a trip to Lake Tahoe I wandered into a little pawn shop. I rekindled my love for photography with a Canon AE-1 with a squeaky mirror for $10.00. From there my life had taken me to Santa Barbara (2005) for a new job and I started shooting surf photography on the side. For me there was nothing better; I had the mountains and valleys 40-minute drive up the pass and the beach was even closer.
Surf photography became the priority for a while and landscapes were something to do when the ocean was flat but living there gave me so many opportunities to hone the subjects I love. I quickly realized how costly it was shoot to film for surf photography so I shifted my fledgling business to digital shooting and all my film cameras went away again.
There is nothing more satisfying and terrifying than blasting through a 36 exposure roll in less than 4 seconds with a Canon 1N RS. Like many who went film > digital > film, I wish I would have held onto what I had at the time with film cameras selling for pennies on the dollar. We will call the next ten years my digital age, then enter the GoPro.
When the GoPro entered the market and every surfer could have a capable underwater camera on their person, my side of the surf business dried up; it just wasn’t fun anymore. Shooting thousands of images a day when I would go out than spending hours in front of the computer just wasn’t rewarding so I looked to slow myself down. About 6 years ago (I am 40 now) I went out and bought a Polaroid pack film camera and starting shooting film all over again. Focusing back on landscape photography I have picked up all variety of film formats and now shoot film as my primary medium to this day.
Phoblographer: How and when did you discover Kodak Aerochrome film? Can you tell us about what it was like shooting with it for the first time?
Golupski: Kodak Aerochrome has been an unfortunate new revelation for me; I say unfortunately because it’s expensive and hard to get now. I either saw a photo on the Analog subreddit or came across it on the Film Photography Projects website a few years ago. I can’t remember which came first but then as many who stumble into this film, I got directed to Richard Mosse works which hooked me. My first roll was all stress, I don’t think I have ever had the film sweats that bad. “Is the exposure right, is there enough IR in the sky, this is so expensive why am I doing this??!!” Using a Nikon F3 with a yellow 12a filter, I struck out. It took me three weeks to shoot up that roll but when I was finally finished my stress was relieved and my shots came out great. Great in the sense the film exposed properly but I was so worried about exposure and not messing up looking back at my compositions and what I shot really wasn’t that good. Lesson learned: Composition first.
Phoblographer: What camera(s) do you prefer shooting with for this special film?
Golupski: For 35mm my go to is a Leica M7 with a Skopar 35mm lens and for medium format I am currently using a Fuji GW690III. Both cameras are super sharp and seals tight so I don’t need to worry about light leaks. I have used a Nikon F3, Yashica Mat 124, The Film Photography Project Wide Mod IR plastic camera and a Hasselblad 500C. So you can shoot this film with great results in really any camera; you just want to make sure it doesn’t use infrared auto film advancing and doesn’t have light leaks.
Phoblographer: Do you also develop your Kodak Aerochrome film? Any tips you can share for those who are thinking of developing it themselves?
Golupski: I develop all of my Kodak Aerochrome at home using the Film Photography Project E-6 kit in my Jobo processor. Color IR film is just as easy to process as E-6 and C-41 film. I highly encourage people to do their own developing. The only addition to your home development kit would be an immersion cooker to keep the chemicals warm. If you can do black and white, you can develop color. My only issue I have had is the medium format Aerochrome you can get off eBay is narrower than the medium format film that is widely available. Getting that on a reel can be a nightmare so I cut one of my reels down in the center and glued it back together to make it easier to load the film in the dark.
Phoblographer: Can you share with us a major collection or body of work that you’ve shot using this film? What made it the perfect film for your project?
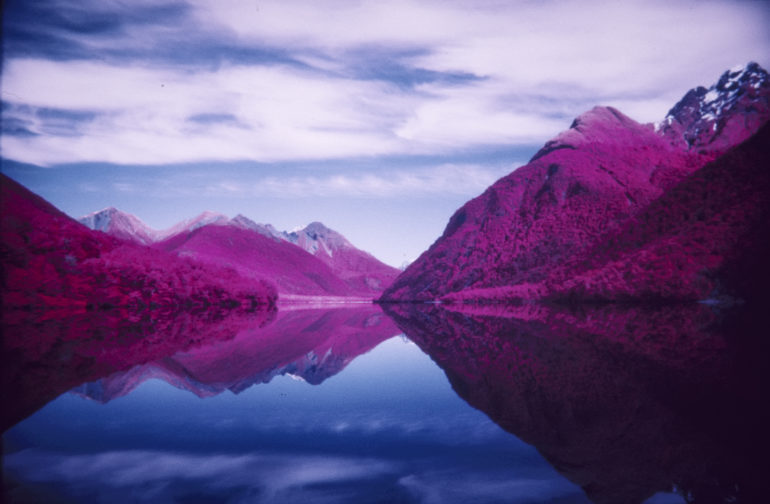
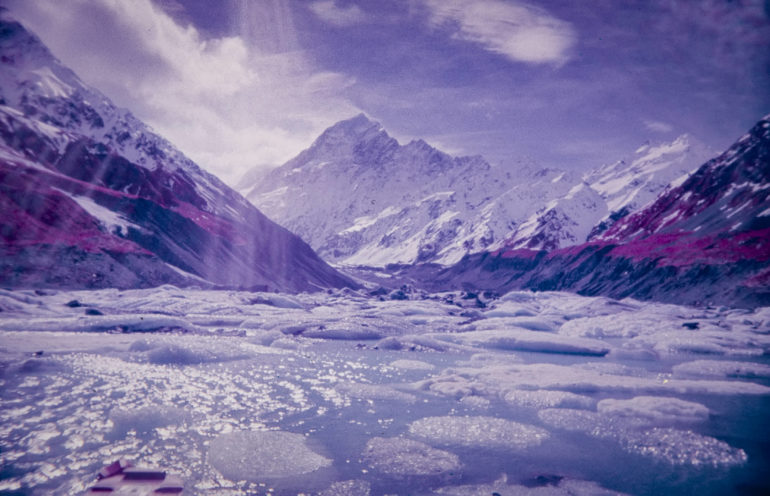
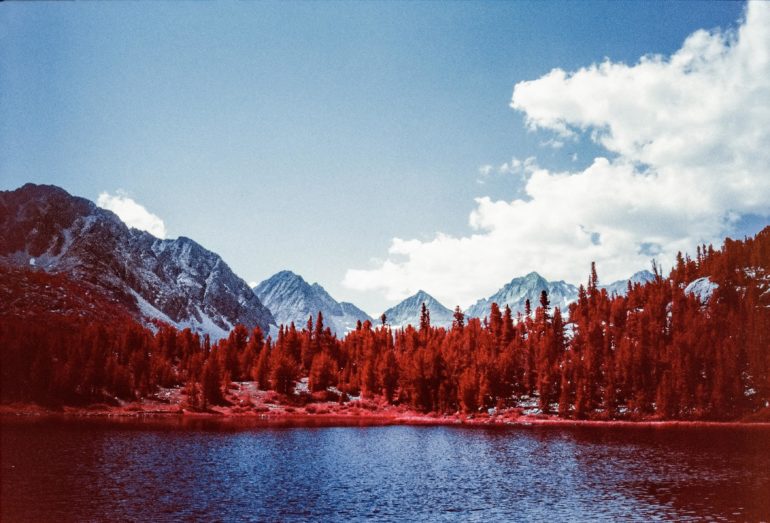
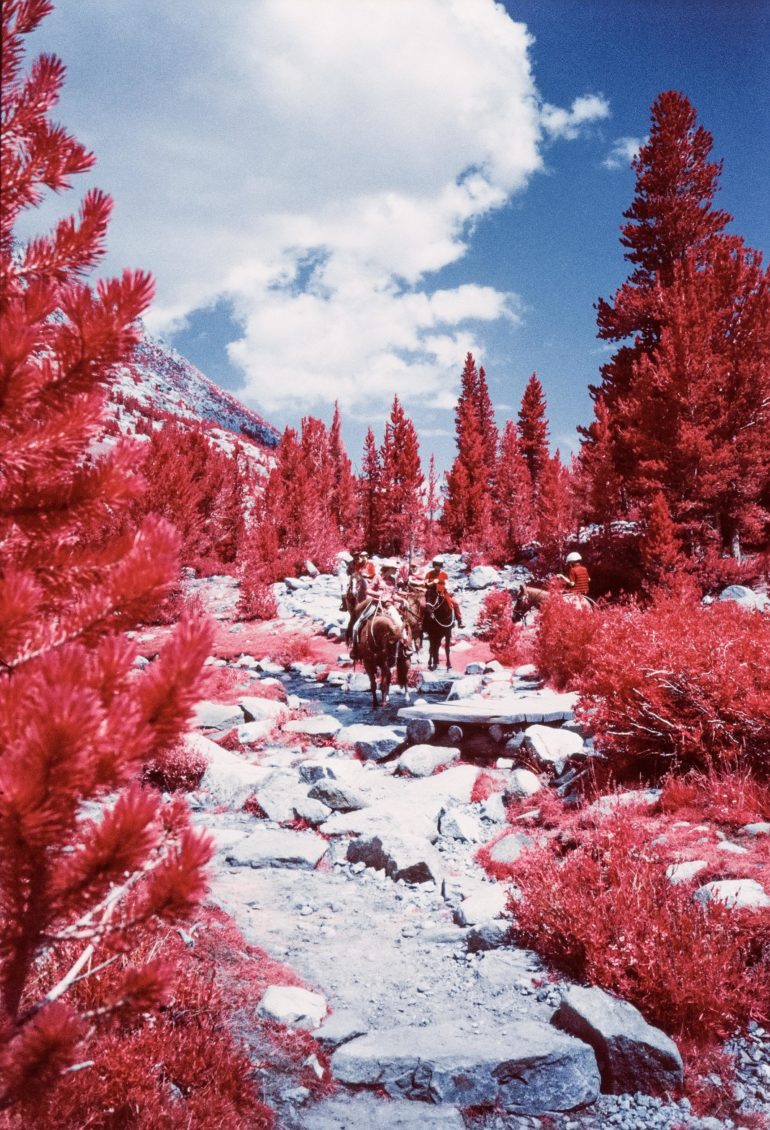
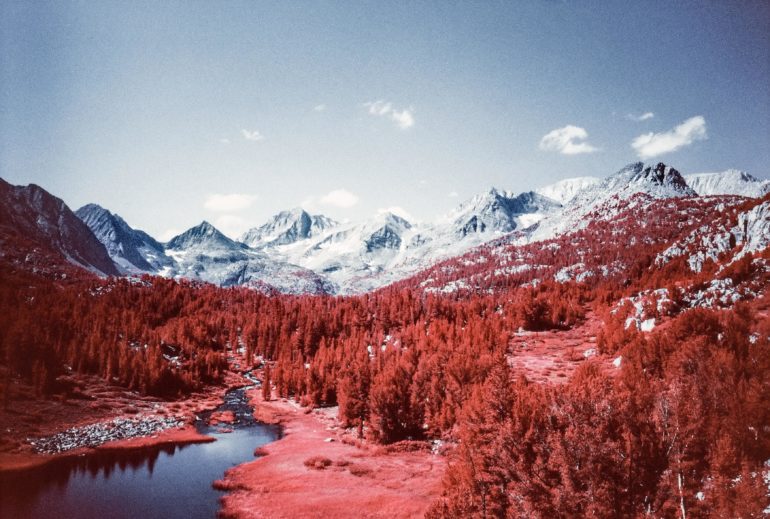
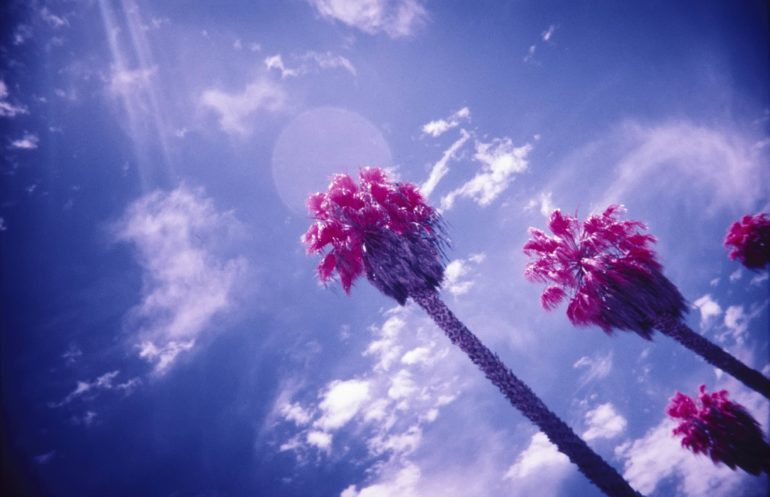
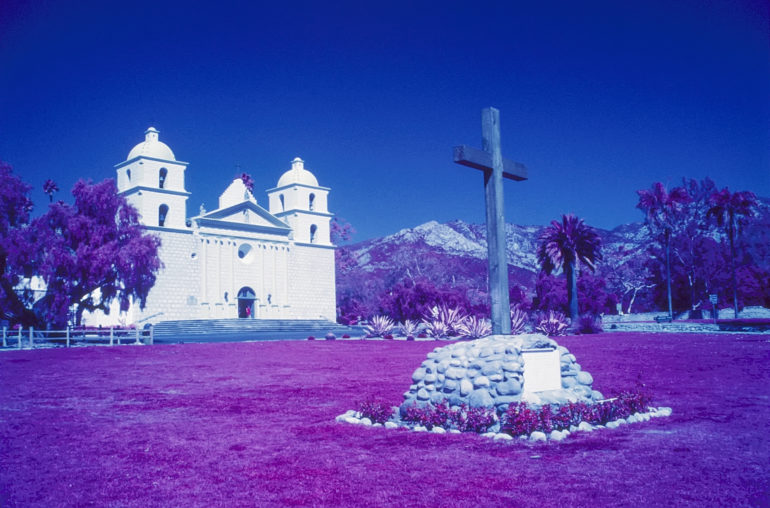
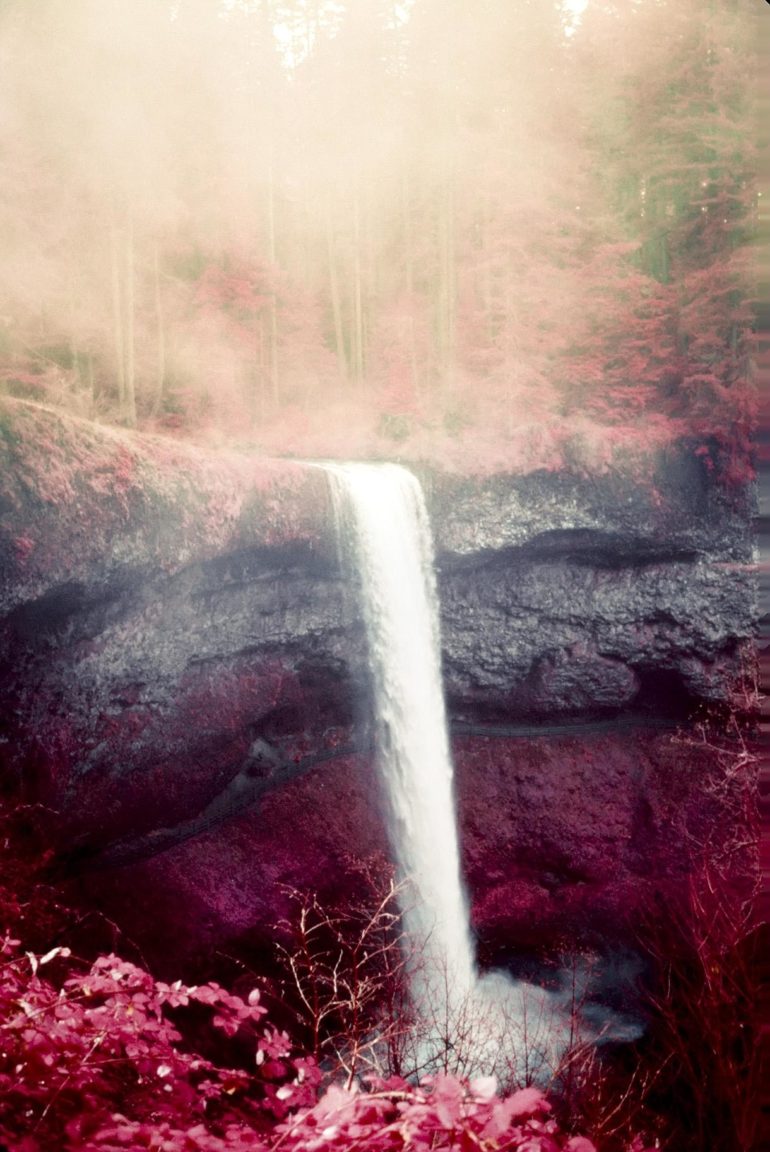
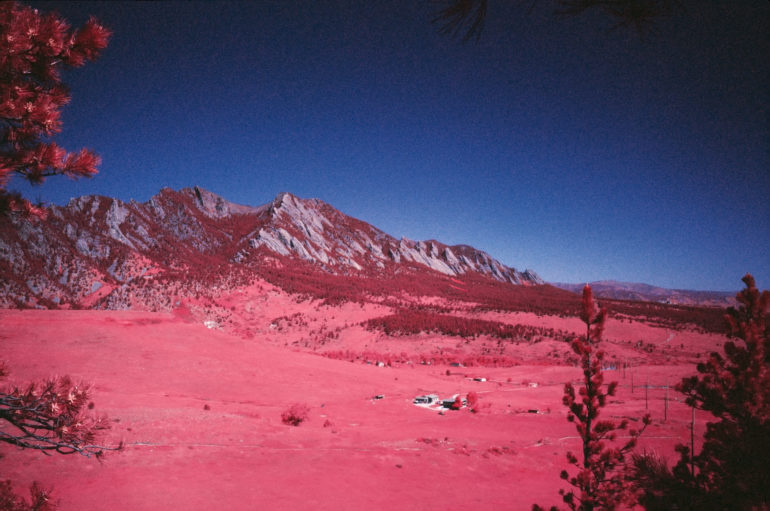
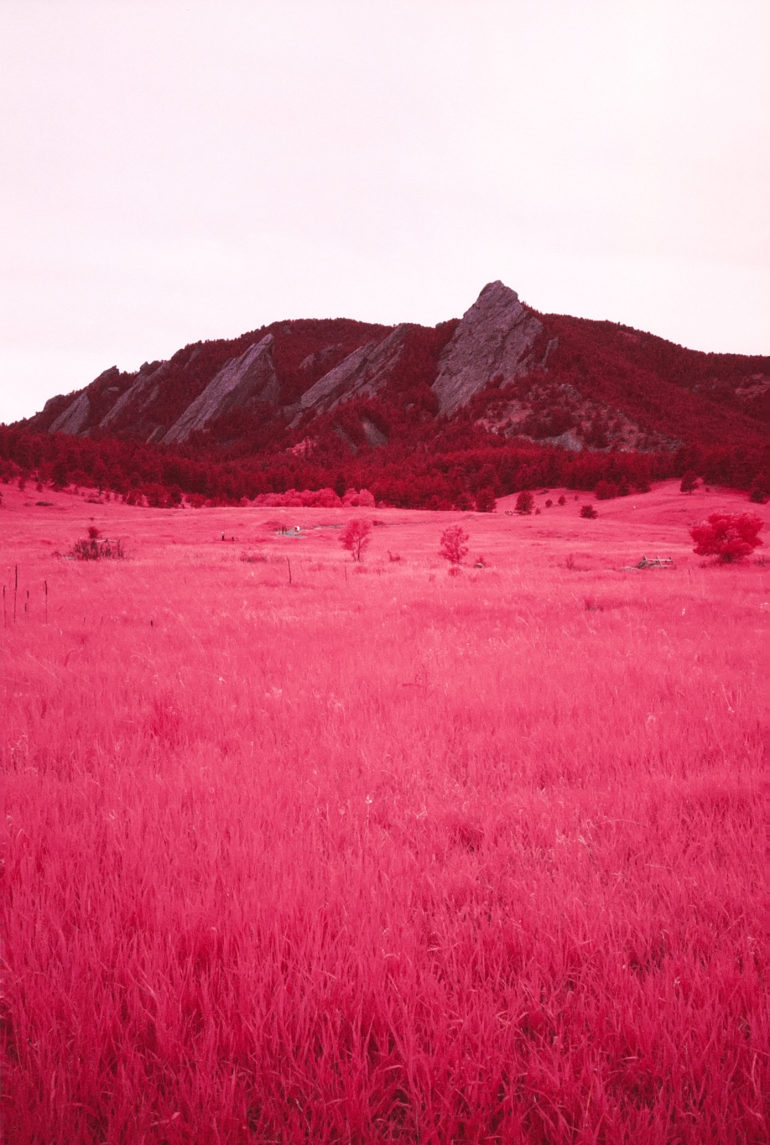
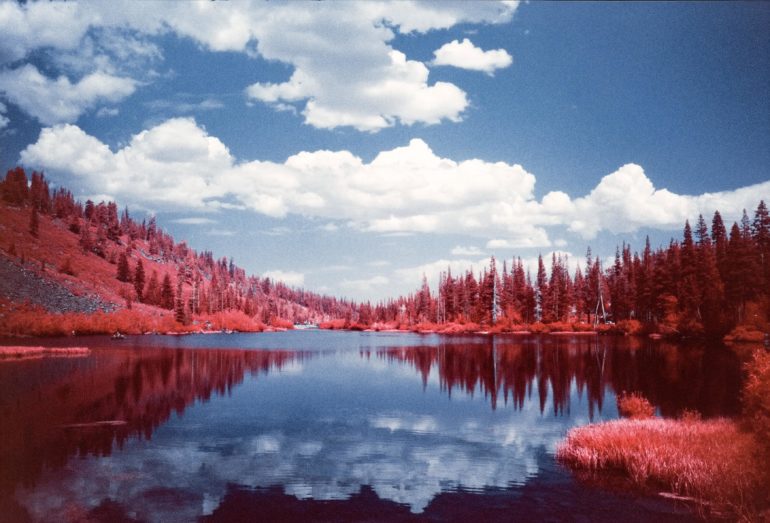
Golupski: I shoot where conditions permit so I have a collection from the Eastern Sierra, New Zealand, Colorado, Oregon and the Central Coast of California. We had a trip to Hawaii where I brought four rolls of Aerochrome and didn’t end up finishing one. We had the worst weather possible for that trip and you just learn to not force this film.
Phoblographer: In what way do you think Kodak Aerochrome contributes to your creative vision?
Golupski: Beyond just forcing me to slow down like I find film shooting does, you do need to really look at your scenes and see if they benefit from shooting with this film. You still need to hit your desired composition but now you need to think should this be shot with Aerochrome. Does it benefit from the tones, will I be satisfied with it or will it be a massive waste of money. This film forces you to be extremely critical, you are shooting expensive film and in respect to the 35mm version, it’s not available from a reliable source anymore. So, it is a finite resource.
Phoblographer: What have you found to be the common misconception about this film today?
Golupski: I guess it’s how fragile it is. It is a robust film capable in shooting in a lot of conditions. I have shot in the desert with the only green being Joshua Trees and in complete over cast skies in Boulder and I was still able to pull out a solid image. If you understand how to shoot slide film, Aerochrome is no different.

Phoblographer: Lastly, any tips on how to make the most out of this unique and now rare emulsion?
Golupski: This is what I normally send to someone if they ask, it’s kind of what I learned from making mistakes.
“Most Kodak Aerochrome is listed at ISO 400 from there you need to take your choice of filters. Yellow 12 leans more pink/magenta, Orange 21 leans red/orange and a Red 25 is way out there with really heavy shifts into yellows for the sky and crushed shadow areas. I don’t recommend using a red filter.
Once you chose which filter to use figure out the filter factor. A Yellow 12 is roughly 1.25 stops, the Orange 21 is 1.6. BUT every manufacturer’s filter could be slightly different so it’s best to test them with a meter to verify. Meter a solid white wall without a filter and check the reading then slip the filter on and check the same wall. Compare the speed/aperture difference between the two.
Once you have all that if your camera meters through the lens set your ISO to 400 and out your filter on it will compensate for it. If it doesn’t I recommend setting your hand held meter to the compensated ISO so you don’t need to do math on the fly. Let’s say your filter meters out at 2 stops then your 400-speed film with filter should be set to ISO 100 on the meter.
Camera set, okay, go shoot. My best experiences are between 10 AM – 2 PM with the sun behind my back. Also, remember that the foliage in your scene is normally going to be the star, so meter the greens, point your lens or meter towards the ground a bit. If you have a spot meter, even better. I have found cameras with multi-matrix metering that take the sky into account too much for color IR photos. SO it can lead to a cool effect of these deep beautiful dark blue skies with the small latitude of slide film your shadow areas normally the reds will be completely crushed.
Ideal situations are optimal but I have also shot in totally overcast skies and had great results so don’t be too scared to just shoot. Just remember to meter the greens if you meter the sky or a white reflective building then all your green areas will go black or deep red with little chance of recovery.”
That is my normal response but I would want to add post-processing. In the film world, these are sometimes nasty words to bring up. I color correct all of my images. In all of my recent work, I use a BW 099 Infracolor filter which is really close to an Orange 21 filter. Even with that the film still has a heavy purple/magenta cast. This could be the age of the film or my filter, I don’t know since I never had the chance to shoot film that wasn’t expired as all Aerochrome is now. Shifting the color temp into the yellow spectrum and adding some green takes 90% of that away. That’s how I end up my deeper reds and cleaner tonal structure in the rocks/middle grey areas.
Follow Doug Golupski on Instagram (@dougolupski) to stay updated on his Kodak Aerchrome photos and his 365 Project.
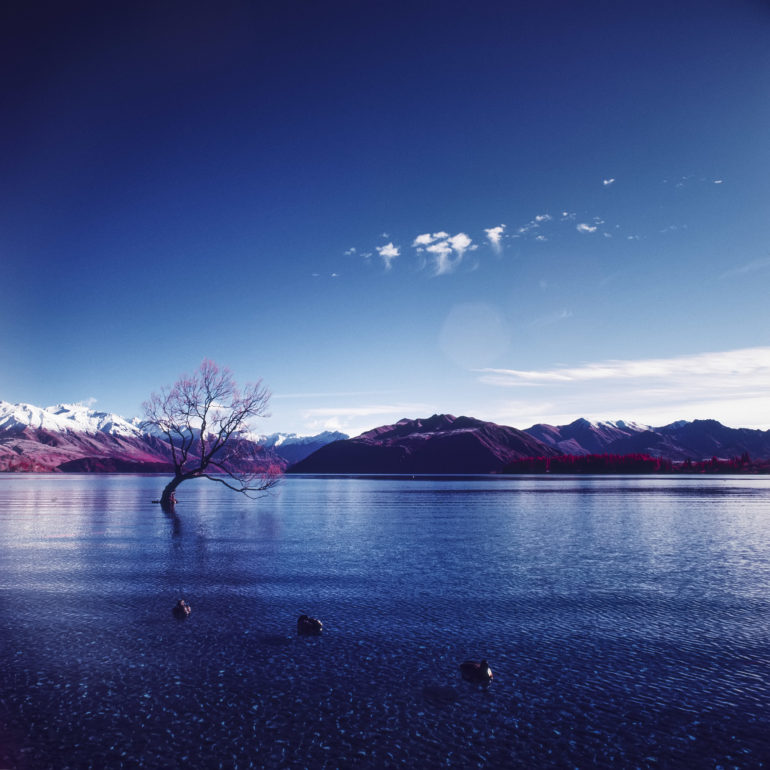
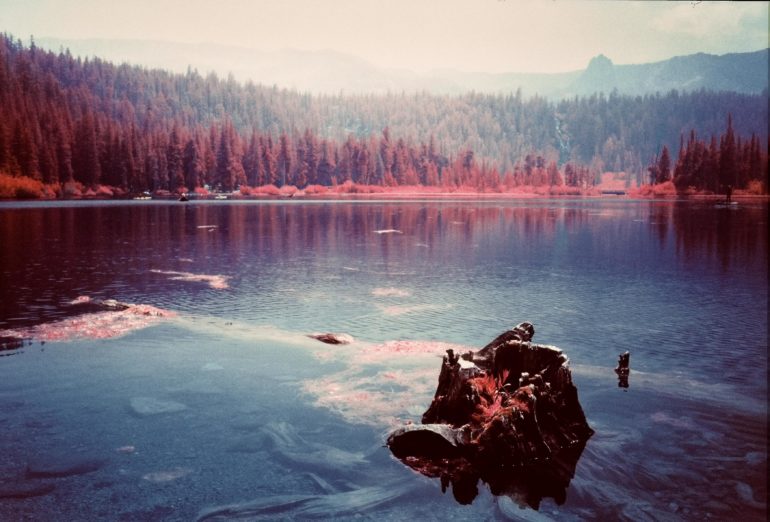
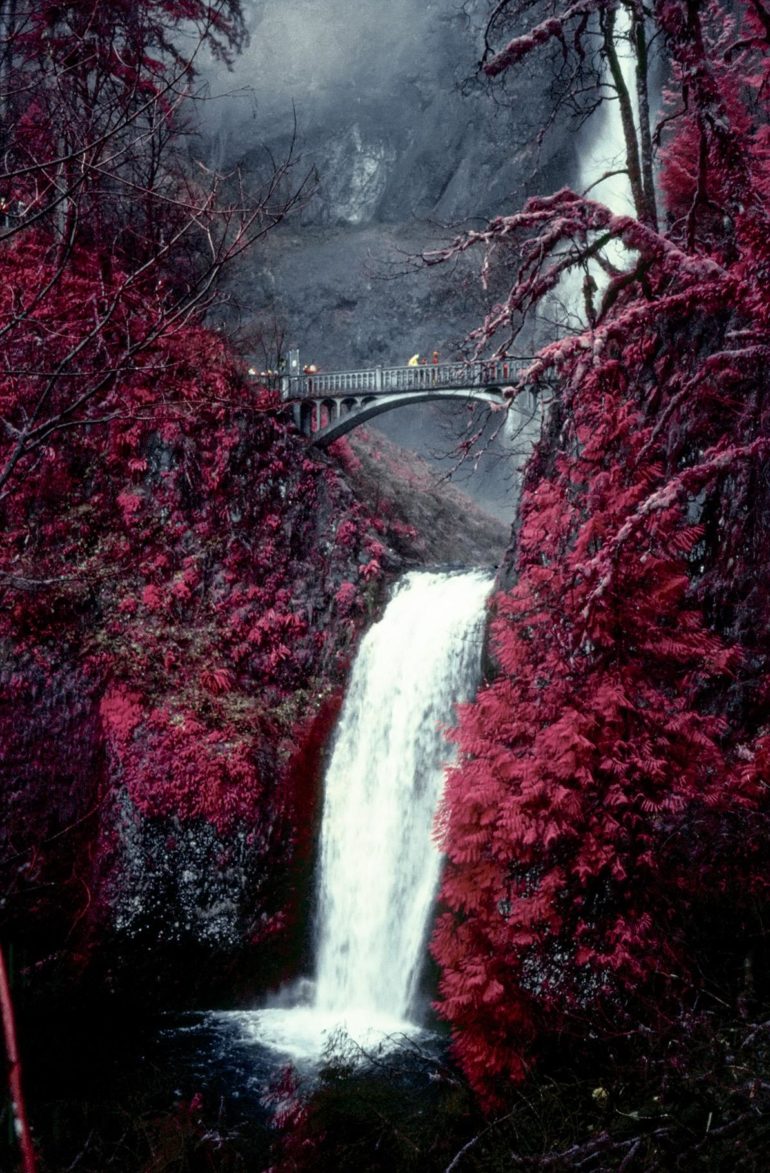
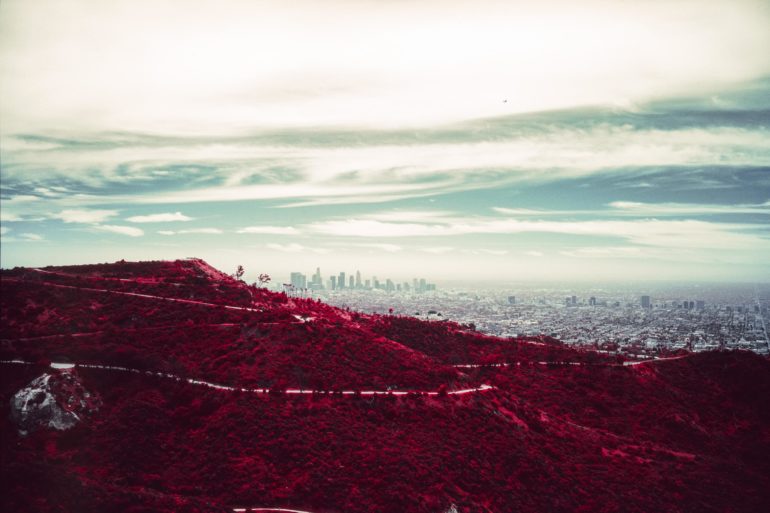
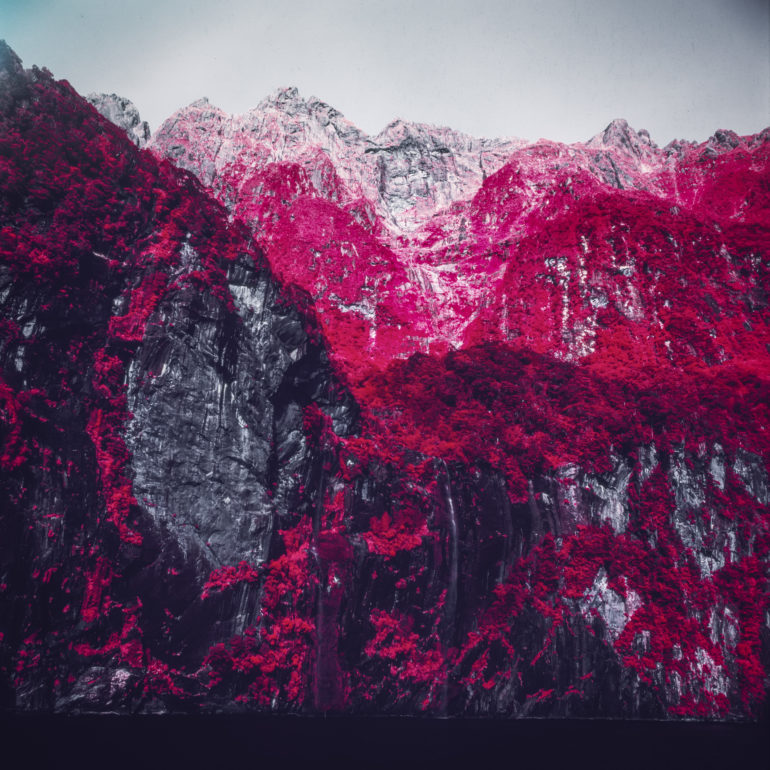
All photos by Doug Golupski. Used with permission.
Get rid of the ads!
Did you enjoy reading this article as much as we enjoyed writing it? There's a way to support us and our reporting, getting ad-free navigation and more as a bonus. Subscribe to us for less than a coffee per month —just $3.99— or take advantage of our yearly subscription with a hefty discount for only $25.- An ad-free experience
- A free mystery box for Lightroom or Capture One
- All the books in our store
- 20% discount on Capture One
- 30% discount on Imalume Photo Theft Protection
- 20% off Herbs and Kettle Tea Company.