
Autofocusing with cameras is one of the biggest features that are always kept in mind when someone makes a purchase. Unfortunately though, not everyone knows how to take the best advantage of what their camera offers them. In truth, if you’ve got a camera from 2011 and afterward, you pretty much have everything you’ll need to accomplish most everyday tasks when it comes to autofocusing on your subject. Whether you’re photographing your pets running around like maniacs or photographing a subject in the dimly lit dark, your camera can handle most instances if you just use it correctly.
Let’s delve delve into this.
Cleaning the Lens and Camera Contacts
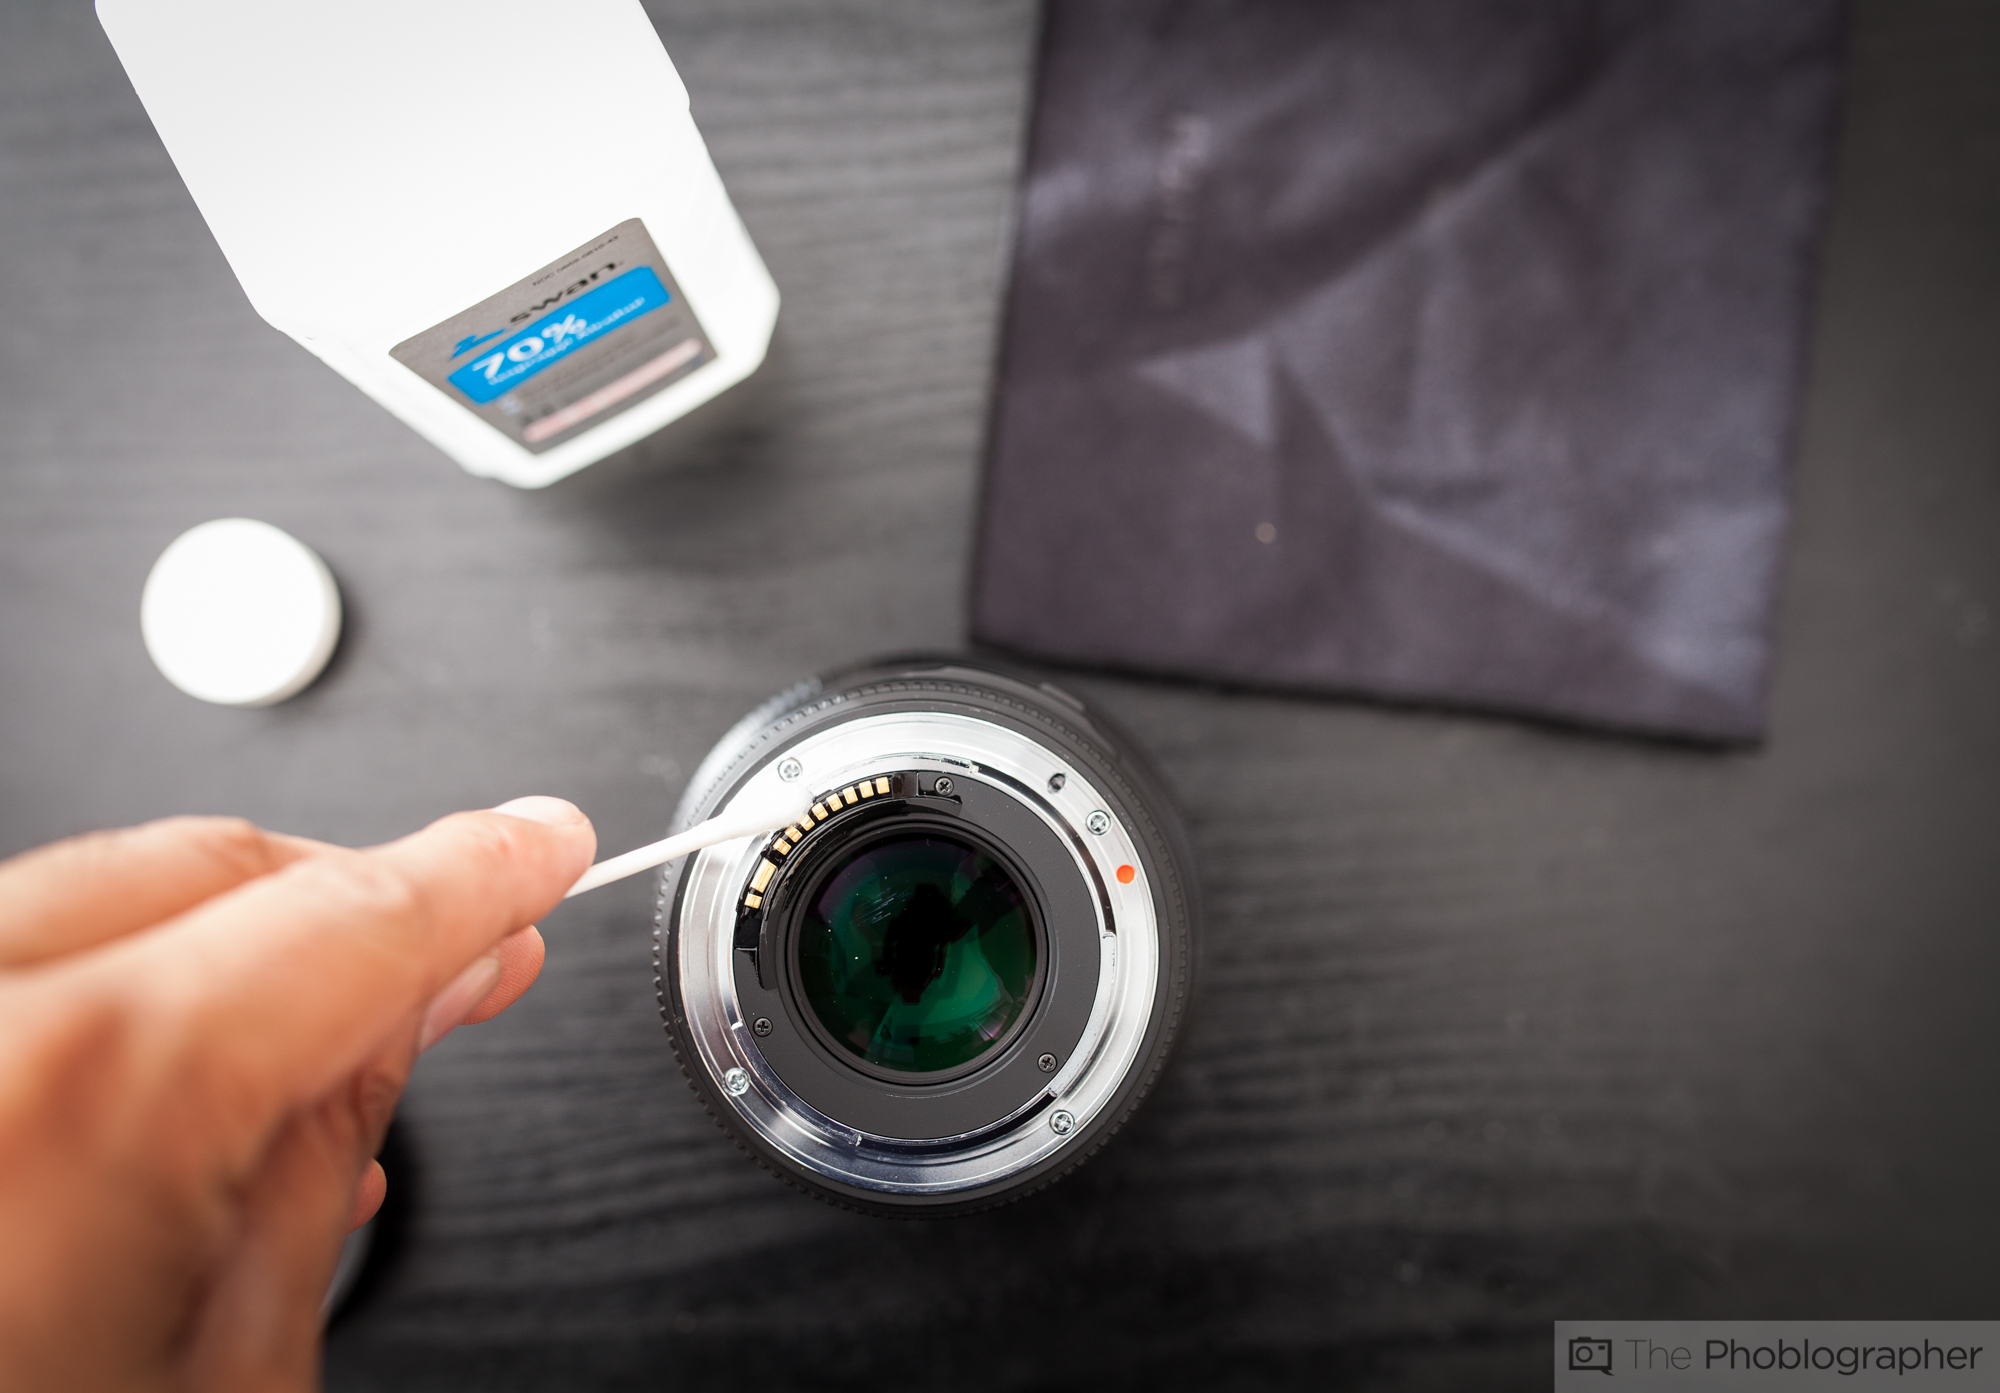
One of the first things you should do that very few people think about is cleaning the contacts of the camera lens and the camera. Think about it this way: you need air the breathe, right? But what if your nose was blocked up and your mouth was too? Then you wouldn’t be able to breathe. The lens and camera communicate and pass information back and forth via these contacts in the same way that you breathe. But when you take the lens off, gunk gets into the contacts and blocks the flow of communication.
Using a cotton swab, thoroughly and carefully clean the contacts with Isopropyl alcohol. Then join the camera and the lens back together.
The Proper Way to Focus and Recompose

What lots of photographers have been doing for years (and effectively still do to some extent) is focusing on a subject with the center focus point and recomposing their photo by shifting the camera. This is sometimes a lot faster than selectively choosing a focusing point. But there is a better way to do it rather than tilting the camera–which is what lots of photographers do.
When you tilt or pivot the camera, you throw off the plane of focus. Instead, sliding it left, right, up, or down slightly keeps the camera on the same plane of focus if you’re careful. Try it!
Apertures and Autofocus

Lots of people always want the depth of field to be very super shallow when they’re trying to capture a candid or moving subject. Either way, stop the lens down by around half a stop to a stop. If you were looking at the image and didn’t know anything about the exposure values, you wouldn’t sit there and worry most of the time. Nor will anyone else. If you’re shooting with a fast prime lens, it isn’t much of an issue to stop down from f1.4 to f2. You’ll still get all the bokeh you wish.
Increase or Decrease Focusing Point Size

Some camera systems (mostly mirrorless) have the option of increasing or decreasing the camera focusing point size. The smaller it is, the slower but more accurate it will be. The larger it is, the faster it will focus. Be sure to adjust your focusing point accordingly to what you need.
Plus, always remember that focusing on a higher contrast spot will always yield you greater success.
Area Focus
If you’re trying to capture a candid moment or something moving very fast, you’re often best off selecting the area focusing options on your camera. This lets you ensure that the camera will get the subject in focus by letting it select a larger general area of the scene to focus on.
Sounds elementary? Sure, but you’re bound to forget it at times.
Choosing Specific Focusing Points
Some folks often let the camera do all the thinking for them. One of the secrets behind machines is that they will do what you tell them to do. So when you don’t select a specific focusing point on the camera, it may sit there just trying to focus on the scene and you won’t get what you want in focus.
So select that focusing point.
Don’t Forget Tracking Focus
Lastly, don’t forget that your camera has a tracking focus option. This will help you keep a subject in focus as it moves across the scene. Generally speaking though, it’s best for you to pan with the subject as you do this.
Get rid of the ads!
Did you enjoy reading this article as much as we enjoyed writing it? There's a way to support us and our reporting, getting ad-free navigation and more as a bonus. Subscribe to us for less than a coffee per month —just $3.99— or take advantage of our yearly subscription with a hefty discount for only $25.- An ad-free experience
- A free mystery box for Lightroom or Capture One
- All the books in our store
- 20% discount on Capture One
- 30% discount on Imalume Photo Theft Protection
- 20% off Herbs and Kettle Tea Company.
- 20% off your order from MPIX printing services.
- 5% off Viltrox Products via their eCommerce store.
- 10% off all film developing, printing and scanning services from Blue Moon Camera and Machine
- 15% off 7Artisans products: The lens and accessory maker is offering a sweet discount for Phoblographer's readers.