Creating the Photograph is an original series where photographers teach you about how they concepted an image, shot it, and edited it. The series has a heavy emphasis on teaching readers how to light. Want to be featured? Email chrisgampat[at]thephoblographer[dot]com
When it comes to underwater portraiture, one of the best photographers out there has to be Ken Kiefer. Ken has loads of experience and like many of us, he also still has a big fascination with comic books and heroes. So the story of how he created the image for today’s Creating the Photograph post surely comes from comics. When seeing an Iron Man costume, he wanted to photograph it underwater–but it wasn’t possible. However, two other costumes were.
Here’s Ken’s story!
The Concept
I’ve always been a fan of superheroes. From reading comic books and watching the original Batman TV shows to the current crop of awesome movies, I can’t get enough.
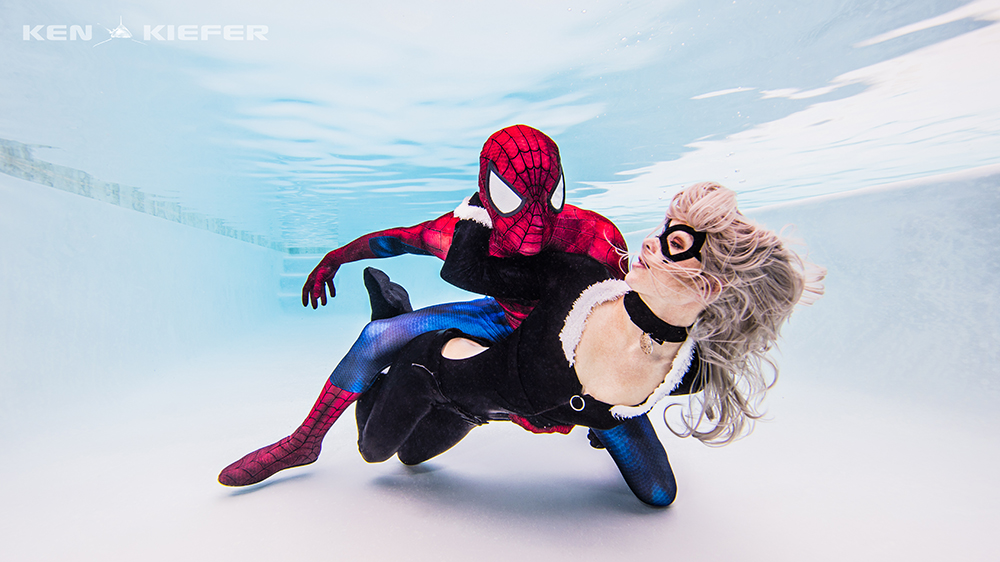
So, when I saw my friend’s super realistic Iron Man costume, I immediately asked him “can that thing get wet?” He said that due to electronics and a lot of metal content that it can’t…. BUT, he said he has a Spiderman costume that he designed and created that could get wet! J While we were planning what we could do underwater with this idea, he went ahead and made a costume for his girlfriend of one of Spiderman’s buddy/enemies called The Black Cat. Turned into a really awesome superhero shoot!
Alex did an absolutely amazing job creating this costume from scratch. He designed the pattern which he had printed on lycra. Then, he learned how to sew and cut/sewed the entire outfit to fit him like a glove. He took apart a pair of shoes and used the upper portion inside the lycra and the soles outside the lycra so that they didn’t slide on his feet and aren’t worn out while wearing the outfit.
A side note about this costume: the lycra becomes almost impermeable once it is submerged. Alex would have to inhale with maximum effort every single time that he emerged from the water to draw tiny amounts of air through the material!! I was amazed at his determination to keep shooting because it was a very uncomfortable position. Not to mention, the multiple layers of the eyes held water and he couldn’t see at all the entire shoot 🙂
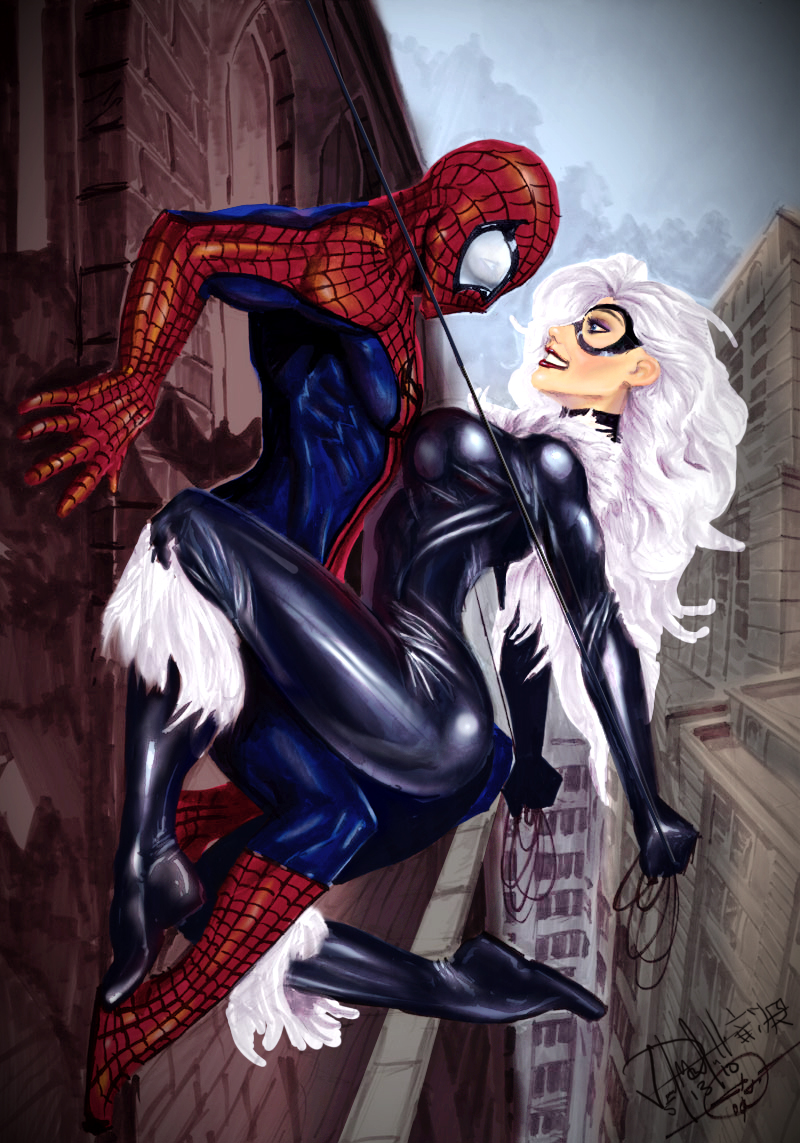
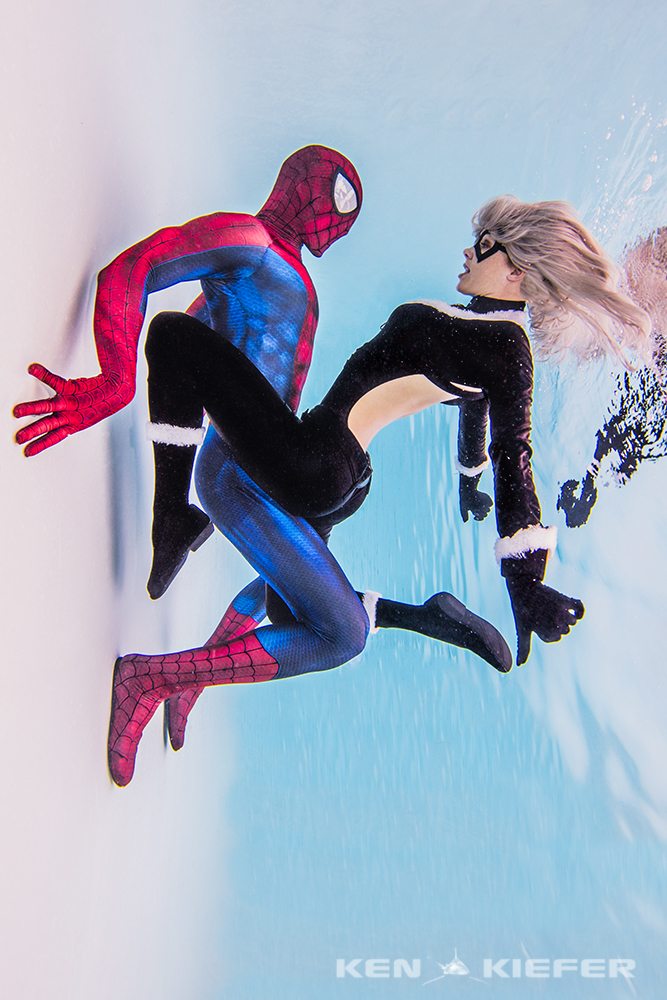
When we were researching poses and ideas for this shoot, my wife came across this cartoon image and really wanted to try and recreate it.
The Gear
- Canon 5Ds
- 16-35mm f4 L
- Encased in Ikelite underwater housing and 8 inch Ikelite dome.
- Two Ikelite DS161 strobes with dual sync cord. Ikelite adjustable strobe arms.
The Shoot

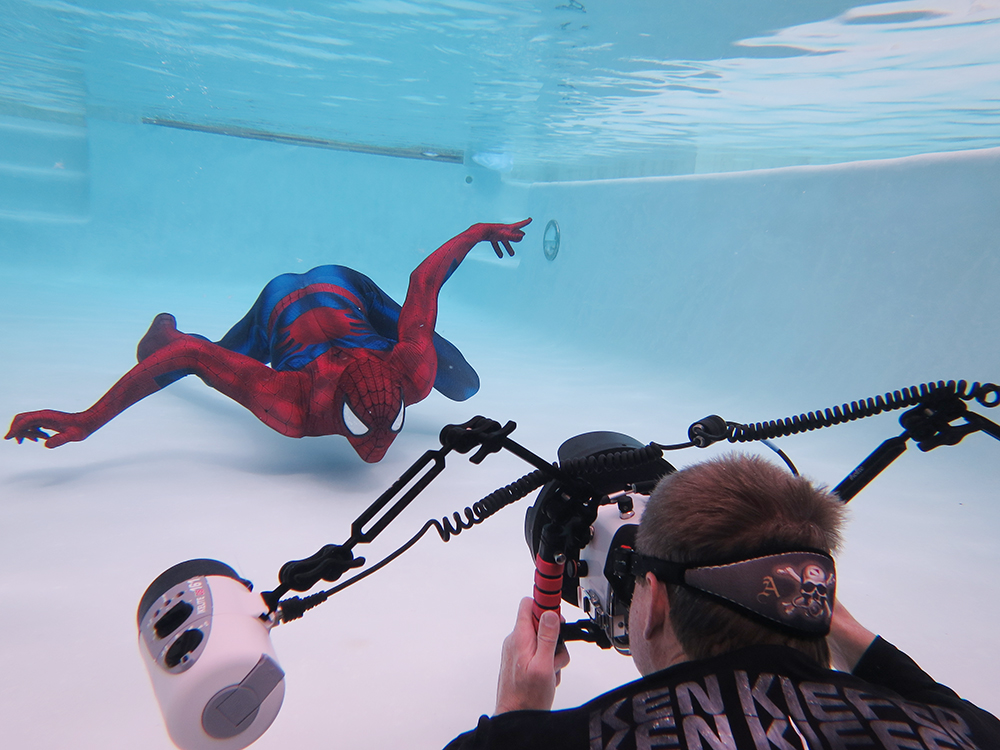
The pool we were shooting in is only 4 feet of depth. Since there was no way to position them on the side of a deep wall, we positioned them on the bottom of the pool and turned the image so that they appeared to be vertical.
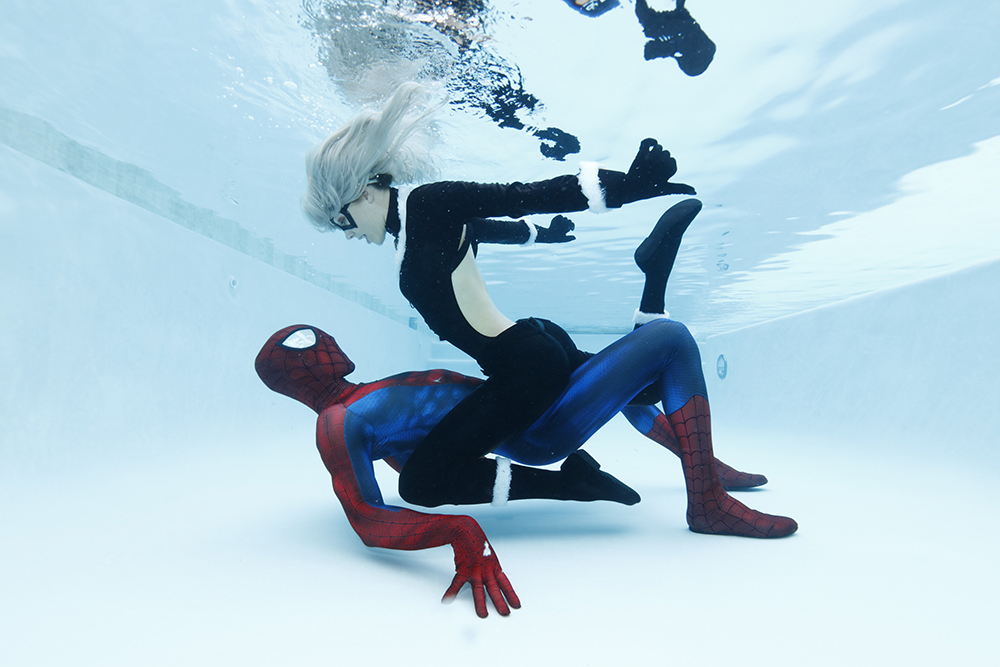
Usually it takes some time to acclimate models to the unique issues encountered in underwater modeling. Things like water jetting up your nose, buoyancy control, breath holding while keeping a relaxed face, hair control, and not being able to see can be overwhelming if you aren’t accustomed them. Luckily these two adjusted incredibly quickly! J
To lay on the bottom of the pool, we had to blow out all of our air and then sink to the bottom to begin each round of shooting. It’s an uncomfortable feeling, but the results were well worth it in the end.
For those not familiar with underwater shooting, it’s important to minimize the distance between your subject and yourself. This allows the light from the strobes to make it through the dense water and back to your sensor in the short time that the shutter is open. It also minimizes any tiny debris in the water, which reflects back the light from the strobes and creates backscatter. To that end, I use full frame cameras and very wide lenses, some rectilinear and some fisheye.
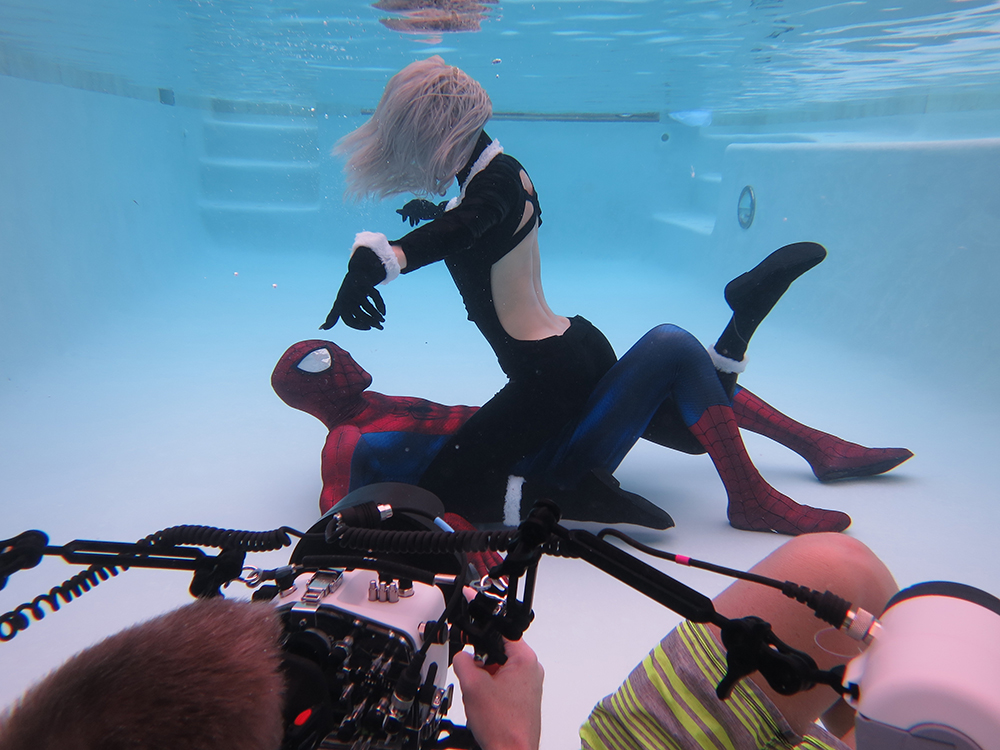
For this shot, we blew out our air and then posed on the bottom while adjusting position approximately 40 times. Any communication has to be done between attempts back on the surface.
I have my two strobes positioned below, and to either side of the camera with the adjustable strobe arms. I used them as fill light to counteract strong shadows on the underside of the models from the bright sunlight.
Post-Production
Opening the RAW shot in Adobe Camera Raw – the first thing I do is adjust the color balance. After that, I pumped the contrast, vibrance, and intensity since we really wanted the image to pop.
From there, I open it in Photoshop and flip it 90 degrees to put Spidey on the wall. Next, the clone brush and heal brush to remove bits of floating debris and get rid of the pool steps, lights and tile trim.
A little bit of sharpening and I’m done.
Before/After
Get rid of the ads!
Did you enjoy reading this article as much as we enjoyed writing it? There's a way to support us and our reporting, getting ad-free navigation and more as a bonus. Subscribe to us for less than a coffee per month —just $3.99— or take advantage of our yearly subscription with a hefty discount for only $25.- An ad-free experience
- A free mystery box for Lightroom or Capture One
- All the books in our store
- 20% discount on Capture One
- 30% discount on Imalume Photo Theft Protection
- 20% off Herbs and Kettle Tea Company.
- 20% off your order from MPIX printing services.
- 5% off Viltrox Products via their eCommerce store.
- 10% off all film developing, printing and scanning services from Blue Moon Camera and Machine
- 15% off 7Artisans products: The lens and accessory maker is offering a sweet discount for Phoblographer's readers.