
All images by Joel Locaylocay. Used with permission.
Photo Essays is a series on the Phoblographer where photographers get to candidly speak their mind about a specific subject or project of theirs. Want to submit? Send them to [email protected]
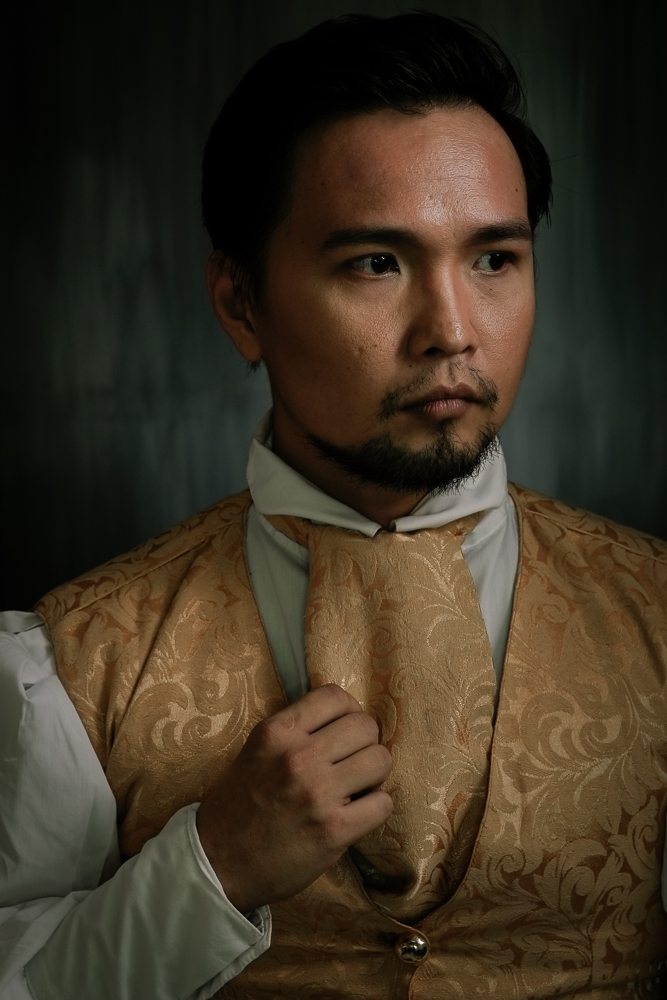
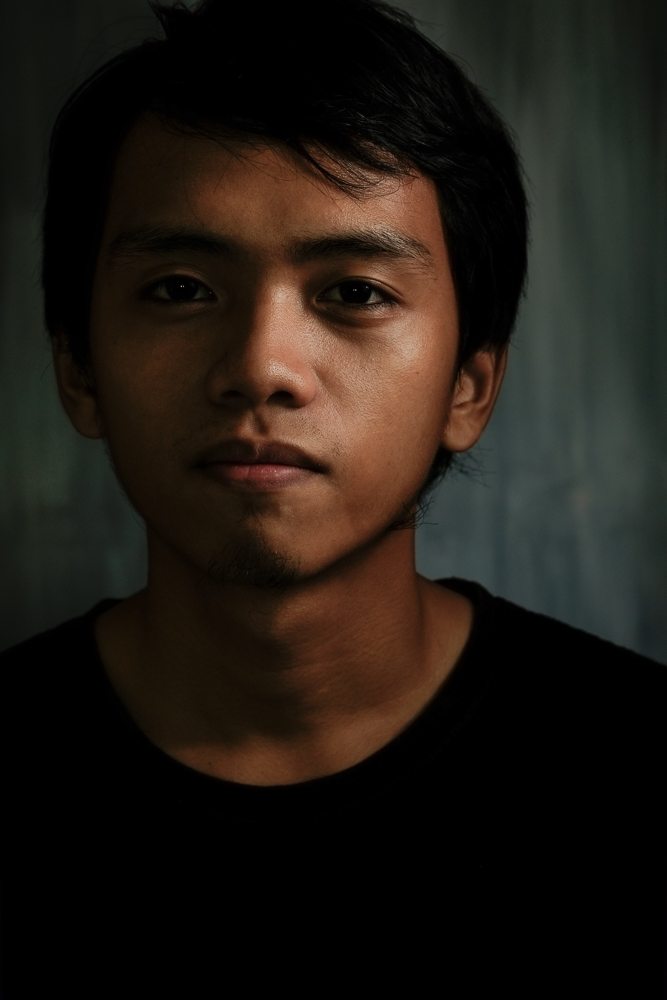
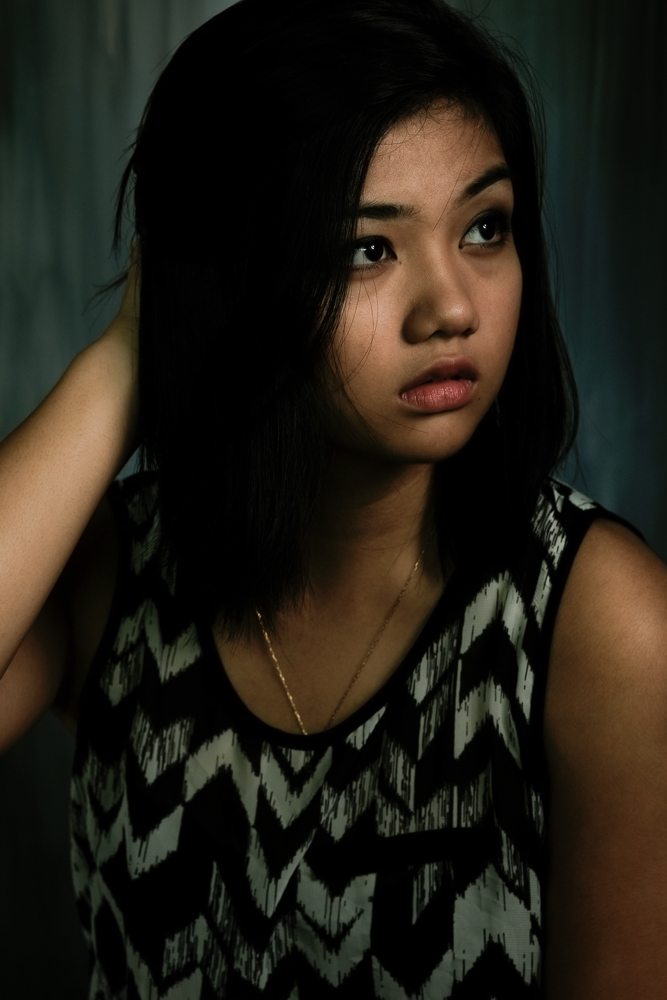
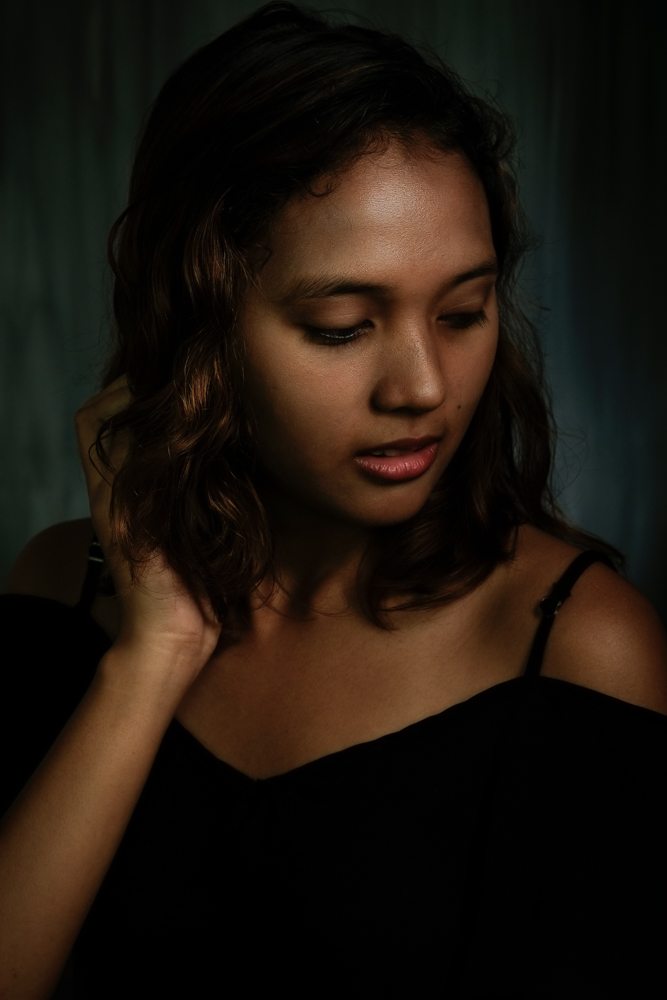
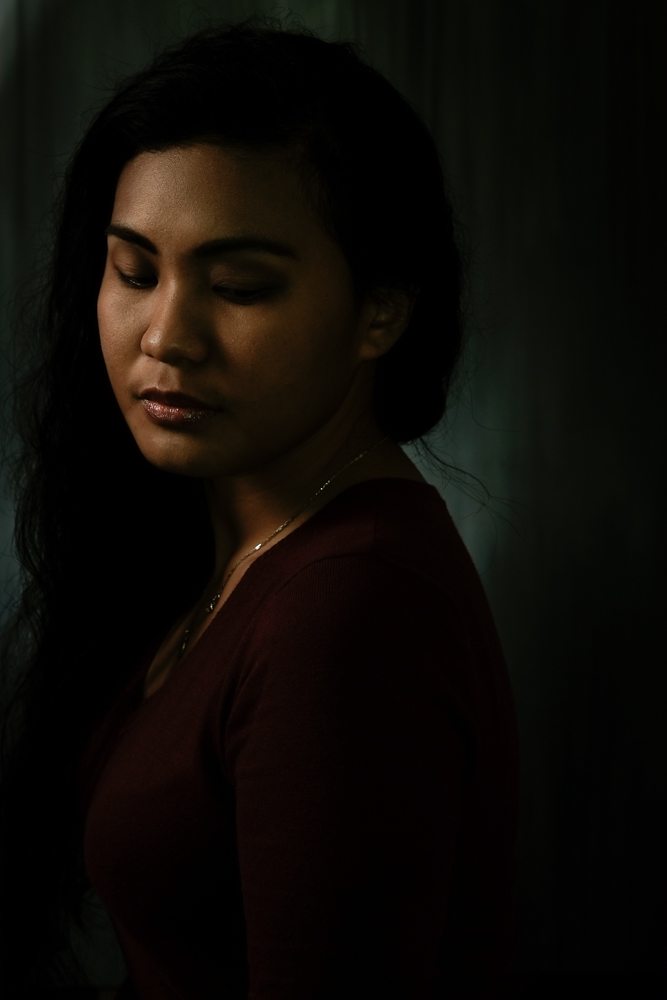
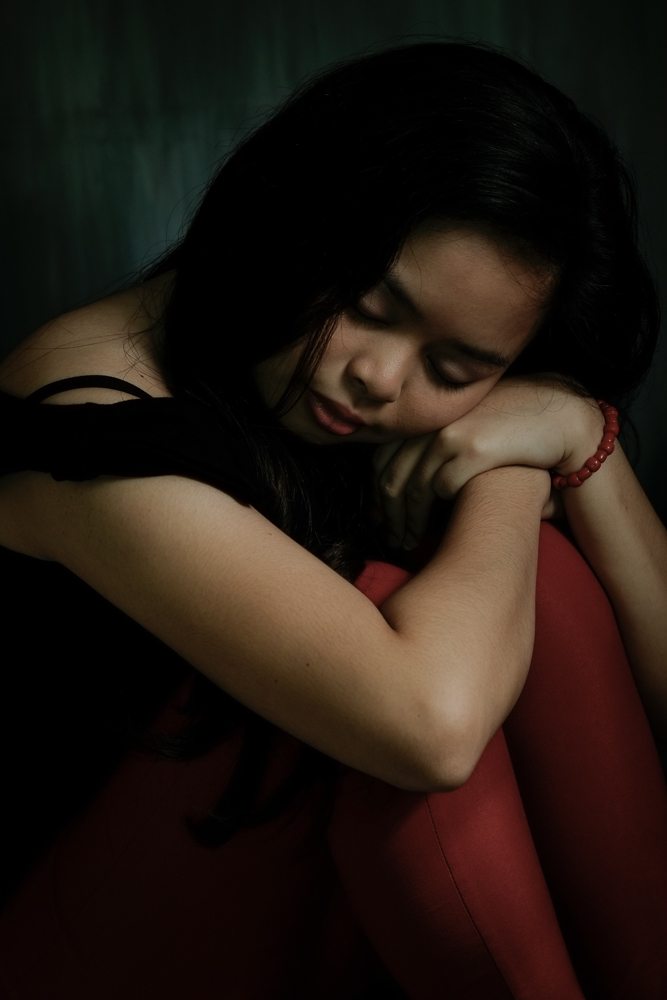
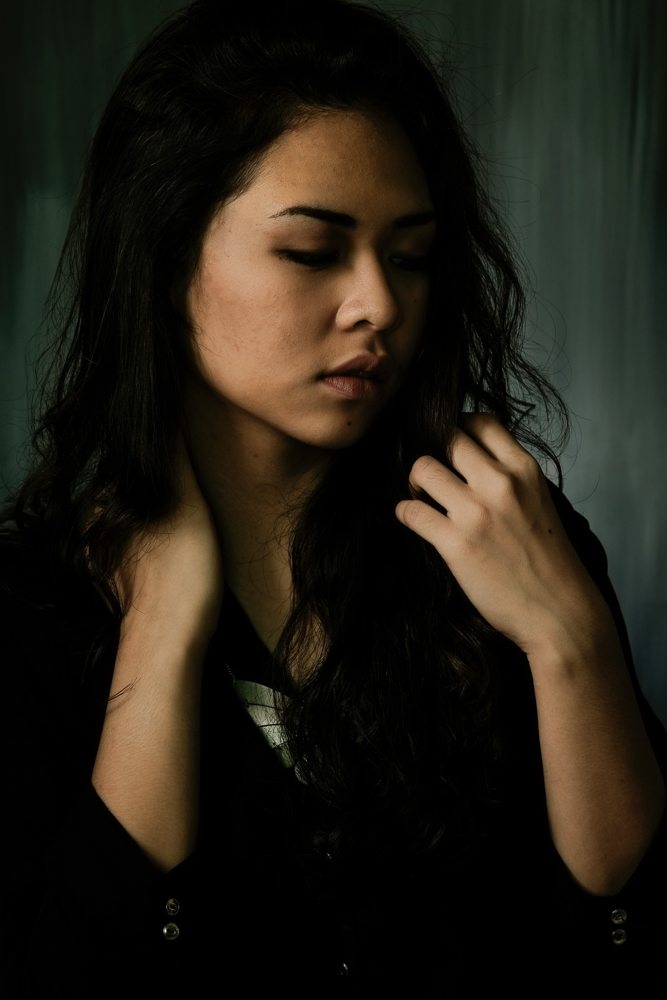
I am most proud of the lighting that I did for my Faces project. This series is inspired by the look and feel of the portraiture of Dan Winters. Well, at least it started out that way. I surely didn’t have the equipment he was using. I lit my subjects using hot shoe flashes triggered off camera. And over the months that I worked on the series, I found that I had developed a look that I could call my own.
Concept and Creative Inspiration
I was in a creative slump and was looking for inspiration to create new work. I found myself drawn to the work of classical painters, specifically those of Rembrandt and Vermeer. They both understood the essence of light. There is a sincerity in the way that they captured seemingly ordinary people and scenes in an extraordinary manner. I was able to find a contemporary parallel in the work of Dan Winters (although a lot of his subjects are not so ordinary). They all made me understand that in a portrait there are two essentials: the subject and the light.
And with this insight, I set out to craft the lighting setup I used for the series. I didn’t have a studio and would have to work around my subjects’ schedules, so I knew I had to come up with something portable with a consistent output. After a few weeks of testing, I was finally ready to work with my first subject. I set out to capture the character of a subject’s face (hence the title of the project) and the way it interacted with the light. I understood that this wasn’t a beauty or glamour portrait. What I wanted to capture was the person’s essence in a photograph.
Most of the subjects that I worked with weren’t models. Some of them were surprised when I asked them to be part of the series. Many of them didn’t see themselves as beautiful enough in a prototypical sense. I assured them that this wasn’t about that and that I would do my best to put them in the best possible light. During each session, I would talk to my subjects while I set up my lights (I often didn’t have the luxury of preparing ahead if I had limited use of the space). I found that this would put them at ease. It also gave me time to look at their face and decide where best to position the key light.

At the start of each shoot, I would tell my subjects that they didn’t have to smile if they didn’t feel like it. I explained to them that a quiet portrait would stand the test of time better. That there is a serene elegance to just being still. I would just ask them to relax and guide them with a few directions (e.g. slowly turn to the left, chin down, etc.). I would shoot a number of pictures and then take breaks in between. Sometimes I would catch the subject doing something (e.g. fixing her hair, looking thoughtfully to one side as we talked, etc.), so I would then ask her to hold that action as I took a quick shot.
Technical Execution
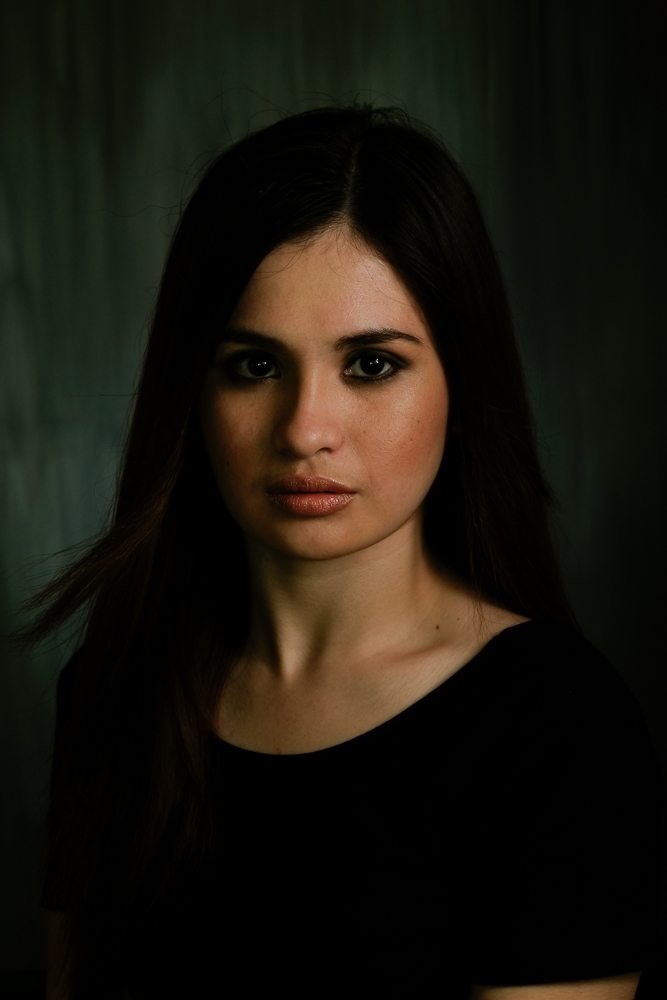
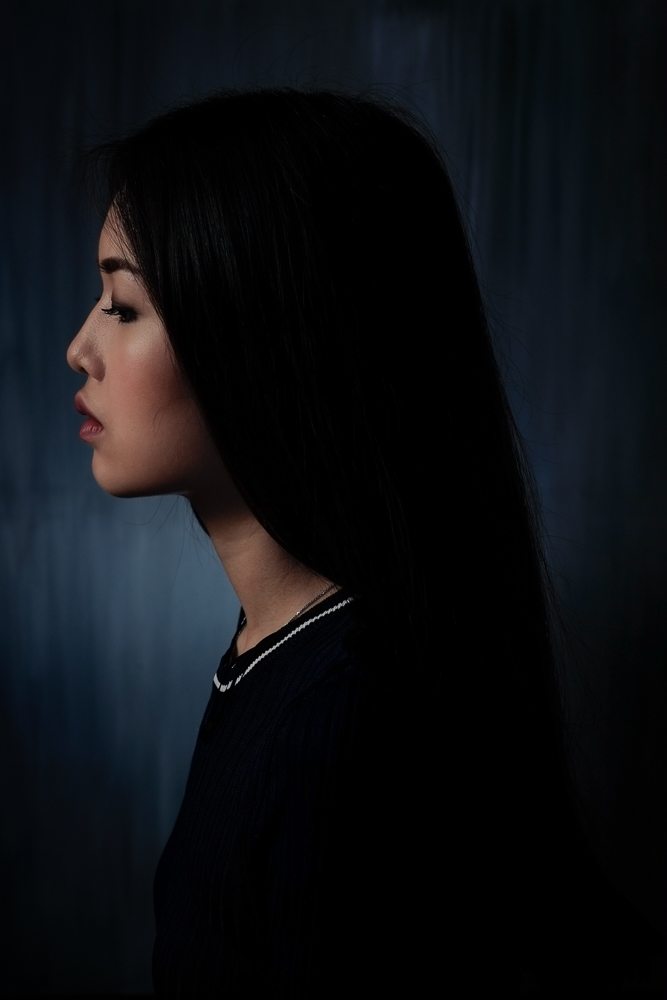
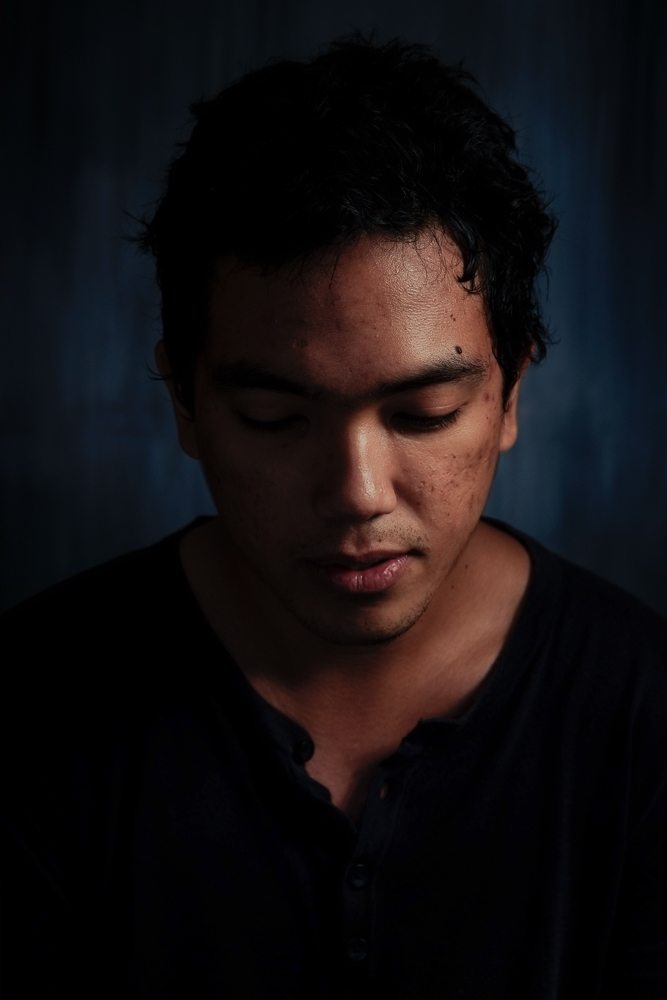
I used 3 flashes to light these portraits. The key light is shot through a Westcott Rapid Box Octa. I decided to use the deflector plate with the modifier, but left the front diffusion panel off. As I brought this light close to my subject, it had both a soft and contrasty quality to it. This light is gelled with a warm color (either a 1/4 CTO or a pale pink). I would also flag this light with black foamcore to keep most of the light on the subject’s face. It is positioned about 3 feet away from the subject (at around 45 degrees), a foot or so above eye level, and then angled down.
The fill light is shot through a white shoot-through umbrella. This light is gelled with a cool color (either a 1/4 Tough Plusgreen or a 1/4 Blue CTB). It is positioned behind and slightly above the photographer to act as on-axis fill. I am able to control the depth of the shadows in my image by adjusting the power of this light accordingly.
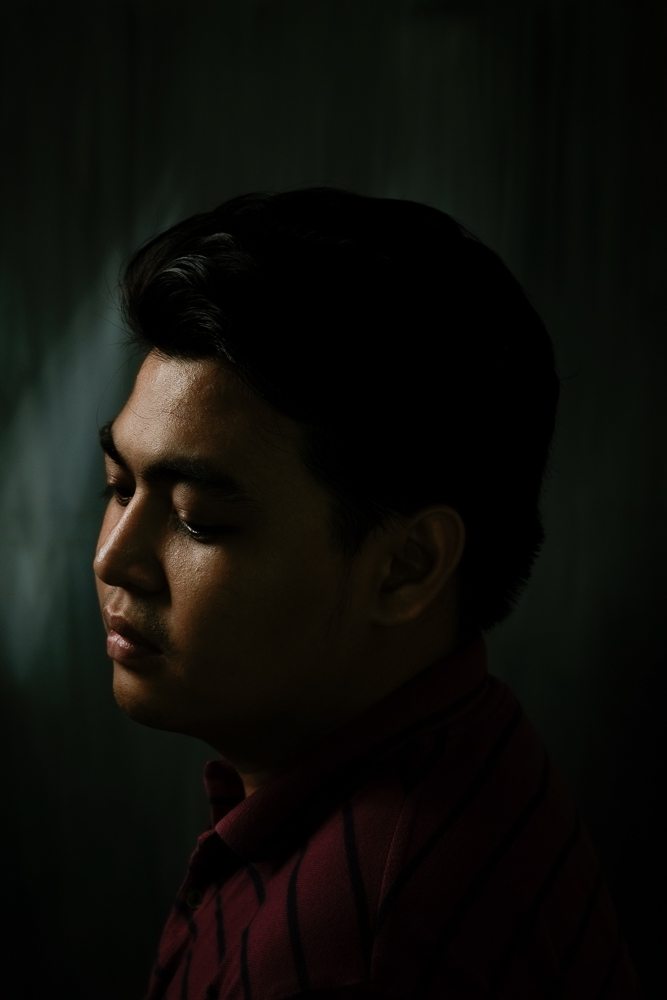
A third light is used to illuminate the background (a custom-painted canvas mounted on a wooden frame). I used gaffers tape to cover parts of the dome diffuser that was attached to the flash to selectively light the surface.
I killed ambient light contribution with a smaller aperture and a shutter speed close to or at my flash sync speed. I built my exposure in the order of fill, background, and finally the key. The angle of the key light reveals the character and features of a subject’s face. It’s not the most flattering, but there is an honest and raw beauty to it.
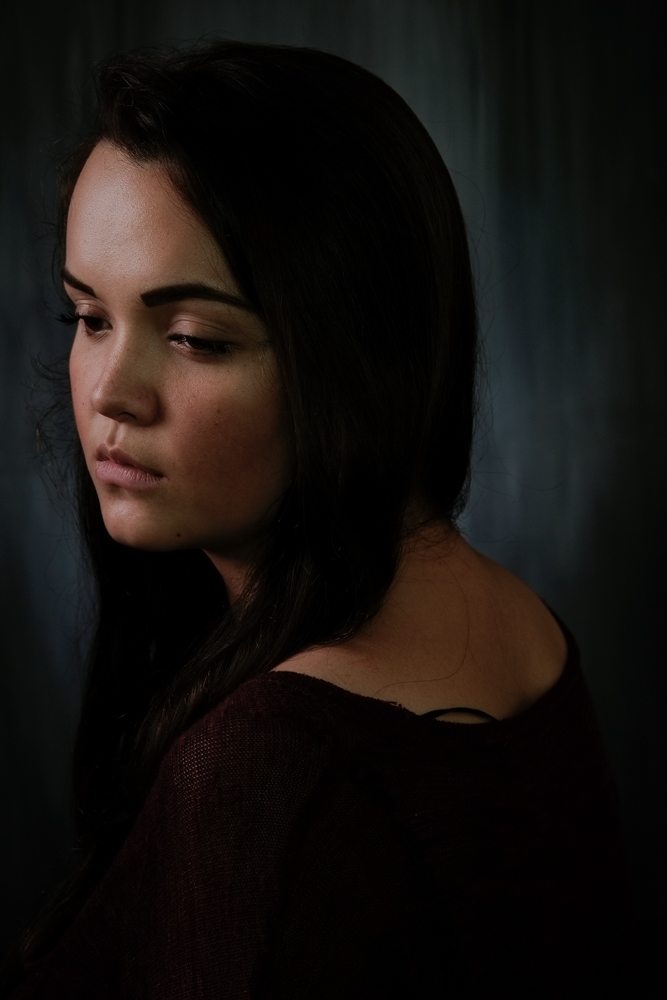
I am proud of how I developed and executed the lighting for this series. First, there’s the color contrast between the key and the fill. Pushing a warm color onto a cooler one and allowing them to complement each other as they mix. Second, I was able to achieve this unique look with relatively meager equipment (Yongnuo Speedlites, Cactus V5 triggers, Rosco gels and the modifiers mentioned). Third, as I don’t have my own studio to work out of, the whole setup is actually portable. It’s not very convenient as I still have to carry a lot of stuff, but this means I could set up and shoot even in small spaces (which is what I had to work with often).

Get rid of the ads!
Did you enjoy reading this article as much as we enjoyed writing it? There's a way to support us and our reporting, getting ad-free navigation and more as a bonus. Subscribe to us for less than a coffee per month —just $3.99— or take advantage of our yearly subscription with a hefty discount for only $25.- An ad-free experience
- A free mystery box for Lightroom or Capture One
- All the books in our store
- 20% discount on Capture One
- 30% discount on Imalume Photo Theft Protection
- 20% off Herbs and Kettle Tea Company.
- 20% off your order from MPIX printing services.
- 5% off Viltrox Products via their eCommerce store.
- 10% off all film developing, printing and scanning services from Blue Moon Camera and Machine
- 15% off 7Artisans products: The lens and accessory maker is offering a sweet discount for Phoblographer's readers.