
Last Updated on 05/26/2016 by Chris Gampat
Creating the Photograph is an original series where photographers teach you about how they concepted an image, shot it, and edited it. The series has a heavy emphasis on teaching readers how to light. Want to be featured? Email chrisgampat[at]thephoblographer[dot]com.
Photographer Jason D. Page is a light painter who has been shooting since 2004; and in order to create the “Lady of the Lake” image for this series, he needed an eight minute exposure. He typically lights scenes by taking a light and painting very carefully–which can be very tough to do. In fact, Jason owns LightPaintingPhotography.com.
Here’s his story.
The Concept
This image is called Lady of The Lake 2, the concept for this image was to create a fantasy type scene of one of mother nature’s guardians. For this series I imagine that these mythical watchers come in the middle of the night to care for the earth, when no one is around.
The Gear
Camera:
Canon 60D
Tokina 11-16mm f2.8
Neewer Intervalometer
Tripod:
Vanguard SBH100 Ball Head Alta Pro 263AT Sticks
Light Painting Tools
Coast G26 Flashlight
Light Painting Brushes Universal Connector
Light Painting Brushes Cone and Color Filter Set Light Painting Brushes Feather Plexiglass Attachment
Extras:
Bug Suit
Lots of Bug Spray Coast Headlamp
The Shoot
This image was created in a mangrove swamp area near Jupiter, Florida. The water in this location is brackish so there was no real concern for alligators like there is in the fresh water lakes of South Florida. The settings for this shot were ISO 100, F5.6, shooting on bulb mode. The exposure time for this image ending up being exactly 8 minutes.

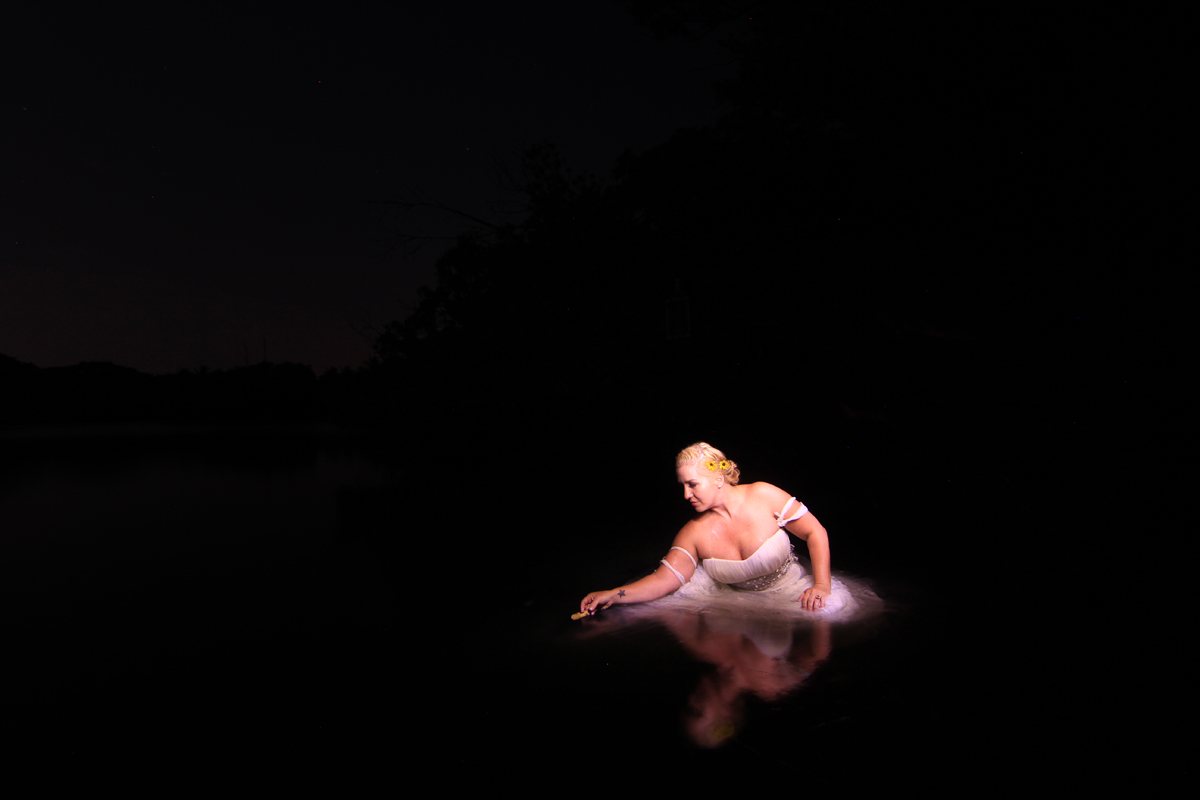
The biggest challenge about this night, and every night shooting in South Florida, were the bugs. The mosquitos in this area are really bad, the model had to be covered in bug spray to make the night bearable. Because all my work is illuminated by hand she had to remain as still as possible for the entire 8 minutes of this exposure even with the bugs biting. I get the advantage of wearing a full bug suit when I am shooting, however for this particular night it proved to be a burden because to get the angle I wanted I ended up getting into the water nearly up to chest level so my bug suit was soaked, heavy and difficult to work in.
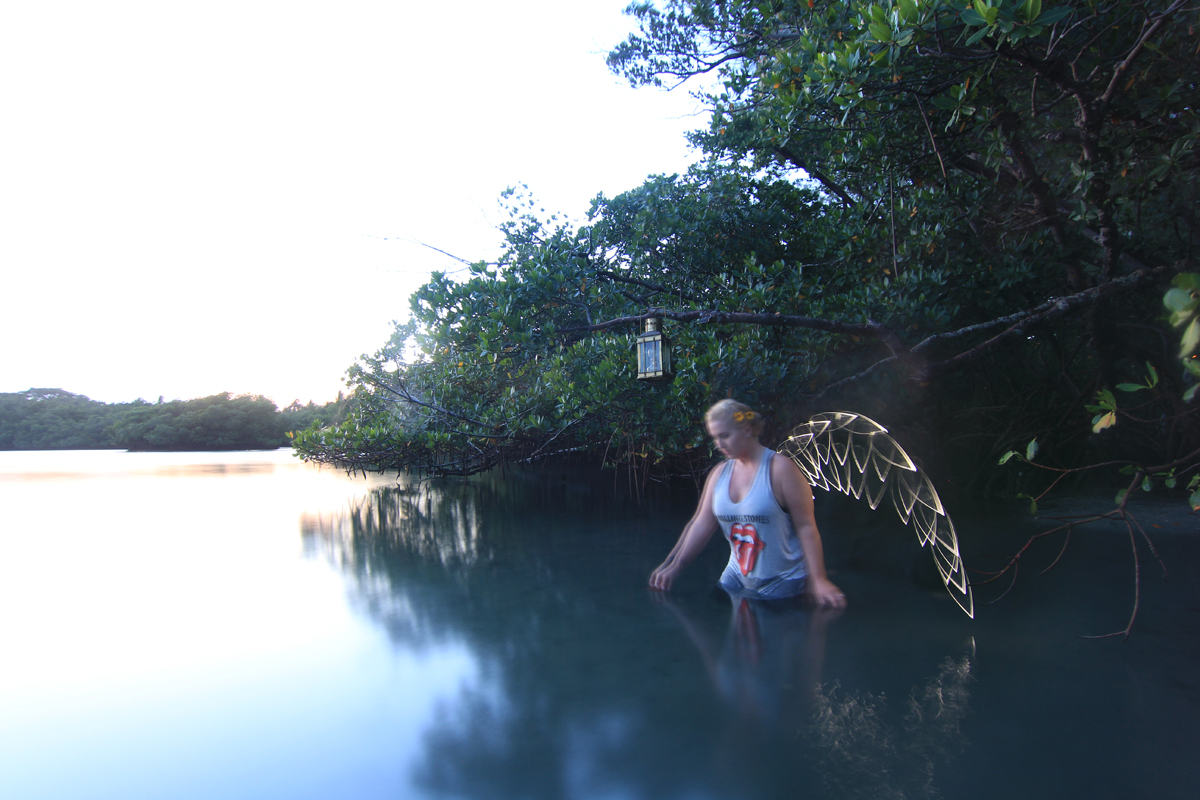
A lighting diagram of this image would show me moving all around in the scene for the entire 8 minutes of the exposure. My light painting work is all lit using handheld light sources as I am moving throughout the scene. Just after the sun goes down I started to workout the colors and light tools that I was going to use. First I worked on creating the wings

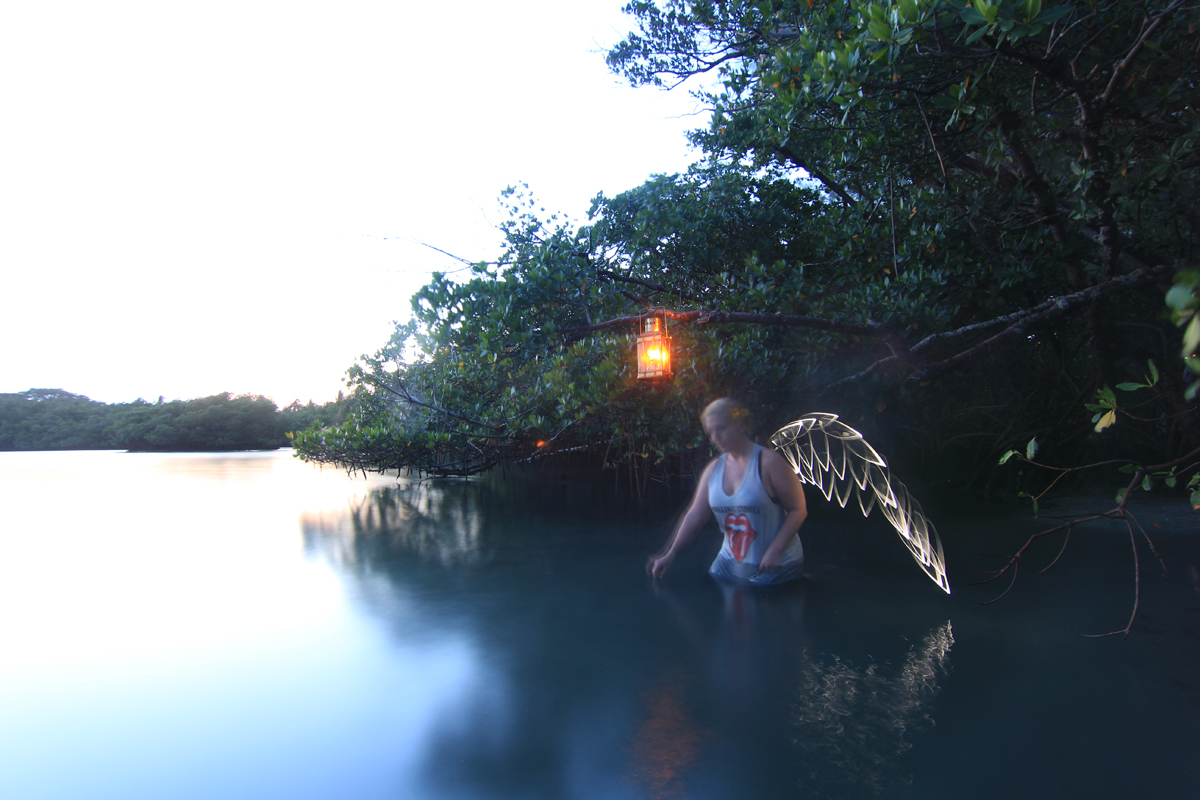
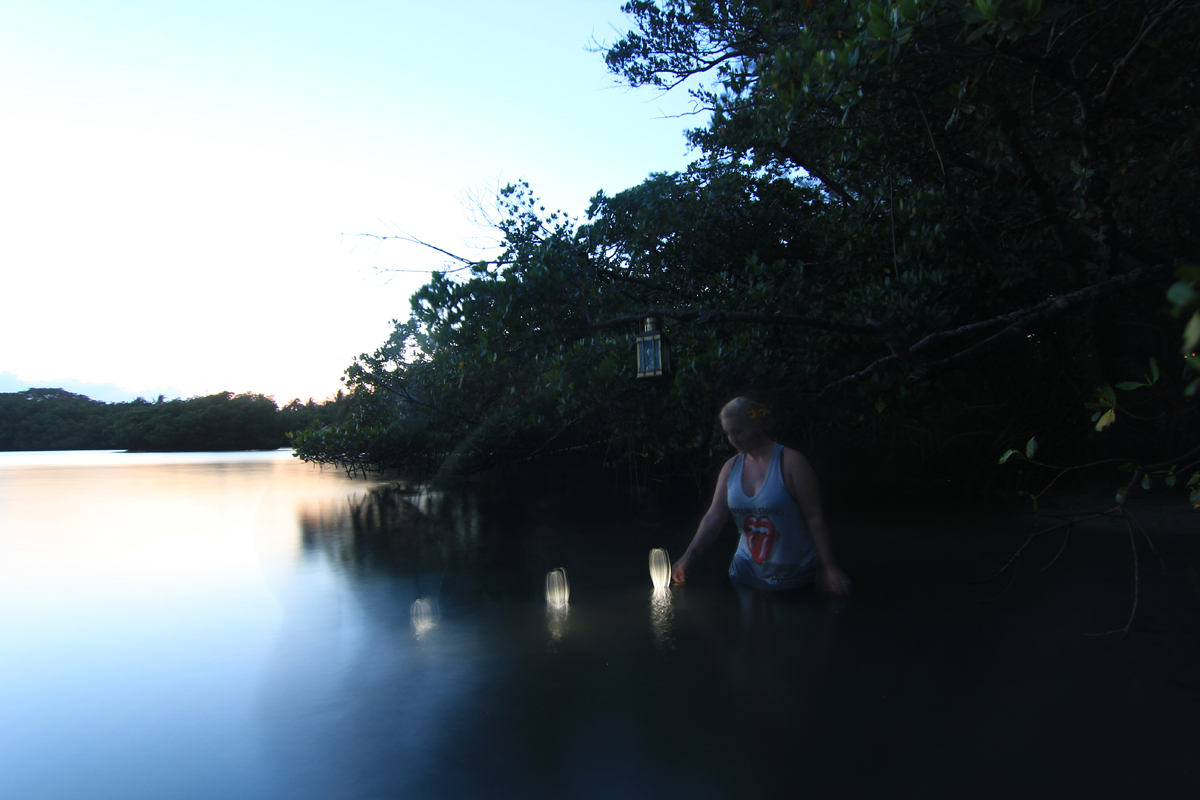
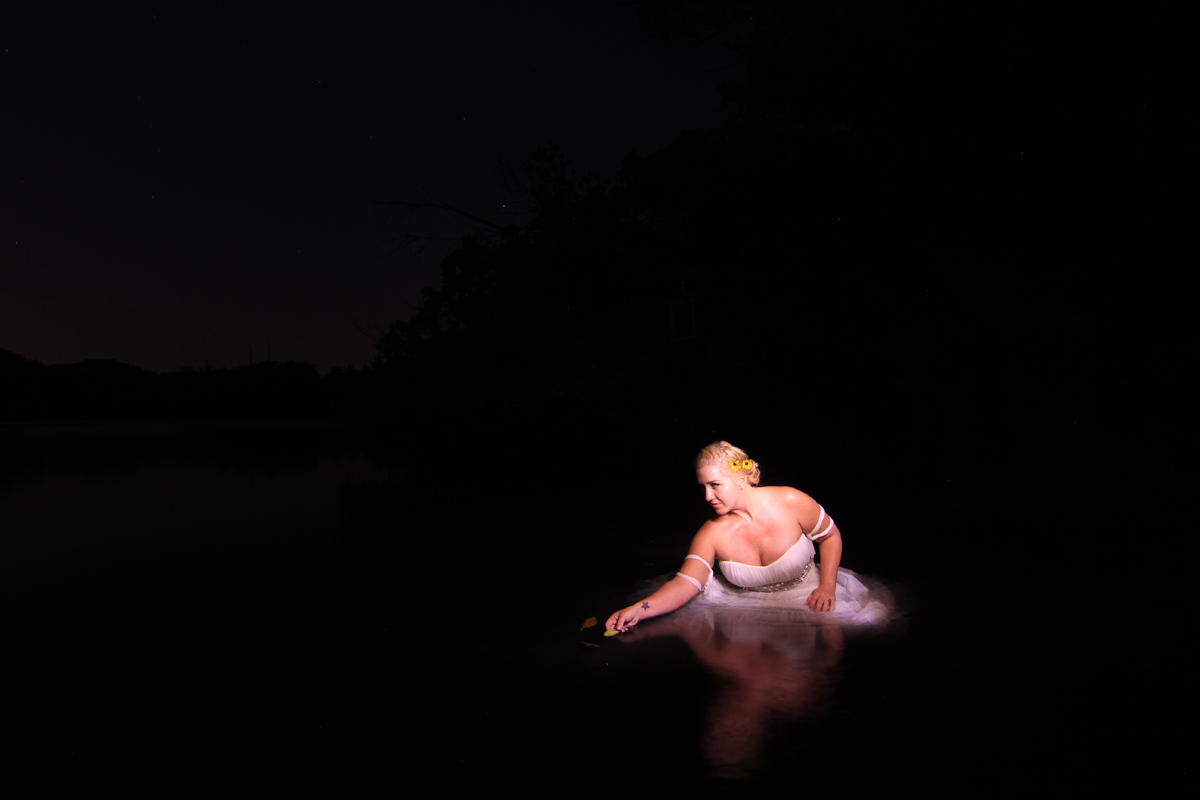
Once I felt like I had a handle on how I wanted to create the wings I began to work on the colors and textures of additional elements in the scene like illuminating the lantern and creating the object she is releasing into the water.
Then it was onto finding the right colors to paint the model with and finding a pose that worked for the image and was comfortable for her to hold for the entire length of the exposure.
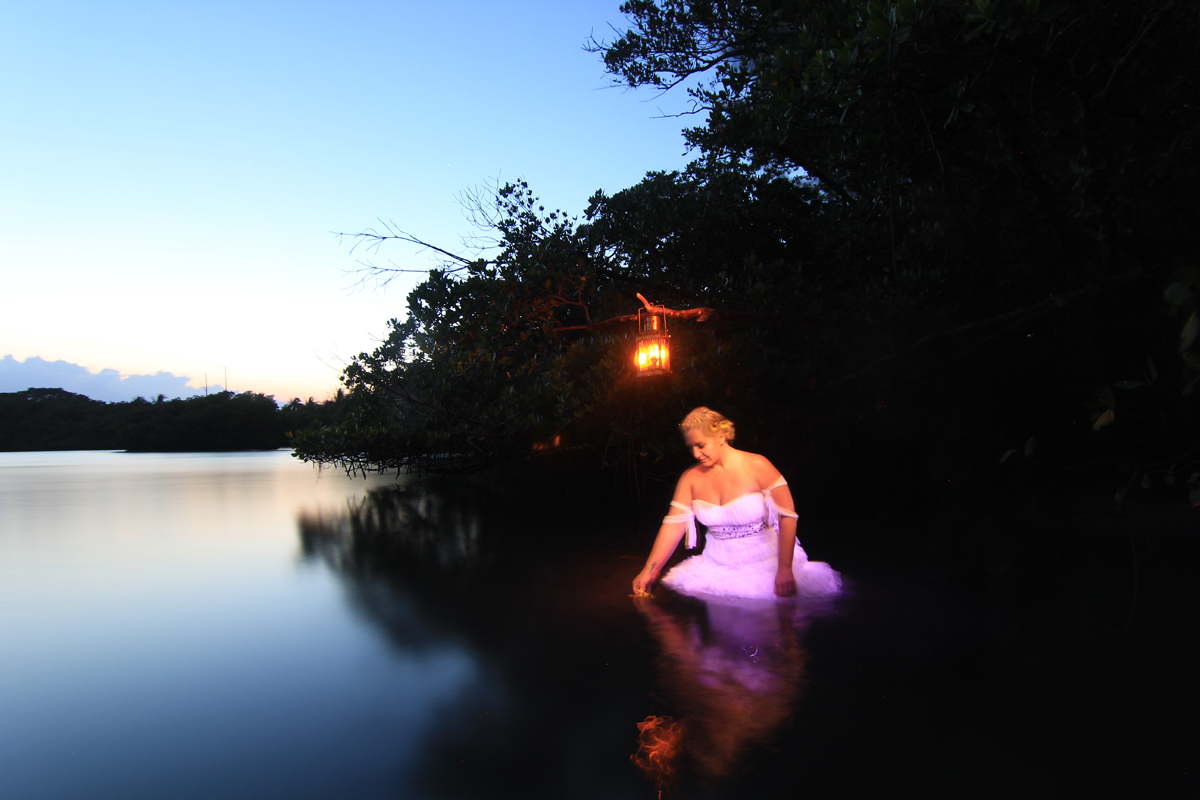
Once I had all that worked out it was plenty dark enough to try to bring it all together in one single exposure. I took about 25 exposure for me to get this one I was happy with. Here is a video tutorial I made showing how to create wings like these:
Light Painting Tutorial: Wings from Light Painting Photography on Vimeo.
Post-Production
Post production in my all my light painting work is very minimal, if used at all. I always try to get the image as close to how I envisioned it in camera. Nothing against PS I just like to try and figure it out while I am shooting. I enjoy the challenge of creating effects in real time, in the camera, that people often think are created on a computer.
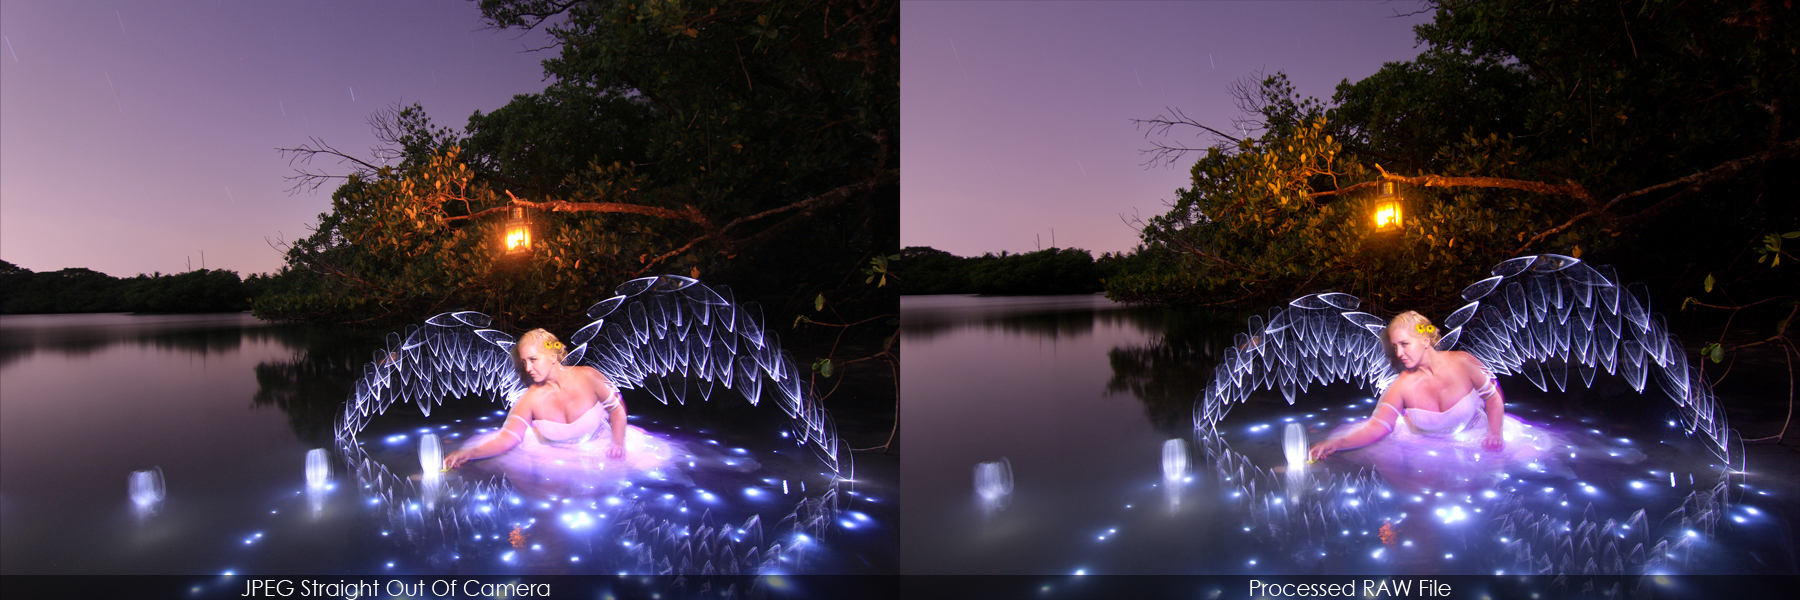
Here is the side by side comparison of the SOOC Jpeg and the final processed Raw file, as you can see it has pretty minimal processing.
Get rid of the ads!
Did you enjoy reading this article as much as we enjoyed writing it? There's a way to support us and our reporting, getting ad-free navigation and more as a bonus. Subscribe to us for less than a coffee per month —just $3.99— or take advantage of our yearly subscription with a hefty discount for only $25.- An ad-free experience
- A free mystery box for Lightroom or Capture One
- All the books in our store
- 20% discount on Capture One
- 30% discount on Imalume Photo Theft Protection
- 20% off Herbs and Kettle Tea Company.
- 20% off your order from MPIX printing services.
- 5% off Viltrox Products via their eCommerce store.
- 10% off all film developing, printing and scanning services from Blue Moon Camera and Machine
- 15% off 7Artisans products: The lens and accessory maker is offering a sweet discount for Phoblographer's readers.