Creating the Photograph is an original series where photographers teach you about how they concepted an image, shot it, and edited it. The series has a heavy emphasis on teaching readers how to light. Want to be featured? Email chrisgampat[at]thephoblographer[dot]com.
Photographer Tim Conzachi has quite a mesmerizing creative vision when it comes to his more conceptual work involving beauty, strobism, and creativity. While in the military, he got into photography–but after a medical injury he retired in 2010. So he went back to school–but nothing felt as fulfilling to him as photography did.
“I had this itch to create and while I was never a great physical artist (I can barely draw a stick figure), my mind was flowing with artistic ideas that I knew I could only create photographically.” Tim states.
So in 2015 he made photography his full time business. These days, he shoots weddings, families, portraits and events (with his camera of course!) But he’s also all about commercial and landscape work over in Reno, NV where he lives.
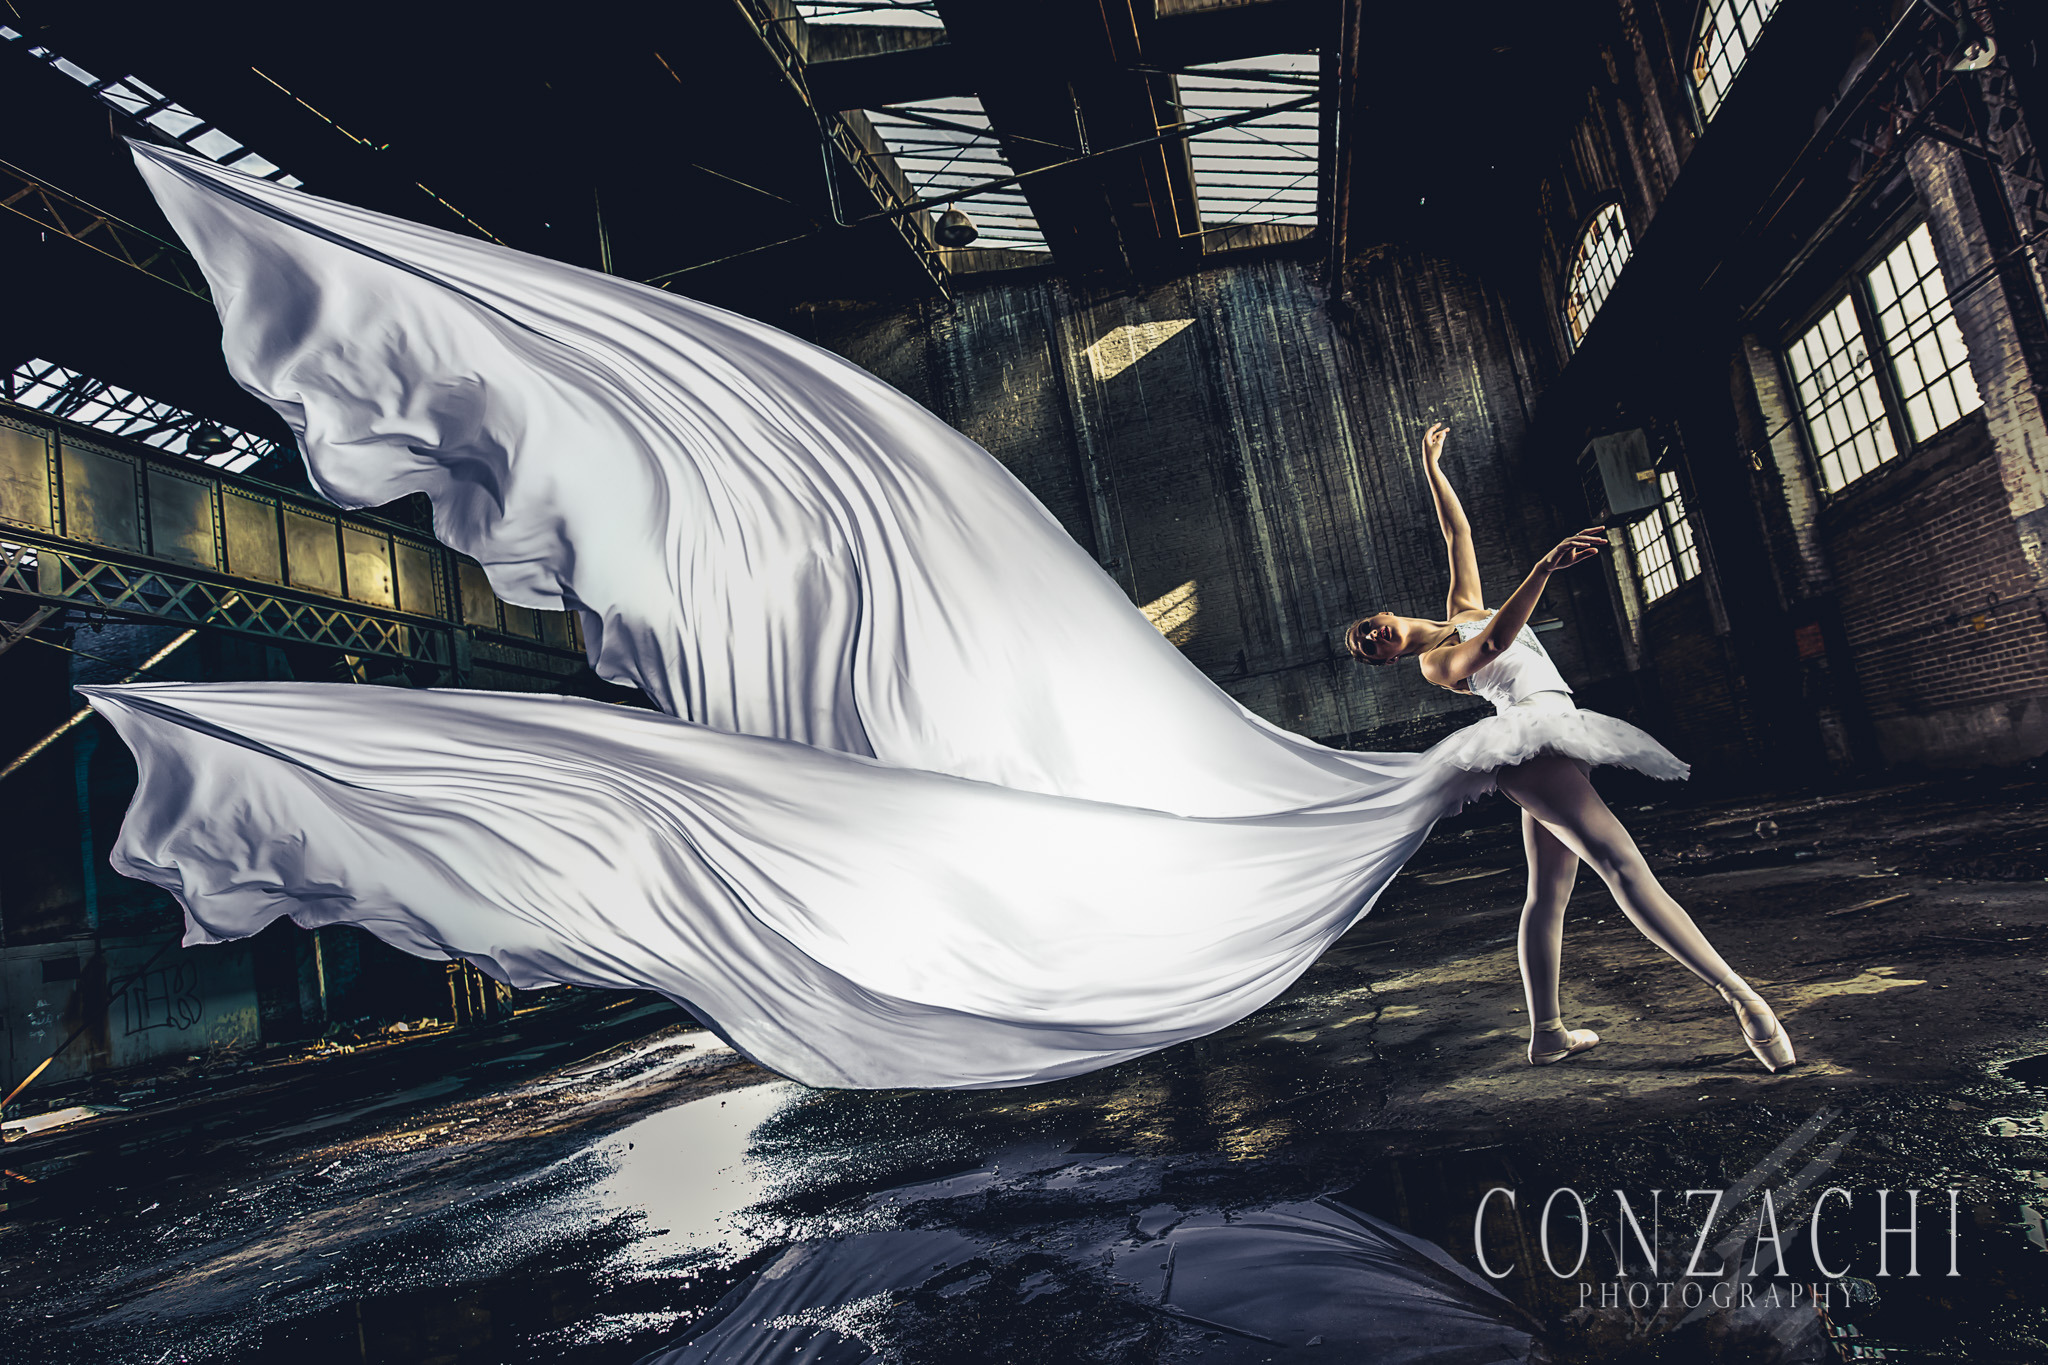
When he emailed the Phoblographer about being featured, his ballet image completely took my breath away.
Here’s his story.
The Concept
I wanted to create something abstract in a grungy location, but also beautiful at the same time. I previously did a ballet shoot for a local magazine in Reno (Reno Tahoe Tonight Magazine) and decided to tackle another ballet shoot again, but this time a bit different.
The Gear
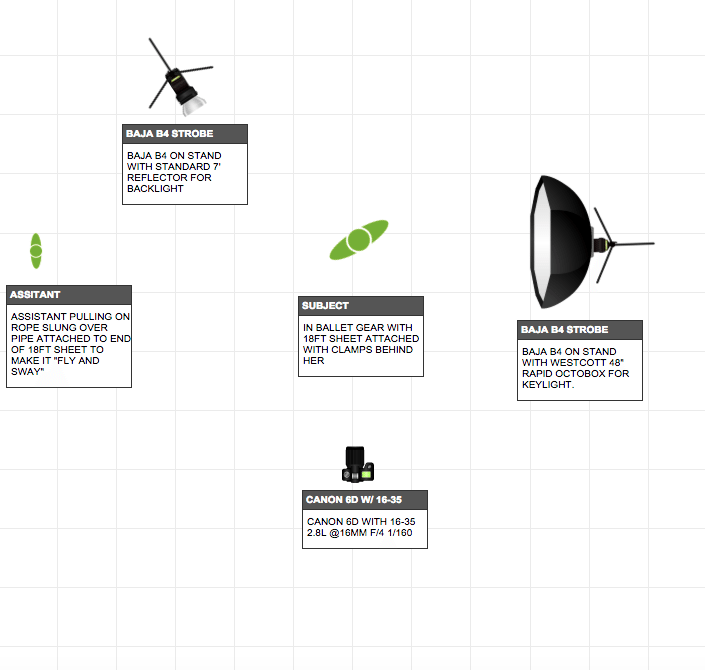
- Canon 6D
- Canon 16-35mm f2.8 L
- 2 Dynalite Baja B4 monolights
- 2 Impact heavy duty light stands (13ft and 9.6ft)
- 1 standard 7 in reflector, and 1 Westcott 48in Rapid Octobox
- Photoshop and Lightroom CC
- 18ft thin white sheet from Walmart
- Pelican 1510 Case w/ dividers, Folding Table, step ladder, rope, cheap clamps
The Shoot
Location
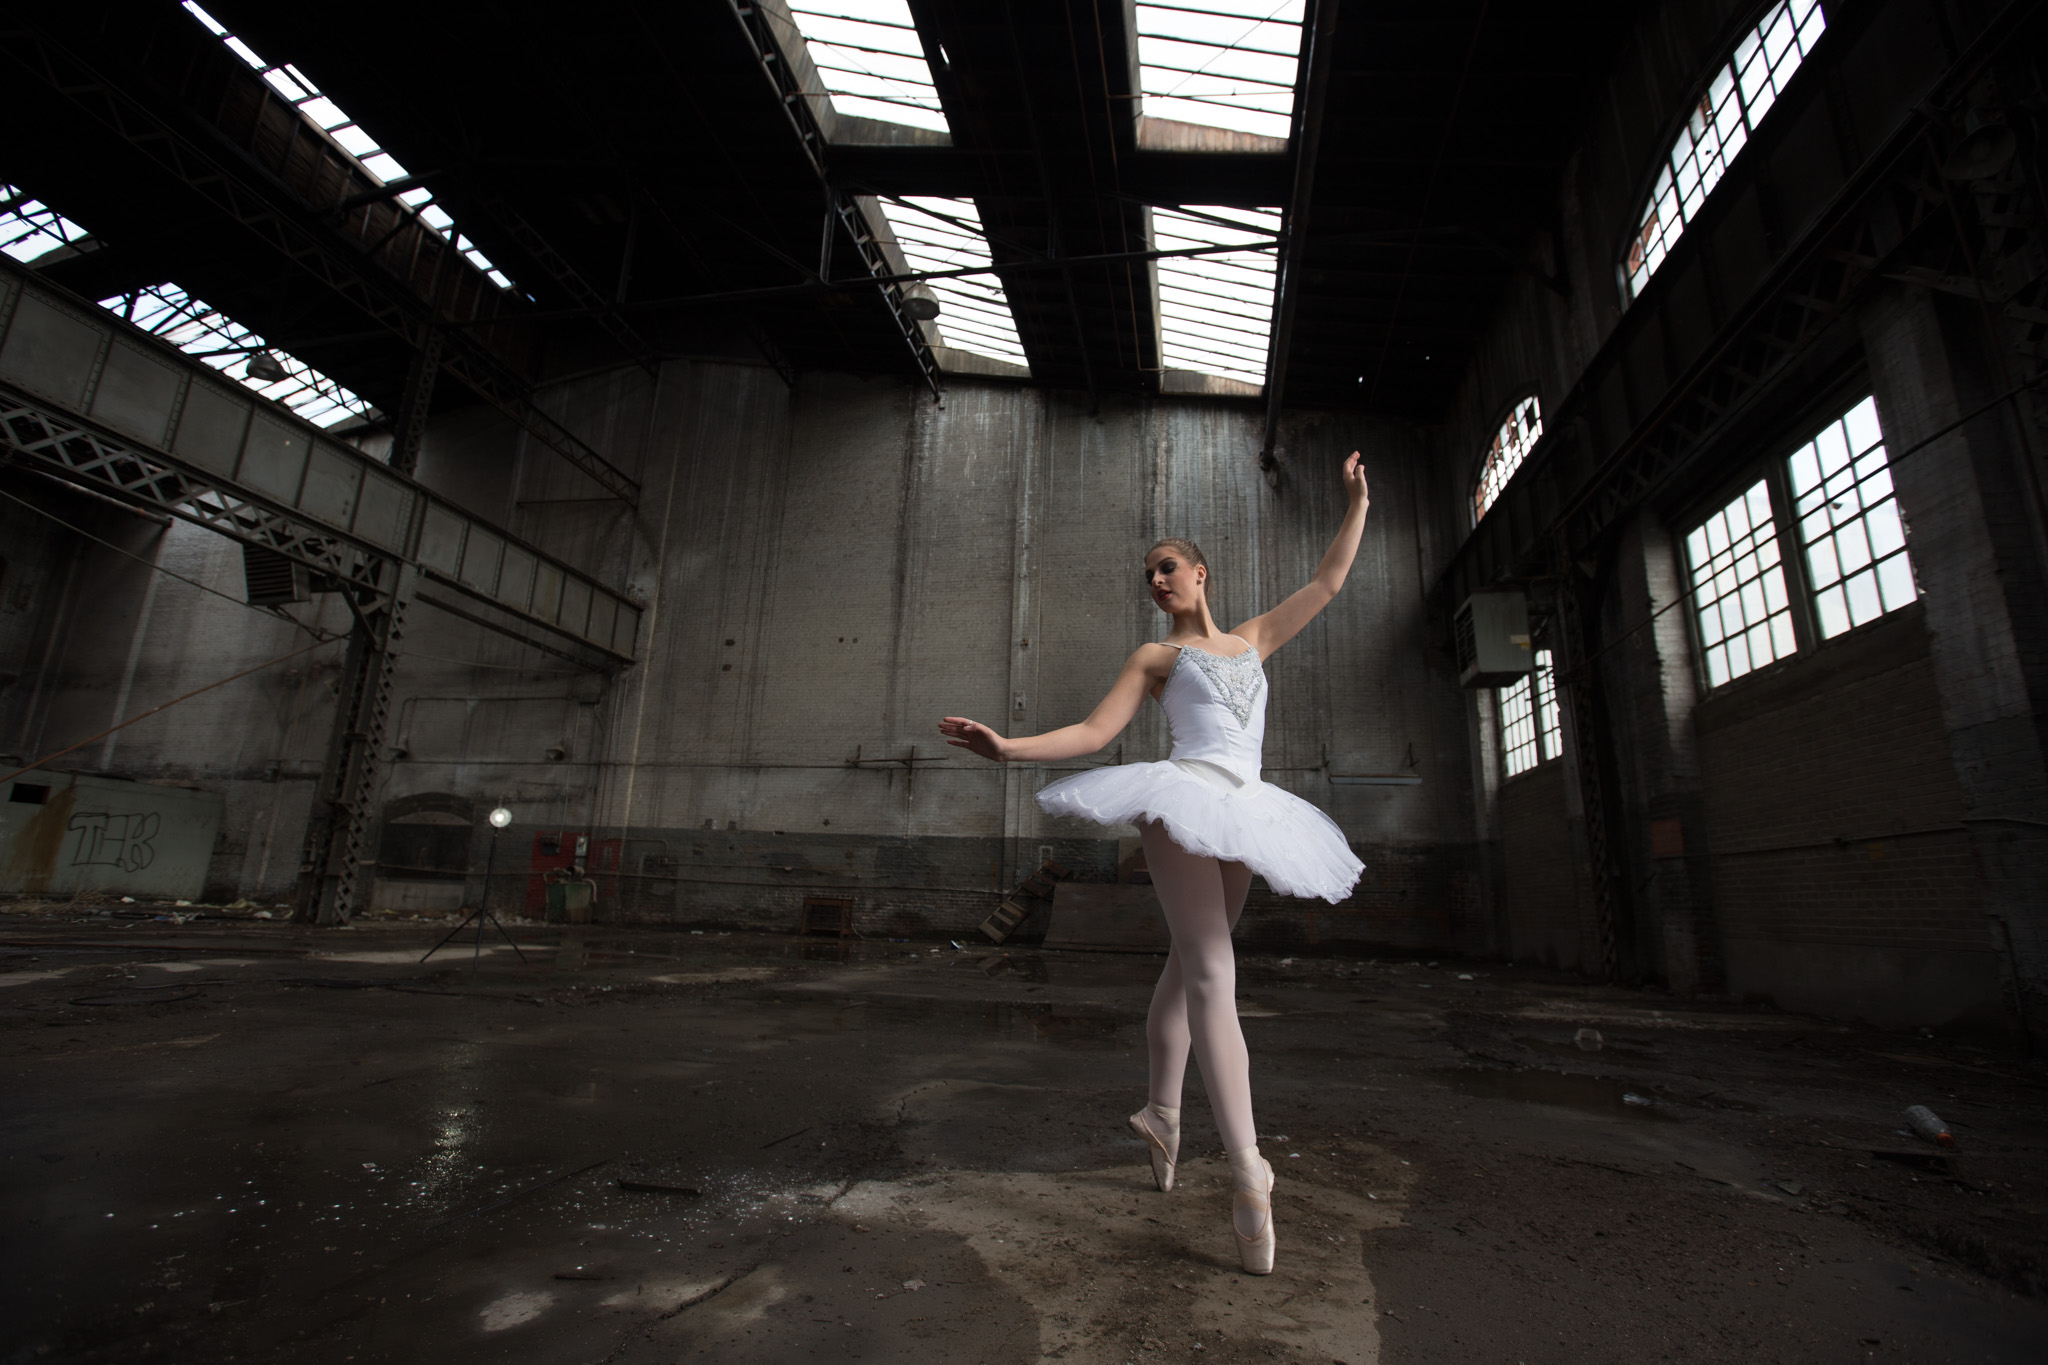
For years I drove by an old building in Reno, NV that is right off of the freeway, and always looked at it and wondered, “what’s in there?”
Finally, after literally 5 years of driving by this place, I decided to take a detour and go check it out. It’s a giant old school brick warehouse with broken windows all around, falling ceilings, dripping pipes, dirty floors, electrical boxes with wires hanging out, and also several remains of hasty campsites inside from squatters and the homeless. It appeared to be abandoned for at least 10 years, maybe even more.
All in all, it was perfect for the shoot that I had in mind. Grungy, dirty, and moody. The perfect place to bring beauty.
Model and Assistant
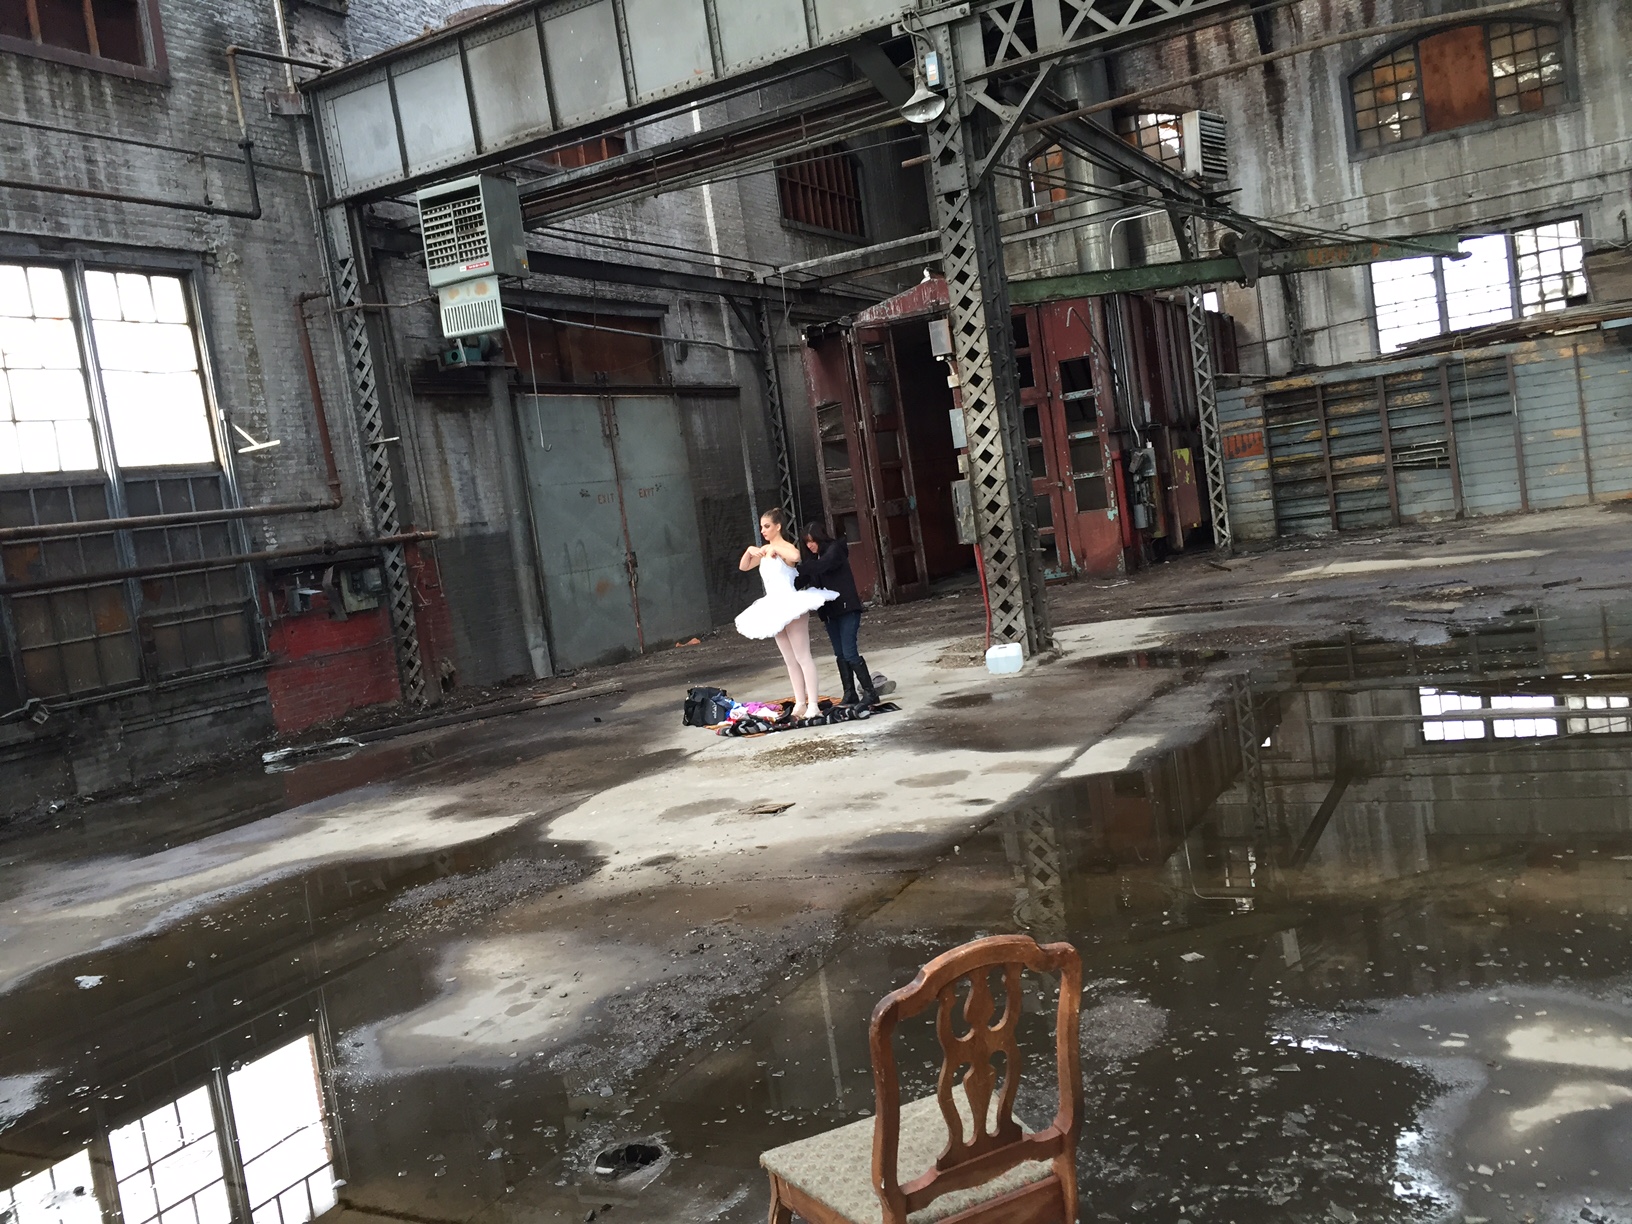
A local professional ballet dancer, Carlee Bertero, who I have worked with a few times before, offered to be my model for this concept. She said she fell in love with the concept, so it was a win win for everyone. My assistant was the beautiful Ms. Talia Ybarra, who helped out immensely!
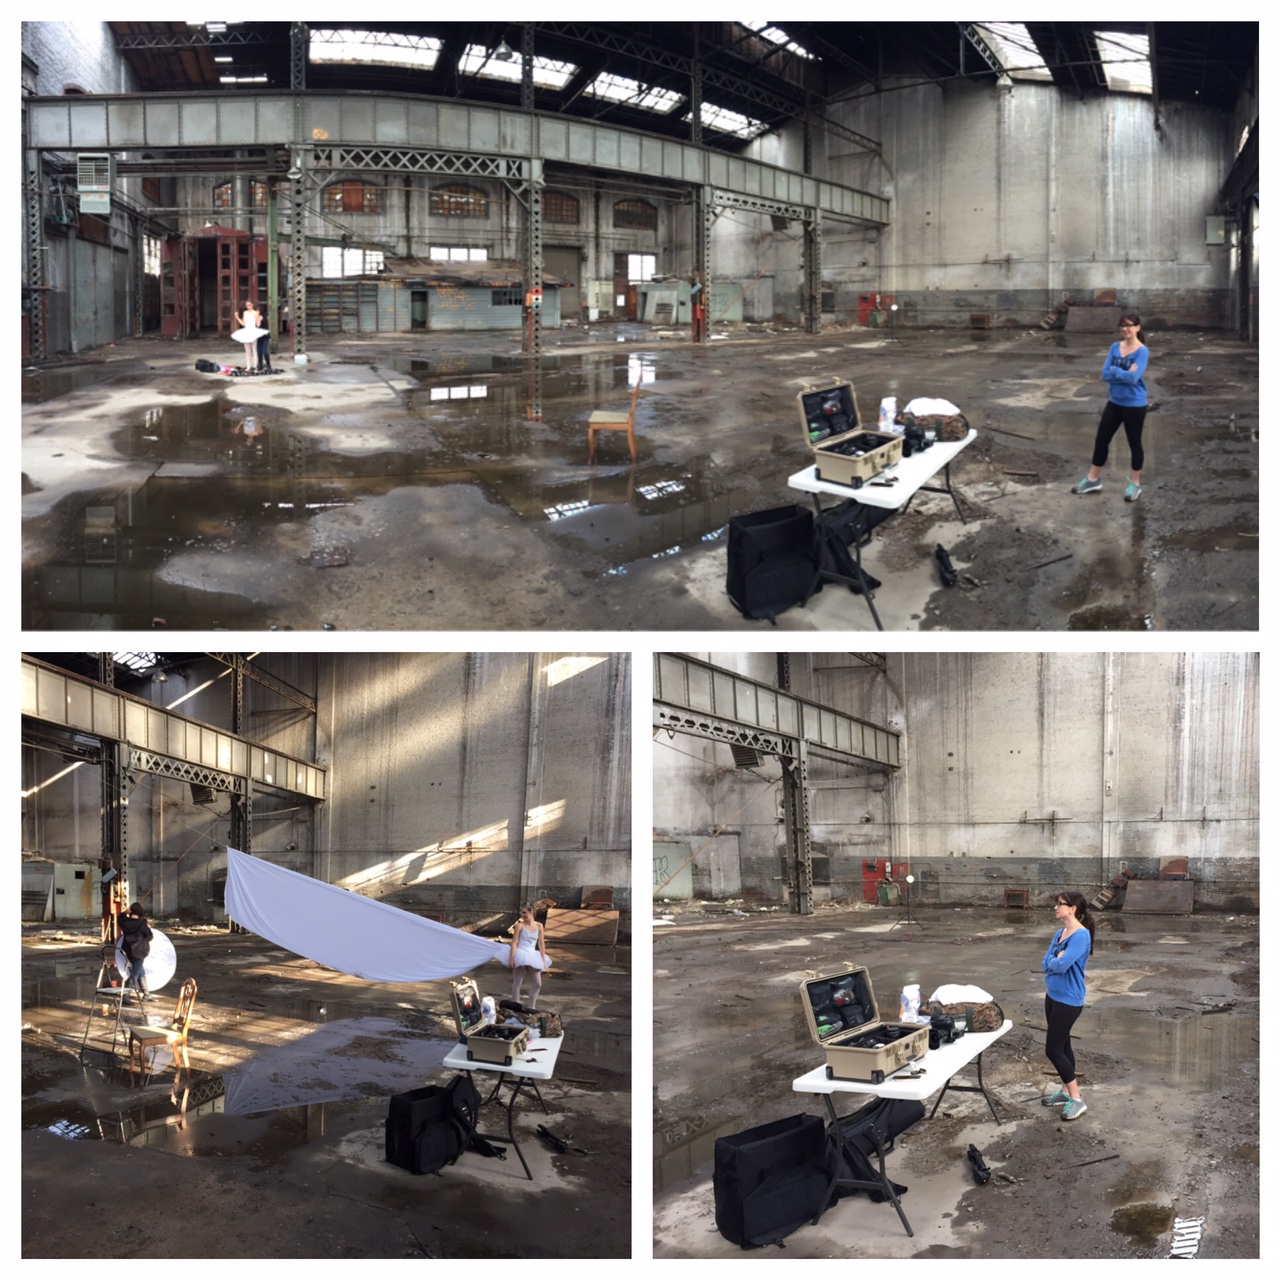
We arrive at the location as scheduled, start unloading gear and getting ready to go inside to setup. Only one problem: it rained the night before! Remember earlier when I mentioned the location having falling ceilings and broken windows? Well yea, that was the perfect location for lots of water to fall into the building and completely soak the floor. And of course the floor was full of dirt and grime, so mixing that with water just created muddy conditions all around. As unfortunate as the water and mud was, it would later create an awesome mirror effect and just add to the overall grunge feeling.
Once we got set up and I started dialing in my camera settings and strobe locations and power, everything started coming together nicely. At first we shot a few test shots, just to get a feel for things and to get the model comfortable(I always do this), then we moved onto building the actual concept.

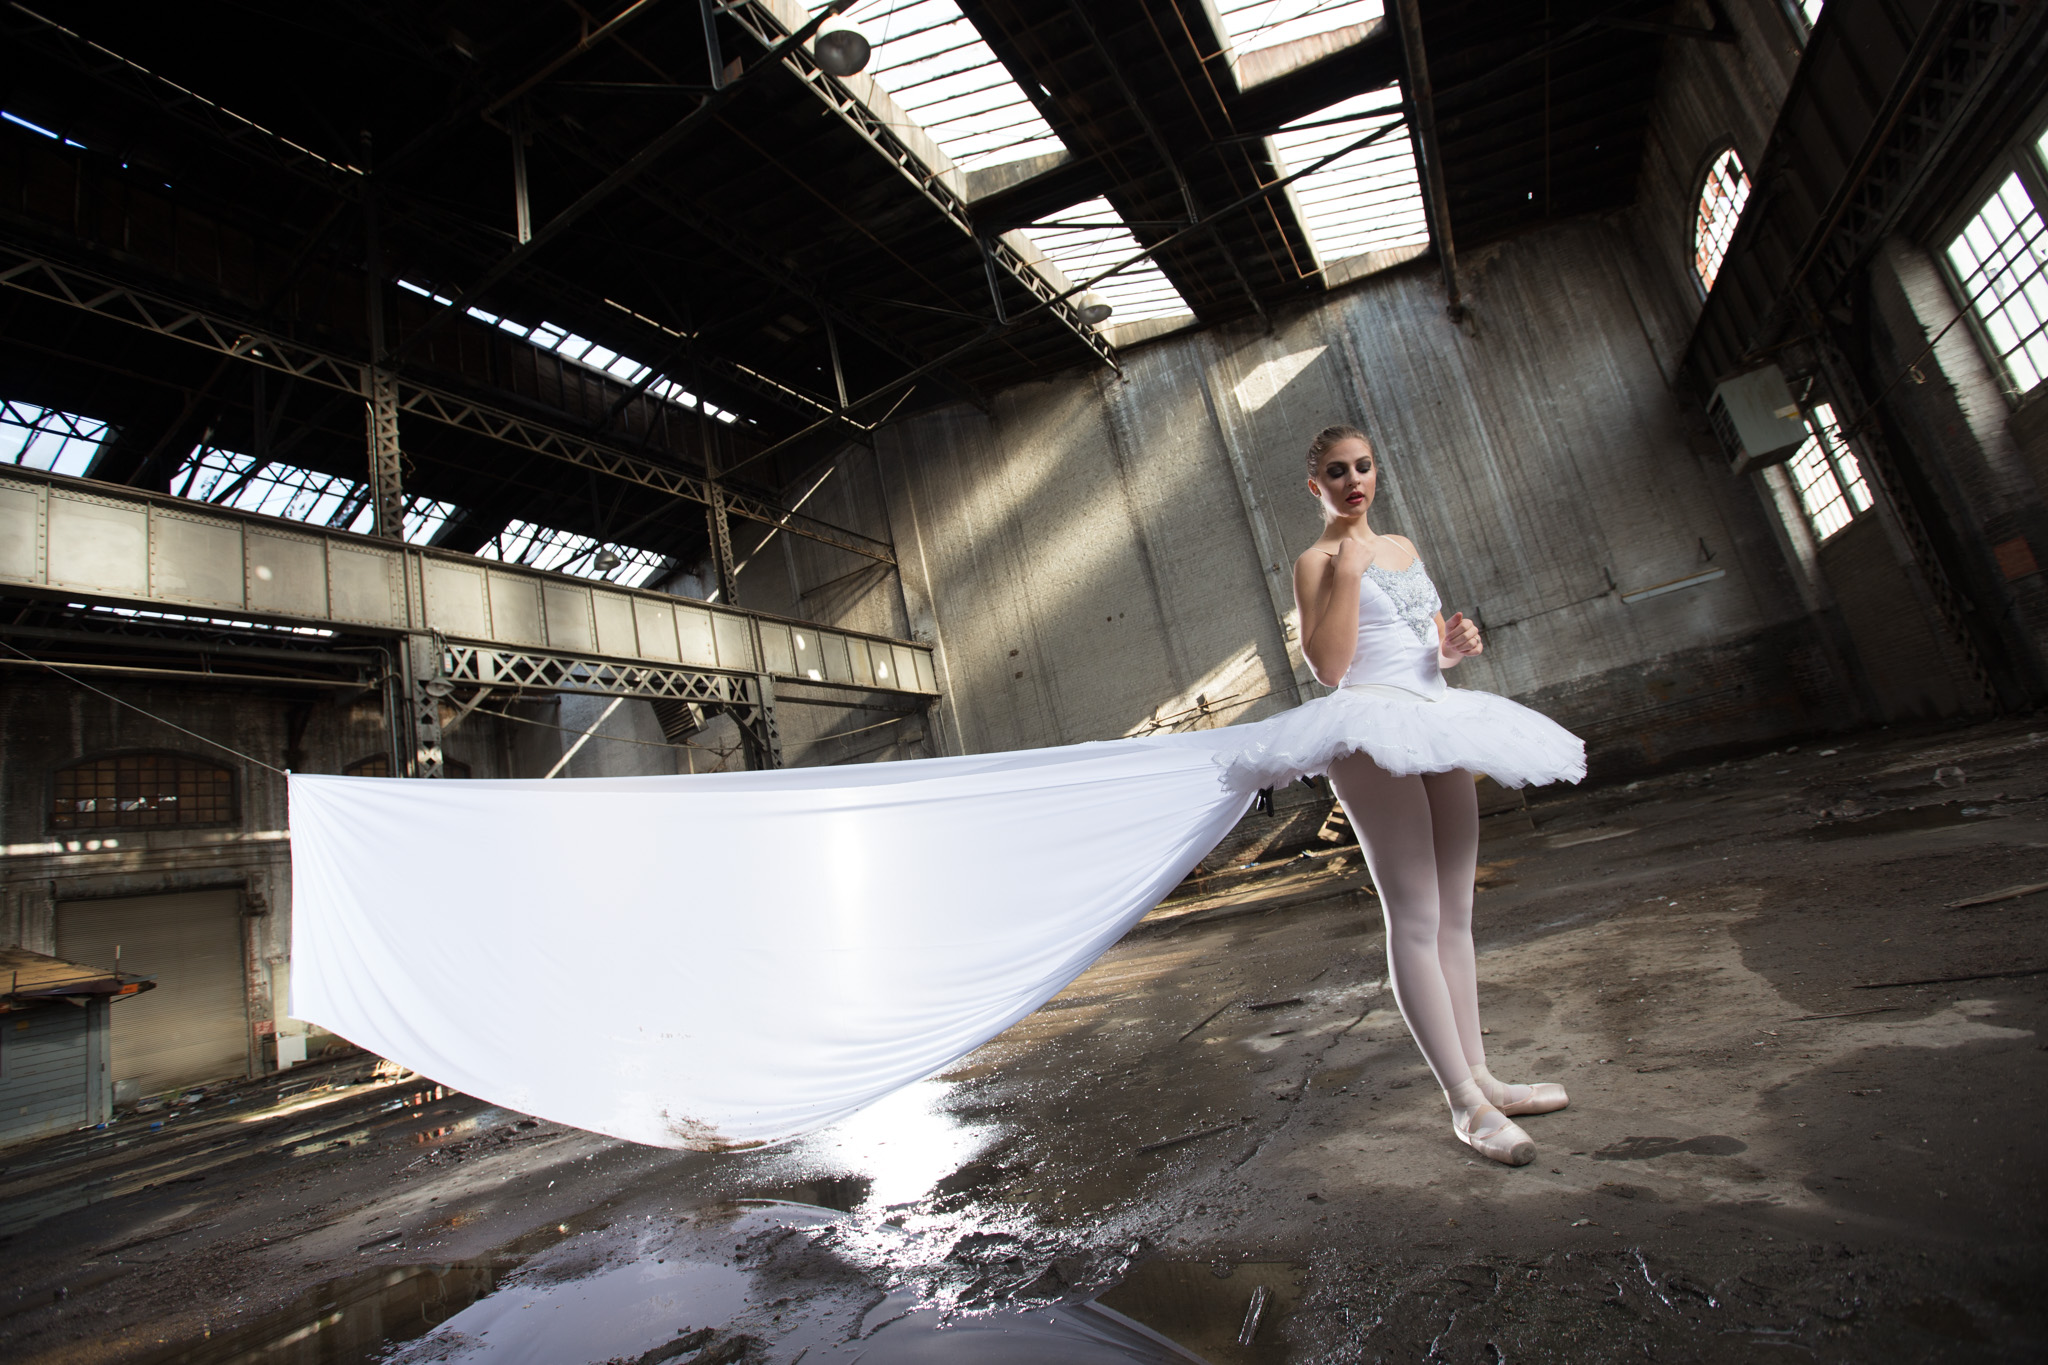
We attached the 18ft white sheet to the back of the model’s tutu with a few clamps. The other free end was held by my assistant. We started by having my assistant just try and wave the material with her hands to see the effect, and then stand on the step ladder to get a higher angle. Trying to keep the clean white sheet off of the dirty ground was nearly impossible. I knew I could just photoshop any dirt out later, but I always like getting as much right in camera as possible so editing time later is minimal.
The sheet just wasn’t flowing like I had hoped. Not getting the effect that I was seeking, I decided to try something hasty and unplanned. I looked around and saw some leaky pipes about 15 feet in the air in the middle of the building and thought to myself, “hmmmm, I could use that if I had some rope.” I remembered that I had a thing of rope in my truck toolbox, so I grabbed it and unrolled it, only to find out that it was shorter than I remembered. But, luckily, it was just long enough. We attached one end of the rope to the free end of the sheet with a simple knot, and threw the other end of the rope over the pipe and down to my assistant(setup 6.jpg). From there I had my assistant yank up and down, kind of like those old church bells where the person yanks up and down on the rope to make the bell ding. This created the perfect flowy and wavy effect that I had hoped for.

After a few different poses, and different techniques of pulling on the rope, we finally got the picture I was looking for.
After that, we were done. We packed it all up and I went home and got to editing.
Post-Production
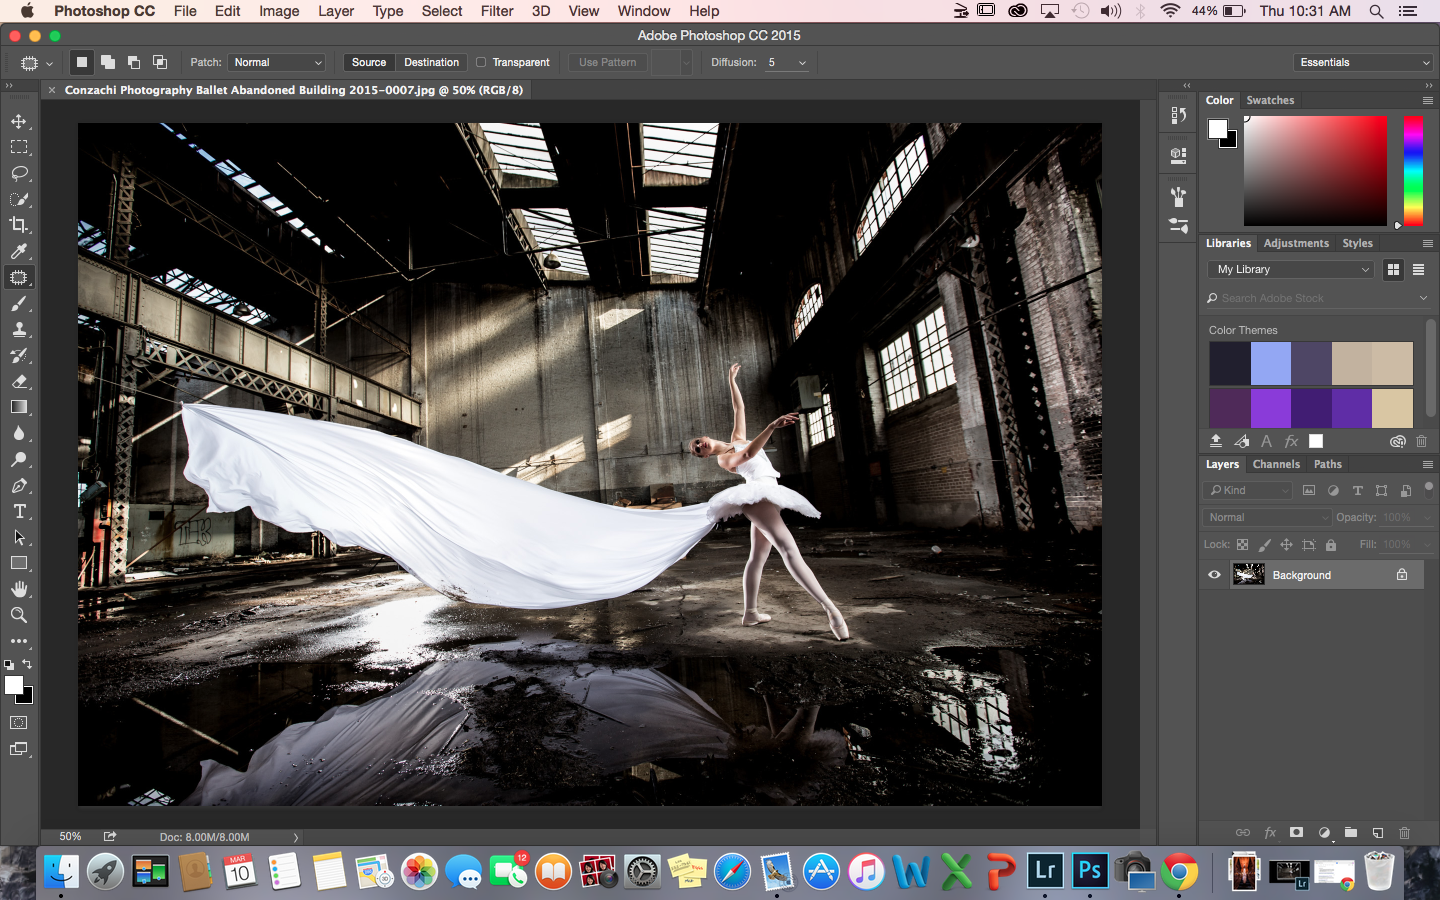
I backed up the photos, and selected the final image to begin the editing process. I started off with the basic edits of exposure, shadows and highlights, color temp, etc. then moved onto the deeper and more in depth editing of cloning, dodge and burn, etc.
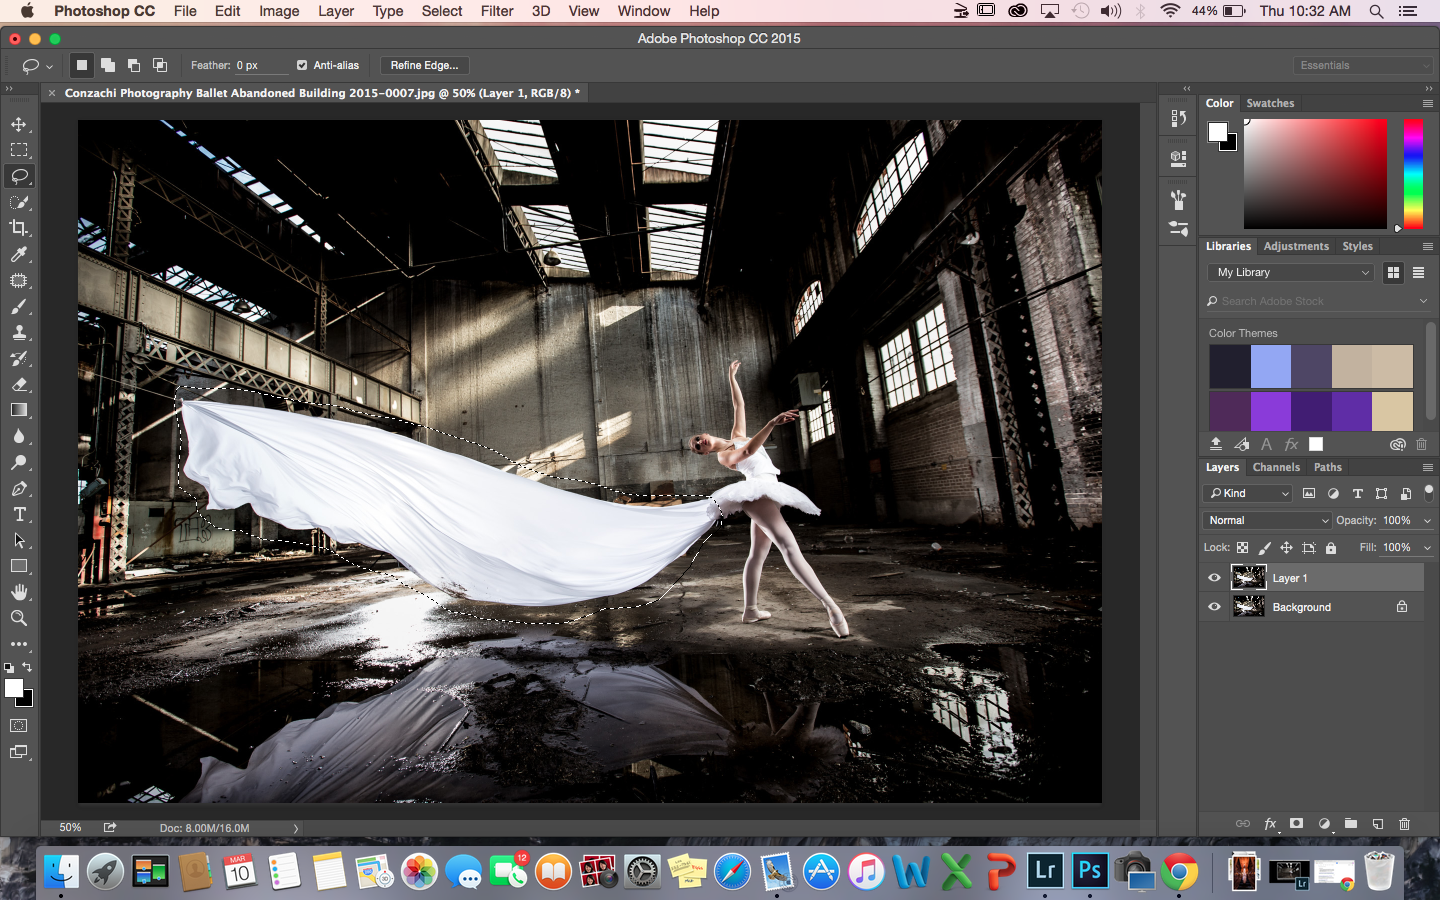
During the editing process, I became increasingly unhappy with the photo. Something was missing. It just wasn’t “enough” for me. So I studied the image for a few minutes, going back and forth with different ideas, and POOF it came to me. There was a large blank area above the model and the sheet, the kind of space where you just get lost and lose attention to the main focus of the image. I decided to do a rough cut out and copy the sheet to make another one and give the appearance of more sheet visible than was really there.
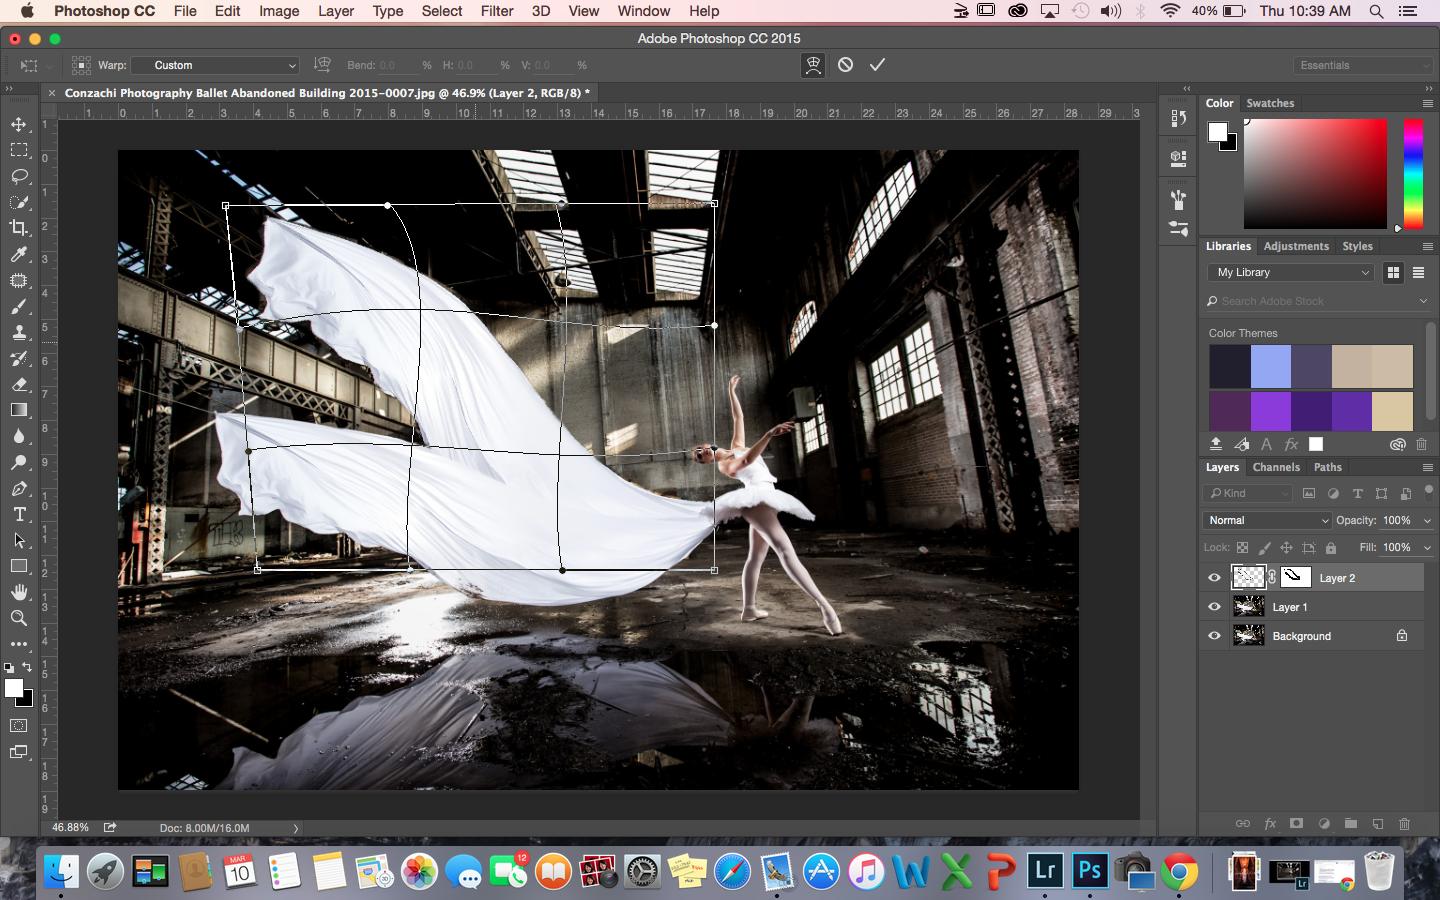
After the sheet was copied, I simply rotated it up a bit(editing 4.jpg). Then it was simply a task of masking out the parts of the sheet that I obviously didn’t want in the photo(editing 5.jpg, editing 6.jpg) and then warped it a little bit so as not to appear like the same sheet as the original(editing 7.jpg, editing 8.jpg). Finally, finished it off with some cloning to get rid of the visible rope(editing 9.jpg) and some color grading adjustments.
Ultimately, I was very happy with the final photo.
Get rid of the ads!
Did you enjoy reading this article as much as we enjoyed writing it? There's a way to support us and our reporting, getting ad-free navigation and more as a bonus. Subscribe to us for less than a coffee per month —just $3.99— or take advantage of our yearly subscription with a hefty discount for only $25.- An ad-free experience
- A free mystery box for Lightroom or Capture One
- All the books in our store
- 20% discount on Capture One
- 30% discount on Imalume Photo Theft Protection
- 20% off Herbs and Kettle Tea Company.
- 20% off your order from MPIX printing services.
- 5% off Viltrox Products via their eCommerce store.
- 10% off all film developing, printing and scanning services from Blue Moon Camera and Machine
- 15% off 7Artisans products: The lens and accessory maker is offering a sweet discount for Phoblographer's readers.