Creating the Photograph is an original series where photographers teach you about how they concepted an image, shot it, and edited it. The series has a heavy emphasis on teaching readers how to light. Want to be featured? Email chrisgampat[at]thephoblographer[dot]com.
Photographer Brandon Cawood is behind a series called “When I Grow Up” that showcases children in their future jobs by use of photography and green screen effects. Specifically, it features 5th graders. He found the class because his sister Malisa teaches them and there was a career week at the school where folks would come in and talk about their jobs.
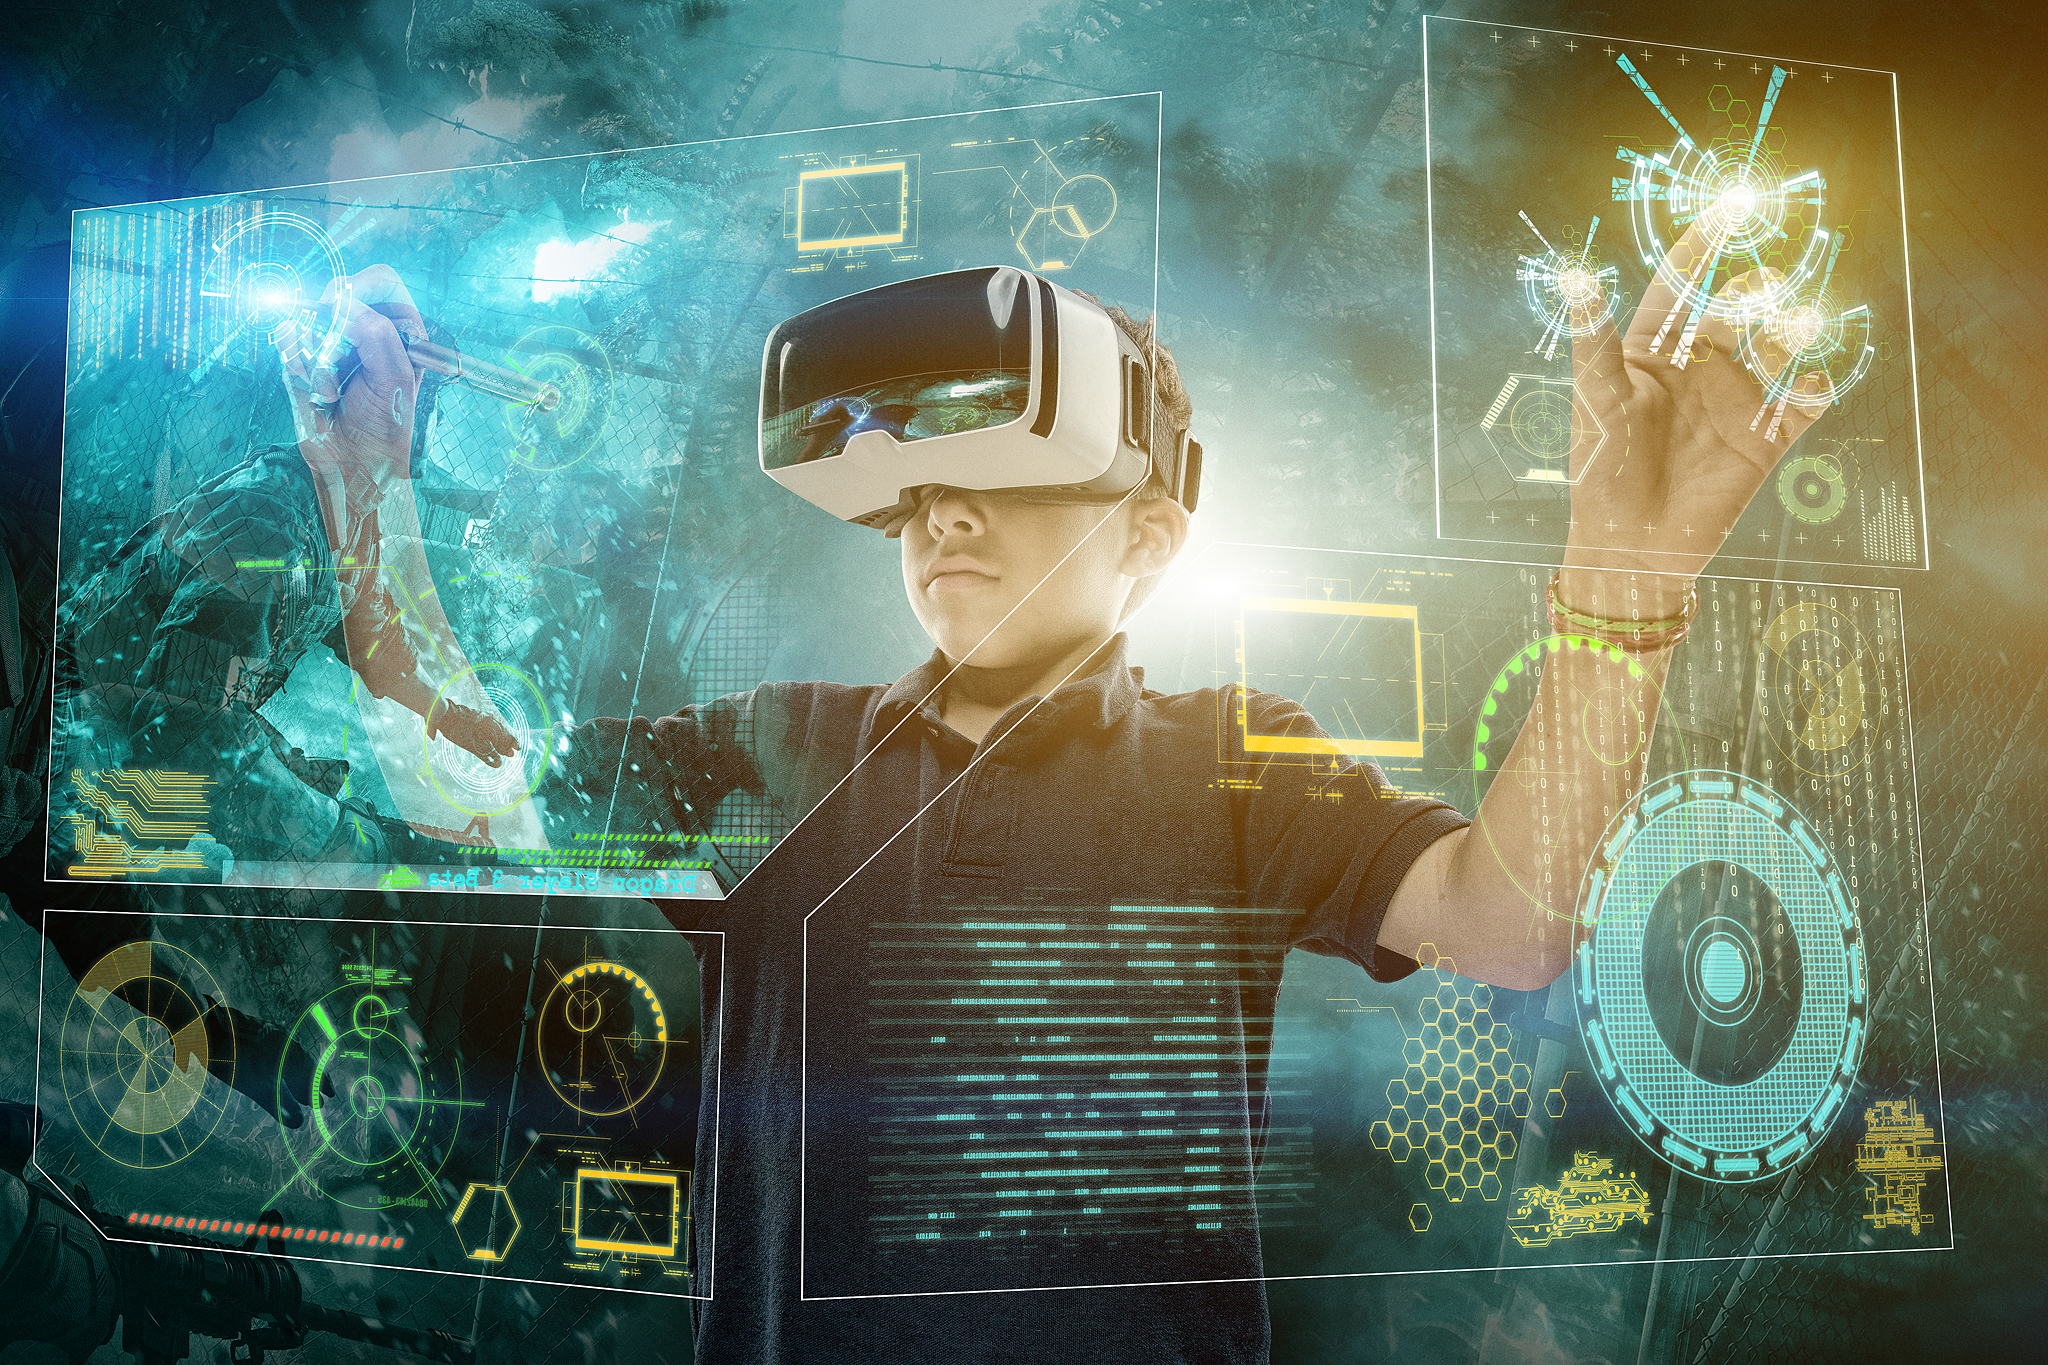
In this specific image, Brandon photographed a student who wants to be a video game designer. His inspiration came from the movies.
The Concept
This image is from a series I just released called “When I Grow Up.” The basic concept behind the series was to create composite image of 5th graders as their future careers. My sister Malisa is a 5th grade teacher. I was invited to speak to her class during career week and the idea was sparked while having a conversation about my images with her class. I photographed the students at the end of May 2015 and spent the summer and fall gather backgrounds in my free time and creating the composites.
For the featured image of this post the young man wants to be a video game designer when he grows up. I decided to take a futuristic approach since it will be a while before this dream becomes a reality. My inspiration for the shot was movies like Ironman and Minority report. I wanted to give him a floating futuristic user interface like we see in those movies.
The Gear
- Canon 5D Mark III
- Canon 24-70mm f2.8 L II
- Paul C. Buff Einstiens.
The Shoot

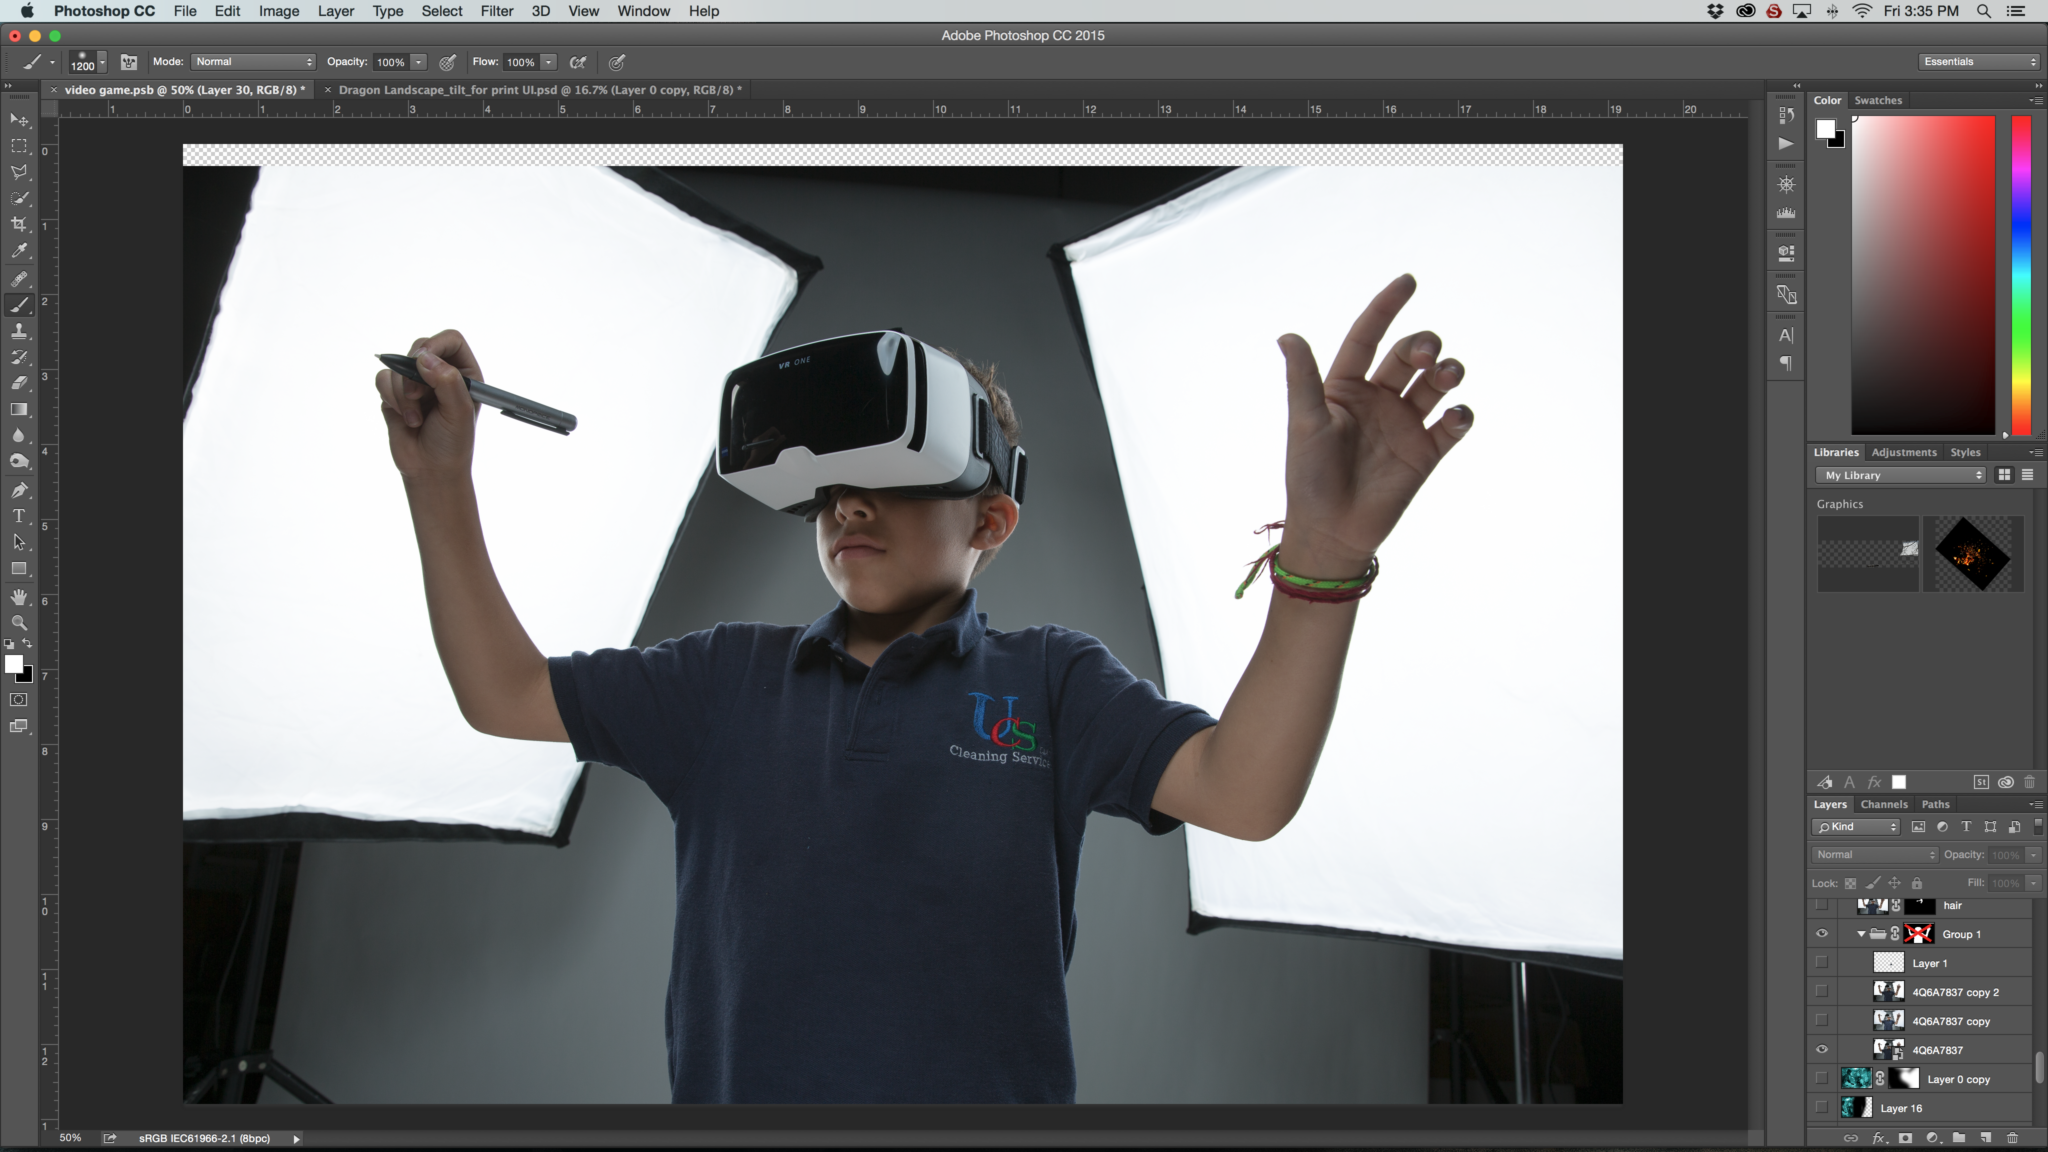
I had to do the photoshoot at the school the last couple of weeks of the year. I was able to set up some white seamless in the auditorium on the stage. The students would come down one by one and my wife Whitney, who also teaches at the same school, would help them figure out their costume and any hair and or make up that they needed. I would then spend about 10-20 minutes with the student getting the shots that I needed. I couldn’t take away too much time from their actual schooling, so it was a bit of a challenge but I think we pulled it off!
Post Production
The first thing I do when it comes to post production is run my raw image through Photoshop Raw and then open it in Photoshop. Next I do my typical processing on my main subject. The reason for this is so I can go ahead and eliminate any haloing or hard lines on the edges when I start to mask them out. I went ahead and cloned out any unwanted logos or blemishes that I wanted to get rid of. Next I do my masking. I prefer to do this manually so add a layer mask, zoom in to about 800%, and use a hard brush at about 8px and mask out around the edge of my subject.
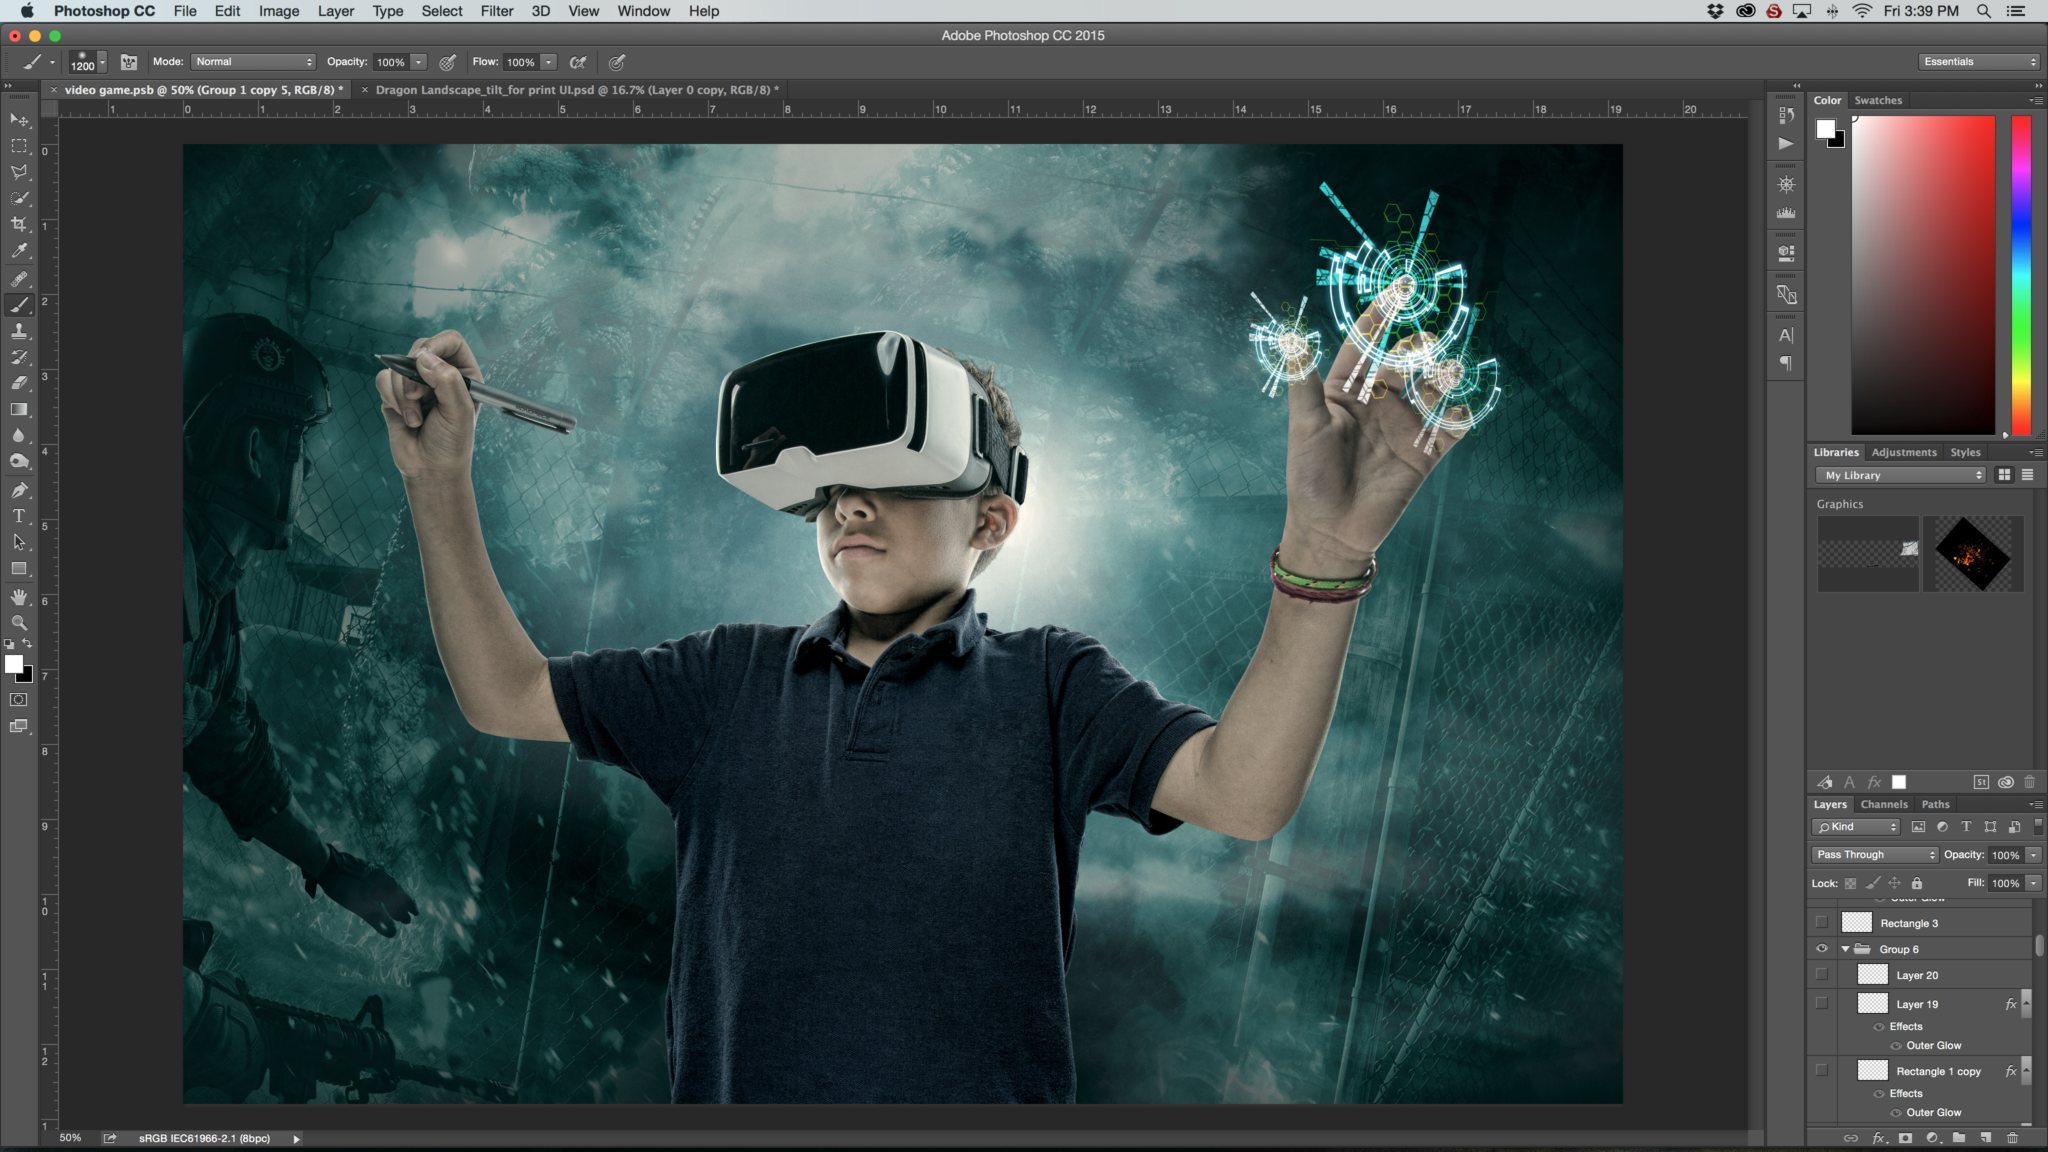
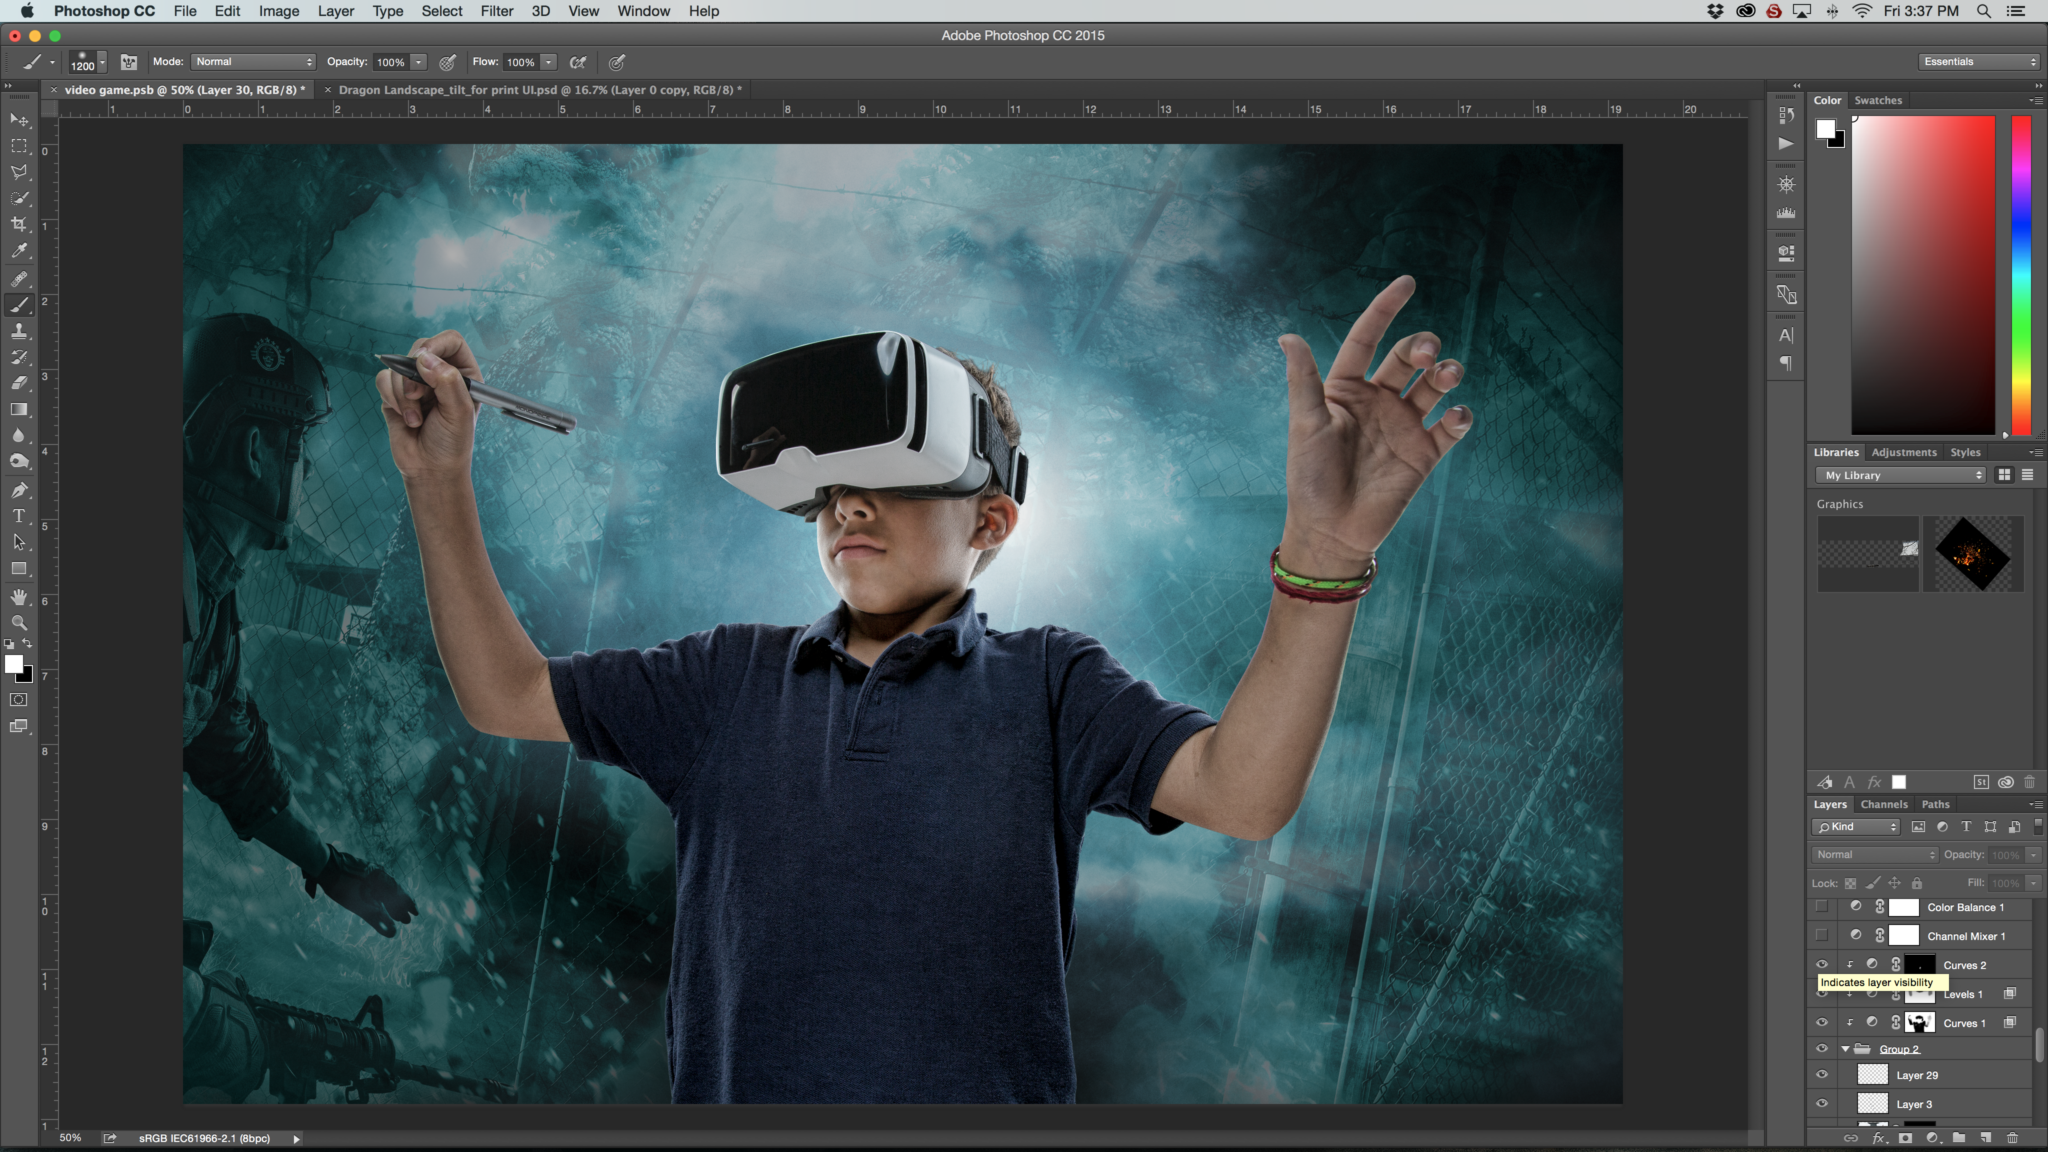
My next step is to set my background. For this image I wanted it to be almost dream like, as if we could see what he was seeing in his virtual world. I used another one of my images and blended in some clouds and other elements by just playin around with different blending modes. I then used a channel mixer layer adjustment, and a color balance layer adjustment to create my color grade. My next step was to create some sort of user interface. I simply did this using the shape tool and creating boxes and lines until I had something that I liked. Next I used this tutorial I found on Phlearn.com to create some futuristic shapes for my user interface
I also found some futuristic brushes to aid in creating my user interface.
Next I used Knoll Light factory for Photoshop to create my flares and lighting effects. I also made sure to add a reflection on the googles of the user interface. Finally I sharpened everything using an unsharp mask and added some noise to help blend everything together and saved my final image!
Get rid of the ads!
Did you enjoy reading this article as much as we enjoyed writing it? There's a way to support us and our reporting, getting ad-free navigation and more as a bonus. Subscribe to us for less than a coffee per month —just $3.99— or take advantage of our yearly subscription with a hefty discount for only $25.- An ad-free experience
- A free mystery box for Lightroom or Capture One
- All the books in our store
- 20% discount on Capture One
- 30% discount on Imalume Photo Theft Protection
- 20% off Herbs and Kettle Tea Company.
- 20% off your order from MPIX printing services.
- 5% off Viltrox Products via their eCommerce store.
- 10% off all film developing, printing and scanning services from Blue Moon Camera and Machine
- 15% off 7Artisans products: The lens and accessory maker is offering a sweet discount for Phoblographer's readers.