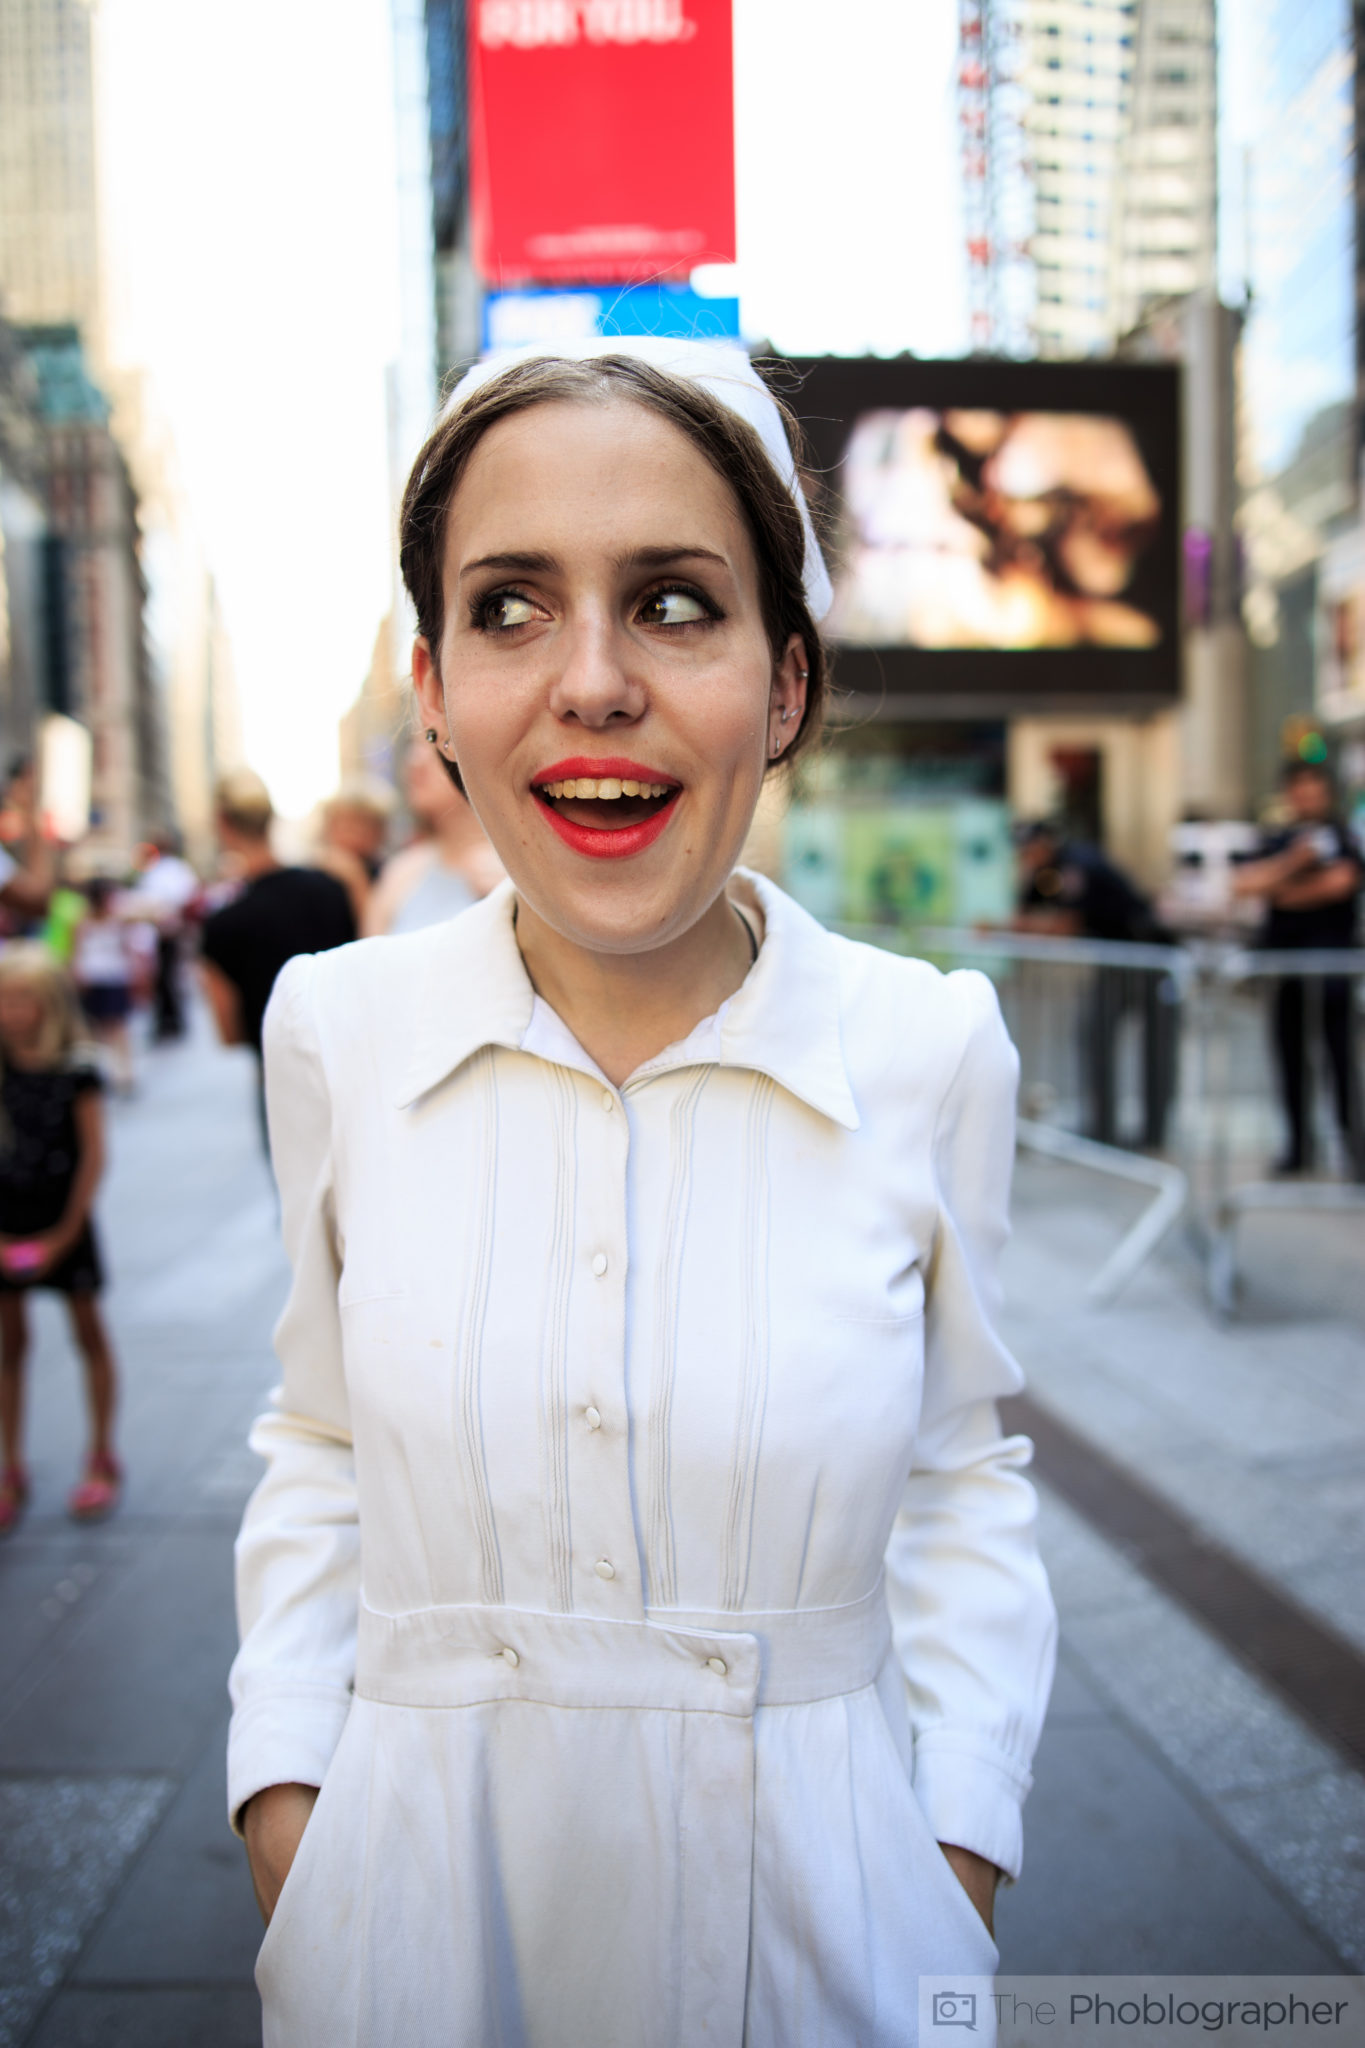
One of the biggest problems with Adobe Lightroom for portrait photographers has been the lack of being able to retouch images. While it’s become better with the addition of specific brushes and gradients, it’s still not so simple. But the folks behind the Lightroom Retouching Toolkit want to change that. Despite lots of flak being given to photographers and companies who retouch, the retouching here is very minor. This kit won’t let you give Fat Joe the body of David Beckham or even help dear Miley Cyrus undo all the effects of Molly on her body (bless her soul.)
So what will it do?
Features
The Lightroom Retouching Toolkit is more or less a bunch of preset–but they’re not the presets that you’ll use like the VSCO filters. Instead, these presets are specifically assigned to the brush tool. You’ll import them like normal presets (sort of) but you’ll also need to sit there and go through each and every one to notice the effects.
The Toolkit lets you whiten teeth, make red lipstick redder, soften skin, whiten the whites of eyes, and do lots more. Each of the brushes are designed with a weaker intensity in mind to allow you to layer and layer in the same way that a retoucher would in Photoshop. Depending on the type of editor you are, this will either be great or plain out annoying.
We’ll explain why later on in the review.
Installation
Installing the presets is pretty simple. When you download the toolkit, you also get a tutorial video on how to install the presets. You’re essentially just bringing them into a folder, restarting Lightroom and calling it a day.
Ease of Use

To access the presets, you’ll need to set up the brush too. Then you can click to change the effect, nd these effects will be associated as presets with said brush tool. Need to whiten teeth? Cool, you’ve got two for that. Smoothing out skin? Or what about getting rid of a scar? Yup, that’s all possible here. Once you wrap your head around using the brushes and layering them all on top of one another, you’ll begin to appreciate the editing process. What do we meant by this?
Each of the brush presets do their job–there’s not doubt about that. But they do it in a weak way. I’ve got a feeling that it was specifically designed this way so that a user wouldn’t have to mess with the presets and adjust them specifically over and over again. Instead, the user will just layer a preset on top of another preset and on top of another. That way, when you feel like you’ve made a mistake, you can simply just delete some of these layers and backtrack a bit.
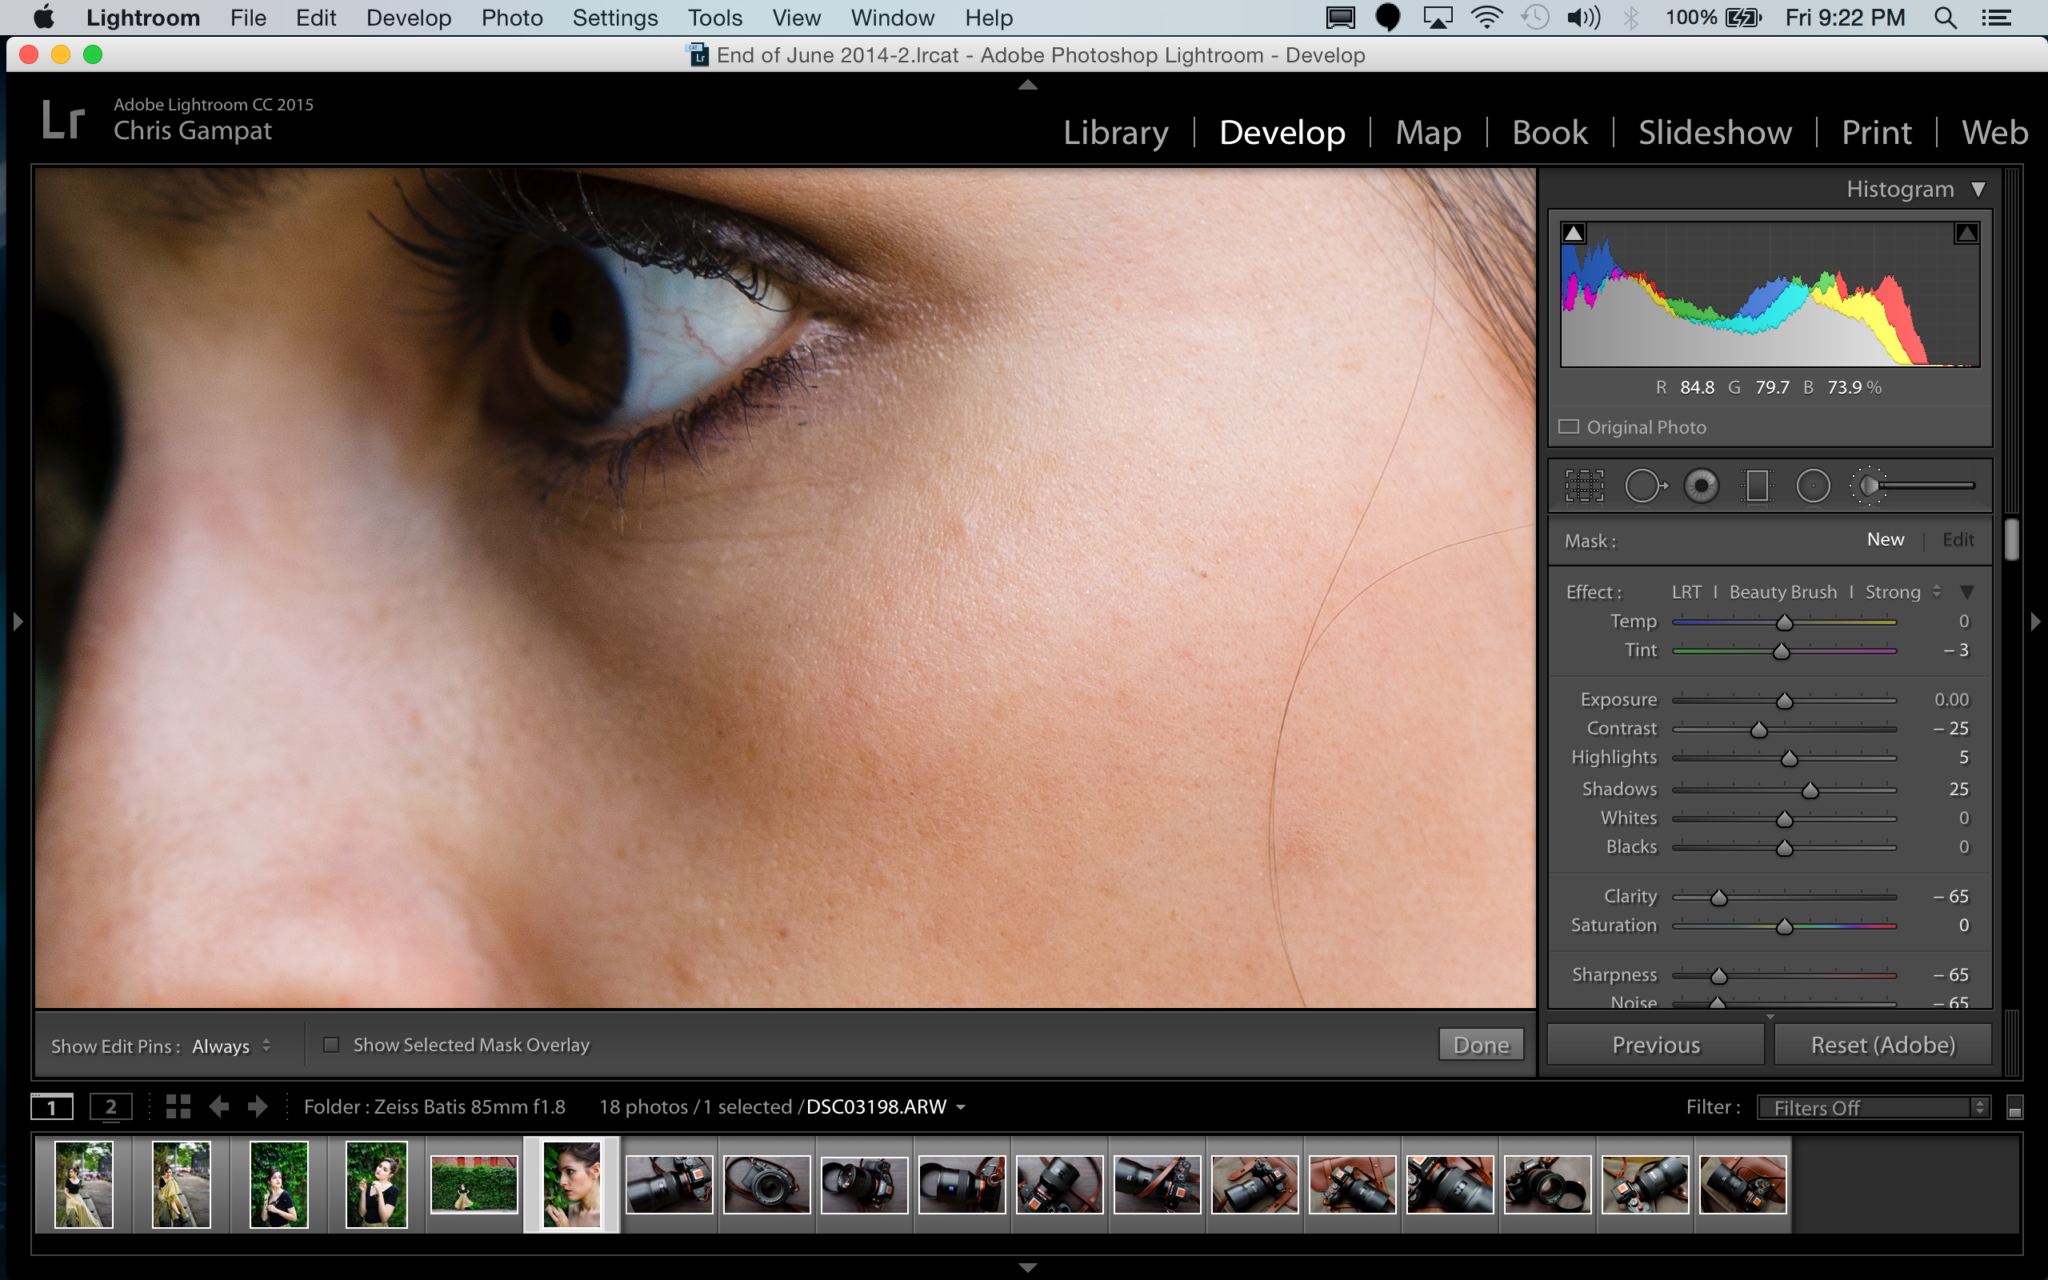
For example, take a look at this 100% crop of Asta. This is the image that we created with basic editing. The sharpening and clarity enhancement brings out lots of details in her skin. Asta already has great skin, but if we wanted to retouch her for a headshot, we’d need to soften her skin up quite a bit.

By applying the China Doll brush to her skin, we soften and brighten the skin up. It’s a nice effect and for the most part works out very effectively when used correctly.

Again, we kept it conservative as far as edits go–but the kit gets the job done.

In some situations like dealing with skin, this form of editing is ideal. This is the original without the brush application. Notice how the whites aren’t so…white.
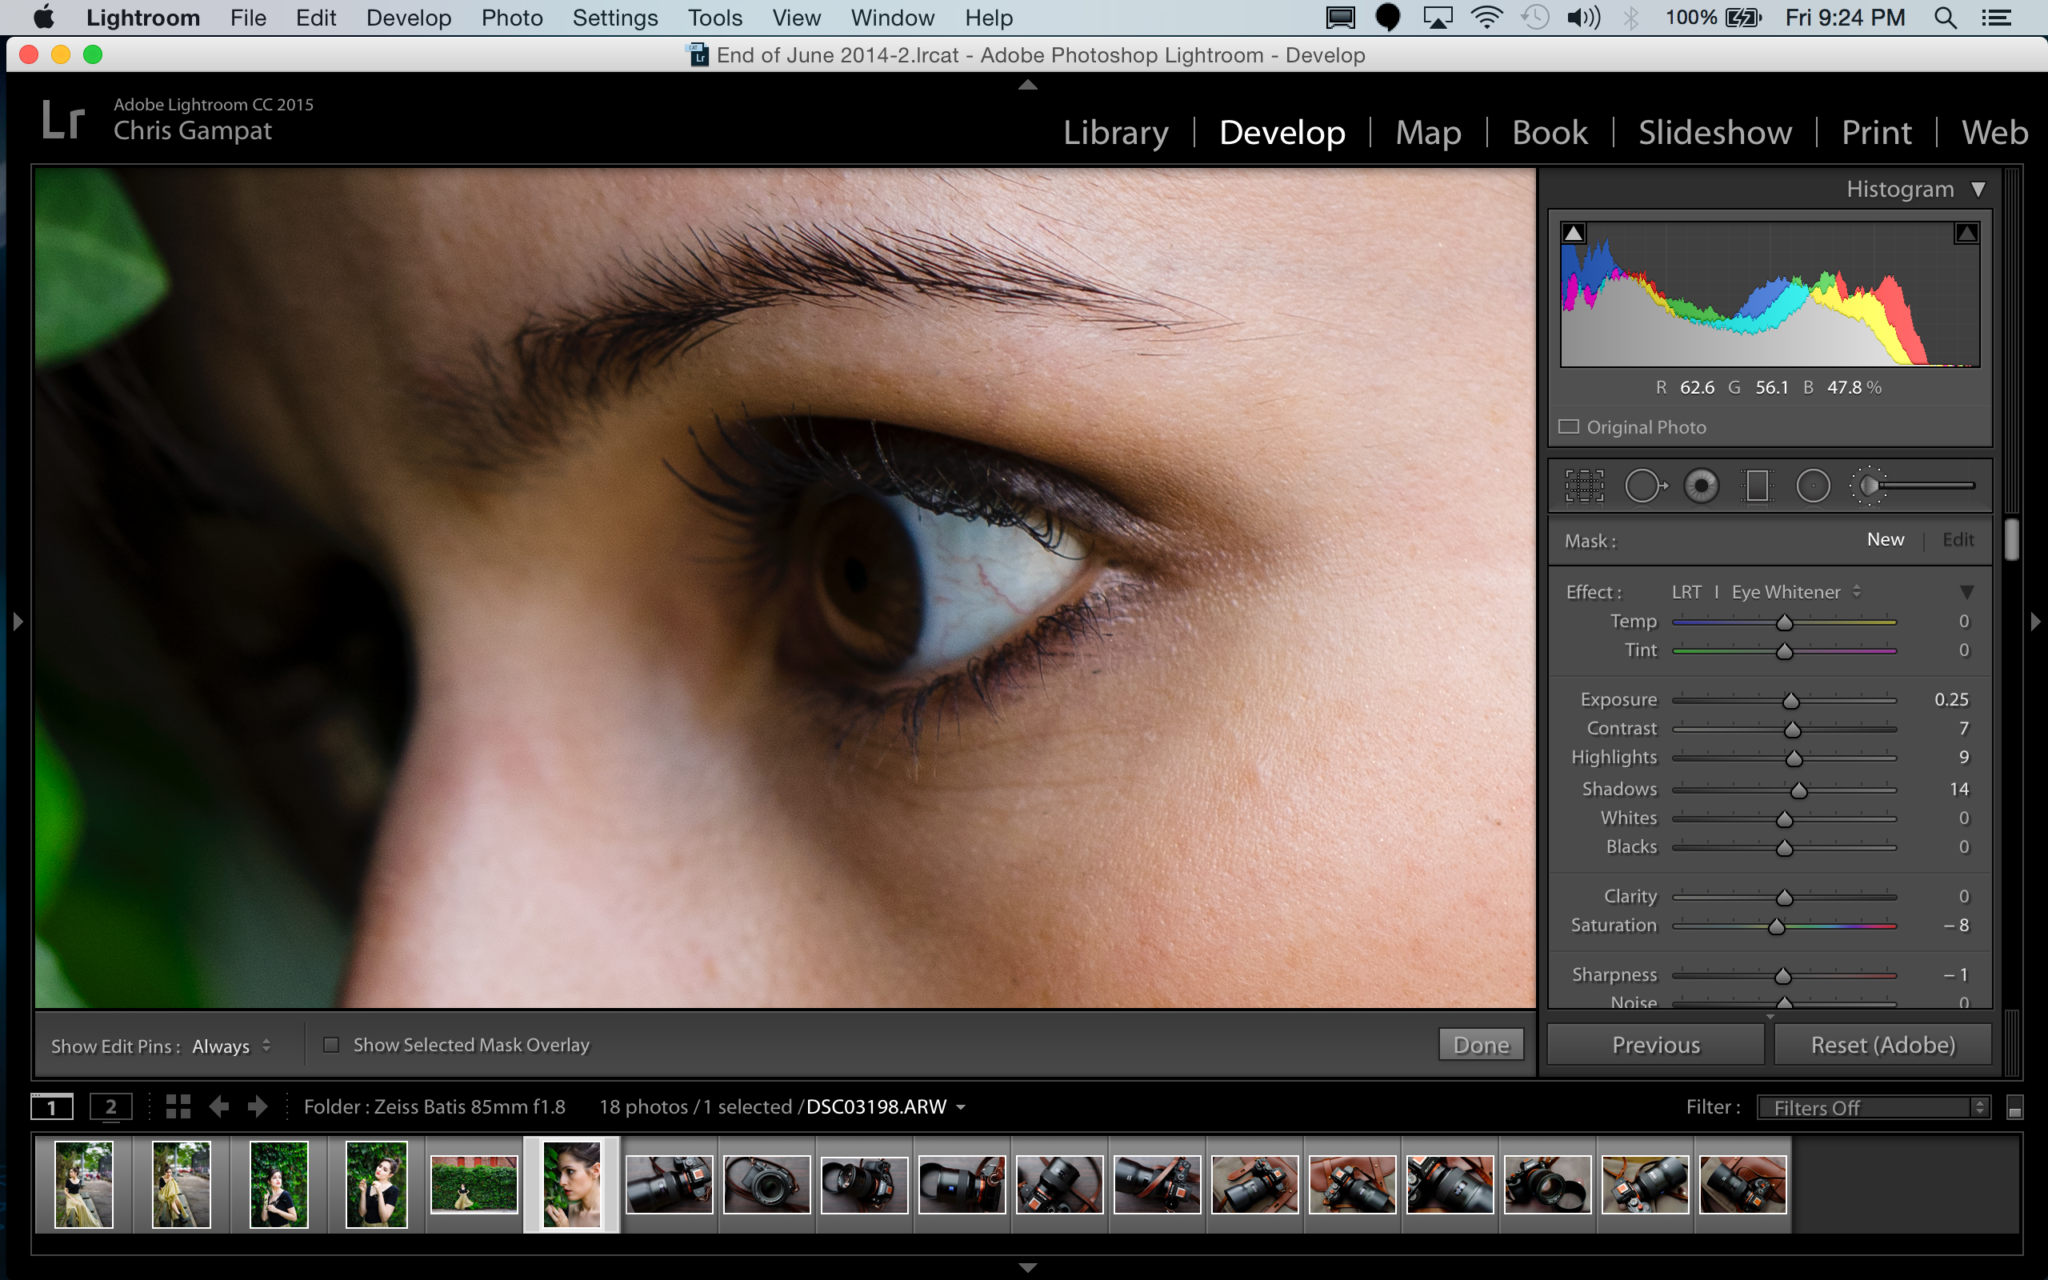
When you apply the brush, you’ll get a bit of whitening done. and really that’s all you need before you zoom out of the image at 100% and realize that you’ve overdone the whitening effect. It’s much more effective and simplistic than my method, but it can also be more time consuming depending on how you edit.
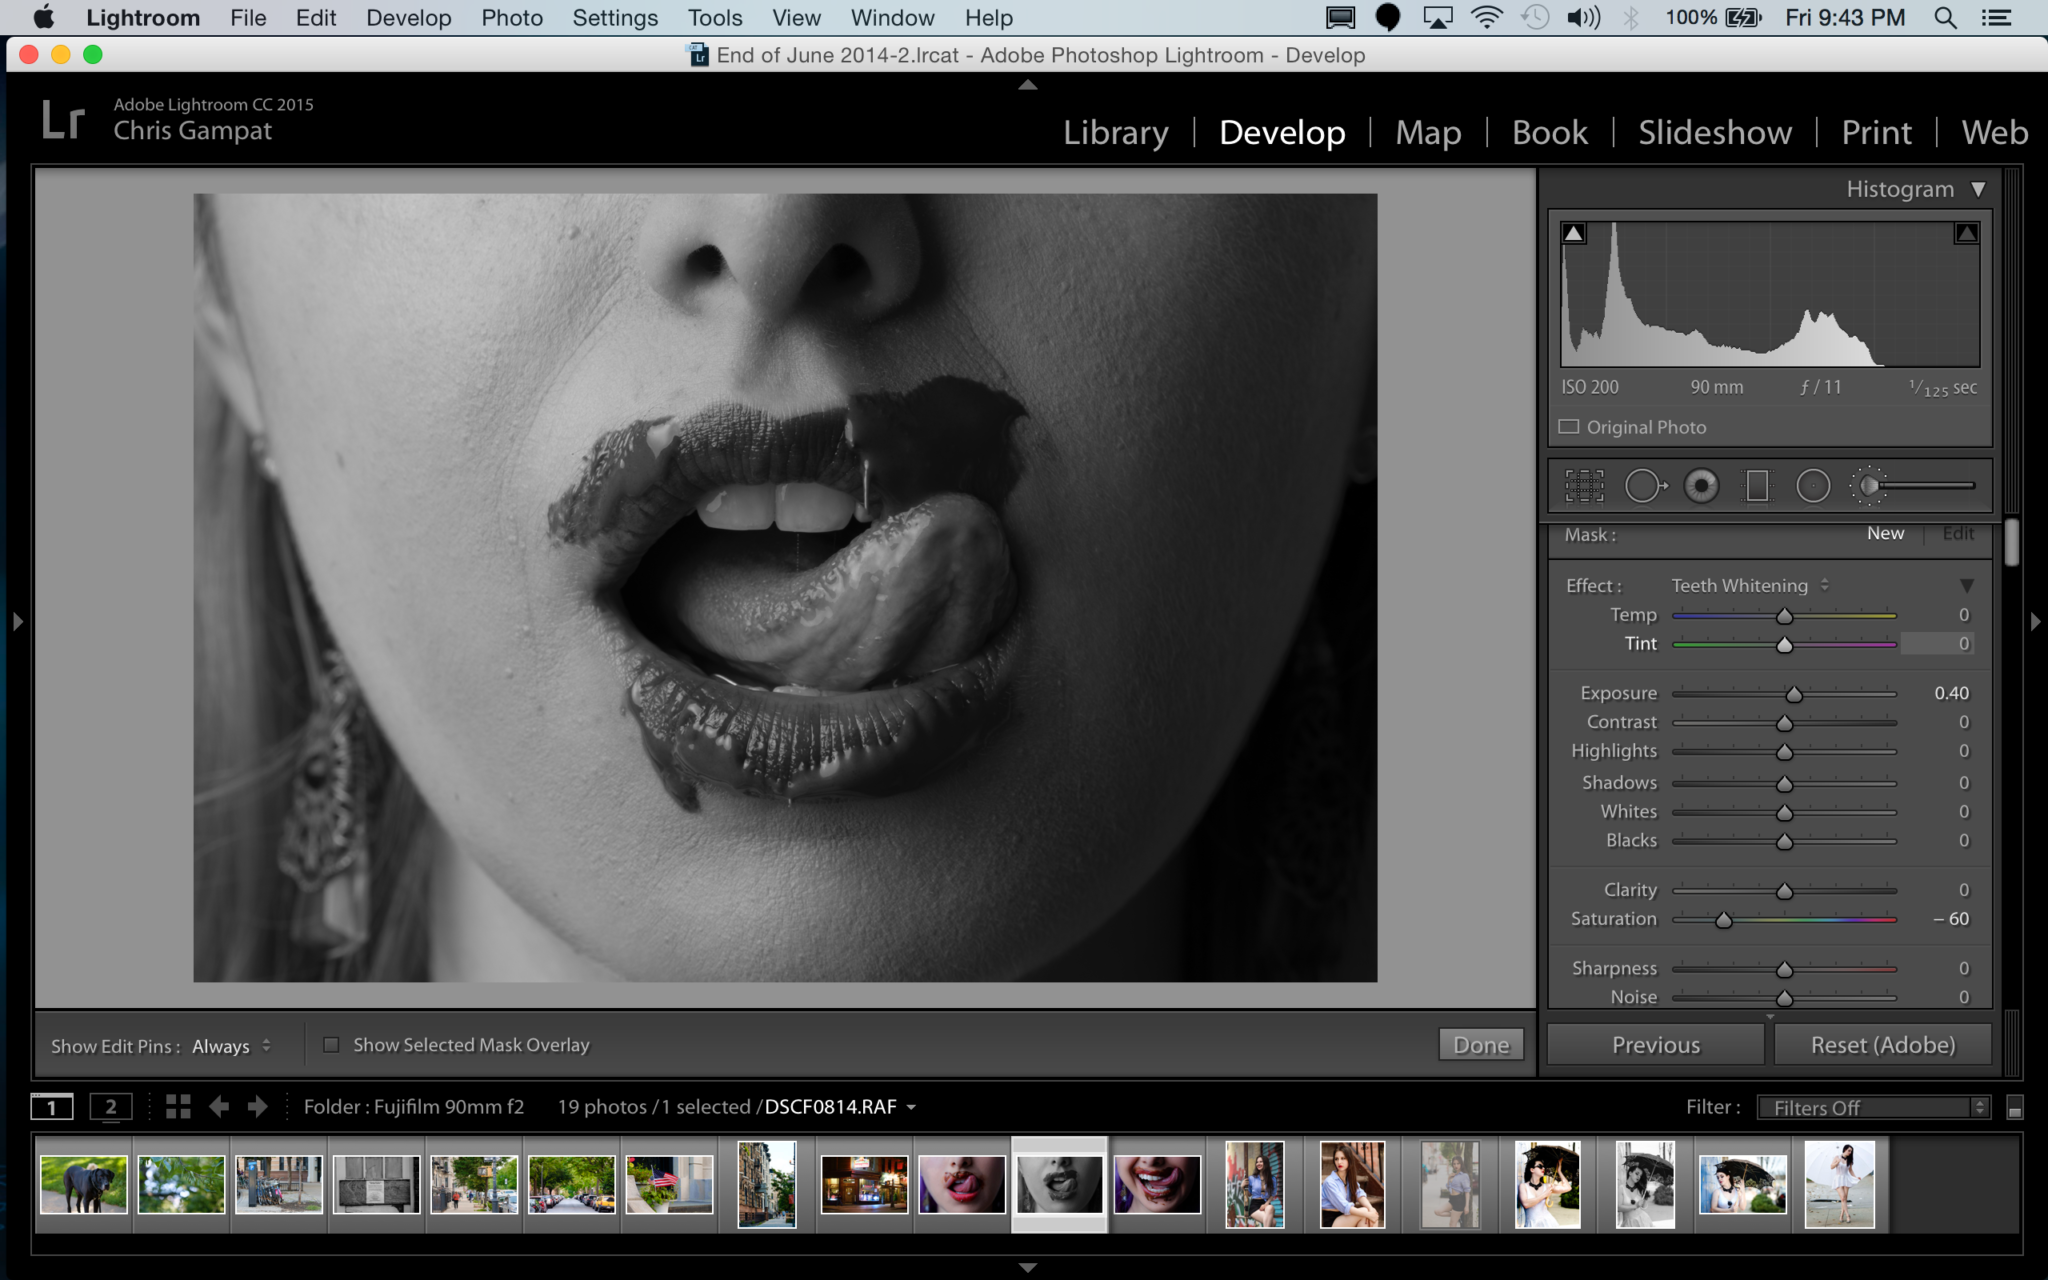
Where this can become very annoying is with teeth. Generally, you’d want teeth to be bright and white. So what you’ll do in a situation like this is brush over a subject’s teeth, raise the exposure, whites, and maybe desaturate a bit. With the Lightroom Retouching toolkit, you’ll need to apply layers.

For more, here’s the company’s own demo video.
Efficiency
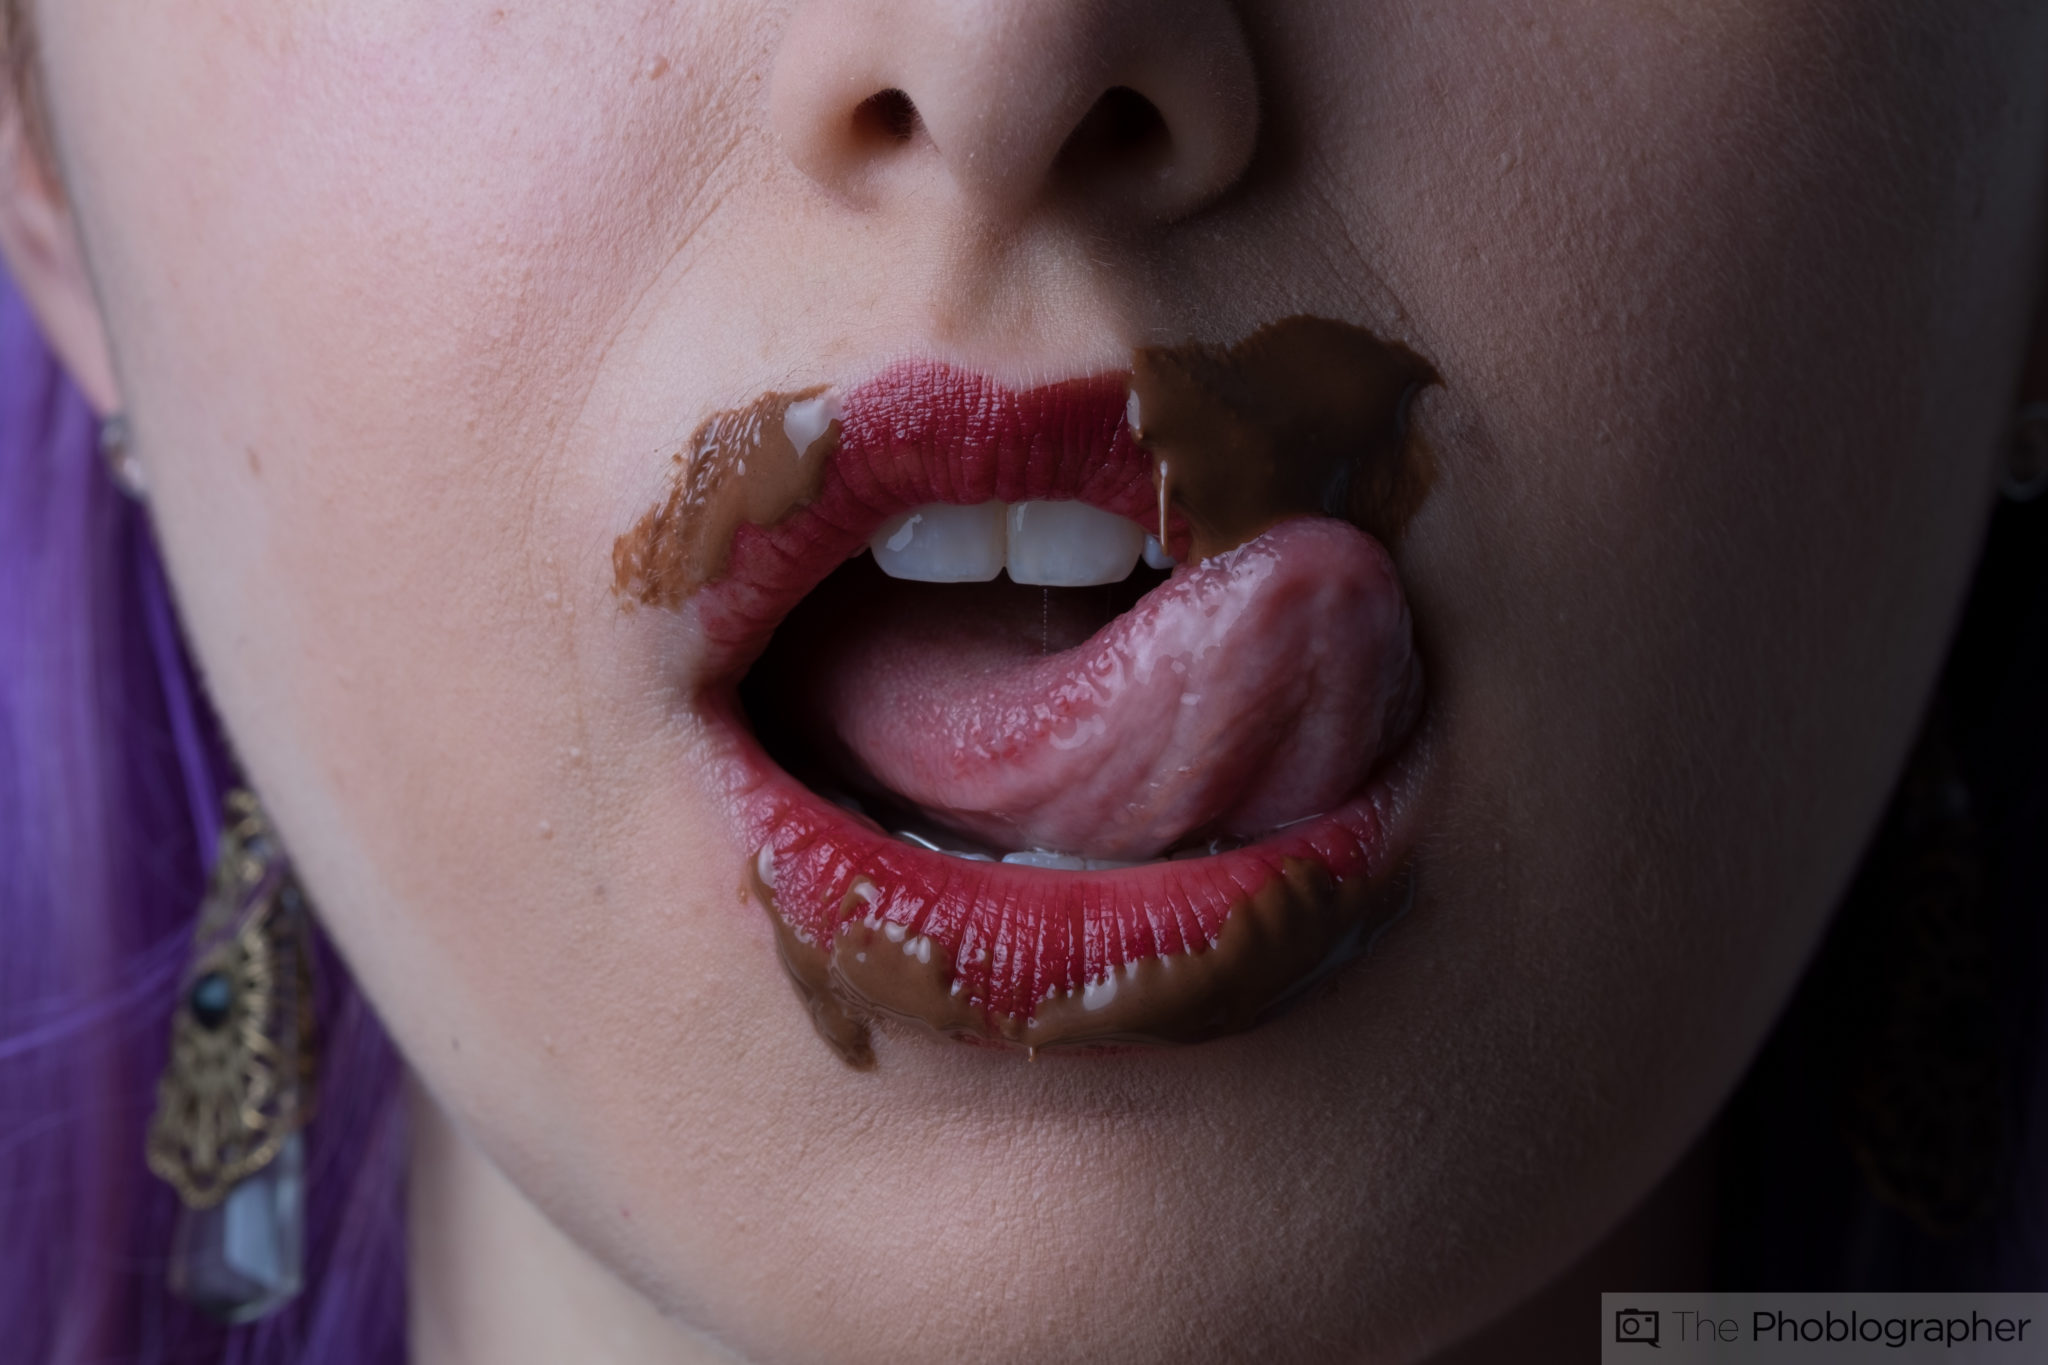
In some ways, the efficiency of editing the images is overwhelmingly better than other methods you may do. But I don’t really see this with the red lipstick application. Whereas I’d brush over the lips, saturate them, add a redder color on top of boosting clarity and brightening them a bit, with the retouching toolkit you’ll need to brush over the lips, then brush again, then brush again until your satisfied.
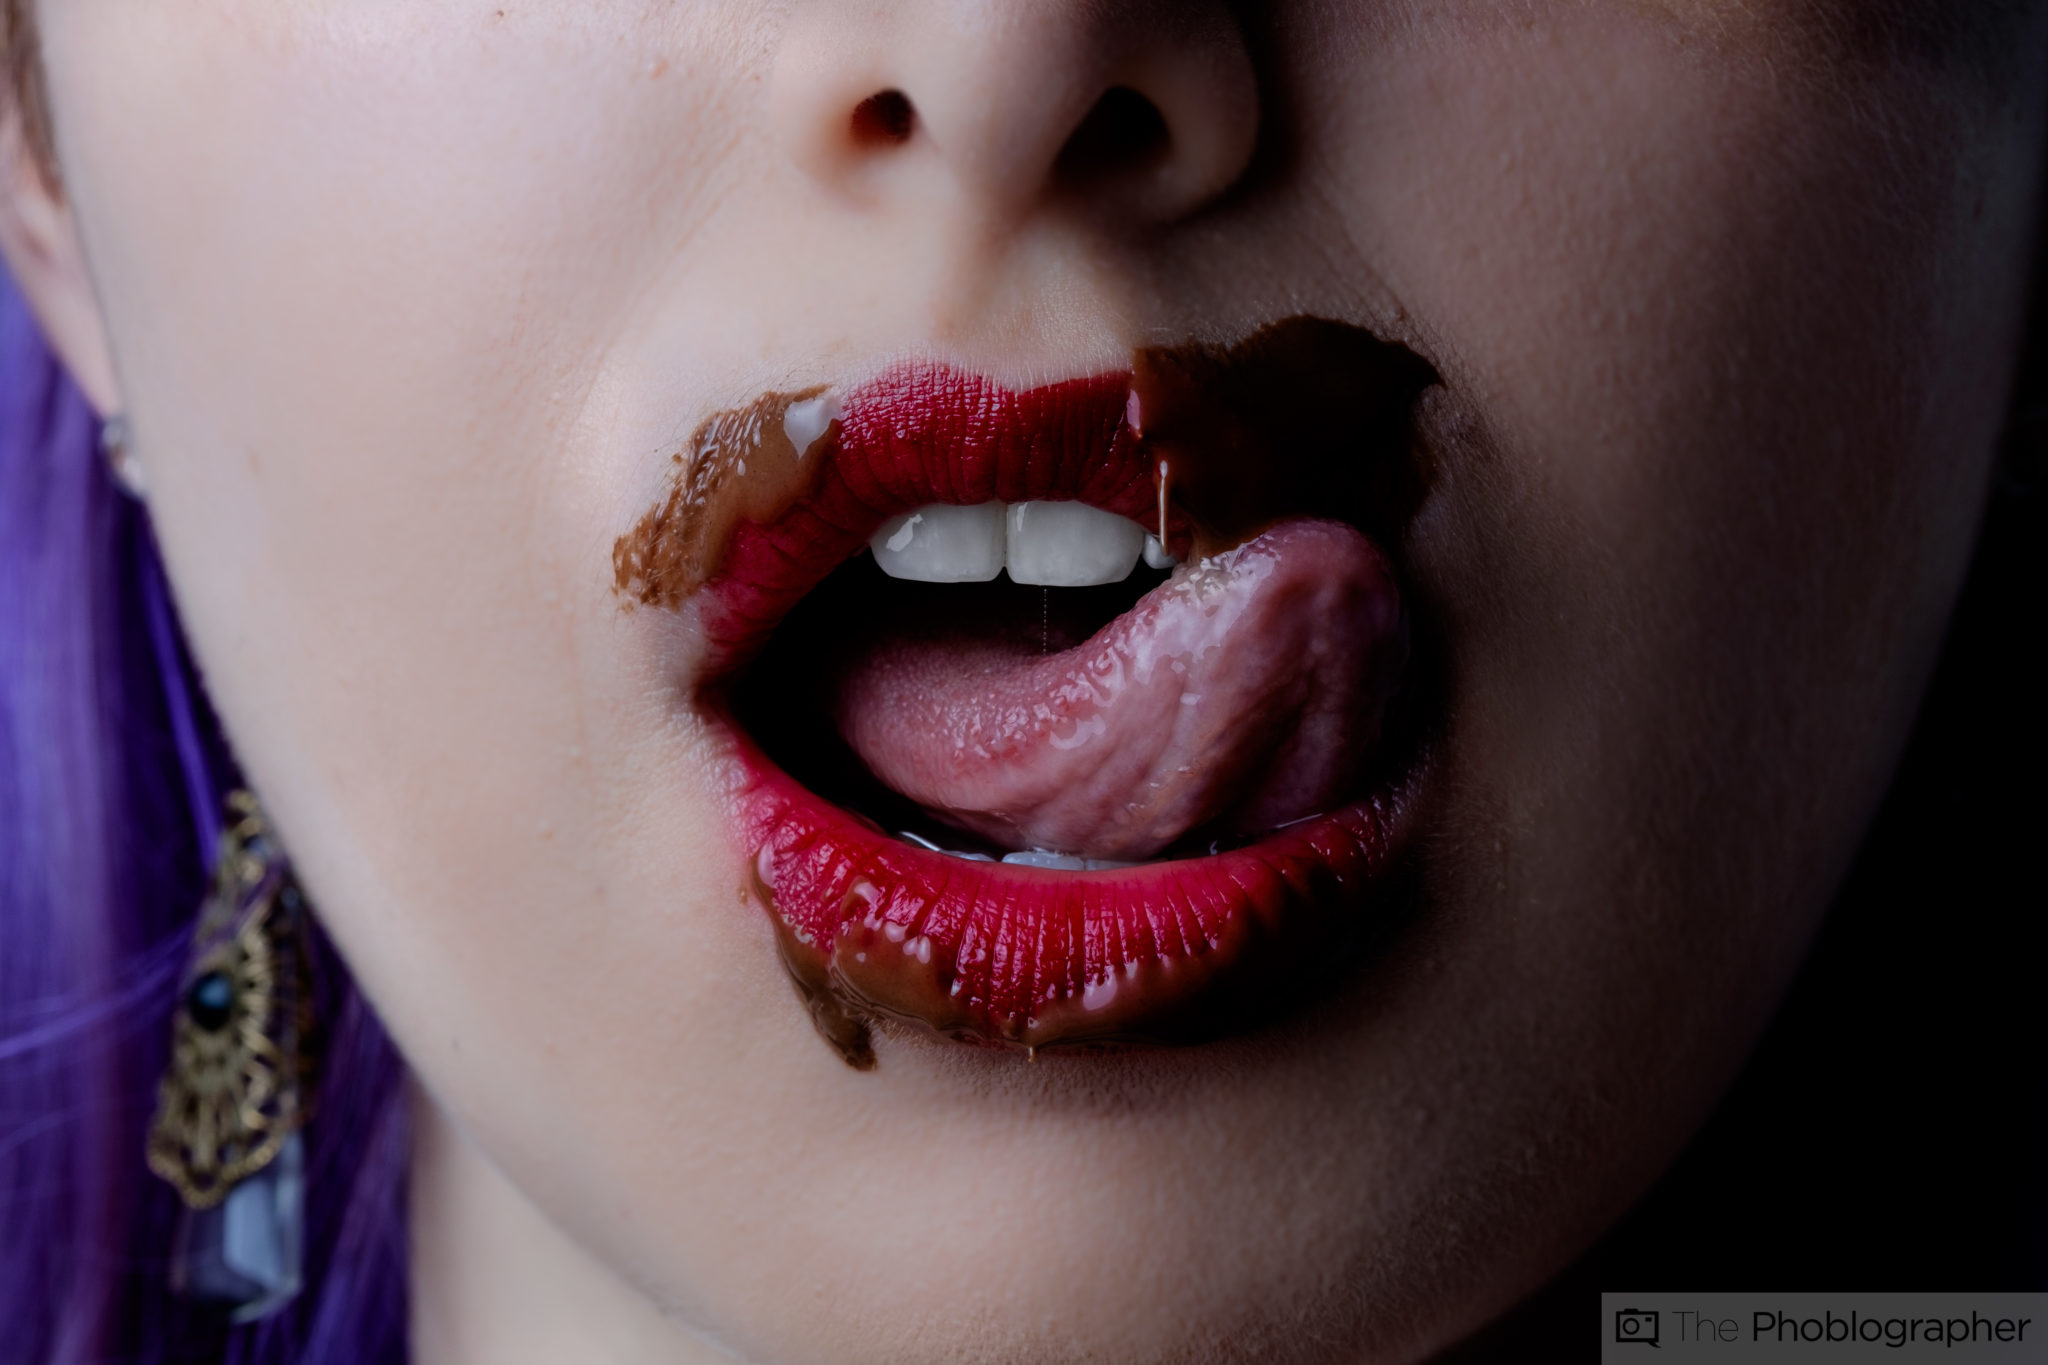
It’s a superfluous amount of work rather than just working with one layer. Still though, you can’t argue with the results. But if you have a way that you believe is more efficient, then we recommend that you go with that route instead.
Conclusions
The Lightroom Retouching Toolkit isn’t designed to alter reality and make people think otherwise, but instead it’s designed to deliver minor edits that a photographer can dial in using layer after layer. To be honest, I really can’t argue with that method vs wasting time by playing with sliders and using deductive reasoning. The brushes do their job and do them well, but for $89, we’re not sure that we’d pay that much. To be fair though, you’re paying for access to the knowledge to be able to do this and someone has already done it for you and made it simple.
Yes, the presets are very valuable–but any photographer that’s going for this type of work will probably own Adobe Lightroom CC–and then they’ll get Photoshop also bundled in to their yearly package. Photoshop will let you do the same things, but nowhere as simply. Instead, these presets do lots of the work for you and all you need to do is layer them.

We rate the Lightroom Retouching Toolkit at four out of five stars. It’s a great attempt, but we wish that it gave us even more presets and varying levels of strength. However, you simply can’t argue with the results.
Get rid of the ads!
Did you enjoy reading this article as much as we enjoyed writing it? There's a way to support us and our reporting, getting ad-free navigation and more as a bonus. Subscribe to us for less than a coffee per month —just $3.99— or take advantage of our yearly subscription with a hefty discount for only $25.- An ad-free experience
- A free mystery box for Lightroom or Capture One
- All the books in our store
- 20% discount on Capture One
- 30% discount on Imalume Photo Theft Protection
- 20% off Herbs and Kettle Tea Company.
- 20% off your order from MPIX printing services.
- 5% off Viltrox Products via their eCommerce store.
- 10% off all film developing, printing and scanning services from Blue Moon Camera and Machine
- 15% off 7Artisans products: The lens and accessory maker is offering a sweet discount for Phoblographer's readers.