Last Updated on 09/08/2016 by Chris Gampat
Fact: many photographers who work in Adobe Lightroom only utilize the basic adjustments panel. However, the program gives them lots of control over their images and allows for many parameters to be manipulated. Sadly, most people are also not aware of much of what the development panel does and how it can help you create the images that you want.
In this post, we give you a very quick introduction and idea of what each section does and how to use them.
Basic
What it does: This panel makes a great deal of global adjustments to the entire image like exposure control, boosting the mid tones via clarity, and overall saturation and vibrance. There are lots of other options too such as adjusting the black levels in the image. IF you want your image to be in color or black and white, you can set that here.
How to Use them: To make the most of these, know that a little goes a long way. Fiddling with way too many global adjustments can create issues with your photos like introducing noise and other problems. Be conservative with this except when the white balancing. Use this panel to get your white balancing and intended exposure spot on.
Tone Curve
What it does: This panel is a leftover relic from Photoshop in some ways. Here you can manipulate the highlights, lights, darks and shadows. It allows for more specific and fine tune adjustments than the basic panel does to these parameters.
How to Use them: To make the most of this panel, make minor adjustments via the basic panel first and then head down to the Tone Curve panel to adjust things like majorly blown out highlights. It works absolute wonders in black and white.
HSL/Color/B&W
What it does: This panel works in conjunction with the saturation and vibrance sliders in the basic adjustments panel and in some ways works with exposure. Here you can adjust the Hue, Saturation and Luminance of each color in the RGB spectrum.
How to Use them: To make the most of this section, identify that the key colors are in your image. Then adjust both the luminance and saturation of each of those accordingly to your own preferences. This works really well when working with skin tones and can be a savior.
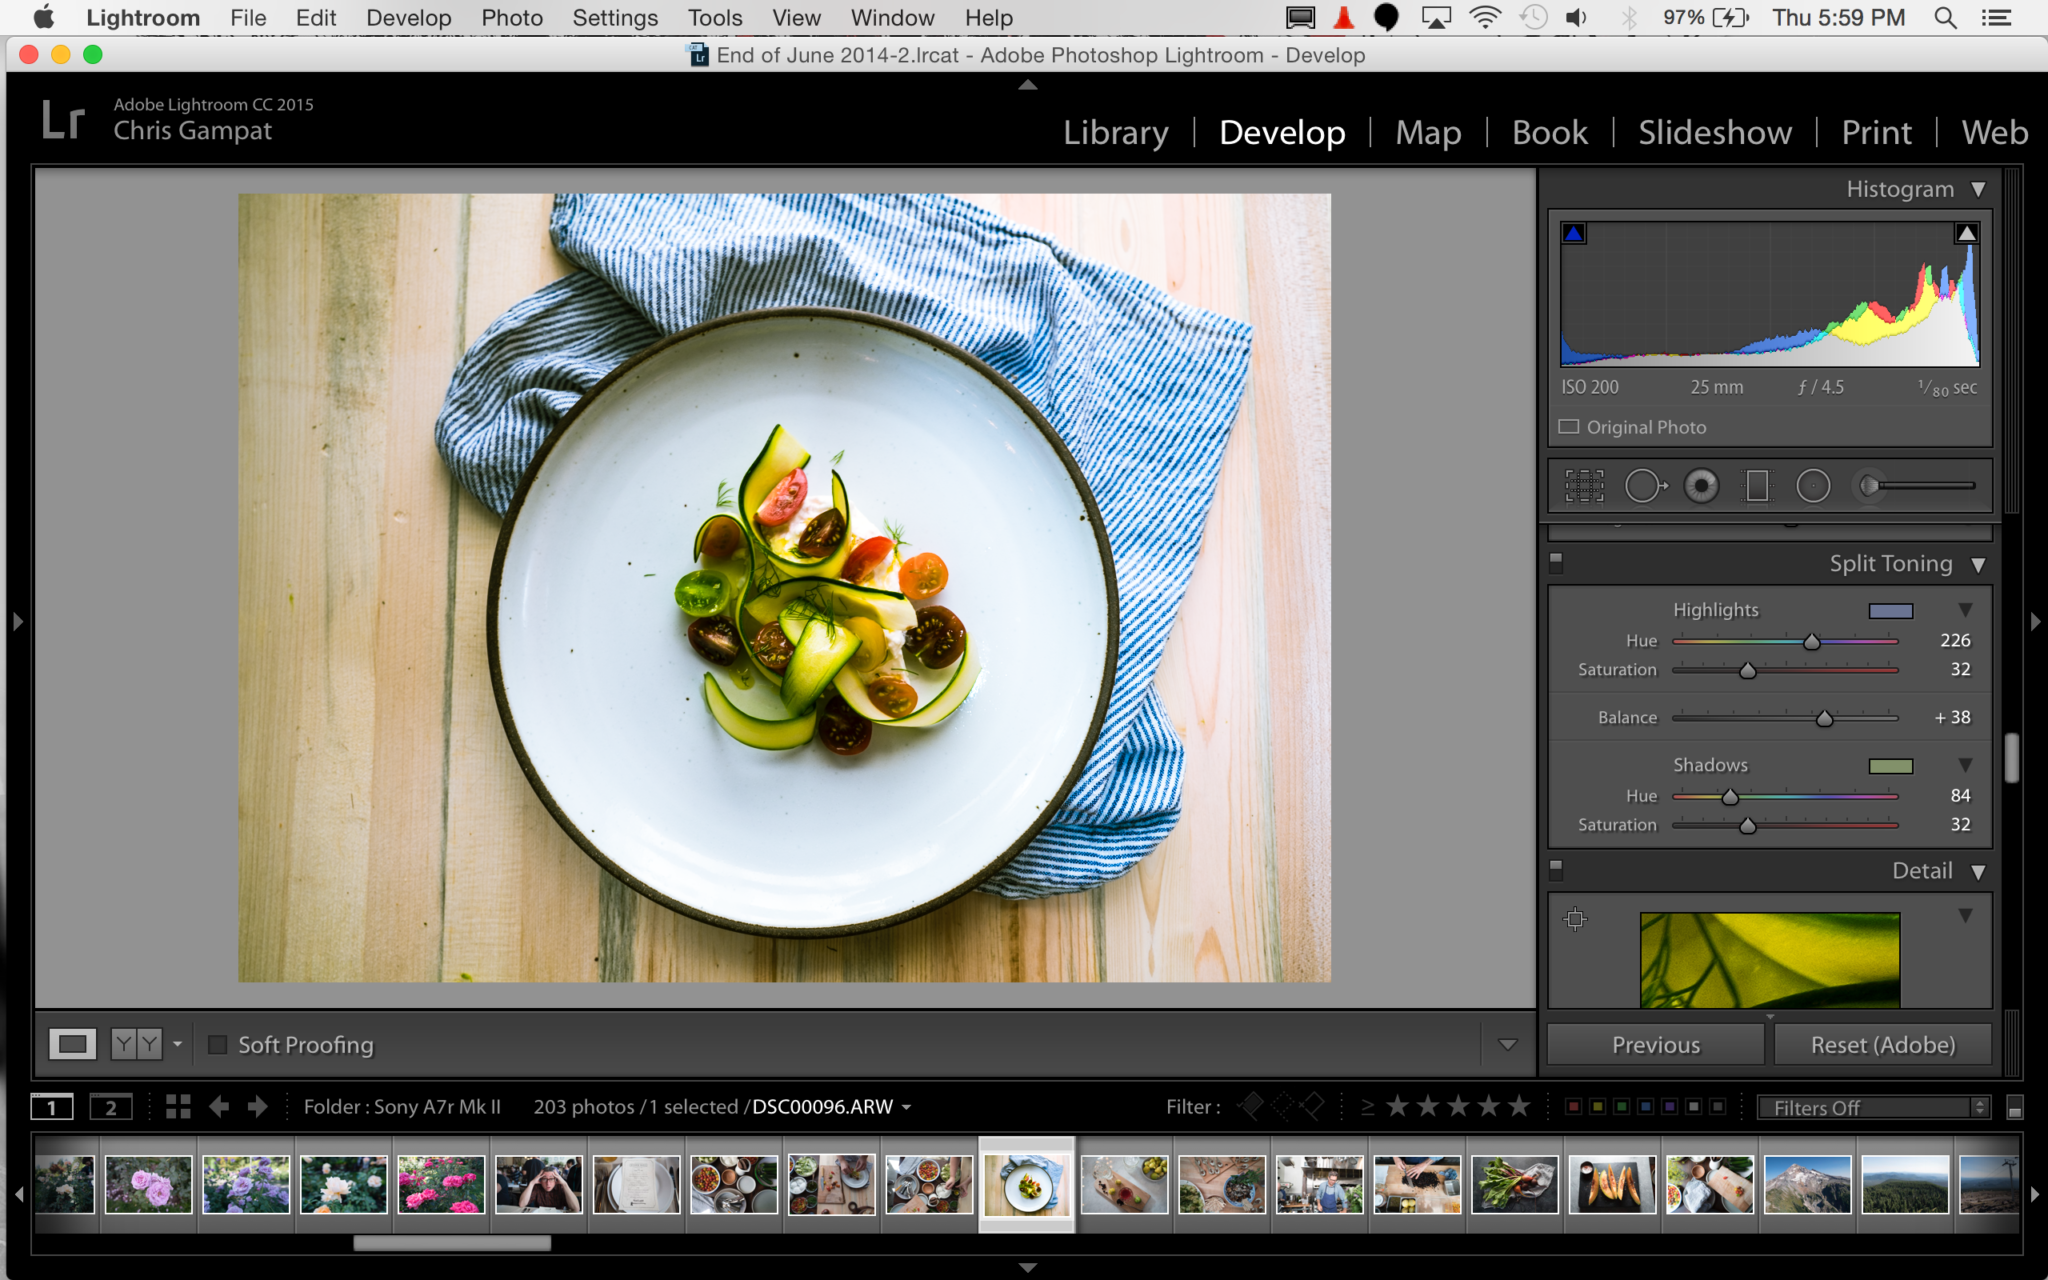
Split Toning
What it does: This panel does is lets you specifically change the tones of the image dramatically. It’s great for concert photographers but without working knowledge of color theory it can be a real headache.
How to Use them: To make the most of this section, set your highlights to be one color and your shadows to be an opposite color on the spectrum that will properly balance the image. An example would be Blue with Yellow. Consult a color wheel for more accurate results.
Then calibrate the saturation of each to be the same amount. After this, play with the balance.
Detail
What it does: This panel lets you do is adjust parameters like sharpness, its sub-properties, and factors that affect noise reduction.
How to Use them: To make the most of these, exercising restraint will go a long way. Most people usually need to tweak the sharpening amount, detail, luminance noise, detail and color.
Lens Corrections
What it does: This panel lets you correct for problems that your lenses may create in the image. Distortion is a big one but so are things like color fringing. Adobe recently introduced Upright, which really helps fix distortion automatically.
How to Use them: This is probably the easiest panel to use. If you like the distortion correction, then do it. If you don’t, then don’t and continue on with editing.
Effects

What it does: This panel lets you add artistic effects like film grain, vignetting, and lets you remove haze from an image.
How to Use them: Most folks won’t care for this, but I personally like to add light vignettes to my images to make my viewer pay more attention to my intended subject in the frame. Creating grainy black and white images is also quite fun.
Camera Calibration
What it does: This panel is mostly used by photographers to add a camera profile. For example, Fujifilm cameras have a Velvia profile and this can be added to the image to make it look more like the JPEG. But there are also other sliders. For the most part, what these do can be controlled individually by the Color slider panel.
How to Use them: To make the most this section, just work with the camera profile. But the hues and how strong overall parts of the color spectrum appear can be tweaked here. It’s still best to do it on an individual level though.
Get rid of the ads!
Did you enjoy reading this article as much as we enjoyed writing it? There's a way to support us and our reporting, getting ad-free navigation and more as a bonus. Subscribe to us for less than a coffee per month —just $3.99— or take advantage of our yearly subscription with a hefty discount for only $25.- An ad-free experience
- A free mystery box for Lightroom or Capture One
- All the books in our store
- 20% discount on Capture One
- 30% discount on Imalume Photo Theft Protection
- 20% off Herbs and Kettle Tea Company.
- 20% off your order from MPIX printing services.
- 5% off Viltrox Products via their eCommerce store.
- 10% off all film developing, printing and scanning services from Blue Moon Camera and Machine
- 15% off 7Artisans products: The lens and accessory maker is offering a sweet discount for Phoblographer's readers.