Last Updated on 04/20/2015 by Chris Gampat
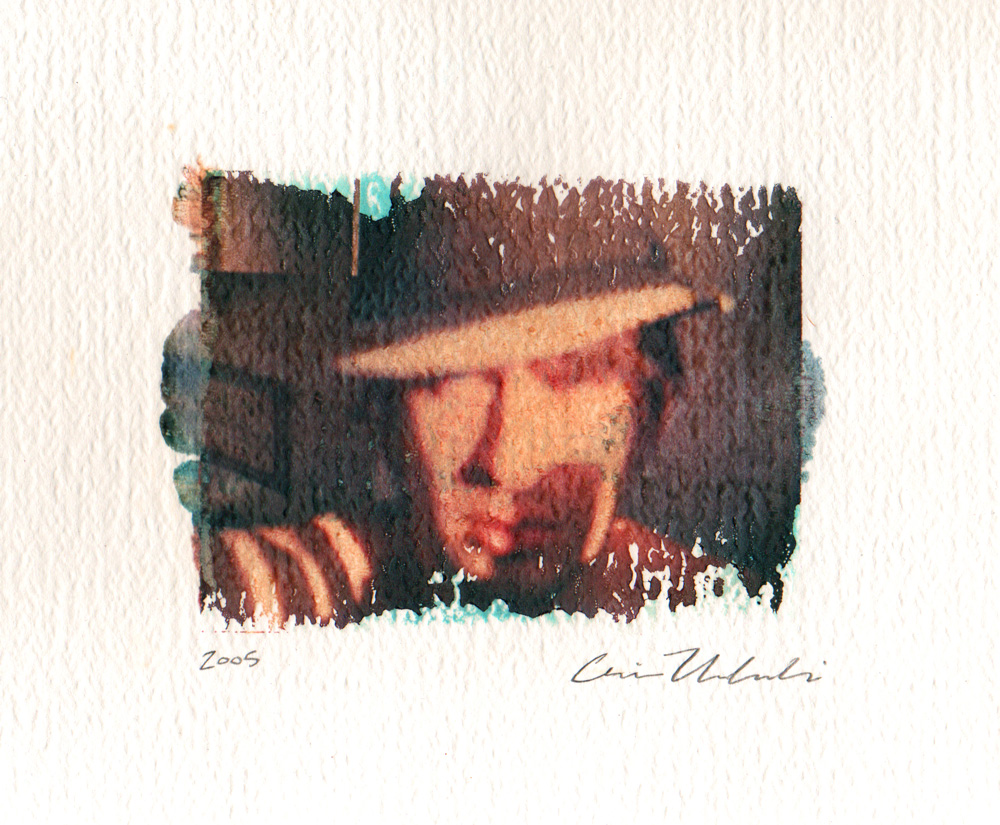
Image by Chris Urbanski. Used with permission.
Chris Urbanski doesn’t call himself a photographer, but he surely defines himself as an artist. So when he showed off his specially made Polaroid Paper Transfer on Reddit, we were amused with the process. Paper transfer techniques have been around for years, but they’re unique and interesting.
Growing up in the 80s, Chris’s dad always shot lots of photos. “At a young age I was also interested in manipulating Polaroids by drawing on them with a dull point while they were developing. And probably driving my dad crazy by “ruining” the photos.” says Chris. “They weren’t cheap then either.”
This eventually developed (pun totally intended) into Chris wanting to move even further with his Polaroid work. Later on, he would do paper transfers. To do these, Chris recommend working in a dim room and working quickly.
He tells us:
“You’ll want to be sure to have a sheet of damp paper prepared before hand. Don’t let your negative develop for longer than 10-15 seconds after a shot. Peel your negative, align quickly on the paper or medium you’re applying the negative to and use a roller for about 1 minute on the back. Be careful not to move the negative once it’s placed. Peel back… then voilà! You’re an arteest!”
Chris believes that doing paper presses has a way of making even bad shots look romantic or earthy with textures that you wouldn’t normally see with film.
“Some take on a life of their own resembling a small watercolor painting. It tends to make framing easier too when transferred to standard paper size and centered correctly.”
Chris is doing a series of transfers for a limited edition music release next winter.
A video of how to do a Polaroid paper transfer is after the jump.
Get rid of the ads!
Did you enjoy reading this article as much as we enjoyed writing it? There's a way to support us and our reporting, getting ad-free navigation and more as a bonus. Subscribe to us for less than a coffee per month —just $3.99— or take advantage of our yearly subscription with a hefty discount for only $25.- An ad-free experience
- A free mystery box for Lightroom or Capture One
- All the books in our store
- 20% discount on Capture One
- 30% discount on Imalume Photo Theft Protection
- 20% off Herbs and Kettle Tea Company.
- 20% off your order from MPIX printing services.
- 5% off Viltrox Products via their eCommerce store.
- 10% off all film developing, printing and scanning services from Blue Moon Camera and Machine
- 15% off 7Artisans products: The lens and accessory maker is offering a sweet discount for Phoblographer's readers.