Creating the Photograph is an original series where we interview photographers about a photo that they shot and how it was achieved. The results are some knowledge passed on to you. Want to be featured? Email chrisgampat[at]thephoblographer[dot]com.
Photographer Sean Tucker is both a photographer and videographer hailing from the UK. He recently released a three part video series giving some useful tips and tricks to would-be product photographers. “I am actively building my portfolio in both stills and video to go after more people-centric work in the future because that is where my heart is. At present I am working on a portrait series, as well as finishing up editing on an episodic documentary series which I shot last year in New York, about a podcast duo reaching their 10 year mile stone.” Sean tells us.
He is also quite the lighting wizard and managed to make a single artificial light look completely natural.
But how did he do it?
Also be sure to check out Sean on Facebook, Twitter, Youtube, Instagram, Flickr.
Concept
Moonika and her friend Lisa are costume designers for the stage here in London, and they contacted me to take some shots of the new pieces they had made. We decided to head out into the woods out back of Lisa’s house to see if we could get some Tudor-style shots, for those of you familiar with the recent bodice-ripping Showtime series.
I knew in my head what sort of shot I wanted.
The Gear
Camera: Canon 5DMk II
Lens: Canon 85mm f1.8
Filter: Variable ND Filter
I knew this combo would give me the shallow depth of field I wanted, but there was a bit more work to do to get the shot I wanted.
The Shoot
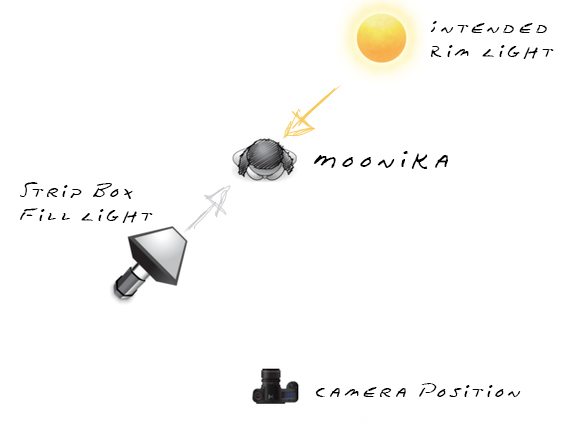
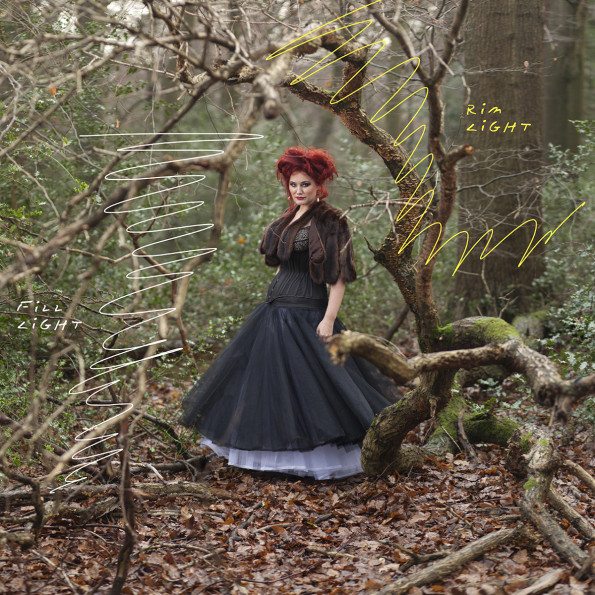
I was looking for a shot of the setting sun coming in through the trees while the subject strolls through the woods. I would bring along my Alien B800 light to act as a fill for the obvious shadows which the setting sun would cast. I chose to use a Strip Box modifier because I wanted the light to have a reasonable even spread across Moonika’s whole length, rather than the fall off I would have had if I used a 1m softbox placed at head height. I could have gotten the even spread with a large 2m softbox, but then I would have had a lot of light spreading across the floor as well. The strip box gave me the most control.
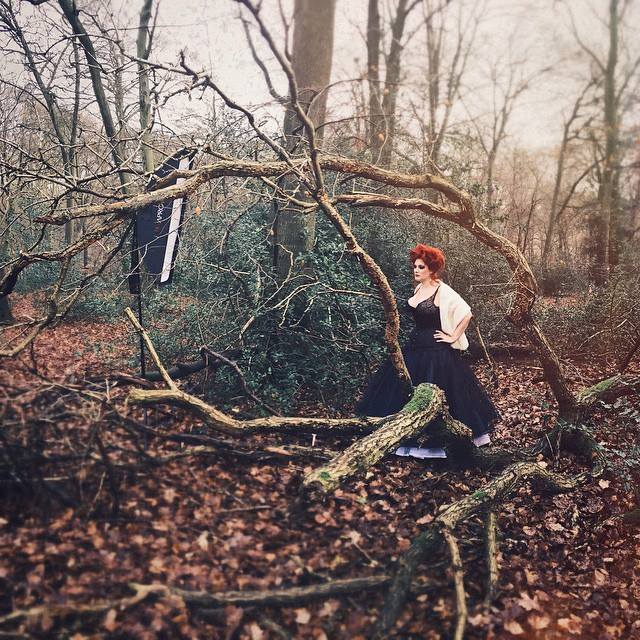
Unfortunately, as you can see from this ‘behind the scenes’ shot, the weather wasn’t playing ball:
No sun.
Flat grey skies.
Not to worry.
I positioned her with her back to the sun anyway to get at least some rim light and lightly filled from the front with my strip box.
I’ll get to how I accentuated the light in the edit.
We had done a bit of walking around and Lisa had discovered a fallen tree. I asked Moonika to stand in middle and positioned myself so it created a natural frame to the image with her standing centre frame.
I also knew that I wanted to imitate a medium format shot, with a full length square cropped shot, and a shallow depth of field. No small task with a DSLR.
Now follow my logic here. If I want the square crop and depth of field which a Medium Format would give, I could get close with a few stitched shots from my 35mm full frame DSLR.
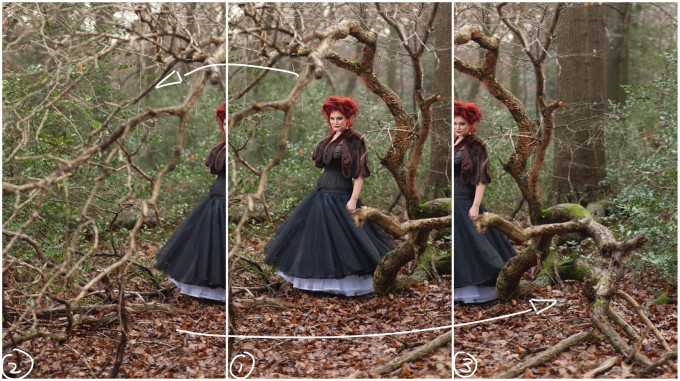
If I shoot 3 portrait-oriented shots, at a low aperture, and then stitch them together and crop the image square, I should be able to replicate some of the feel and depth I’m looking for. So I lined up my first shot with Moonika sitting in centre frame, and then warned her that I needed her to freeze for 3 consecutive shots, including one left and one right of the centre frame, with a small over lap between each so that photoshop would have something to stitch. Here are the raw shots out of camera:
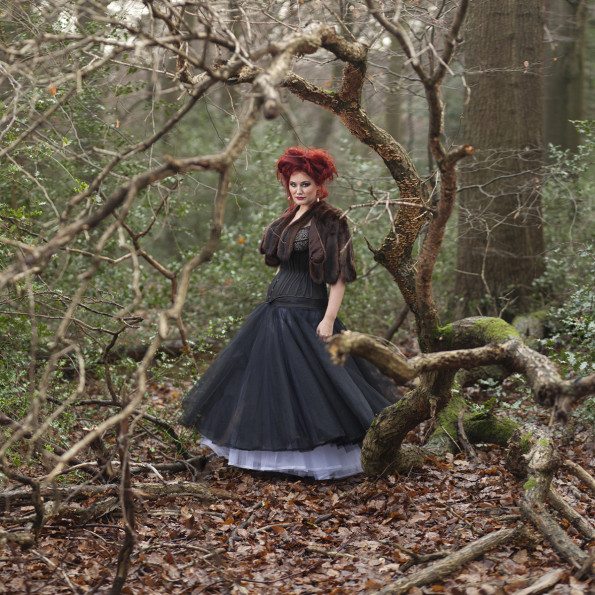
And here is the shot after stitching the 3 shots together and cropping:
Back to the lighting. What sun was making it in through the cloud cover was still highlighting her from behind, including her hair and shoulders, but not nearly as much as I wanted. It still looked a little flat.
So with the lighting I wanted in mind I went to work in Photoshop.
Post Production
There is too much to go into detail about here, but let me list the steps I took:
I removed any obvious distractions with the Healing Brush and Clone Stamp tools.
I dodged the highlights to accentuate shape using a Curves Layer set to Screen, and masking it in.
I burned the shadows to accentuate shape using the Curves layer set to Multiply, and masking it in.
I then went to work on colour using a combination of Curves, Colour Balance and Levels to get the feel I wanted. In short I was looking to warm up the whole image, and introduce some cooler tones to the shadows to create some colour contrast.
I then used the Lighting Effects Filter to direct the light from the rear of the image. This layer only ends up being used at about 20% opacity but gives a nice starting point.
I then created a fake sun in the background using the Lens Flare Filter on two layers, one small one at the centre point of my proposed sun, and one larger at a lower opacity to give the light some depth. These layers were both masked using the Apply Image function so that they only applied to the highlights of the image.
I created some subtle rays for the sun by creating a curves layer with brightened mids and highlights, and boosted yellows, and then drawing rays extending out into the image on a mask layer. To blend everything I blurred the mask layer until I couldn’t see any defined lines.
I burned the edges of the image to pull the focus towards the centre, again using a masked Curves Layer set to Multiply.
I boosted the Saturation of her hair with a masked Saturation Adjustment Layer.
I further corrected the colour, as before, to create more feel after completing the light changes.
To finish I sharpened the image using a High Pass Filter.
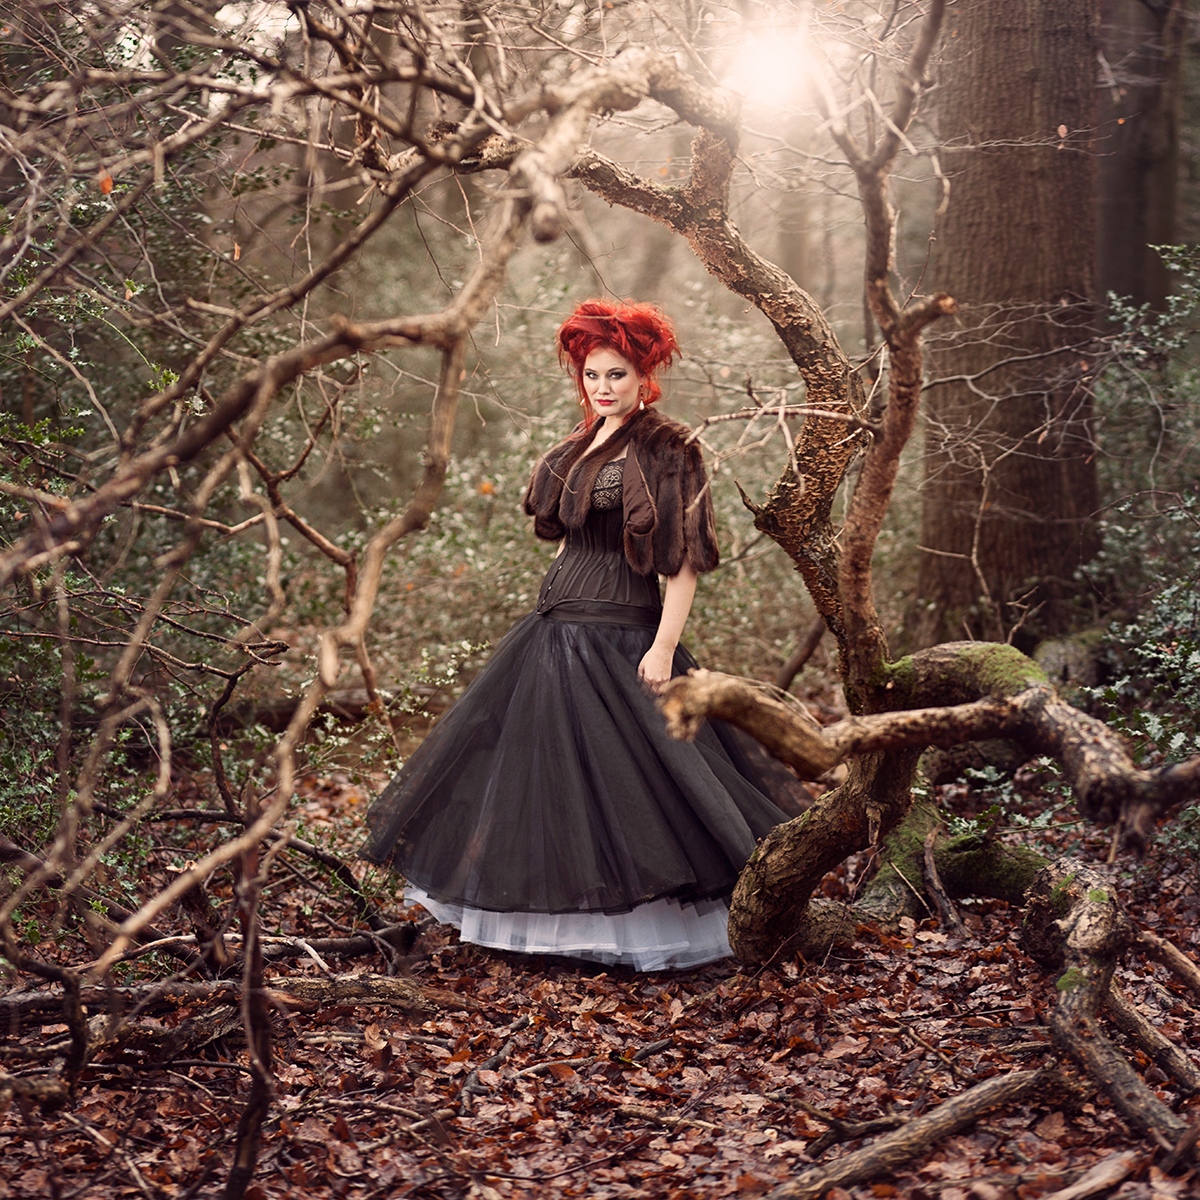
Here is the final image:

