Want more Useful Photography Tips? Click here.
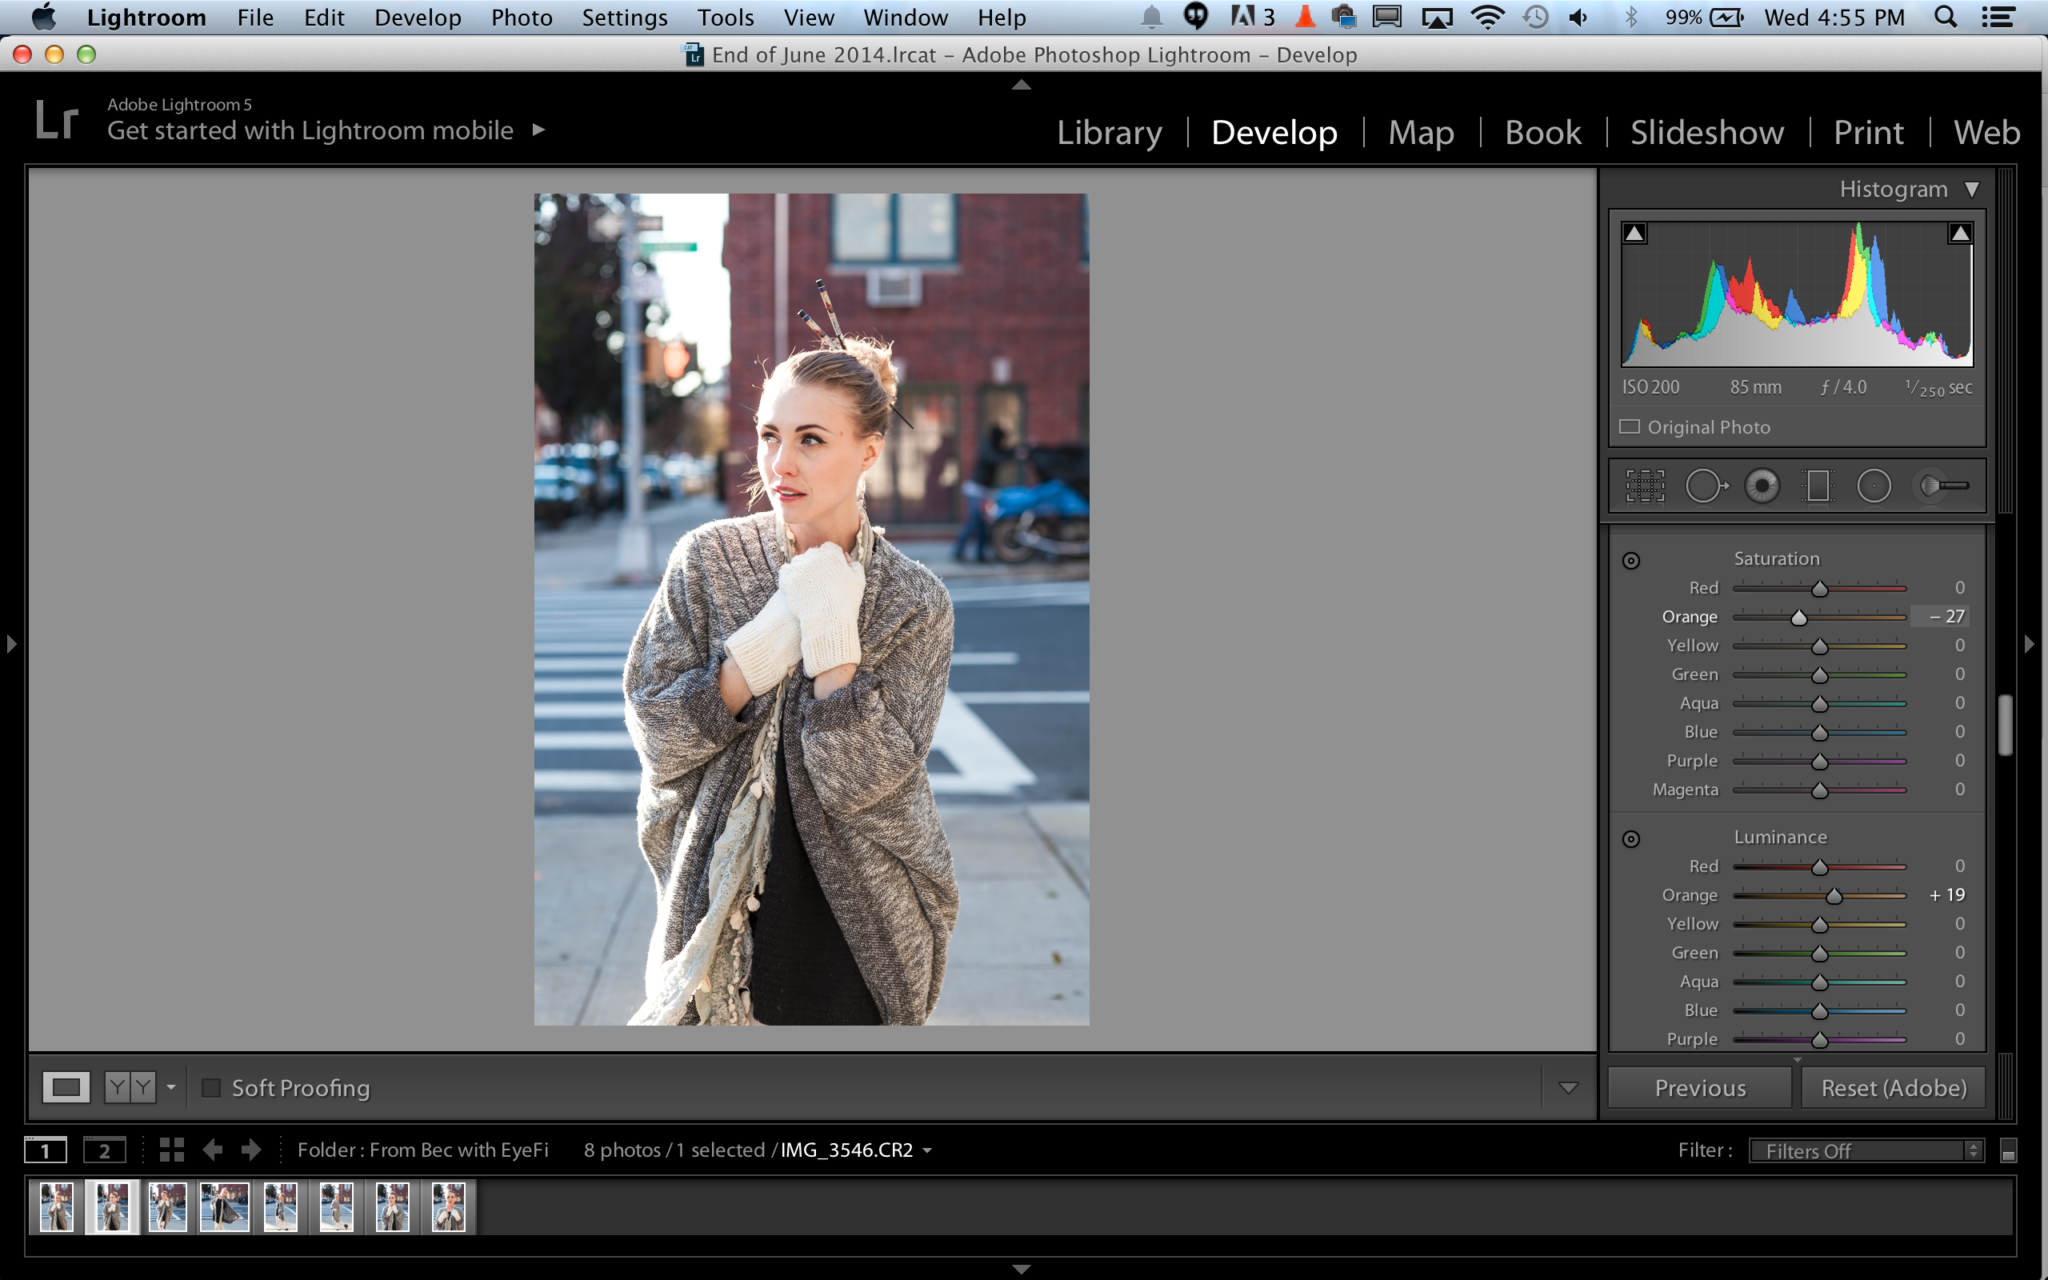
There are times in portraiture where your camera will render a person’s skin as way too orange. This tends to happen a lot during the golden hour. But getting rid of that problem is very, very simple and it can be fixed in less than 10 seconds. It has nothing to do with the desaturation slider–at least the one all the way at the top in Adobe Lightroom!
To start, the most obvious way to prevent this problem is to manually white balance. But that isn’t always possible and sometimes you just don’t have time to do so. After you’ve got your white balance just right, it’s time to work with the skin tones.
The secret is to work with the color channels specifically. We recommend turning up the luminance a bit to brighten the orange color channel and then slightly desaturating it to give the skin tones a more natural look. But to be sure that the program sees it as orange to begin with, we recommend choosing the dropper tool. Sometimes, Lightroom can see oranges as yellows or reds.
If it isn’t working for you, then take the adjustment brush and touch up the areas by brightening them a bit and desaturating them as well.
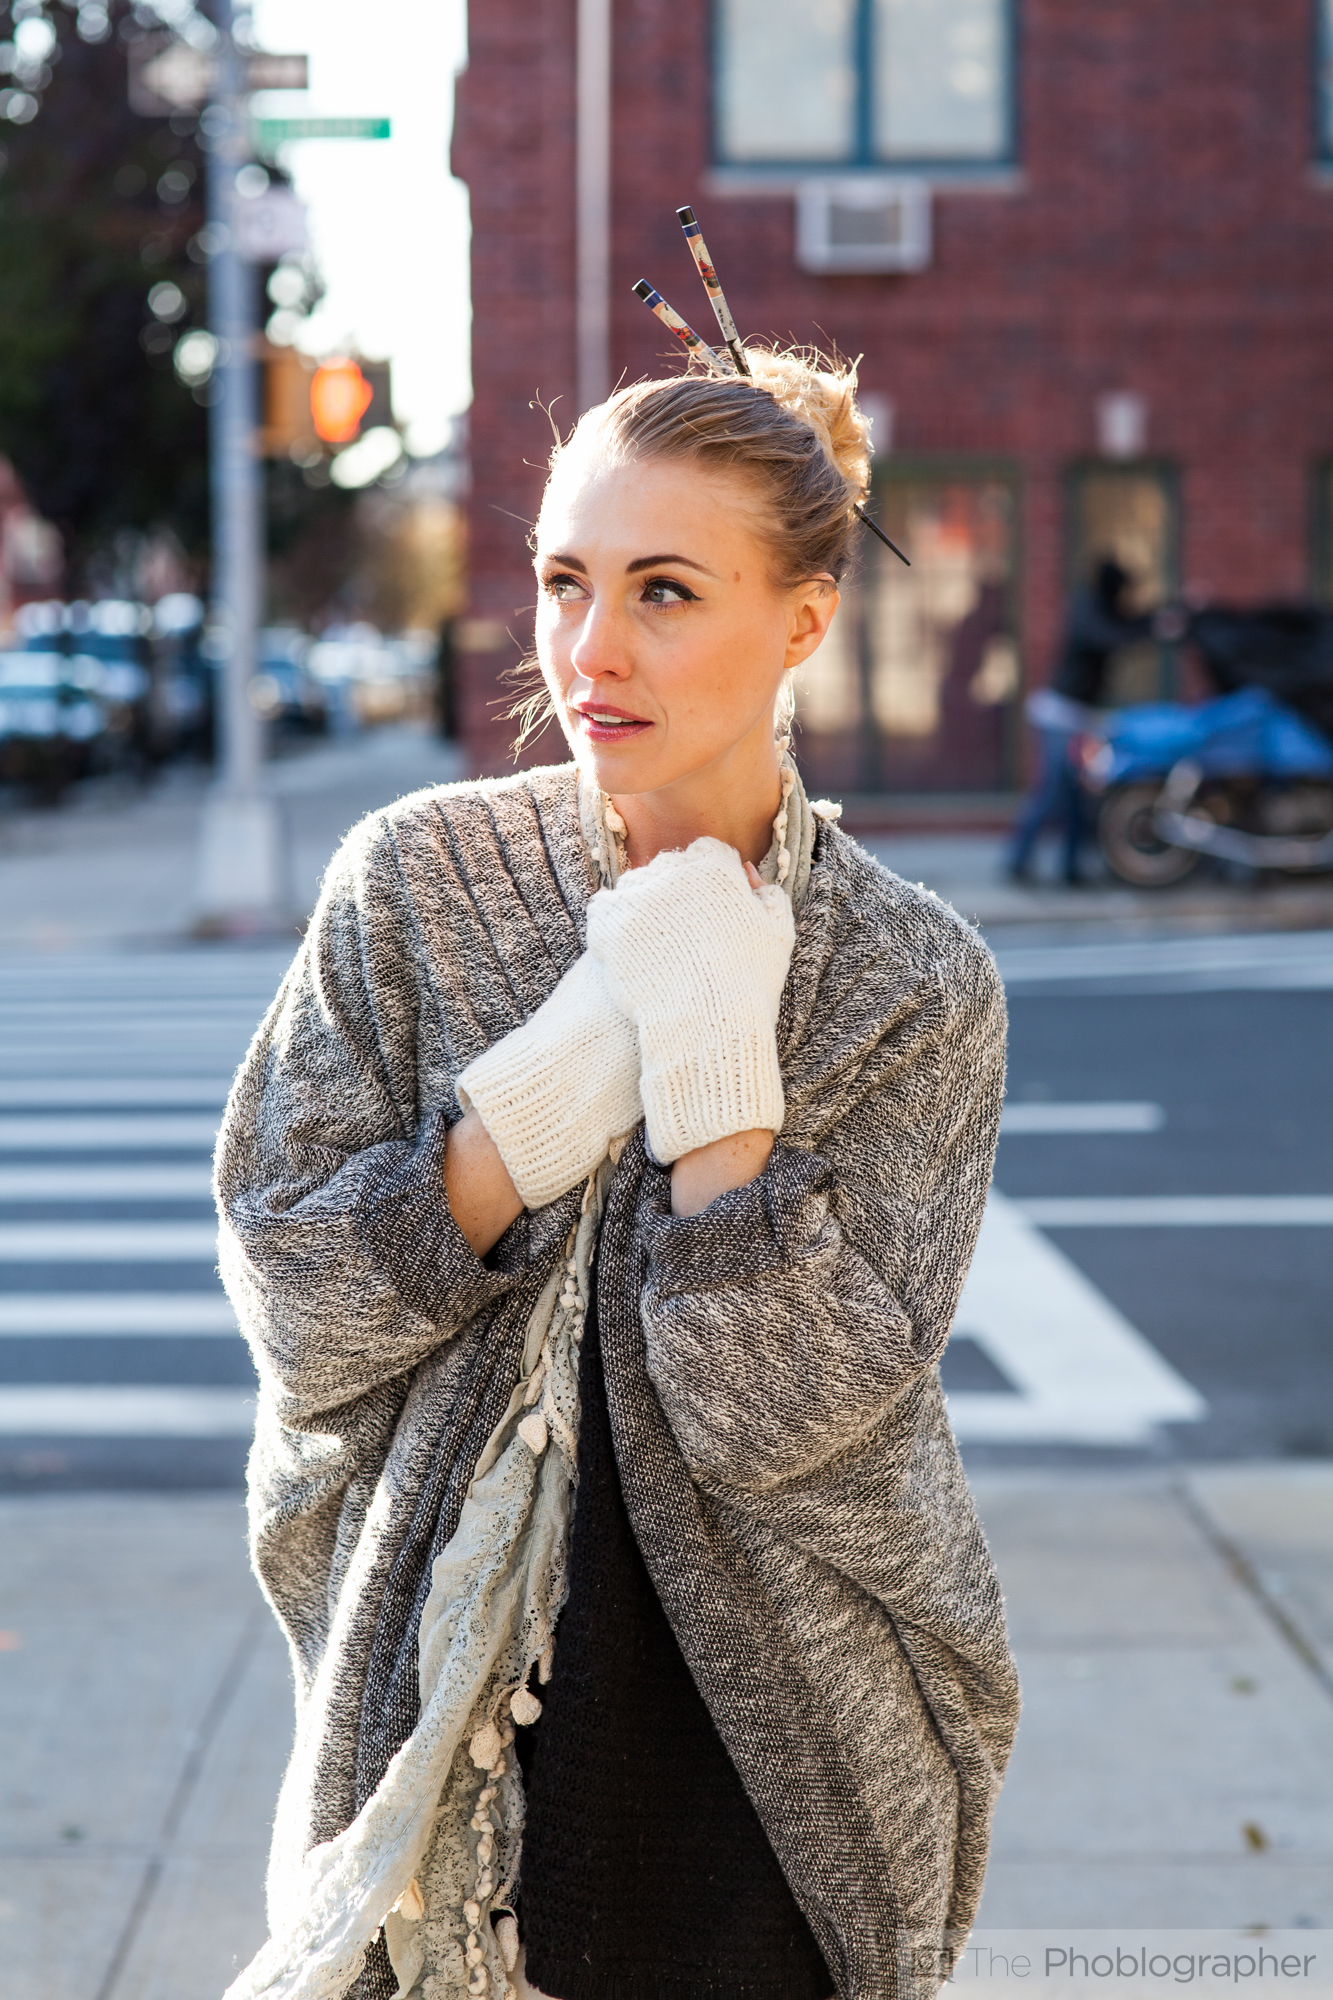
The results of this project are after the jump.
Get rid of the ads!
Did you enjoy reading this article as much as we enjoyed writing it? There's a way to support us and our reporting, getting ad-free navigation and more as a bonus. Subscribe to us for less than a coffee per month —just $3.99— or take advantage of our yearly subscription with a hefty discount for only $25.- An ad-free experience
- A free mystery box for Lightroom or Capture One
- All the books in our store
- 20% discount on Capture One
- 30% discount on Imalume Photo Theft Protection
- 20% off Herbs and Kettle Tea Company.
- 20% off your order from MPIX printing services.
- 5% off Viltrox Products via their eCommerce store.
- 10% off all film developing, printing and scanning services from Blue Moon Camera and Machine
- 15% off 7Artisans products: The lens and accessory maker is offering a sweet discount for Phoblographer's readers.