
There are loads of films out there that have a beautiful and iconic look to them that die hards will say that you can’t capture at all. But even though this may be true for color film, when it comes ot black and white film it’s a lot simpler. Through lots of careful observations and experimentations, we believe that we’ve figured out the way to make your images look a lot like Fujifilm NEOPAN, or at least come close to it.
Fujifilm Neopan was a black and white low contrast film that was loved by many photographers out there for its graininess and its ability to be so versatile in the darkroom due to the low contrast nature of it. Essentially, what this meant is that it was incredibly forgiving.
But to get that look in Adobe Lightroom, you’ll need to do a little bit of work. However, it’s really quick and really simple.
It Starts With the Image
First off, what we’re going to say from the beginning is that in order to get this done in the quickest way, it will first start with a properly exposed image. To start, your camera should be in the evaluative metering mode and you should be trying to expose for the midtones–which essentially means that you should get the meter marker in the middle of the exposure meter when shooting.
But the be honest, modern camera sensors of anywhere from up to five years ago are all incredibly capable and if you over or underexpose by around one top of light, you’ll still be able to equalize the image and get the results that you want.
The Editing
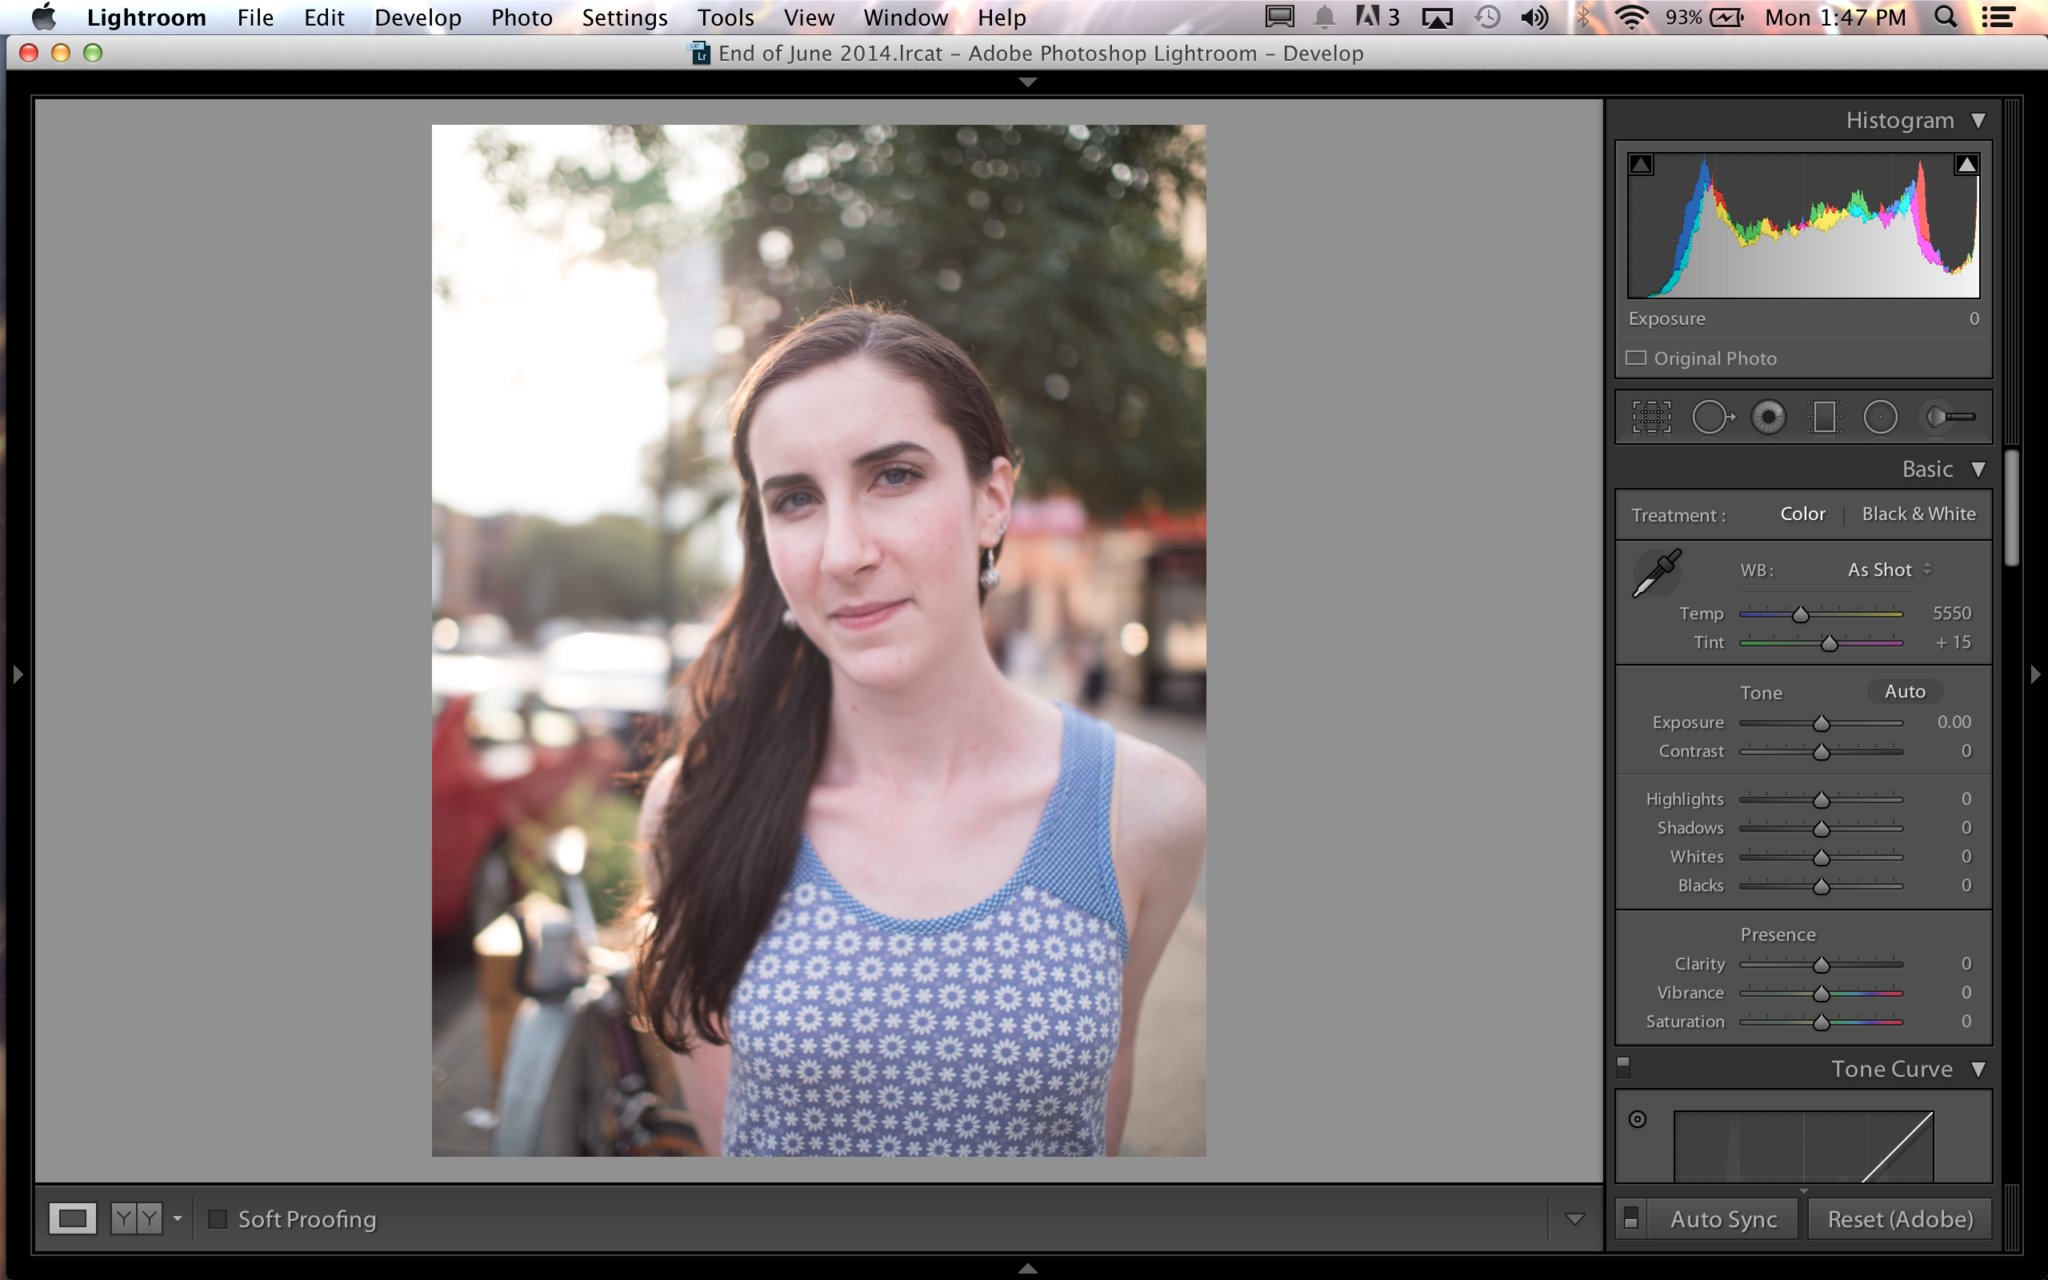
So–let’s get started. First off, what’ you’re going to do is load up your image in Adobe Lightroom. For the most real estate space to take careful note of what you’re doing to it, we recommend that you collapse the top and bottom panels.
Now you’ll want to get started working on the image.
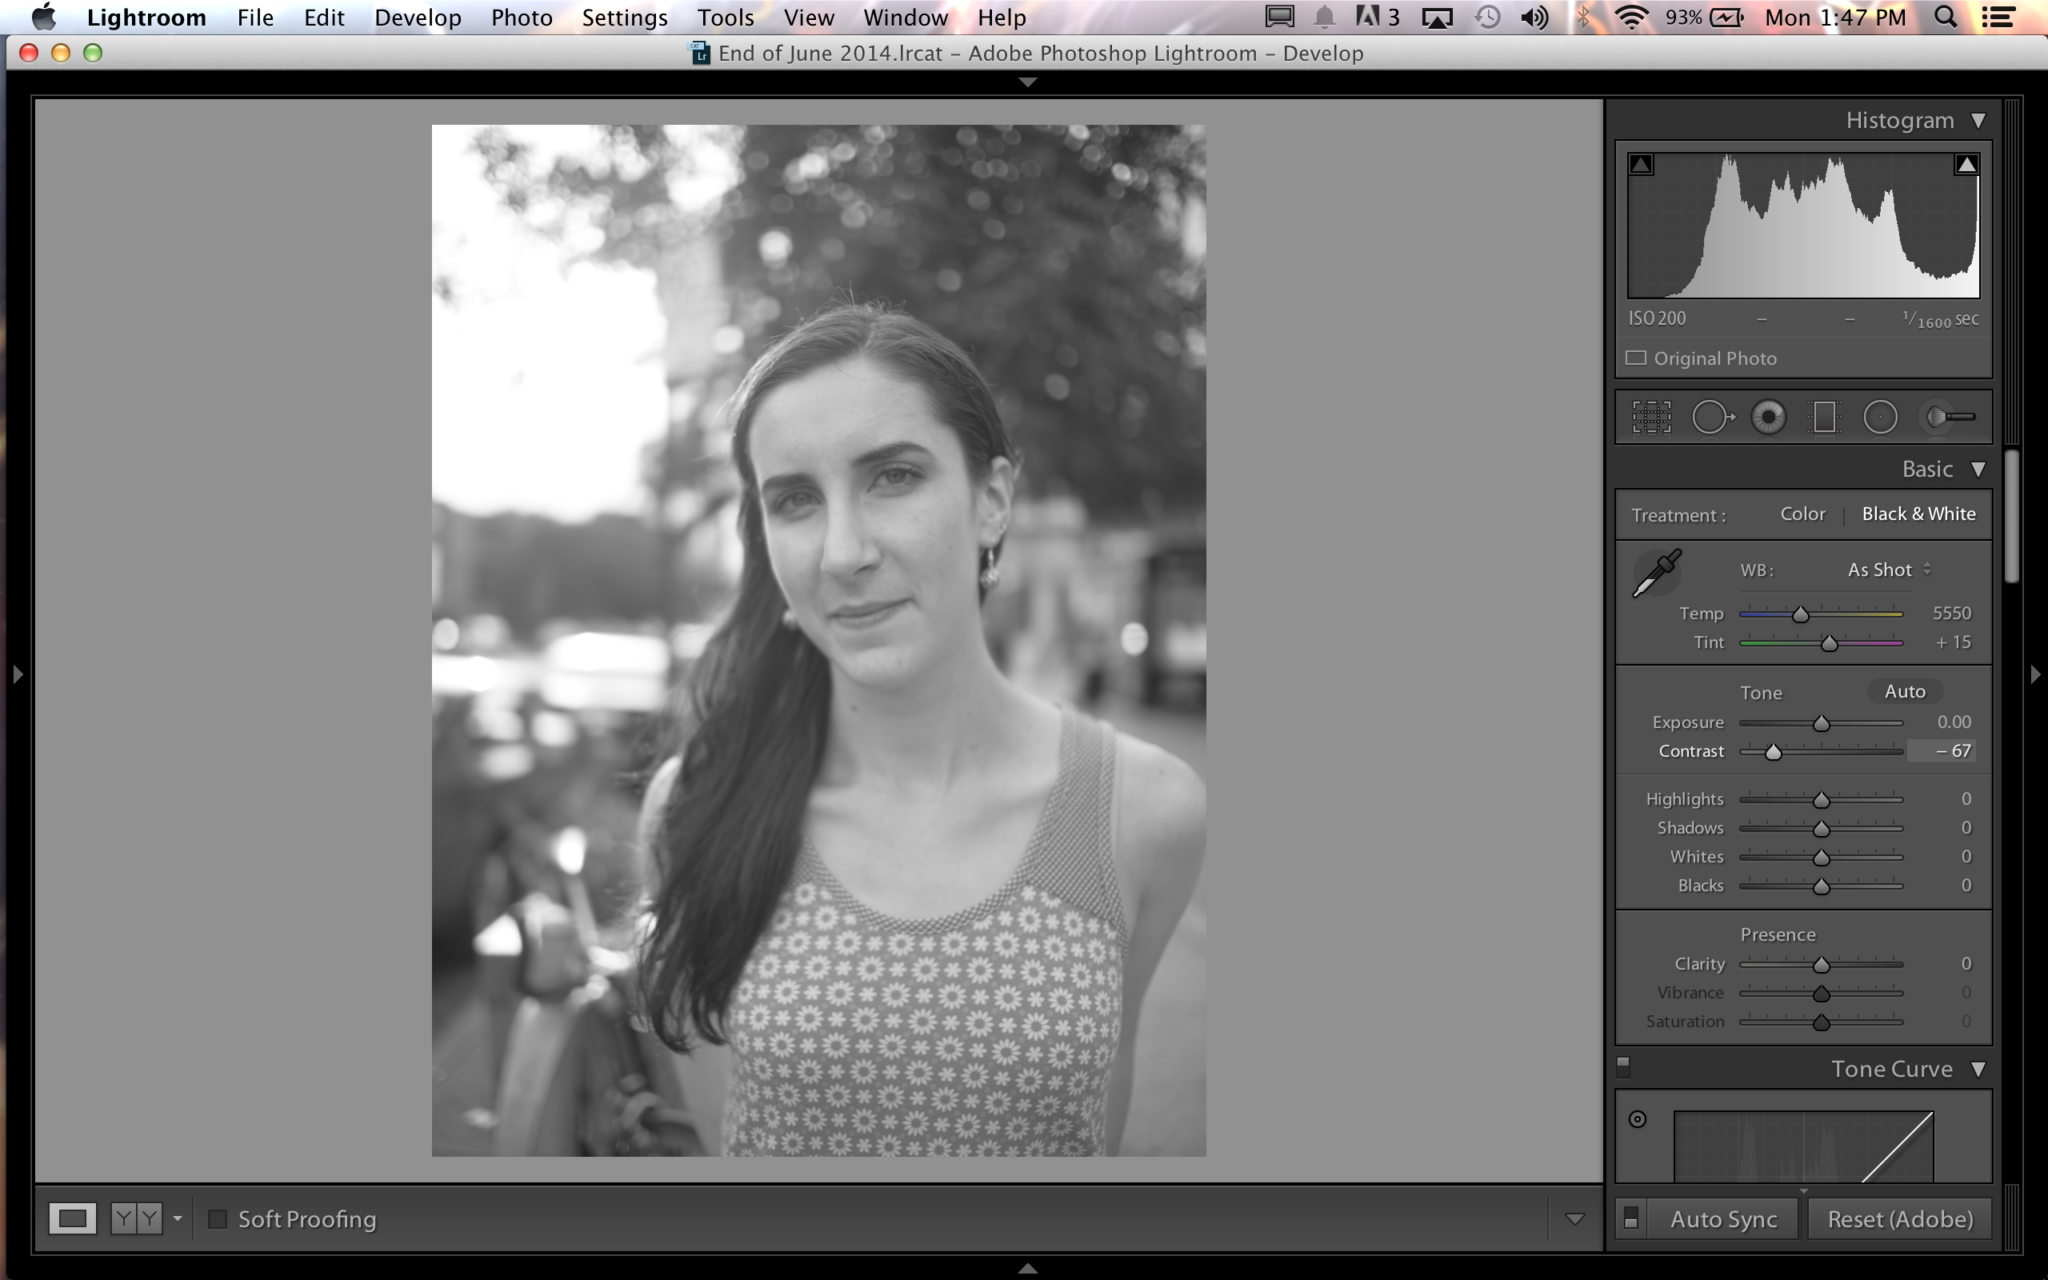
The first thing that you’re doing to do is hit the black and white conversation instead of desaturating. This will come in more handy later because if you want to tweak individual color levels to have more effect, it will be much easier and only require the pushing and pulling of a slider or two.
After converting to black and white, what we also recommend is that you lower the contrast quite a bit. We generally recommend that you nerf it by anywhere from 87-93% in order to get the least effect from contrast.
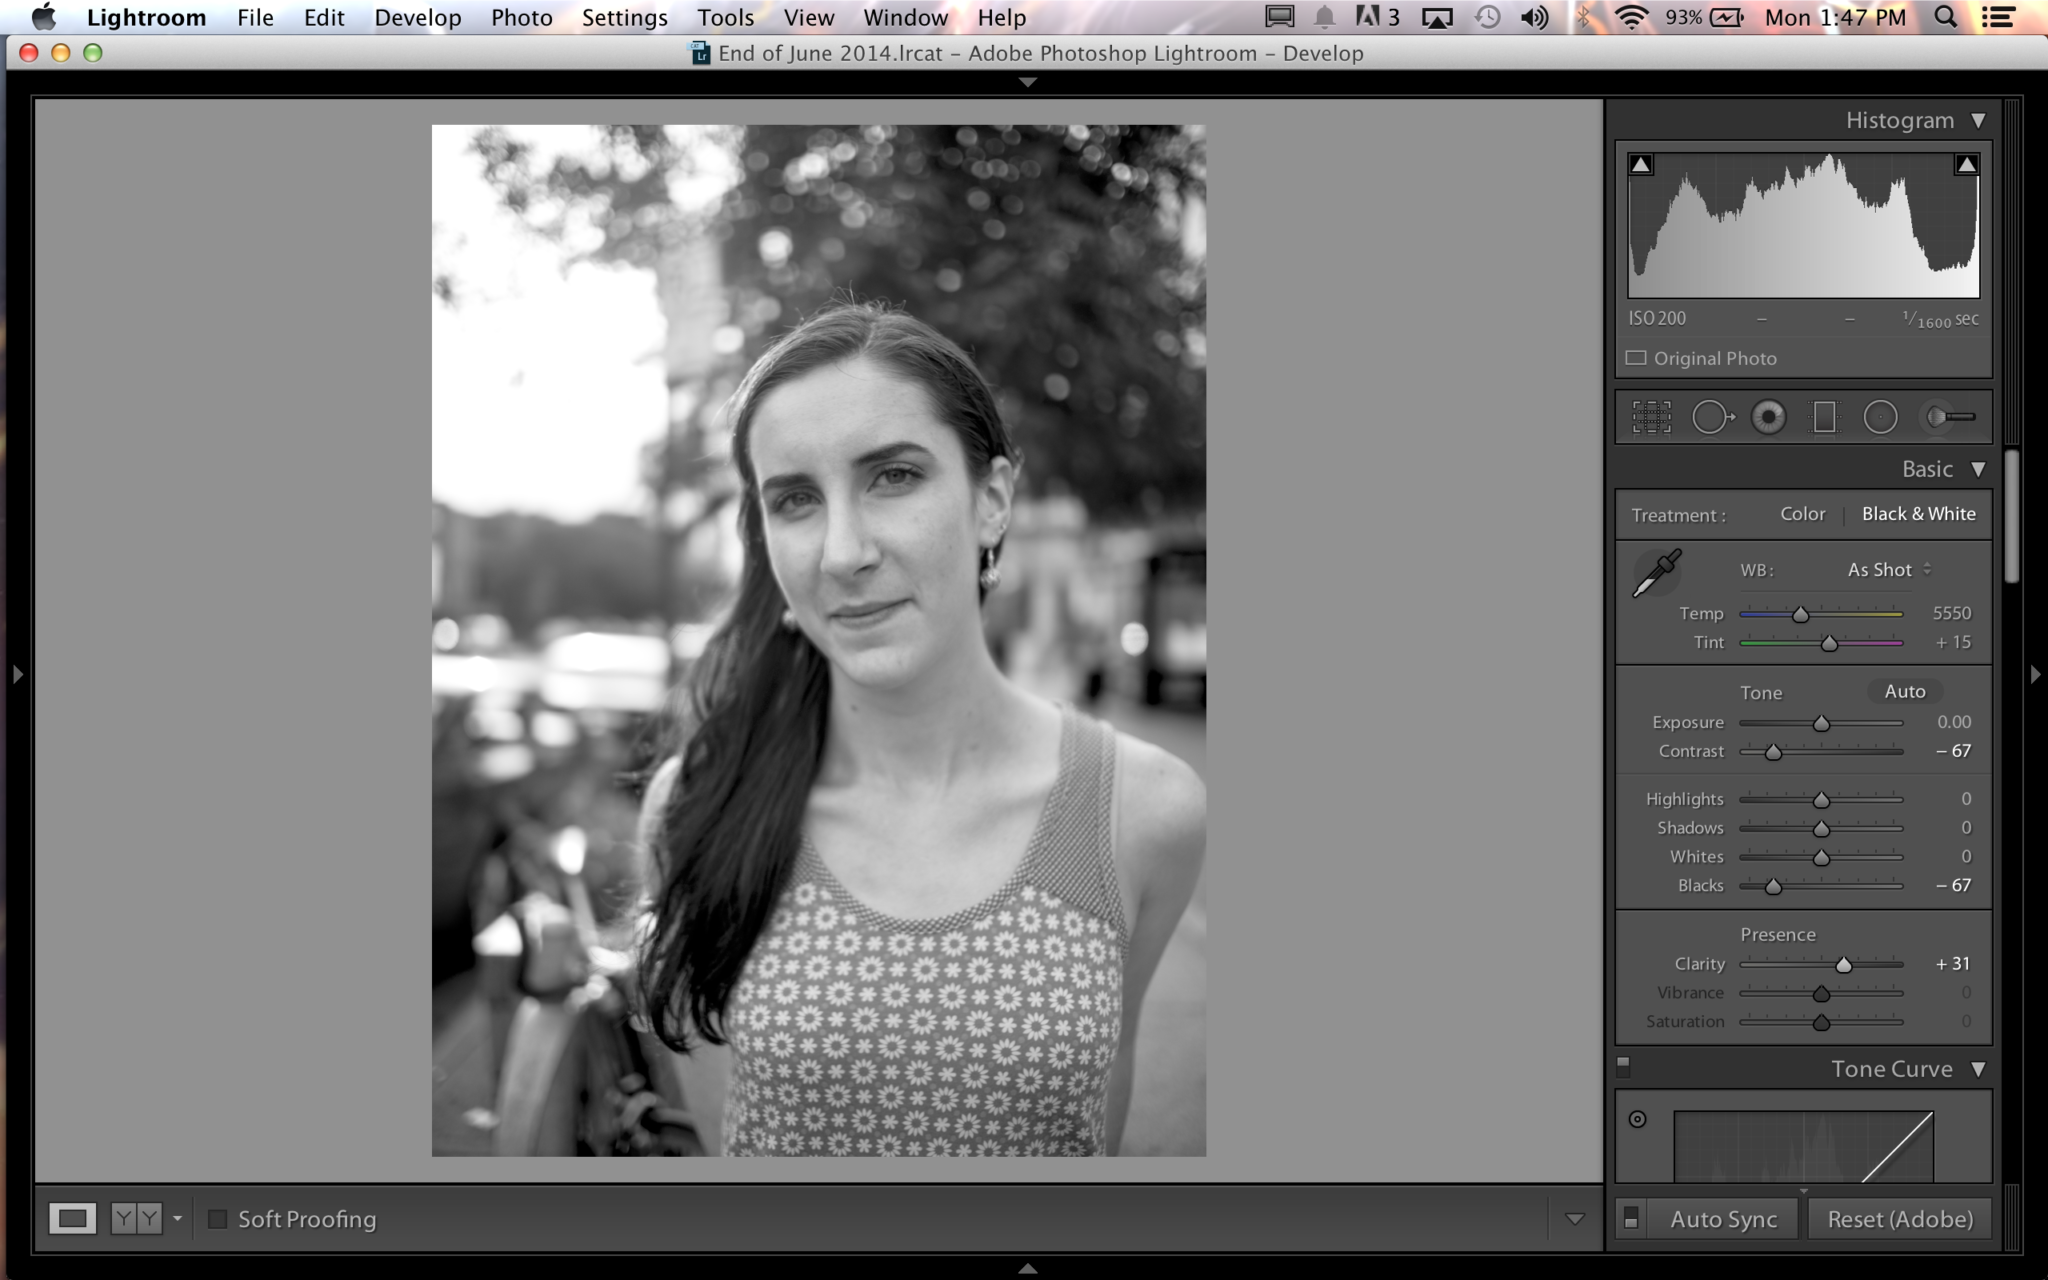
When you’ve done this, it’s time to start working with other parameters to give your image the characteristic punch that low contrast black and white film has without jeopardizing the dynamic range. In order to do this, we recommend that you bump up the clarity level a bit until you feel that the image has some punch. Then to add a bit more punch, you’re going to nerf the black levels a bit more. If you’re shooting a portrait like we did, then nerf it just enough to get detail in the hair or defining characteristics like eyes and shapes.
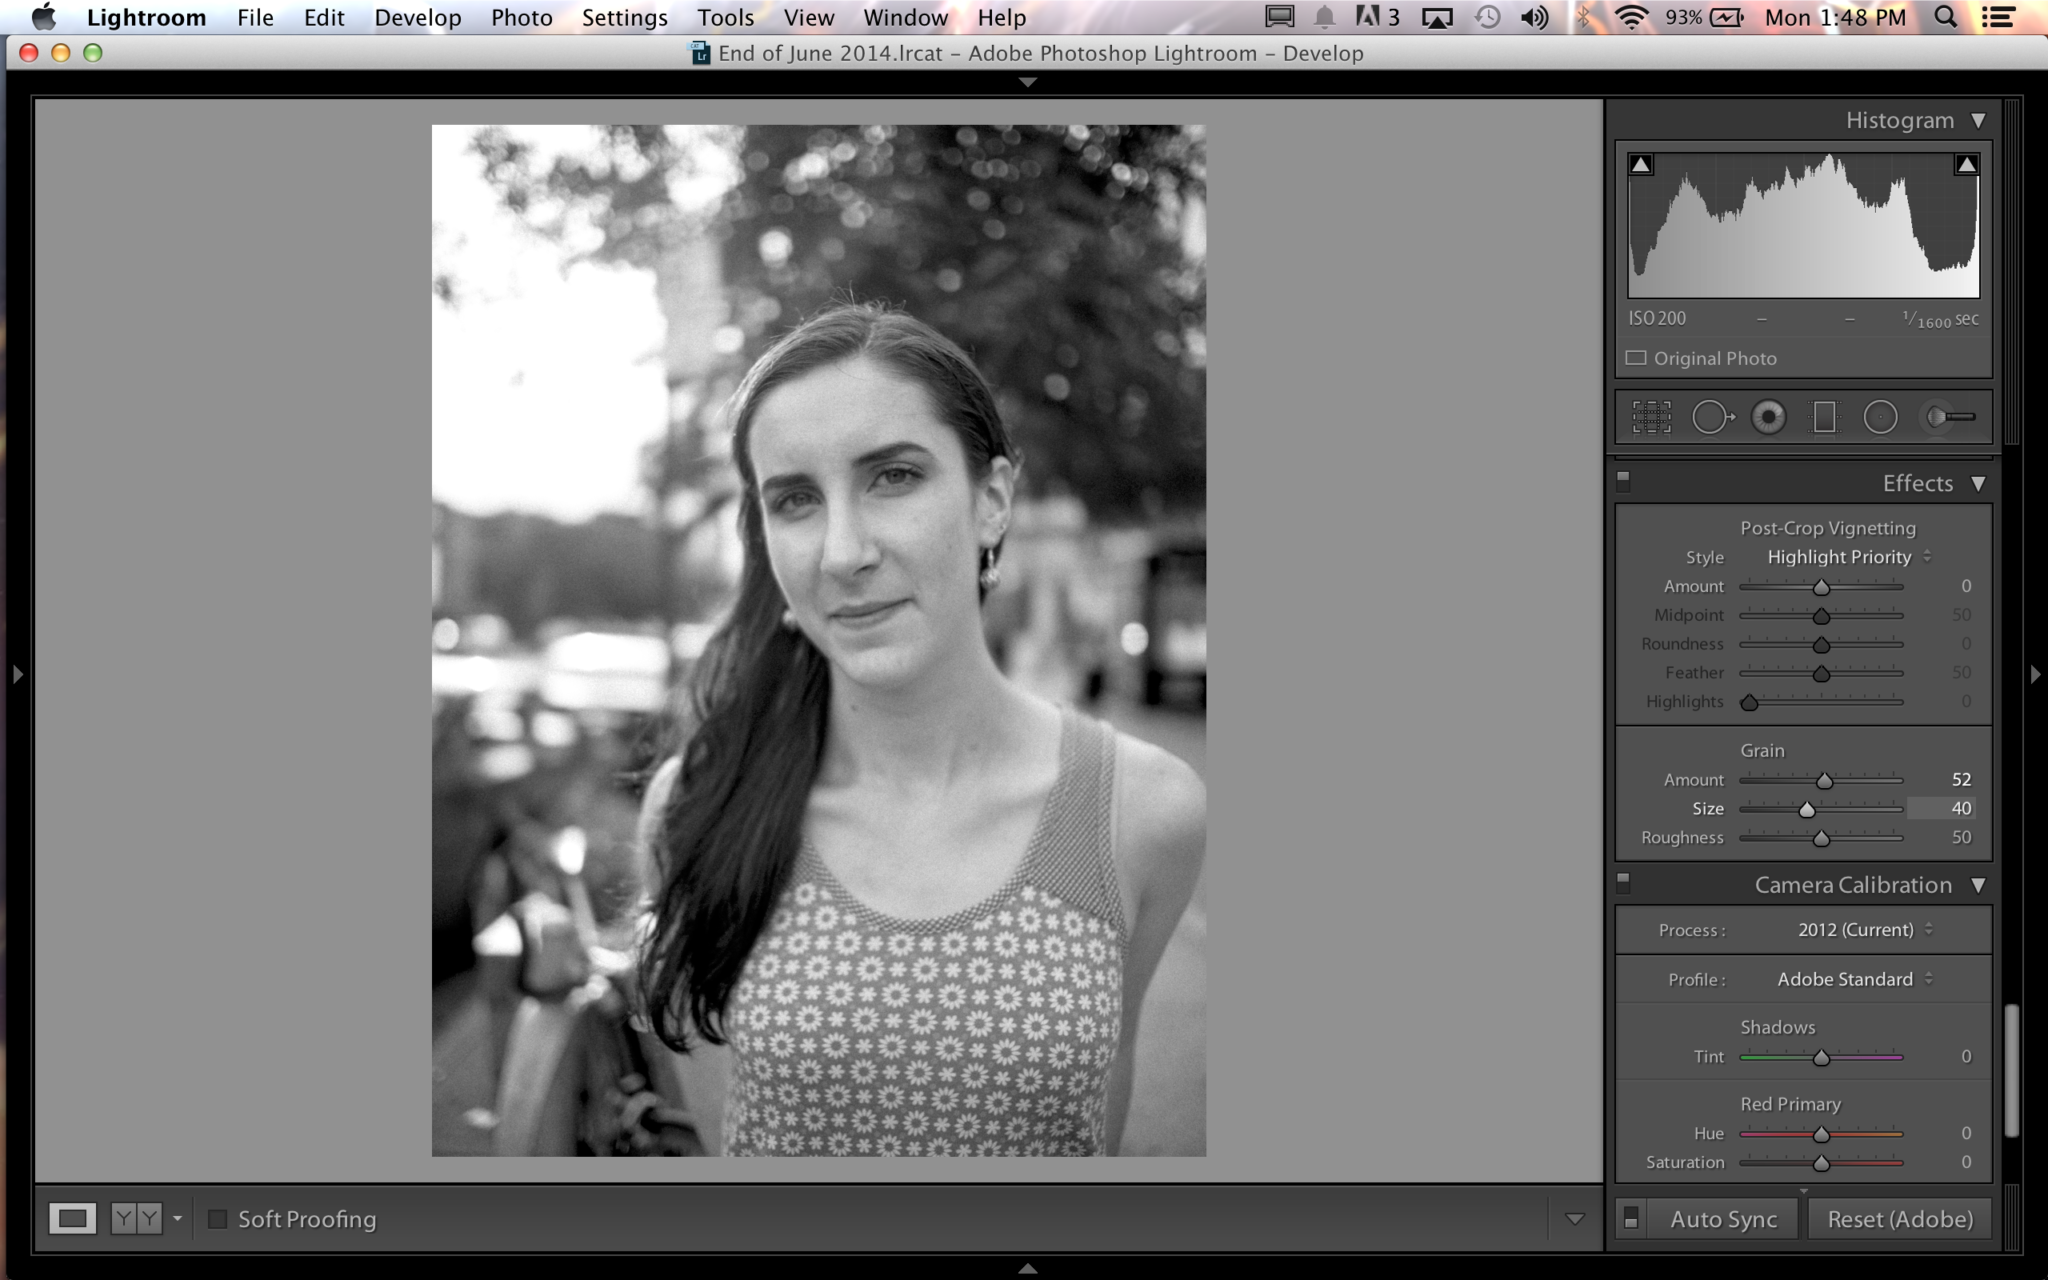
Next, what you’re going to do is add the biggest characteristic of black and white film: grain. Scroll down the side panel and add enough grain to make it look effective. You can do this in a number of ways:
– Maxing out the grain slider
– Putting in grain, but making said grain really big
– Increasing the roughness of the grain to make it look gritty.
We’re interested in a balance, and so by experimenting a bit we found a nice balance between some big grain, a bit of roughness or extra details, and beautiful look overall.
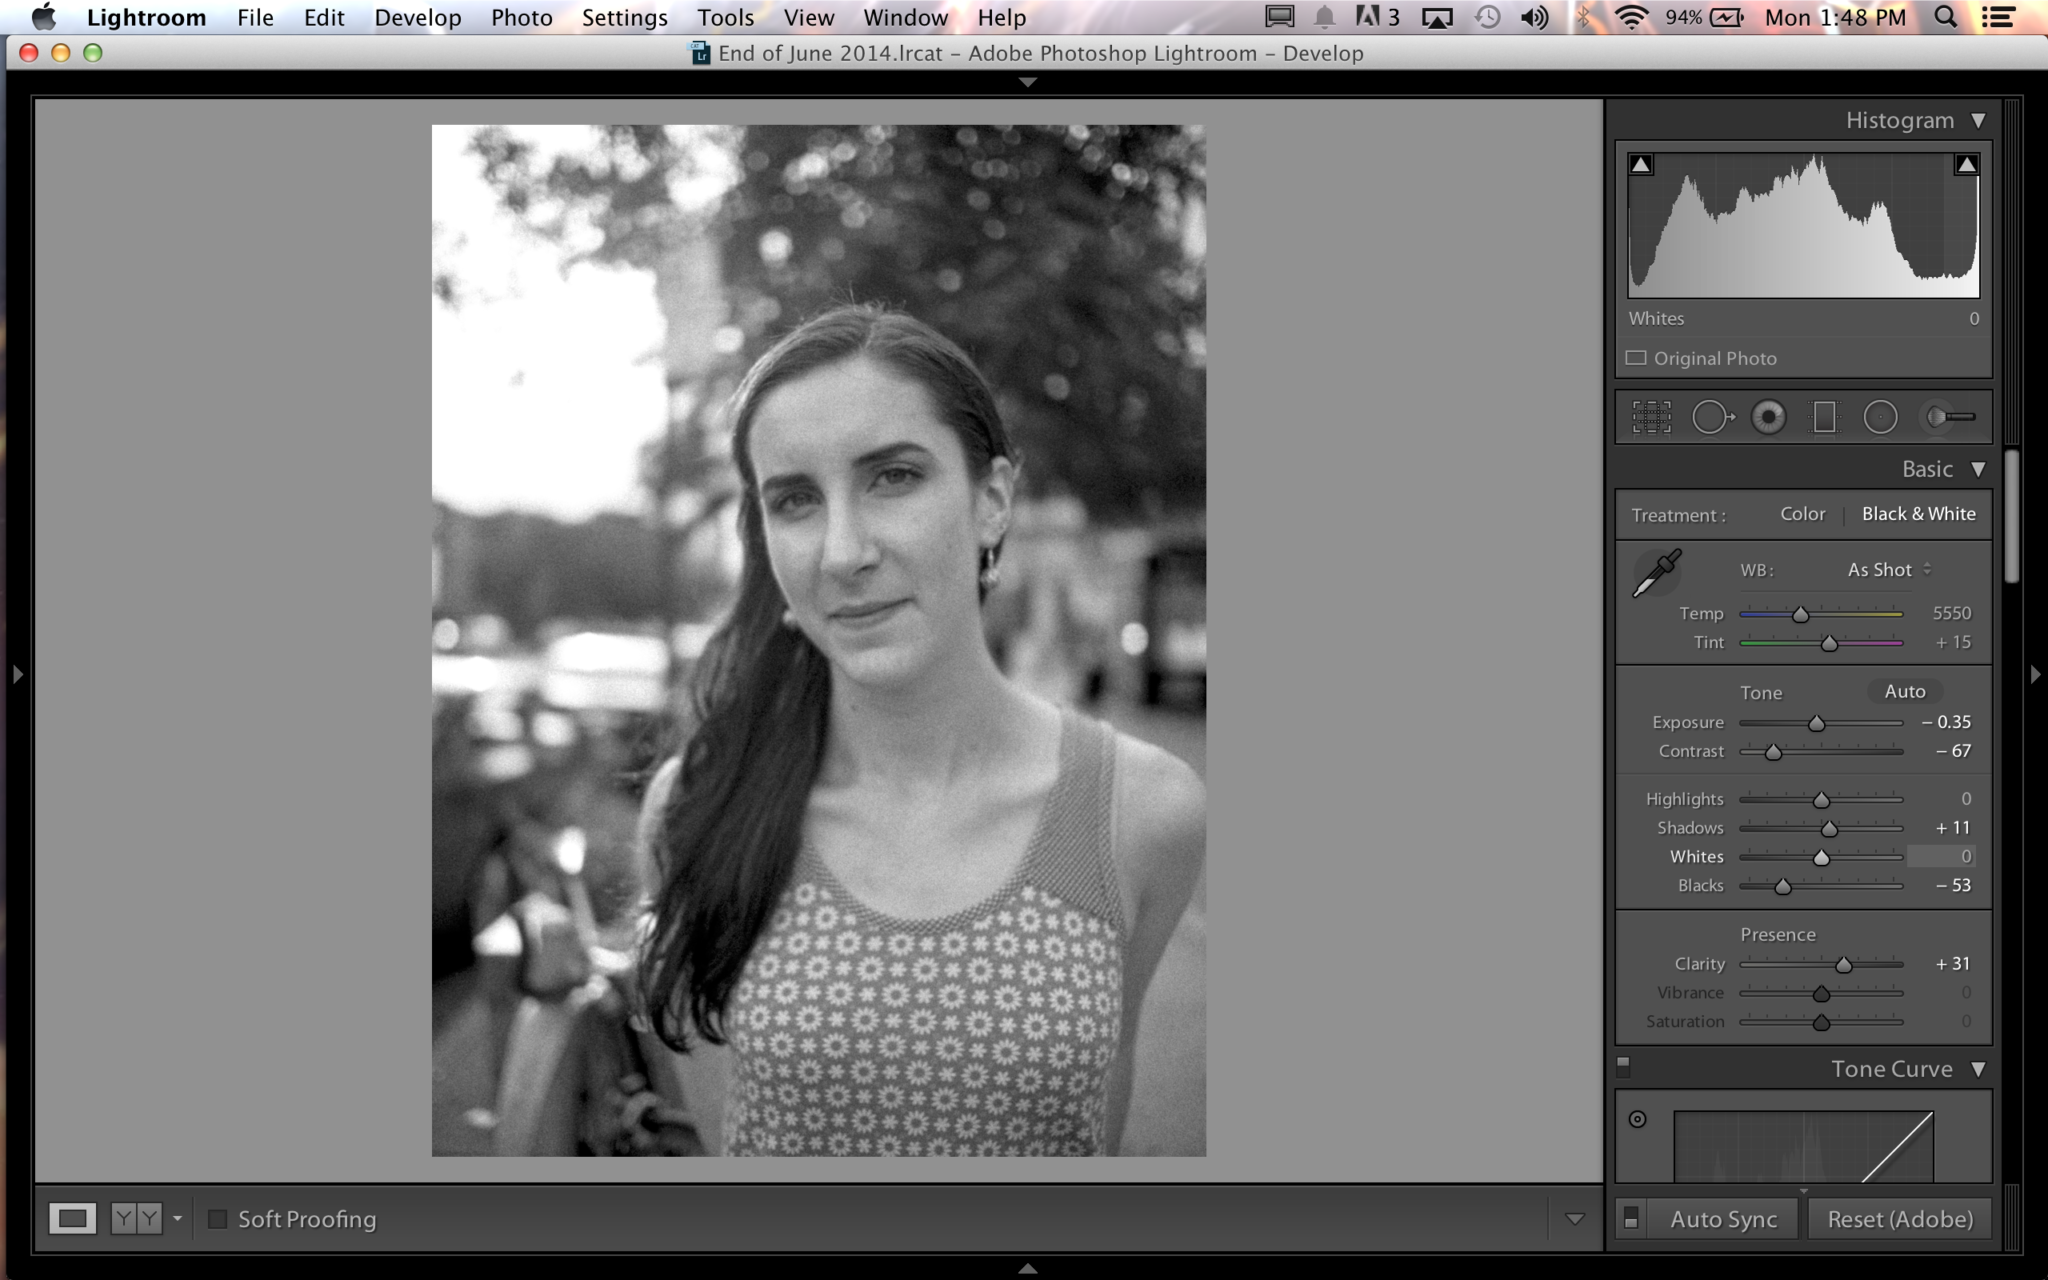
Lastly what you want to do is add some finishing touches that can require some eyeballing like killing the white range, boosting the shadows, and maybe working with the exposure or color levels individually to get just the right look that you want.
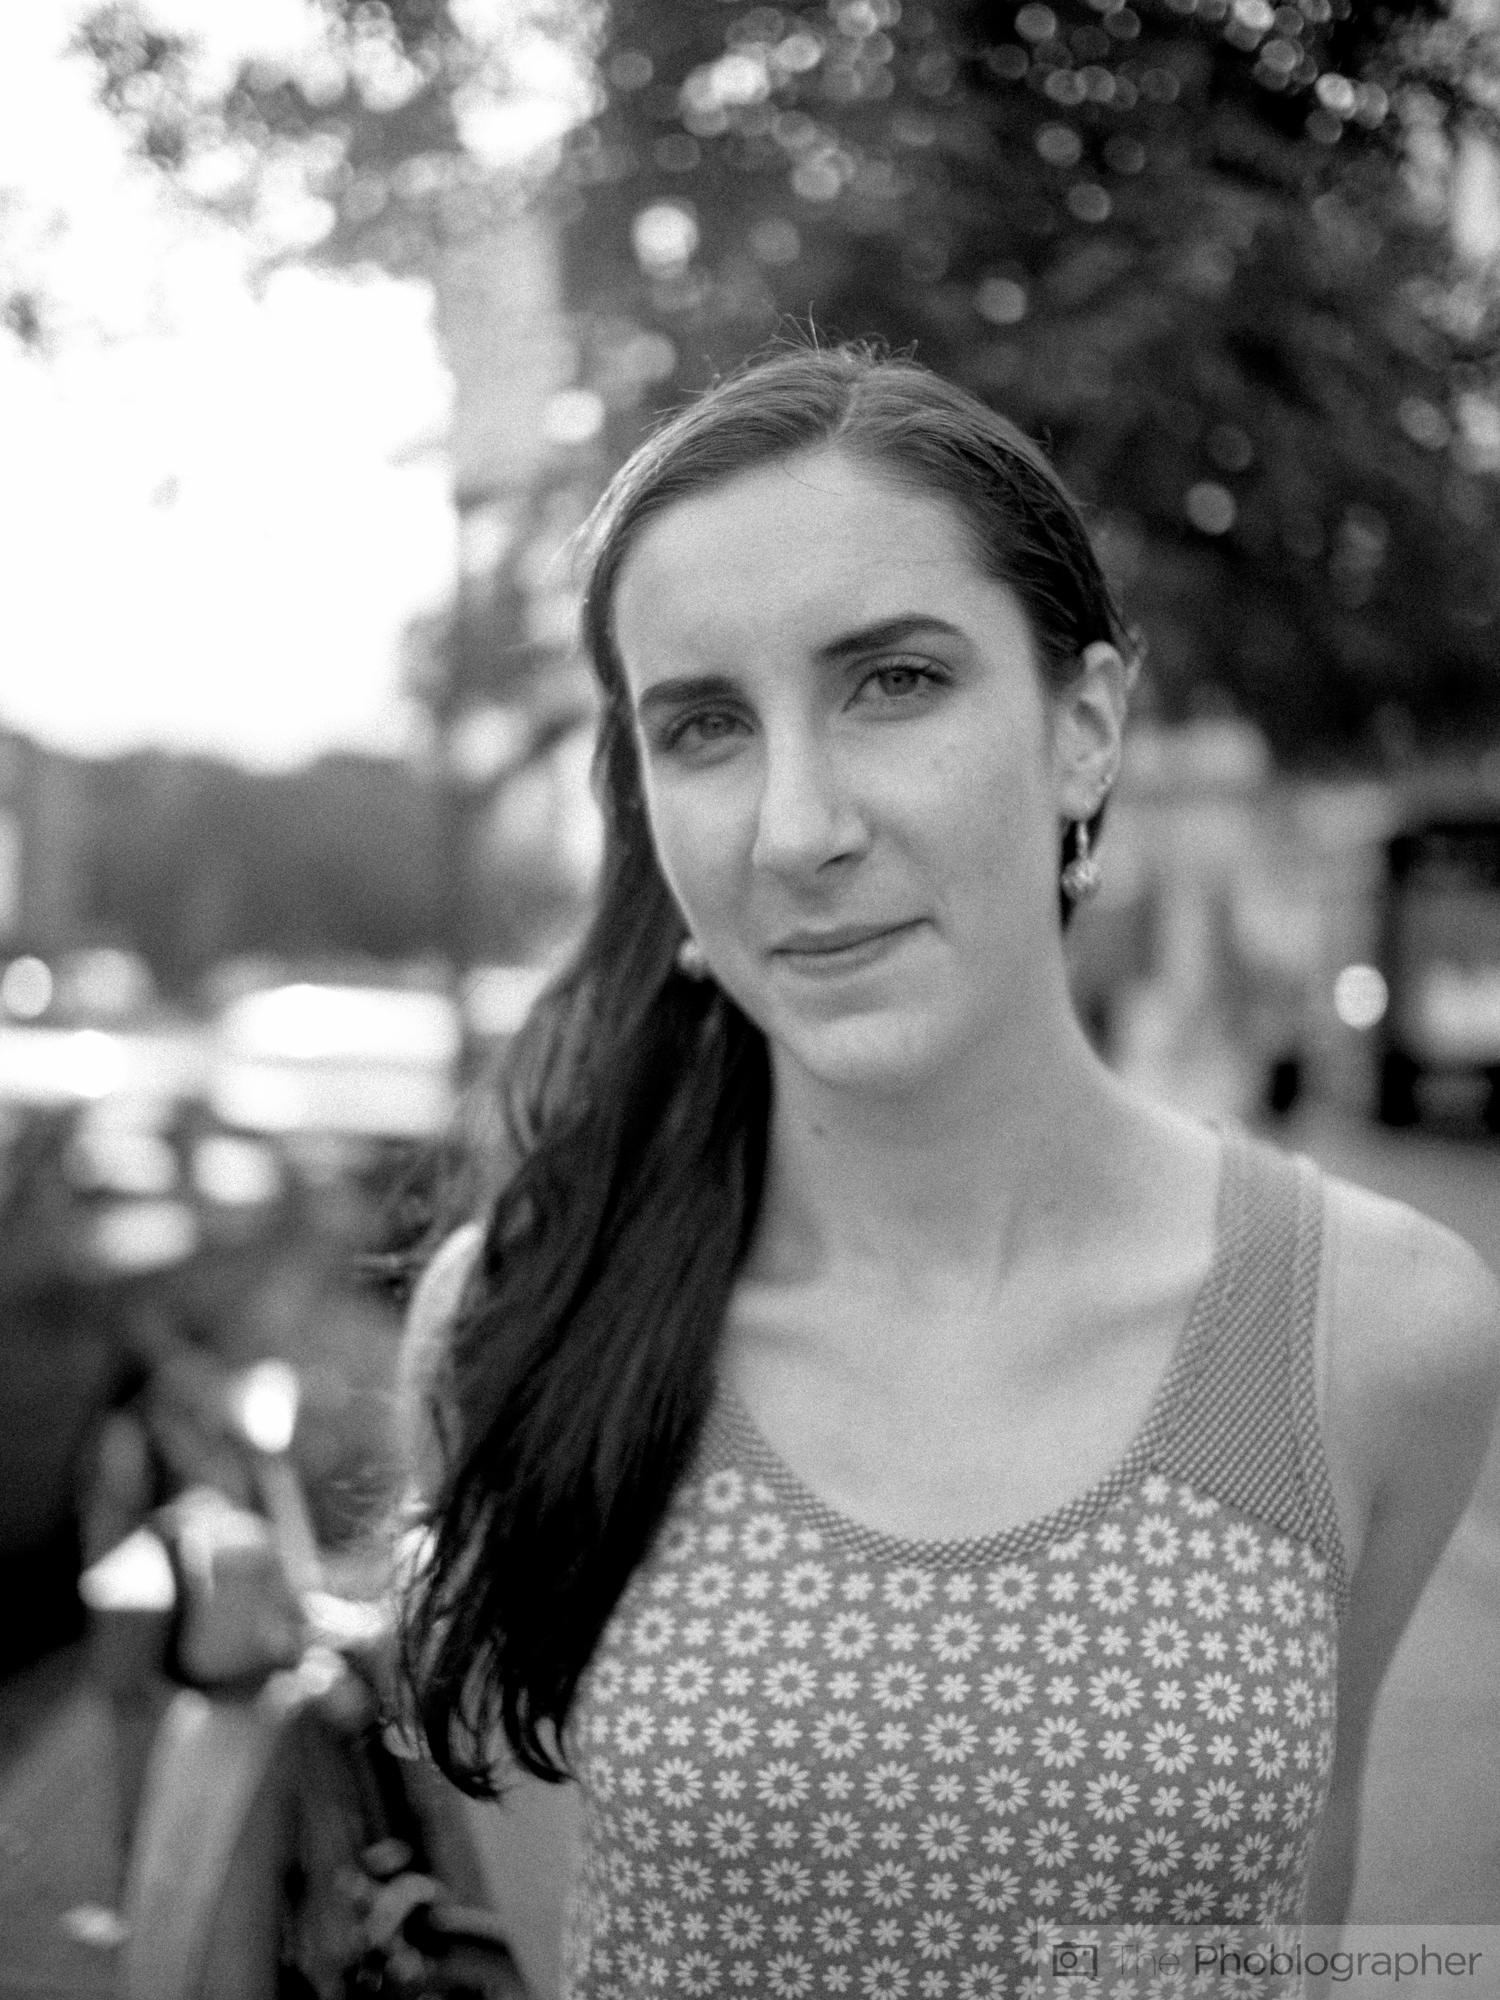
And with less than maybe two minutes of editing, you’ve created an image that looks like low contrast black and white film. Dare we say, after lots of comparing, we think that we nailed the formula to make it look like Fujifilm Neopan. Try it out for yourself.
Get rid of the ads!
Did you enjoy reading this article as much as we enjoyed writing it? There's a way to support us and our reporting, getting ad-free navigation and more as a bonus. Subscribe to us for less than a coffee per month —just $3.99— or take advantage of our yearly subscription with a hefty discount for only $25.- An ad-free experience
- A free mystery box for Lightroom or Capture One
- All the books in our store
- 20% discount on Capture One
- 30% discount on Imalume Photo Theft Protection
- 20% off Herbs and Kettle Tea Company.