Last Updated on 08/28/2018 by Chris Gampat
This post originally appeared on the B&E Photographs journal on May 1, 2014, and is being syndicated at The Phoblographer with Brandon Wehman’s permission. All photos taken by and used with permission from Brandon Wehman.
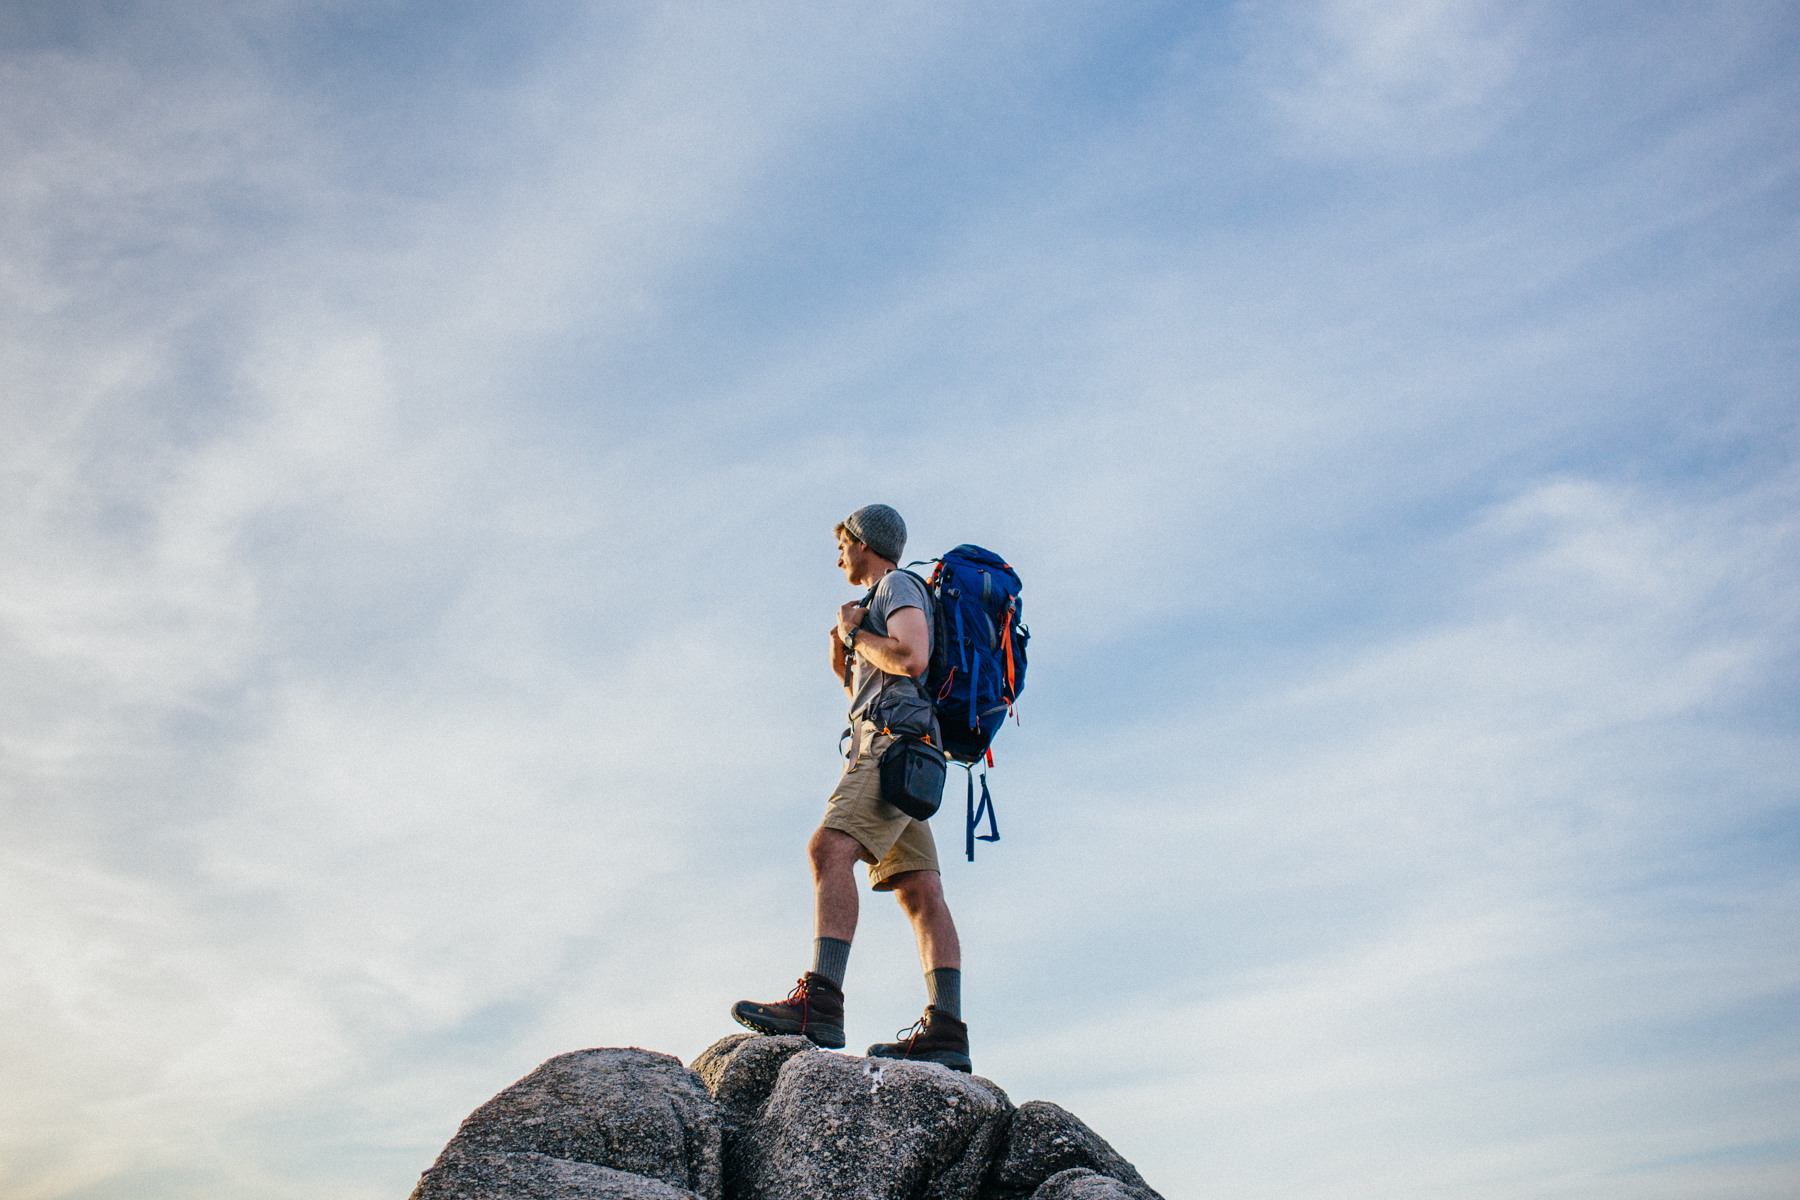
While an amazing experience, backpacking is no easy task. It’s even trickier if you have your precious gear in tow. Not that it’s an impossible undertaking… Monterey, Calif-based photographer Brandon Wehman shows us just how to do it right.
Whether you’re about to embark on a multi-day backpacking trip, or just a day hike down your favorite trail, bringing a good camera along is a great way to capture and share your adventure with family and friends. A camera that fits in your pocket, like an iPhone or a point-and-shoot, is easy enough to carry along, but what if you want to bring your big DSLR? What’s the best way to keep it safe while at the same time having it easily accessible to snap a quick shot? That’s the question I ran into while prepping for my recent backpacking trip to Patagonia. The solution I share below works perfectly for my particular backpacking setup, but the overall idea can be adapted to whatever setup you’re using.
Camera Safety
The first objective is to keep the camera safe. Backpacking is rife with opportunities to harm your camera: accidentally bumping it against a rock or tree trunk, moisture from the occasional rain shower, or dirt and dust creeping its way into the camera’s nether regions. A rugged case of good quality should easily protect against those risks.
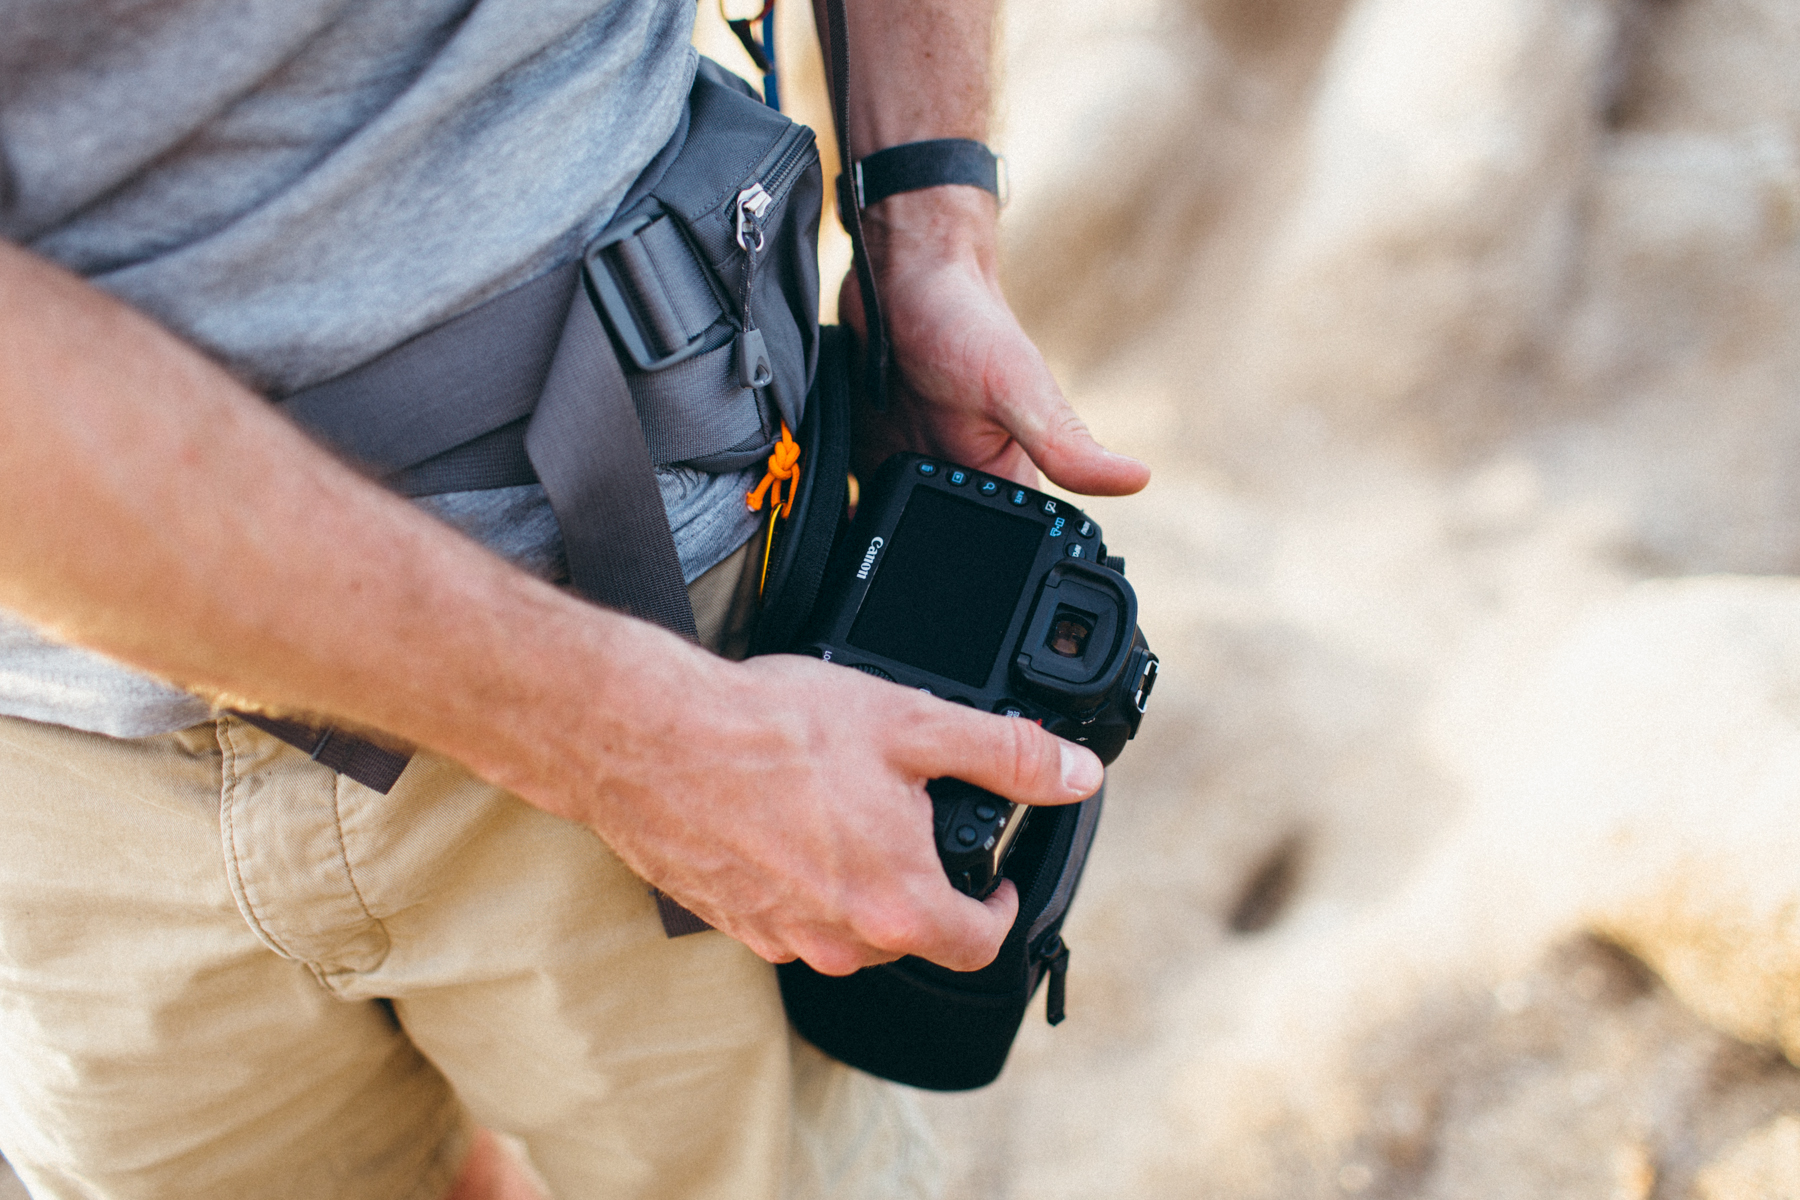
There are hundreds of camera cases available, all of varying quality and size. I wanted a case that fit my Canon 5D Mark III with a medium-length prime lens attached, somewhere in the 35-50mm range. After trying many different lenses, considering weight, image quality, and price (if damaged…) my adventure lens of choice is the Canon 50mm f/1.4. That’s all we used in Iceland and it worked great.
After reading many reviews and shopping around at various stores, I decided that the best case for my needs was the Timbuk2 Sneak Camera Case. The bag easily fits my 5D mounted to the 50 1.4 with its lens hood attached. I’ve also managed to fit my Canon 24 and 35 f/1.4L in the case too, but their hoods have to be stowed backward. Not a problem, but I really like the added protection provided by having the lens hood fixed properly.
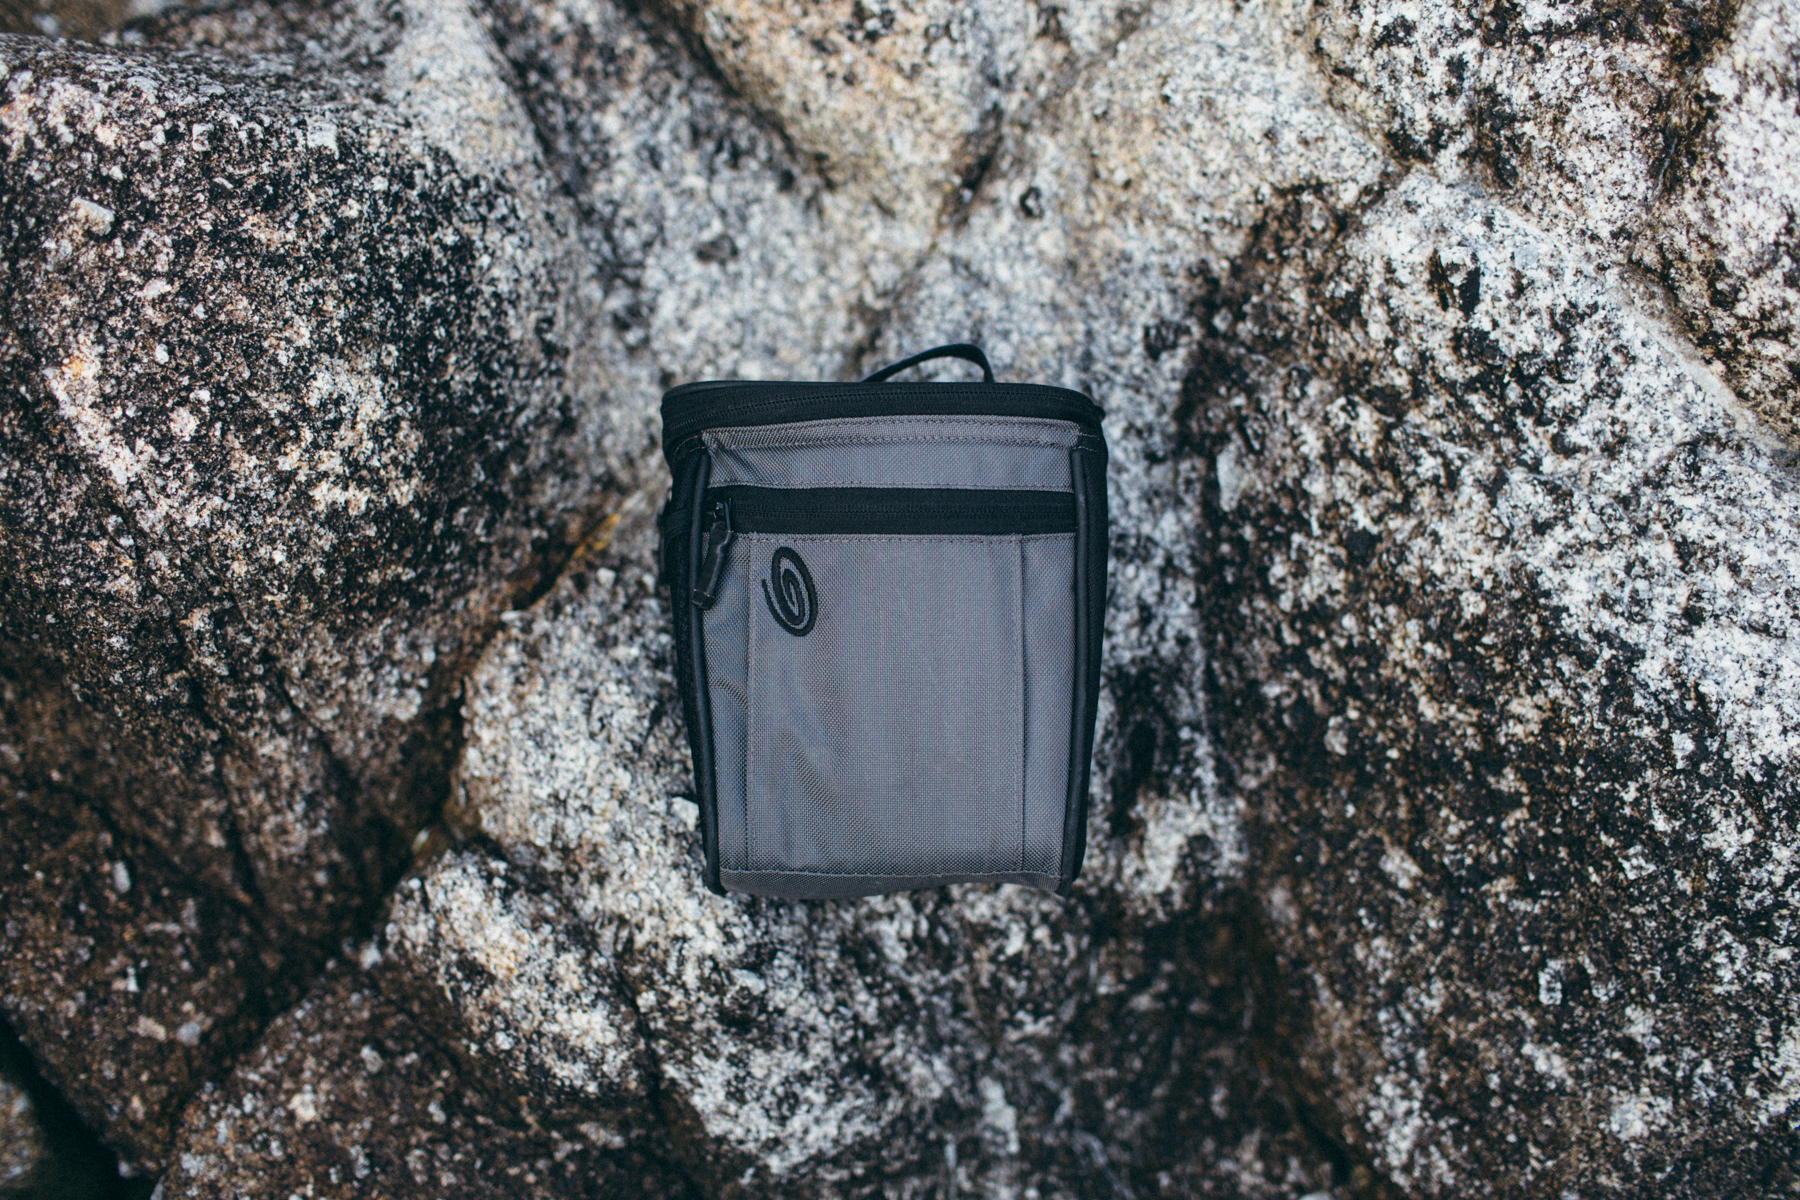
The Timbuk2 case satisfies all my needs for bump, moisture, and dust protection. I’ve put this case through the ringer on quite a few trips and I couldn’t be more pleased with how well it’s held up.
But what’s the best way to wear the case AND your backpack at the same time? Good question, that brings us to the next section…
Camera Accessibility
If you’re going to bother bringing along the heft of a DSLR on a backpacking trip, you best use it as often as you can. It’s difficult to use it, however, if it’s tucked away in your backpack. Some of my favorite traveling shots are those taken on the fly. They’re captured when a moment is fleeting and about to pass by all too quickly. If I had the camera stowed away in the backpack, the moment would have passed long before I could get the pack off and camera out.
The solution is not to wear a case around your neck or across your chest. You need to be agile and feel light on your feet while you’re hiking. That’s hard if you have five pounds of metal and glass dangling in front of you. All too often I see fellow hikers make this mistake, wrongfully regretting their decision to take the beastly DSLR instead of their pocketable iPhone.
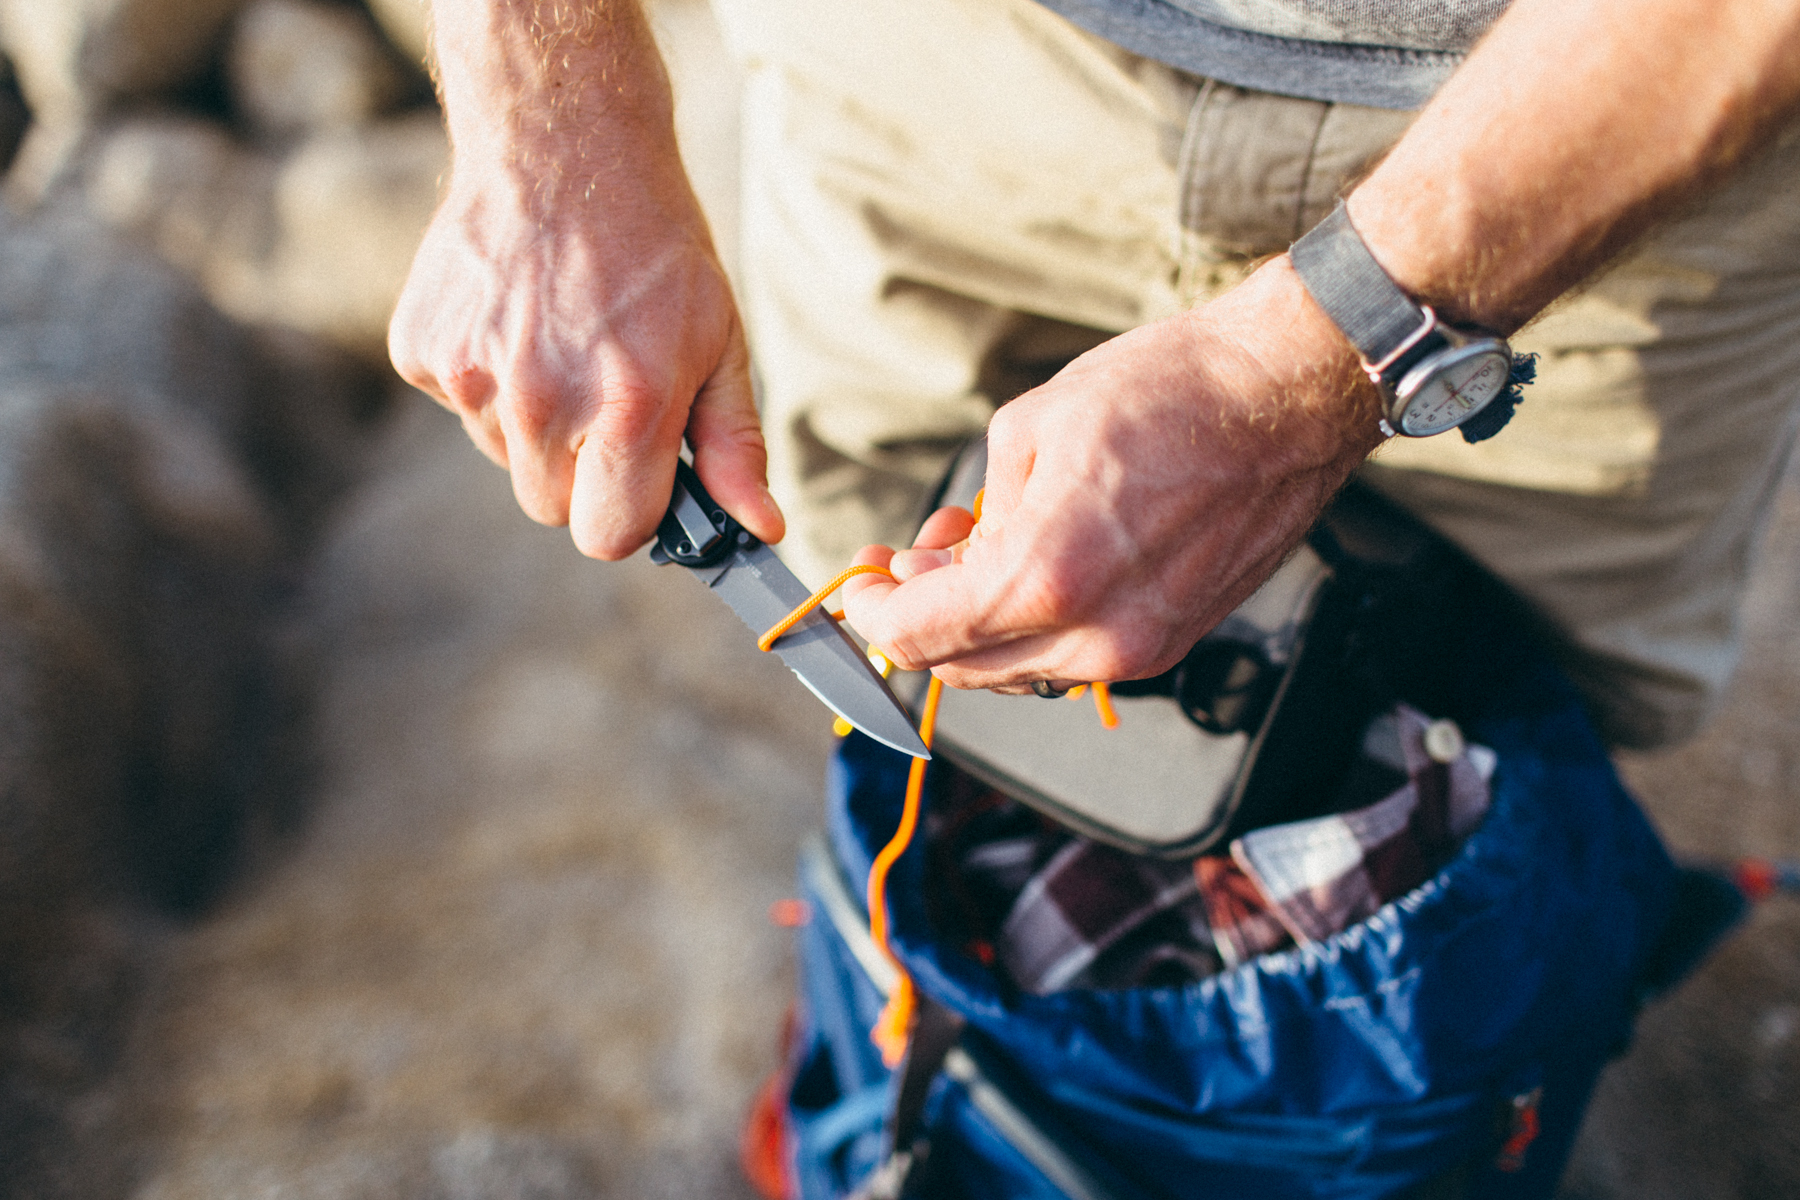
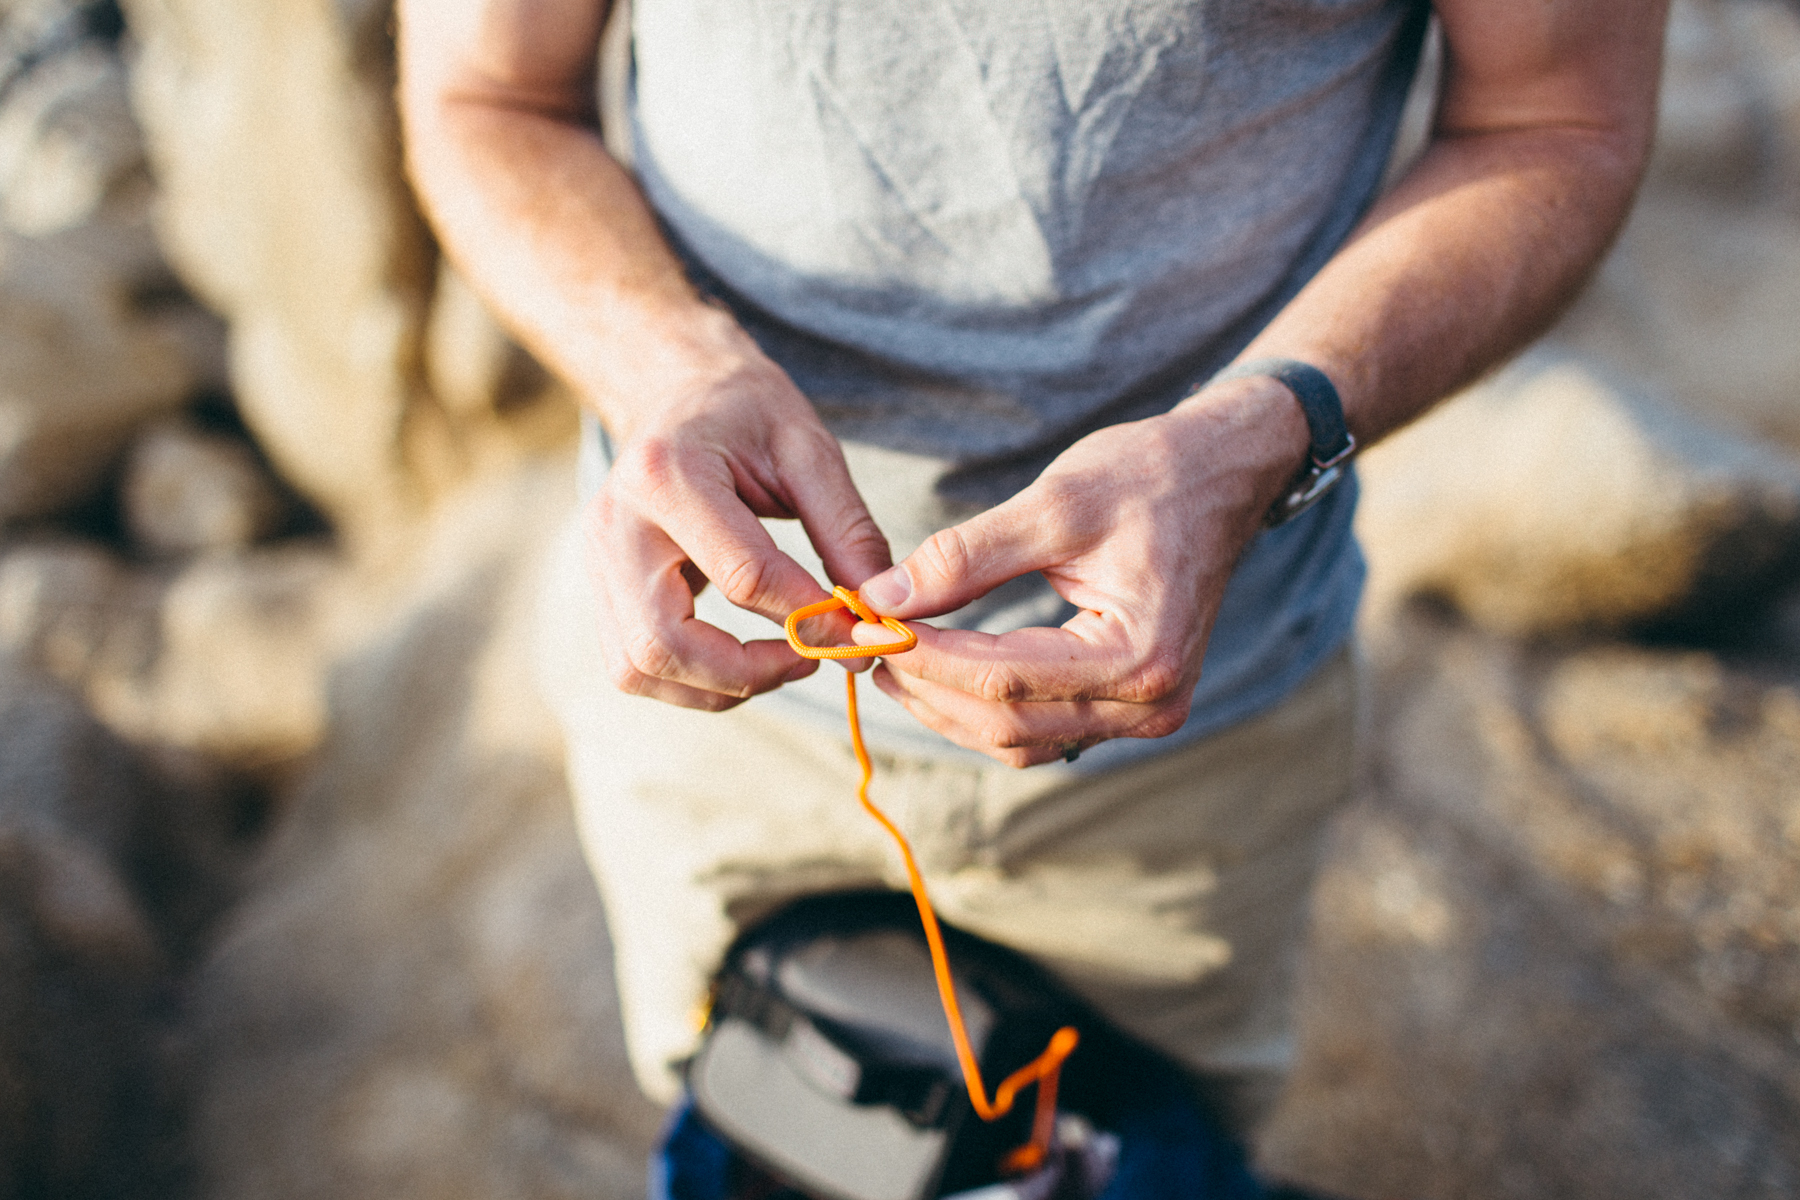
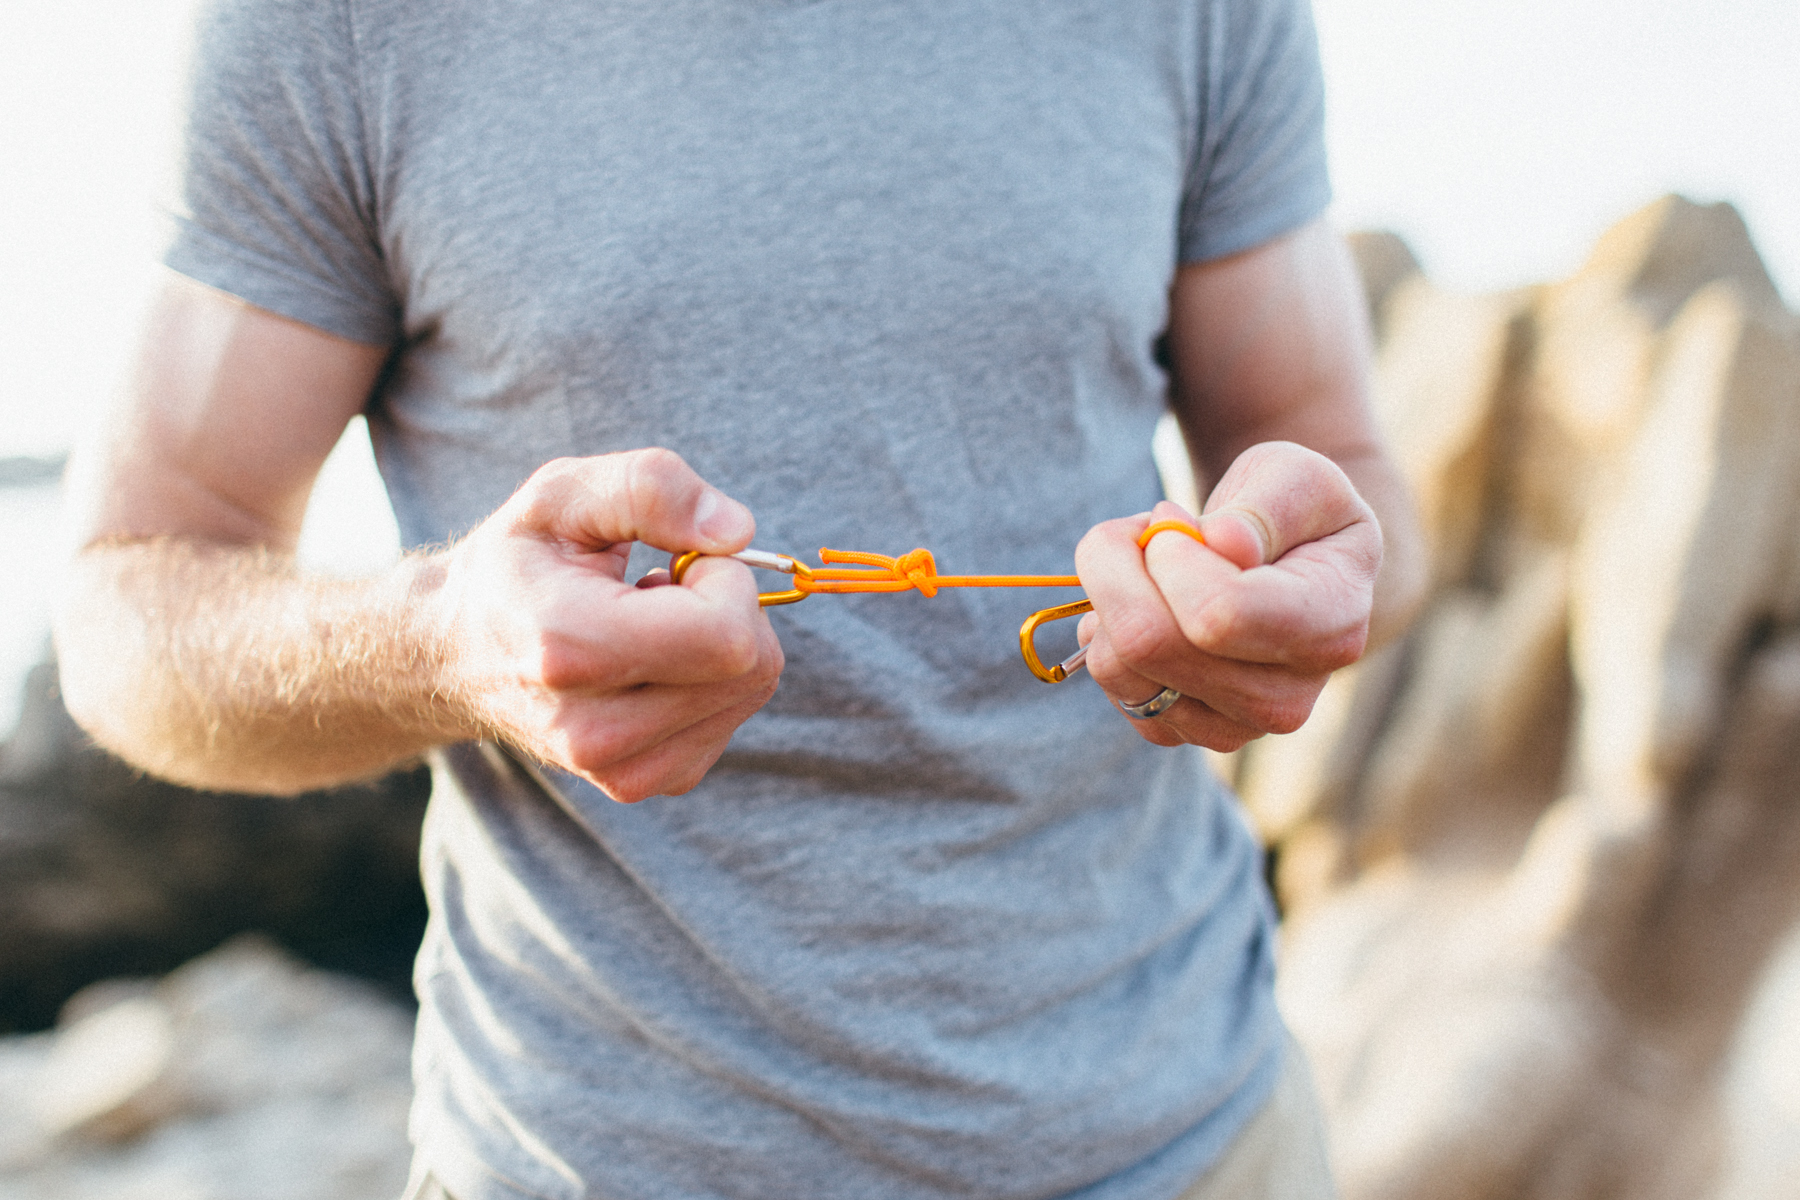
Here is my solution. It’s not pretty, nor is it slick, but it’s effective, rugged, and keeps my camera ready to go whenever I need it. You’ll need the Timbuk2 case, 1-2 carabiners, and a small bit of paracord. (I keep several feet of this in my backpack at all times.)
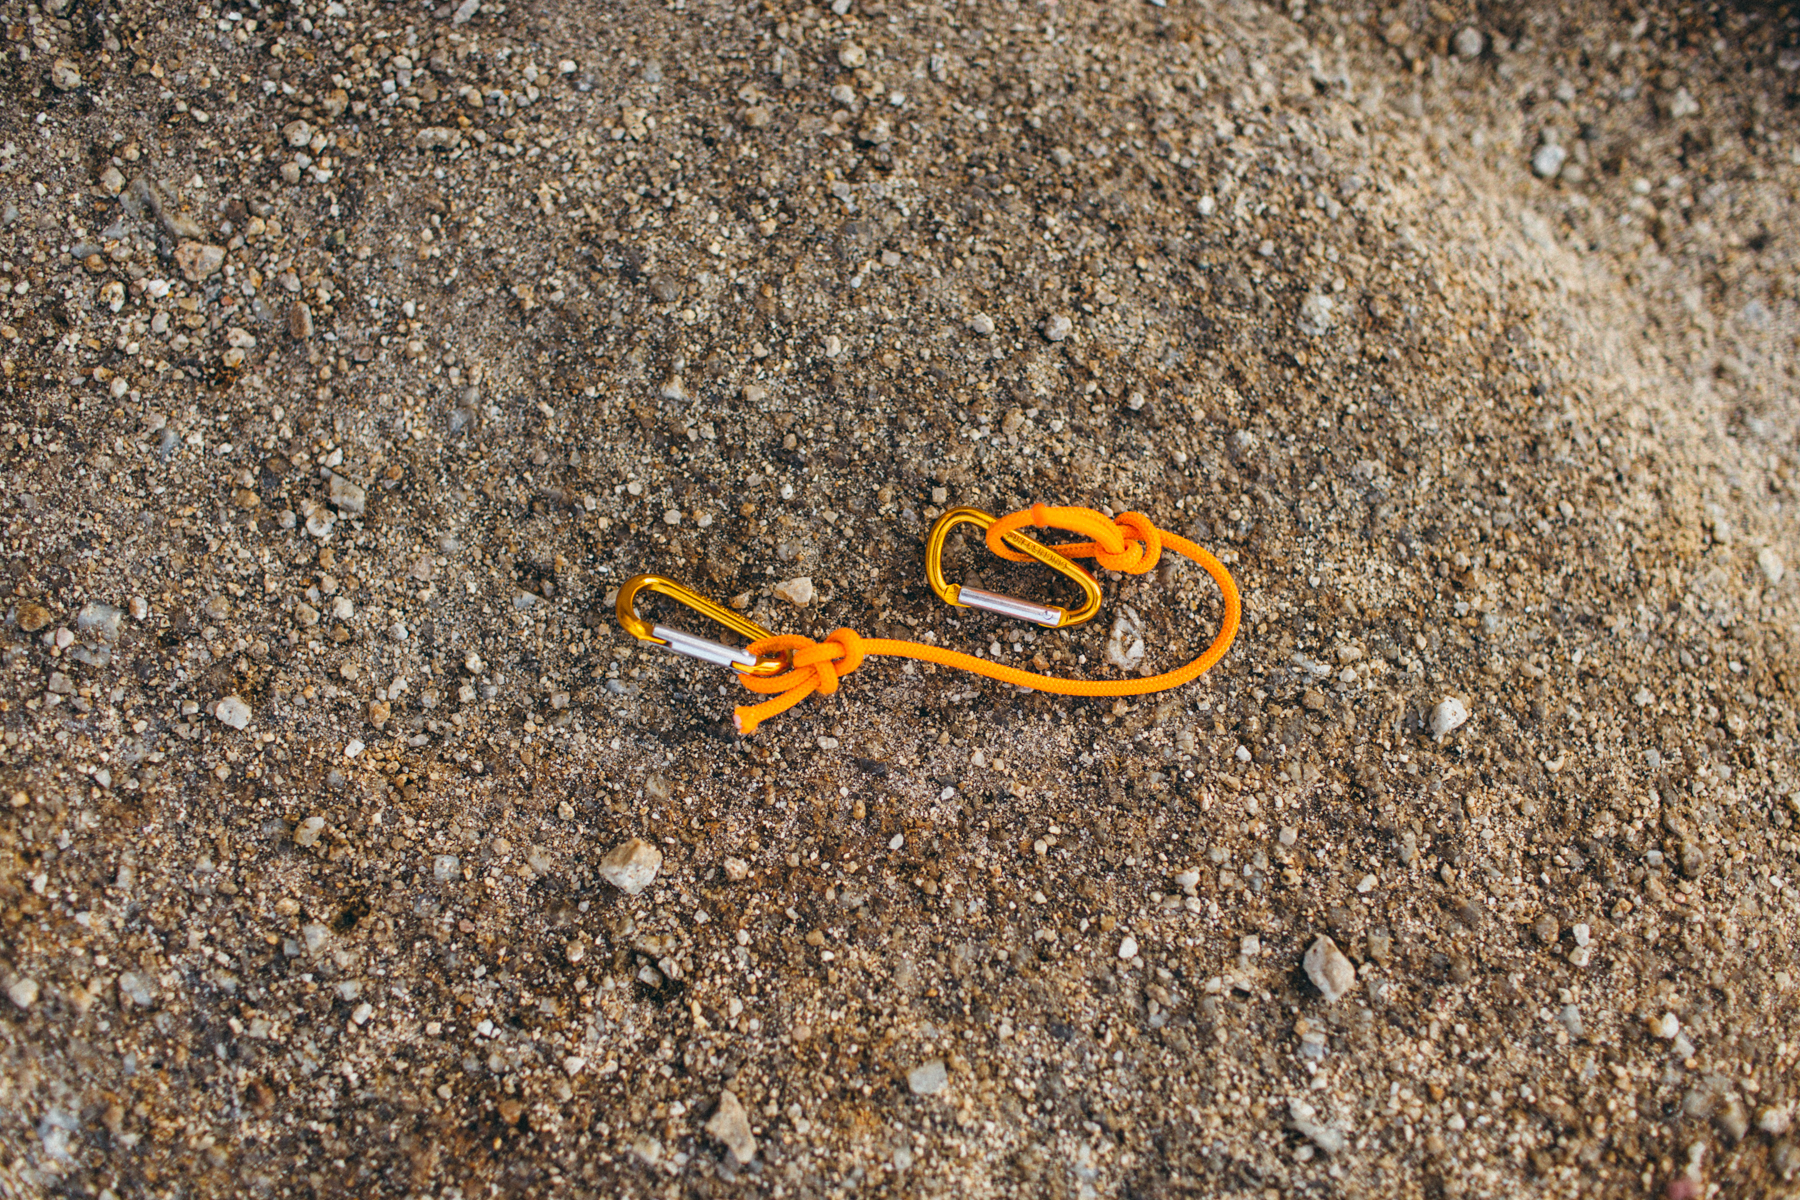
Measure out a piece of line that’s a bit longer than the width of the Timbuk2 case. Then tie two bowlines on each end.

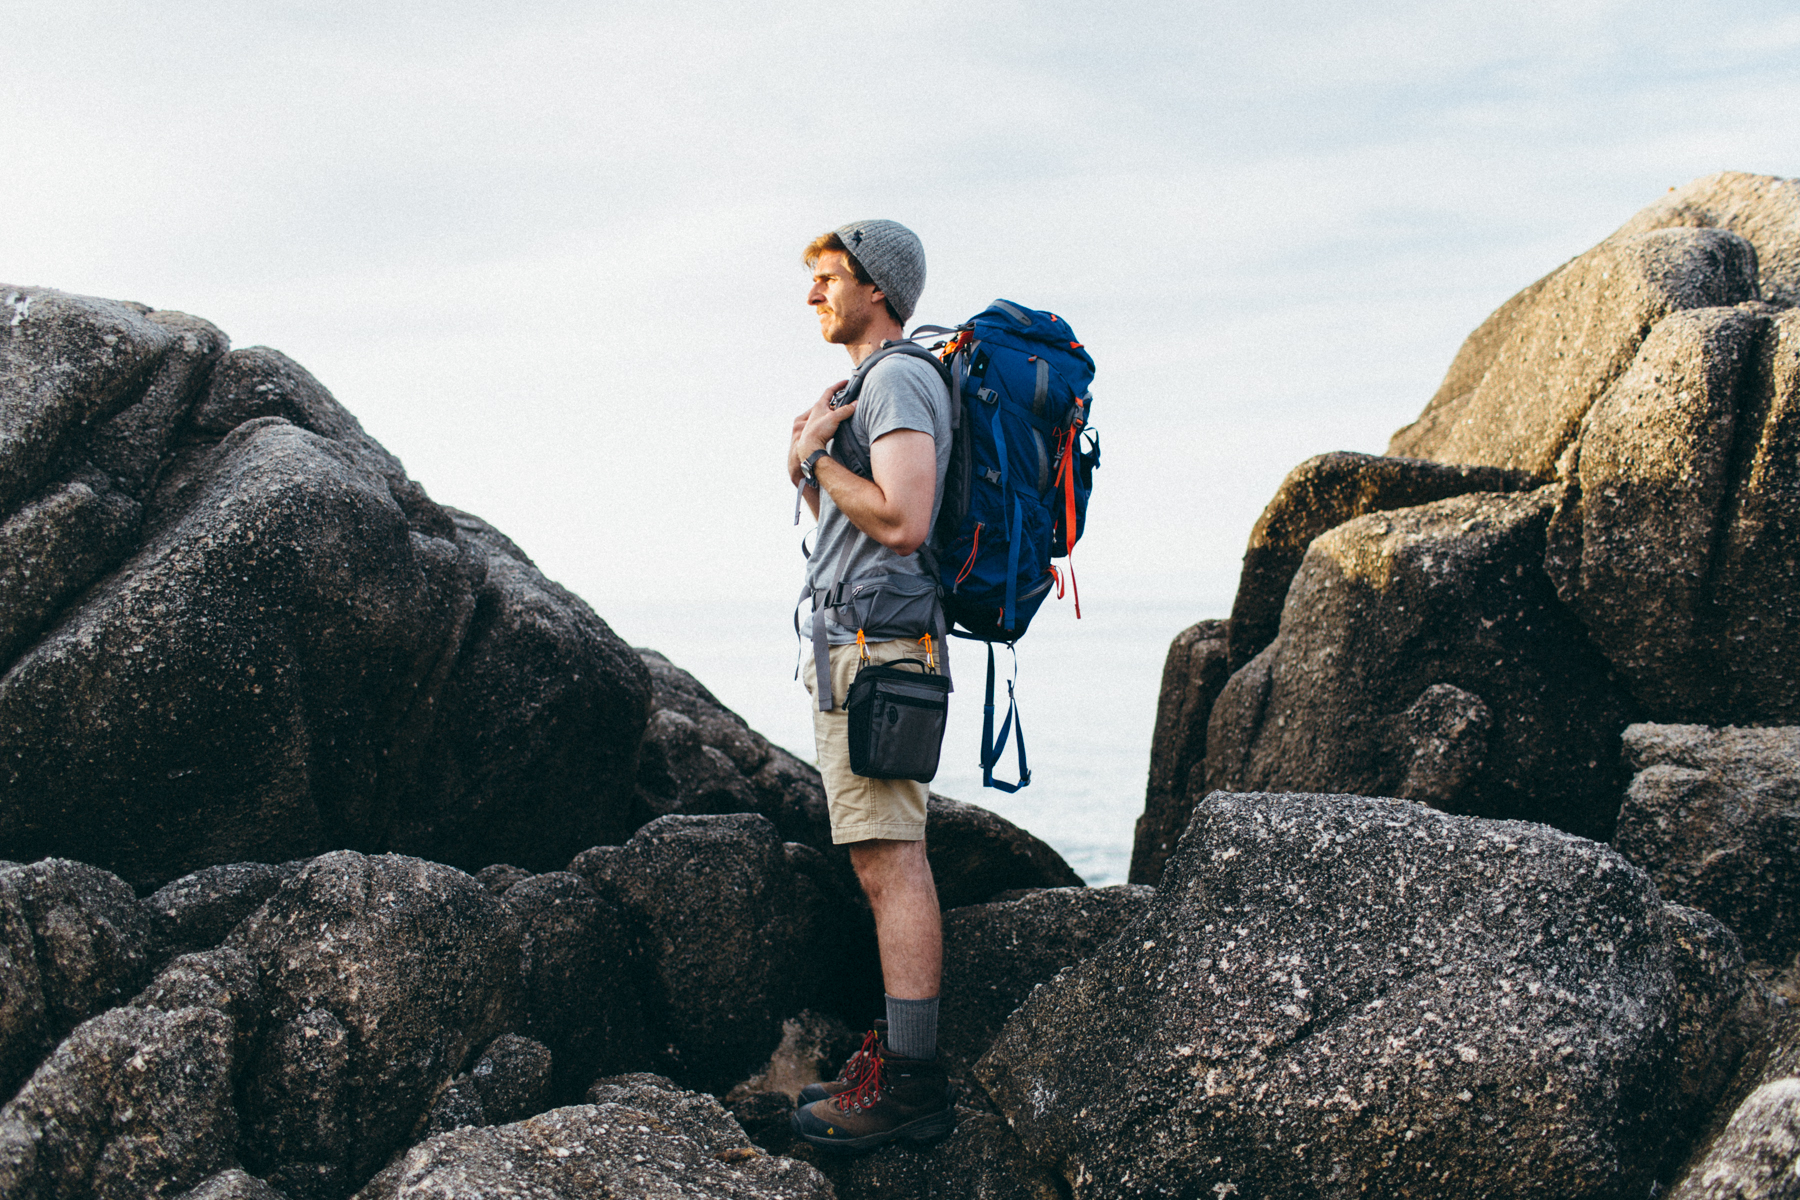
Most modern backpacks have small pockets on the waist strap. My REI Crestrail 70 has one on each side and are sewn in such a way that they allow me to run the paracord through the backside of the pocket, between the pocket and the strap.
If your backpack doesn’t have pockets sewn like the pockets on the Crestrail, you could accomplish the same thing by making loops around the hip strap using the paracord. Either way, the idea is to move the camera to the hip strap.
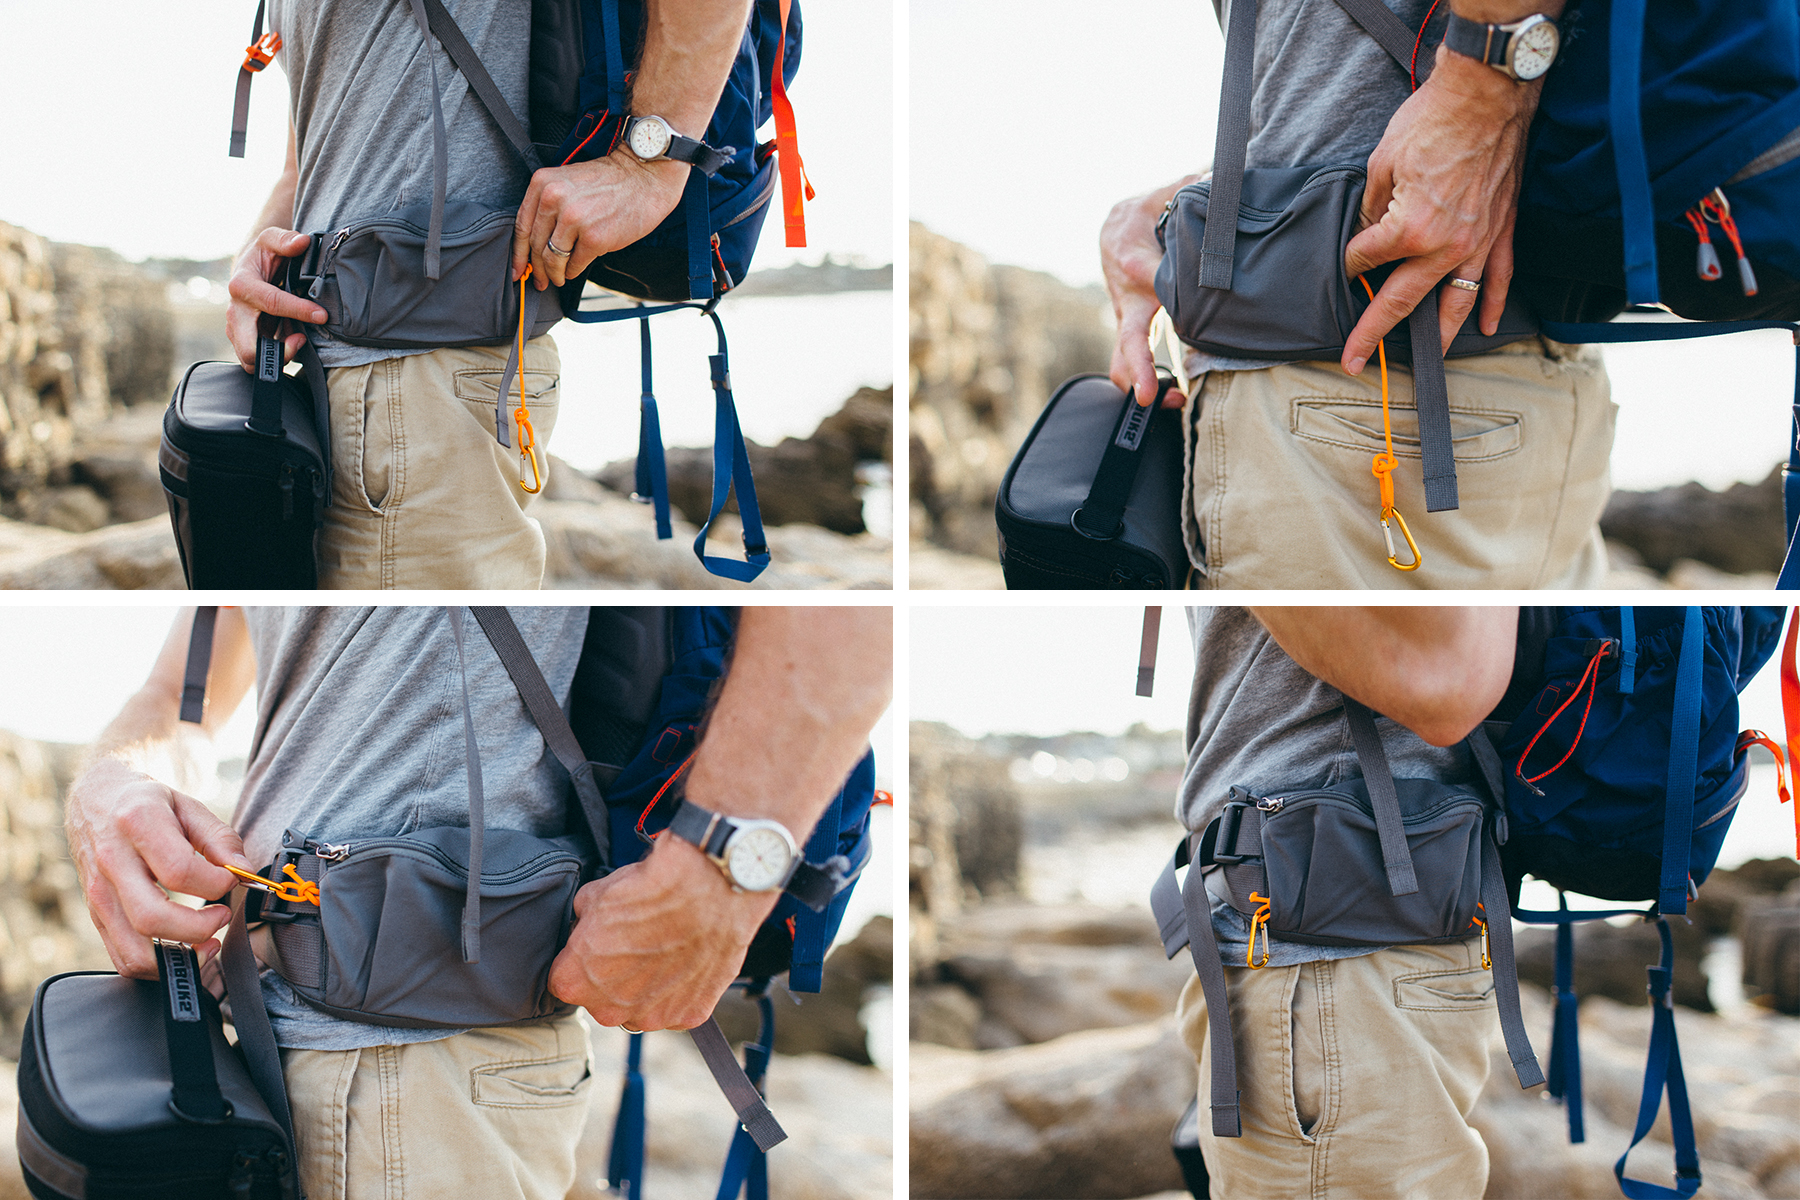
This allowed me to connect the paracord, using the carabiners, to the Timbuk2’s metal loops. If you don’t have the pockets or the space behind the pockets, you can make two loops using the paracord and achieve similar results. I put the camera on the left waist belt since I’m right-handed and wanted to easily reach over and grab the camera from its pouch with the hand I would shoot with.

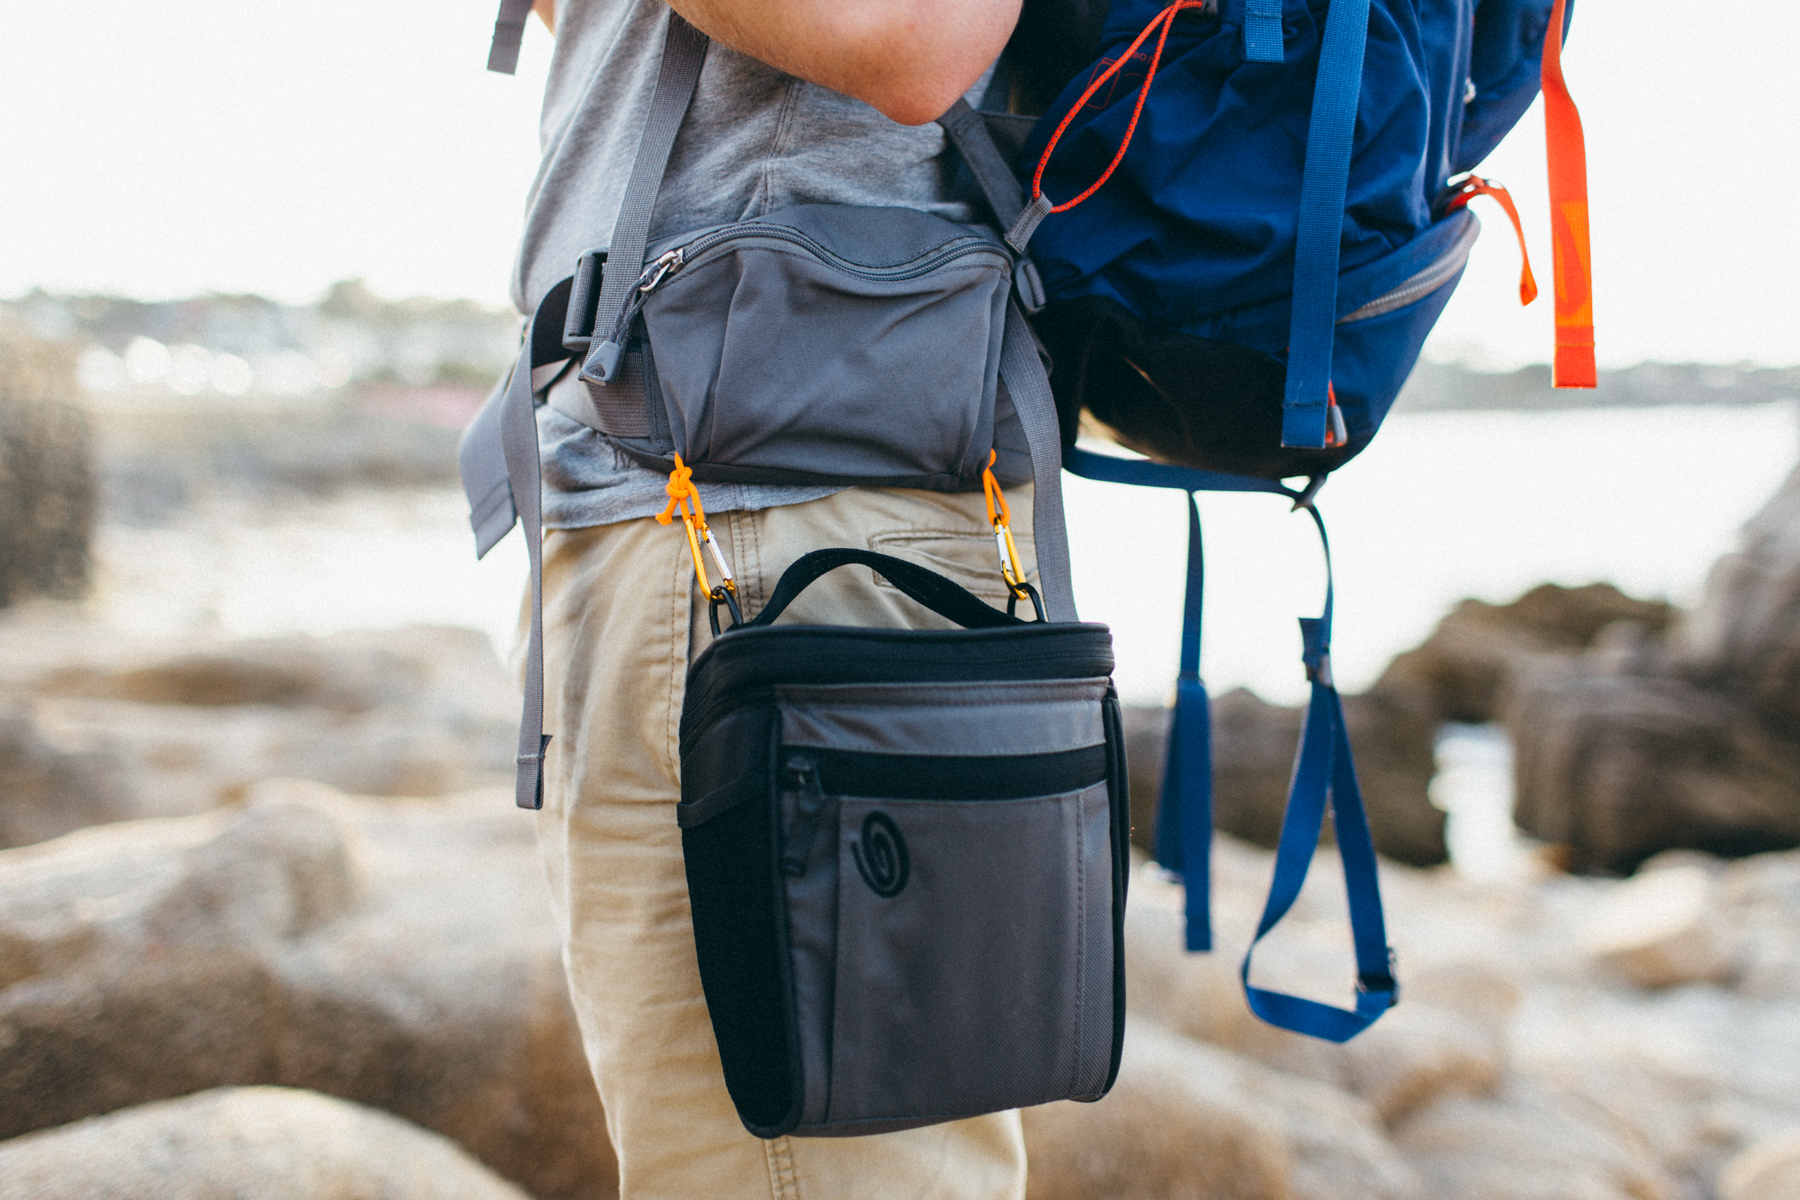
Positioning the DSLR like this allows me to easily access it at my hip and also puts the weight of the camera lower on my body, helping me maintain balance while hiking. The weight being placed on the hip belt helps distribute the load on the part of my body already accustomed to carrying the majority of the weight. In other words, the camera is infinitely less noticeable there on my waist than it would have been if it were strapped to my neck or across my chest.
Hopefully my humble tip will help make your next backpacking trip with your DSLR much more enjoyable. Also feel free to share your experiences backpacking with the a DSLR and send any successful improvements or tips my way.
Happy trails.
Special thanks to Brandon for letting The Phoblographer syndicate this awesome post. Please visit their website at www.bephotographs.com to see their wonderful work or follow them on Facebook for their latest updates.
For more, please follow us on Facebook, Google+, Flickr and Twitter.
Get rid of the ads!
Did you enjoy reading this article as much as we enjoyed writing it? There's a way to support us and our reporting, getting ad-free navigation and more as a bonus. Subscribe to us for less than a coffee per month —just $3.99— or take advantage of our yearly subscription with a hefty discount for only $25.- An ad-free experience
- A free mystery box for Lightroom or Capture One
- All the books in our store
- 20% discount on Capture One
- 30% discount on Imalume Photo Theft Protection
- 20% off Herbs and Kettle Tea Company.
- 20% off your order from MPIX printing services.
- 5% off Viltrox Products via their eCommerce store.
- 10% off all film developing, printing and scanning services from Blue Moon Camera and Machine
- 15% off 7Artisans products: The lens and accessory maker is offering a sweet discount for Phoblographer's readers.