All images by Sander Martijn. Used with permission.
Creating the Photograph is an original series where we interview photographers about a photo that they shot and how it was achieved. The results are some knowledge passed on to you. Want to be featured? Email chrisgampat[at]thephoblographer[dot]com.
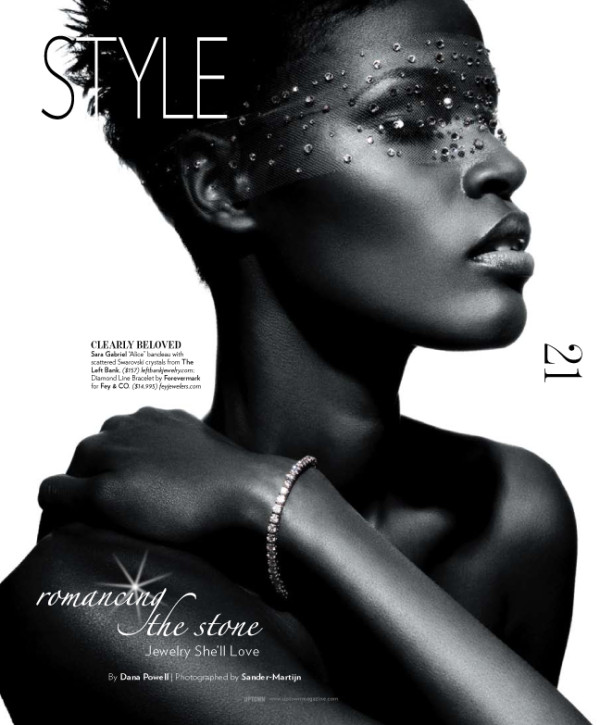
Sander Martijn is a fashion photographer based in NYC, and also a former Phoblographer staffer. Sander’s style of lighting is extremely by the book but when combined with his creative vision works out quite well for the images that he produces. Late last year, he photographed something that many photographer find incredibly difficult: jewelry. Additionally, the jewelry was photographed on a model.
Here’s how he got the photo that worked perfectly for the magazine he shot it for.
This post is a modified posting originally found here.
The Concept
When I was shown the inspiration for this diamond jewelry beauty shoot for Uptown Magazine I knew it would be technically challenging. Normally a challenging setup it was further complicated by the fact that I was shooting in an art gallery rather than a photo studio and I was on location in Chicago so I didn’t have my full arsenal of equipment with me. Still, I answered as I always do – Sure, I can do it. It would definitely be a team effort between makeup, lighting and post-production, but it could be done.
Gear Used
– Nikon D300
– Tamron 28-75mm f/2.8 lens tethered to a Macbook Pro
– Speedotron pack with 3 strobes, 2 43″ bounce umbrellas, a 10-40 degree grid kit, a Sekonic light meter, two pocket wizard plus IIs and 5-7 large black tablecloths.
The Shoot
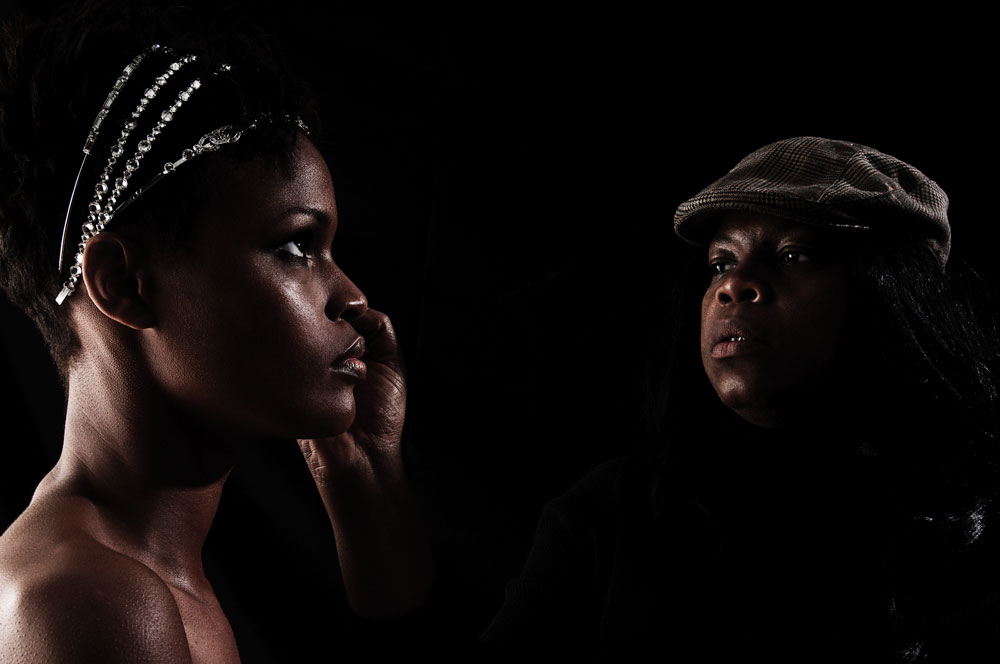
I proceeded to do something I always do when presented with a challenge, while Candace Corey got to work on the makeup making the models as dark and reflective as possible. I don’t know if this is unique to me or common, I do it automatically without thinking about it. I stood where I would be shooting from and just stared at the blank wall. It might look odd to an observer, but for me it’s akin to a painter staring at a blank canvas before deciding where to put the first stroke.

Once I had a picture in my head I got to work. First I did the obvious and simple which was to light the background so it would be perfectly white. The required background area was relatively small so a light on each side with an umbrella on it was sufficient.
Next I turned to the keylight. Ideally I would have a strip softbox with a grid on it, but I didn’t have that. Even if I did it might still cause more spread than we wanted. Instead, high up on a boom arm I put a single head with a 7″ reflector in it and a grid – I can’t remember what degree grid I decided on but I used my light meter to figure it out. Since we wanted vertical highlights I place strips of gaffer tape on the left and right sides over the grids to create a more rectangular shape.
Grids not only focus the light but also the heat and would have melted or even burned the gaffer tape in seconds so I set an assistant by the pack to turn the model lights on only when I needed to adjust it and off again right away – this meant I was shooting slightly blind but it couldn’t be helped. The alternative was too dangerous.
I still wasn’t happy yet – in this all white gallery the light was going to bounce all over, ruining my carefully constructed setup. I turned to the Editor and told her I wished we were in a studio because I wanted to flag everything off. She asked what I meant and I explained that I would normally use the black sides of V-flats to create a tunnel, removing any ability for light to bounce around where I didn’t want it. She asked if black tablecloths might work and it was worth a shot. I moved stacks of chairs into place and clamped black tablecloths to the tops of them creating the black tunnel I wanted. Basically satisfied I wanted to test it – having an assistant stand in wouldn’t work because they wouldn’t have the sheen that Candace was off working on. Instead I found a chair painted in reflective gold and placed it where I was going to have the models and took a test shot. Perfect. I knew I had the lighting right before I took a single photo of a person.
Post-Production
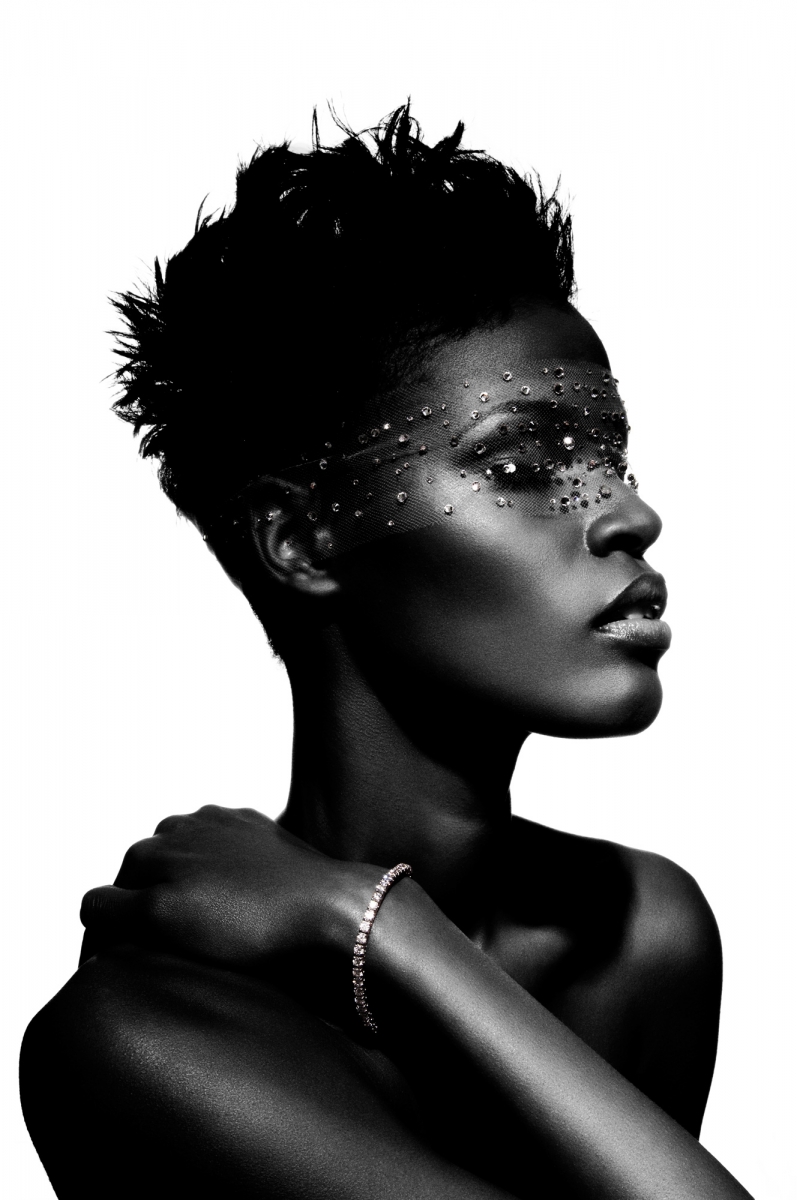
The final step was done in post-production. First I wanted a pure paper-white background. Rather than spending a long time working with the pretty white background I started with I created a new layer under the original that was filled with white. I then created a mask and carefully masked the model out. I then added a curves adjustment layer to get the contrast I wanted. This made the image too dark so I added a brightness/contrast adjustment layer over that to brighten it back up. The final effect was created using a carefully composed black and white adjustment layer which masked out the jewelry so that any spectral color highlights in the diamonds remained. To get a great Black and White from a digital source you really need to adjust every color channel separately until you get the desired effect. At this point I passed it off to the magazine’s retoucher to do the standard beauty retouching work. Although I don’t know exactly what her process is, this usually entails a neutral grey overlay and then dodging and burning until the blemishes are all removed and the shadows and highlights perfected. After that a high pass filter is usually then applied to sharpen up the image.
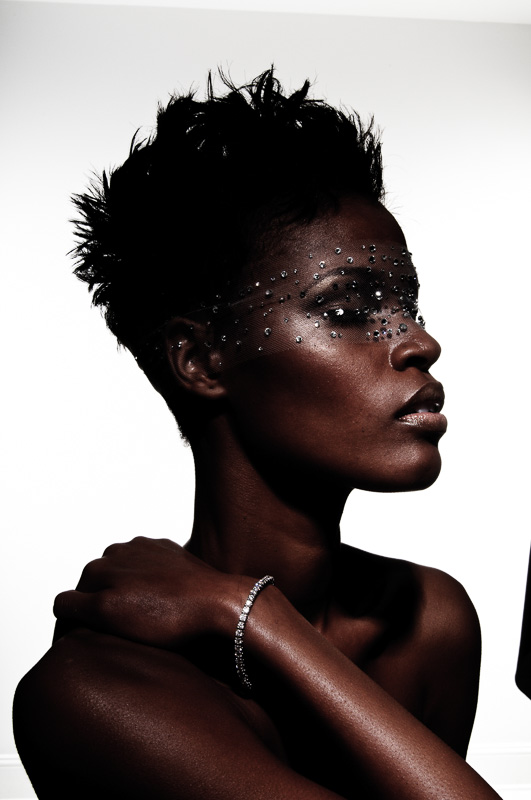
Before/After
For more, please follow us on Facebook, Google+, Flickr and Twitter.
Get rid of the ads!
Did you enjoy reading this article as much as we enjoyed writing it? There's a way to support us and our reporting, getting ad-free navigation and more as a bonus. Subscribe to us for less than a coffee per month —just $3.99— or take advantage of our yearly subscription with a hefty discount for only $25.- An ad-free experience
- A free mystery box for Lightroom or Capture One
- All the books in our store
- 20% discount on Capture One
- 30% discount on Imalume Photo Theft Protection
- 20% off Herbs and Kettle Tea Company.