Finding a proper scanner is always a bit of a hassle, particularly when you’ve unearthed a trove of negatives in some back corner of the attic. Constantly bringing negatives to your local photo place can get costly, and that’s just the jpegs. TIFF files – the real bread and butter of scanned negatives – are both gigantic and expensive. Your best bet would be to invest in a scanner to offset the costs of digitizing those negatives. And here, we have the Epson V550, an affordable flatbed scanner that does a swell of job of giving your negatives, 35mm slides and printed photographs digital life.
Pros and Cons
Pros
-Affordable.
-The negative trays for 35mm film allow you to scan up to 12 at a time, depending on how the negatives are cut.
-The quality of the scans mirrors what I would normally get from B&H Photo.
Cons
-The scanner is quite loud when it’s importing images.
-The EPSON Scan program for importing images is a bit cumbersome to get used to.
Gear Used
For this review, I used the Epson V550 with a bunch of old negatives and my MacBook Pro.
Tech Specs
Courtesy of B&H Photo Video’s listing:
- Optical Resolution 6400 dpi
- Scan Documents, Photos up to 8.5 x 11.7″
- Color Depth 48-bit
- Dmax 3.4
- Scan 35 mm Negatives and Slides
- Scan Medium Format Film
- Upload to Photo-Sharing & Cloud Sites
- OCR & PDF Creation Software Included
- Programmable 1-Touch Scan Buttons
Ergonomics
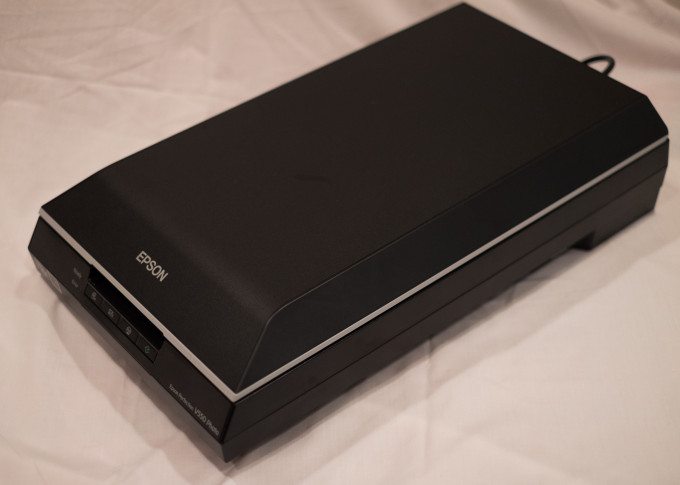
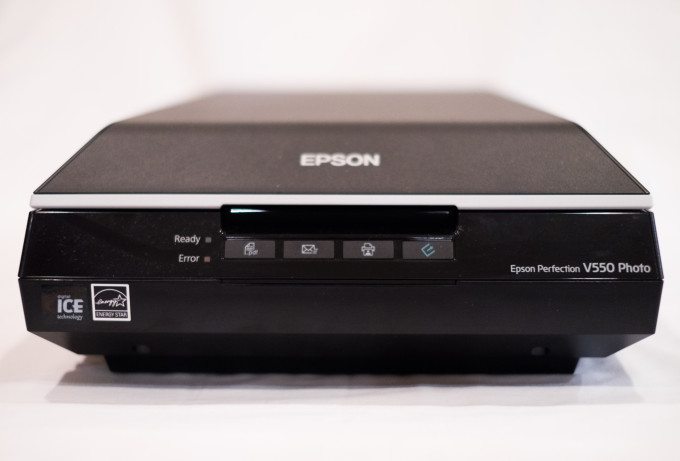
The Epson V550 will take up a decent amount of desk space. It’s both a document and a film scanner, which accounts for its heft. Hinges at the back of the unit will keep the top propped up while you arrange your items for scanning. The front has four buttons: PDF, email, copy, and start. There’s also a “Ready” light and an “Error” light.

The On/Off button shown here is tucked into the right side of the unit. If you press it blindly, you might find that your finger lands on the small LED to the left of it. Slide your finger forward a bit and press, and the scanner will come to life.
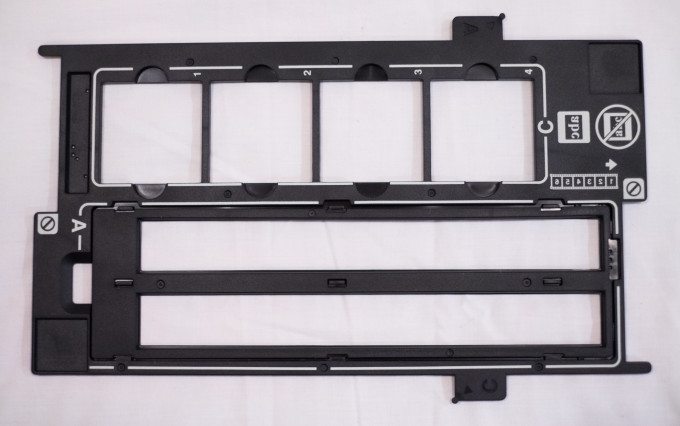
This is one of two film trays. The section labeled A is for 35mm film, and the section labeled B is for 35mm slides. For the film, the top snaps in and out to secure the film in place. For the slides, you place them in the corresponding squares in the orientation shown by the diagram.
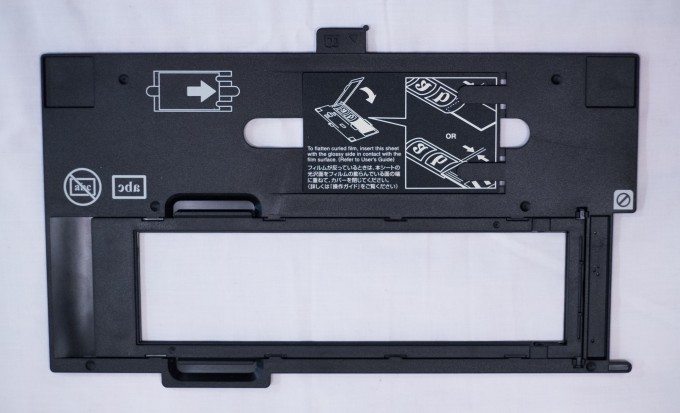
This is the other film tray for 120mm film. Like the 35mm film tray, the top snaps in and out here to secure the 120mm film in place. To ensure the film is flat, there’s a card just above that you can place on top of the film.

This is the last of the inserts. You slide this into the top of the unit when you’re scanning documents or prints. If you’re working with film, you need to remove this from the top.

These three parts labeled A, B, C are you where you position either of the two film trays. For 35mm film strips, you place the A tab on the A spot, which is to the left in the above image. For 35mm slides, you place the B tab on B, and for 120mm film, you place C on C.
Build Quality
The Epson V550 is a fairly heavy scanner that is encased in plastic. Unlike most of the equipment we review here, the Epson V550 will stay in spot, so the standard wear-and-tear of the on-the-go photographer doesn’t apply here. It’s important to note that the glass can smudge easily, but that’s quickly remedied with a microfiber cloth. Just make sure you clear out enough space for it.
Ease of Use
The Epson Perfection V550 Photo has four modes built in to the Epson Scan program that you use to bring images from the unit onto your computer. Full Auto, Home, Office and Professional are the modes from which you can choose. Full Auto is as simple as a click. In Full Auto, the scanner will determine what’s on the glass and will save it as a JPEG. Office mode is geared towards text documents.
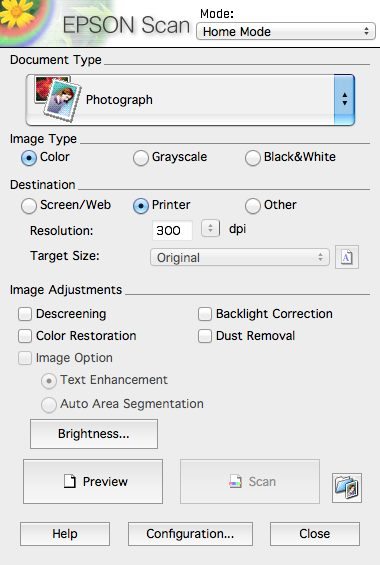
Home affords you some more options as to what you’re scanning, how you want it to be saved, and if you want the scanner to try and clean up the image. Click Preview to get an initial view and then select which images you want and click Scan.
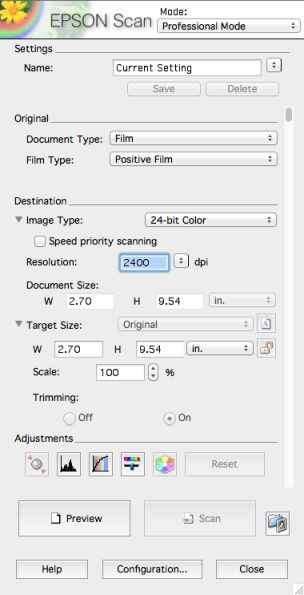
The full suite of controls is available in Professional mode, shown in part above. On my 13″ MacBook Pro, this Pro menu reaches from the very top to the very bottom of the screen, and the scroll bar doesn’t respond to the track pad, which can make the initial configurations a bit cumbersome. Like Home mode, you click preview to bring what’s on the glass. If you only want a portion of the film strip, you select the images and click scan. If you don’t set a destination folder, it’ll default to the Epson V550 folder. If you’re more organized, you’ll create your own suite of folders.
Image Quality

The Epson V550 scans images nicely. The negatives I scanned matched what I picked up from B&H Photo many moons ago. The V550 renders tones accurately, and the images are sharp in all the right places. The V550 comes with Digital ICE Technology (Image Correction and Enhancement) that will clean up an image marred by the usual suspects (dust and scratches), but this also lengthens the scan time. If you’ve got clean negatives, you’ve got nothing to worry about it. If you find the scans are a bit dusty, try gently wiping them with a microfiber cloth. I ran into that issue a several times, and a few quick wipes yielded clean scans.
Extra Image Samples


Conclusion
The Epson Perfection V550 Photo is an affordable scanner that will help with your archiving. Granted, if you have a large amount of negatives to digitize, you’ll want to set aside some time because the V550 can only process negatives in small doses. The process is longer if you use professional mode because of the fact that you have to calibrate myriad settings, and you have to preview the negatives before you scan them in. If you’ve got a trove of negatives, like I do, it’d be best to split them into smaller batches and scan them over several days or more, depending on how many you have.
Pick it up at Amazon.
Please Support The Phoblographer
We love to bring you guys the latest and average news and gear related stuff. However, we can’t keep doing that unless we have your continued support. If you would like to purchase any of the items mentioned, please do so by clicking our links first and then purchasing the items as we then get a small portion of the sale to help run the website.
Also, please follow us on Facebook, Google+, Flickr and Twitter.