Last Updated on 05/01/2013 by Chris Gampat
Editor’s Note: Creating the Photograph is a new series that we’re starting where we interview photographers all about the photo that they shot and talk to them about how it was achieved. The results are some knowledge passed onto you. Want to be featured? Email chrisgampat[at]thephoblographer[dot]com
I had the pleasure of meeting Heidger Marx on a photowalk with my former B&H Photo employees at night, and after seeing his work, I was amazed that a man so humble and soft-spoken has captured and created long exposure photos at some of the awesomest locations I’ve seen for something like this.Heidger is based in NYC and his passion is long exposures and night photography, but has also shot portraits. He currently leads workshops as well for people interested in learning more about the art. While going through his portfolio, we asked him about the photo above.
Here’s his story. And if you’re interested check out more in our Creating the Photograph series.

The Concept
First, please let me say that the idea of what I did here, is not generally new. I was inspired by a talk of a former night photography teacher of mine, Scott Martin, who created a similar image to this one.
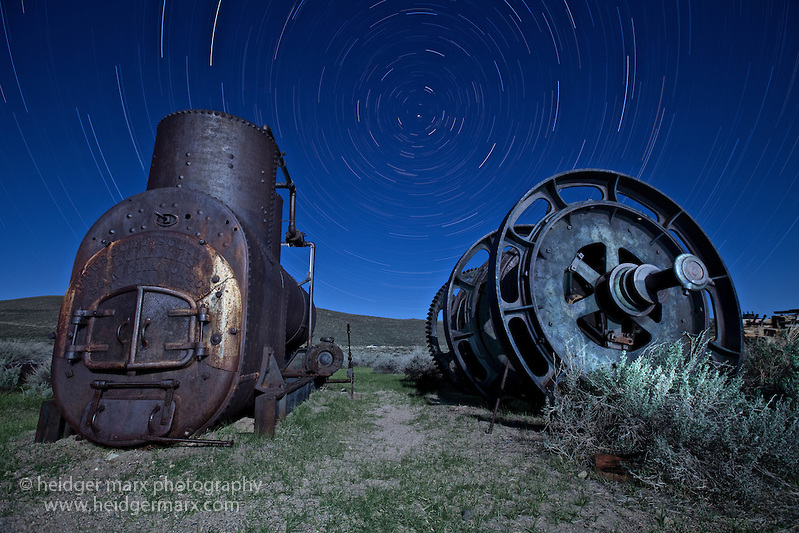
When staying a night at the Bodie State Historic Park in California’s Eastern Sierra, I found this old mining equipment and thought they could give me a great foreground with a very long exposure on the sky to bring out the startrails as a contrast to the static machinery on the ground. Luckily, the equipment was perfectly aligned in a north-south direction, so I could shoot directly into the North and capture the star trails revolving around Polaris, the North Star. At the same time, I wanted to make sure that the foreground would be bright enough to show all of the details that this defunct machinery had to offer.
Gear
Gitzo Tripod GT2531 with ballhead GH1780QR
Vello Intervalometer (programmable cable release)
Various LED flashlights
Adobe Photoshop CS4
Russel Brown’s “Stack-O-Matic” script for Photoshop
The Shoot
On a full moon night like the one this image was taken, there is still a lot of light in the middle of nowhere, such as a ghost town that Bodie is. But I needed the long exposure to create long star trails and still had to deal with noise inevitably caused by super long exposures and I knew that the foreground would turn out almost pitch black, unless I would shed some extra light on it.
So, what is the solution? Let’s take pinhole cameras out of the list of options and assume that you are all disciples of digital photograpy. The way to go in a situation like this is image stacking.
The image above was taken at a total exposure time of 1 hour and 24 minutes. But wait, did we say an exposure time that long would lead to a lot of digital noise? That’s right and that is why the image is broken up into 21 individual frames of an exposure time of 4 minutes each.
The noise seems to be under control, but what are we doing with lighting the foreground? This is why the first 4 minute image included the additional light painting of the details of the machinery. This includes frontal light on the equipment, light the pipes from the side and lighting the foreground in front and between the equipment.
The other BIG advantage of this approach is that you only “waste” 4 minutes in case your light painting wasn’t all that successful or you spilled over in a certain part of the subject (knowing light painting a little bit, believe me, there are a million things that could go wrong, and yes, they all do go wrong at some time!). In a single exposure (if it were possible), you have to wait over an hour to figure out just that…
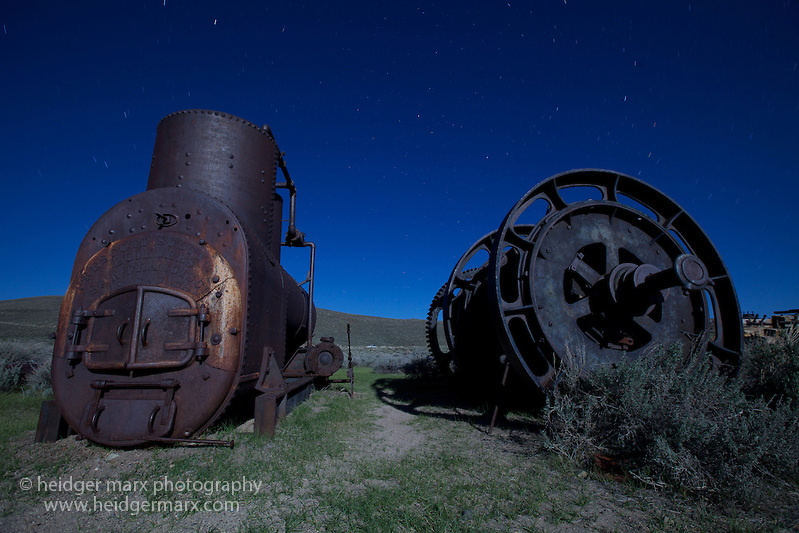
Below is an example of the first frame that includes the light painting and the first position of the stars, taken at ISO 200, f/7.1 and 4min.

The next image is one of the 20 subsequent frames that only records the ambient moon light and moving stars. A programmable cable release will help you take images of exactly the same length, thus ensuring the exact same exposure. The minimum time in between two shots is one second as the time is needed to write the image (LENR/Long Exposure Noise Reduction MUST be turned OFF, otherwise your gaps turn out to be a little bit longer). Longer gaps then a second will literally lead to gaps in the star trails further down the process…this is hard to believe at first, but this is due the amazing resolution of modern cameras.
Post-Production
After all images have been recorded successfully, we move on to post-processing and merging the images into one stacked image. I used the very convenient “Stack-O-Matic” script from Adobe’s Russel Brown that lets you select all frames in Adobe Raw and import them into Photoshop as individual layers in one image file.
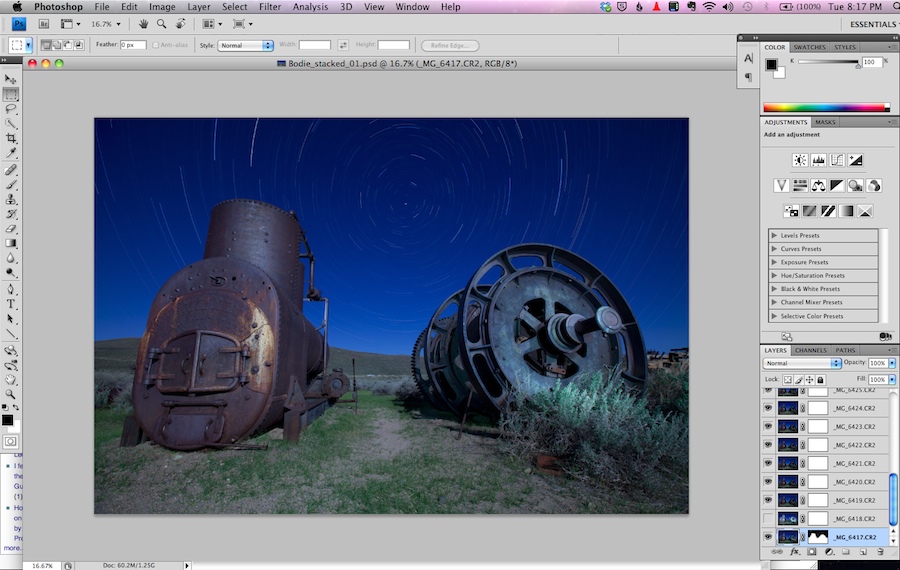
The first frame was taken a few minutes before the second frame, as I had to check whether the light painting on the machinery was successful and I also had to program the cable release. So the stars in that first image would have been too far apart by a gap from the rest of the 20 other images, so I used a layer mask in Photoshop to mask the sky in that frame.
During the merge process in Photoshop, all parts of the frames that weren’t supposed to be there (stars in the first frame used for light painting the foreground, that would have created gaps as described, and stray light from driving by cars) were hidden behind layer masks. Finally, the frames were merged with the brightest part of the frame being the dominating.
———————–
Be sure to visit Heidger’s website, Facebook page and Twitter.
Heidger teaches private and group workshops on night photography in New York City and is currently organizing a new travel photography workshop to India (Delhi, Agra, Jaipur) with the award-winning and India-based photographer Debesh Sharma for August 2013. Please refer to Heidger’s website for further information and how to contact him.
Get rid of the ads!
Did you enjoy reading this article as much as we enjoyed writing it? There's a way to support us and our reporting, getting ad-free navigation and more as a bonus. Subscribe to us for less than a coffee per month —just $3.99— or take advantage of our yearly subscription with a hefty discount for only $25.- An ad-free experience
- A free mystery box for Lightroom or Capture One
- All the books in our store
- 20% discount on Capture One
- 30% discount on Imalume Photo Theft Protection
- 20% off Herbs and Kettle Tea Company.
- 20% off your order from MPIX printing services.
- 5% off Viltrox Products via their eCommerce store.
- 10% off all film developing, printing and scanning services from Blue Moon Camera and Machine
- 15% off 7Artisans products: The lens and accessory maker is offering a sweet discount for Phoblographer's readers.