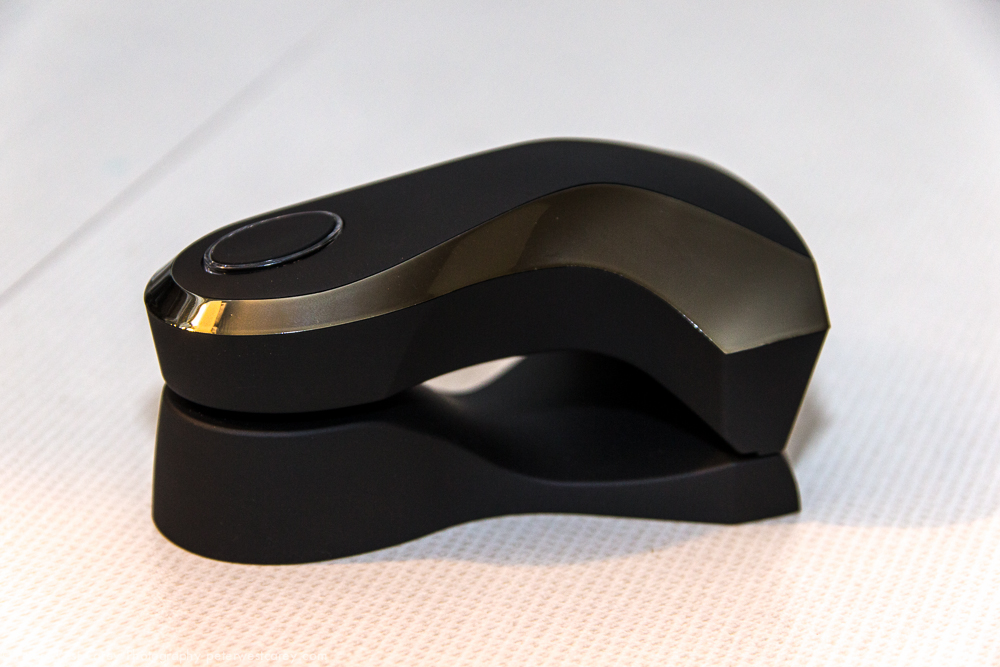
You have all kinds of pretty pictures on your computer but what happens when you want to print them? Some opt for services like Snapfish or Costco. Otherwise hand off the file to a professional lab like BayPhoto and pay a little more for better service.
Others still endeavor to print their own images. For those so willing, color calibration is a key factor to WYSIWIG (what you see is what you get) results. I’ve struggled with it in the past and was thus excited to try a demo copy of the Spyder Print device.
The Spyder Print requires time and patience to use but I am finding the results have been worth the effort. It’s not a quick fix that does everything for you, but it is fairly simple and straightforward to use.
Gear Used
How It Works
In principle, the Spyder Print is a simple process and a vital one for accurate prints. Your printer prints slightly differently on different papers with difference settings. I know that’s over simplifying things, but there are so many variables to printing it’s hard to list them all. Key to the process is ensuring camera, monitor and printer are calibrated to a standard so red, green and blue look the same on each device.
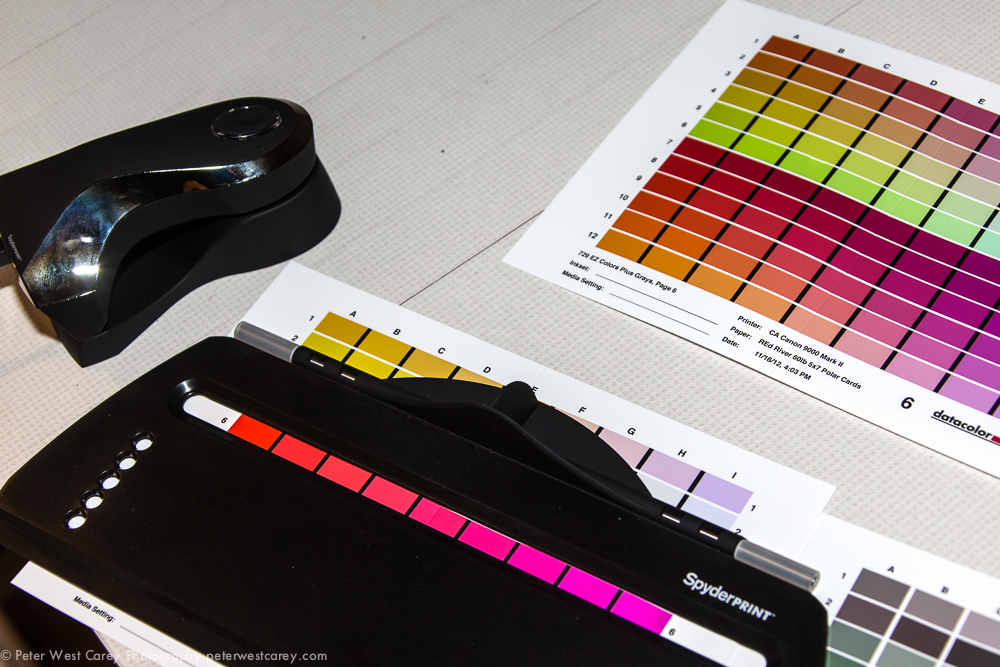
The Spyder Print works by printing out a test pattern on one or more sheets of printer paper. The kit comes with a handheld scanner which is then swiped over the sample prints in a logical order to read in the resulting data. This process helps match colors to their expected results and will allow the kit to create an ICC profile for that specific printer, paper and printer settings on the computer.
Ergonomics
Ergonomics actually comes into play often with this device, although I didn’t believe it would at first glance. The premise of using the device is to move the scanner along rows of colors while the scanner reads the colors. This seems simple enough but I found out on my first test print that the unit is not setup for 11×17” (tabloid) sized paper. You see, the unit comes with a tray in which the scanner can sit and slide to make scanning rows more easy.
But that tray only works if paper is 8×10” or smaller. Instead, I had to freestyle my scanning from left to right, which wasn’t that hard. The scanning unit is comfortable even when I spent 10 minutes scanning samples.
In Real Life
As mentioned above, the scanner works best with smaller paper. With a larger sheet, you will have to free-hand your scanning and it can work to either go side to side or top to bottom.
The overall process is simple:
- Load up the software and warm up your printer.
- Insert your selected style of paper.
- Use the program to print test sheets. This can be from 1 to 9 pages depending on your desired accuracy.
- Let the prints dry for 30 minutes.
- Use the USB scanner to pass over each color sample. Listen to your computer make dinging noises while you complete this task.
- When scanning is finished, the program will create an ICC profile (with your chosen naming) which will be saved in a default location for use by all programs.
After the profile is created, I was able to use it to create prints with more accurate color. It is important to note that small changes in the overall process of printing can make a difference. For instance, when I created my test patterns, I used a setting on my print dialog box telling it I was using Canon Semi-Gloss paper because there was no exact match for the Ilford Prestige Gallerie Smooth Pearl I was using. The results were decent but if I switched that dialog to a gloss paper or matte paper, the results changed noticeably in different ways. In some cases, blues turned toward purple and tans bleached out.
For this reason, experimentation is the name of the game to know what works best for each image. There is no one-size-fits-all when it comes to printing, but I am learning how to reduce the guess work and speed up my flow with the Spyder Print.
As a first impression, I am not 100% convinced (after testing with two different printers and two different printers) that the profiles are any more accurate than the default Canon profiles for certain paper.
Conclusion
For my first run with the Spyder Print, I found it easy to use and the results noticeable (although not conclusive to really needing the device). I have some learning to do before I have the system down pat. It’s not as easy as picking up a new camera and instantly getting fabulous results right away. It takes work, but it is worth the effort.
Please Support The Phoblographer
We love to bring you guys the latest and greatest news and gear related stuff. However, we can’t keep doing that unless we have your continued support. If you would like to purchase any of the items mentioned, please do so by clicking our links first and then purchasing the items as we then get a small portion of the sale to help run the website.


