Concert photography can be very rewarding (both personally and monetarily). If you really stick at it, you can make some pretty good money. However, there is a reason why you end up making good money; concert photography isn’t a walk in the park. There are many factors that go into the machine that is great live concert shots.
A typical concert can be 2-3 hours, of which you’ll be shooting the entire time (unless a photo release prohibits you only to a set amount of songs); not to mention the several hours spent finishing the images on the computer. You have to be very knowledgeable with your equipment as you don’t have time to monkey around with it when the lights are on and the mics are hot. You need to know how to capture the emotion and mood of the show by using many different photographic techniques. I wouldn’t say it’s quite as stressful as wedding photography but you still generally only have one chance to get the shot (and unlike a wedding, you have no idea when that shot is going to happen).
Here are some general tips to follow to take your music photography to that next level.
Editor’s Note: This is a guest blog posting by Travis Lawton, the Lawtographer
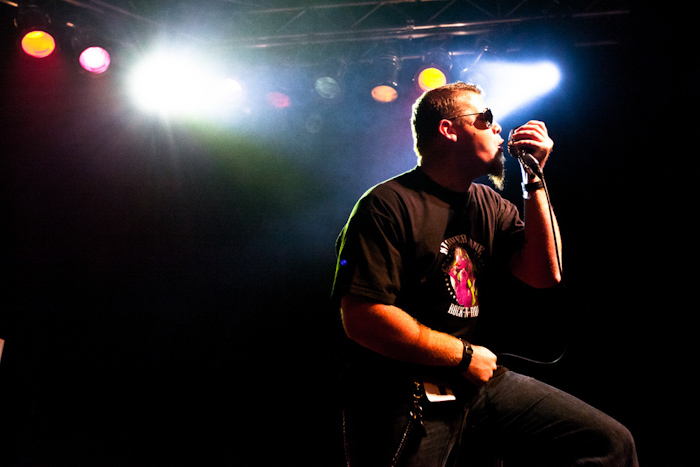
Tip #1: Mood!
This is a biggie: You need to capture the scene as you see, but you only have one single frame to do it. A lot of times, what this can boil down to is lighting. Some may disagree with this but one of my biggest rules is not to use flash unless I absolutely have to. I feel the number one killer of concert photography is using a flash. Now there are some times when a flash can work its way into the mix (using it on a very low power for the slightest bit of fill light, positioning it behind the artist’s for some nice rim light, sometimes it’s needed to light the drummer who’s always tucked away in the back, etc.), but in general it doesn’t belong. Let’s just say it this way; I take a flash but rarely use it. Your equipment can make a massive impact on this tip, I’ll explain why below in the equipment section.
Tip #2: Composition!
Think about the composition of the image before you take it. Is there a bunch of stuff in the foreground or background that will throw the image off? Are you trying to take a group shot but one member is covering another (think about the drummer)? Composition can make or break an image. Sometimes you get that perfect shot but you accidentally cut the guitarist in half by not framing properly.
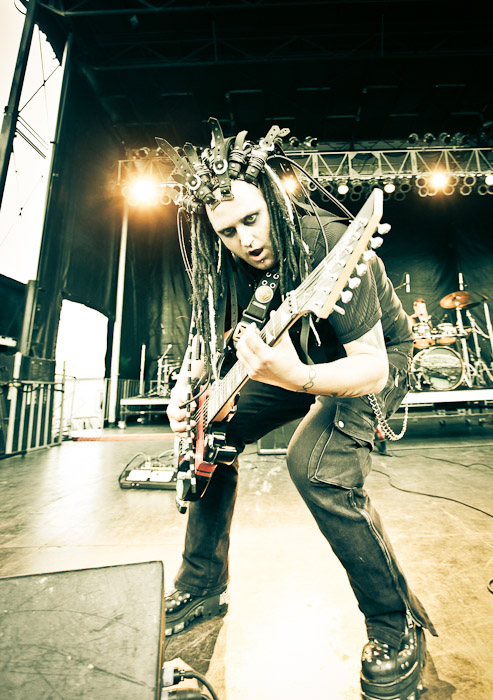
Tip #3: Angles!
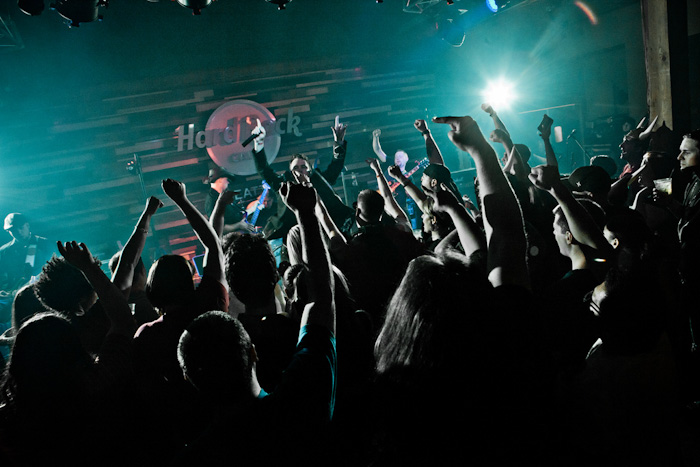
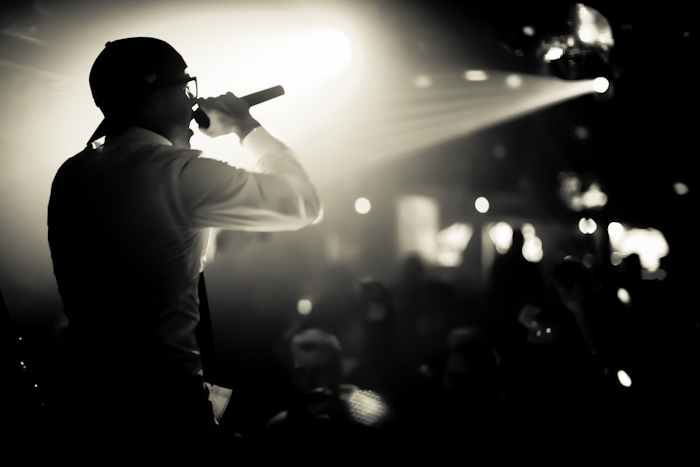
Think variety. No one (especially the band) wants to see 400 pictures from the exact same spot. Use those feet; get right up from, kneel down for some wide-angle shots, move back and get some shots over the crowd’s heads, go to the side of the stage and get some profile shots of the band, maybe some close-up shots of the instruments while they’re playing, move to the other side, maybe some zoomed in shots of faces (band and crowd) for emotion. Another great spot is back by the drummer looking out towards the crowd (take some shots of him/her while your there). Bands LOVE images that show the crowd enjoying their music. This angle also makes for some great pictures of the front man as the lights overhead shining down cast a perfect outline of light on them.
Tip #4: Shoot In RAW!
If your camera has an option to take pictures in RAW vs the typical JPEG, do it. Downside to this is each picture you take eats up more space on your memory card but the trade-off is worth. There is a reason why a RAW image is bigger than a JPEG, simply put, it has more data. The easy answer for why to shoot in RAW is that it gives you more freedom later in your photo editing program. Many times the pictures don’t come out perfectly. They can be too dark (or too bright if a stage light went off right when you took the picture), blurry, maybe the subject’s face is shadowed from an overhead light, etc. RAW saves more of the “scene” so that you can pull some of that back in with minimal quality loss to the overall image during post processing.
Tip #5: The Right Equipment!
This one is kinda hard because it can mean spending some substantial coin on gear. As far as the camera is concerned, the biggest thing to look at in my mind is how well the camera can perform at high ISO. Many of the newer cameras are phenomenal at this, and it’s only going to get better. Because we’re not using flash (right), we need as much light as possible to hit the camera’s image sensor and that means pumping up the ISO. I shoot most of my concert images at ISO3200, sometimes ISO6400. My Canon EOS 5D Mark II
is very good at handling noise at very high ISO. Sure it can come out grainy sometimes but that can add to the look, especially for rock and metal bands.
The camera is only one half the equation, the other is the lens. Ideally you want lenses that can handle very wide apertures. Another plus is for the lens to have image stabilization.
Recommendations for great live music lenses:
- Wide-Angle: Canon 16-35mm f/2.8L
(Nikon version here
)
- All Purpose: Canon 24-70mm f/2.8L
(Nikon version here
)
- Zoom: Canon 70-200mm f/2.8L Image Stabilized
(Nikon version here
)
- Extreme Low Light: Canon 50mm f/1.2L
(Nikon example here
)
Clicking on the links may produce some sticker shock but there’s a reason why they cost what they cost. With the suggested lenses in your bag, you will be perfectly geared to tackle the show.
I can practically hear you saying “What if I can’t afford those right now, should I just give up the idea of shooting music”, absolutely not! There are plenty of more affordable lenses that will work just fine. For example, I would recommend picking up a 50mm lens no matter what genre of photography you like. You can net yourself the more affordable Canon 50mm f1.4version or even the very cheap Canon 50mm f/1.8
version both of which will give you superb low light abilities.
Tip #6: ABR!
What does ABR stand for? Always Be Ready. I fall victim to this often. I can’t tell you how many times I’ve missed what I thought would be a great shot because I didn’t have the camera up to my face, ready to take a picture. Musicians are always moving and they might do something for 1 second and if you miss it, you miss it forever. I’ll tell you a secret; ABR in between songs. Just because the song ended doesn’t mean you get a break from shooting. Sometimes musicians give you a perfect shot in between songs.
Tip #7: Set Your Exposure Manually!
This is a tip you might hear quite frequently. For me, concert photography was what made me make the leap to shooting all my images manually. While shooting concerts, one of your greatest enemies can be the lighting on stage (or whoever is running the lights). If you leave your camera in full auto (green mode), program auto exposure (P), aperture priority auto exposure(Av), or shutter priority auto exposure (Tv), you’re leaving the camera to decide the final outcome of the image based on the light it sees when you press the shutter halfway.
Stage lighting is very dynamic. Lights are always moving and turning off and on. Problem is what happens when the camera decides what settings to use based on the current lights on the stage, but when the image is actually recorded, those lights have turned off or moved to pointing at a different part of the stage? You get an image that is much too dark (usually beyond salvage). It also go the other way if the lights are off, and they come on right as the image is recorded. Your image will be way to bright.
By setting your exposure manually you can dial in settings that will give you a good image for the scene you’re looking at so when lights turn on or off, you still have a usable image that may just need some minor tweaks in post production. If you move to a different position, just take 2 seconds to dial in new settings and continue shooting. Trust me, you’ll end up with many more keepers shooting full manual.
Conclusion
Concert photography can be a blast as well as challenge you to be a better photographer, and you can end up making some cash by doing it. That doesn’t necessarily mean you can go out to a show tonight and make some money. You generally have to put in your dues, building a portfolio of images and making contacts. Many people shoot every show they can and then contact the band afterward and see if they would like to purchase any of the images for use. Whether you’re making money doing it or not, concert photography will leave you with some great images, awesome stories, and a ringing in your ears. That reminds me of another tip; BUY EAR PLUGS!
Please Support The Phoblographer
We love to bring you guys the latest and greatest news and gear related stuff. However, we can’t keep doing that unless we have your continued support. If you would like to purchase any of the items mentioned, please do so by clicking our links first and then purchasing the items as we then get a small portion of the sale to help run the website.
Get rid of the ads!
Did you enjoy reading this article as much as we enjoyed writing it? There's a way to support us and our reporting, getting ad-free navigation and more as a bonus. Subscribe to us for less than a coffee per month —just $3.99— or take advantage of our yearly subscription with a hefty discount for only $25.- An ad-free experience
- A free mystery box for Lightroom or Capture One
- All the books in our store
- 20% discount on Capture One
- 30% discount on Imalume Photo Theft Protection
- 20% off Herbs and Kettle Tea Company.