I am by no means a Lightroom expert, but I have learned quite a bit by simply using the program over the past two years. Many of the features I now use I learned by simply reading and playing around withing different settings. In today’s post, I wanted to take some time to show you a few of my favorite features, tips, and tricks in Lightroom.
Note: I need to apologize upfront to the PC users out there as I am a Mac guy and have been for about 10 years now. The menus in this review will be based on Lightroom for the Mac but as I understand it, the PC version is nearly the same so most of this should translate.
Setup
If you are new to Lightroom, or digital photography, getting started is probably the hardest part. I doubt there are any two photographers that use Lightroom in the exact same way. I’m not saying my way is the right way, it is simply what works for me. Here are a few of my tips for Lightroom setup.
Install and Hard Drive Setup
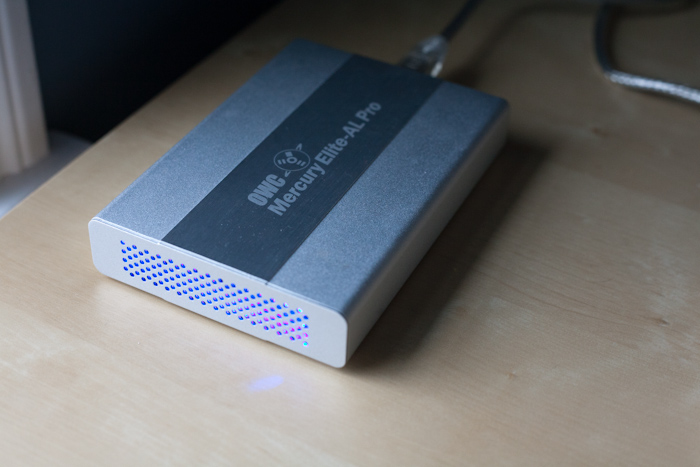
Most people keep everything (documents, programs, photos, music, etc.) on their computer’s internal hard drive. This is fine most of the time but if you really want to speed things up, I recommend storing any media you plan on editing (photos, movies, etc.) on an external hard drive. Take my setup for example. I have a Mercury Elite-AL Pro external hard drive (500GB, 7200rpm, firewire 800) from Other World Computing (OWC), they make great products for Mac users, and I love it dearly. I installed Lightroom to my computer’s internal hard drive but I keep all of my photos and my Lightroom libraries on my external hard drive. This means my data is being pulled from a different drive than my OS and editing programs. All of this equates to faster performance.
A few other things to note here:
- Spend the money on a good external hard drive, it’s worth it. Go for at least a 7200rpm or, if you really want speed, get a solid state drive.
- I prefer firewire 800 for its speed and that fact that it allows me to daisy chain drives together. Thunderbolt peripherals will be coming out soon but I will probably hold off on buying a Thunderbolt hard drive until the technology has some time to be tested.
- Please, please, please backup your data. The Mercury-Elite drive is my daily use drive but it’s a little much for a backup. I purchased another, slower drive from OWC which I use to backup my Mercury-Elite. Another option is online backup but if you have tons of RAW images, life may be easier with physical drives.
File handling
Most readers will already know this, so bear with me. All RAW files, except .dng files, are accompanied by XMP “sidecar” files. These files contain metadata and any post processing edits that were made to the original file. Most photo editing software is smart enough to automatically associate these sidecar files with the actual photo file, so you only see one file when browsing within the editing software. Your computer’s OS however is not that smart. It actually sees the image and the sidecar as two different files. If something where to happen to the sidecar file, you would be probably have some four letter words to shout at your computer.
If you are going to import RAW images into Lightroom you need to understand that, by default, any edits made to these images in Lightroom will not actually be written to the XMP sidecar file. Instead, all metadata and post processing changes will be saved in the Lightroom library. This allows for nondestructive editing which keeps your originals nice and clean. The thing to remember is, if anything happens to your Lightroom library, all of your post processing work will be lost. So, there are two things to think about here. The first is backing up your Lightroom library. I store all of my photos and my Lightroom libraries on an external hard drive which I then backup using another external drive. That backup drive stays in my desk at work. Backing up your work is important but keeping a backup offsite is something not may people do. I plan for the worst and I recommend you do the same.
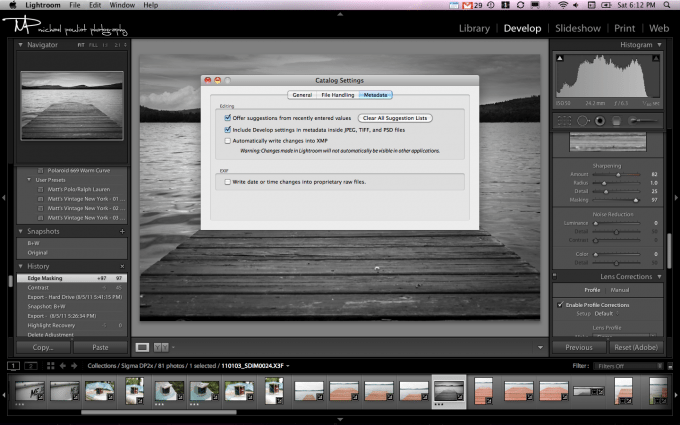
The second option you have is writing your edits and metadata directly to the file. This can be done manually by going to “Photo” on the menu bar and then selecting “Save Metadata to File”; the keyboard shortcut for this is command+S. This can get old pretty quickly and I often find myself forgetting to do this step. Thankfully, Lightroom also has the ability to automatically save changes to the RAW file. This means in addition to having your metadata and post processing changes saved in the Lightroom library, the original file is also updated. I prefer to save changes to the XMP sidecar files for a few reasons.
- It’s like having a backup of your Lightroom library built into your RAW images. If anything should happen to your Lightroom library, all of your images will still look the same, but you will loose any Lightroom history you may have with the file (e.g. snapshots, edit history, etc.). I can live with that.
- If you use other programs to edit your photos (Photoshop, Nik software, etc.), you do not have to go into Lightroom, find the file, and then choose to open it using another program from Lightroom. You simply find the file on your drive and open it with whatever program you need to use. All of your metadata and post processing changes will be present.
I’m sure many of you are now asking why doesn’t Lightroom just have this feature active by default? Well, it’s really all about performance. Remember, every time you made an edit to a photograph, it is writing to the file and the Lightroom library. I would say the majority of users will not notice a difference. The only users that may see a difference are those doing massive batch edits or those that may be editing files from an offsite server. For example, wedding photographers may have thousands of images after a shoot. Say they need to do a batch change to the white balance for a thousand images. Lightroom will need to edit all of those images at the file level and in the Lightroom library. There are also other factors that can affect performance like your computer, your HD speed and the size of your Lightroom library. Again, I suggest you give it a try. If you notice a significant difference, simply turn this option off.
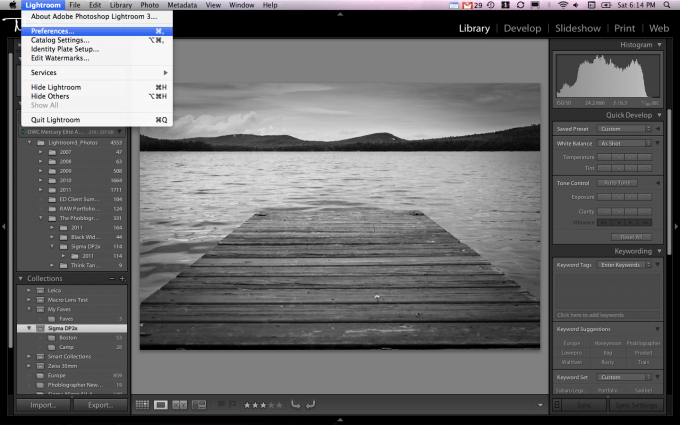
So how do I select this feature? It’s easy, just follow the steps below:
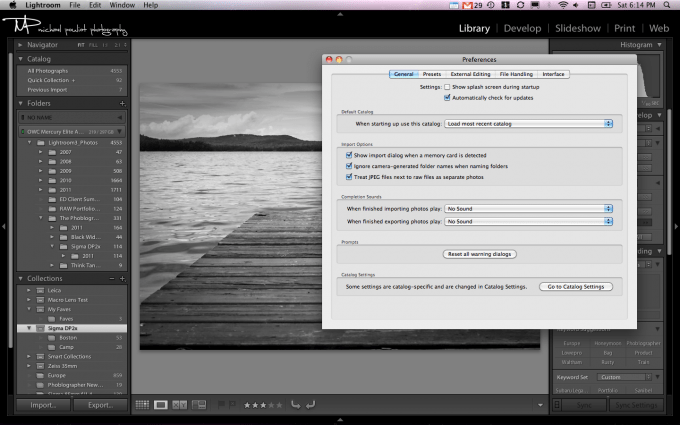
Step #1: Select Lightroom on the top menu bar, then select preferences
Step #2: Select the “Got to Catalog Settings” button on the bottom right of the dialog box.
Step #3: Check the box “Automatically write changes into XMP”.
Lightroom Libraries
One thing many Lightroom users do is they keep all of their images in one giant library. This may work for you now, but wait until your library gets to tens of thousands of images. Trust me, it happens faster than you think. As the library get’s bigger, you will notice a drastic hit in performance. On top of that, if anything happens to your sole library, all of your metadata and post processing changes will be gone (unless you are auto saving to XMP). Even if you are automatically saving changes to your XMP sidecar files, it’s still a massive pain in the ass to rebuilt a library from scratch. So what do you do? Well, here’s what I do. I have three “main” libraries and several other libraries for various projects. The three main libraries consist of a library for my personal work, a library for The Phoblographer, and a library for family and travel. All of these libraries live on my external hard drive along with my photos which I backup with another offsite external hard drive once per week. On top of all of that, I backup all of my libraries to my computer’s internal hard drive just because Lightroom will automatically do this when I close Lightroom. Is it overkill? Probably, but I’d rather be safe than sorry.
I highly recommend you start using multiple libraries even if your current library is small. This will help improve performance and it could save your bacon if your Lightroom library get’s damaged, lost or corrupt. Multiple libraries are also extremely easy to setup and manage so you really don’t have an excuse. Do it now!
DNG or Manufacturer Specific RAW Files
One subject that is always a topic of debate is .dng files. For those of you that don’t already know, the .dng file extension is Adobe’s open source RAW file format. Most camera manufactures have their own RAW file format, Canon has .CR2 and Nikon had .NEF, which can make things a bit difficult for software companies. Adobe has set out to make a universal RAW format that can be use by anyone as it is an open format. For example, Leica uses this file format in their digital cameras.
So why would you want to use .dng files instead of the manufacture’s default RAW file? Well, there there are a few advantages but they aren’t earth shattering. The first is .dng files have an imbedded sidecar file. Most RAW files keep their metadata in a separate file known as an XMP file. This means each RAW file you have is really seen as two files by your computer’s OS. If a RAW image loses it’s XMP file, any metadata or post processing changes will be lost. The Adobe .dng file is seen as one file by your computer’s OS so there is no XMP file to lose. The second benefit of .dng files is they are roughly 20% smaller while still offering the same amount of RAW image flexibility. This many not sound like much but 20% can add up for photographers with tens or hundreds of thousands of photos.
If you decide that .dng files are what you need, you can have Lightroom automatically convert any RAW file to a .dng file upon import. I personally do not convert images to .dng files. Honestly, I’m not sure why I haven’t…it’s most likely becuase I’ve always dealt with .CR2 files and I’ve never really felt the need to change.
Creating a Custom Nameplate
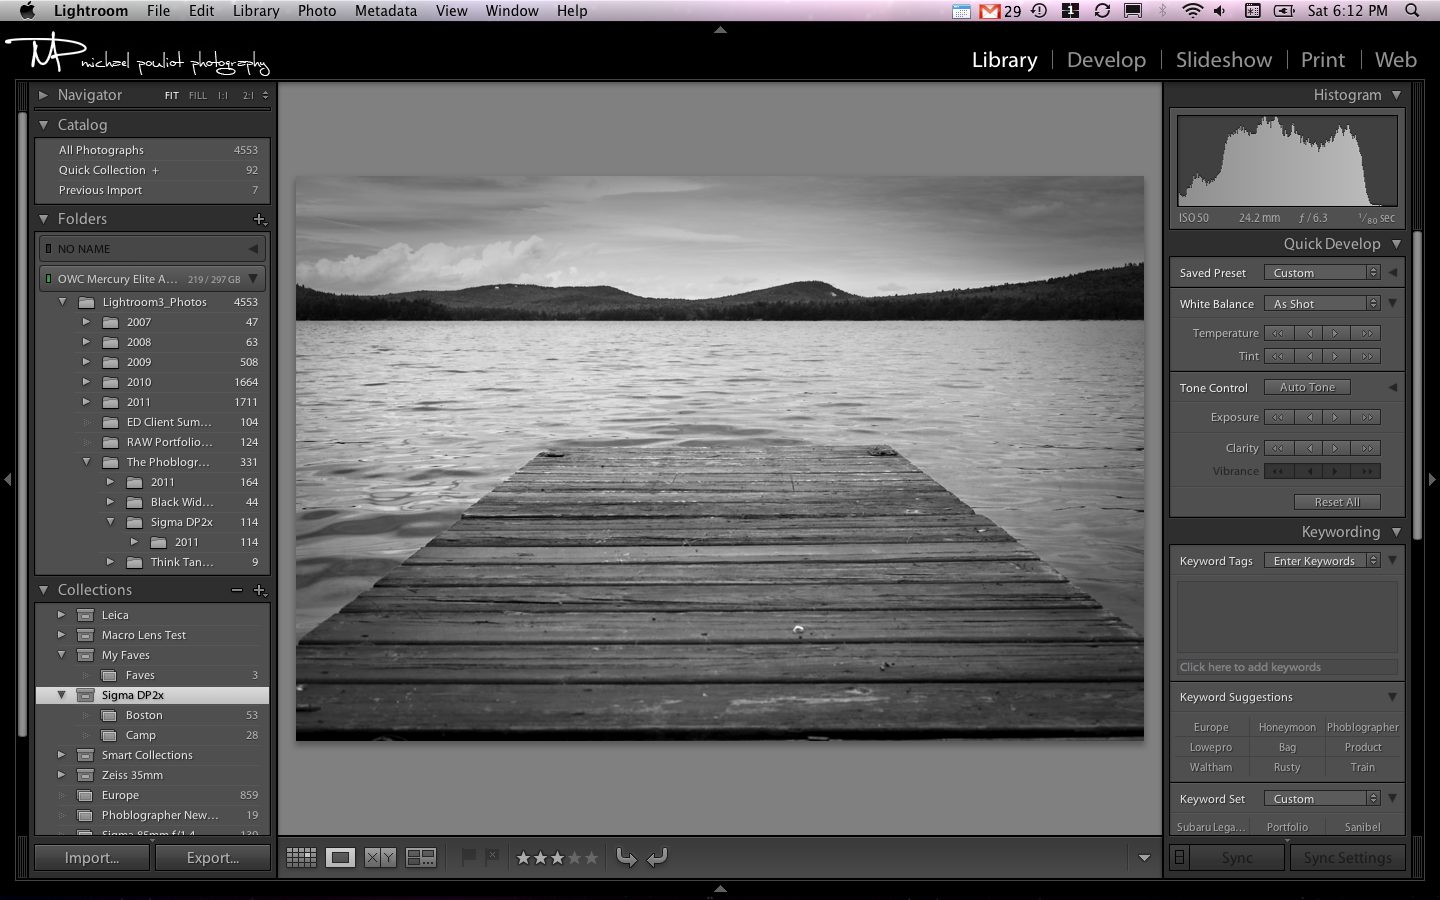
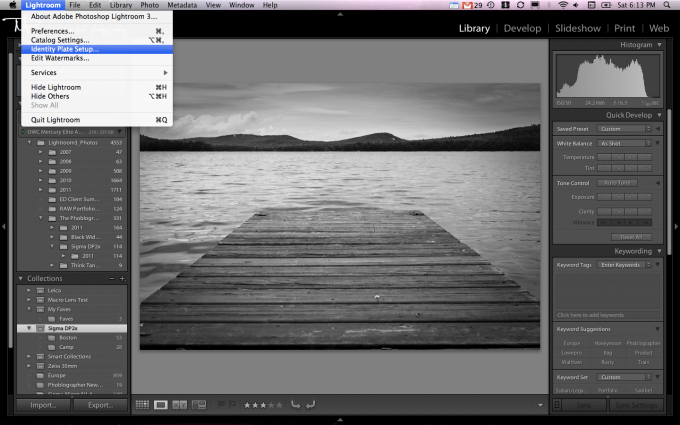
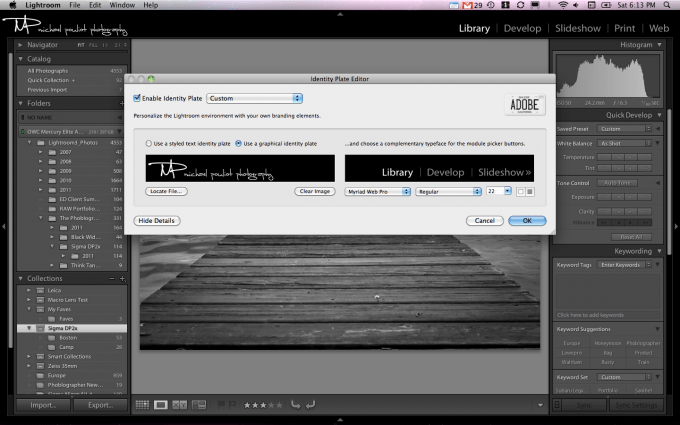
Why stare at a boring black Lightroom dashboard when you can spice it up with your own customized nameplate. The best part is, it’s super easy. All you need to do is create a nameplate in Photoshop or any other program. My nameplate is a 270×57 px JPEG and it works great. Once you have created your nameplate, simply click on Lightroom on the menu bar and choose “Identity Plate Setup…”. Next, locate your nameplate file on your computer and you are done. Side note, you can also change the font of the module names so they match your nameplate font. Pretty slick.
We Want to Hear from You
We are all about sharing your experiences with the community here at The Phoblographer. Please share some of your favorite Lightroom features, tips, and/or tricks in the comments section below.
Lightroom is on Sale!
You can pick Lightroom up for $179 at B&H until 8/20/11. That is a killer deal!
Please Support The Phoblographer
We love to bring you guys the latest and greatest news and gear related stuff. However, we can’t keep doing that unless we have your continued support. If you would like to purchase any of the items mentioned, please do so by clicking our links first and then purchasing the items as we then get a small portion of the sale to help run the website.


