Last Updated on 08/30/2011 by Sander-Martijn
Reader Sara Emanuel sent in some images to Thephoblographer, asking how to capture some images of colorful lights strung in tress: her images either had burnt-out white lights or a lack of detail in the background, and she wasn’t happy with either.

A digital camera’s sensor, or a piece of film, can only produce a quality image if the amount of light which strikes it during an exposure is within its capabilities – too much light and you’ll get overexposure, a washing-out of colors leading to fully white, not enough light and the image will appear dark – heavily underexposed and there’s nothing actually recorded by the sensor, which appears as black on a photograph.
Photographers and automatic exposure systems use the aperture and shutter speed settings to control the amount of light getting to the sensor, and the sensitivity of the sensor (expressed as ISO), to ensure the light getting to the sensor is within the capabilities of being recorded.
Of course, lighting is usually not uniform across an entire image, so there will be dark areas and bright areas, but unless everything is within the range the sensor can record – usually around five stops – there will be no detail either in the highlights, shadows or both.
This is why people are often disappointed when shooting at night, spotlit subjects, scenes with bright sun and shadows. Put simply, it’s hard and sometimes impossible to get great detail in an image’s shadows and still record bright sources of light in the same image.
Some of the techniques to address this problem include:
- Bracketing
- Fill flash
- HDR (High Dynamic Range)
- Reflectors
- Multiple exposure
The Phoblographer will be writing about the techniques listed above in the future, but for now let’s have a look at Sara’s problem.
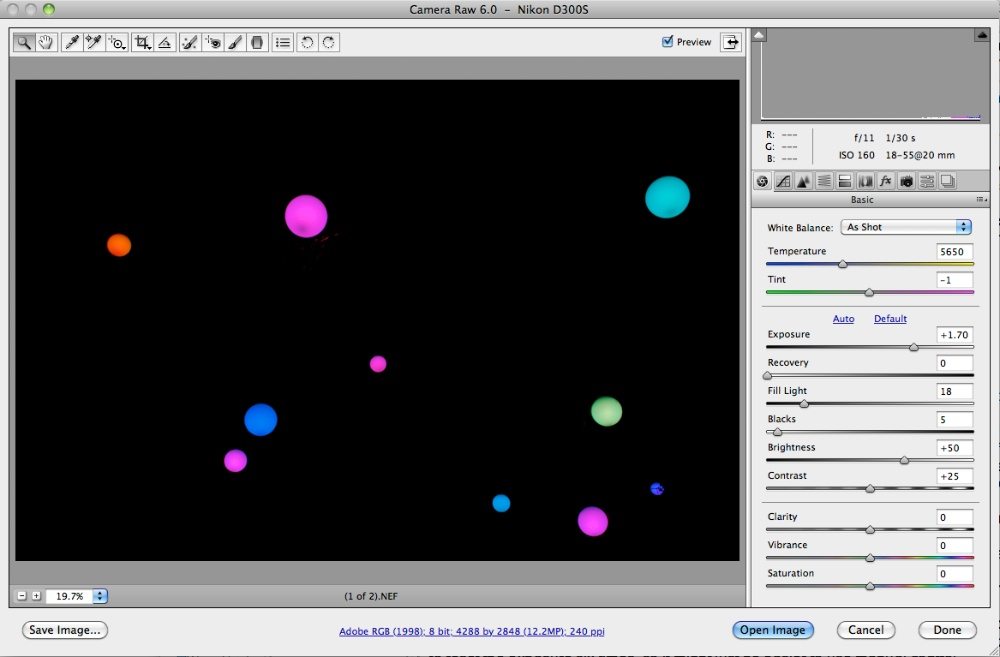
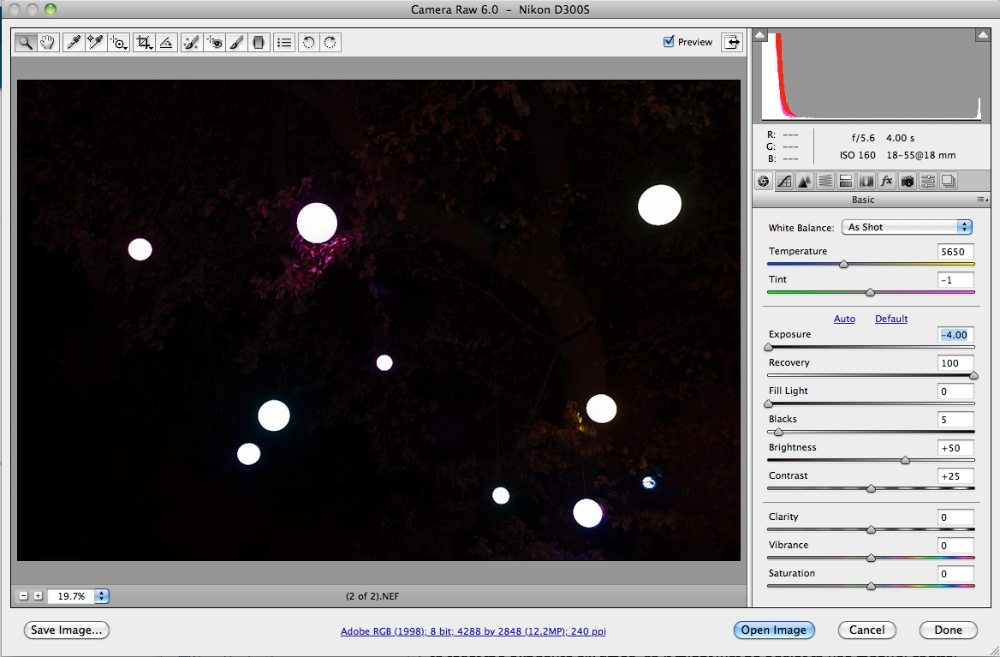
The two exposures she made and sent to The Phoblograher are both actually good exposures – it depends on what you actually want in your image. One shows colorful balls, almost floating in air; there’s a real mystery as to what’s being shot. The other shows the scene, how it’s now obvious the balls are lights hanging from trees… but the lights are now burnt-out balls, with little color because the exposure has been too much for the sensor.
How to get both? Well, it’s going to be hard, but maybe not impossible. Throwing more light at the scene with fill flash or reflectors isn’t a good idea, so let’s look at the other options.
If it can be shot again, I’d use exposure bracketing to try to find a compromise between the exposure the lights need (not much) and the background needs. I’d try to be ready as soon as the lights are switched on – if there’s any ambient light left in the evening sky, it will make the difference between the lights and the background a lot less, which will make the shots easier to capture.
I would spot meter the lights and the background and take a series of images 1/2 stop apart between the two – which could be 18 frames. This could be done using AEB (automatic exposure bracketing), but you may have to reset the exposure six times, so it might just be easier to use manual control.
Shoot RAW: it gives more latitude when working in your computer.
When sorting through the images, choose the one with just acceptable background lighting (which you may be able to bring up in whichever RAW converter you use), and use the dodge tool to darken the lights themselves.


Sara’s images are nine stops apart in their exposure, and even Adobe Camera Raw couldn’t find detail in the lights in the long exposure or background detail in the short exposure. An image shot between the two would probably, at first glance, look like a terrible compromise between the two – a vague image in the background, globes still too bright. However, there’s a chance the background could be brought up and the lights reduced in intensity, which could produce a pleasing image. With nine stops between the two it’s always going to be hard though.
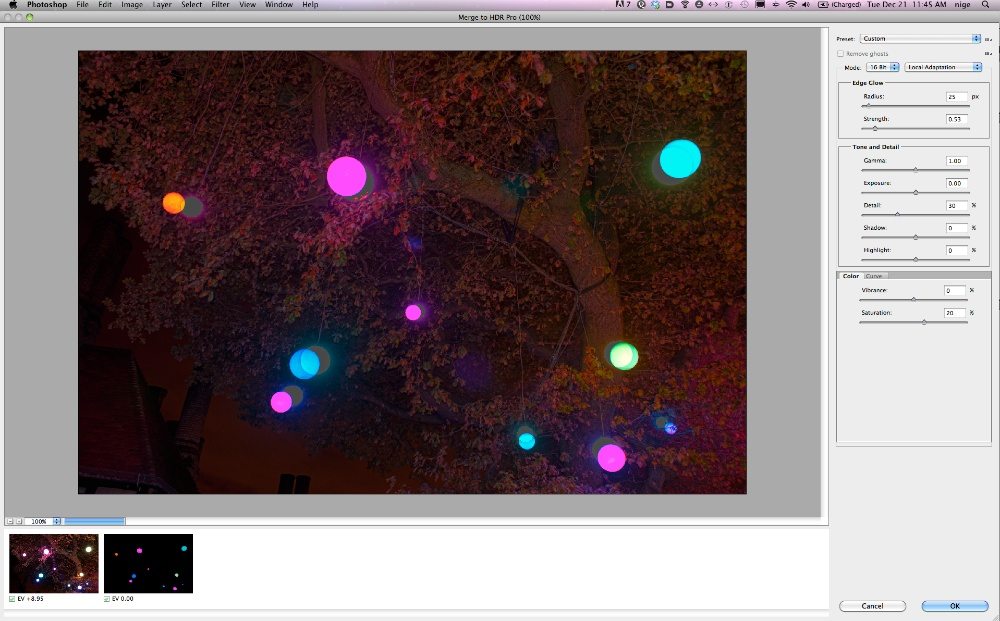
If you’re still not happy with the image, you could use multiple images. This is quite easy to do in Adobe Photoshop CS5: File-Automate-Merge to HDR. However, if you’re planning for a subject like Sara’s, use as high a shutter speed as possible to reduce movement in the lights and leaves: if it’s windy it may be impossible to get the alignment of the images satisfactory. Using a tripod, and AEB set to three stops apart, a high ISO and a wide aperture will help. Changing the exposure by using altering the ISO might be a good idea, too.
Because of movement in the lights between exposures my attempt at merging the frames wasn’t successful, but hopefully you’ll get the idea, and see how it could work for two frames using a fast shutterspeed shot quickly could work.

Please Support The Phoblographer
We love to bring you guys the latest and greatest news and gear related stuff. However, we can’t keep doing that unless we have your continued support. If you would like to purchase any of the items mentioned, please do so by clicking our links first and then purchasing the items as we then get a small portion of the sale to help run the website.


