Last Updated on 08/30/2011 by Sander-Martijn
Nero’s latest offering, Multimedia Suite 10, is an excellent toolkit for the video inclined. You can burn, rip, convert, back up, organize and edit digital media. The suite is divided into three programs: Nero Vision Xtra, Nero Burning ROM, and Nero BackItUp & Burn. In this post, I’ll provide a brief tutorial for creating a basic video with Nero Vision Xtra.
Major Features
-Photo Editing
-Create slideshows/movies
-Multi-track video editing
-Advanced video effects/transitions with HD output
-Multiple burning options
In Use

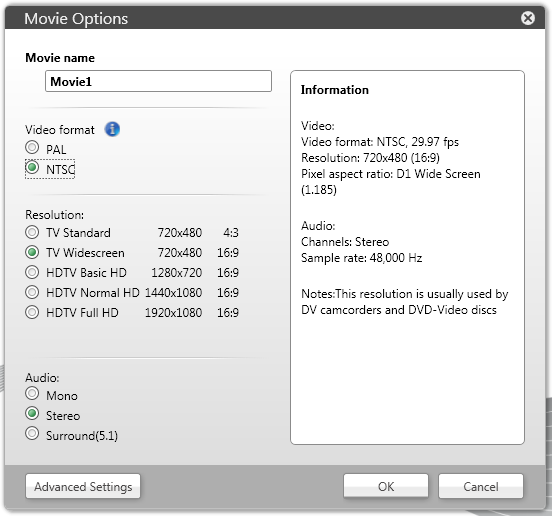
When you start up Nero, you get a screen that allows you to: make a DVD, make an AVCHD, make a Blu-Ray disc, make a CD, record directly to disc, make a movie or slide show, and capture video to hard drive. Select “Make a movie.” That will bring you to the following.

If you’re in America, select NTSC as your video format. If you’re in Europe, Australia, or parts of Asia, select PAL. Configure your resolution and sound to your liking, then click OK.
Video Editing Interface and Ease of Use

The top right corner of the screen enables you to import videos, photos, clip art, and music. The video shown at the end of this post was taken with an Apple iPod nano 5th Gen. Anything you want to be in your movie, you drag into the timeline below in the specified track. Just above the editing timeline, there’s a small microphone button. Clicking that will allow you to record a narration track.
Once you’ve select the video file you want to edit, it’ll show up in the video tray marked “It will show up here.” And to begin the editing process, drag the video into the “Video 1” track. Then you can begin the effects.

On the far right, you’ll notice a nifty little pair of scissors. Use ’em to cut up a video as many times as you want. Up top, you’ll see the circle over the text box. Nero provides a number of styles for the type of text you’d want to include in your video. If you want text to be shown alone, as opposed to hovering over the video, in a certain segment, cut your video and separate the two chunks. Once you’ve typed what you want, click on the box in the small area above – where all the wavy “Neros” are – and drag it into the Video 1 track.

There are little blue triangles strewn across the bottom audio track. Those are key frames. In multi-track video editing software, like Nero, a key frame indicates a change in the signal. If you look above in the white area, where it says Audio Level, you can set the audio level of each key frame. If you set two consecutive key frames to different audio levels, you’ll establish an audio gradient in which the video will progressively change volume. Fade in. Fade out.
Conclusion
Nero Vision Xtra is a solid video editing program. I’m the type that tends to tear open a package, chuck the instruction manual to the side, and poke around the product. I learn by clicking in this case. One of the most fundamental things about this program is that in order to edit a section, be it video, audio, or text overlay, the time slider has to be somewhere in that chunk. Keep that in mind when using this program.
Upon exporting the video, there’s an option for a number of formats – AVI, AVI (DV), WMV, MPEG-1, MPEG-2, MP4, AVC, and AVCHD/Blu-ray.
Happy movie making.
[youtube=https://www.youtube.com/watch?v=ajhDz9j-Vys&fs=1&hl=en_US]
Please Support the Phoblographer
We love to bring you guys the latest and greatest news and gear related stuff. However, we can’t keep doing that unless we have your continued support. If you would like to purchase any of the items mentioned, please do so by clicking our link and then purchasing the items as we then get a small portion of the sale to help run the website.


