Imagine our excitement when after years and years of mobile photography being so limited that we were able to shoot a photo using our phone and have an off-camera strobe go off to provide extra illumination. These capabilities have only recently become accessible. Sure, Nokia had manual camera control with their line of phones but what both Android and iOS both offer is comparably more mainstream.
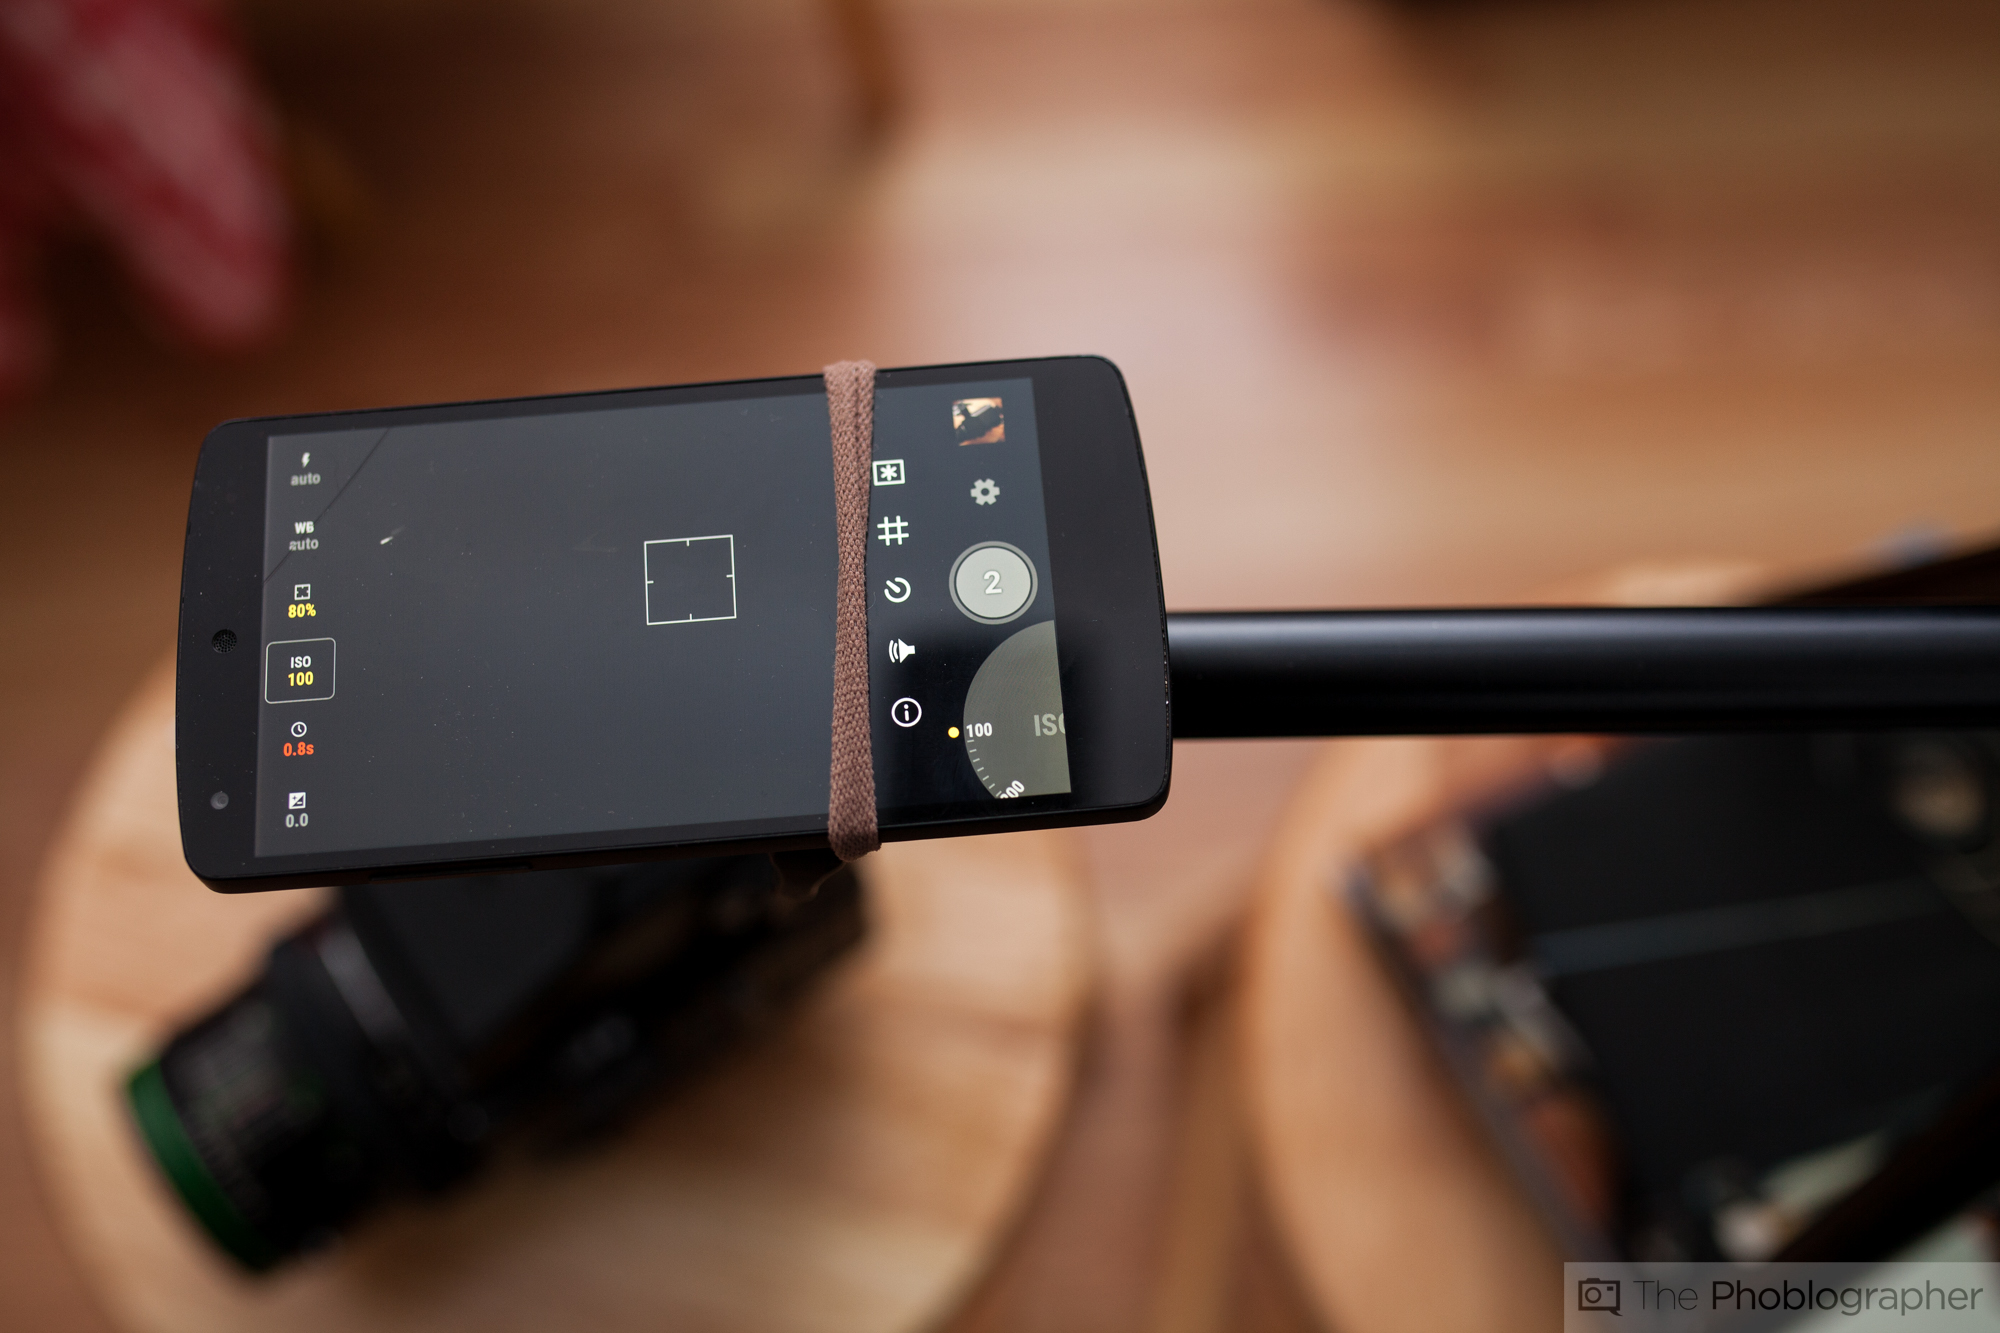
When browsing the Android store of manual shutter control apps, I found the Manual Camera app that allows the user to set the ISO, shutter speed, focusing, white balance and many more parameters. But we had also recently got the Triggertrap Flash Adapter in for review.
And when using both of them together, we were able to shoot an image mostly illuminated by strobe.
What You Need
– An Android or iOS phone with either Manual camera for Android or Manual for iOS.
– An Android or iOS tablet with the Triggertrap Mobile app.
– An off-camera flash or strobe.
– A tripod with the MeFOTO Sidekick 360, although we didn’t use one of this tutorial
– Triggertrap mobile adapter
– A handheld Light Meter
The Setup
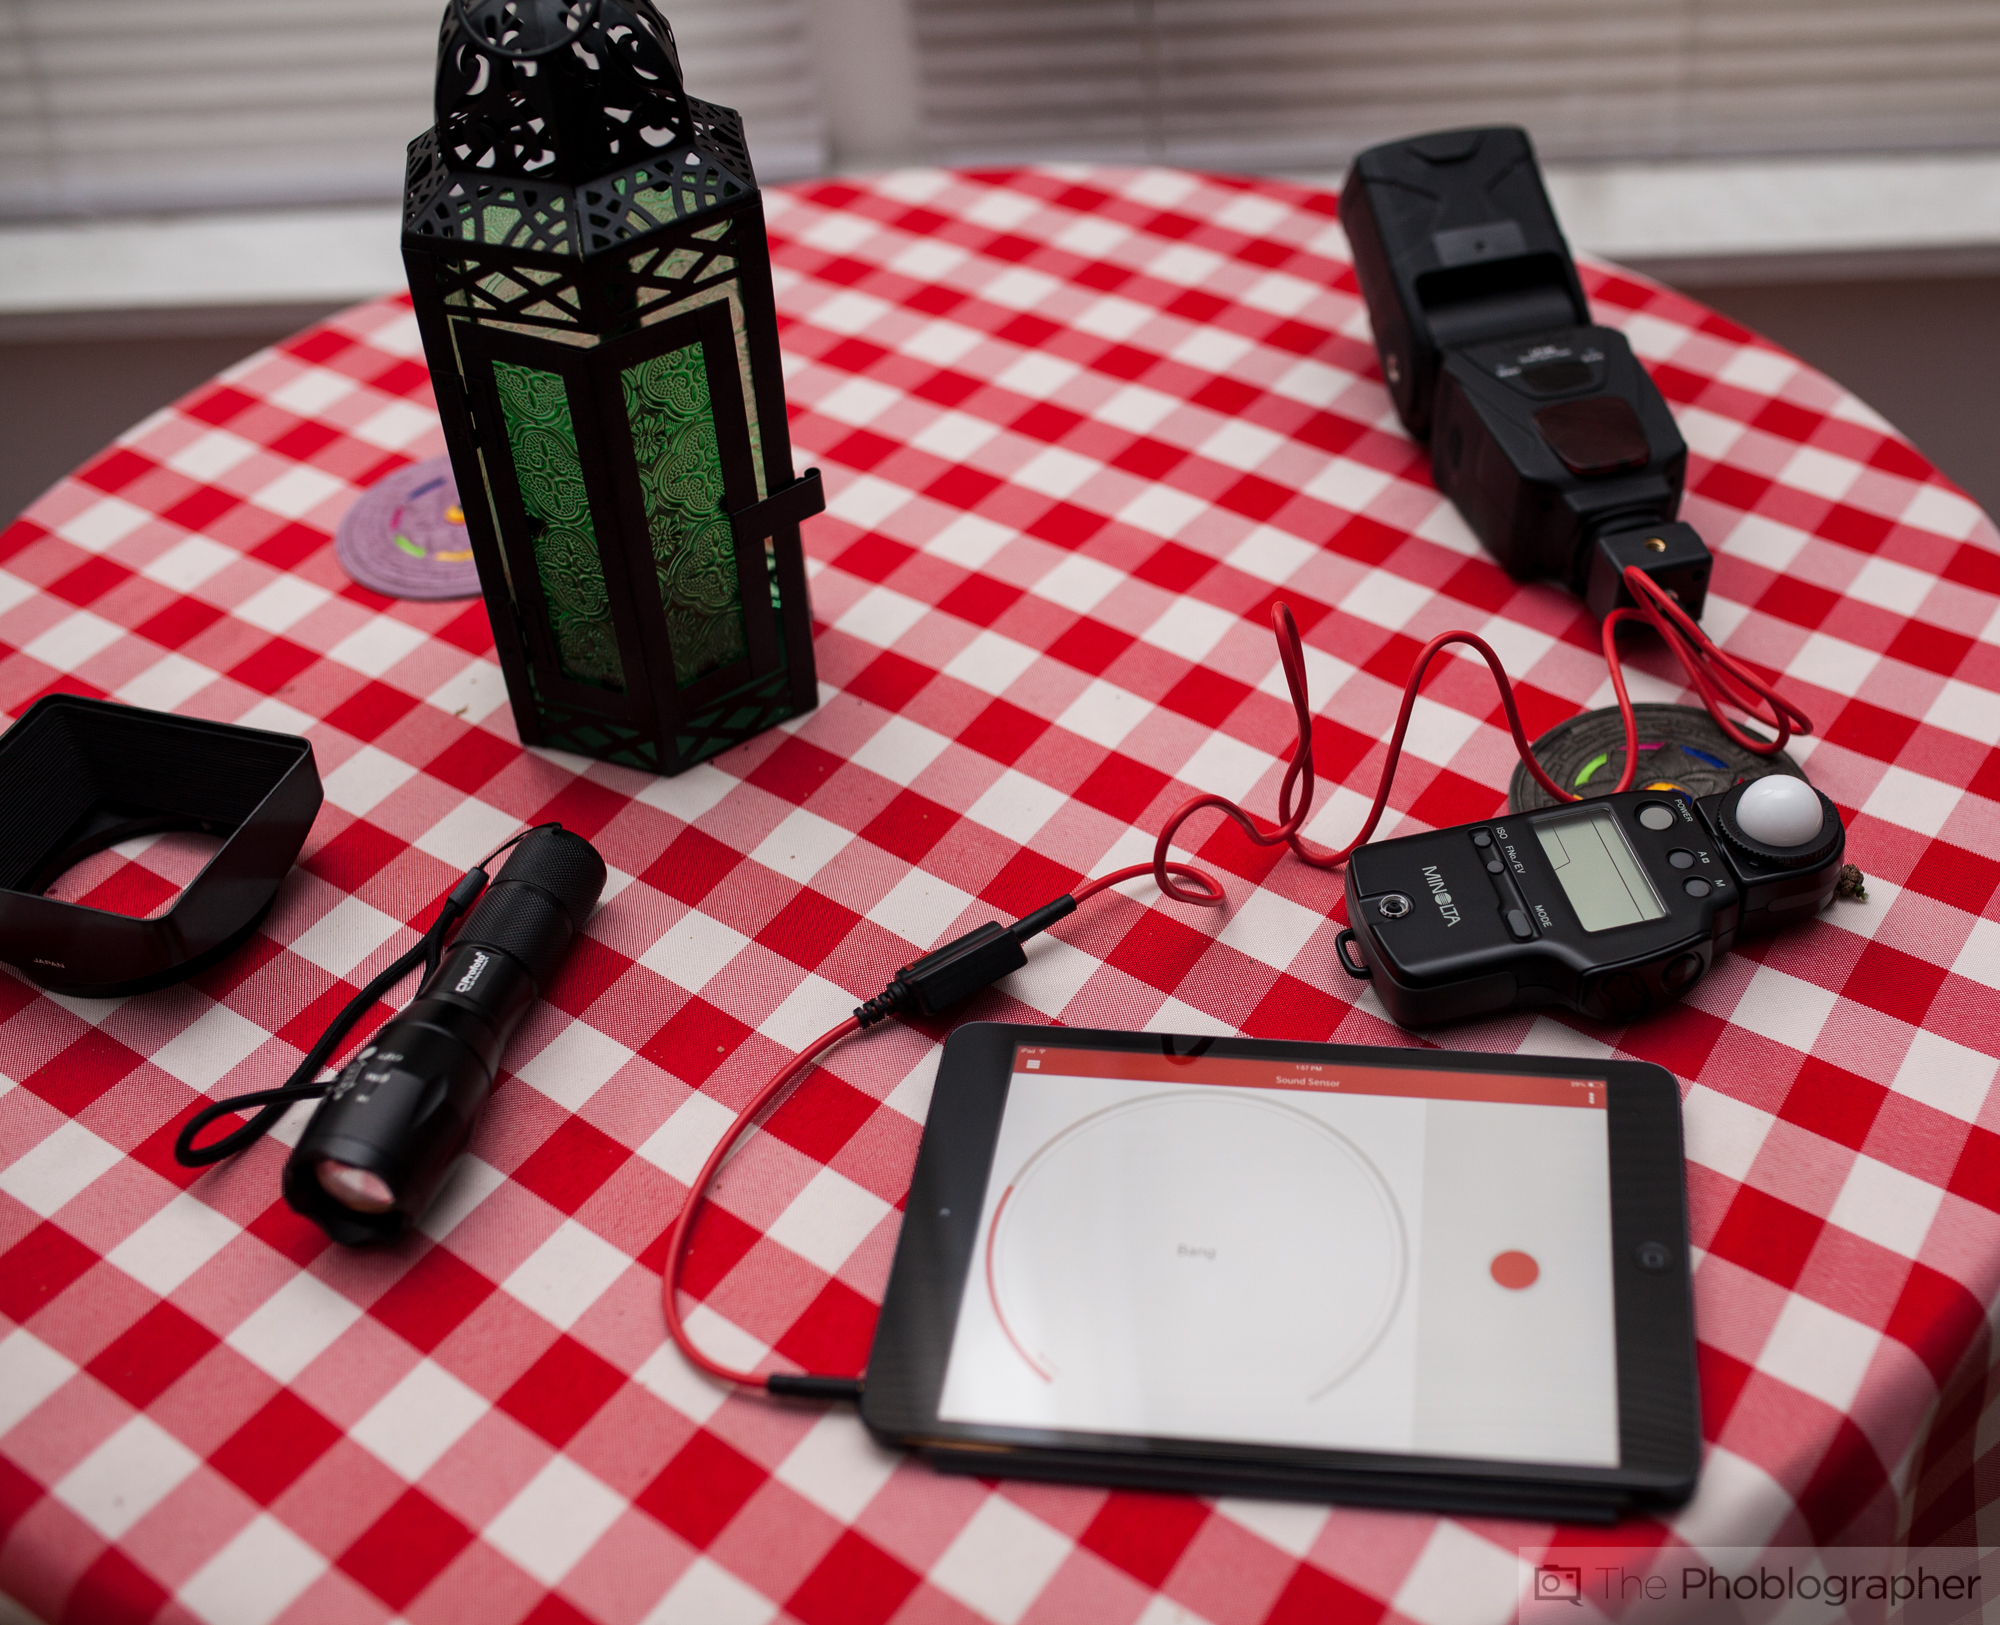
You’ll want to begin by setting up your light. To shoot these images, I used a very standard lighting setup that I have over at the Phoblographer that makes a scene look like it’s totally lit by window light. Then I set up my flash along with my iPad with Triggertrap mobile. This took a bit of figuring out but you’ll need to turn on the flash, plug in the adapter, then plug the other end into the tablet, and then connect the adapter and the cable from the tablet. It’s a bit complicated, but it will work.
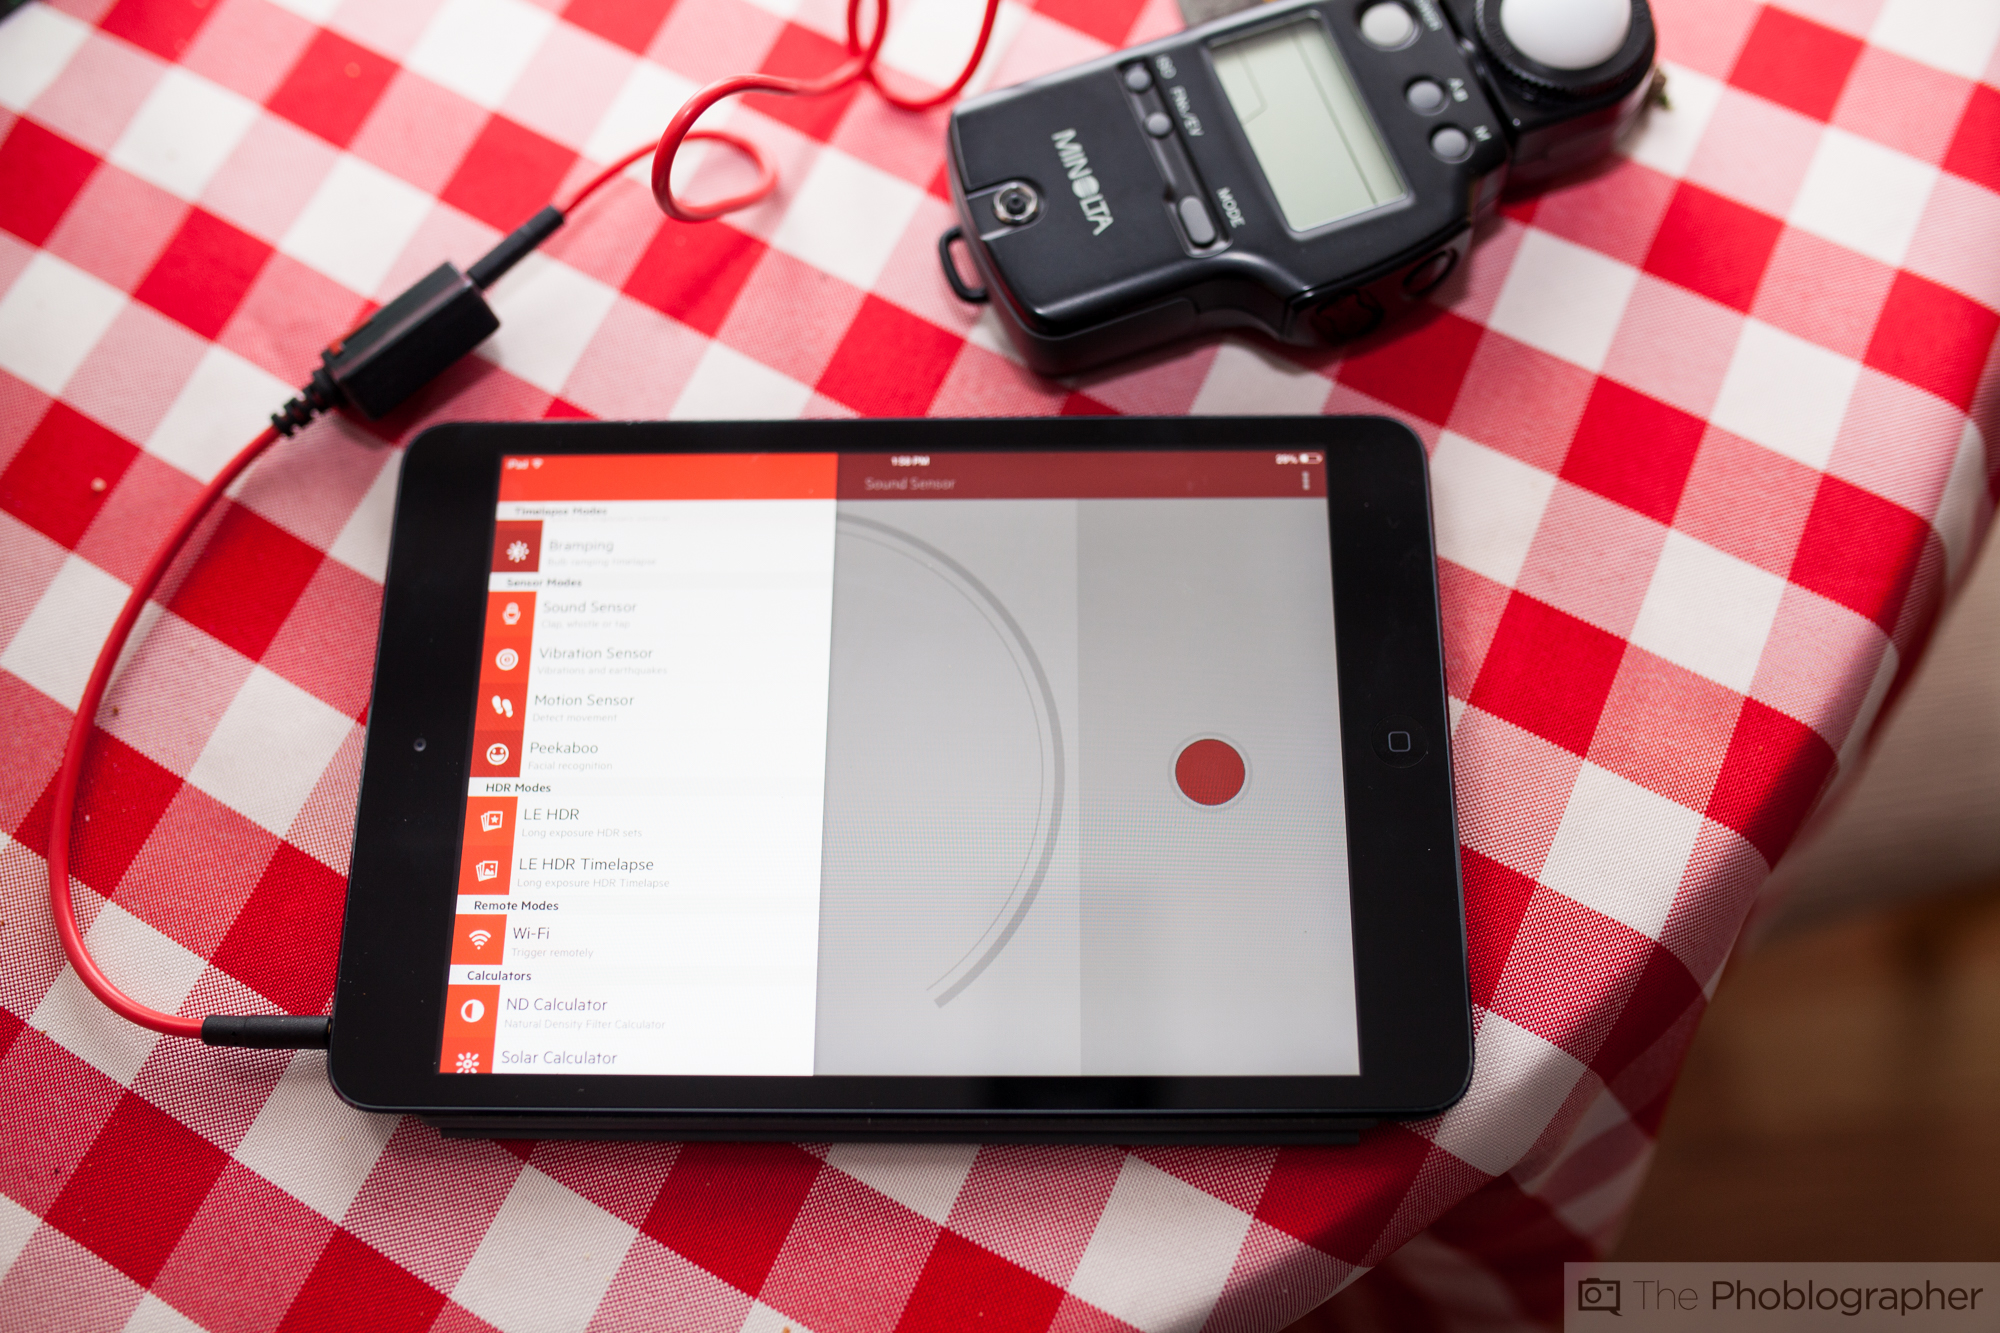
Then you’ll want to set your Triggertrap app to the sound sensor mode. When this is done, adjust the settings according by moving the little settings slider. Then give it a test. If it fires, then you’re good to go.
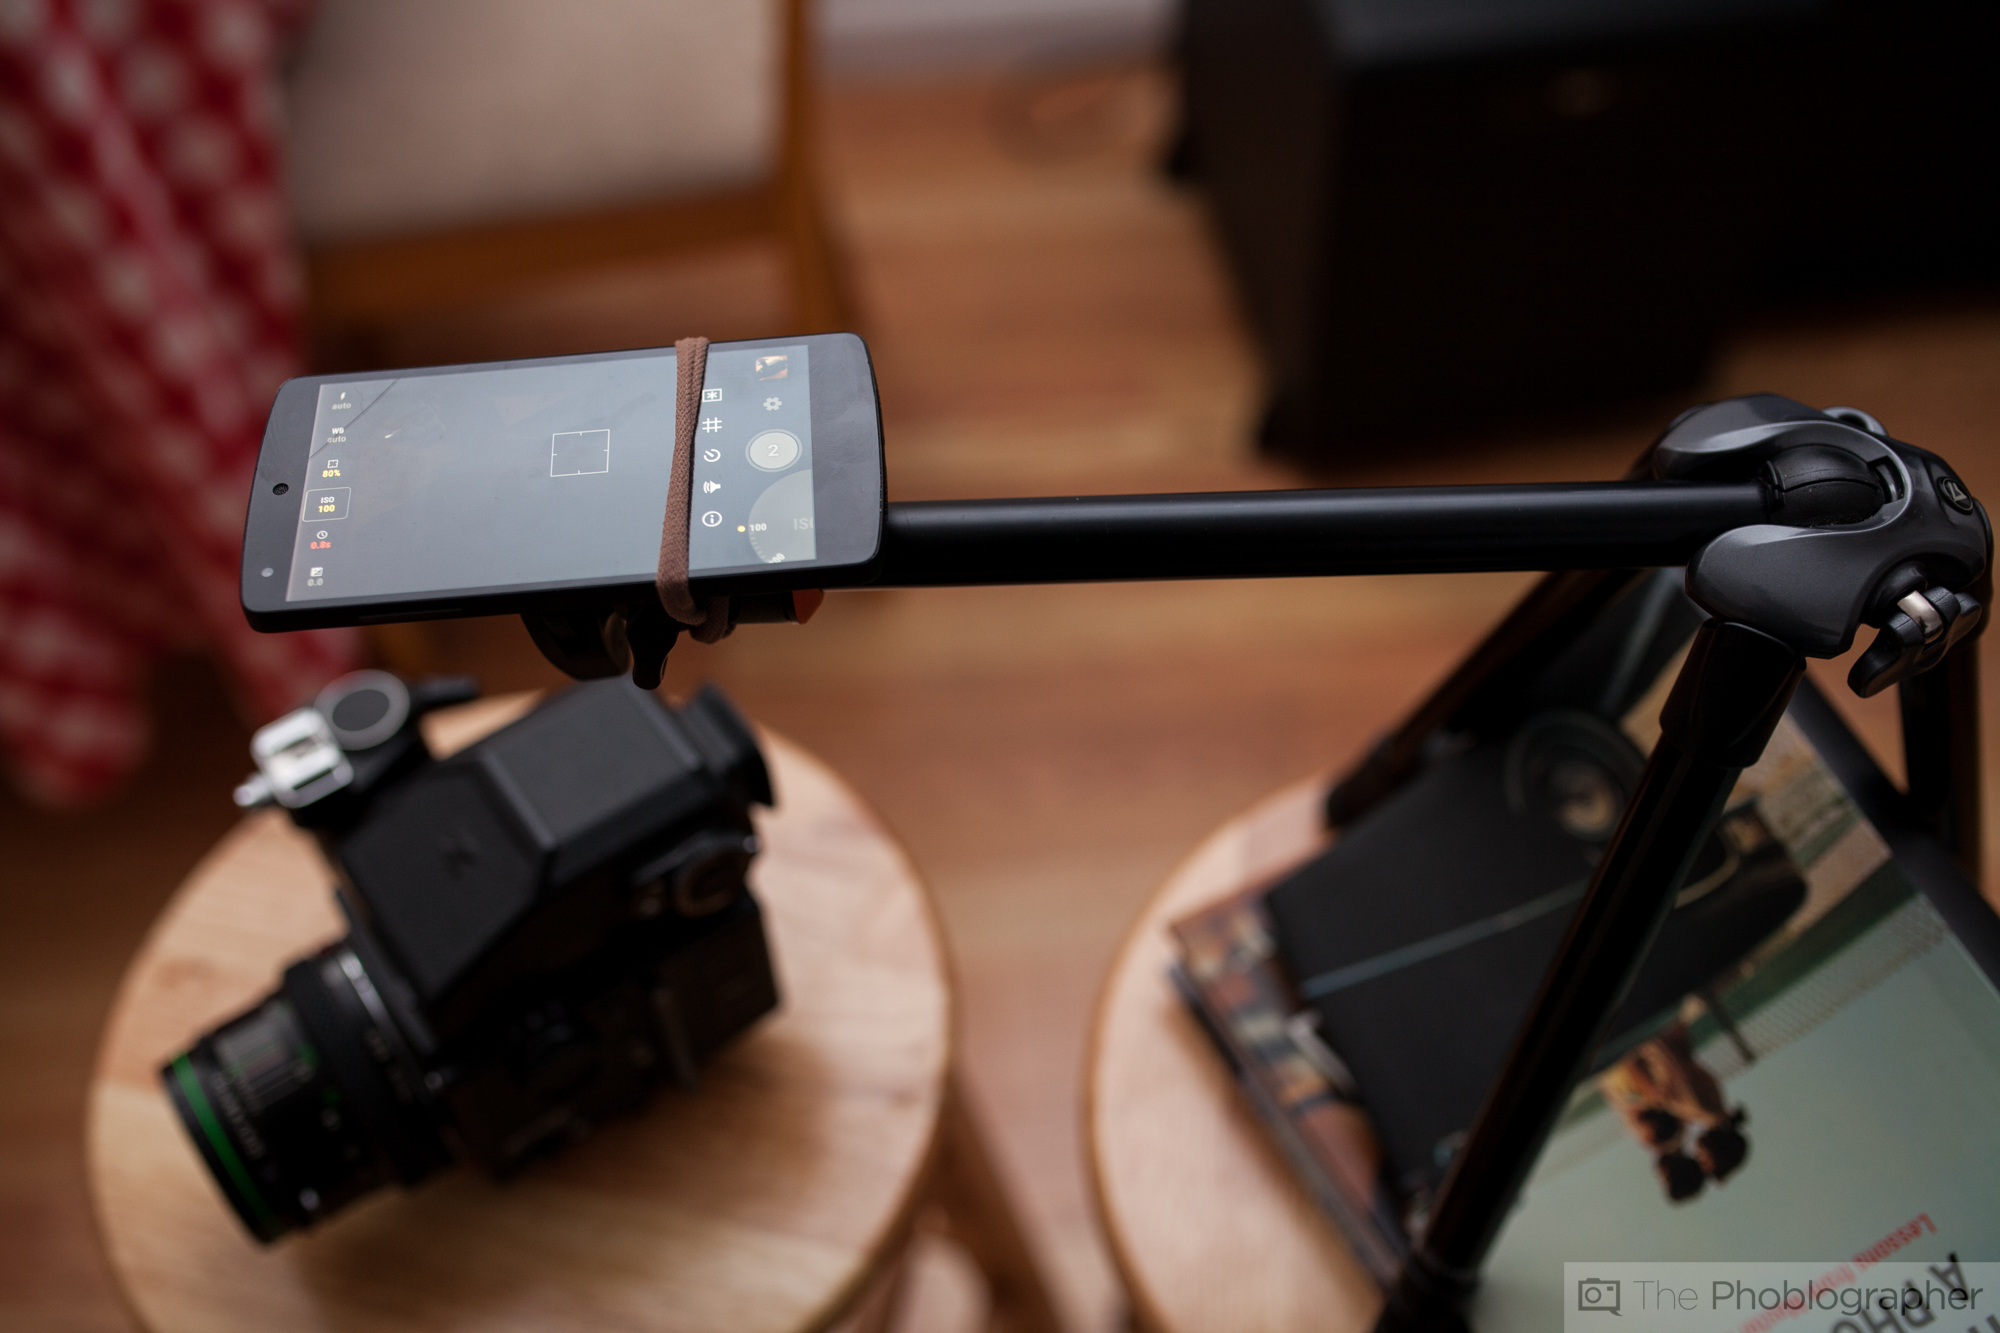
Next, you’ll want to bring your subject and set up in a way that you’d normally shoot a scene. We usually tend to shoot from above when photographing products and that’s what we wanted. To do this, I used a Vanguard tripod and a hair tie that a model left over at my apartment. This would be much safer with the Sidekick 360 that I talked about, but it isn’t necessary.
If you’re photographing a cup of coffee though, then make sure that your phone doesn’t fall into the cup. Also try to provide lots of counter balance to the tripod since the arm is leaning over.
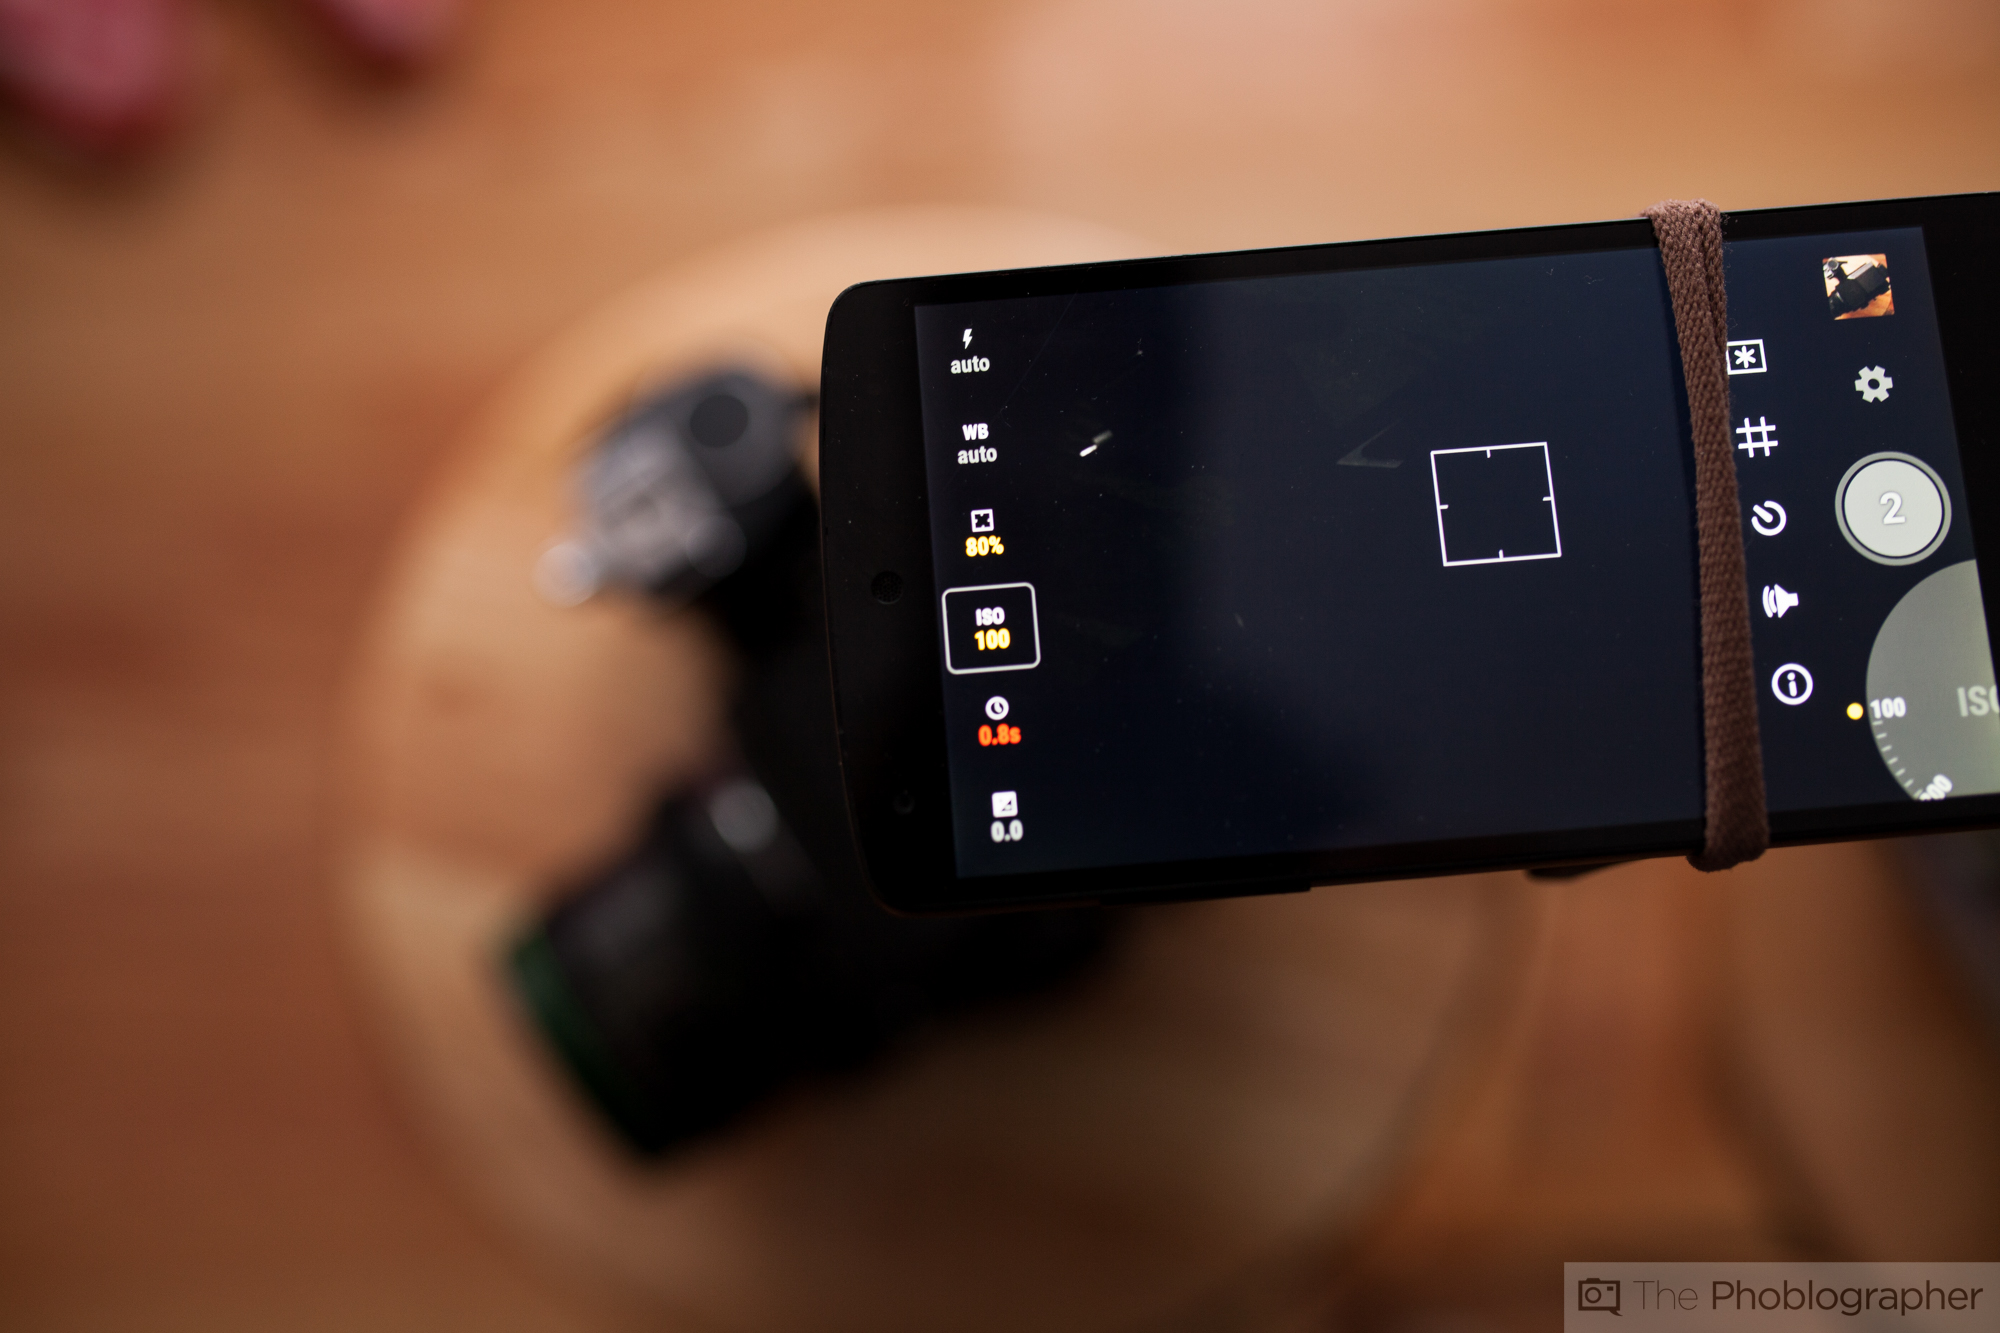
Using the Manual camera app, I set my shooting parameters to ISO 175, 1/4 of a second, manual focus and manually focused. The aperture is locked at a steady f2.4 with my Nexus 5–so I also needed to use a handheld light meter that measured strobe output to ensure that my light was firing at f2.4 or at least close enough. I also ensured that the flash was off.
The focusing is very tough to get perfect and it requires you to be very careful. I used a flashlight to give myself extra illumination and to tell what part of my scene was in focus. The reason why this is being shot at such a slow shutter speed is because I needed to find a way to make sure that the flash synced and fired when the shutter was open. Triggertrap usually recommends that you shoot for around two seconds, but my phone didn’t go down to such a low setting. Shooting at anything faster than 1/4 of a second is incredibly tough to do because the two units aren’t directly synced together.
After this is done, set the app to a delay shooting mode to ensure that the phone doesn’t shake, and when the camera is shooting, make a loud noise to ensure that the sound sensor linked flash triggers.
The alternative is to make the sound very sensitive or make the flash trigger over and over again. We’re not talking about stroboscopic mode, but telling Triggertrap to make it fire once a second. If you’re a musician, you’ll be able to get into the rhythm. Once you’re able to lock yourself onto how often Triggertrap will fire the flash, go ahead and trigger the camera. But the best method that I found was to set Triggertrap to fire the flash once a second, then set the delay shooting mode up to 2 seconds. The camera then was able to allow the light into the scene.
The Results
BEFORE YOU GO ON: NOTE THAT THESE IMAGES ARE SIMPLY PROOF OF CONCEPT. THEY AREN’T HIGH ART, AND THEY AREN’T MEANT TO DO ANYTHING ELSE BUT SHOW YOU THAT THIS TECHNIQUE IS POSSIBLE.
The camera on the Nexus 5 is usually okay, but in this case, we still wanted to sharpen the images even more in Lightroom. At the time, I wasn’t able to shoot RAW with Android Lollipop. To be honest, I’m still not sure when that’s coming. But when it does, the camera will be much more capable as will the editing process.
Manually focusing is tough, but at the macro range you tend to get the sharpest images. The biggest problem has to do with the slow shutter speed. A flash or strobe with a faster flash duration will also help you get sharper images.
We encourage you to give it a try but to also remember that you’re basically shooting the same way that studio film shooters used to.