
Last Updated on 08/05/2020 by Chris Gampat
Understanding what your light meter is trying to tell you plays a critical role in your ability to create properly exposed images.
Light meters are designed to measure the amount of light available in a scene. In photography, they are used to determine the appropriate aperture and shutter speed required to properly expose an image. Back in the film days, not many cameras came with a light meter built-in. Photographers had to rely on external light meters to accurately determine the proper exposure. As time went on, camera manufacturers began incorporating light meters into their camera bodies. This made it much easier for photographers to expose their images properly. Fast forward to today, just about every commercially available digital camera has a light meter built-in. They play an essential role in your camera’s ability to create properly exposed images. There will be times when you may want to ignore what your light meter is telling you for creative or other reasons. To do that, however, requires that you understand what the camera’s light meter is telling you. Let’s dive into it.
Where the Heck Is It?
Depending on your particular camera, you can view your camera’s light meter readings in a few different places. Most modern digital cameras can display the light meter scale somewhere on the rear LCD. If you don’t see it on your camera, you may need to dive into the menus and enable it. Some cameras can also display the light meter via an integrated top informational display. Other cameras also feature additional screens on the back of the camera that can display light meter readings as well. Not all cameras come with the latter two options, so your mileage may vary.
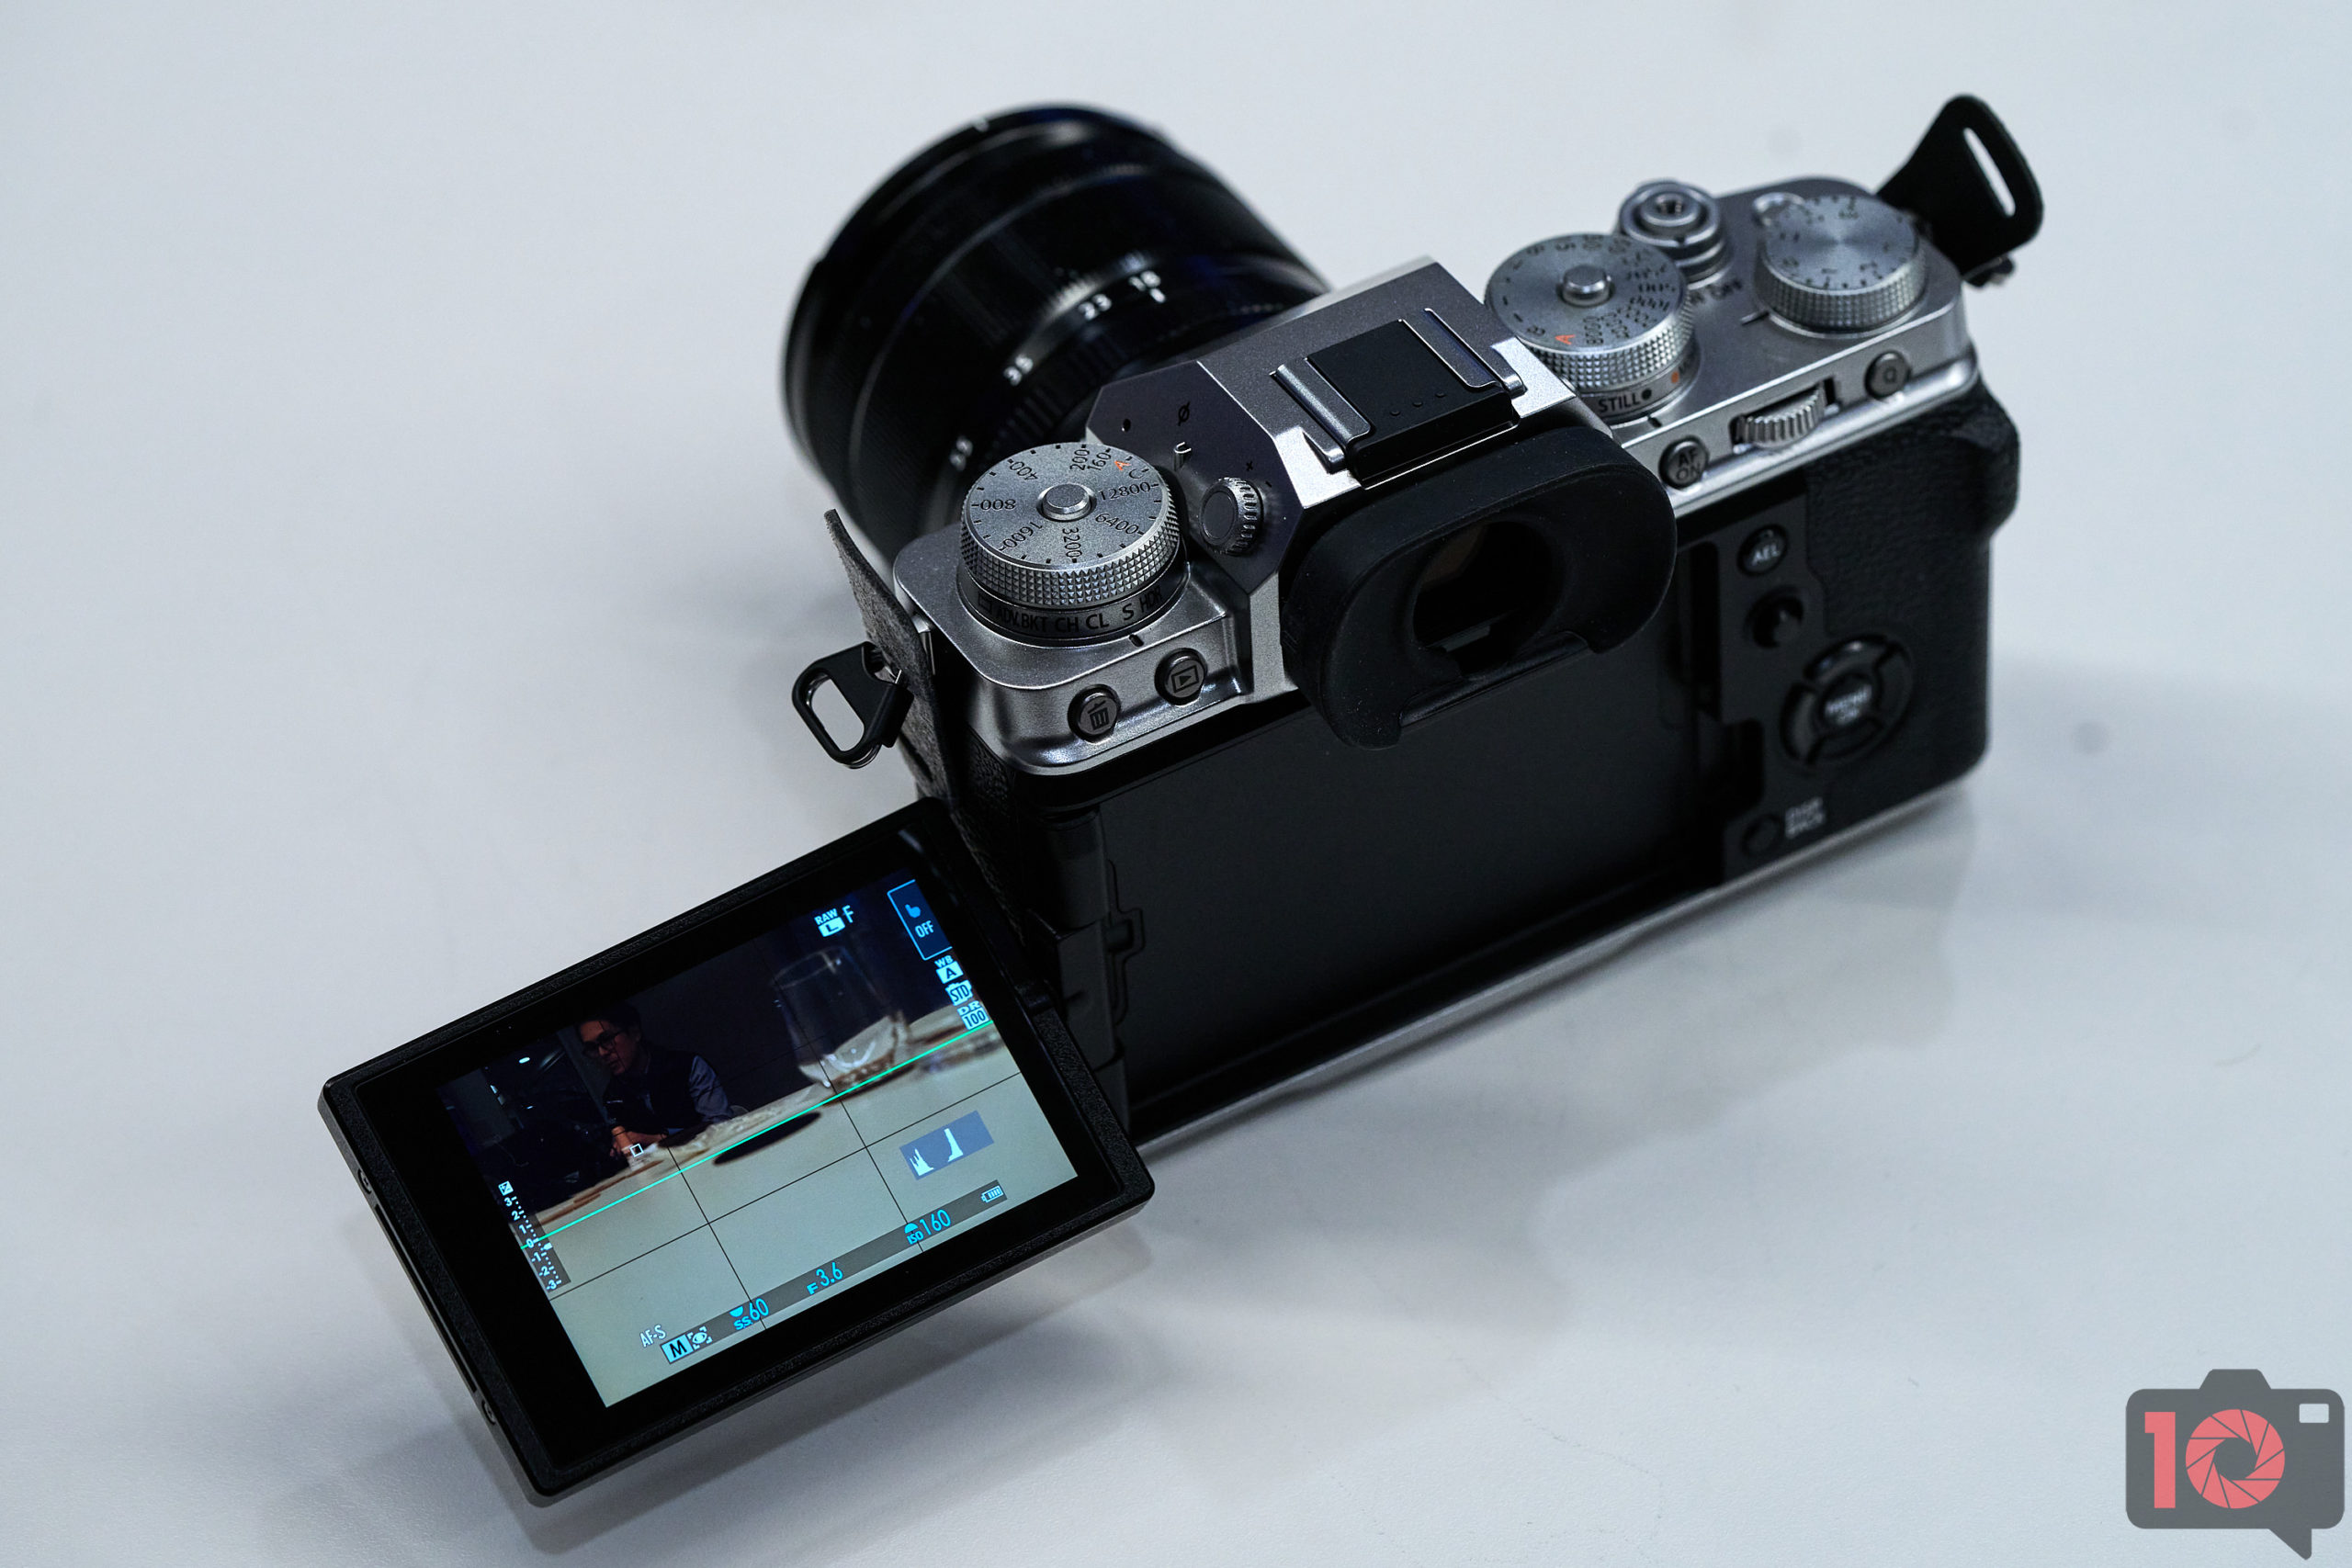
The Fujifilm X-T4’s has the option to display a light meter scale on its rear display.
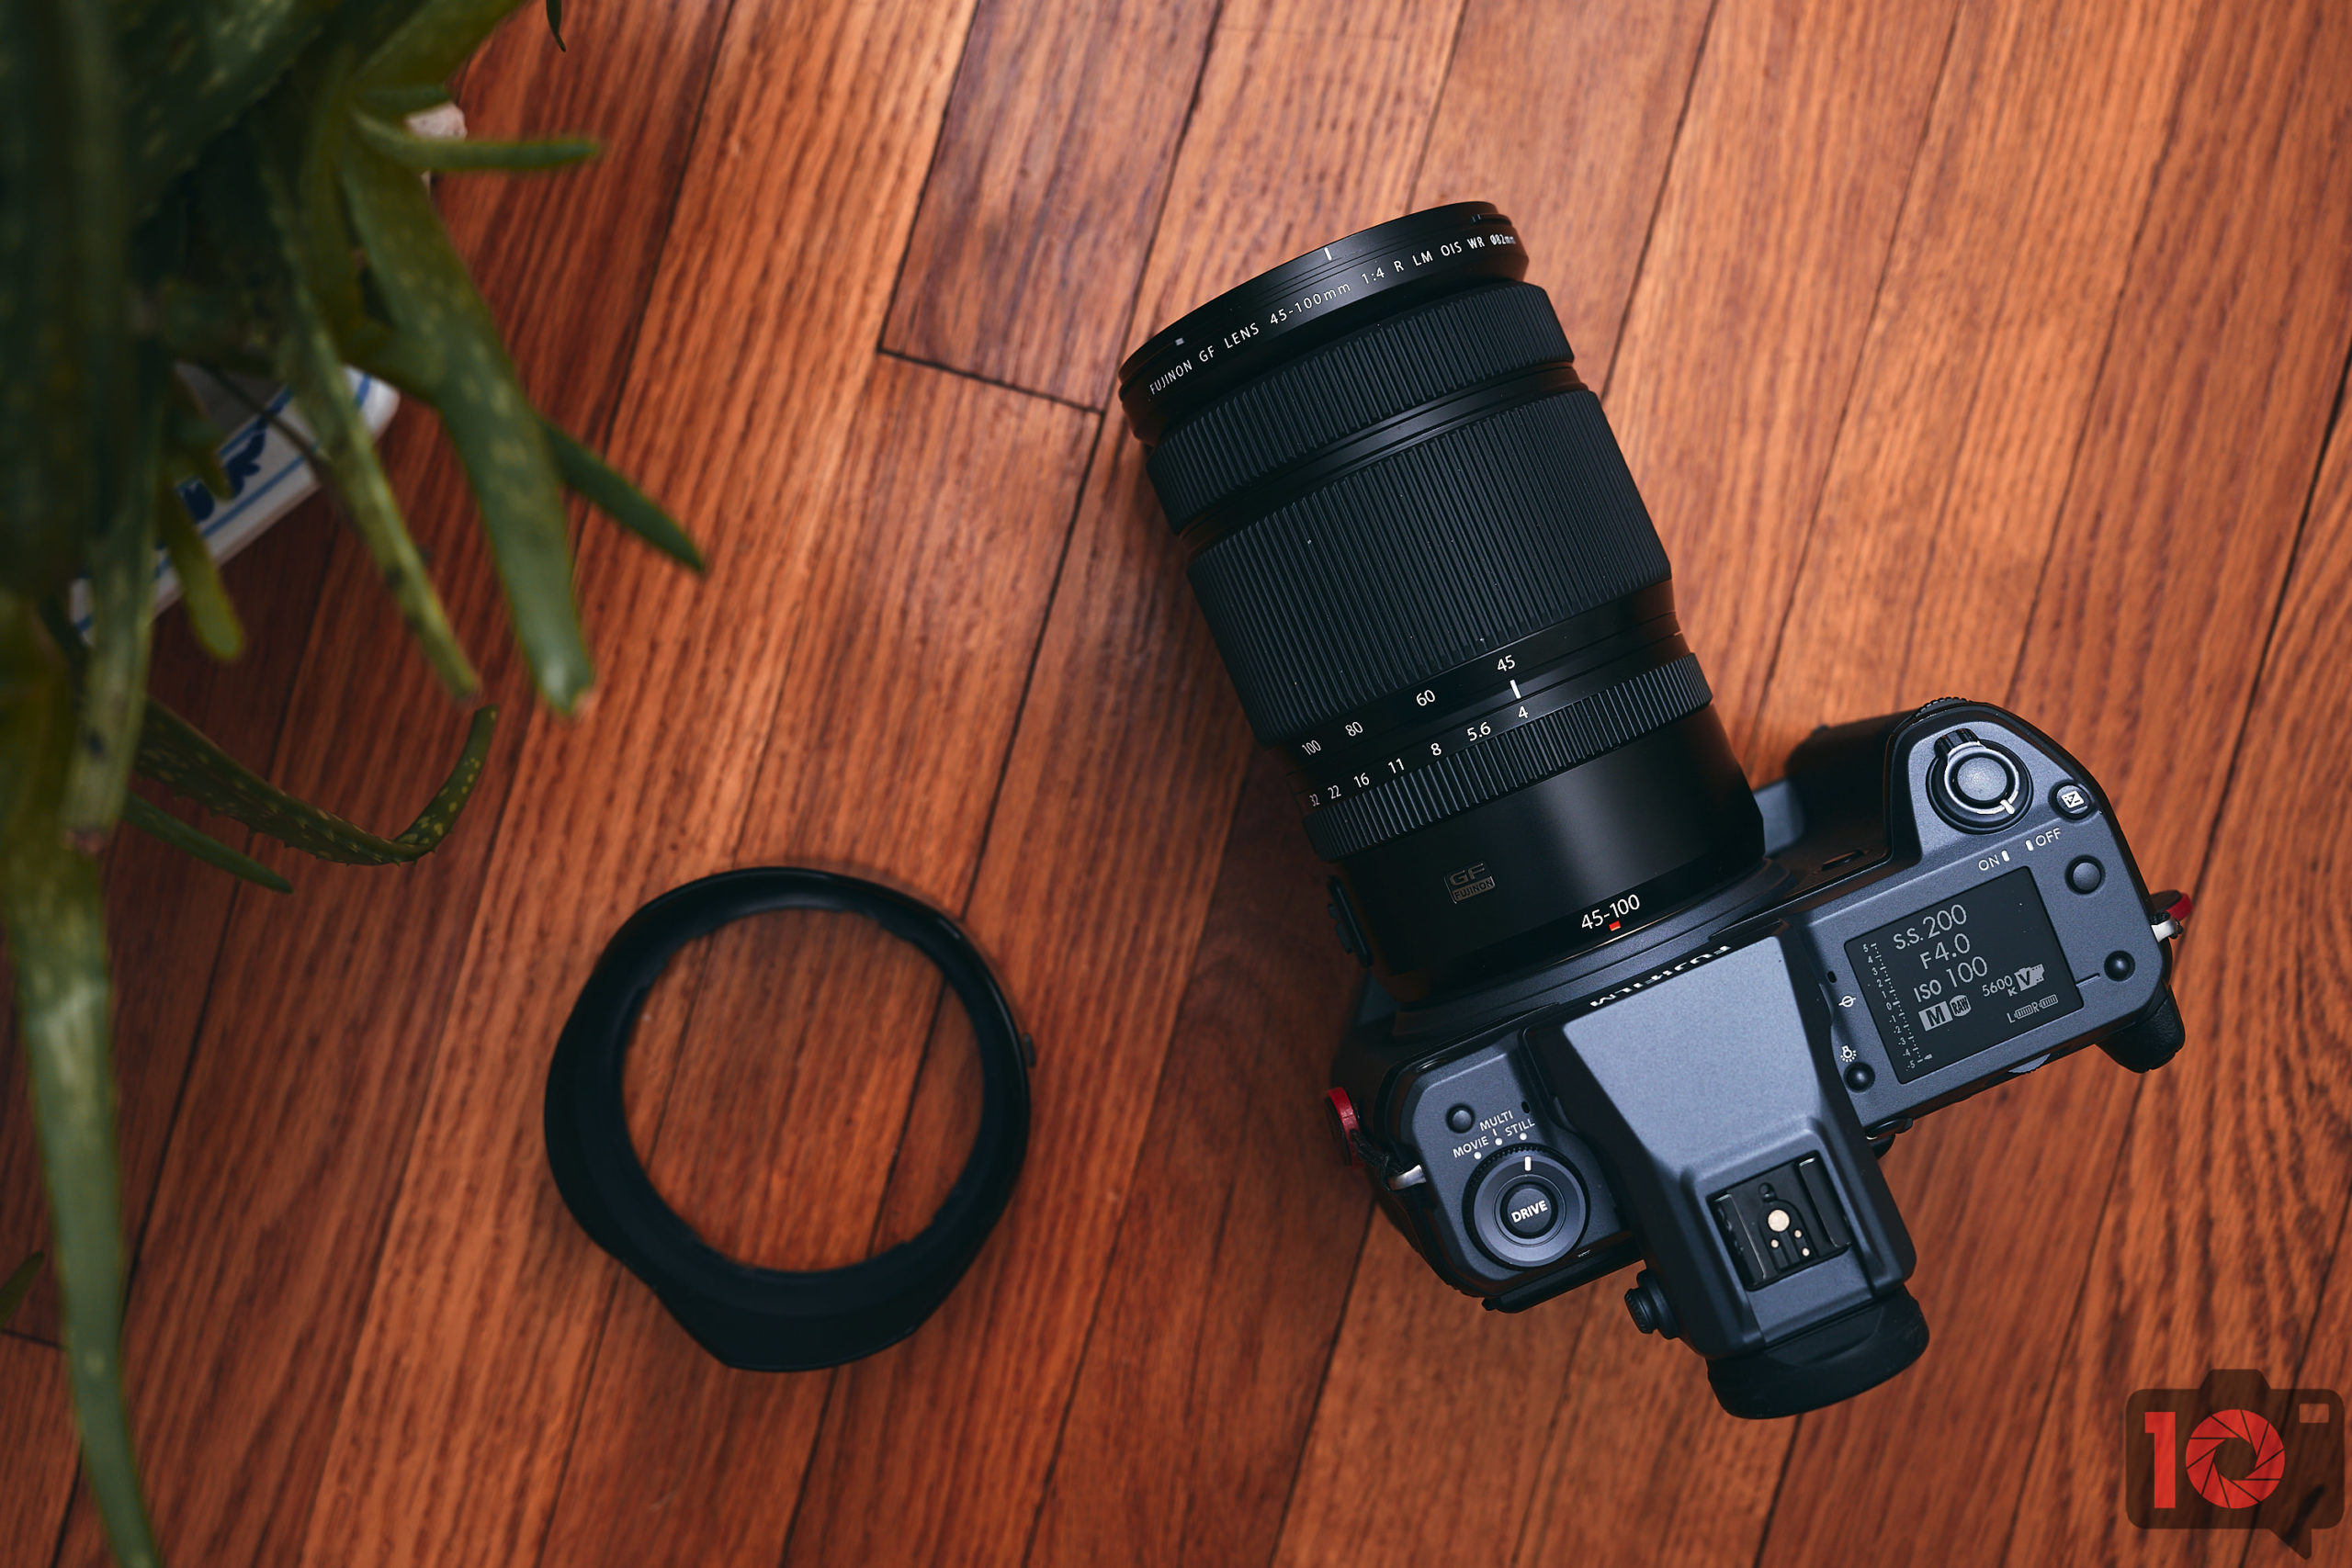
The Fujifilm GFX 100 is an example of a top informational display that features a light meter scale.
The Meter Itself
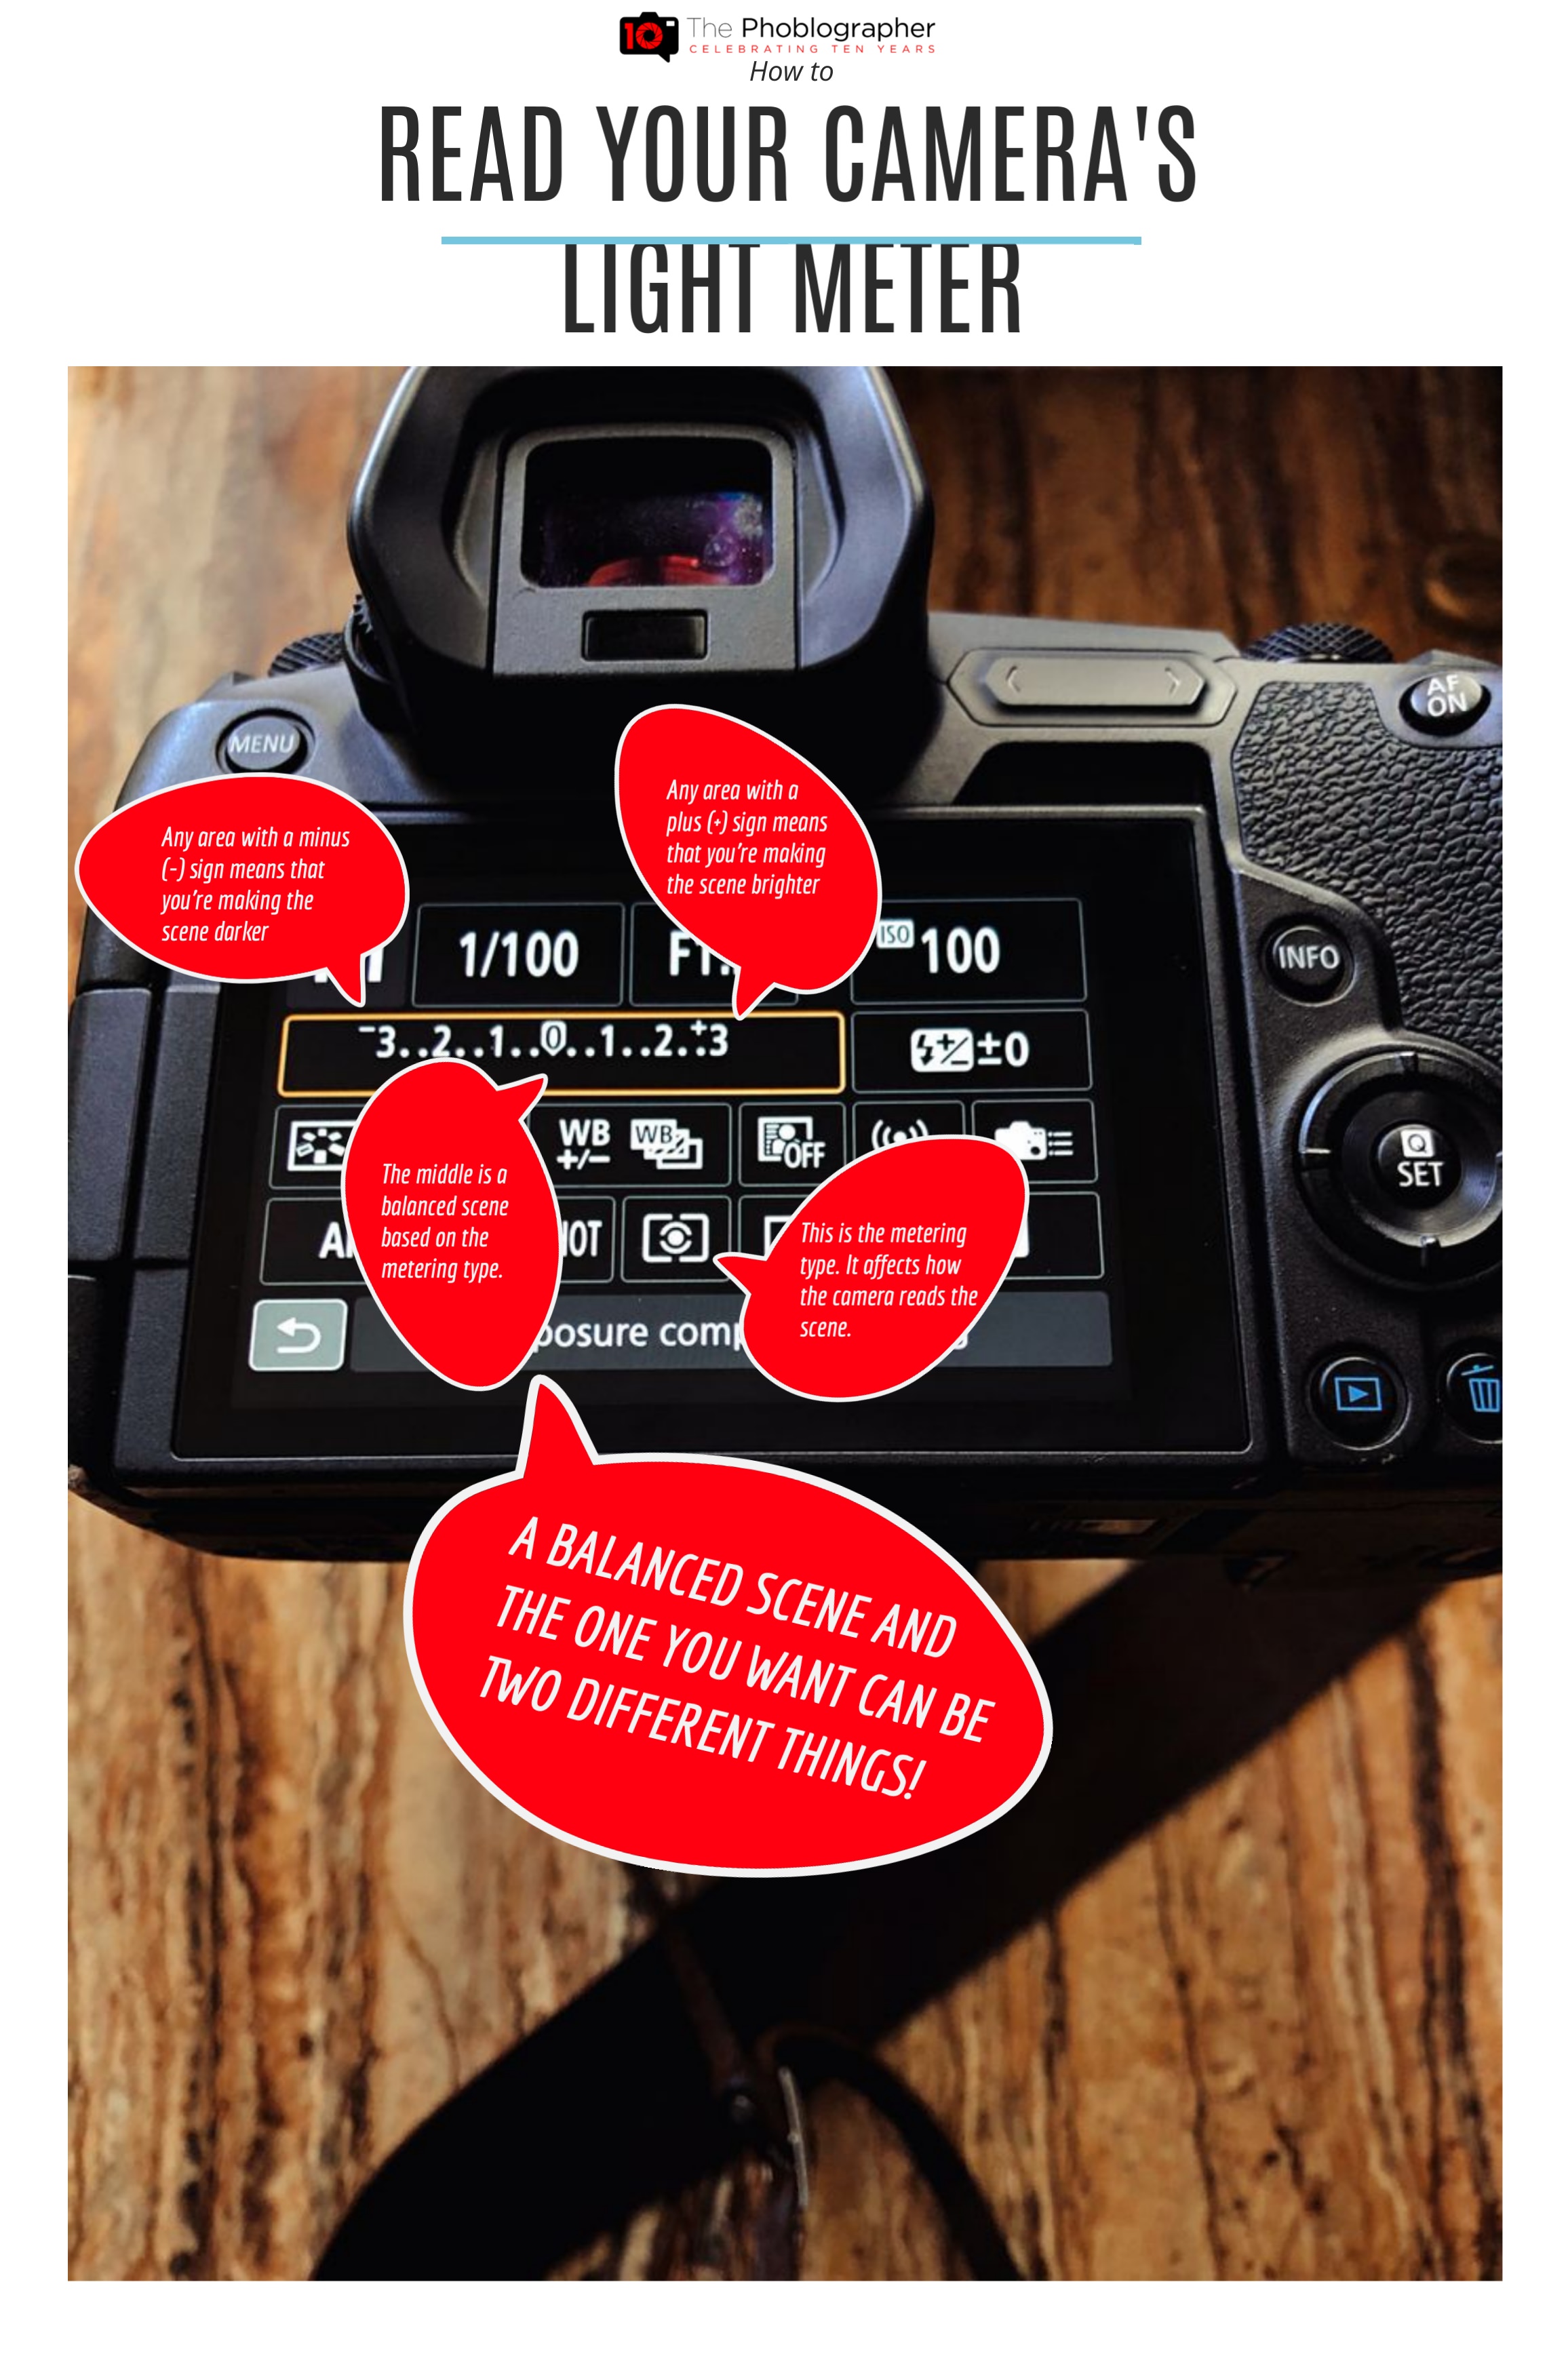
Although the appearance of the light meter scale may differ cosmetically between different camera brands and models, they are functionally identical for the most part. Each light meter scale has a center that is marked with a 0. One side of the 0 is positive, while the opposite side is negative. When your light meter has a reading of 0, it indicates that your scene is exposed correctly based on the metering mode you’ve selected (more on this shortly).
If the scale goes into the negative, it means that your scene is underexposed according to your metering mode. The resulting image will be darker than it appears in real life. Conversely, a positive reading indicates that you’re overexposing your scene. This will result in a final image that’s blown out. Most light meter scales tend to measure between +/-3 stops of light. Some cameras, however, can measure up to +/-5 or more.
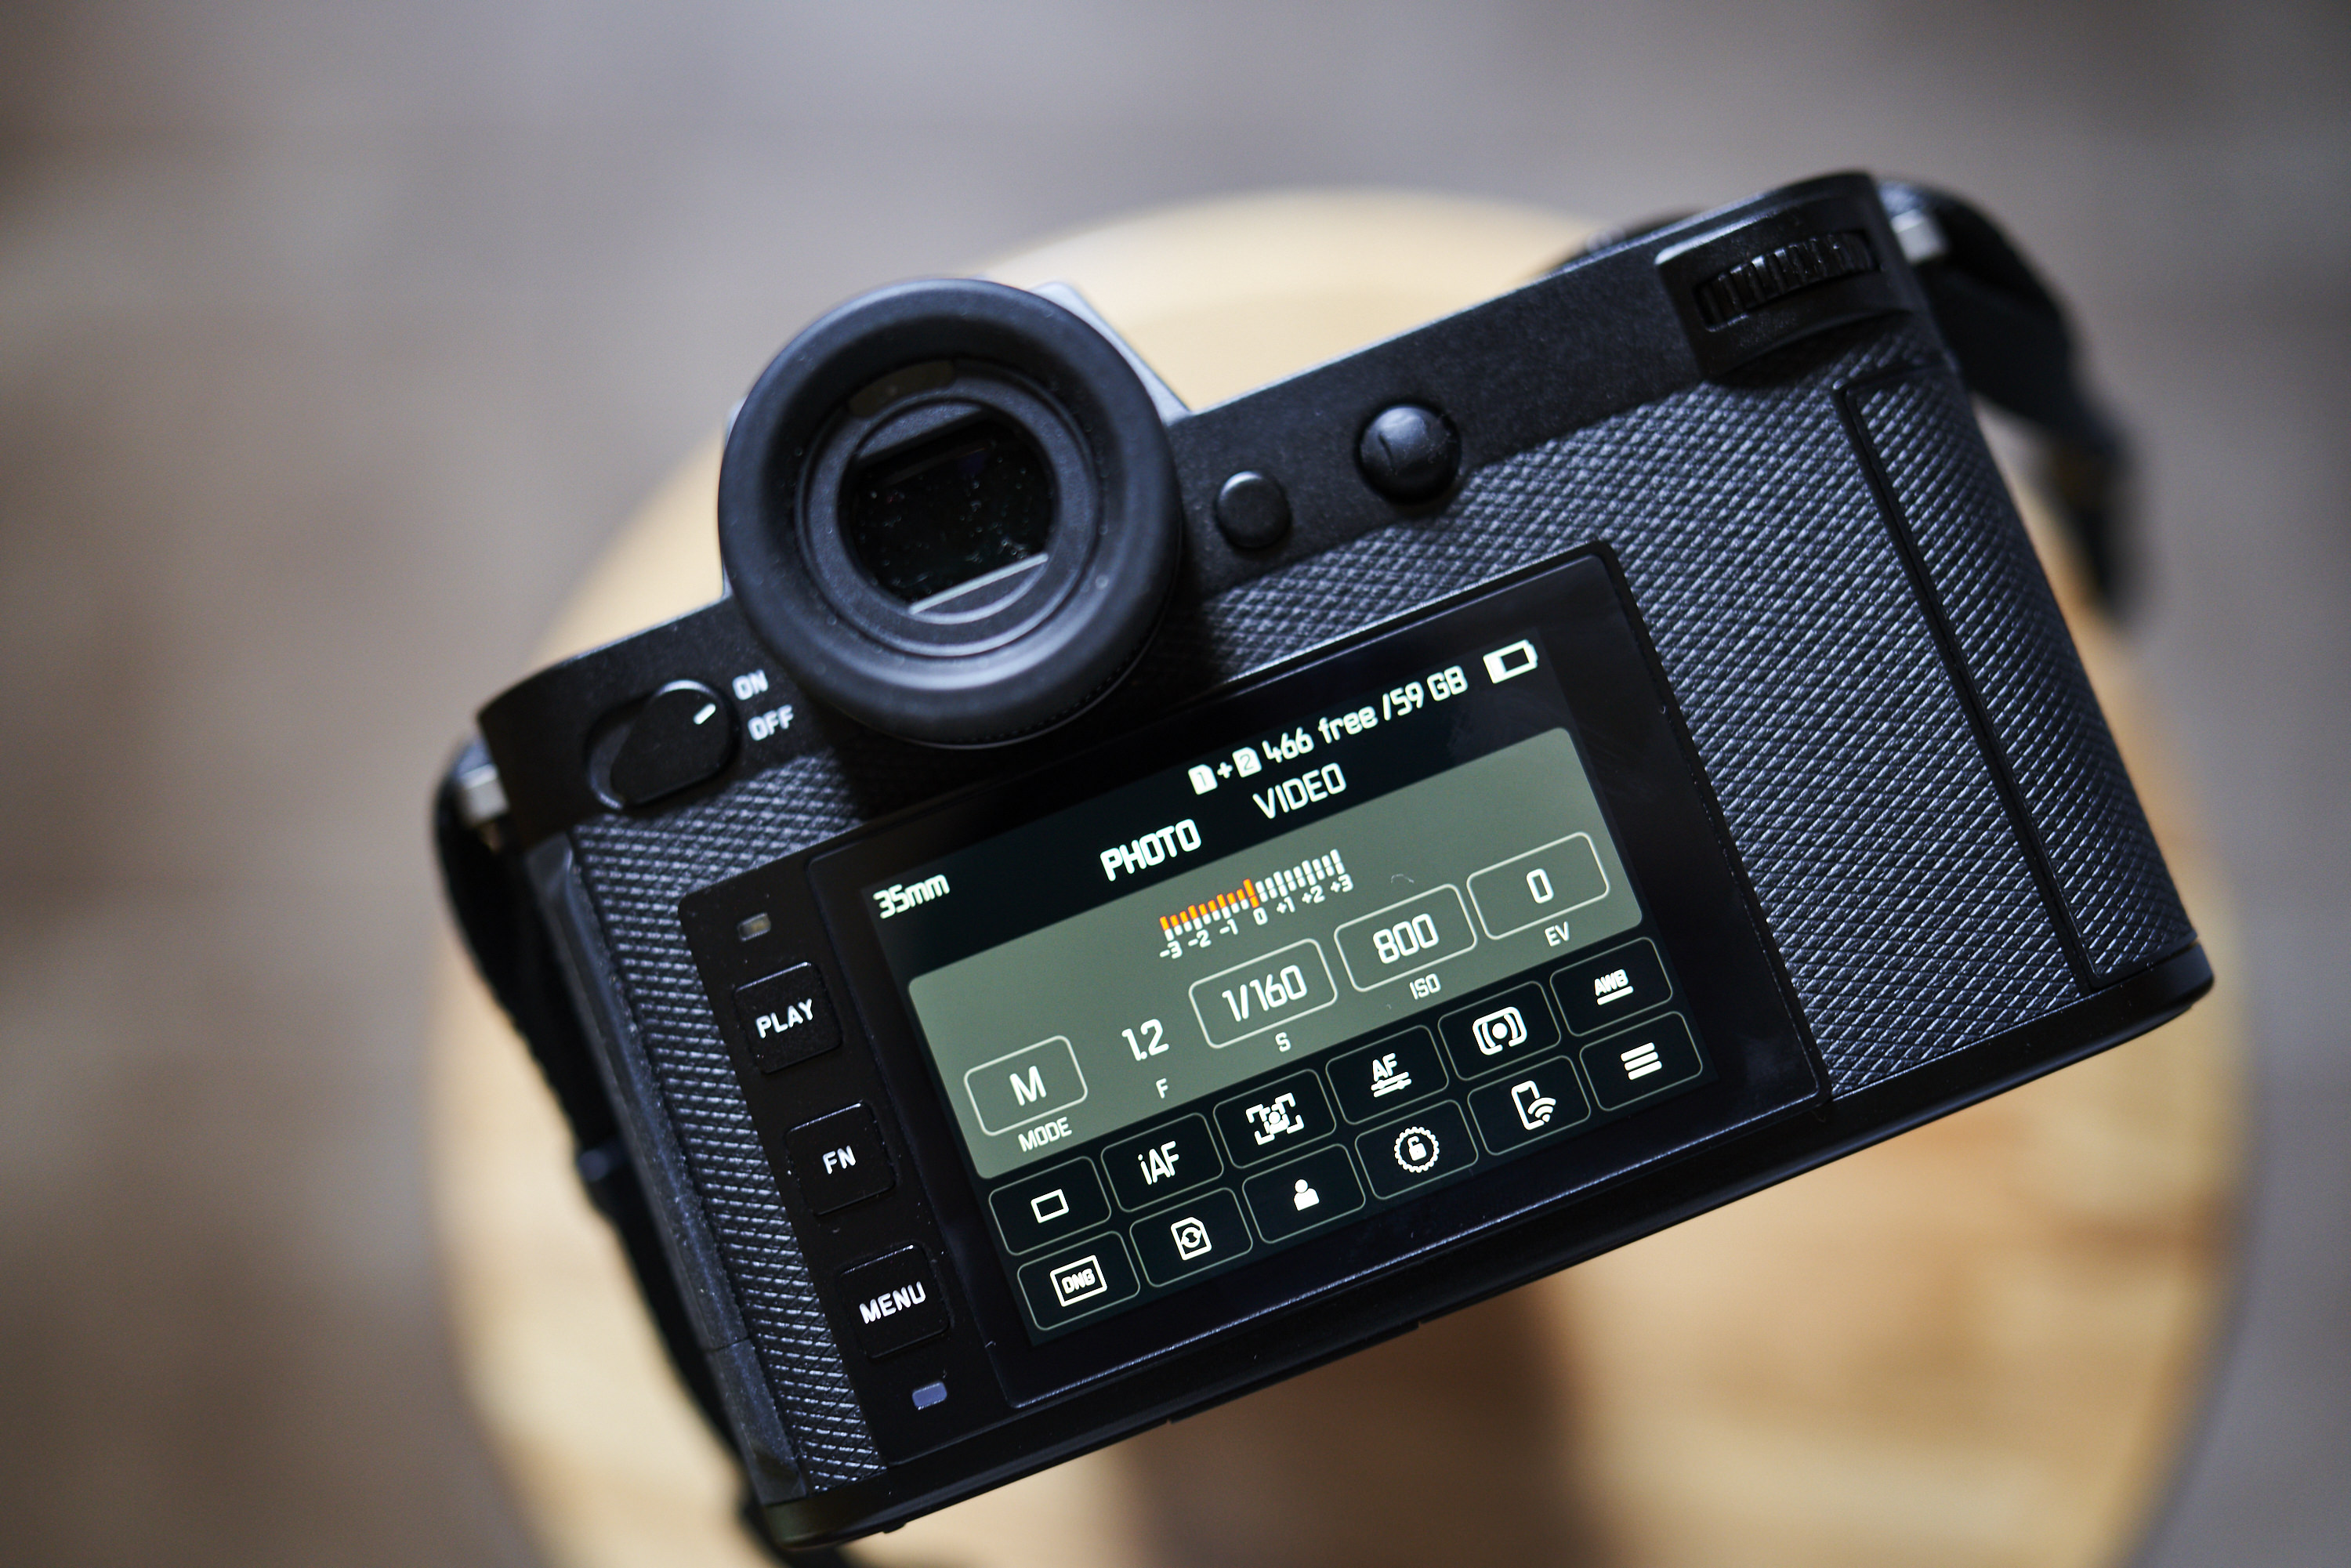
Light meter scale displayed on the Leica SL2’s rear LCD
Metering Mode
A metering mode describes how your camera is measuring the light in a scene. Your light meter’s reading is directly correlated to the mode selected. Some of the more common metering modes include Evaluative (also referred to as Matrix on some cameras), Spot, Center-Weighted Average, and Partial. Some newer cameras may have additional metering modes as well. Be sure to check out our Metering Modes in a Nutshell article for a more in-depth look at the various metering modes available on your camera.
Get rid of the ads!
Did you enjoy reading this article as much as we enjoyed writing it? There's a way to support us and our reporting, getting ad-free navigation and more as a bonus. Subscribe to us for less than a coffee per month —just $3.99— or take advantage of our yearly subscription with a hefty discount for only $25.- An ad-free experience
- A free mystery box for Lightroom or Capture One
- All the books in our store
- 20% discount on Capture One
- 30% discount on Imalume Photo Theft Protection
- 20% off Herbs and Kettle Tea Company.
- 20% off your order from MPIX printing services.
- 5% off Viltrox Products via their eCommerce store.
- 10% off all film developing, printing and scanning services from Blue Moon Camera and Machine
- 15% off 7Artisans products: The lens and accessory maker is offering a sweet discount for Phoblographer's readers.