
Last Updated on 05/09/2022 by Feroz Khan
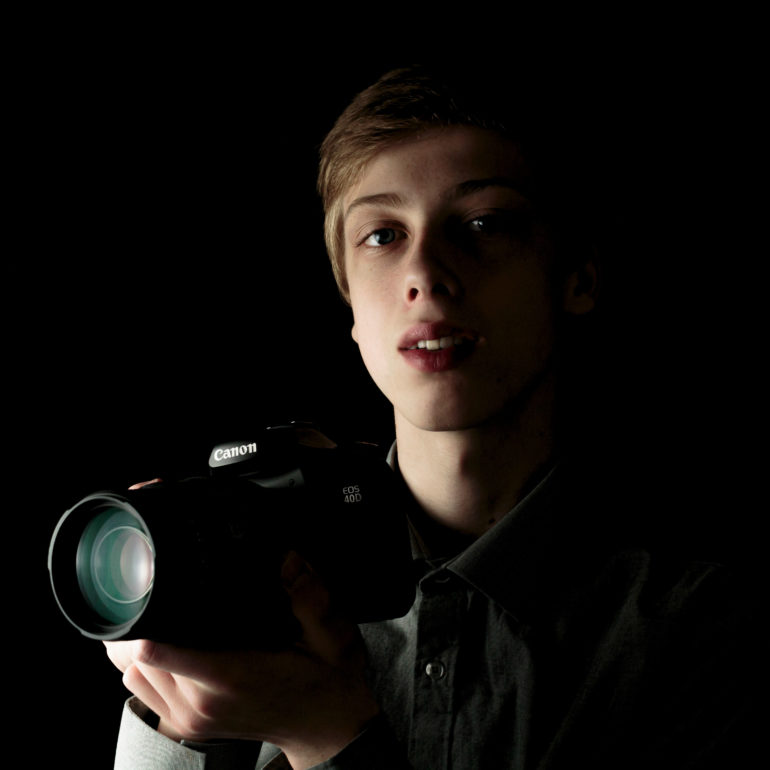
“When I want to achieve something, creatively speaking, I tend not to give up,” says 18-year-old photographer and inventor David O’Regan on how he started making cameras of his own. It was anything but simple, and there were quite a few stumbling blocks along the way. But he’s managed to produce something quite unique and has no plans to stop soon.
View this article with minimal banner ads in our app for iOS, iPad, and Android. Get no banner ads for $24.99/year.
In an era where kids his age would are hooked on Fornite or Minecraft, David O’Regan fell in love with photography. A chance retweeting of his photo by a NASA astronaut gave him the boost he needed, and he hasn’t looked back since. Technical and material challenges presented themselves quickly when he began designing his own camera. Pushing them aside, David has made a handful of cameras and lenses to satisfy his large-format cravings. In this interview, he shares what drives his passion for photography and tinkering with cameras.
The Essential Photography Gear Used by David O’Regan
David told us:
- Canon EOS 5D Mark III
- Brownie Box cameras
- Canon EOS 70D
- Voigtländer Vitomatic II
- Canon EOS 1D Mark II
- Large Format 6×4” made by David
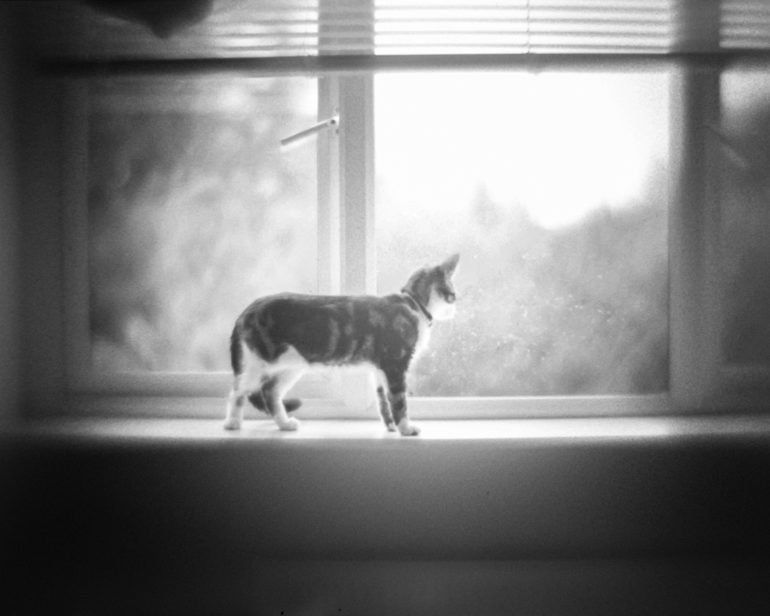
My large format camera really was just an experiment at first. But I really do dig it now. I can’t use it as often as I’d like, the sheer size and weight tired me out quickly. I have an idea for a photographic project with it, but I won’t be sharing details of that with the world quite yet.
The Phoblographer: Hi David. Please tell us about yourself and how you got into photography.
David O’Regan: My name is David O’Regan. I am 18 years old. My family moved here to Ireland from Germany when I was around two years old. Apparently, my mother liked my Dad’s place of birth so much, she convinced him to uproot and move back here. I wouldn’t be exaggerating if I said that photography is my life. It is a rare occasion to see me put down a camera and not pick it up again after more than a couple of minutes. I have been taking photos seriously since my early teen years.
What got me into photography is a bit of a strange story, I think. I grew up looking over my Dad’s shoulders as he learned photoshop CS2. Of course, my 4-year-old self would get bored after five minutes and walk away or nag him for some chocolate, but regardless the foundation of my mind was being poured at the time.
I eventually developed an interest in video. I made friends who had similar interests at the time; one of them showed me a video editor called Sony Vegas Pro 13 (I think it was called at the time), and I fell in love with video from there. I never used a camera at the time but instead recorded gameplay of the games I would play, edit them, and feel proud that I could edit just like the professionals. Compared to what I can do now, it was terrible, but I enjoyed doing that at the time. My interest did eventually fade, though.
It wasn’t until I was in secondary school that I got the idea to take on photography, and it happened by chance. We went on an ice-skating trip as a class, and I did not want to get on the ice. I instead opted to take photos for the school. I was prompted by the supervising teacher to join the photography club, and a few months later, I finally decided to do so. Originally, I wasn’t very interested and ended up missing many of the meetings because I simply forgot about them. Eventually, we took an astrophotography trip to Knockadoon. I distinctly remember forgetting my jacket, and despite the grip that the bitter cold took on me, especially my feet, I found the experience really enjoyable. That trip is where I got my first taste of a DSLR, and I loved it. I even got a photo I took retweeted by NASA’s own Douglas Wheelock. I think that this moment was probably the spark that finally took me to the point of no return.
The Phoblographer: What camera gear do you use for your work?
David O’Regan: I have amassed a large quantity of gear over the last six years. My main camera is the Canon EOS 5D Mark III, which I acquired not long ago. I also have a Canon EOS 70D and a Canon EOS 1D Mark II, that is probably almost as old as I am. In addition to this, I own three or four film cameras, ranging from the Brownie Box cameras to my grandfather’s Voigtländer Vitomatic II, a Rangefinder. I use these combined with a variety of lenses, including a Canon 50mm f/1.4, a Canon 50mm f/1.8 (STM), a Canon 17-40mm f/4, a 70-200mm f/2.8, and a variety of M42 Primes, which include a Pentacon 50mm f/1.8 and a Helios 44-2 58mm f/2, and occasionally a lens that with a. Did I mention that Large Format 6×4” camera I built?
I use the old 1D Mark II as an everyday camera. I got it at a surprisingly good price. I got it mainly because I wouldn’t be upset if it broke. It has an APS-H sensor, which is bigger than what the Canon Rebel series cameras possess, and is built like a tank. It also has a low megapixel count, which makes for small raw file sizes, and by extension, a lesser bottleneck in post-production. The horrible LCD also helps prevent chomping.
My 5D Mark III is my favourite camera of the lot. It has a bit of everything, really. It performs brilliantly in low light, and the autofocus is fantastic. It also takes full advantage of the old m42 mount lenses.
My first camera was the 70D. It was the camera my parents got me and the one I have put through the most ordeals. It has ended up in my reserves, although I do still use it for product photography work, as it has a built-in flash, which can activate my speedlights, freeing them up for other lighting purposes. It usually comes with me, and I occasionally find that it comes in handy when I have no choice but to work live view or need a video B-Cam.
The film cameras are used less often. When I Have a bit of spare cash, I’ll go to my local print lab and get a film, usually whichever is cheapest, and have some fun for the day. I Find my film SLRs to be very useful in designing lenses, As I have direct access to the shutter mechanism. It also doesn’t bother me if I shatter the mirror in a Canon EOS 500n.
The Phoblographer: Where did the idea to make a camera by yourself come from? What was the inspirational trigger?
David O’Regan: I can’t say that anything “Inspired” me per se. To be honest, I wish I recorded that early phase better; I might better be able to retrospectively see what on earth I must have been thinking to take this kind of project on.
I played with the idea for a long time. I started building pinhole “lenses” and cameras within about a year of picking up photography, nearly as soon as I got my 70D actually. When I found out about large format, it seems that a mystical red button labelled “Don’t Click Me” appeared in my brain. Large format is incredibly expensive, and I just couldn’t have it. I think everyone has that feeling at times, an envy of sorts. I think I just wanted it because it exists, and when I want to achieve something, creatively speaking, I tend not to give up -for better or for worse.
The Phoblographer: When you decided to go ahead with it, what were the plans you set out for yourself?
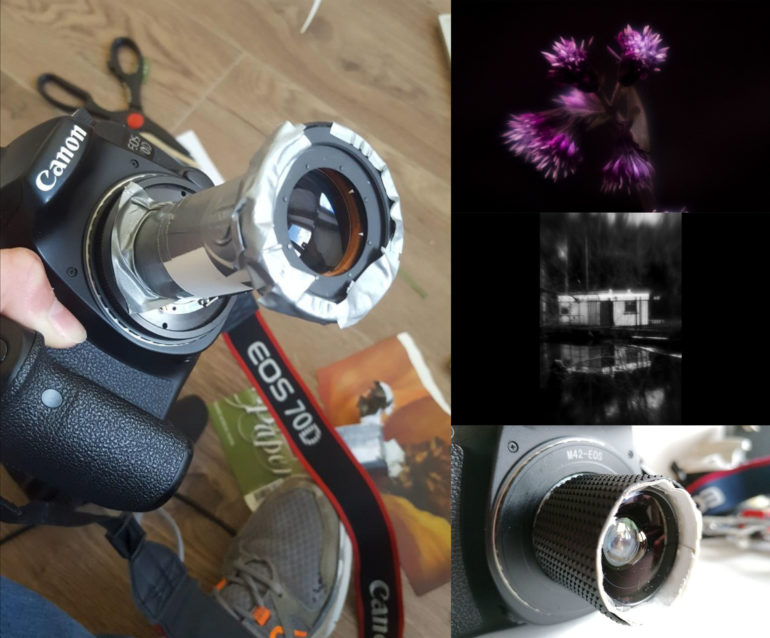
David O’Regan: It wasn’t until I moved closer to the nearby city that I started making my own lenses using the disassembled lenses I pulled out of old musty, fungus-infested lenses that I could consider the idea more seriously. I found a combination of lenses from a magnifying glass and the front element of a Vivitar telephoto lens. Needless to say, my big, red luminous button had been pushed to the point of no return. My idea started simmering over the course of around a year. Just before my Summer Holidays last year, I finally decided I would act on it. I consulted with the physics teacher at my school and got some formulas that I really didn’t understand at the time.
It was planning time, and I had little in the way of ideas. I started with what I had the most experience in. I designed a few focusing helicoids for lenses on paper. I felt that if I used one of those designs, I would risk accidentally letting the lens fall off the camera body. As well as that, having an excessively large tube would constrain the Image circle, so I scrapped that and went for a bellows design.
I didn’t want to use film. At the rate with which I make photographs, I would bankrupt myself, my family, and the entire European Union by using film. I settled instead on another idea. Most large format cameras have ground glass onto which the photographer focuses their image.
I decided that scanning such a ground glass would suffice. I could choose to use a flatbed scanner, but it’s too slow and the “rolling shutter” too extreme. I considered a phone, but the camera apps are all about as frustrating as humanly possible, and the manual focus resets to continuous autofocus every time I take a photo. I don’t have any compact cameras, so there was only one logical conclusion in my mind: Use my Canon EOS 70D as the “taking” camera.
There are two ways to set this up: I could put the taking camera on the lens side of the large format camera and photograph a reflected image (less light is lost this way), or put the taking camera behind ground glass, thus photographing a refracted image. I chose the refracted image, as using a reflection would infer changing the focus of both the taking and large format cameras simultaneously, which is finicky at best, in my opinion.
You get the idea. There are many variables that go into the production of a camera, even a project as “simple” as the camera obscura I made here. I had some shortcuts that helped me along; I didn’t need to make a shutter because I am not using film, for example. I also don’t need it to be 100% lightproof (although it does help in terms of contrast and image clarity) because light leaks cannot destroy a film emulsion that doesn’t exist.
The Phoblographer: Was it easy to find resources for the raw materials and designs?
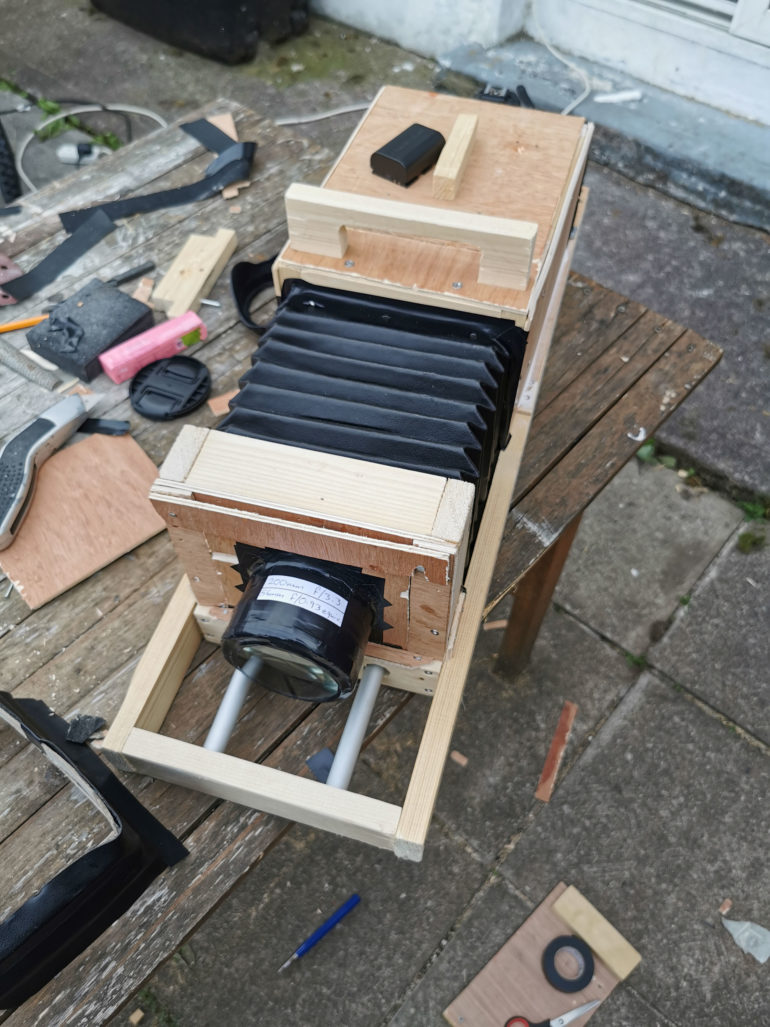
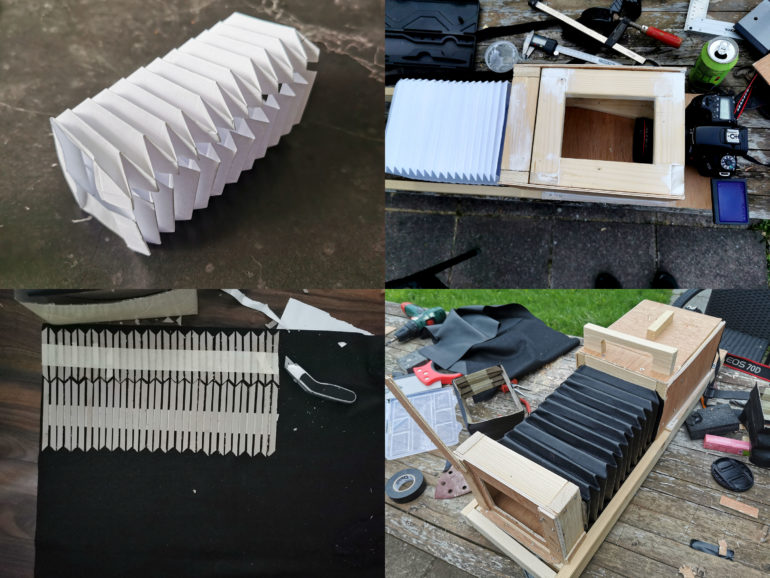
David O’Regan: I made the camera out of 18x44mm pine wood, as well as plywood we had lying around. These are all things you might find in a hardware store or something like that. I was lucky with regard to tools. My Dad has amassed a considerable collection of tools over the years -I guess that’s where my camera hoarding problem comes from. The main ones I used were a bench hook, a tenon saw, a coping saw, chisels, some files, and rasps too. The only thing I didn’t really touch were the power tools, other than a hand drill, as they are too unwieldy and unpredictable for my taste.
The most difficult material to source was a translucent, ground glass-like material. I initially used one of the light diffusers you might find in an LCD panel. It did the trick but suffered from a hot spot in the center of the image, resulting in almost unusable levels of vignetting. Luckily I happened across a great solution. It was thanks to the staff in the print lab I use and visit who had the idea to use some backlight paper. It cut enough light to eliminate the hotspot while having a texture smooth enough to avoid a blotchy image, not unlike what you might expect by placing a sheet of normal paper between you and a bright light source.
The Phoblographer: There might have been at least a handful of hurdles to getting this pet project achieved. What were the top ones you tackled?
David O’Regan: This is a very good question. The bellows were a particularly nasty piece of work to try and produce. I could have bought some for upwards of €100. But as evidenced by the very existence of my project, I have some thrifty tendencies, so I opted to spend €20 on some fake leather in the local vibes and scribes and make them myself. It’s not difficult to do as such. It was just tedious and required me to be paying very close attention as I worked. I didn’t touch the leather until I practiced through a lot of A3 paper over the course of a couple of weeks.
The most gut-wrenching of my hurdles was the slow realization that the redesign of my bellows slider to improve the smoothness of adjustment resulted in a flange distance [Distance between the image sensor and the lens mount] too long for the 119mm f/2 doublet lens I designed the whole camera around. The reason it had been such a low point in the build is that the full-frame equivalent of the lens was around a 33mm f/0.56. I still wish that I could have made that lens work with the camera. It rendered what was, in my opinion, a really exquisite and unique image. I eventually settled for two lenses, a 183mm f/3.1 and a 200mm f/3.3. Both are also doublet designs.
The Phoblographer: What was the feeling like when you got past those barriers, and when you finally shot your first photograph with your hand made camera?
David O’Regan: I must admit, I didn’t think I would actually pull those bellows off. Once I had them glued together, I had to look at them more than twice to register that I had actually just folded them together without a single incision into the material. I’m still quite proud of that aspect of my build, even now. There’s no denying that I learned a thing or ten from those bellows alone. The main takeaway from that experience for me was that it is a terrible idea to use a spray adhesive on this material; it will stay tacky for months.
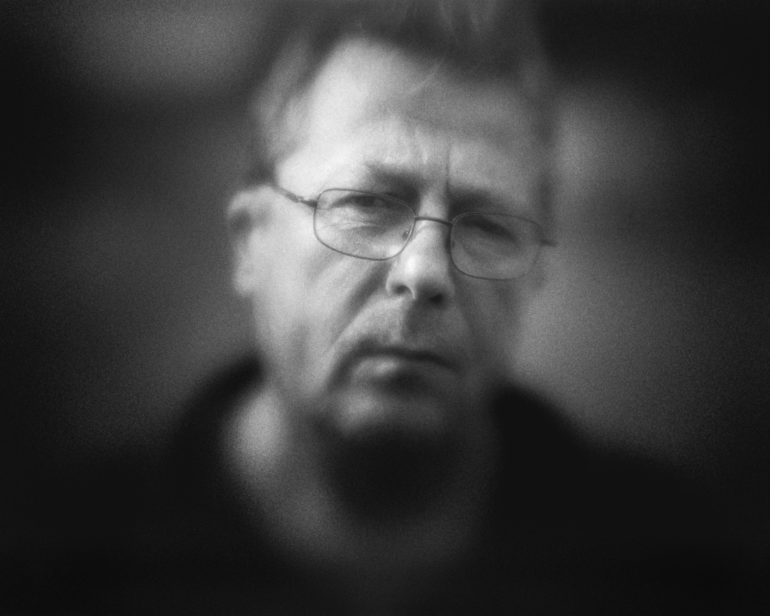
As for my first photograph taken on the camera? I would need a pretty good definition of “first” in the context of my situation to properly answer that. For testing purposes, there was no time when I wasn’t taking photos through it. I had improvised ground glass on my camera in one form or another from the very start and shot photos throughout the project. Most of them were a pile of hot trash, as they were only to affirm that I wasn’t losing infinity focus or something trivial like that. As for the first photograph taken on the fully finished camera? It was pretty surreal. I didn’t have my tripod with me, so I rested the meter-long behemoth on a little stone wall and took a photo of my Dad.
The Phoblographer: In terms of film stock for these cameras, what emotional factors help in the decision making?
David O’Regan: As I already mentioned, film and especially large-format film, is pretty unaffordable for me. I could have opted to use paper, and it doesn’t take an awful lot of modification to do that. All I really need is a lens cap (to act as a shutter) and a way to stop light from entering the rear. It’s not too much of a stretch to modify the camera to do that, if I’m honest. I just don’t think it is necessary. There isn’t really an “emotional” choice for choosing to do it the way I did. I used the simplest, most cost-effective methods that work. It allows me to focus on creating rather than worrying about the cost of what I’m doing. If I’m worried about the cost, I stop creating anything whatsoever because I get very precious about materials available to me. I don’t want to miss potentially portfolio-worthy shots because I am scared of wasting something.
The Phoblographer: With infinite choices for the focal length of your first handmade lens, tell us why you went with your final choice.
David O’Regan: The reason behind my choice of focal length? It simply happened to be what worked, namely with the materials I have. I hesitate to call it handmade, though; I think homemade suits what I do just fine. The lenses are made from the optics of other things (Magnifying glasses, irreparable camera lenses, projectors, etc.) that I take apart. I interpret handmade to mean grinding my own lenses, which requires many hours or even days in an ultra-expensive grinder. If a machine takes that long to do this, I can forget about doing it by hand, not in the least because the glass dust is some nasty stuff that no one wants near their eyes or their lungs. I neither have a grinder nor the desire to spend entire days transforming entire chunks of glass to an abrasive powder.
I considered using some form of two-part epoxy resin to mold them, and I still plan on trying it out in the future, but my current situation has inhibited me, at least for another while. Plastic lenses like that are a very real possibility. I can always add more lenses to my lens mount, and I can reuse my proprietary lens mount on any hypothetical future projects if I were to bring them to fruition. I’m sure there is a way to do this; there must be.
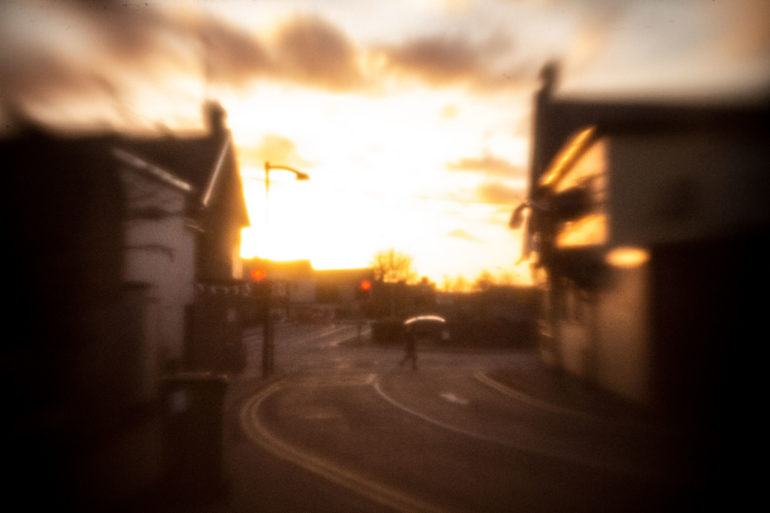
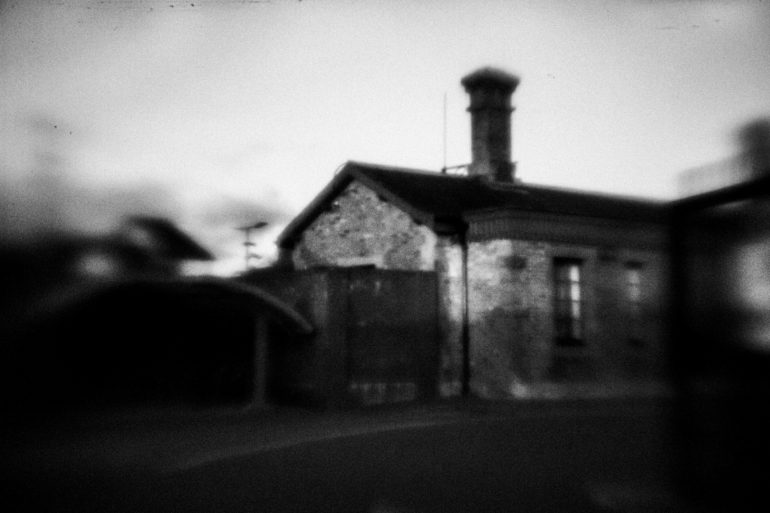
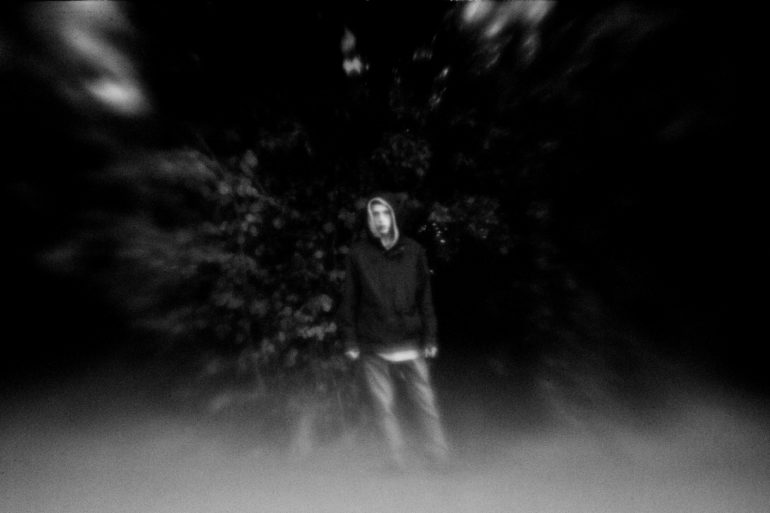
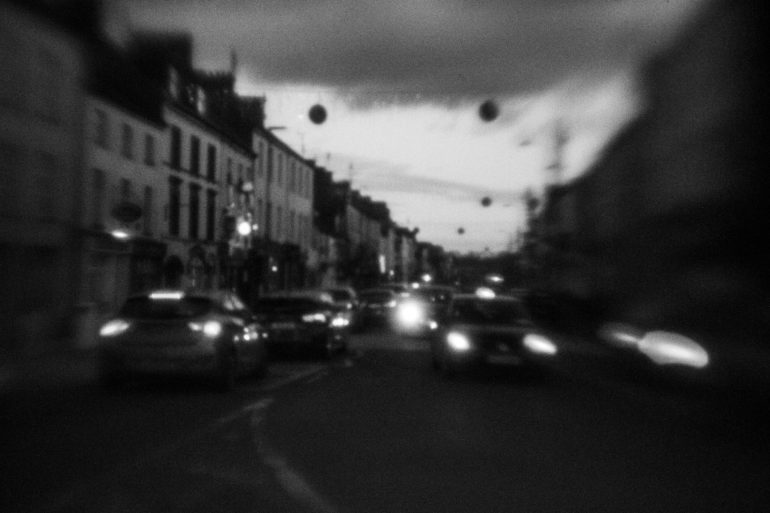
The 183mm f/3.1 renders a really psychedelic image. With a bit of effort, It can produce a really disturbing image. -That’s due to the severity of the distortion around the edges. I find that pincushion distortion causes more unease than barrel distortion, probably because we see less of it in the real world. Car mirrors, for example, are slightly curved depending on the vehicle. They have a certain degree of barrel distortion. My lens is a bit different. The field curvature causes a sense of barrel distortion (what you see is really just slightly swirly bokeh). Mix this with the actual distortion (pincushion), and we get a really unsettling image, characteristics not really seen in the pixel-perfect ultra-sharp optics of today.
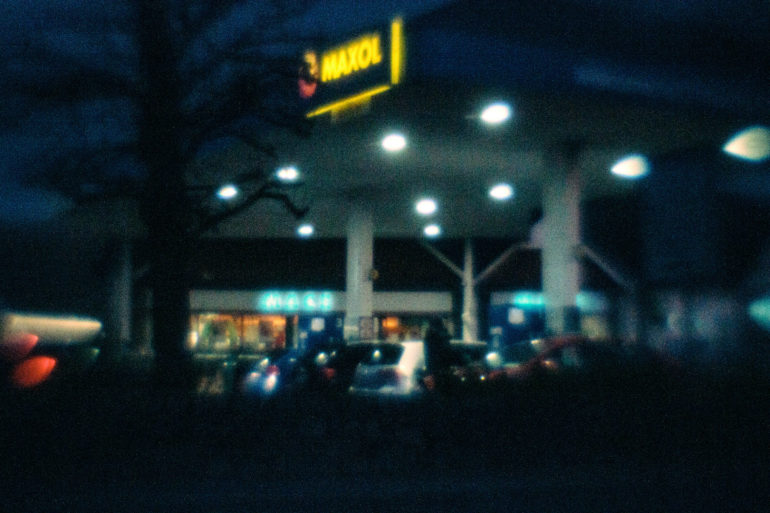
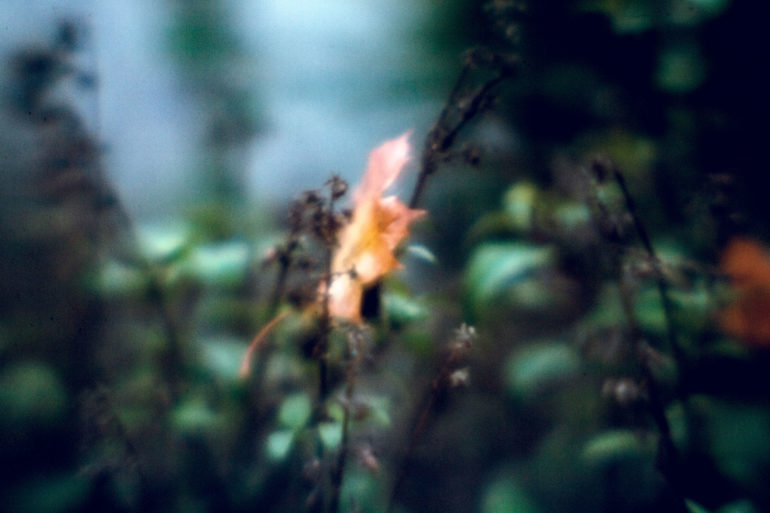
The 200mm f/3.3 is quite soft really, but it renders a very even image relative to the other lens. It lacks even more contrast than the other lens, but it is definitely more “usable” for general applications. It is really hard to measure the sharpness of each lens. I think the sharpness definitely depends on what you point it at; any bright lights or specular highlights and the lenses just begin to render a really bright glow. That’s the lenses’ spherical aberrations talking, I think.
There isn’t a final choice of lens for my camera. I will keep adding to the collection. I would like at least a couple of sharp(er) lenses for my camera. A couple more that look psychedelic wouldn’t hurt either.
The Phoblographer: How long did that first camera (and lens?) take to make and finish? Relief aside, what other feelings did you experience?
David O’Regan: I have made a total of three cameras to date. Number one was a matchbox camera which I created in the best part of an hour or two. The second is one I never actually finished because summer holidays ran out, and I lost interest. I finished the latest one. I started it much earlier in the summer than the previous model and made sure to have enough materials to start with. It was at least a two-month ordeal, much more if you factor in planning. Regardless I felt a sense of joy throughout the process of building the camera.
To be honest, I think the pride about it could be seen by the grin permanently plastered on my face. When that initial energy boost died down a little bit, I tried doing a little bit of street photography with it. To my horror, every time I passed a person or saw someone approaching, I began losing my composure. I descended into bouts of uncontrollable laughter as I saw the faces of passers-by. I remember putting myself in the shoes of the passers-by and seeing a teenager holding a one-meter-long contraption that looks like it is held together by some electrical tape. Somehow they were the ones who kept a straight face.
I have made so many lenses over the last three to four years that I simply don’t remember which came first. It doesn’t help that I usually pull them apart after a little while to make something else I have an idea for. My two large format lenses have never been disassembled for any reason whatsoever though. I think they must hold my record for longest-lasting homemade lenses to date.
To give some perspective as to the amount of time I have been doing this for, I go to the local print lab often. I end up meeting all different kinds of interesting photographers there. The staff there know me well. I seek advice from them often with these projects. Over the years, I have brought in some things that are so absurd that when they see something unusual in my hands, they don’t question how I did it, rather upholding an attitude of, “yeah.. that does sound like something David would do.” I like that. It helps me stay grounded when the crowds overhype what I have built over the years.
The Phoblographer: Were there any inspirational designs or brands that you looked up to for completing this camera?
David O’Regan: No specific brands inspired me in a significant way. The people around me though, are a very different story. Many have helped out in what to them seems an insignificant way, or without knowing that they have set off a light bulb in my brain. The simple act of handing me a special type of paper in the print lab had set off a chain reaction that resulted in me completely rethinking the design of my ground glass. These are the real inspirations.
Another example would be my younger brother questioning my choice of tools. This is something I didn’t really appreciate in that moment (we get along like oil and water), but ultimately it resulted in me getting the job done more efficiently and safely.
Even my easy access to the woodworking tools my Dad has is, in a way, a significant inspiration. If you have ever wanted to do something, just to find out you didn’t have the resources to do it, you’ll know exactly what I’m talking about. It is very possible that without access to his tools, I probably wouldn’t be writing this. It can be really discouraging to not have what you need to get the job done.
My school also helped me out in a way. I don’t know about other areas of the world, but here in Ireland, we have access to subjects like woodwork and metalwork for our junior cycle, with the Leaving Certificate equivalent being Construction Studies and Engineering. It is because of subjects like this that I have the skills for such an undertaking.
If I was to be left with no choice but to pick a design that inspired me, it would have to be the two Box Cameras I own, One being a brownie, the other one worn to the point where the logo is completely unrecognizable. Those box cameras are a marvel of engineering just by virtue of how simplified they have been made. I need to shamefully admit that I don’t know a single large-format camera brand, despite my love for the medium. I only used them one or two times to see how the bellows were folded.
The bellows system is mounted on a slider; I guess it is arguable that the inspiration for the focus mechanism came from one of those video sliders you can get on amazon for really quite cheap. I eyeballed one of those for a while. I don’t do enough video to justify one of those to myself.
The Phoblographer: We’d like to see the most challenging photograph that you took with your camera. Why would you rate this one as the most difficult?
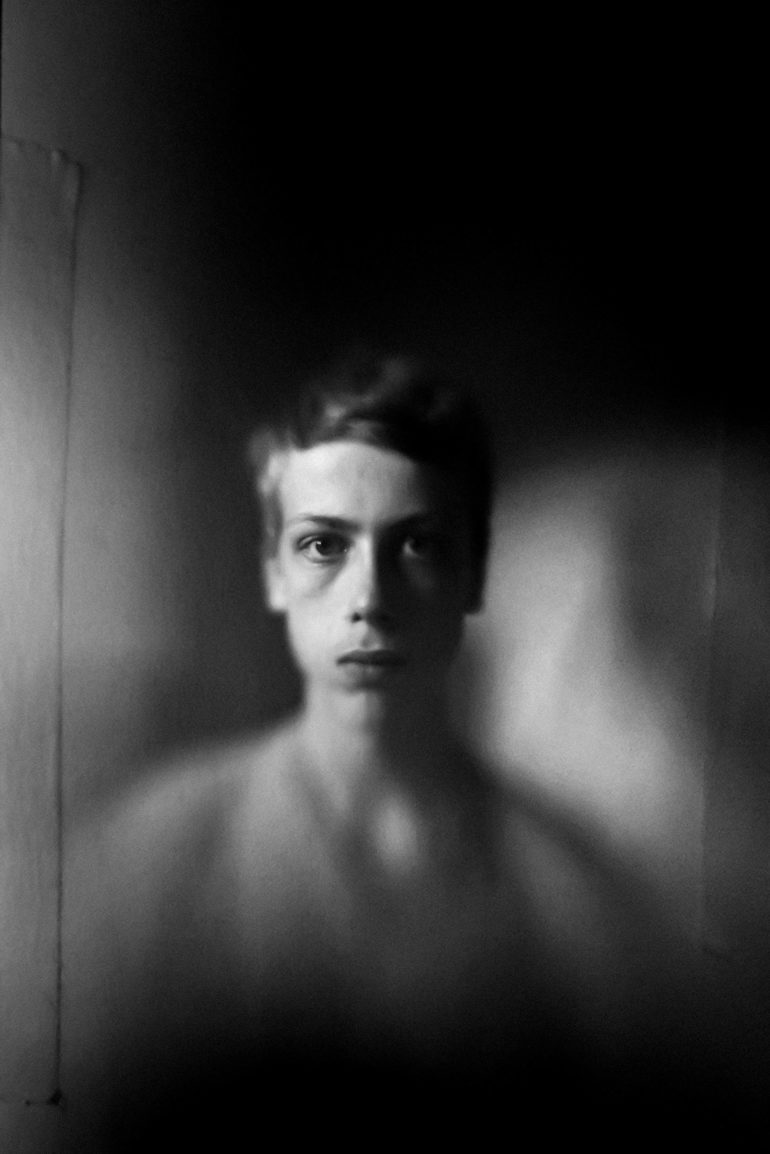
David O’Regan: That’s a much more difficult question than I think you realized. I have never had an easy time taking photos with that camera. The camera itself is the challenge, if you will. I think that the most difficult was definitely that self-portrait I took on the cardboard test rig, if that counts.
I don’t know if you have ever tried to focus on yourself manually with a lens that has only a few millimeters of depth of field whilst using your phone for a wifi live view connection while you fight against the sun to avoid losing what little light you have, and all while minimizing your motion blur on a one or two-second shutter speed. What I do know is that it is at least as hard to do as it is to read this paragraph without taking a breather and still comprehending every letter and implication it has.
The editing was an even greater nightmare. By virtue of this being taken with a homemade lens I was working with, the photo was incredibly soft straight out of camera. This was caused by none other than a complete lack of literally any micro-contrast, as well as chromatic and spherical aberration issues that plagued every frame. Let’s say that I spent a few hours travelling between photoshop and Topaz Sharpen AI.
It was undoubtedly worth it though. I would personally rate the resulting photo near the top of the best photos I have ever taken, with the 2017 Hennessy Portrait Prize winner Jack Hickey saying simply, “The portrait is art.” He did also hint that it might be worth cropping out the masking tape. I also asked Claire O’Rourke, a Wedding and Portrait photographer and member of the IPPVA, what she thought of my image. I was told that “the black and white tones, the lighting, and your expression all come together to make it a stunning portrait.” Most of my photographs would never have solicited such a response from other artists and photographers, to be honest.
The Phoblographer: What would you say you could improve upon in the next edition or model of camera?
David O’Regan: Next model? That is a pretty ambitious system of thought, but here goes!
Retrospectively, I found that the guide rail of the camera is way too close to the lens. Because of this, I get a big wood coloured stain in the bottom of my image. To fix that would be an instant improvement. The next would be a shorter flange distance to accommodate wide-angle lenses.
Other than this, I do have a plethora of ideas. I could experiment with an 8×10 or 8×12 version. That behemoth would end up twice the size and four times the weight of my current setup. It’s definitely worth noting that my current setup is already wobbly on my tripod. And it’s not a small tripod. It is designed to hold up to seven and a half kilograms, and to nearly quadruple that; now that would be really impractical. Then again, my current camera is already incredibly impractical, so it’s not a great stretch to do that. Whether or not this issue will stop me from trying, well, that’s a decision for future me to make.
I definitely won’t promise a “next model” or “redesign,” at least not too soon. I want to use the camera I have here for a while first. Besides that, I think it is more worthwhile to upgrade the lenses from here on out. I’m sure that at some point, I will get bored and decide to work on the next model, but it’s not on the table quite yet.
The Phoblographer: Any plans to make a digital DIY or film/digital hybrid camera in the future?
David O’Regan: Wow. You gave me an idea with that question. As I already said, I have no plans for anything currently, but a film/digital hybrid sounds like an engineering nightmare. Would that stop me from trying? Not really.
When you mentioned the film/digital hybrid, something instantly came to mind. I took a projector apart last year. It is one of those 3LCD projectors. It’s a similar concept to the 3CCD television broadcast cameras, but in reverse. 3CCD cameras allow light into the lens. From there a prism splits the light three ways: The reds go one way, the greens another, and the remaining blue goes somewhere completely different. A Charged Coupled Device lives at the end of each of these outputs. 3LCD is the exact opposite, the LCDs at the three inputs are combined into one output at the projector lens side by the prism.
In theory, I could make a camera like that. Right in the center output, I could put a focus screen and mirror, on one end a CCD or CMOS sensor, and on the other side, a shutter with a film winding system behind it. It would require some mechanisms beyond my *current* level of knowledge. But I’m more than willing to change that. I think that it’s a really cool idea. I’m sure someone, somewhere has already built something like this.
There are whole communities built around building cameras. Look at the Homemade Camera Podcast for instance. They deal primarily with film, on the other hand, Olexiy Bo Shportun had a Facebook group called DigitalObscuraCam, dedicated to people sharing ideas about digital camera obscuras. I only found it when I was halfway through my build unfortunately, I could have saved an awful lot of time with the group behind me. Unfortunately, Facebook took the group down. It was a kind place for advice with these things, and I hope that he will get it back up and running soon.
All images by David O’Regan. Used with permission. Check out his website as well as his Instagram, Linkedin, and Reddit pages to see more of his work.
Get rid of the ads!
Did you enjoy reading this article as much as we enjoyed writing it? There's a way to support us and our reporting, getting ad-free navigation and more as a bonus. Subscribe to us for less than a coffee per month —just $3.99— or take advantage of our yearly subscription with a hefty discount for only $25.- An ad-free experience
- A free mystery box for Lightroom or Capture One
- All the books in our store
- 20% discount on Capture One
- 30% discount on Imalume Photo Theft Protection
- 20% off Herbs and Kettle Tea Company.
- 20% off your order from MPIX printing services.
- 5% off Viltrox Products via their eCommerce store.
- 10% off all film developing, printing and scanning services from Blue Moon Camera and Machine
- 15% off 7Artisans products: The lens and accessory maker is offering a sweet discount for Phoblographer's readers.