
Rembrandt Lighting is a popular technique for portrait photography.
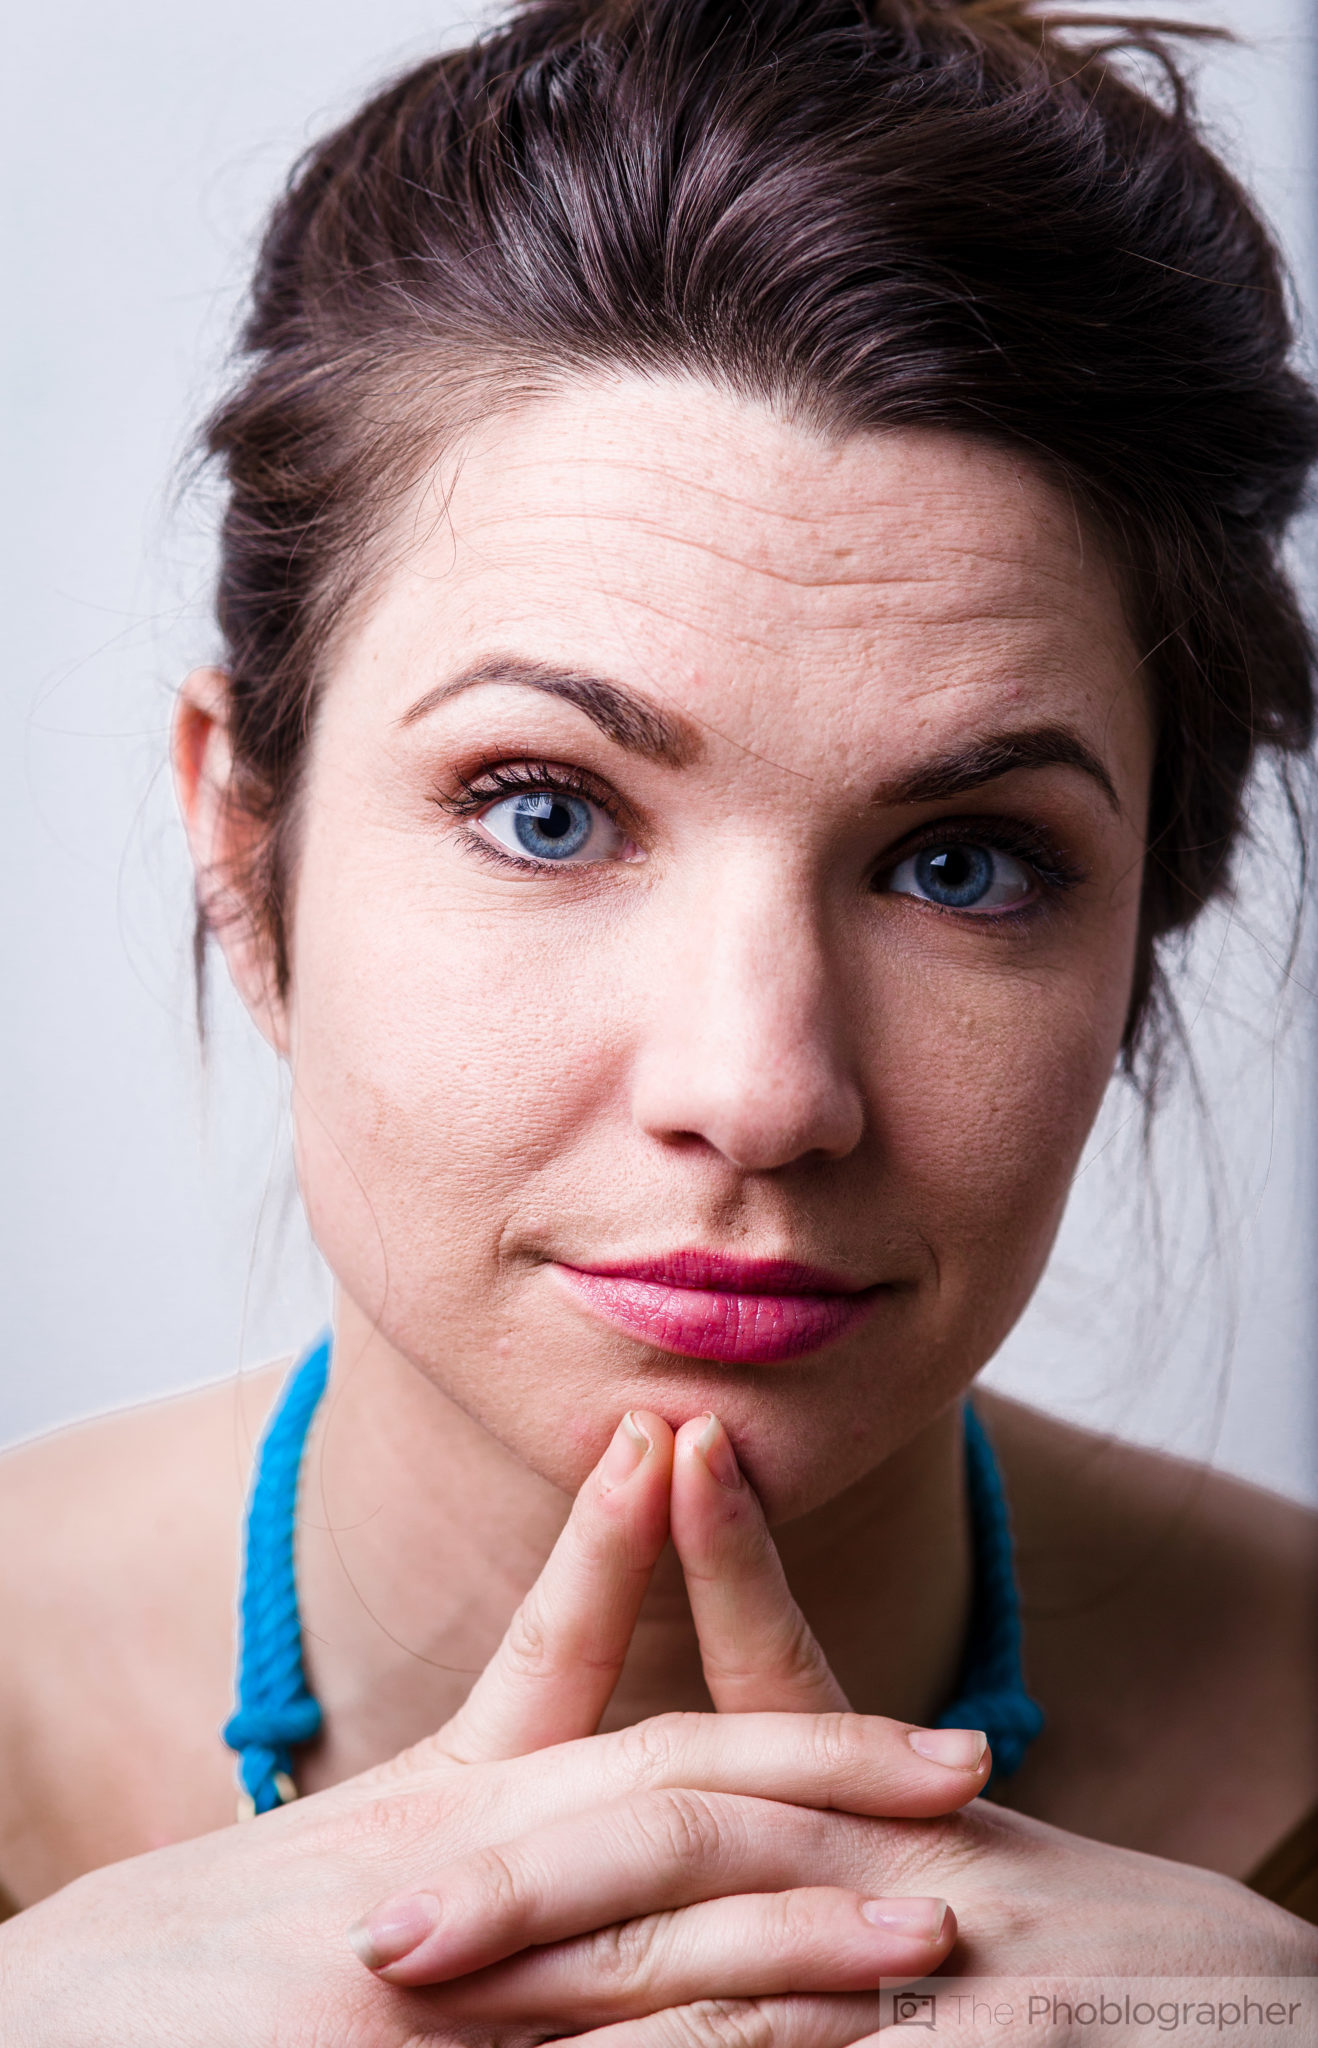
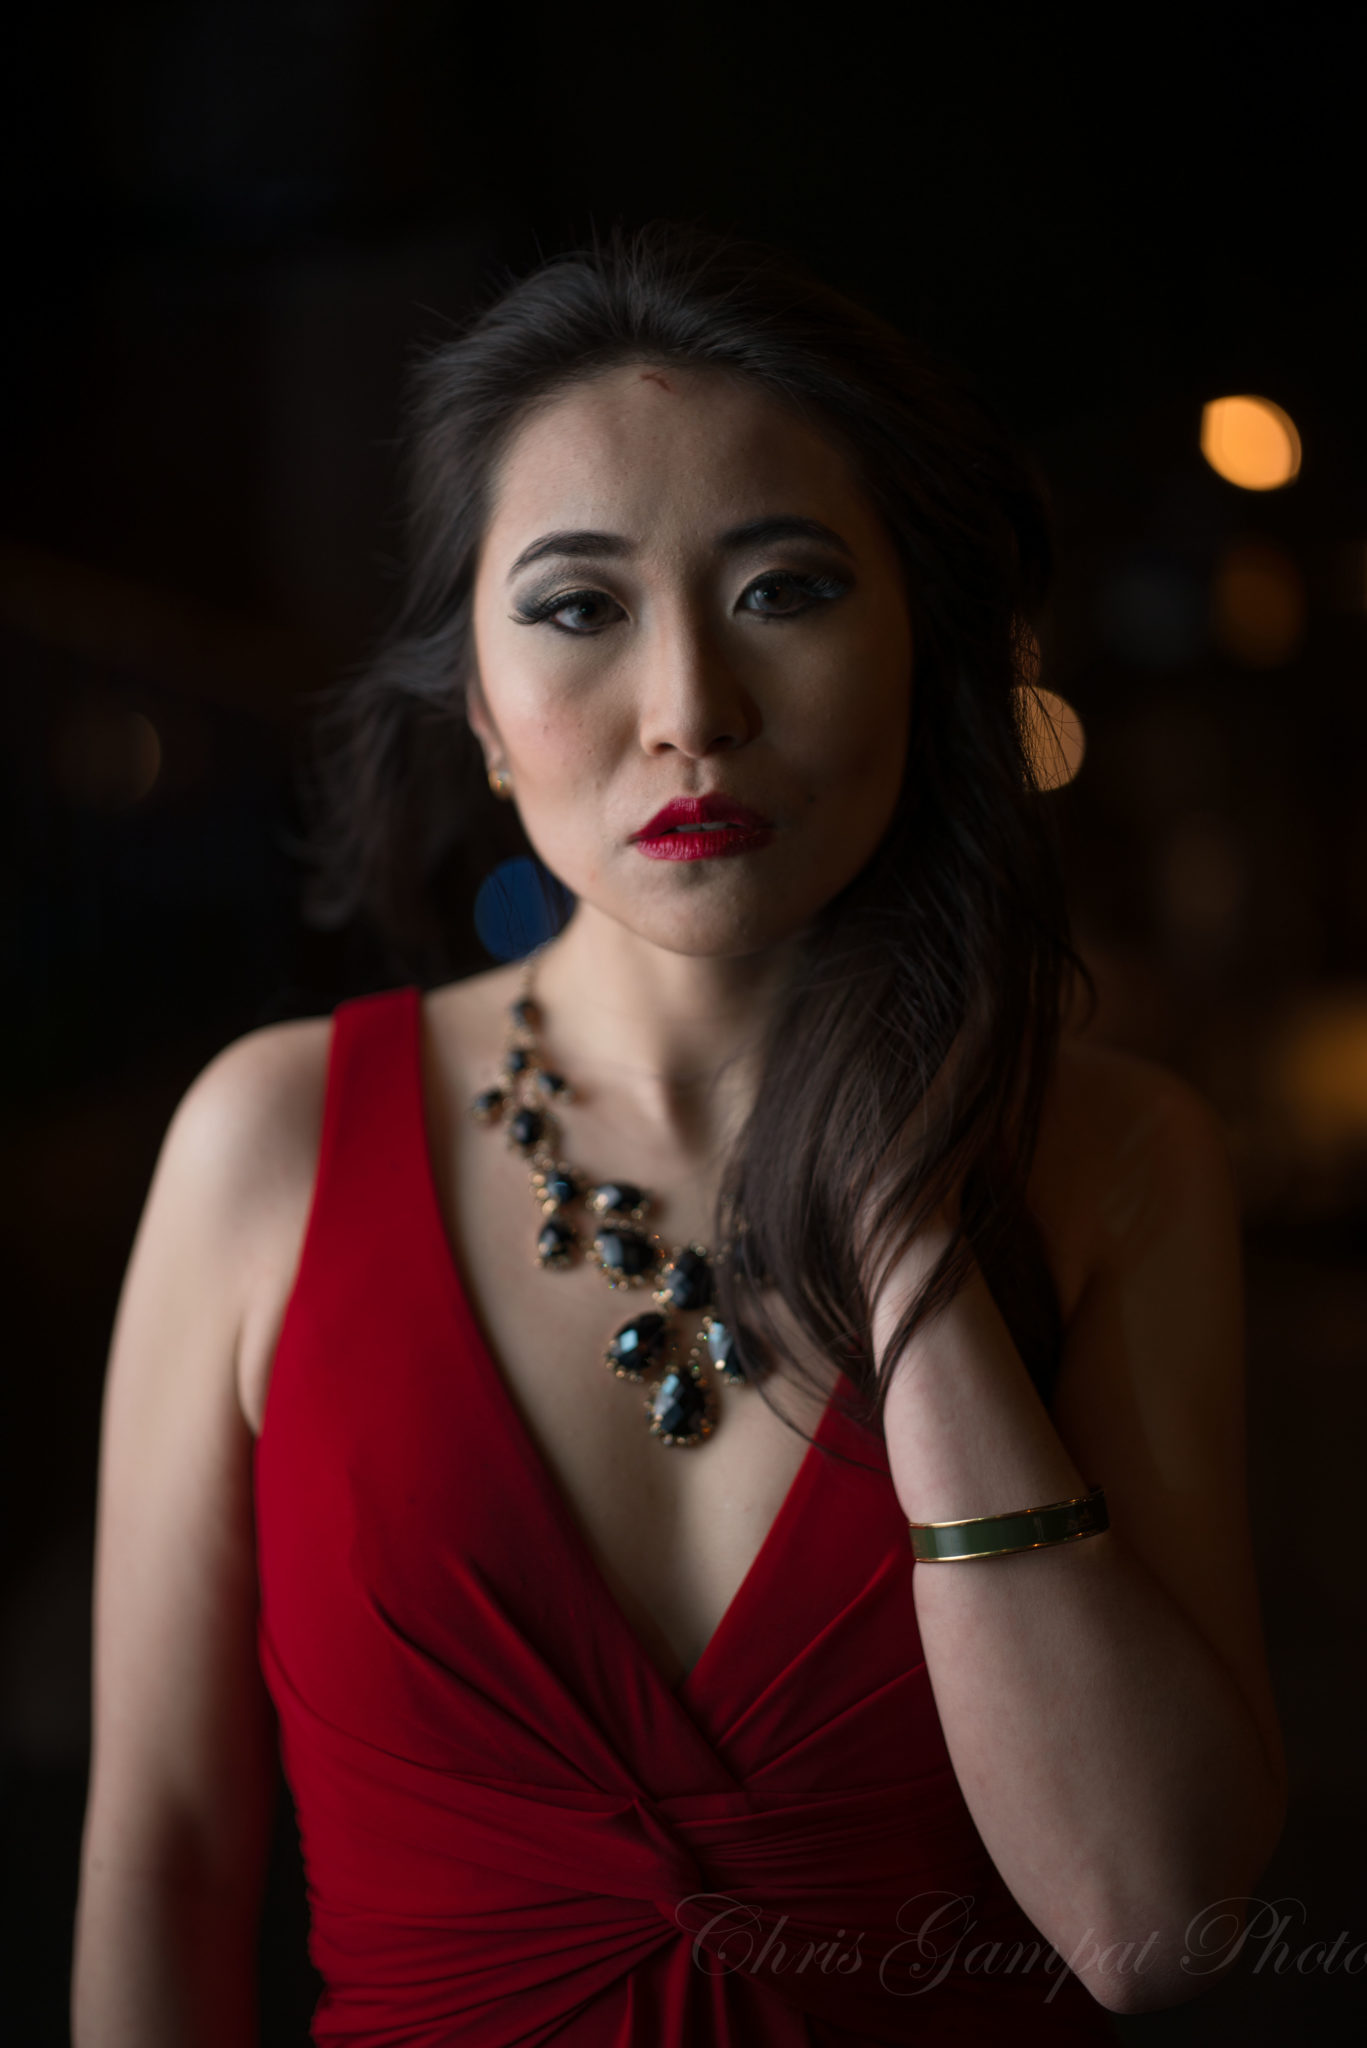
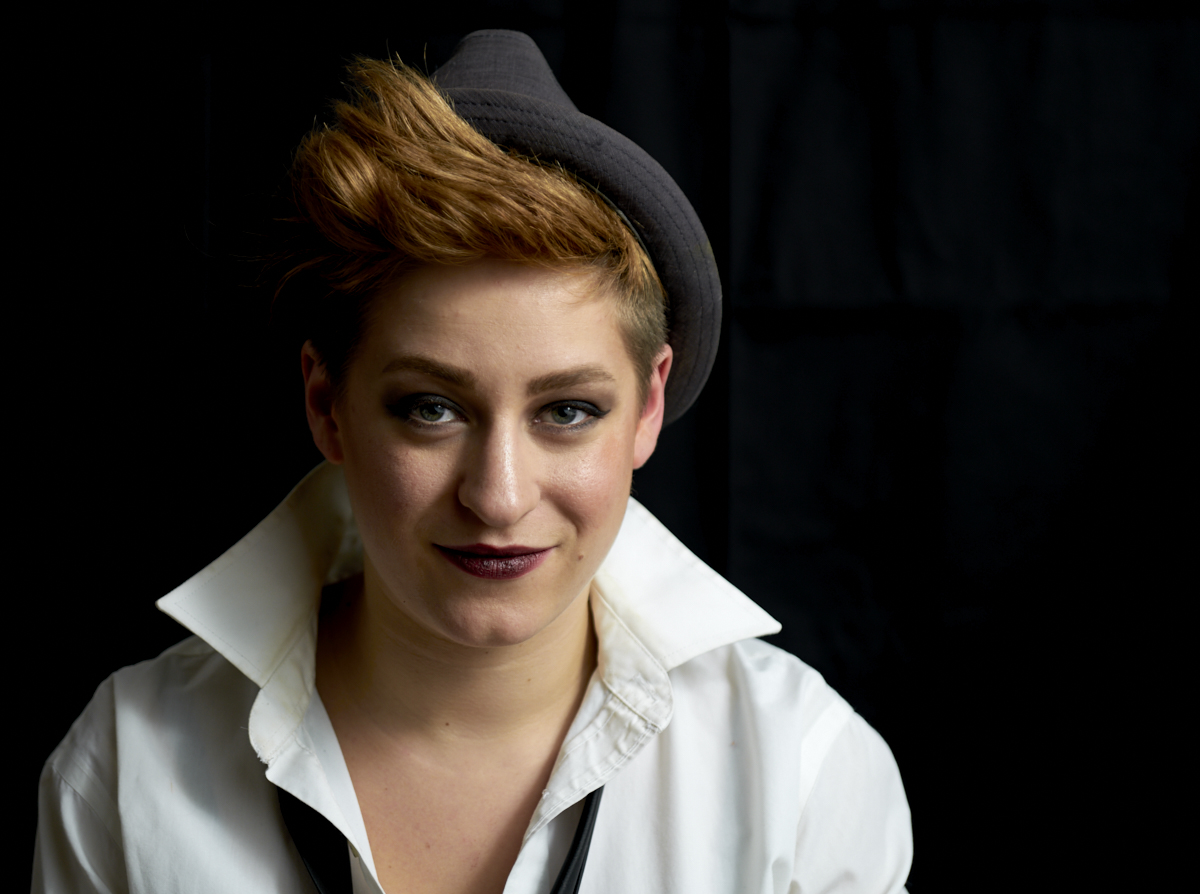
Chances are that if you’re really into portraiture, that you’ve studied work that includes Rembrandt lighting. This method is popular partially because it’s such a flattering lighting option. It’s known for the signature triangle that you see on the face because of the angle. And like all photography these days, it’s pretty much just about the angles. Luckily for you, it can be done with both natural light and off-camera lighting. We always prefer to control the lighting that we put in the scene. Today, we’ve got our own original cheat sheet for you, along with supplementary info.
Angles
“For the absolute most effect, make the zoom head of your flash the widest it can be. If you’re using a softbox of some sort, you’ll want the light modifier to be to the side of the subject and just a bit in front of them a tad. This will help with aiming the light at the right spot.”
– How to Create Rembrandt Lighting in a Photo
Rembrandt lighting is all about angles. As annoying as that sounds, it’s true. The big things:
- Your light has to be to the side of your subject though still in front of them. With the subject facing you, place the light between a 45 degree to 90-degree angle
- Have your subject turn their face towards you at a 0 and 30-degree angle
- Fire the light
So let’s say that you’re working with a light source that doesn’t move: that’s fine. Just move yourself or your subject. Windows are an absolutely fantastic option for Rembrandt lighting. Always try to use a lighting source that’s soft and larger than your subject in the frame. So if you’re photographing a full person, make sure the window is larger than the person. If you’re shooting just the face, then the light source only really needs to be a few feet large.
Time of Day?
To get Rembrandt lighting, a photographer can shoot at pretty much any time of the day. But the best time is whenever your window has the most direct light. To figure out what that is, periodically look at the light in your studio or home. Take notice of how dark the shadows are at a specific time. Then also consider the weather conditions. If you’re shooting on a cloudy day, then the light is always going to be softer than usual. But if the sky is super bright, then the sun will be able to soak through, providing that you have a clear view of it. Of course, it doesn’t always work.
It’s All About Communication
So here’s the thing, your portrait subject will know nothing about the lighting that you’re shooting them with. So ideally, you’ll need to direct them on how to position their face. This method of Rembrandt lighting is specifically about posing the face. Their expression can be anything that you wish. But they just need to be facing the most effective way in this situation. There are lots of ways to do that using hand signals. And to understand it the best, you should really try to get in front of the camera every now and again.
This cheat sheet was made with Visme. Click here if you want more Photography Cheat Sheets.
Get rid of the ads!
Did you enjoy reading this article as much as we enjoyed writing it? There's a way to support us and our reporting, getting ad-free navigation and more as a bonus. Subscribe to us for less than a coffee per month —just $3.99— or take advantage of our yearly subscription with a hefty discount for only $25.- An ad-free experience
- A free mystery box for Lightroom or Capture One
- All the books in our store
- 20% discount on Capture One
- 30% discount on Imalume Photo Theft Protection
- 20% off Herbs and Kettle Tea Company.
- 20% off your order from MPIX printing services.
- 5% off Viltrox Products via their eCommerce store.
- 10% off all film developing, printing and scanning services from Blue Moon Camera and Machine
- 15% off 7Artisans products: The lens and accessory maker is offering a sweet discount for Phoblographer's readers.