Photographers sick of working on tiny laptop screens will appreciate the extra real estate of the Odake BladeX Pro Portable External 4K Monitor.
One of the common dilemmas photographers run into when editing images on laptops is that they never seem to have enough screen real estate. On a desktop, you would just replace your display with a larger one, but that’s not possible with laptops. Odake is trying to help alleviate this problem with their BladeX Pro – a portable 15.6″ external 4K monitor. The BladeX Pro’s Indiegogo campaign was just fully funded, and we got to check out a pre-production sample to see if it lives up to the task.
Table of Contents
Pros and Cons
Pros
- 4K resolution
- Low profile, minimalist design
- Lots of connectivity options
- Plenty of accessories are included
- The base can double duty as a USB hub when connected via USB-C
Cons
- Overly saturated colors out of the box
- Flimsy construction
- Wobbly hinge design
- Short battery life
- 100% Adobe RGB range coverage is quite questionable
Equipment Used
We tested the Odake Blade X Pro Portable External 4K Monitor with an early 2015 model 13″ MacBook Pro equipped with Retina display.
Tech Specs
Tech specs for the Odake Blade X Pro Portable External 4K Monitor taken from the Indiegogo campaign page.
| Screen Size | 15.6″ |
| Battery Capacity | 3000 mAh |
| Battery Life | Up to 3 Hours |
| Weight | 1.89 lbs |
| Thickness | 4.5 mm |
| Inputs | HDMI, USB-C, USB |
| Resolution | 3840 x 2160 |
| Aspect Ratio | 16:9 |
| Contrast Ratio | 1200:1 |
| Refresh Rate | 60 Hz |
| Response Time | 4 ms |
| Color Gamut | 100% Adobe RGB 16.7M |
| Brightness | 300 cd/m2 |
| Speaker | Two Speakers |
| USB-C PD Charging | Yes |
Ergonomics

The clean, minimalist design of the Odake BladeX Pro gives the 4K external monitor a low profile form factor. With the bezel below the display being the only exception, the bezels around the 15.6″ 4K display are super thin. The panel itself has a matte finish that does a good job minimizing glare. Odake also makes a non-Pro version of the BladeX with a touch-enabled 1080p panel. Connecting the BladeX via the USB-C port allows you to interact with your computer via the touch screen. The 4K panel lacks touch capabilities but makes up for it with the increased resolution. An Apple iPhone 7 Plus can be seen in the above image as a size reference.
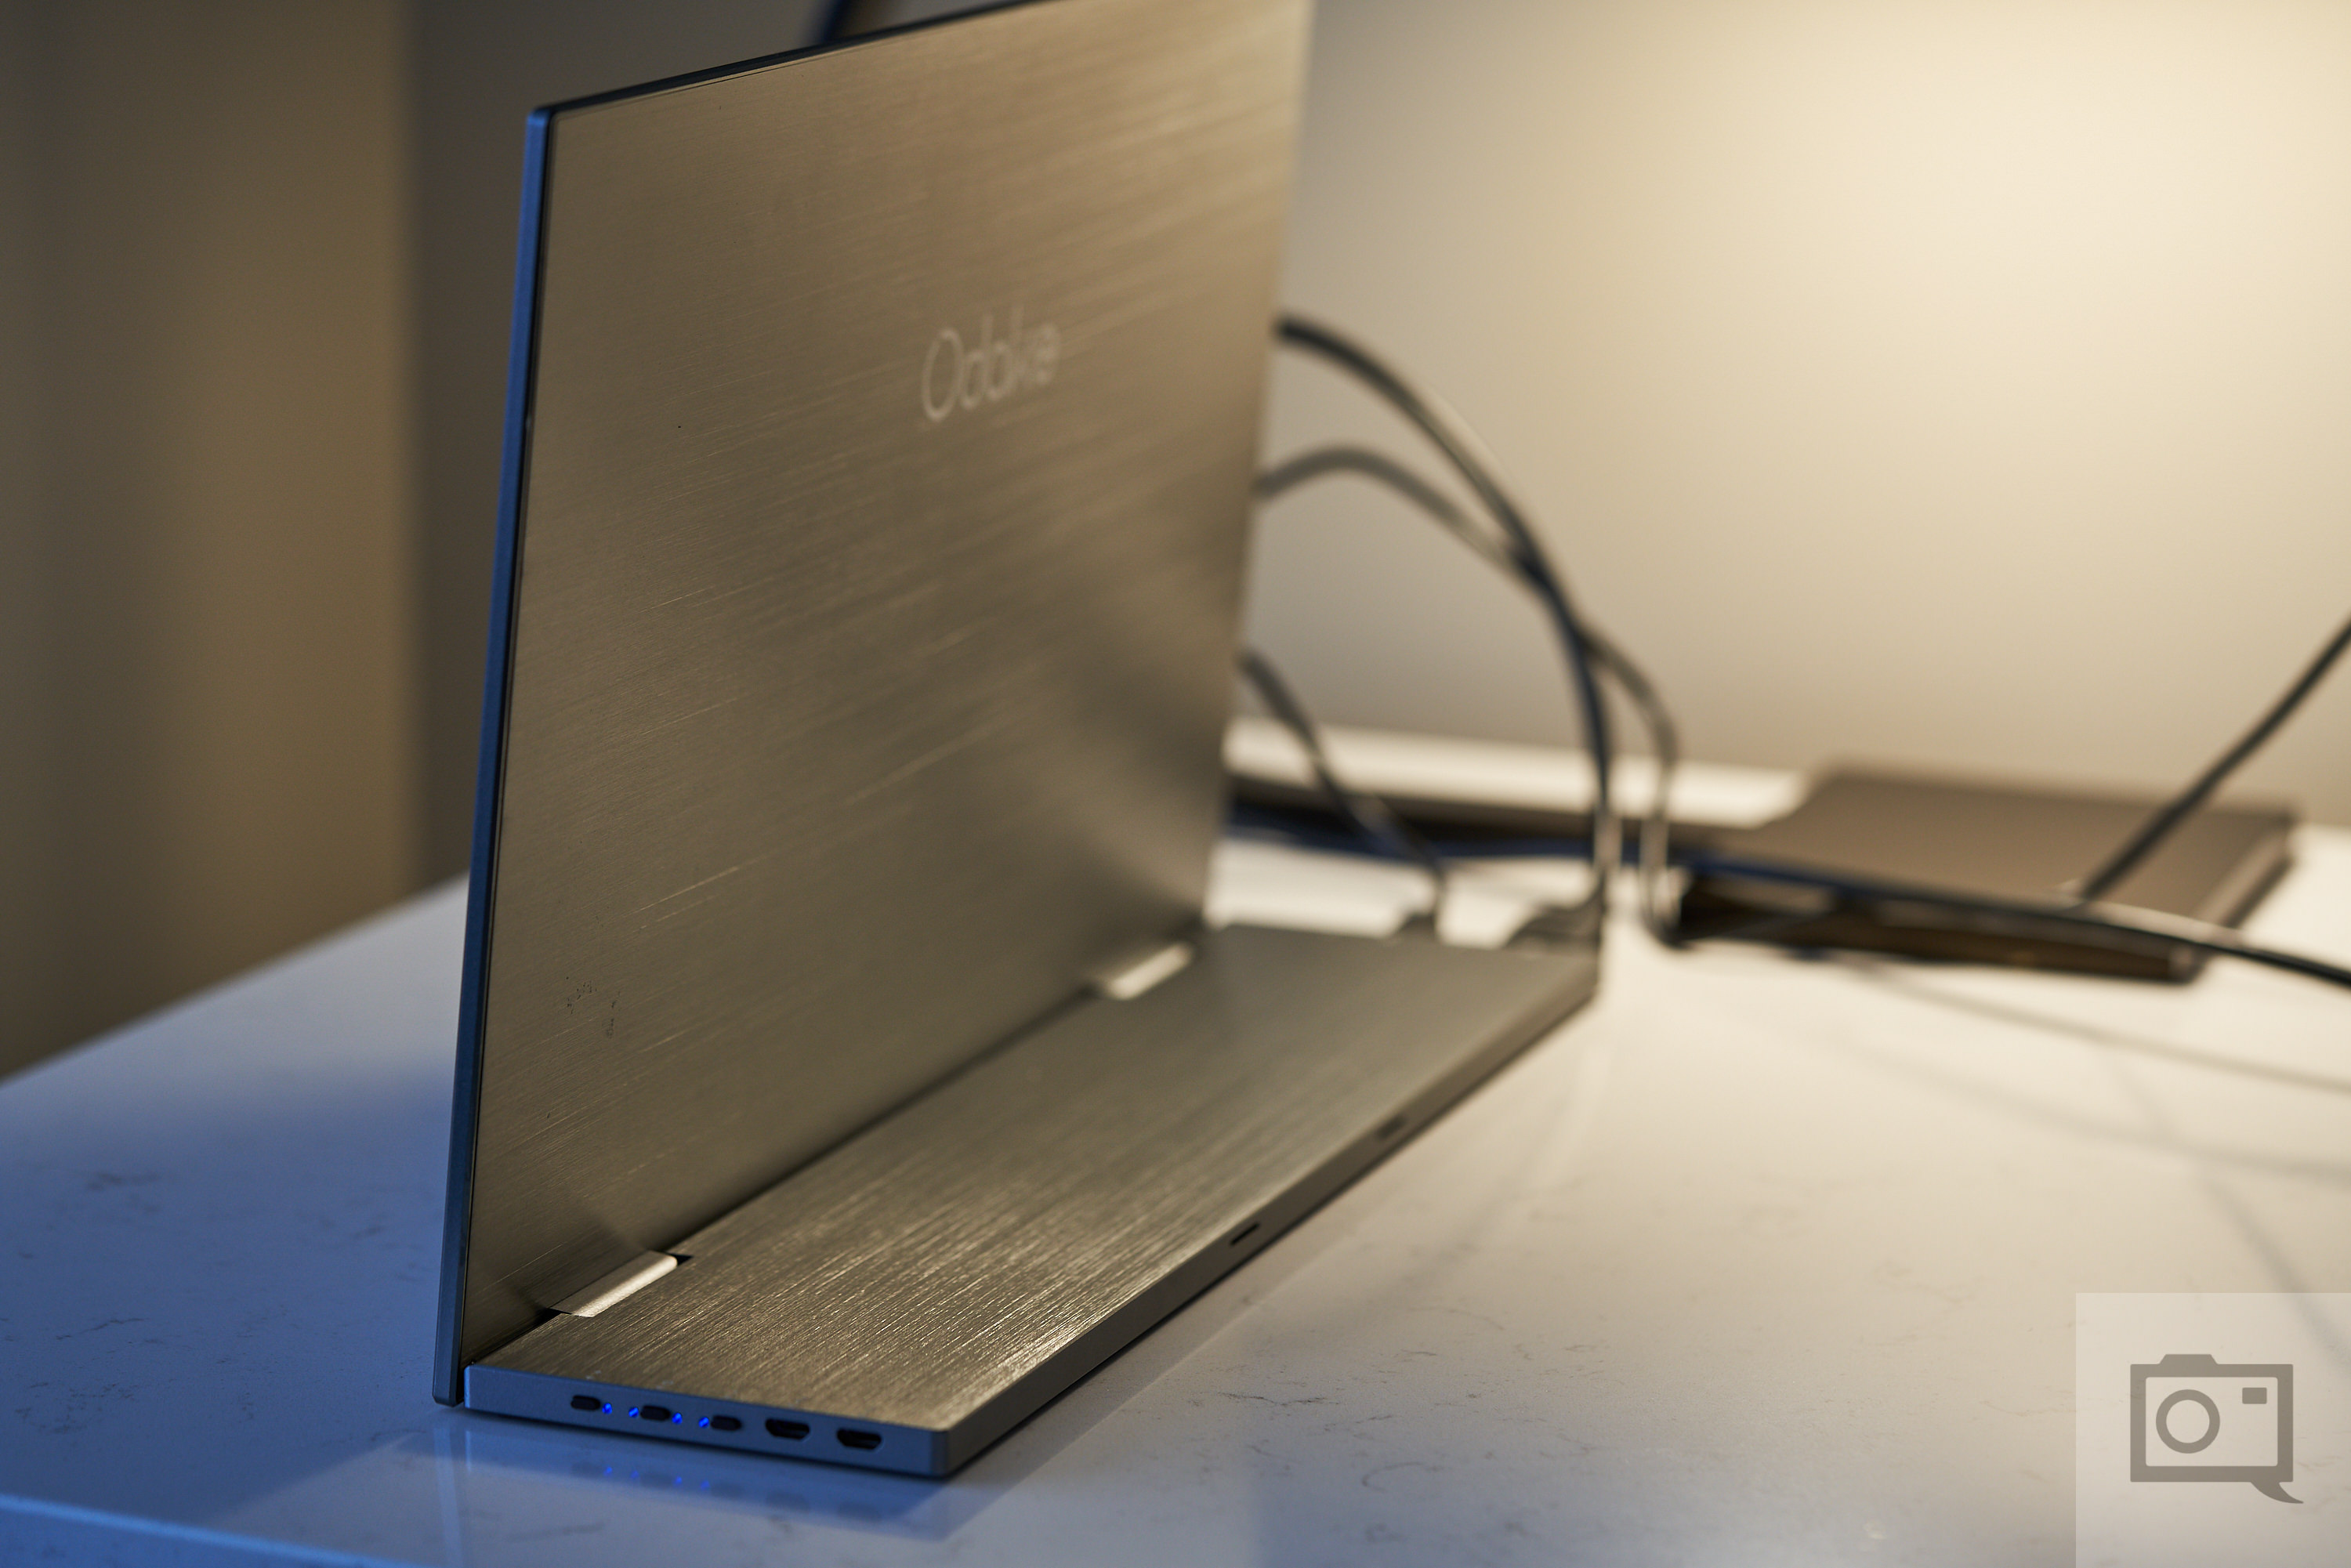
The BladeX Pro’s display is attached to the base via two hinges. Here’s what the monitor looks like from the back when fully unfolded. The screen is almost fully perpendicular to the base. The 3000 mAh rechargeable battery and other circuitry are housed within the base, giving it enough weight that the monitor won’t tip over when fully opened.
The hinges on the BladeX Pro have enough tension to them that the display won’t close on its own after you’ve adjusted it to your desired viewing angle. We would have preferred more tension to the hinges though: the display was prone to wobbling around with even the slightest movement. Granted, the review unit Odake sent us is a prototype, so hopefully the final product will do away with the wobble issue.
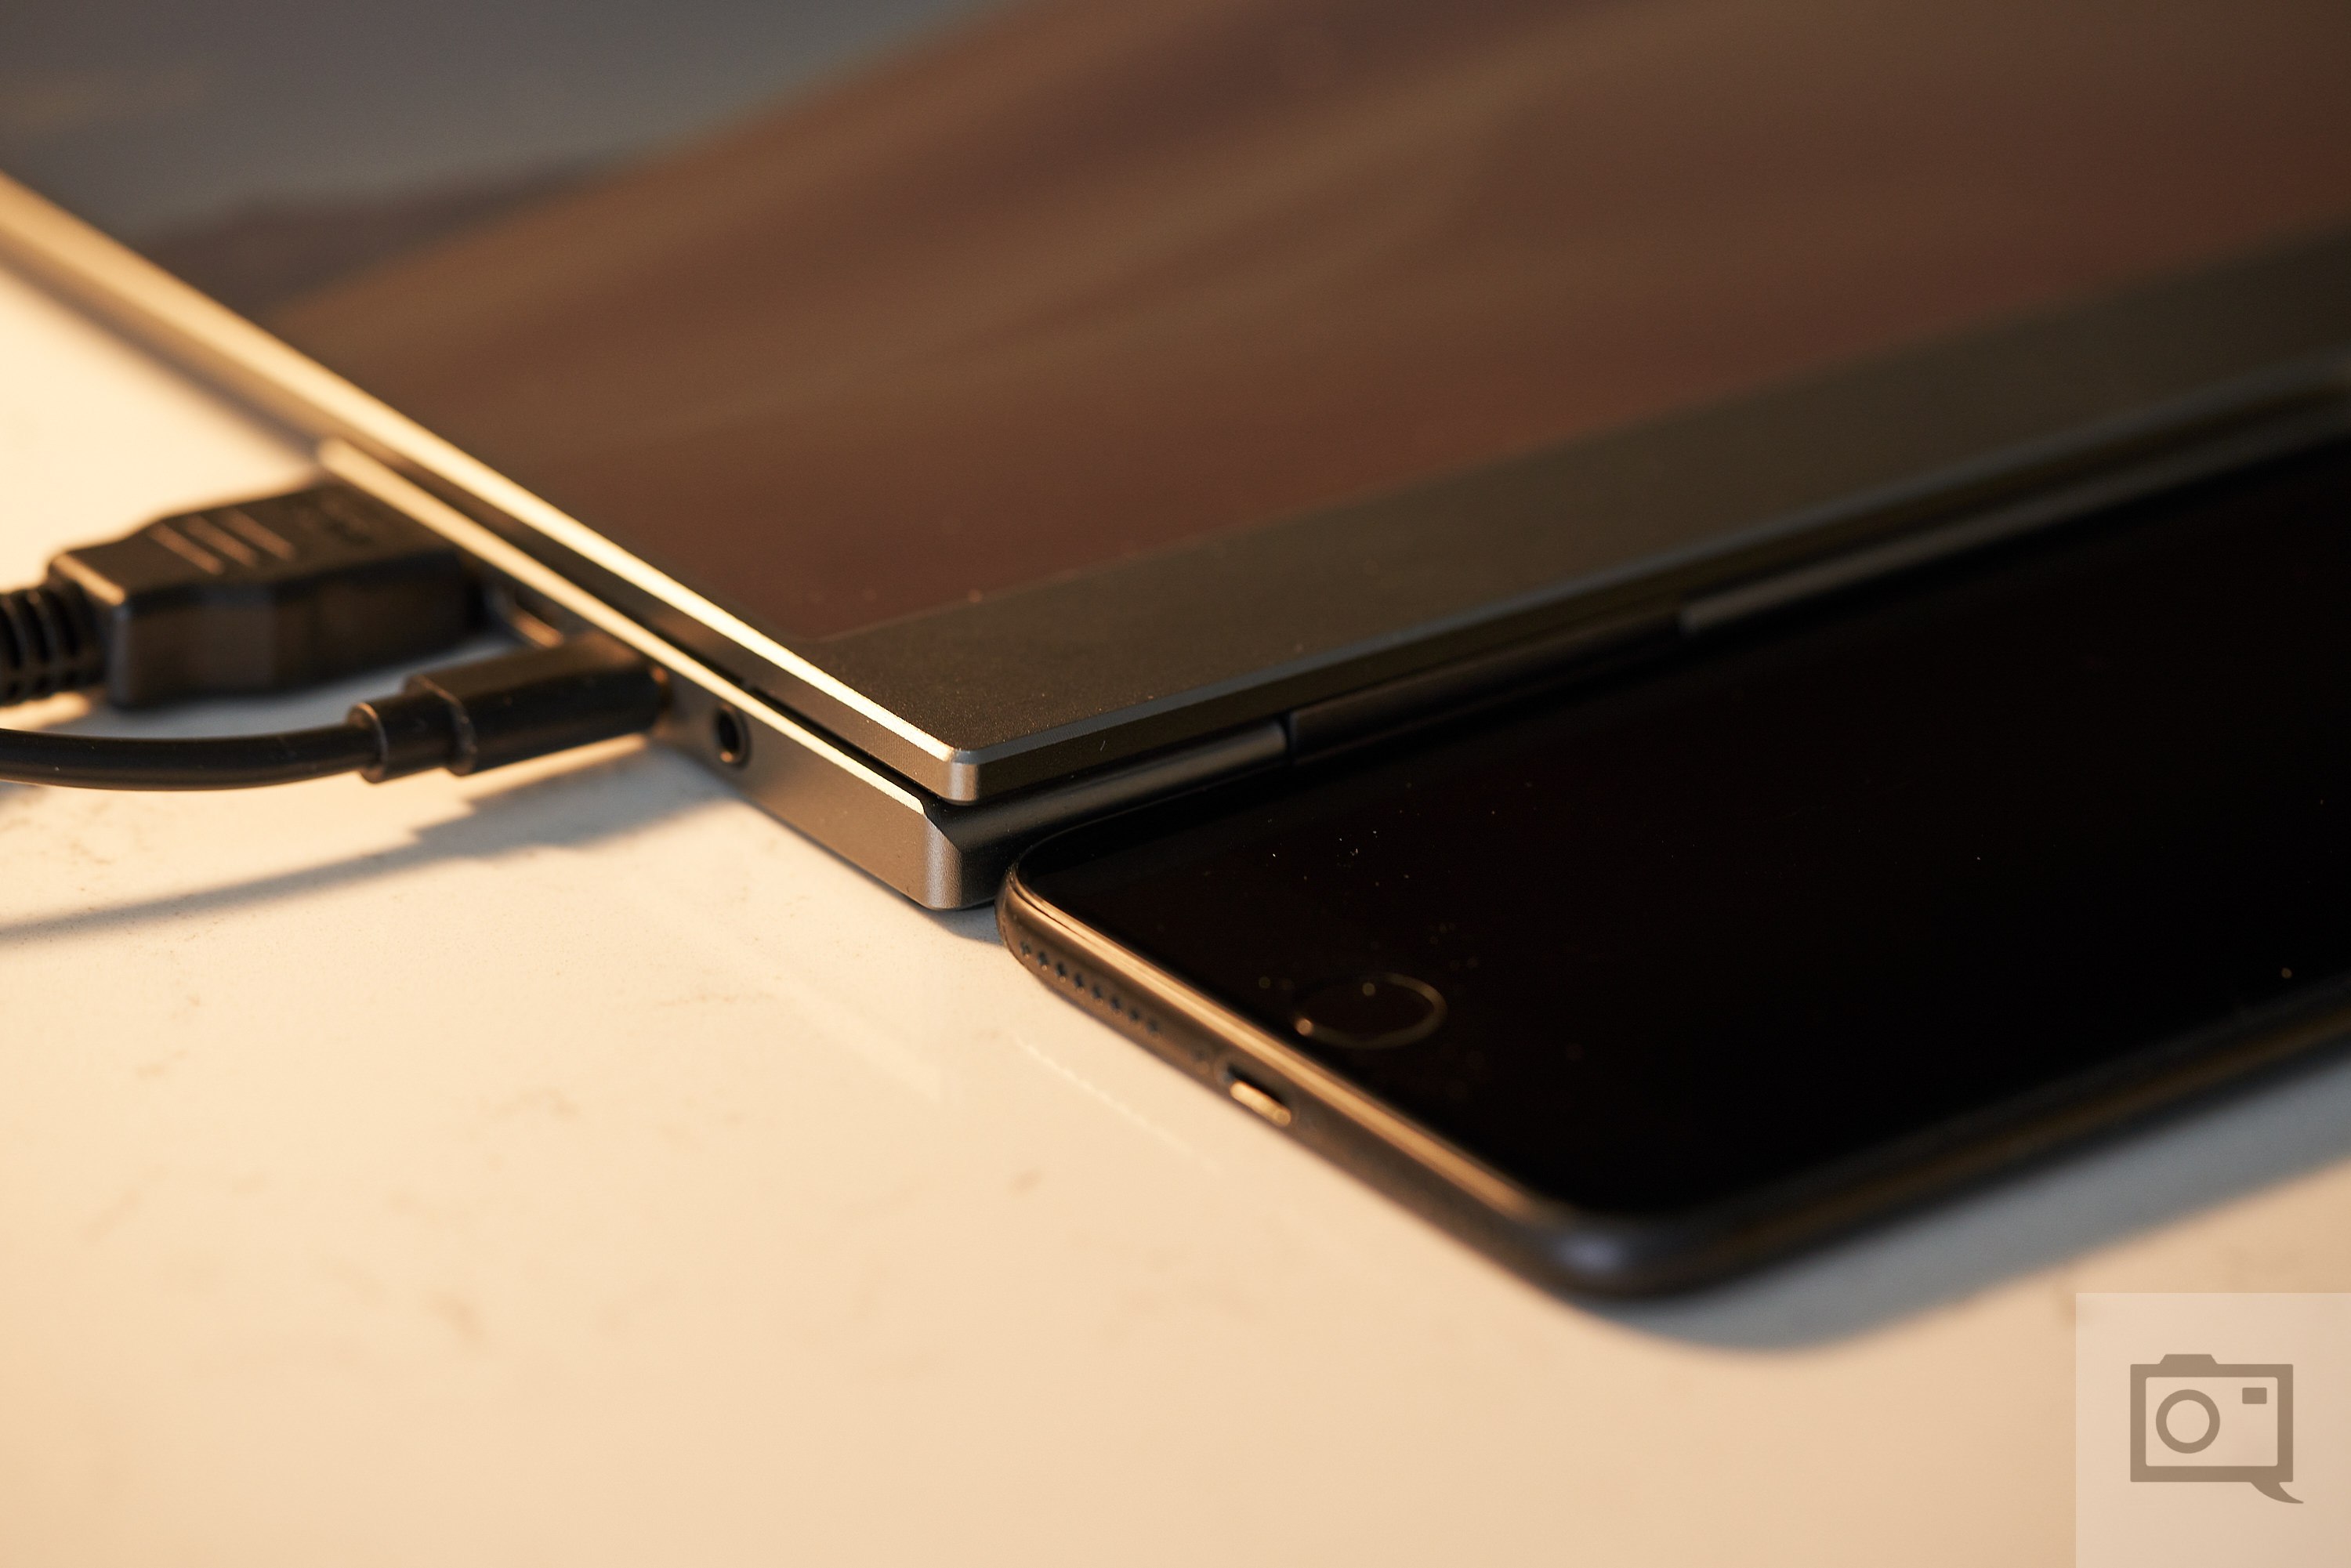
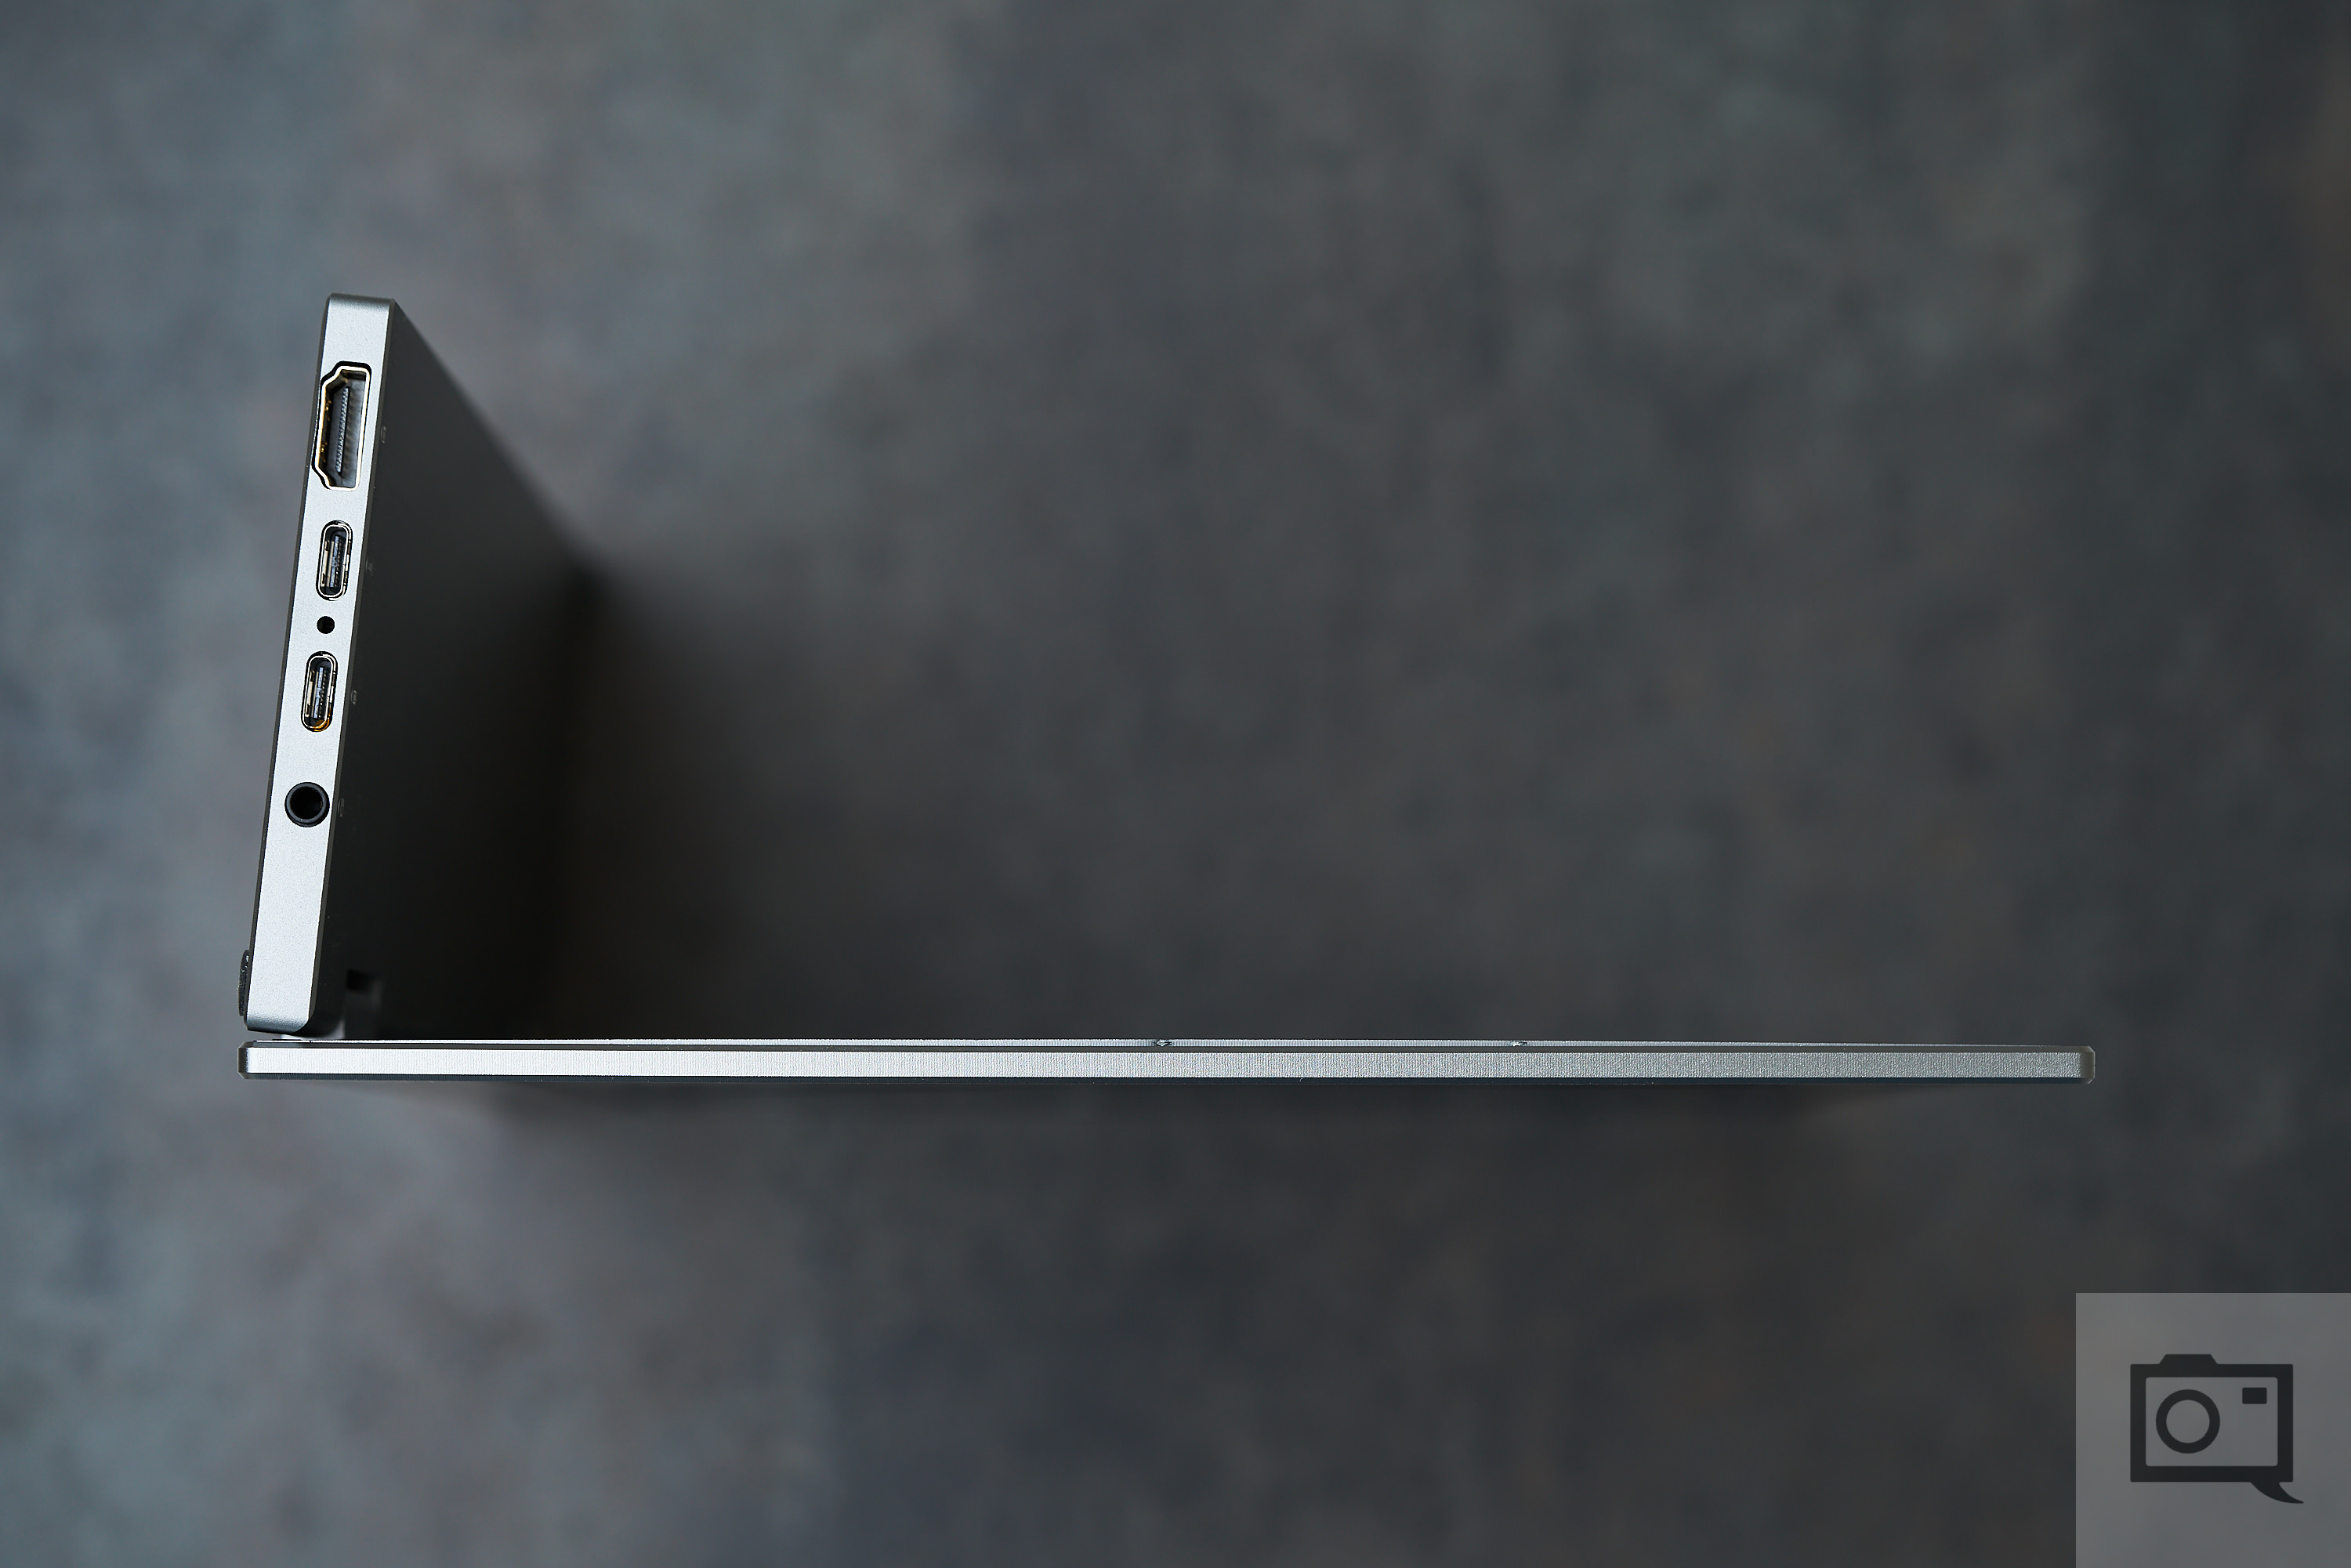
While Odake markets the BladeX Pro as just 4.5 mm thick, this only applies to the display itself. The base of the BladeX Pro is roughly the same thickness as an Apple iPhone 7 Plus.
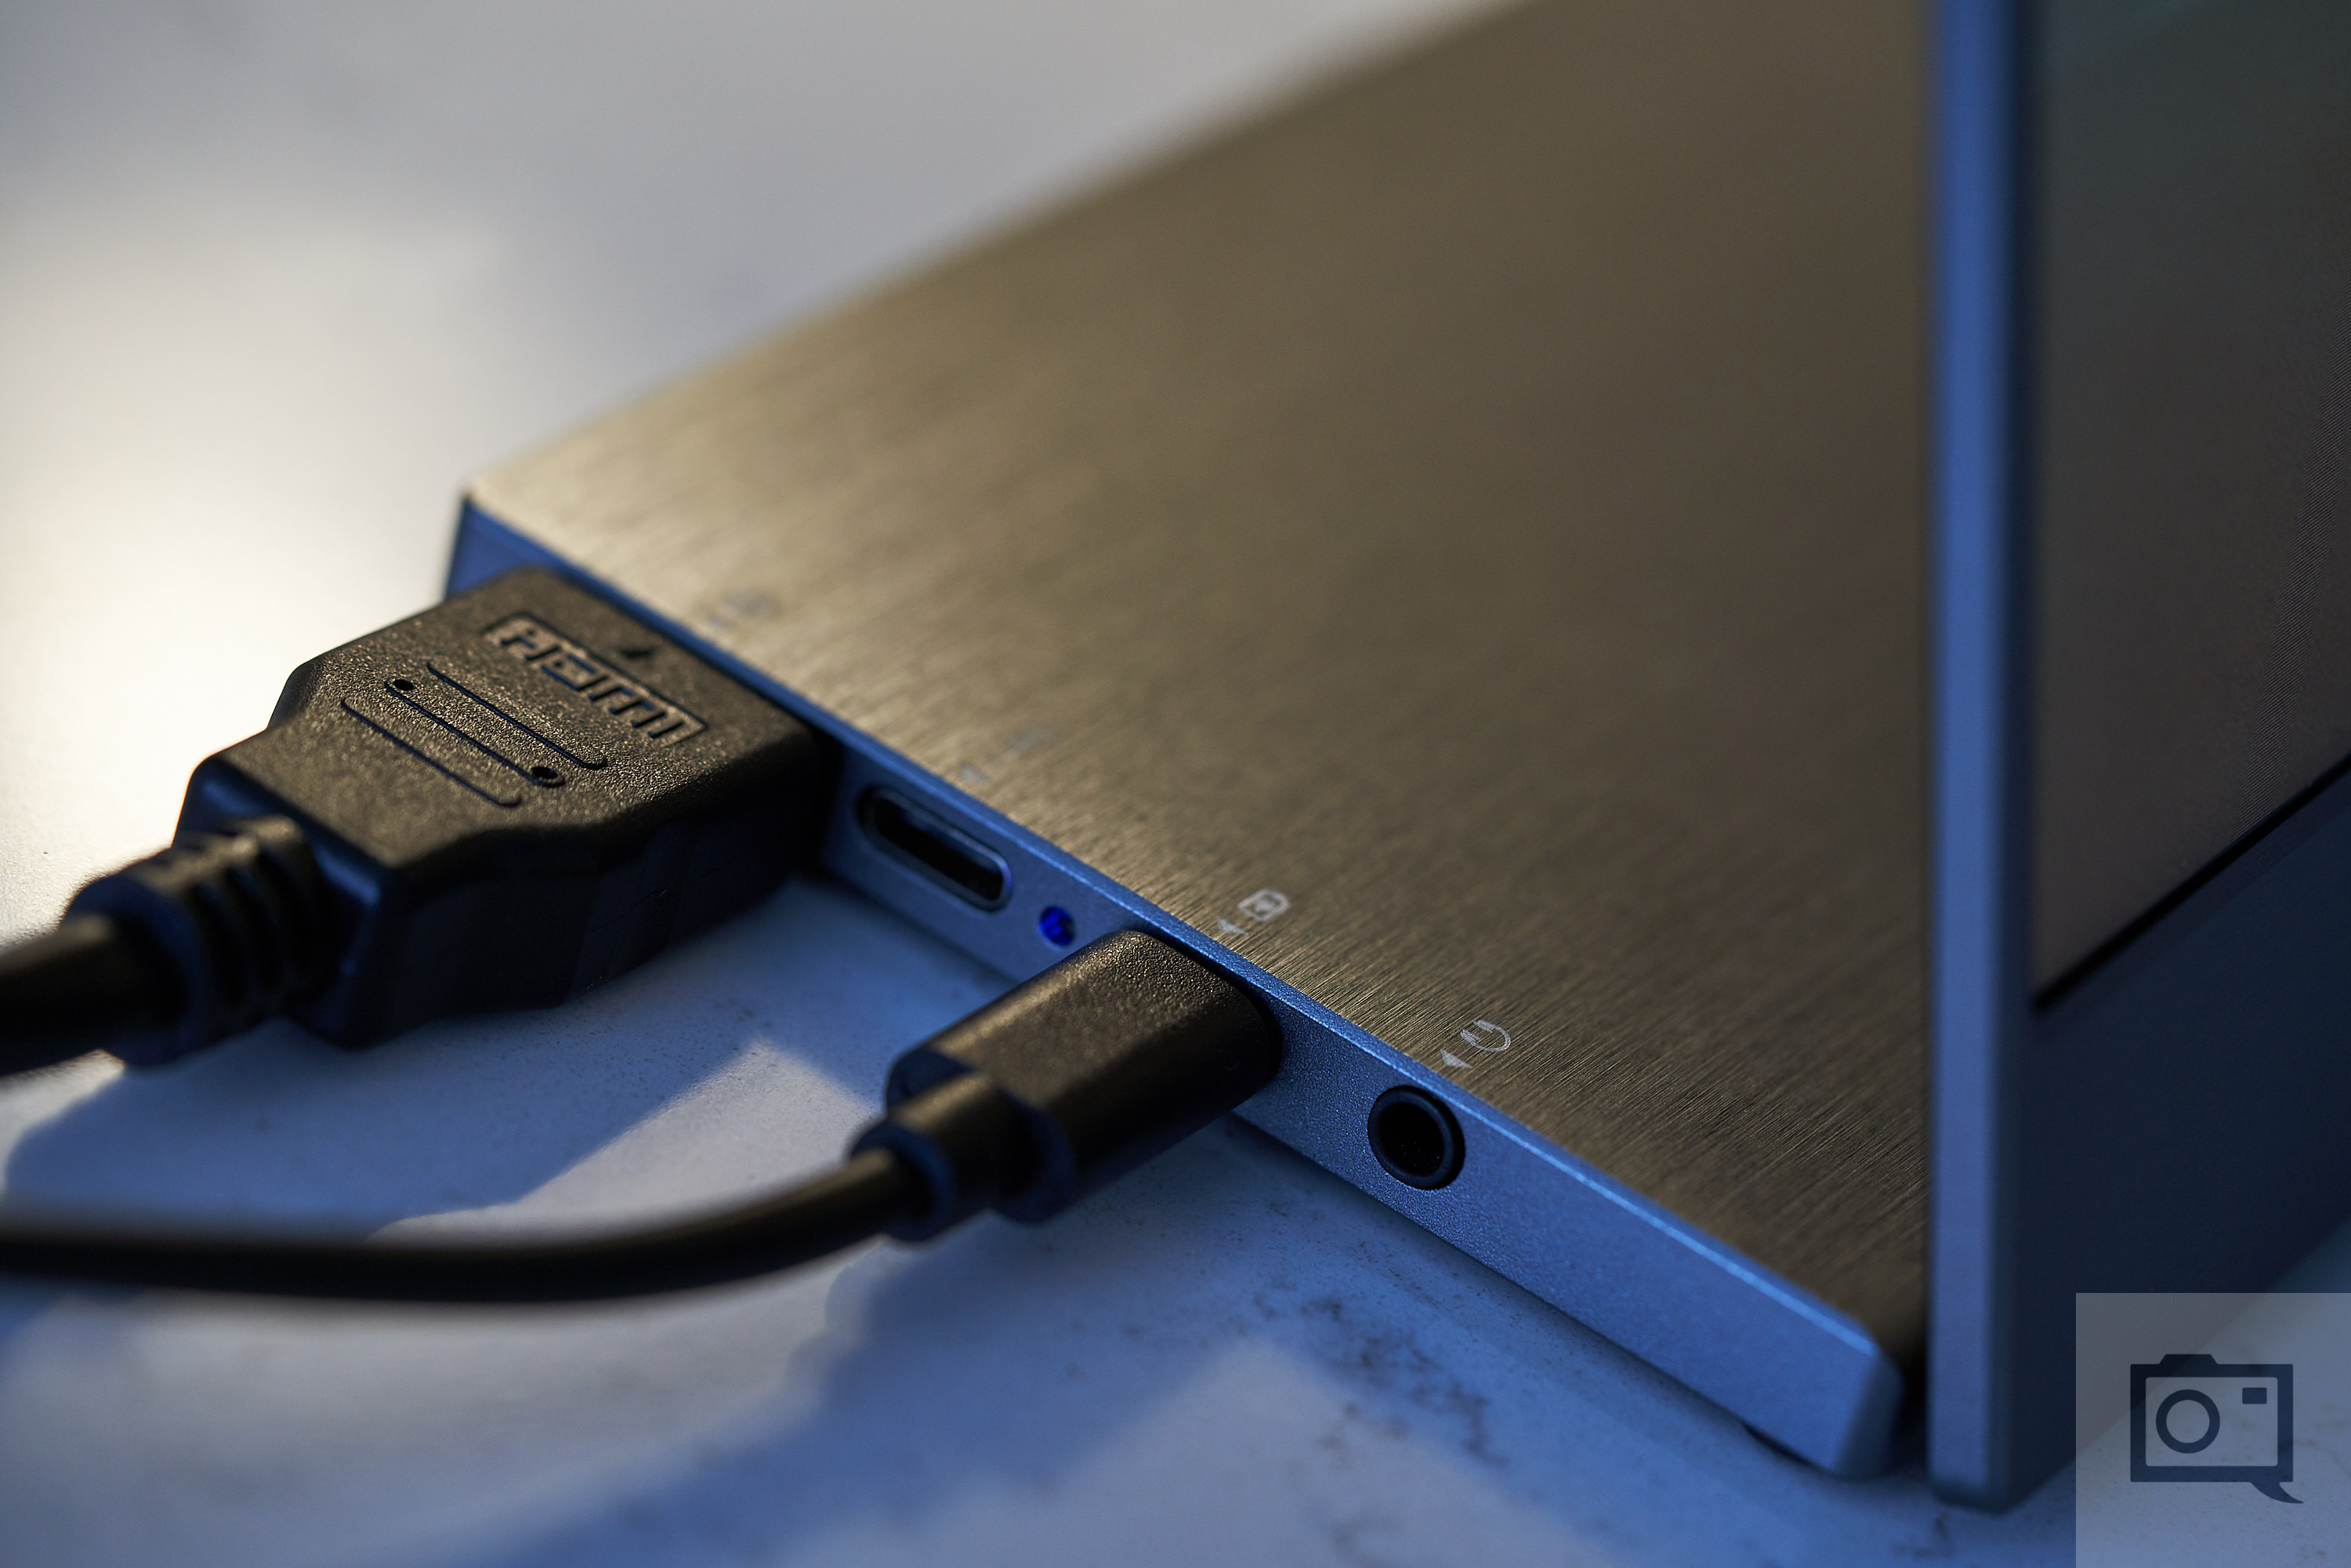
Plenty of connectivity options adorn both sides of the BladeX Pro’s base. On the left, you’ll find an HDMI port, a pair of USB-C ports, as well as a 3.5 mm audio jack. One of the USB-C ports supports power delivery and is what you’ll use to charge the BladeX Pro. You can pass audio through to the BladeX Pro’s built-in speakers. Should you though? Probably not. If you’re using a laptop that can drive an external 4K display, chances are it’s got much better speakers built-in already. If your laptop lacks a 3.5 mm audio jack, you can use the one on the BladeX Pro in situations where you don’t want to disturb other people.
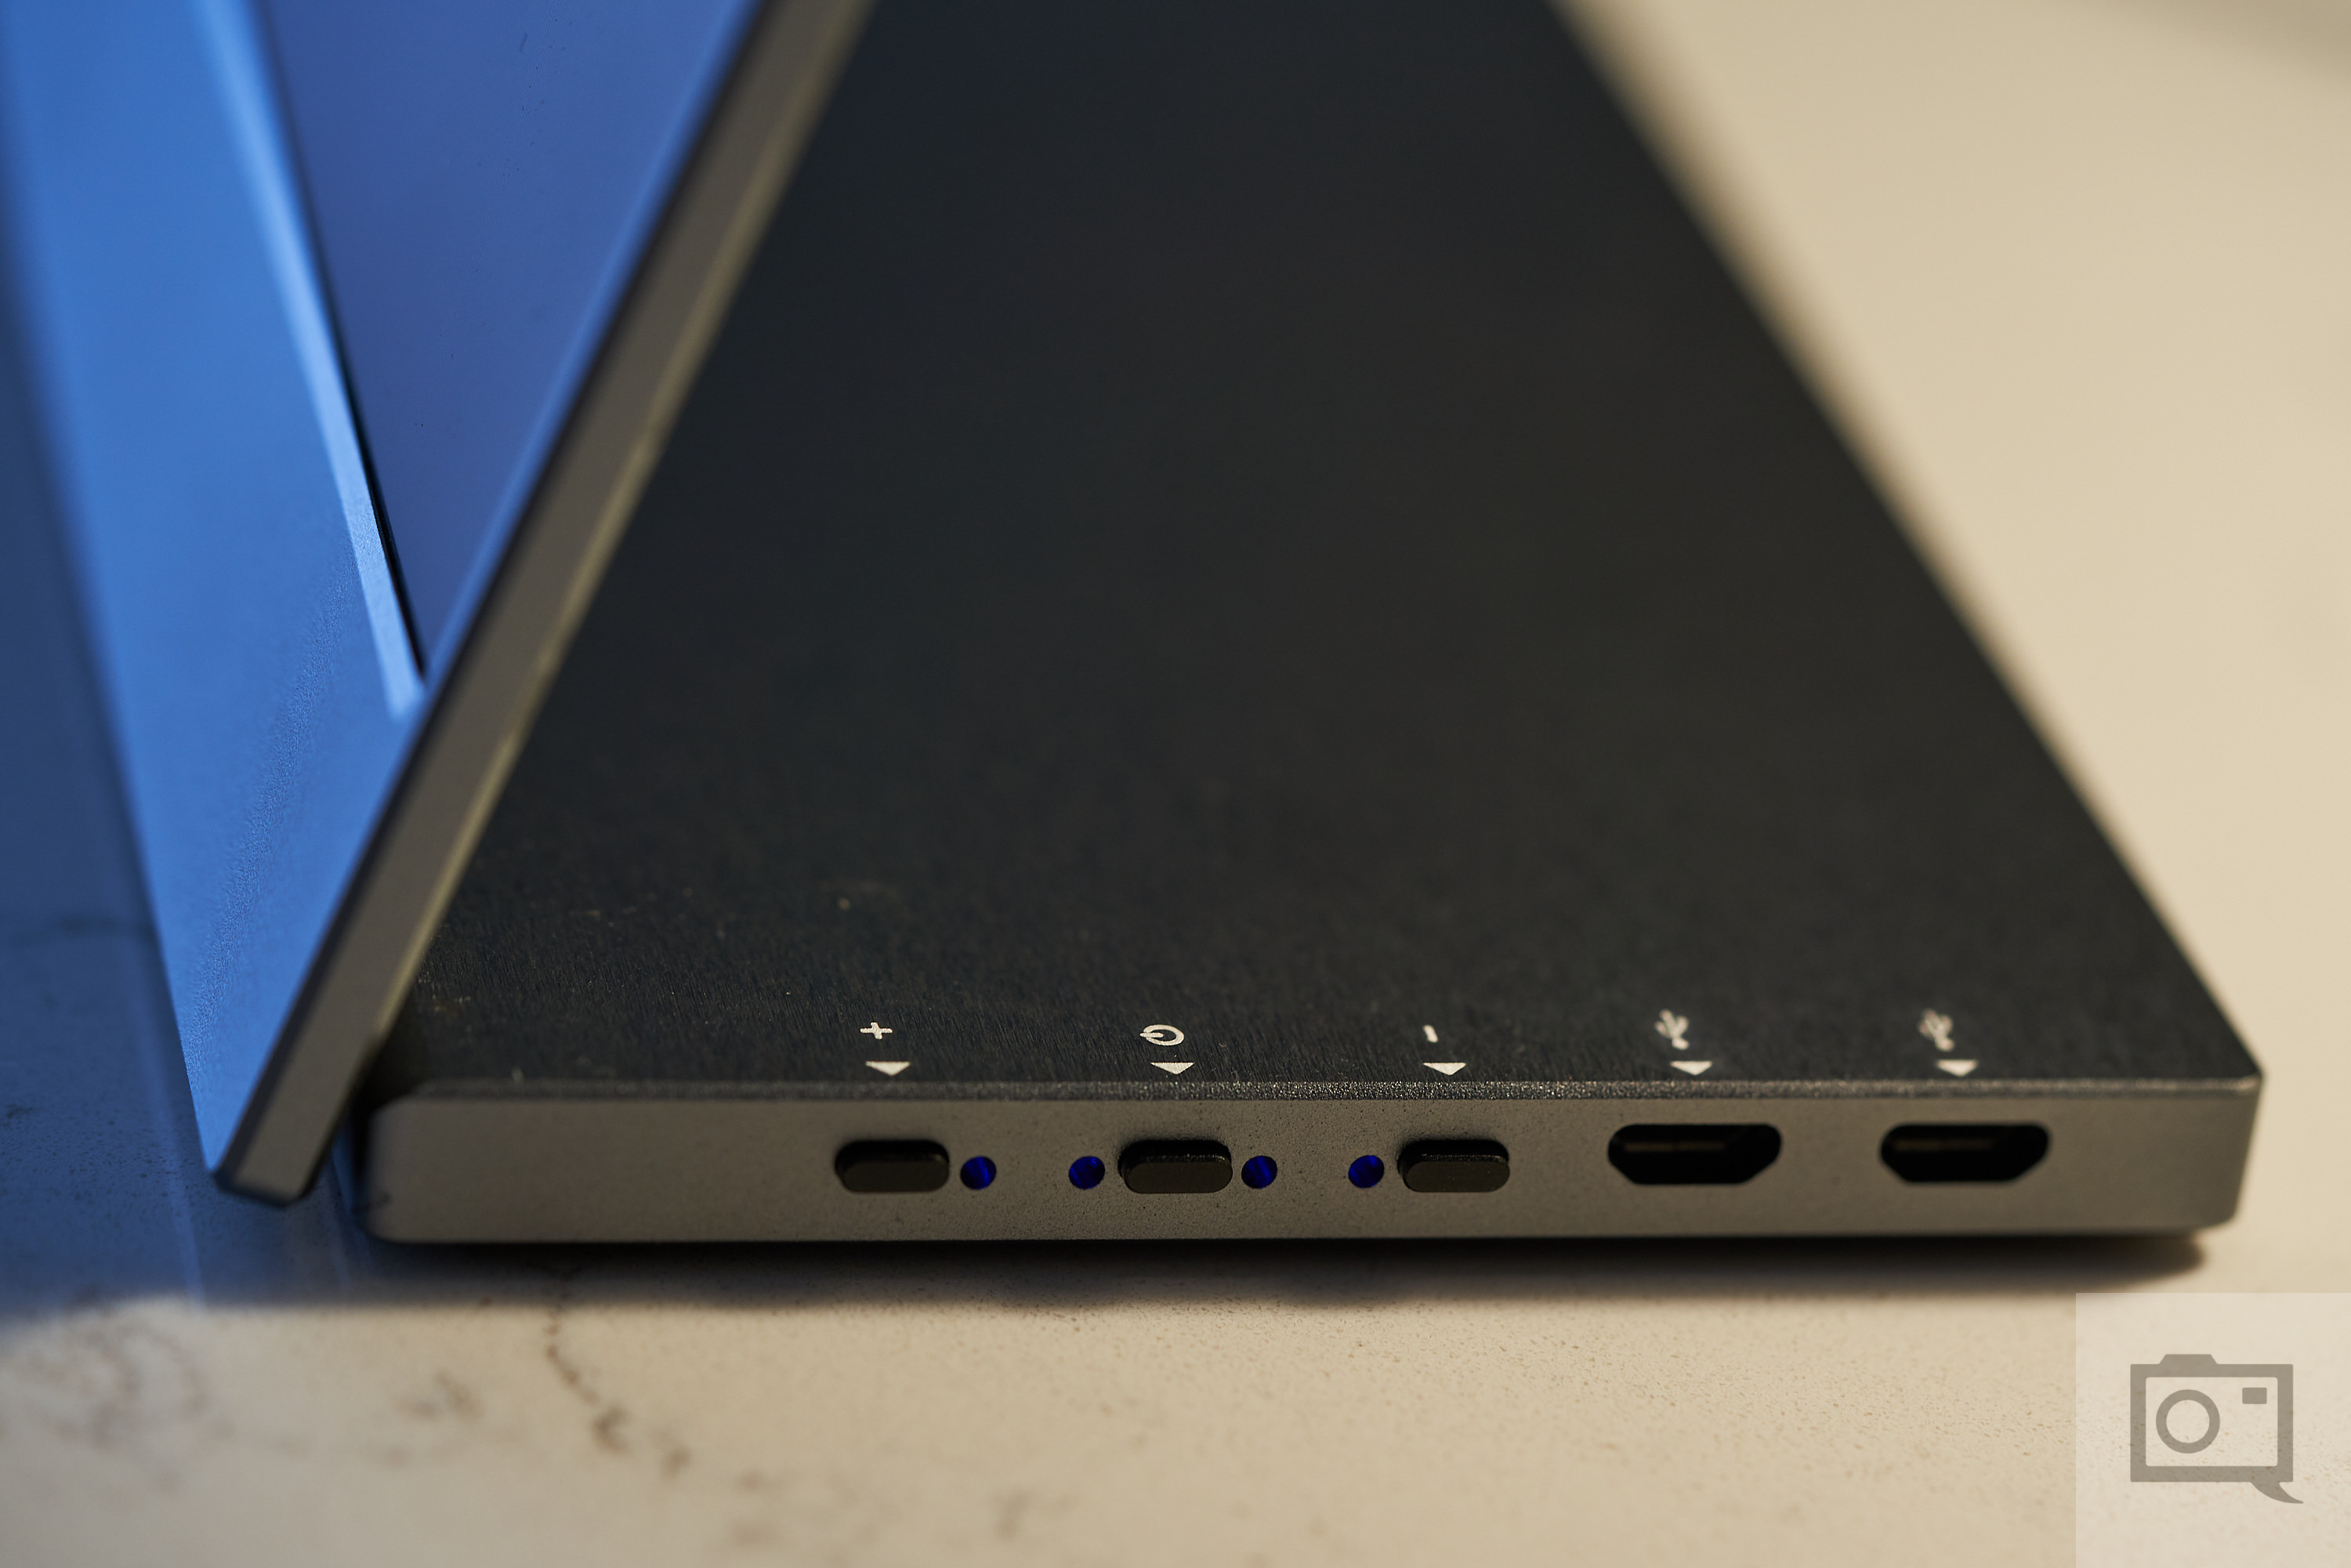
On the opposite side, you’ll find the power/menu button, a pair of adjustment (+/-) buttons, as well as two micro USB ports. Holding down the power/menu button turns the BladeX Pro on or off. While the display is on, pressing the power/menu button will bring up the on-screen display where you can make various adjustments. The + and – buttons are used to adjust the volume of the built-in speaker as well as to navigate the OSD menu. The implementation leans toward the clunky side, but thankfully you shouldn’t need to dive through the menus too often once you’ve calibrated the display to your liking. Odake included a pair of micro USB to female USB Type-A adapters with our review unit. If you’re connecting the BladeX Pro to your laptop via USB-C, these extra ports basically turn the base into a USB hub.

When not in use, you can fold up the Odake BladeX Pro for storage or transport. It’s very compact once folded and you shouldn’t have too much trouble fitting this inside most laptop sleeves.
Build Quality
Odake did an excellent job with the BladeX Pro’s industrial design to minimize the external monitor’s overall footprint. It’s reasonably lightweight as well for a 15.6″ external monitor. The housing around the display itself is just 4.5 mm thick, barely thicker than the panel itself. The bezels around the display (aside from the bottom one) are also barely noticeable. The overall compact form factor of the BladeX Pro makes it easy for on-the-go photographers to slip into camera bags or carry-on luggage.
“While Odake’s to be commended for designing such a compact external monitor, one tradeoff that we noticed was the monitor’s overall structural integrity.”
While Odake is to be commended for designing such a compact external monitor, one tradeoff that we noticed was the monitor’s overall structural integrity. Upon unboxing the monitor and inspecting its overall fit and finish, we noticed that the metal cover on the rear of the display was bulging away from the 4K panel. We also heard some things shifting around the base unit of the BladeX Pro, possibly the built-in rechargeable battery or one of the circuit boards. To be fair, the review sample of the BladeX Pro provided to us was a pre-production unit. It’s possible that final production models won’t exhibit these same issues. We reached out to Odake for comment, and they claimed that the problems were likely a result of damage sustained during shipping but shouldn’t affect the external display’s functionality. For what it’s worth, the BladeX Pro powered on without issue.
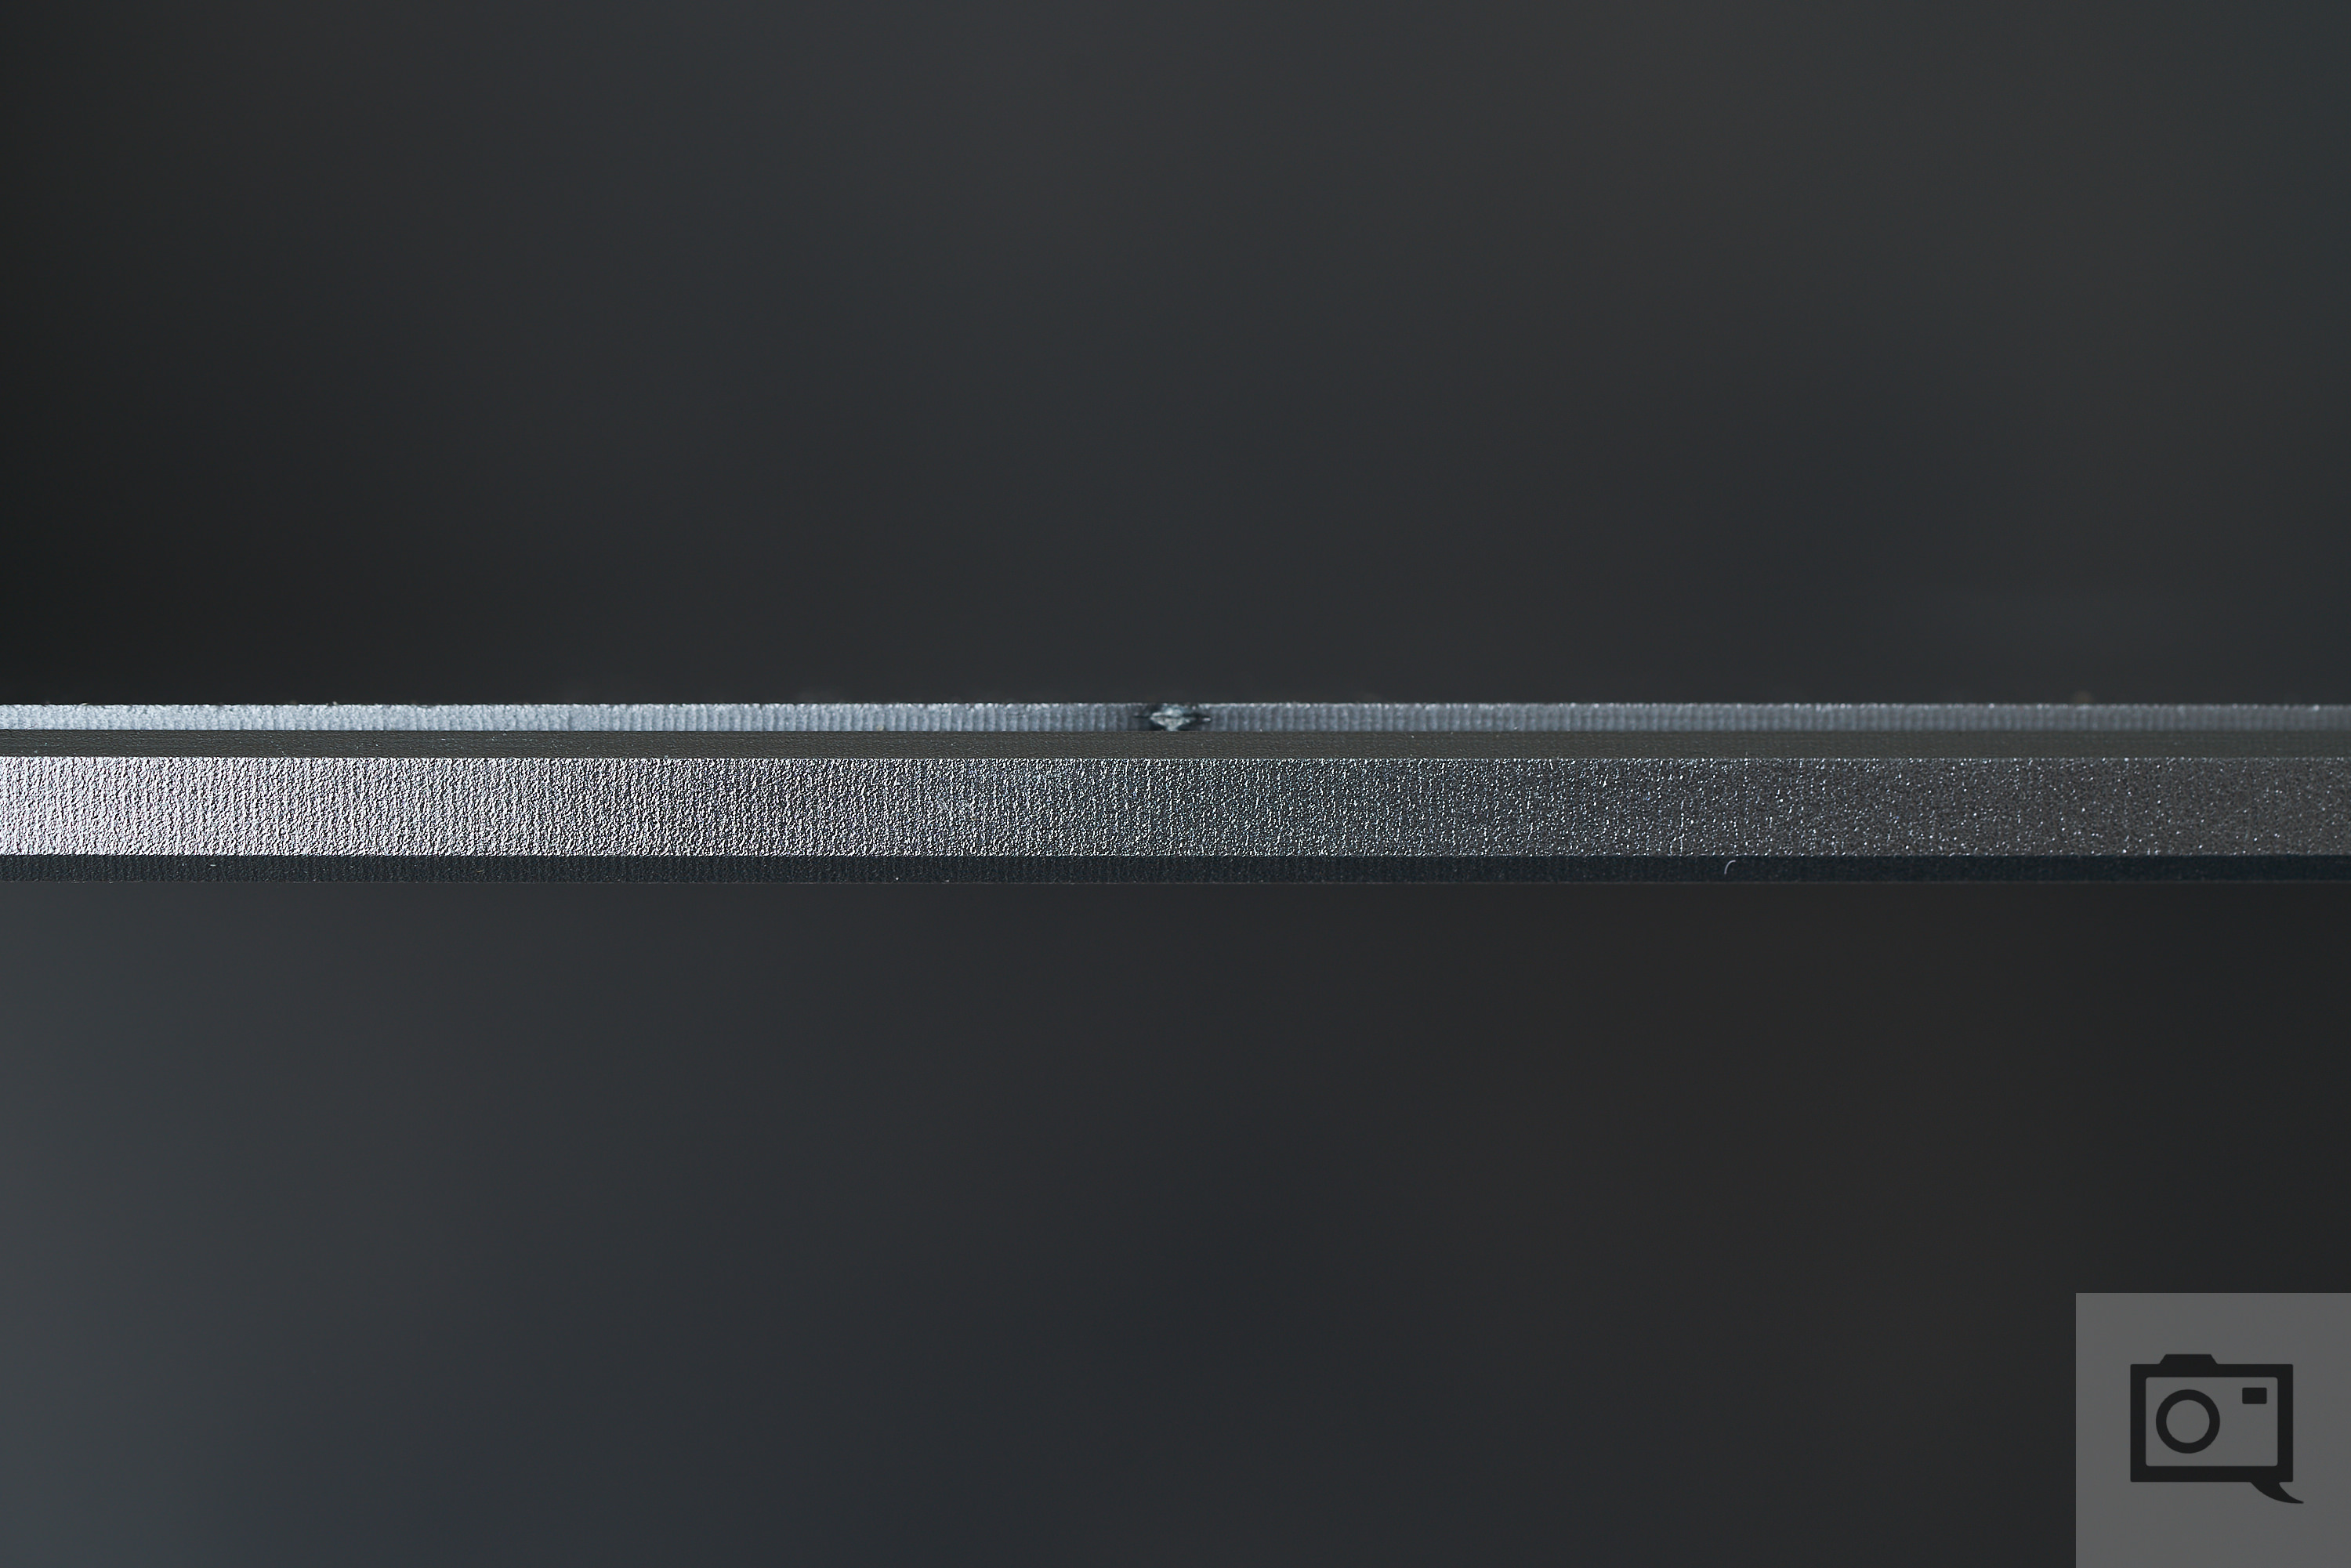
Here’s a closer look at how the rear cover is separated from the bezels around the BladeX Pro’s 4K display. It should be flush against the back rather than separated, exposing the side of the panel (the greyish part in between the metal parts in the above image). Throughout our time testing the BladeX Pro, we took it on a number of trips. We’re happy to report that the BladeX Pro is still running without issue after having been transported in messenger bags, camera backpacks, hard cases, etc. and on both carry-on and checked luggage.
Ease of Use
Getting the Odake BladeX Pro 4k external display up and running is a breeze. (Calibrating the display is another story, however, but we’ll come back to that in a bit.) The BladeX Pro is pretty much ready to go as soon as you unbox it. You can hook it up to your computer via HDMI or USB-C. If you’re opting for HDMI, then you’ll either have to first charge the BladeX Pro or connect the included USB-C charger at the same time. USB-C is the more convenient way to go, as you can power the BladeX Pro as well as send a video feed to it using just one cable. You’ll need to make sure your computer’s USB-C output supports power delivery of course. Odake claims that the battery in the BladeX Pro can run up to three hours, and our tests have shown similar results with the monitor running at its default settings. In addition to the USB-C wall wart, Odake included pretty much all of the cables you’ll need in the box. We’ve seen more premium brands skimp on those accessories, so it was nice to see Odake throwing them in with the BladeX Pro. They even included a remote control in the box with our review unit, but we never had a reason to use it. You can conceivably hook the BladeX Pro up to a game console or a mobile device that can output video via USB-C and use the monitor as an external TV of sorts: whatever floats your boat.

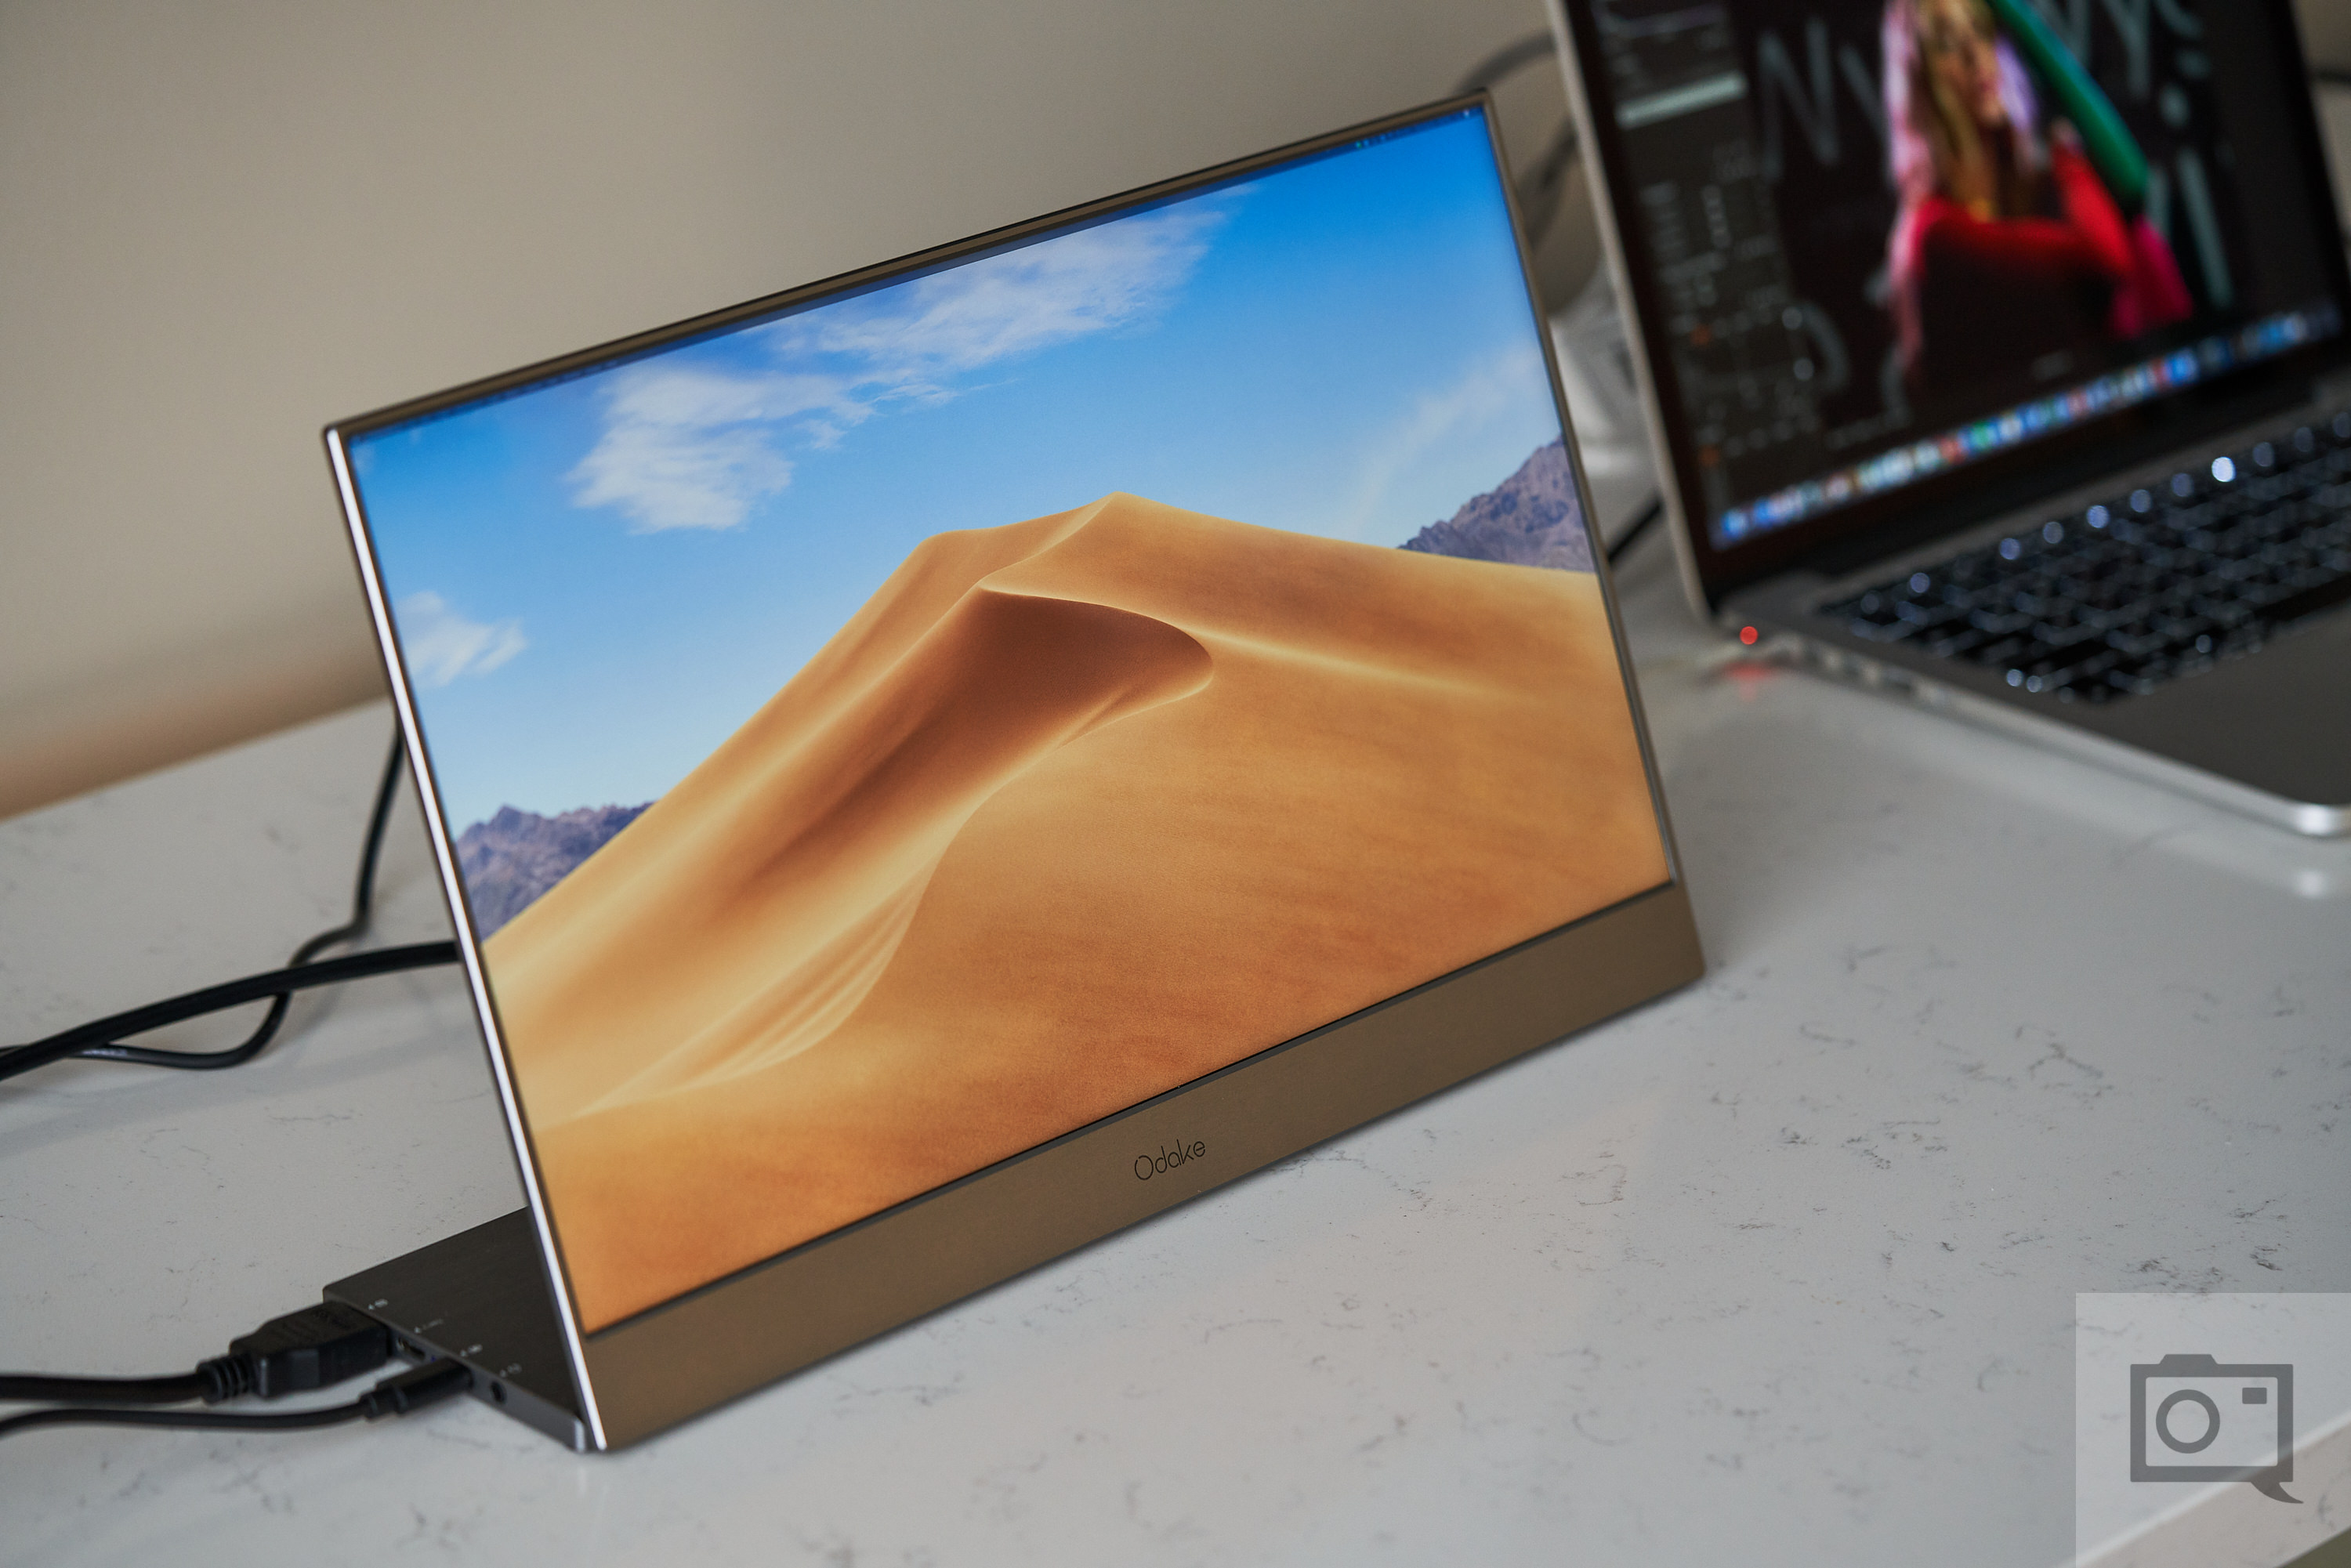
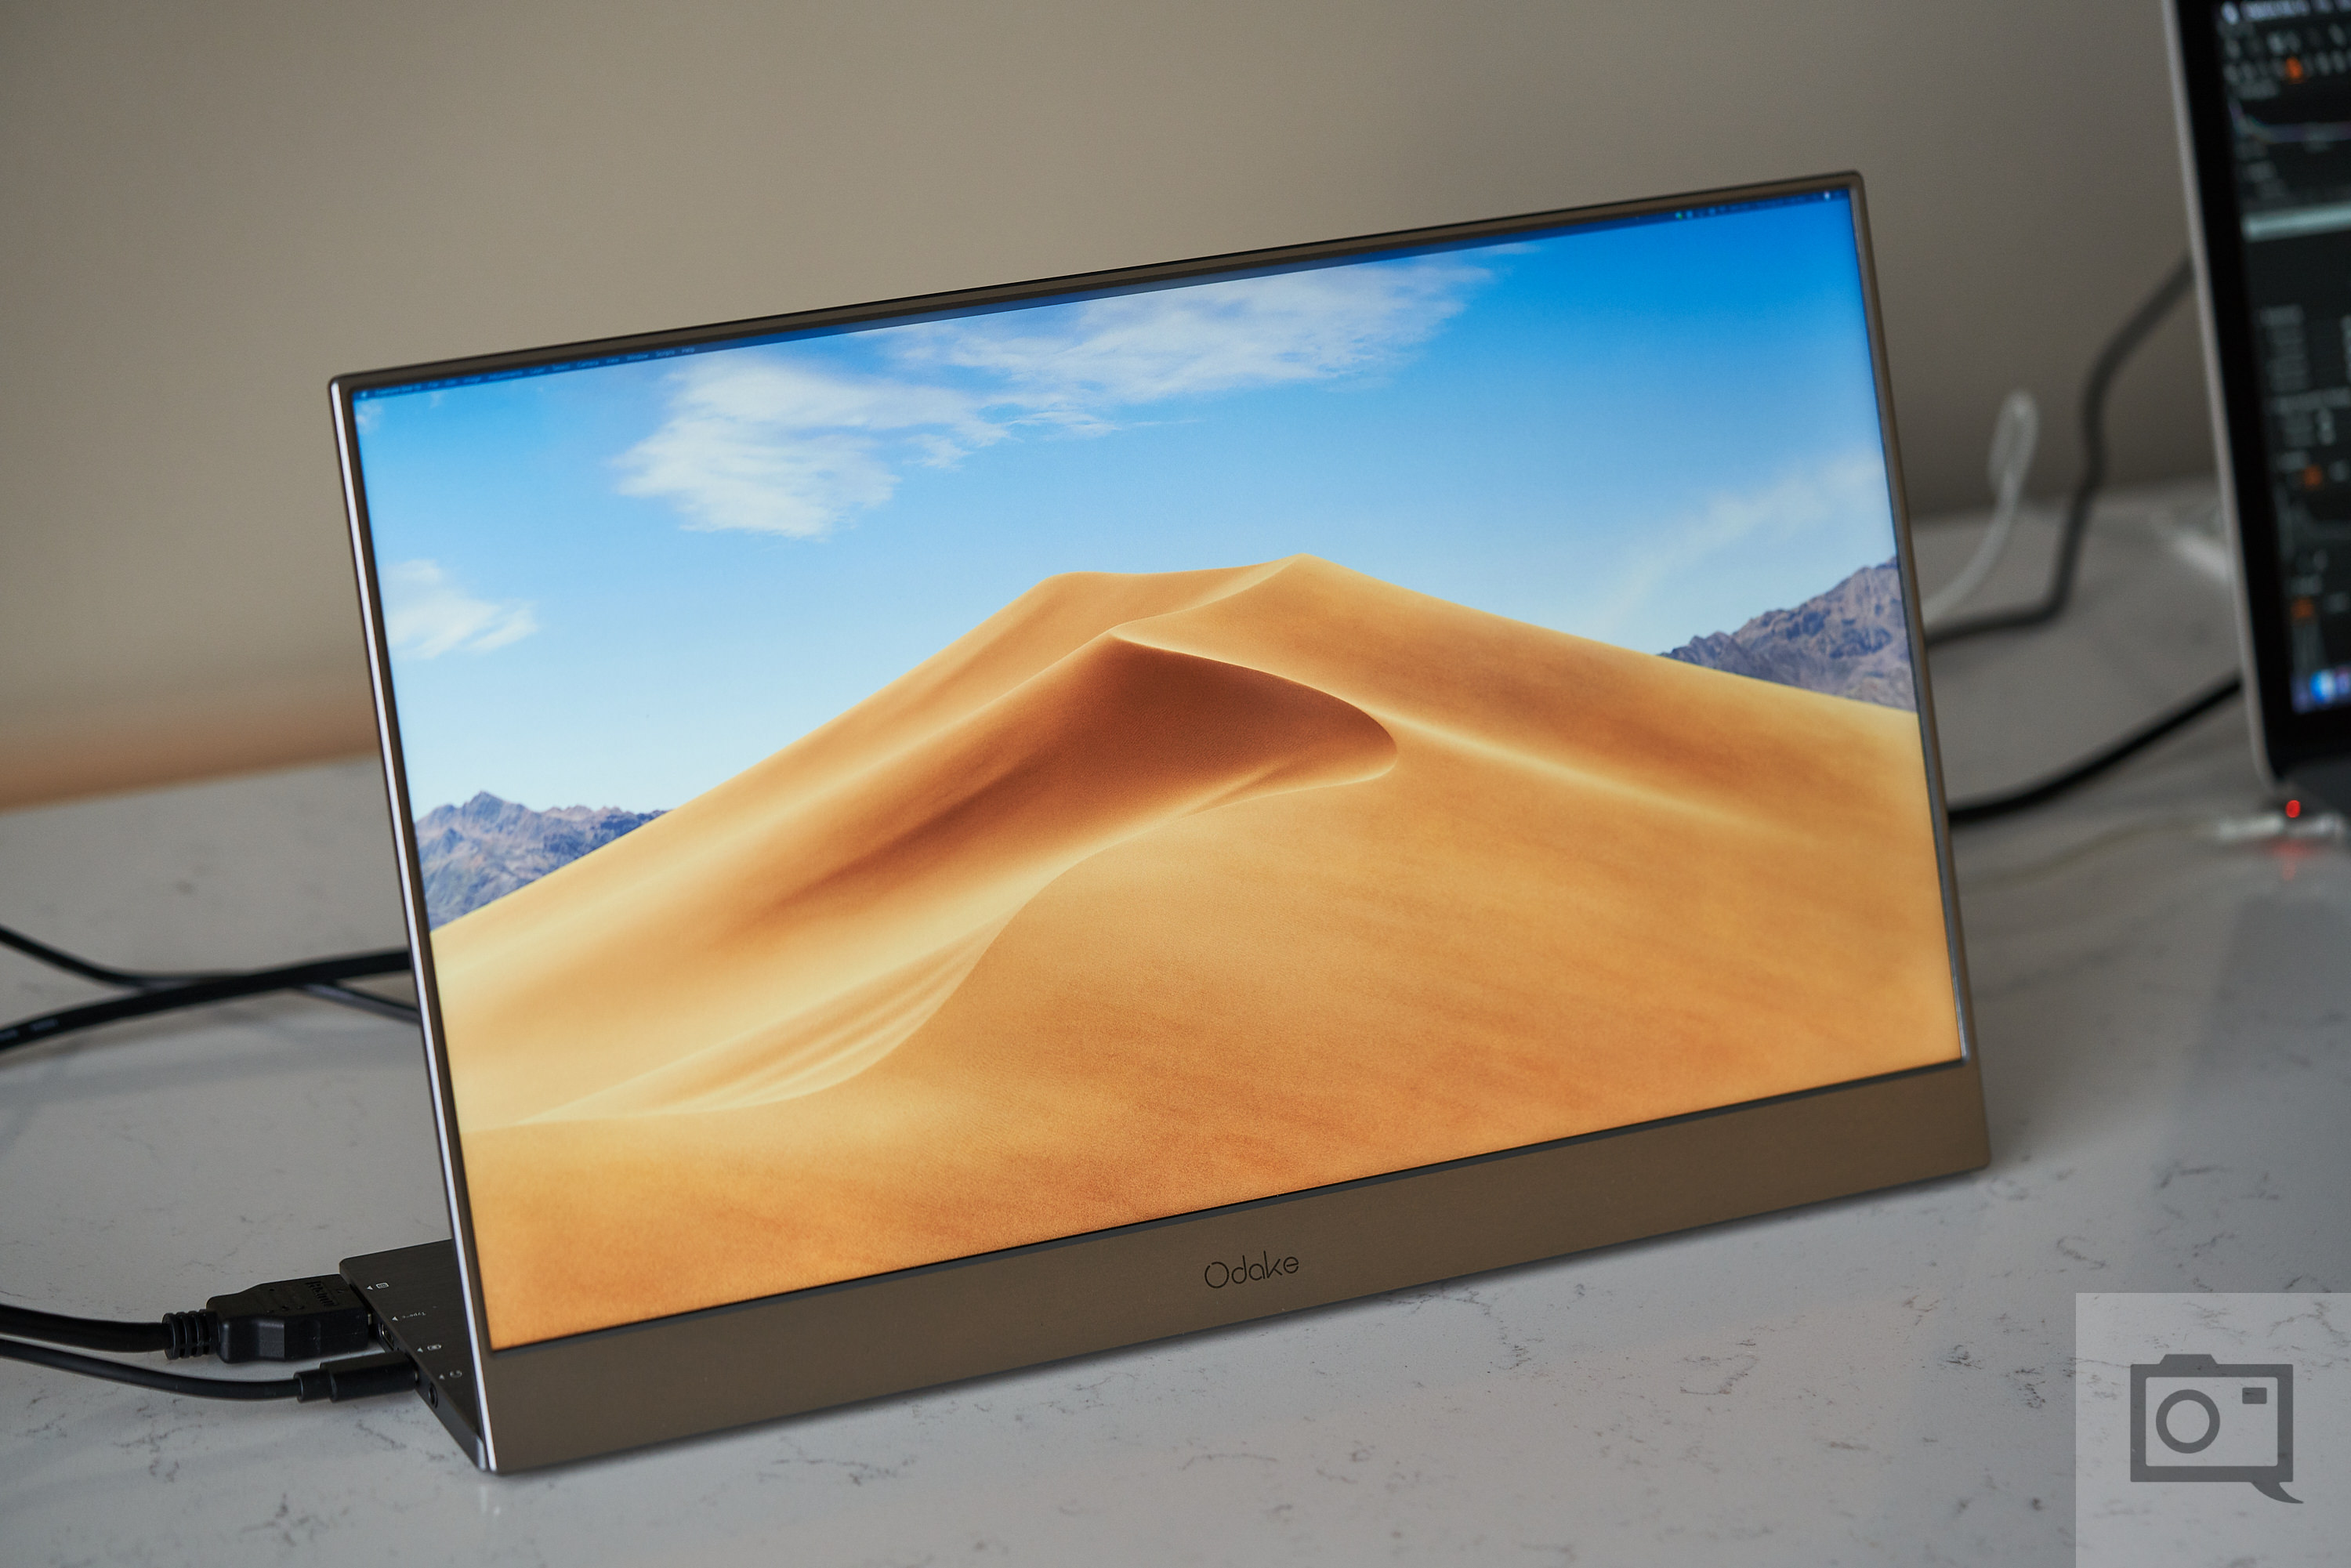
With the BladeX Pro connected to your laptop, you now have significantly more screen real estate at your disposal. Having an extra screen allows you to keep your raw editing software open in one monitor while your email inbox takes over the other. This is huge for multi-taskers. You can have multiple programs open at one time instead of switching between windows all the time. If you’re giving a presentation to a client, you can have your client look at the BladeX Pro while you’re looking at your laptop instead of both of you huddling around the same tiny screen. There are plenty of other use cases for the BladeX Pro: it all depends on your workflow.
“The difference between the two displays was jarring, to say the least. People used to contrasty, saturated displays found on most mobile devices may never notice unless they’re looking at the two displays side by side.”
Color Accuracy
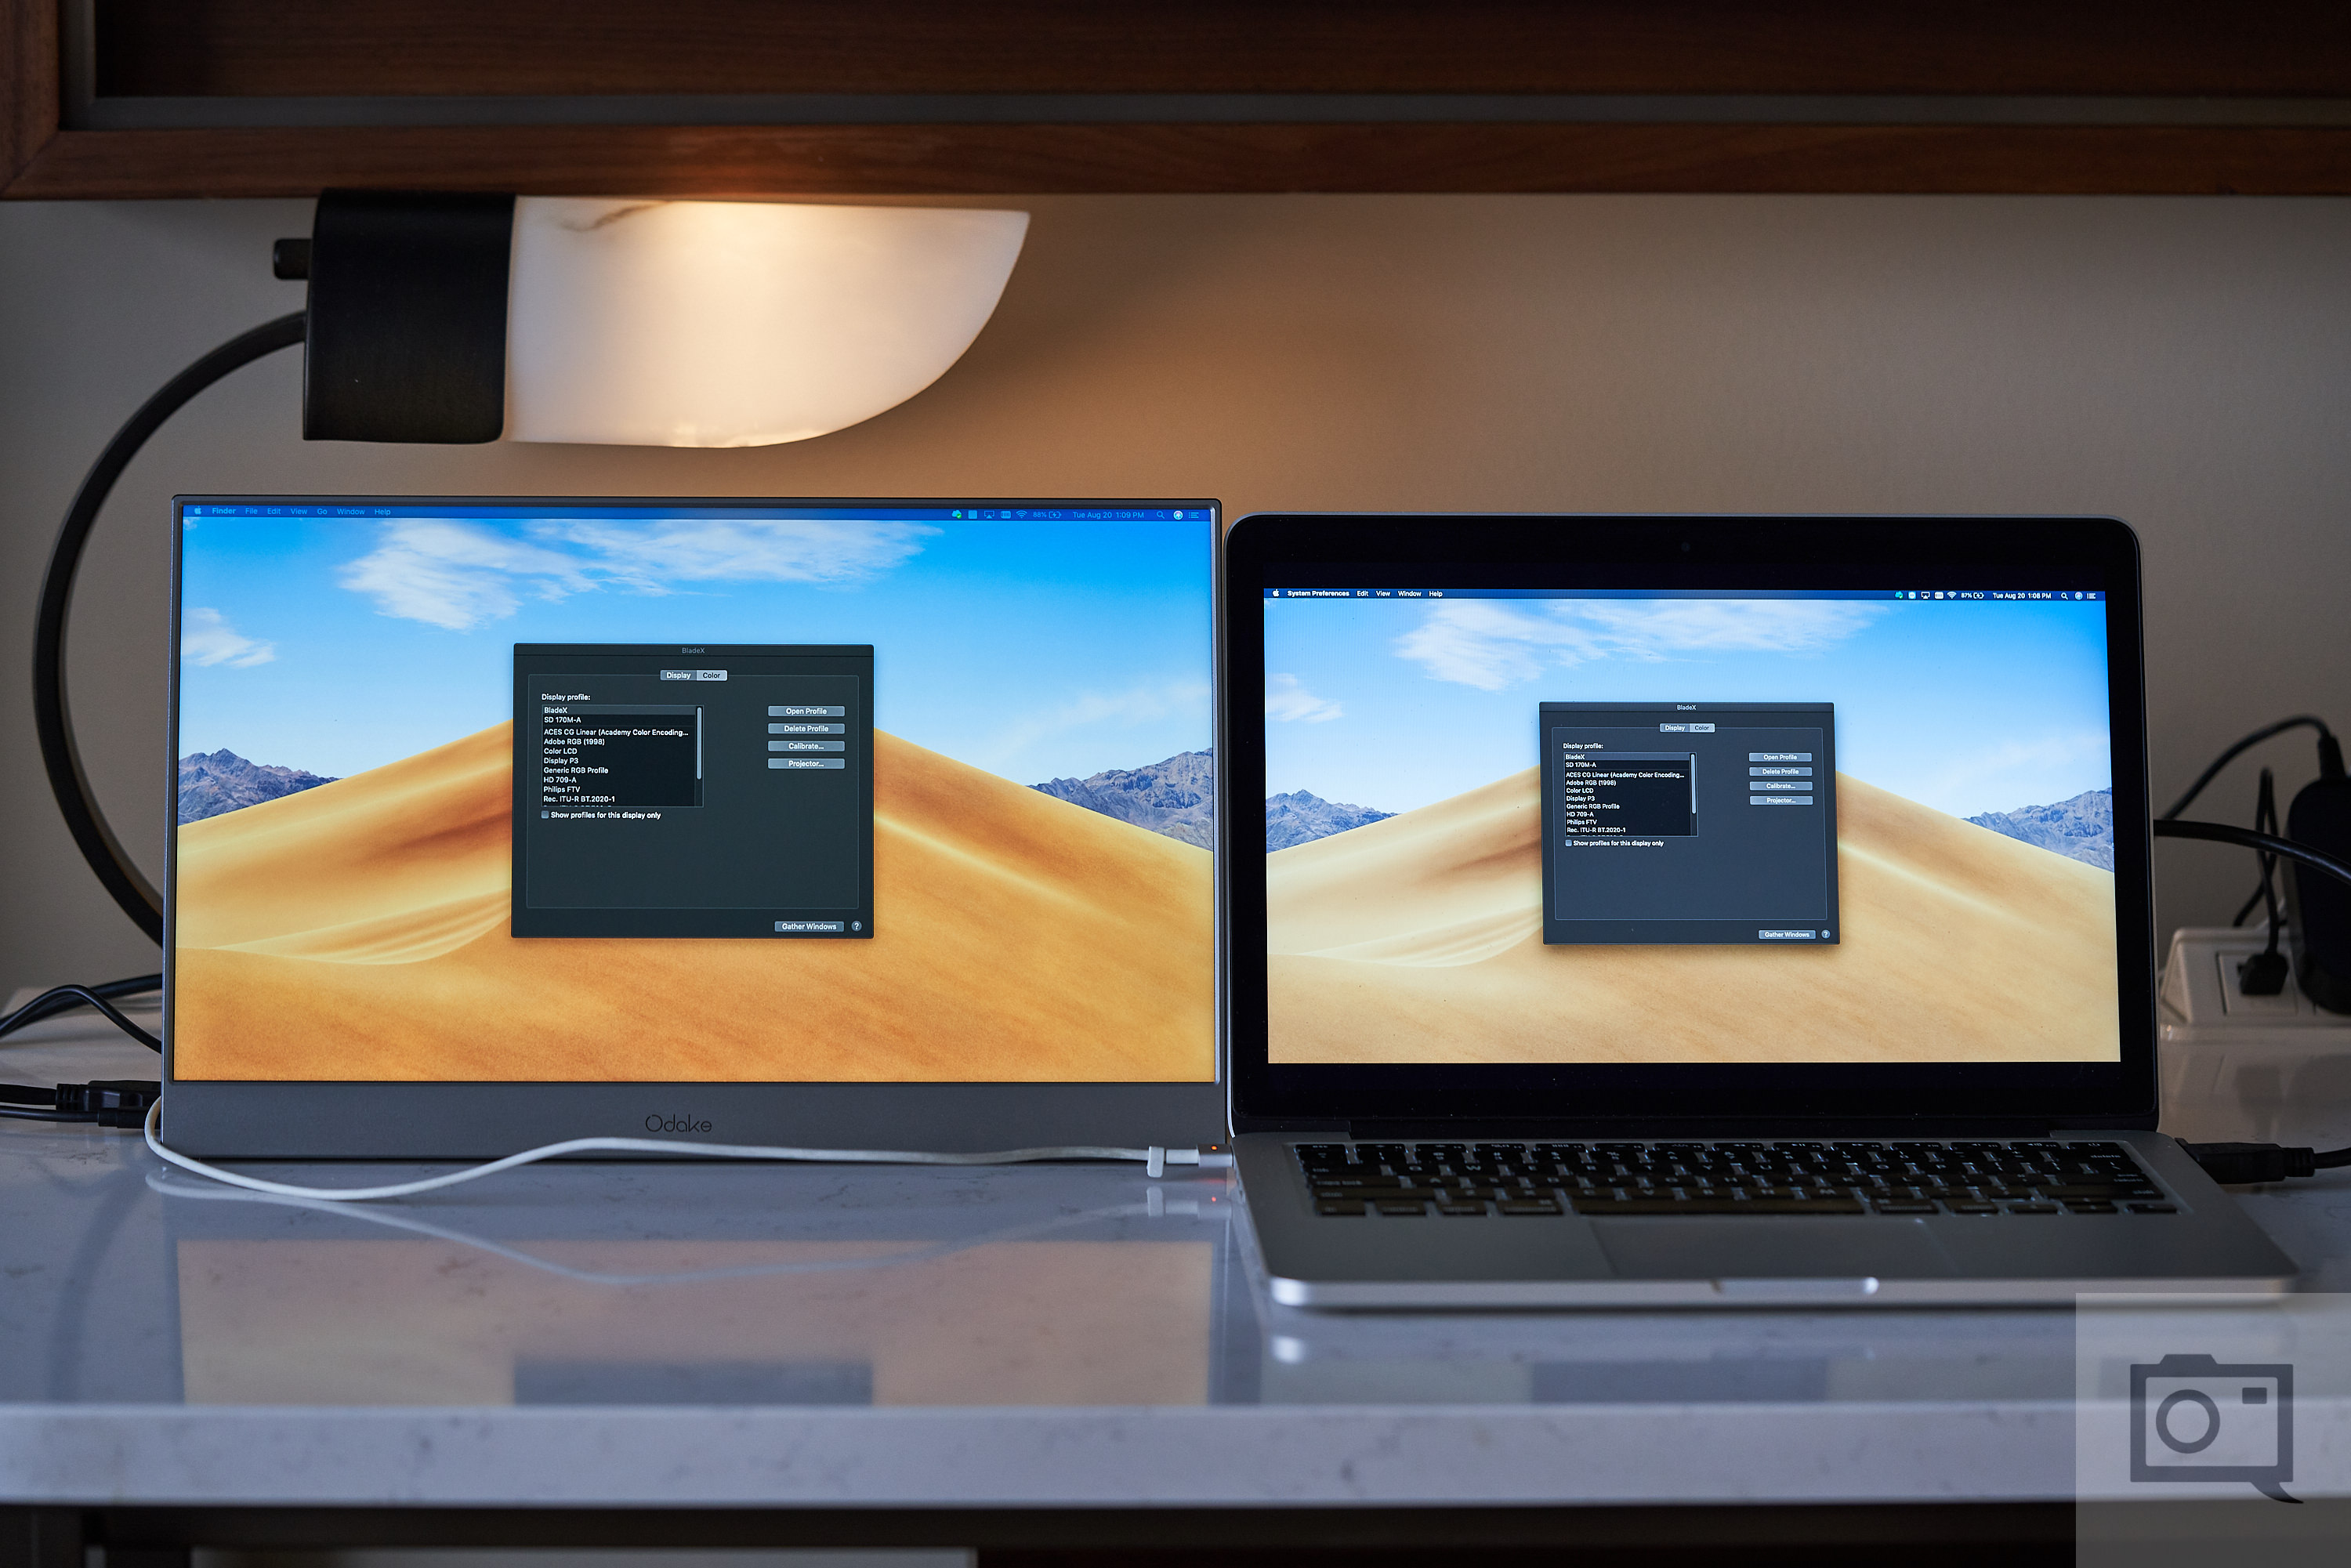
In terms of picture quality, the Odake BladeX Pro looks very contrasty and noticeably saturated out of the box. The above image shows the uncalibrated, out of the box Odake BladeX Pro side by side against a 13″ MacBook Pro (early 2015 model) equipped with a calibrated Retina display. The difference between the two displays was jarring, to say the least. People used to contrasty, saturated displays found on most mobile devices may never notice unless they’re looking at the two displays side by side. For us photographers, though, this presents a significant issue. Odake claims that the BladeX Pro’s 4K panel covers 100% of the Adobe RGB color space. We attempted to verify this using the same Datacolor SpyderX Elite colorimeter used to calibrate our MacBook Pro but ran into a bunch of errors trying to get the calibration software to run correctly. To be clear, these errors were only with this monitor–it works fine with our MacBook. You can adjust the panel’s brightness, contrast, color space, and other display settings using the BladeX Pro’s on-screen menu. It’s not going to be as precise as a proper calibration, but at least you can try to match it against another calibrated display.
Conclusions

Likes
- Lightweight
- Easy to transport
- Plenty of ports
- The matte display keeps glare to a minimum
Dislikes
- Build quality could stand to be improved
- The on-screen display’s menu looks like it came from a flatscreen monitor from the early 2000s
- Battery life could be longer
While we’ve seen a lot of useful and innovative products come out of Kickstarter and Indiegogo campaigns in the past, a fair share of them have been pretty disappointing. In the case of the Odake BladeX Pro, what we got was a promising product that ultimately didn’t quite fully stick the landing. The BladeX Pro lives up to the promise of being a lightweight and thin 15.6″ portable 4K monitor. However, its inconsistent build quality and questionable color profile keep it from being an outstanding product. While we can chalk up the build quality issue to pre-production woes, we’re still hesitant to recommend it to photographers. If you’re a photographer who works with color-critical workflows, this is definitely not the external display for you. If you can cope with the odd colors though, the added screen real estate certainly makes edit images from a laptop easier. As of last month, the BladeX Pro’s Indiegogo campaign was fully funded, and Odake is slated to begin production shortly. Time will tell if Odake can address these issues with their final product.

The Odake BladeX Pro Portable External 4K Monitor earns Three out of Five Stars.
Get rid of the ads!
Did you enjoy reading this article as much as we enjoyed writing it? There's a way to support us and our reporting, getting ad-free navigation and more as a bonus. Subscribe to us for less than a coffee per month —just $3.99— or take advantage of our yearly subscription with a hefty discount for only $25.- An ad-free experience
- A free mystery box for Lightroom or Capture One
- All the books in our store
- 20% discount on Capture One
- 30% discount on Imalume Photo Theft Protection
- 20% off Herbs and Kettle Tea Company.
- 20% off your order from MPIX printing services.
- 5% off Viltrox Products via their eCommerce store.
- 10% off all film developing, printing and scanning services from Blue Moon Camera and Machine
- 15% off 7Artisans products: The lens and accessory maker is offering a sweet discount for Phoblographer's readers.