
Last Updated on 05/29/2019 by Chris Gampat
Photographers like Galen Weld show us how determination and getting crafty can get us our dream cameras — like a DIY 35mm panoramic camera!
Move over, Hasselblad XPan. You’ve got some cool competitors out there now, courtesy of the highly resourceful and creative film photographer. They show us that if we can’t get our hands on a coveted camera like the Xpan, there’s nothing stopping us from making our own instead. That is if we can get even half as crafty and clever as Seattle-based Galen Weld, who has recently shared his progress on building his own DIY 35mm panoramic camera. If you’re interested in making your own assembly he’s even got the stuff to get you started!
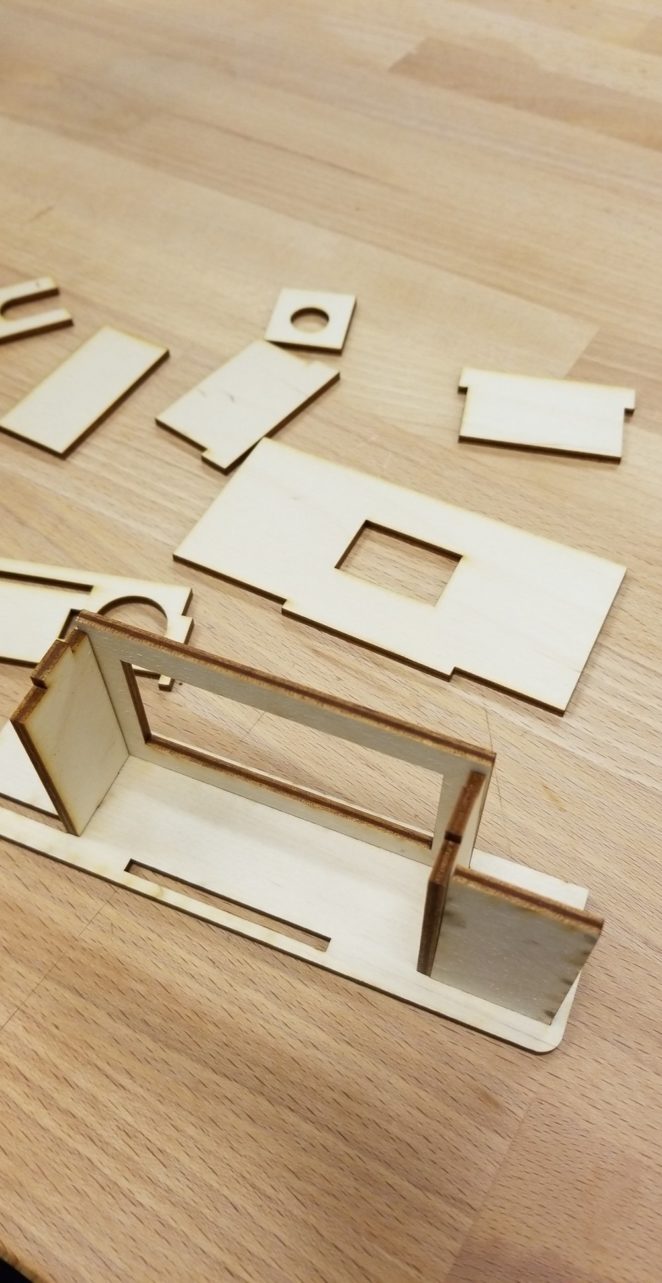
We have nothing but serious respect for photographers to build their own cameras, as there’s certainly nothing easy about designing, building, and assembling all the parts of a working DIY camera. Building on the fact that the most basic camera is essentially a light-tight box that takes in film or photosensitive medium and has a lens attached to it, they put their design skills to work to fashion their own version using their material of choice. For Galen, it’s laser-cut wood, as he prefers the feel of wood over 3D printed plastic.
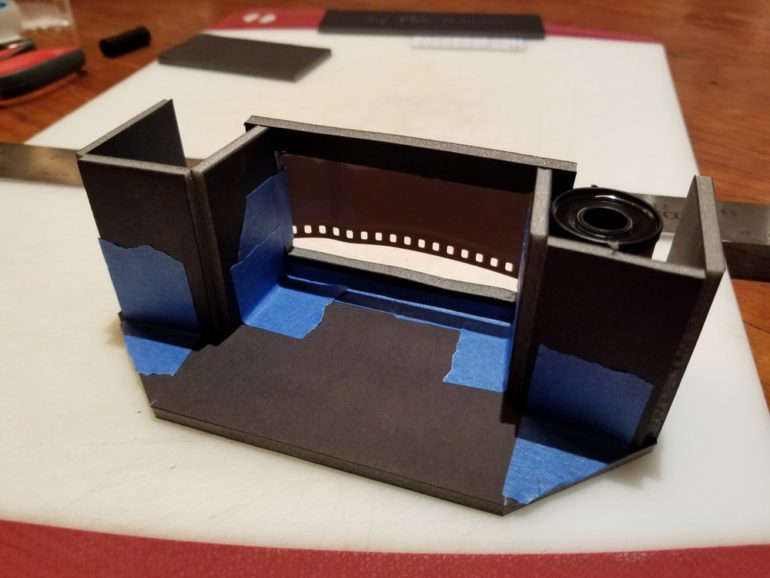
For his panoramic camera, Galen designed the front part to accommodate a Fujinon f5.6 large format lens. He made the lens board with a standard Copal #00 shutter hole. It bolts on to the front of the camera through threaded nuts embedded within a few layers of plywood on the lens box. For the compact ground glass, he sanded a small sheet of clear plastic, which he can place where the film sits and adjust the focus using a loupe. For this latest working version, he has set the focus to around 15 meters and stop down to get infinity focus.
He went with a simple design for the entire camera, which he described as “essentially just attaching a hollow box to the front of the camera, and extending some of the existing vertical pieces for greater structural integrity.” The back was designed to fit around the added structure, with some rounded light seals above and below the back area to help with the light-tightness. Once the cut parts were assembled, he put more wood glue on the inside corners with Q-tips, using a flashlight to check for light-tightness. Then, he painted the inside with matte black spray paint, put felt and foam light seals at the back, and glued black yarn along the seams. He used lengths of dowel for the rewind and take-up spools, then placed a 1/4-20 nut on the bottom for a tripod mount.
His first test shots below are still pretty impressive even with some light leaks, which he gathered came from the gaps around the lens box. Dealing with this problem, he tells us in detail, has been the most challenging bit of the whole project so far.


“The most challenging part has been debugging the light leaks. Everything else has been super super fun – tinkering with foam to make the design, mocking it up in CAD, laser cutting, assembly, woodworking, painting, and blogging about the whole thing! The light leaks are the only part that’s been a pain. It’s really time consuming to shoot a test roll, and develop it yourself, then wait it for it to dry, and then poring over the film on a light table, trying to figure out where the film was in the camera and where the light leaks are. It’s challenging, but also absolutely worth it! Once the light leaks are fixed, there’s nothing better than pulling a roll of film off the developing spool and seeing that the camera actually worked!”
Aside from finally finding a permanent solution to the light leaks problem, Galen also shared with us that he has a lot of improvements in store for his DIY 35mm panoramic camera.
“Since I wrote the blog post, I’ve made a leather wraparound case for the camera, that in addition to looking nice and being more pleasant to hold, hopefully (haven’t tested it yet) will help provide an extra barrier against light leaks. Beyond this, the biggest priority is adding a viewfinder – right now it’s kinda difficult to compose by aiming and guessing! I’ve purchased a old external optical viewfinder with a 35mm-equivalent FOV from an old film camera, and am in the process of designing a mount for that to attach it to the rest of the camera. Once it’s mounted, I’ll mask off the top and bottom of the ‘finder so it matches the aspect ratio of the camera itself. After that, it’ll be adding polish – attaching easier-to-grip knobs to the film wind and rewind mechanism, sanding and staining the wood on the camera, and finding a nice way to permanently mount the shutter release.
“Down the road, I’d like to design a new version from the ground-up with more easily adjustable focus.”
Good job, Galen, and we’re going to keep an eye on your project’s progress!
Make sure to follow Galen Weld’s updates on his blog, Instagram, and also on this Reddit thread, if you like. Oh, and he has also put up the CAD files and instructions for those who want to try building their own panoramic camera.
All photos used with permission from Galen Weld
Get rid of the ads!
Did you enjoy reading this article as much as we enjoyed writing it? There's a way to support us and our reporting, getting ad-free navigation and more as a bonus. Subscribe to us for less than a coffee per month —just $3.99— or take advantage of our yearly subscription with a hefty discount for only $25.- An ad-free experience
- A free mystery box for Lightroom or Capture One
- All the books in our store
- 20% discount on Capture One
- 30% discount on Imalume Photo Theft Protection
- 20% off Herbs and Kettle Tea Company.
- 20% off your order from MPIX printing services.