
Last Updated on 10/22/2018 by Mark Beckenbach
Loupedeck+ promises to make photo editing faster and more intuitive.
For many professional photographers, post processing is an integral part of their workflow. While I prefer to get as much done in camera as possible, knowing what I’m able to pull out of my RAW files during post production has allowed me to shoot under some less than ideal situations and still produce deliverable work to clients. This doesn’t mean I necessarily enjoy sitting in front of my computer working in Adobe Lightroom Classic CC or Capture One any more than I have to. Given the choice, I’d rather be out and about clicking my shutter rather than clicking away on my keyboard or dragging sliders around with my mouse. This is where the Loupedeck+ comes in, with the promise of cutting down editing time and making the process more intuitive.
Loupedeck’s original photo editing console was first crowdfunded on Indiegogo back in 2016. Taking user feedback on the original Loupedeck into account, they’ve now released the upgraded Loupedeck+. Think of Loupedeck+ as a DJ’s mixing table, but designed with photographers and photo editors in mind, helping to speed up their post processing workflow.
Pros and Cons
Pros
- Improved build quality compared to the first generation Loupedeck
- Mechanical keys provide much better tactile feedback
- Significantly more customizable than the original
Cons
- Lacks basic tilt adjustments
- No wireless connectivity option and cable is non-removable
- Pricey (MSRP: US $229)
Gear Used
We tested the Loupedeck+ with a 13 inch MacBook Pro with Retina Display (Early 2015 Model), custom built PC running Windows 10 Pro version 1803, and the latest release of Adobe Lightroom Classic CC for both Mac & PC.
Video provided by Loupedeck
Tech Specs
Specs taken from Loupedeck+’s Adorama listing
Supported Software
Adobe Lightroom 7.4 or later, Skylum Aurora HDR, Beta integration with Capture One (additional photo editing software compatibility under development)
Supported Operating System
Windows 10, 8.1, or 7
macOS 10.12 or later
Network Connectivity
A network connection is needed for Loupedeck software downloads
USB Cable
USB 2.0 Type-A (integrated)
Dimensions
15.6 x 6.0 x 1.6″ (39.62 x 15.24 x 4.06cm)
Weight
1.48 lbs (0.67kg)
Ergonomics

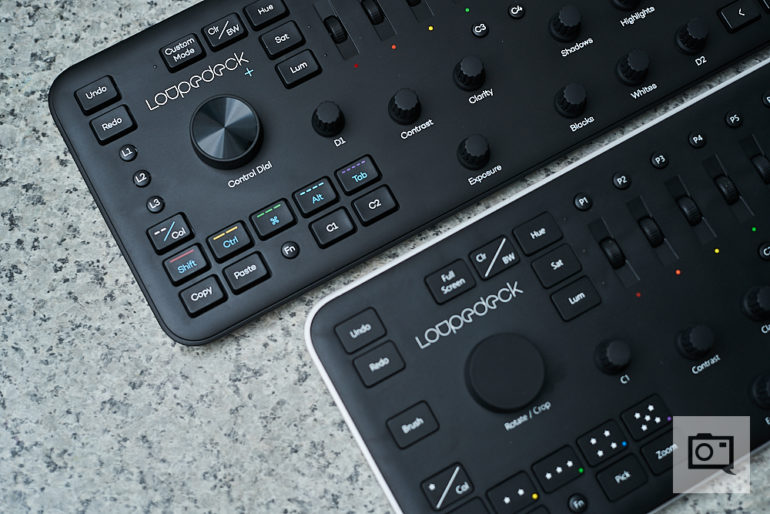
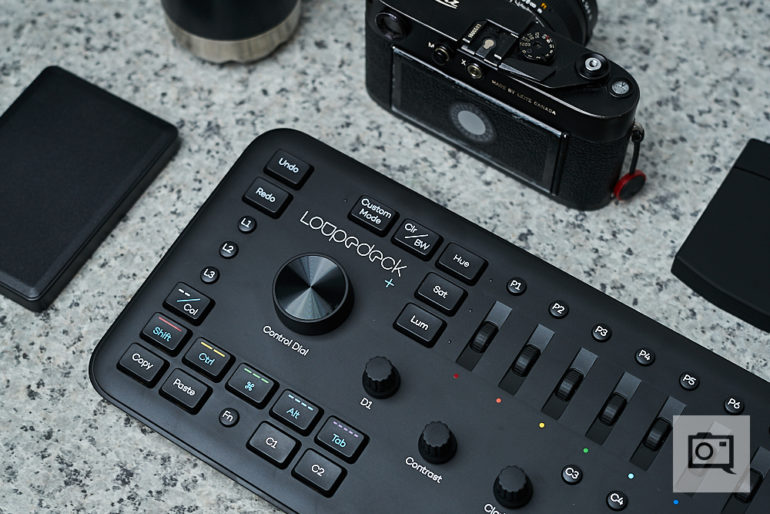
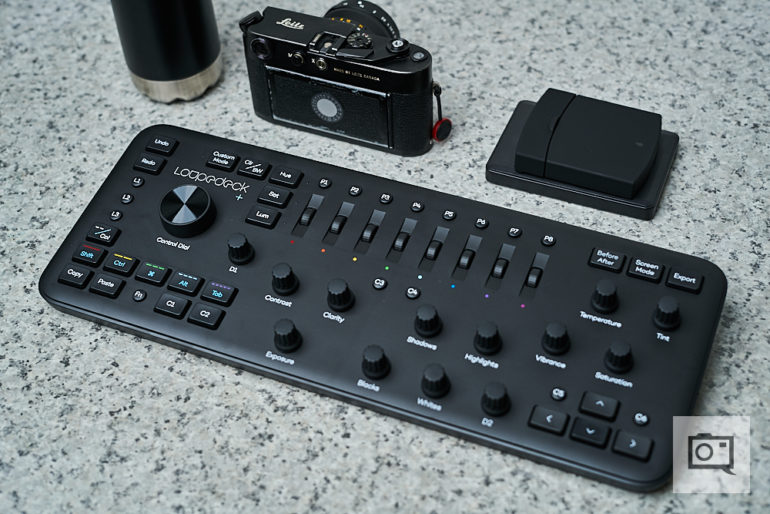
At first glance, the layout on the Loupedeck+ looks almost identical to the original Loupedeck, the most noticeable difference being the silver colored plastic housing from the original has been replaced with a flat black one in the Loupedeck+. I personally quite prefer the stealthiness of the new housing, and it makes the Loupedeck+ appear smaller as well. Another major difference that you’ll likely notice on the Loupedeck+ right away is the upgraded Control Dial, which features a machined metal top plate compared to the original which was all soft touch plastic. While the new Control Dial felt pretty much identical as the one from the original Loupedeck in terms of tactile feel, the visual upgrade definitely made the Loupedeck+ look like a much more premium product.
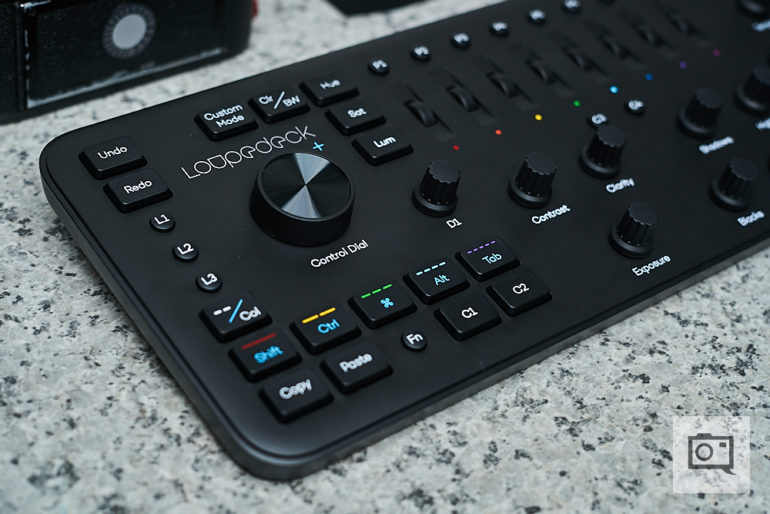
The Hue, Saturation, and Luminance selection keys to the upper right of the Control Dial remain unchanged in the Loupedeck+, with the same white LEDs indicating which mode is currently selected. The eight color coded scroll wheels used to adjust Hue, Saturation, and Luminance, along with the eight user configurable Preset buttons can be found in the same area along the top middle of the Loupedeck+ as well.
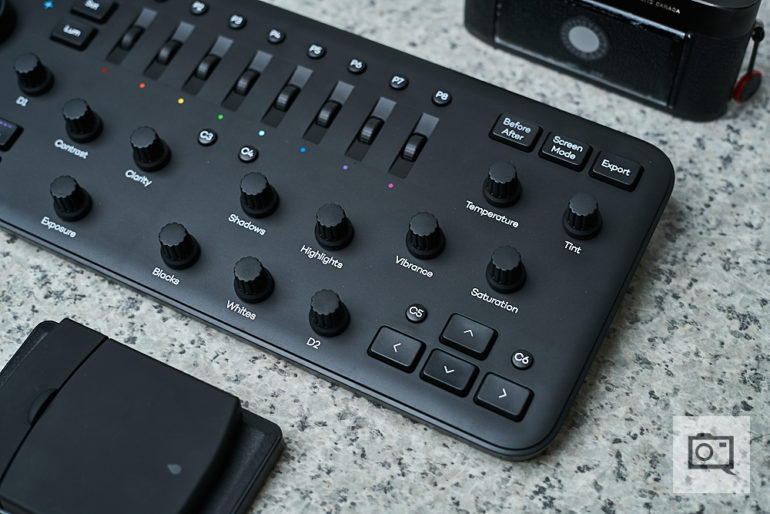
There are other layouts changes on the Loupedeck+ as well. The Brush button that was on the left side of the original Loupedeck has been replaced with three circle buttons (L1, L2, and L3) on the Loupedeck+, assigned to the Adjustment Brush, Radial Filter, and Graduated Filter by default. The Pick button is now the C1 button, but functionality remains the same. The left zoom button is now the C2 button, and is assigned to flag the selected image in Lightroom as rejected or not by default. The right zoom button from the original Loupedeck has been replaced with a customizable dial, which on the Loupedeck+ is assigned to adjusting the Sharpness amount by default. The Zoom functionality now defaults to the C5 button on the Loupedeck+. The Full Screen button on the original Loupedeck is now the Custom Mode key, which allows users to assign additional functionality to the dials on the Loupedeck+ (excluding the Control Dial and the D1 and D2 dials). The Screen Mode button replaces the original Full Screen button, but is functionally identical, and has been migrated over to the right of the console between the Before/After and Export keys.
Build Quality
The keys on the original Loupedeck always felt very mushy, with a tactile feel that’s reminiscent of cheap crappy keyboards that came bundled with computers you’d see on display at brick and mortar electronics stores. As someone who uses a mechanical keyboard on a daily basis, I was relieved to learn that the Loupedeck+ utilizes mechanical keys. The tactile feedback from the new keys on the Loupedeck+ is immediate, and make for a much more satisfying user experience. The Loupedeck+ overall felt more solid when compared to the original, with noticeably less flex in the housing.
The included USB 2.0 cable is just over four feet long, which should be long enough for most users to connect to their computers. Given the Loupedeck+’s price tag, however, I was disappointed that the upgraded unit didn’t feature a removable cable or wireless connectivity. If the cable somehow got crimped or if you’re got pets running around that love chewing on cables, you’re going to have a bad time. Like the original Loupedeck, the Loupedeck+ still lack any sort of tilt adjustments, something that almost every standalone keyboard made since the 1980’s have incorporated. For a device that’s so design focused, the continued omission of any tilt adjustments feels like an egregious oversight.
Ease of Use
Setting up the Loupedeck+ is a pretty painless process. Download the latest version of the setup software from Loupedeck’s website for the operating system of your choice, install the Loupedeck Setup program, plug in the Loupedeck+ into an available USB 2.0 port on your computer and you’re off to the races. You’ll also be able to customize the functionality of a lot of the buttons and dials using the Loupedeck Setup software, if you so desire.
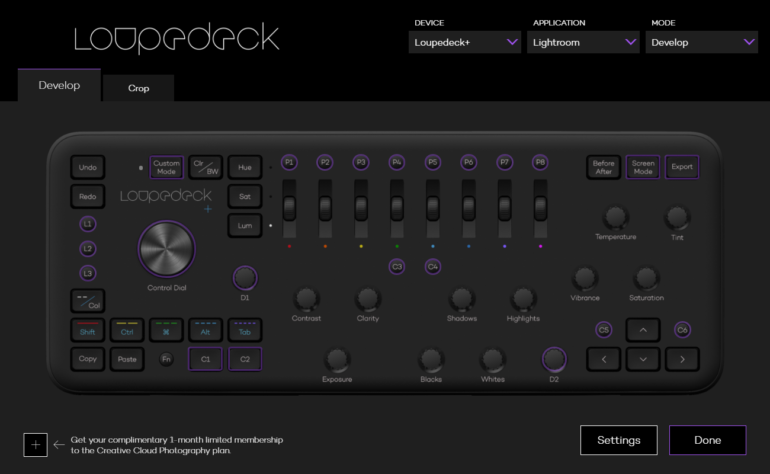
Customization options available for Loupedeck+
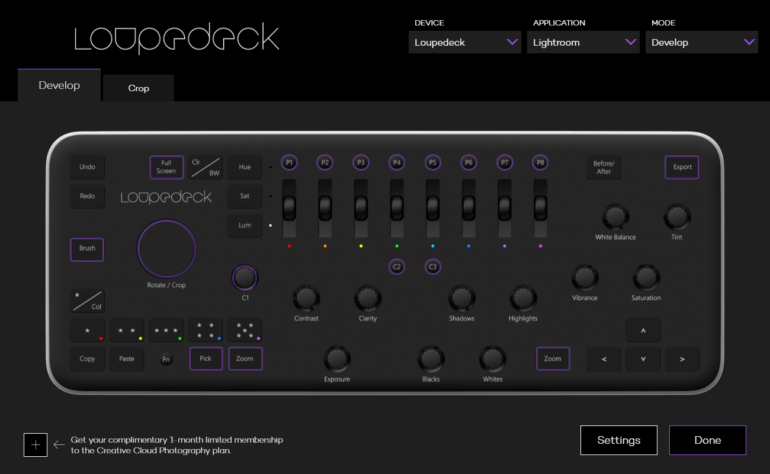
Customization options available for original Loupedeck
In addition to Adobe Lightroom Classic CC, Loupedeck+ also supports Skylum’s Aurora HDR as well as beta integration with Capture One. The company claims that support for additional photo editing software is under development. Since I’m not an Aurora HDR user and support for Capture One is still in beta, we only tested the Loupedeck+ with Adobe Lightroom Classic CC for this review. Once I familiarized myself with the layout of the Loupedeck+, I did notice that I was spending less time jumping between a lot of the tabs within the Develop module in Adobe Lightroom Classic CC.
With the exception of the Control Dial, most of the dials and scroll wheels only work in Adobe Lightroom Classic CC’s Develop module. The Control Dial works like a scrubber in the Library module, scrolling through images in your current collection. You’ll be able to use the buttons below the Control Dial to rate and color code your images, which is usually the first thing that I do when importing a shoot into my Lightroom library. Within Lightroom’s Develop module is where I really got to put the Loupedeck+ through its paces. Turning the various dials on the Loupedeck+ to make adjustments to an image felt a lot more natural when compared to dragging a slider left and right with a mouse or clicking on the numerical value for the setting I want to adjust and then using the arrow keys to dial in the adjustments. I do wish the scroll wheels used to adjust Hue, Saturation, and Luminance were a bit more sensitive though. Compared to dragging the sliders around or keying in specific adjustment values, using the scroll wheels to adjust HSL values felt like an eternity. I’d love to see Loupedeck incorporate something similar to the infinite scroll wheels that Logitech has been using in their mice in their next revision of the photo editing console to help speed up HSL adjustments. One of my favorite features on the Loupedeck+ is being able to reset whatever value I’m adjusting to zero by clicking on the corresponding dial or scroll wheel. For the Preset lovers out there, you’ll be happy to know that you can assign your eight favorite develop presets to the P1 through P8 buttons about the HSL scroll wheels.
Conclusions
The Loupedeck+ shows that the folks over at Loupedeck are paying attention to user feedback, but some of problems that plagued the original still persist. Unless you’ve got a big enough workspace, you’re essentially putting two keyboards onto your desk by adding a Loupedeck+ into your setup. The situation gets even more awkward if you’re using a laptop, having to reach over the Loupedeck+ to get to your keyboard and touchpad. I can definitely see casual Lightroom users benefiting from using Loupedeck+ as their main interface, but most Lightroom power users will already have the hotkeys for functionalities that Loupedeck+ has mapped to physical buttons memorized, which begs the question of whether or not the Loupedeck+ is worth the considerable monetary investment. For me, the return on investment with Loupedeck+ is just a bit too low, but your mileage may vary. I do have to applaud the team at Loupedeck for the many refinements they’ve made to the Loupedeck+, and I look forward the next version of the product when it has full Capture One integration.

The Loupedeck+ receives three out of five stars. Want to add one to your setup? You can find it on Amazon.
Get rid of the ads!
Did you enjoy reading this article as much as we enjoyed writing it? There's a way to support us and our reporting, getting ad-free navigation and more as a bonus. Subscribe to us for less than a coffee per month —just $3.99— or take advantage of our yearly subscription with a hefty discount for only $25.- An ad-free experience
- A free mystery box for Lightroom or Capture One
- All the books in our store
- 20% discount on Capture One
- 30% discount on Imalume Photo Theft Protection
- 20% off Herbs and Kettle Tea Company.
- 20% off your order from MPIX printing services.
- 5% off Viltrox Products via their eCommerce store.
- 10% off all film developing, printing and scanning services from Blue Moon Camera and Machine
- 15% off 7Artisans products: The lens and accessory maker is offering a sweet discount for Phoblographer's readers.