
Last Updated on 06/11/2018 by Mark Beckenbach
This is a syndicated blog post from Digital Photo Magazine. It is being republished here with permission.
My introduction to “real” macro photography came more than a decade ago when I was reviewing the Canon MP-E 65mm F/2.8 1-5x Macro lens and Canon’s macro strobe setup. I had shot macro before, but this was my first time shooting with a lens that captured images greater than life-size, and it was a mesmerizing experience.I remember buying flowers so that I’d have a steady object to practice with, and I set them out on the dining room table in a nice sunny spot. At first, I took some images at the least magnified setting, the 1x power, and the images were lovely. With the Canon strobe system and some tinkering, I could really control focus and background lighting, and I took some nice photos.
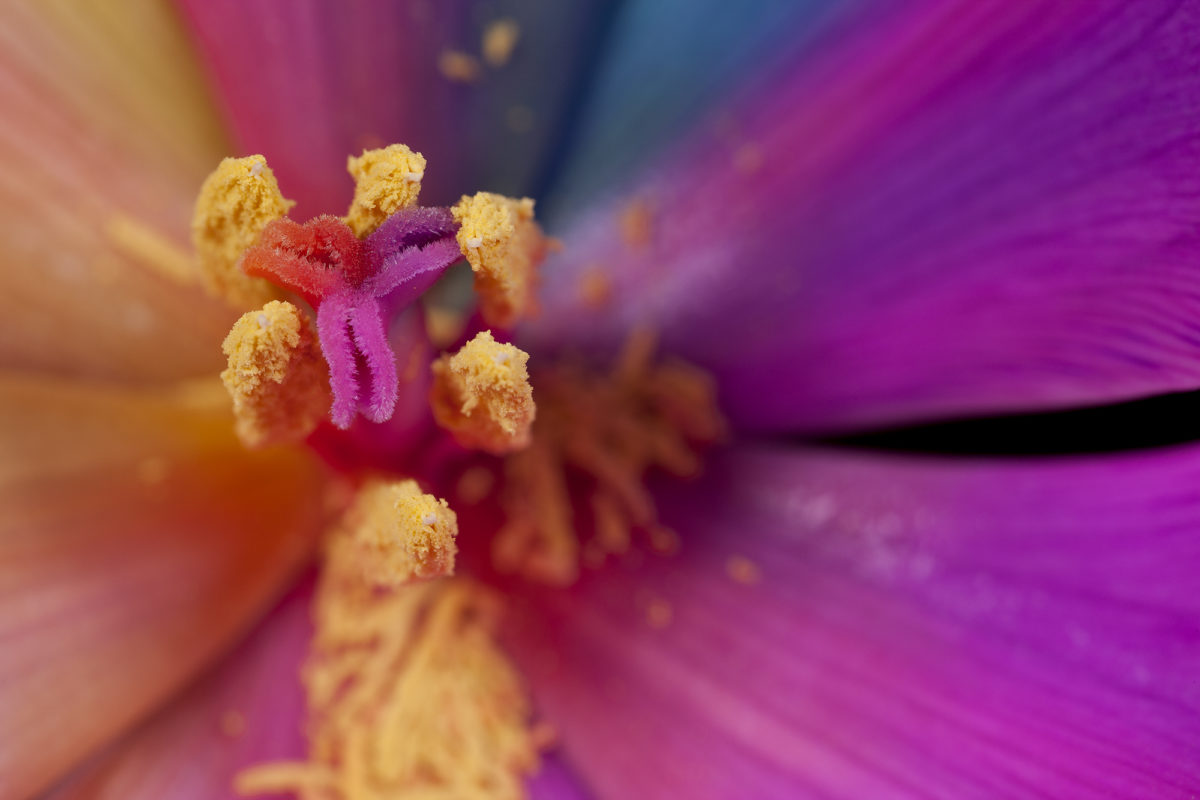
After a few minutes of getting acquainted with the gear, I cranked up the magnification, and somewhere around 3x a whole world exploded in front of my eyes. I could see the grains of pollen on a flower’s stamen, the intricate pattern of cells that make up the petals, blemishes that rippled with colors. Each individual frame was an entire hidden universe of texture and colors. Soon I took the gear outside and began photographing blooming flowers, drops of rainwater and the creepy eyes of spiders.
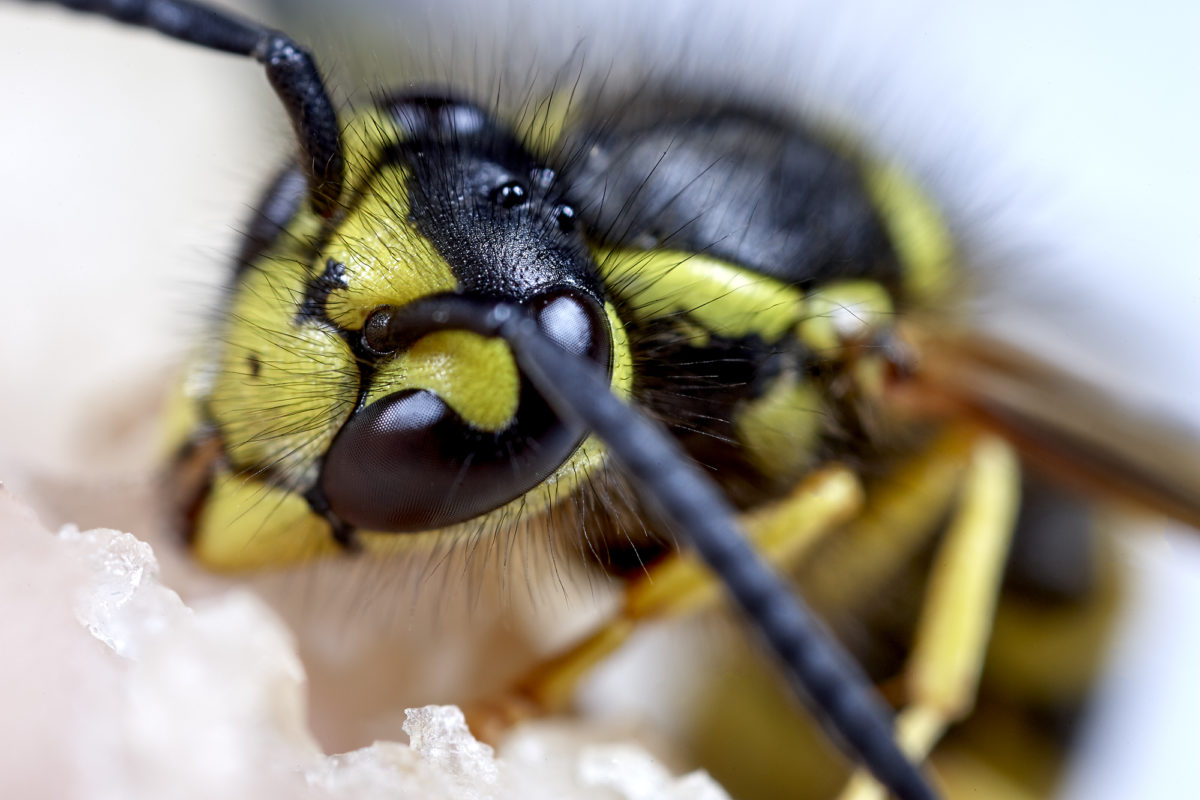
It was the insect kingdom that fascinated me the most. We think of bugs as being small and insignificant, but at their own scale they’re majestic and beautiful, and it’s hard not to marvel at their creation and wonder how something as intricate as a housefly came to be.
Macro photography isn’t all done at the microscopic—in fact, I refer to my favorite type of macro work as “hyper-macro”—and it’s not all about detail and resolution. Some great macro work is a study in colors and vibrancy, while others prefer to capture the macro world as a form of abstract art.
No matter the type of macro photography you explore, capturing images at a small scale can help you learn to take better photos at our own level of magnification. Once you learn to see the details in a tiny scene, and once you master the tricks to compose and to light it, you’ll realize those same things apply to any other type of photography.
Defining Macro
Technically, many lenses marketed as being “macro” are really “close-up” lenses, in that they allow the camera to focus at distances much closer than a typical lens. A lens doesn’t truly function as a macro lens until it’s able to resolve images at life-size, also referred to as a 1:1 ratio. While this might seem like a confusing term, it’s actually simple. At 1:1, the size of the object you’re photographing is equal to the amount of space it takes up on the sensor. Photograph a fly that’s 30mm high, and it would take up 30mm of sensor space.
I like to think of this by picturing a movie screen and imagining that it’s the sensor in a really big camera. If you walked up to the sensor and stood directly against it, you’d appear life-sized. One six-foot person would appear six feet tall on the screen. Walk to the back of the theater, though, and you’d start to appear smaller, relative to the view from the screen. There would be less detail available because you’re harder to see.
That Canon 65mm 1x-5x lens that got me hooked on macro? It resolves up to 5:1, meaning that six-foot-tall person on that movie screen would appear 30-feet tall. If you think of a movie like Star Wars, where Darth Vader occupies the majority of a frame—and how much detail you can see—you can imagine what it’s like to photograph bugs or parts of flowers at that scale.
The takeaway here is that a real macro photographer needs a macro lens, and that’s a lens that resolves to 1:1 or better. Macro lenses come in a variety of focal lengths, usually ranging from around 65mm out through 200mm. The shorter the focal length, the closer you need to be to your subject to maintain that 1:1 ratio. If a 1:1 macro lens is listed as having a nine-inch minimum focal distance, then the lens needs to be nine inches away to be at 1:1.
Just like with portraits, the focal length affects the way the image looks—a telephoto lens will “compress” the foreground and background just as it would normally, and just like with regular-sized photography, the aperture determines the background blur. That said, many macro lenses have critical focus areas of millimeters, or a fraction of a millimeter, so the effect of the ƒ-stop for focus blur is magnified as well.
Extending The Glass
Another way to get a macro image is to take a normal lens and add an extension tube—a glass-free tube the same width as a normal lens, which moves the standard lens away from the sensor, and I like to think of those elementary-school circular magnifying glasses we all used in science. Hold a magnifying glass right up to a bug and the bug appears life-size or slightly bigger. Move the magnifying glass away from the bug and it starts to look bigger and bigger. That’s the same thing that happens when you use an extension tube with a standard lens.
This is a cheap and easy way to get into macro photography, as you don’t need to purchase any additional equipment aside from the extension tube (see the equipment guide for tips on buying extension tubes). The disadvantage is that by moving the lens away from the sensor you lose some light, which results in some loss of image quality. Extension tubes are a great place to start, but if you really like macro photography, it’s a good idea to invest in a good macro lens.
Flip It Around
Another way to create a macro lens is to take a standard lens and mount it to the camera so that the front element points toward the sensor using a reverse-mount adapter ring sized for the thread size of your lens and the mount for your camera. By reversing the optics, you’re turning your camera into a microscope, and you can even mount several lenses together to create images up to around 3x life-size.
This might be a good way to see if you’re into hyper-macro photography, but it’s a cumbersome technique and leaves the lens open to the elements.
Focus
An important consideration when shooting macros is the use of autofocus. Many macro lenses, especially those at longer focal lengths, benefit from having autofocus capabilities. It’s great to lock onto a butterfly gathering pollen on a plant without having to manually adjust the focus.
For closer work, though, many people shoot in manual focus and use minute adjustments of the distance between the lens and the subject to change the critical focus area. When shooting insects outdoors, I try to slowly sway toward them, because insects are less frightened of something that moves like a blowing branch than something like the sound of an autofocus motor. (You’d be surprised at the things that insects hear that we don’t.)
There’s nothing wrong with using autofocus when shooting macro, but try to shoot manually to get the feeling of the amount of accuracy available when you’re directly picking the focus point.
Screening Exam
For a very long time I shot macros with a DSLR, and I’ve spent a lot of time laying on the ground, bending over the top of a plant and crouching occasionally to check focus. These days I tend to shoot with a mirrorless system, or shoot my DSLRs in Live View mode, as the ability to compose and evaluate a scene using a pivoting LCD screen means fewer shoots spent laying in the underbrush. The focus-assist modes on many mirrorless cameras are particularly handy when shooting macros, as they’ll illuminate the in-focus part of the shot and magnify the image during manual composition.
Lighting
An issue of great importance in macro photography is lighting, and the importance of your lighting increases along with magnification. Macro photography needs a lot of light, especially as you start to stop down to increase depth of field. You can photograph flowers in bright sun with a macro lens, but as you get right near 1:1, light falls off very quickly. As you move closer to an object to photograph it, you’re also more likely to get in the way of the light source and cast your subject into shadow. Above 1:1, and you need a very large amount of light to create an evenly illuminated scene.
The best lighting for macro photography is a macro-sized ring light or macro setup with dual flashes that can be rotated around a ring that attaches to the front of a lens. This allows the photographer to angle the light in order to create different looks, and to create fill flash at a macro scale.
As LEDs become more common, I’ve started to carry a few different lights with me for macro shoots. I have a variety of penlight-sized lights to throw light on small surfaces, as well as LED headlamps to help me illuminate something by pointing my head at it. I’ve also used the Westcott Ice Light, a handheld LED, during macro photography sessions, as I can hold it with one hand while I compose with another.
A Little Word
Macro photography is a great, calming break from “traditional” photography, and practicing macro photography will make you a better photographer. It’s a small world after all.

Gear
Cameras
One of the nice things about macro photography is that you don’t need a camera that’s designed for speed and performance. The stamen of a flower isn’t going anywhere, and even if you’re photographing insects, you’re not capturing them flying around like teeny-tiny circus performers; you’re going to capture them as they alight on a branch or a flower’s petal.
In fact, big, bulky “pro” cameras are generally a disadvantage when shooting macro work, especially if you’re handholding shots. I remember doing some of my early macro work with a Canon EOS 1D, which I shot handheld when capturing bees, flies and other insects. Between the camera, the lens and the lights, I could only shoot for about 15 minutes before I got fatigued.
Resolution is key in macro photography, and there are a number of cameras that really lend themselves to macro work.

Nikon D850
While not exactly a svelte camera, the Nikon D850 packs 45.7 megapixels into a camera that’s the size of a standard enthusiast-sized body, making it the best resolution-per-ounce camera in Nikon’s lineup. While it can capture 9 fps, you won’t need that for macro work. What it does have, aside from resolution, is focus-stacking automation that the company calls Focus Shift mode. While the camera won’t blend the images together, it completely automates the process. Pick a number of shots and how much you want the focus to be moved between each shot, and the camera does the rest. The result is a batch of images that can be blended together to create a depth of field not possible with any current lens.
Price: $3,300. Website: nikonusa.com

Sony a7R II
This high-resolution full-frame mirrorless packs a heck of a punch, thanks to its 42-megapixel sensor. The light weight of the a7R II makes it easy to handhold, and you can use adapters to pair the Sony camera with macro lenses designed for Canon. The result is a light, sophisticated camera with tremendous image quality. The onboard 5-axis image stabilization makes it easy to handhold while shooting macro work.
Price: $2,300. Website: sony.com

Fujifilm X-T2
Thanks to the new Fujifilm XF 80mm F/2.8 Macro (see below), the first 1:1 macro lens for the system, Fuji shooters now can jump into the world of life-size macro reproduction. The pivoting screen makes shooting low-level macro much easier than viewfinder shooting. The more compact X-T20 shares the image quality of the X-T2, but shaves off some pro-level features that aren’t needed for macro work, making it a great value.
Price: $1,600 (X-T2); X-T20 ($899). Website: fujifilmusa.com

Olympus OM-D E-M10 Mark III
This super-compact camera is still easy to use, thanks to thoughtful design elements and the arrangement of the control dials and switches. Built-in 5-Axis Image Stabilization is great to have in a camera this small. The enthusiast-oriented OM-D E-M10 Mark III is designed with a number of automated functions and preset scenes, but can also be operated fully manually, great for detailed macro work.
Price: $650. Website: getolympus.com

Canon EOS M6
This APS-C mirrorless camera from Canon gets a boost in the macro world thanks to the unique Canon EF-M 28mm F/3.5 STM macro lens, which has a built-in macro light. This combined package allows macro shooters to create soft, even illumination of their subjects without lugging around external flash systems and modifiers.
Price: $730. Website: usa.canon.com
Lenses

Canon MP-E 65mm f.2.8 1-5x Macro
While most macro lenses capture images at a reproduction rate of around 1:1, this unique lens starts at 1X and goes all the way to five times life-size. For “super-macro” or “hyper-macro” this lens will resolve the individual grains of pollen on a flower’s stamen or the hairs on a housefly. This is a must-have lens for the hardcore macro shooter.
Price: $1,050. Website: usa.canon.com

Sigma 105mm F2.8 EX DG OS HSM Macro
This killer telephoto macro from Sigma has recently dropped in price from around $1,000 to around $550. This telephoto lens is a great portrait lens on its own merits, so you get both a high-quality long lens and a high-quality macro lens in one package. The lens focuses to 1:1 and has HSM AF for fact lock on subjects, even at macro sizes. Available in Canon, Nikon, Sony A-mount and, via Sigma’s MC-11 converter, Sony E-mount.
Price: $570. Website: sigmaphoto.com

Fujifilm XF 80mm f/2.8 R LM OIS WR Macro
Another double-duty lens, this 80mm Fuji lens has a focal length equivalent of 120mm on full-frame cameras and can focus to life-size 1:1. The lens has built-in stabilization, a weather-sealed design and a minimum focal distance of 9.8 inches, and its arrival means Fujifilm shooters now have a native macro lens that performs as well as Fujifilm’s other legendary glass.
Price: $1,200. Website: fujifilmusa.com

Tamron SP 90mm F/2.8 Di Macro 1:1 VC USD
Tamron’s 90mm macro is a new version of their long-running macro lens, and it incorporates features like better image stabilization, better AF speed and moisture- and dust-resistance. The Tamron 90mm macro has always been a great choice for macro photographers, and this update makes it even better.
Price: $600. Website: tamron-usa.com

Rokinon 100mm F2.8 Full Frame Macro
Rokinon’s budget-friendly 100mm macro offers a 1:1 reproduction at a minimum 12-inch focus distance, with internal focus (so the element doesn’t extend during shooting, bumping your subject) and an optical design that creates a clear, sharp image. You’ll lose autofocus with this lens, but most macro work is manually focused anyhow.
Price: $550. Website: rokinon.com
Lighting

An ideal, but expensive, solution for the Canon-based macro photographer is the Canon MT-26EX-RT Macro Twin light, which features two small speedlights that can be rotated around a camera’s lens via an adapter, while also adjusting the tilt. The lights can be quickly detached for even more precise adjustments and to create different lighting looks on small-sized subjects. This is the must-have light if you’re shooting with the Canon 65mm 1x-5x lens.
Price: $1,000. Website: usa.canon.com


Nikon and Olympus users both have a dedicated flash system much like the Canon MT-26EX, with the Olympus STF-8 Twin Flash ($479) and the Nikon R1C1 Wireless Close-Up Speedlight System ($650). The Nikon system is particularly good for macro work, as it ditches the cables in favor of remote triggering, and can work with the company’s Speedlight system. I’ve used the small lighting units to provide fill-flash on portrait work.
Less expensive ring lights are available as well, with Bolt, Yongnuo, Polaroid, Sigma, Nissin, Metz, Godox and others making models that range from around $70 to more than $700.


Camera Support
While I shoot most of my macro work handheld, for focus stacking and for other high-detail shots, a tripod and good tripod head are a must. To lighten my load, I like to use carbon-fiber tripods from brands like Benro, Gitzo, Manfrotto, Really Right Stuff, SLIK and others, but really any solid tripod will do. In fact, sometimes the heavier the tripod the better when shooting macro, as the solidity of the tripod reduces camera shake.
I’ll also keep a tabletop tripod handy, for shooting items on a surface where a tripod won’t fit next to it, and for shooting at ground level.
Most tripod heads will do for macro work, though one that can be pivoted quickly and then locked very firmly into place is great when shooting insects in the wild.


My go-to tripod head setup is to use the Manfrotto XPRO Geared 3-Way Pan/Tilt head, thanks to the micro-adjustable settings, along with the Manfrotto 454 Micrometric Positioning Sliding Plate, in order to adjust my camera in miniscule, precise steps. Similar plates are made by Kirk, Novoflex, Oben, Really Right Stuff and others.
Extension Tubes
While there are cheap extension tubes that don’t provide any electrical contacts, these leave the photographer unable to use autofocus or auto metering. A better idea is to get an extension tube from the camera’s manufacturer, or from a third party that provides electrical contacts so the lenses retain their features. Tubes with contacts usually start around $50, and sets with multiple tubes range between $100 and $300.The silver bullet of lighting solves some difficult photographic problems.
Get rid of the ads!
Did you enjoy reading this article as much as we enjoyed writing it? There's a way to support us and our reporting, getting ad-free navigation and more as a bonus. Subscribe to us for less than a coffee per month —just $3.99— or take advantage of our yearly subscription with a hefty discount for only $25.- An ad-free experience
- A free mystery box for Lightroom or Capture One
- All the books in our store
- 20% discount on Capture One
- 30% discount on Imalume Photo Theft Protection
- 20% off Herbs and Kettle Tea Company.
- 20% off your order from MPIX printing services.
- 5% off Viltrox Products via their eCommerce store.
- 10% off all film developing, printing and scanning services from Blue Moon Camera and Machine
- 15% off 7Artisans products: The lens and accessory maker is offering a sweet discount for Phoblographer's readers.