Last Updated on 05/24/2018 by Mark Beckenbach
Setting up a studio? You’ll definitely need some diffusers, but there’s no need to break the bank to get beautiful diffused light.
Whether you’re doing portrait photography or YouTube videos, good lighting is the first and most important element you should set up in a studio. The most straightforward way to this is to get a softbox for diffused light. But, if you don’t have the budget for advanced and expensive pro equipment yet, there are some affordable options you can use to start with.
In a recent video tutorial for Shutterstock Tutorials, filmmaker and designer Todd Blankenship shows us not one, but three cheap ways to achieve great diffused light. If you only have budget for one light source, he demonstrates how you can transform it into a basic diffused light setup. Watch and learn:
Todd starts with the key principle of effective light diffusion: make your light source as big as possible in relation to your subject. The bigger and closer the light source is to your subject, the softer the light will appear. This is why the common misconception of slapping on a translucent material directly onto your light source often doesn’t work. The best that it does is disperse the light just a little bit, and your subject still looks harshly illuminated.
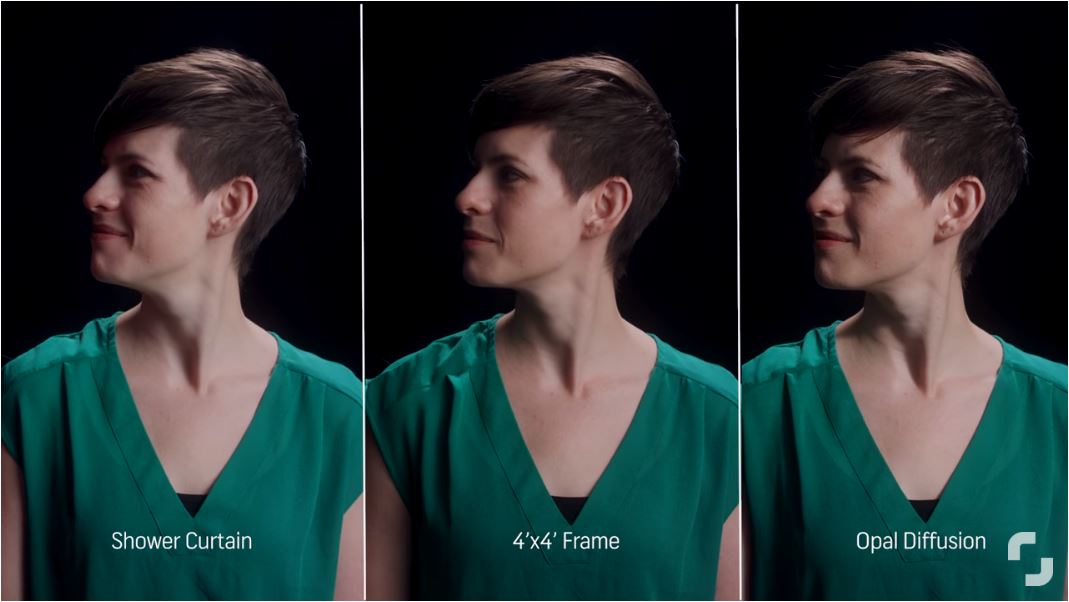
Here’s where Todd’s tips come in handy. He shares three of these cheap options he personally owns and likes to use. First is a Fotodiox Pro-Studio Solutions 4′ x 4′ Frame, which you can get for under $200. This frame is easy to set up and folds into a nice carrying case, and also comes with some extra materials for bouncing light. Next is the Opal Frost Diffusion, which comes in big rolls and are often skinned onto a frame and slid into a C-stand. With this option, the light is still soft but retains definition on your subject. Last and definitely the most cost-effective choice is a shower curtain, which you simply clamp on the gobo arm of a C-stand and you’re good to go.
Unlike a softbox, which requires that both the light source and the diffuser be moved together, all you have to do with these options is put them in front of your light to create a big, soft light source.
Check out and subscribe to the Shutterstock Tutorials channel for more of their nifty photography tips and tricks.
Screenshot image from the video by Shutterstock Tutorials


