
When you look at most Graduated ND and standard ND (Neutral Density) filter sets out there, you’ll find loads of pretty expensive options. But when you look at the Neewer Complete ND Filter kit, you start to scratch your head–at least you will as a novice. The more experienced amongst us will know that the build quality of the higher end stuff will be leaps and bounds better, and so will the image quality. We all completely understand the difference between great glass and mediocre glass, and know that you won’t be able to create as great images straight out of the camera as you can with better glass and paying for a much higher premium overall.
However, you’d be incredibly shocked if I told you that you were really, really wrong.
Pros and Cons
Pros
- Loads of filters
- Loads and loads of very well built (though I’ve felt better) step up rings
- Easy to use ND filter holder
- Very affordable at only $20
- Comes with a nice case to carry everything
- Great image quality
- If you don’t like the image quality, it’s very ease to embrace any flaws it has with modern cameras.
Cons
- Filters are prone to fingerprint smears.
Gear Used
We tested the Neewer Complete ND filter kit with the Olympus OMD EM1 Mk II, the Voigtlander 17.5mm f0.95 and the Olympus 12-40mm f2.8 PRO lens. Additional testing was done with the Lomography Diana F+, with the Instant back and Fujifilm Instax Mini Monochrome film.
Tech Specs
Specs taken from the Amazon product listing
(8)Neutral Density ND Filter Set
-ND filters (Neutral Density) reduce the amount of light reaching the film without affecting the color. Can be used to enable slower shutter speeds. Also can be used to better separate subjects from the background by allowing wider apertures, effectively decreasing depth of field. Great for portraiture and outdoor scenes.
-Graduated ND filters provide a gradual color transition for a smooth blending effect. Give your landscape and skin texture a more colorful touch. Perfect for changing the mood of a picture.
-ND filters are one of the least expensive and most effective ways to dramatically improve your shots.
(9)Adapter Ring
-Compatible with Cokin P series filter system.
-Specifically designed for your camera for a tight and secure fit.
-Material: Metal
(2)Square Filter Holder
-To use the square filter holder, an adapter ring must first be mounted on your lens. Slide the filter holder onto the ring adapter until it snaps into place.
(2)Square Lens Hood
-Lens hoods are designed to prevent flares–those circles of light that can accompany images where a strong light source is just outside the frame.
-Easily mounts onto your filter-holder by pressing on the upper and lower parts of the lens hood.
Ergonomics

The filter kit has three main components: the filter ring starts by going into the filter thread on your lens. From there, you connect the filter holder/hood combination. Then you take the ND filters themselves and slide them into the filter holder. You can even stack them if you wish, due to the fact that there are multiple slots overall.
Build Quality

The filter rings themselves are built surprisingly well. They’re not Sigma, Hoya, or B&W quality, but they’re far better than anything that you’ll get out there for super cheap. The Filter holder seems like it will eventually break when I put too much pressure on it. So, you’ll need to be fairly careful with it and apply pressure to just the right areas vs unleashing all the Super Saiyan powers that have been dormant in you and your bloodline for millennia.
Sliding the filters in and out also takes a bit of work and constant pressure; but I’m okay with that. I want my filters to be held in place tightly and effectively.
Ease of Use
The toughest part of using this entire kit is probably getting the filter rings on and off of the filter holder itself. That in and of itself isn’t so bad overall to be honest.
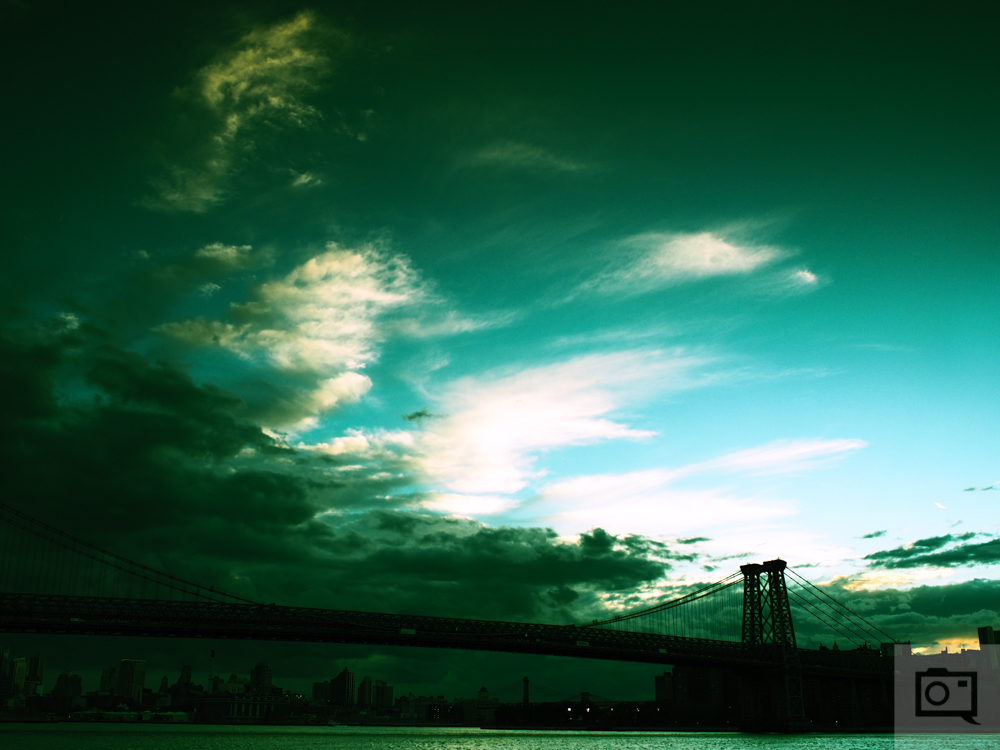
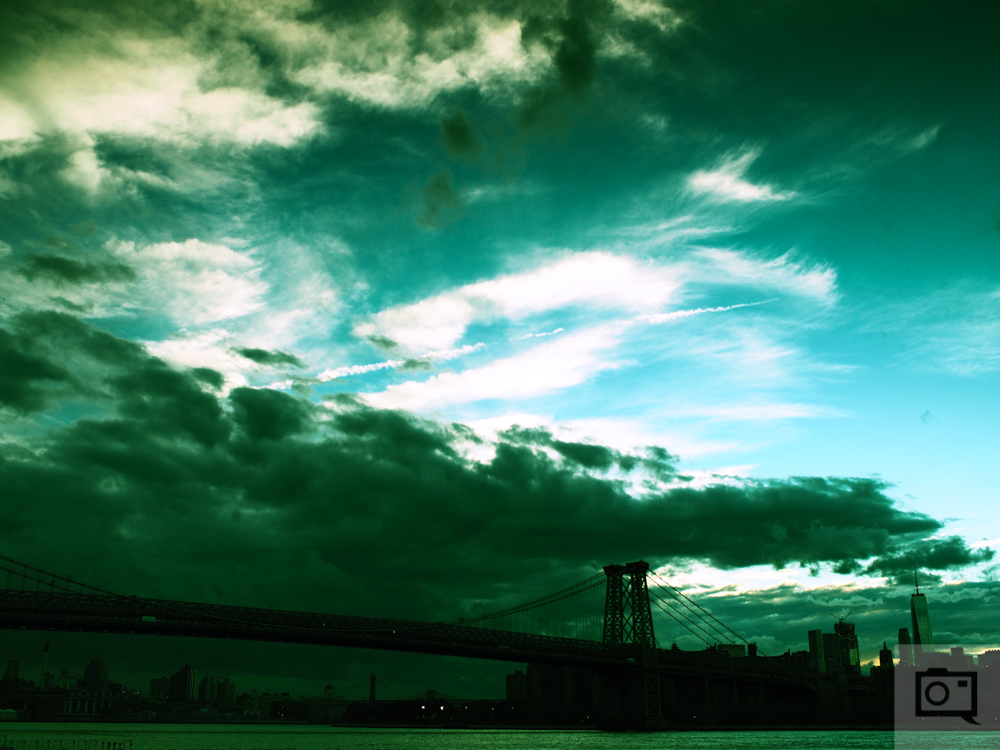
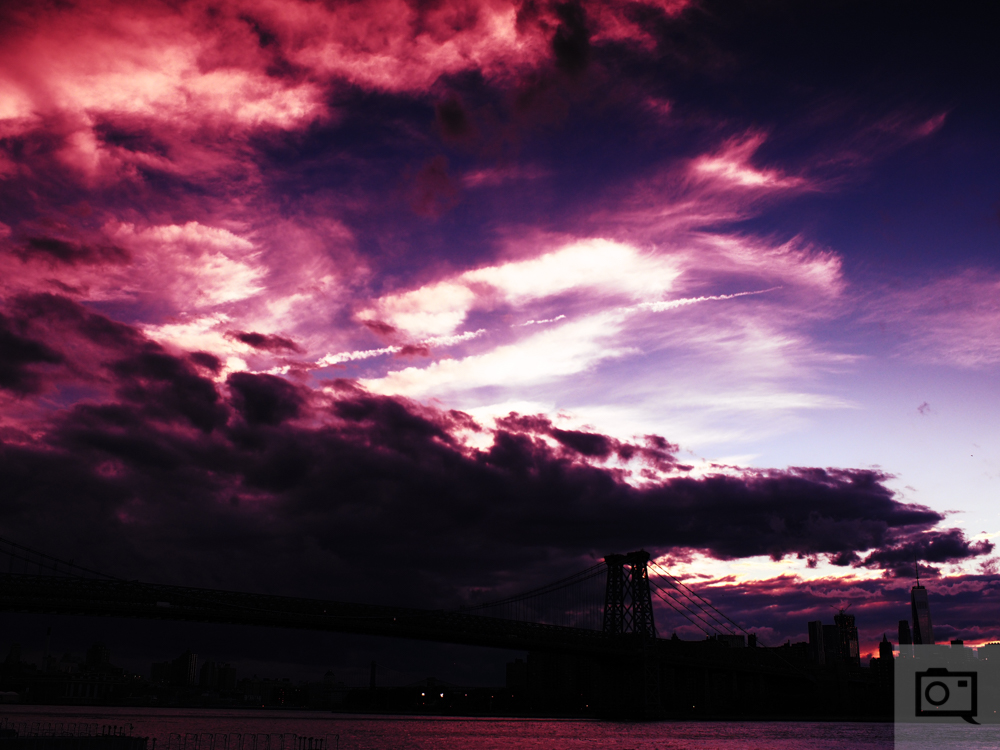
Image Quality
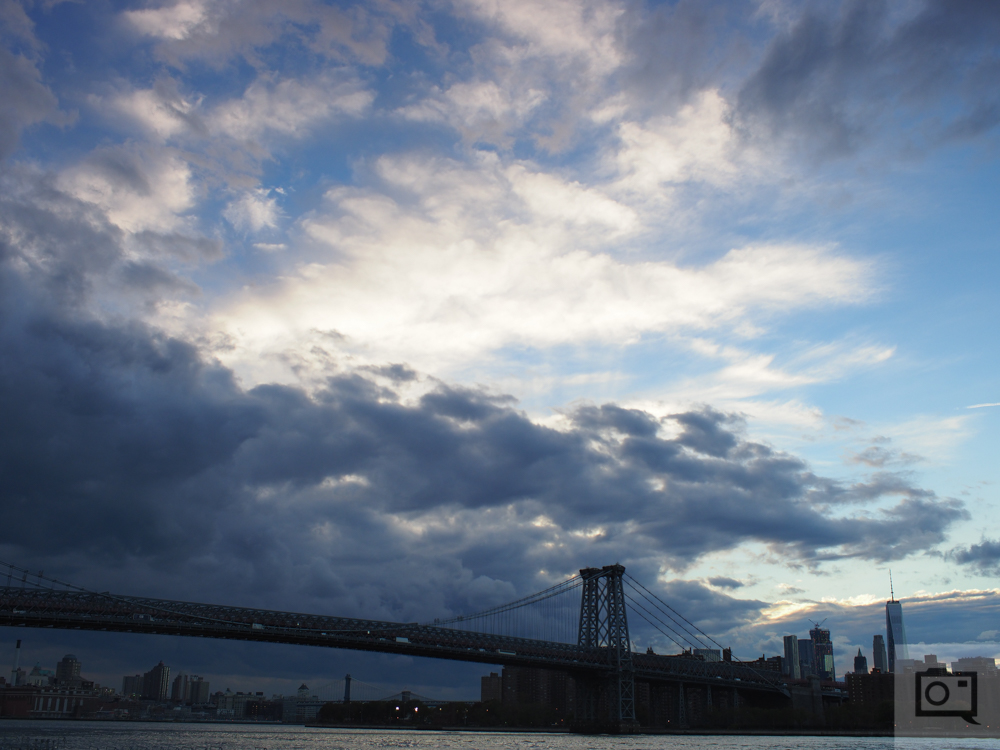
Above and below are two JPEG fine images right out of the Olympus camera. They’re pretty good overall and have a really nice look to them that doesn’t make the image look like an HDR at all, but instead genuinely makes it look like this is how the image was captured. Obviously, this has to do with the processing involved here–which there was none.
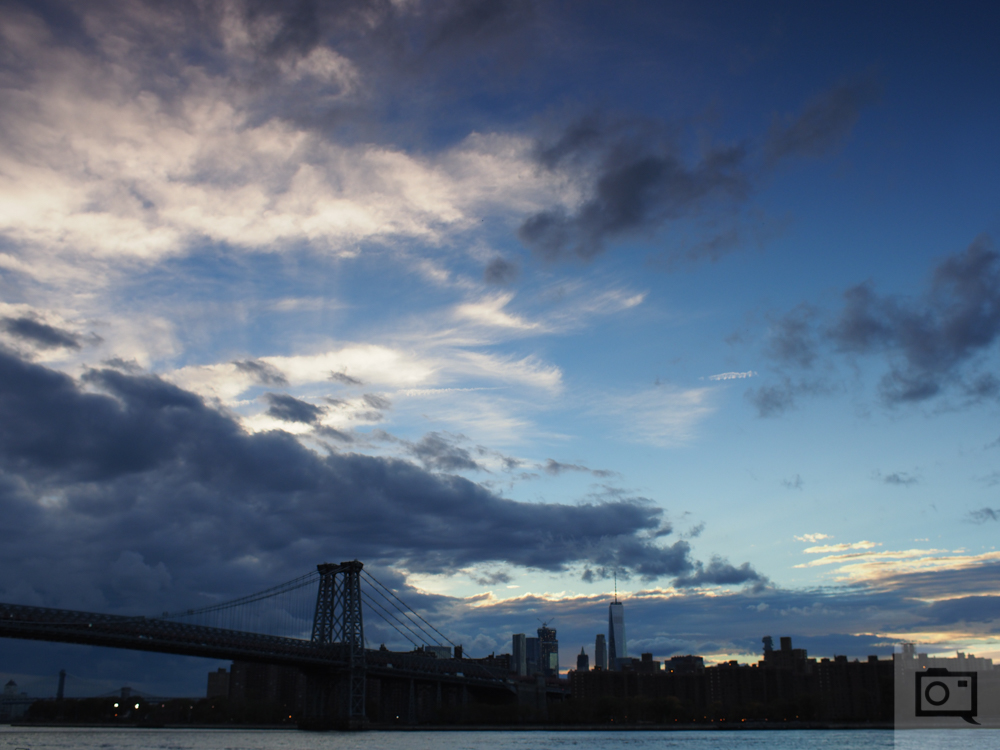
Something that I could have done is brightened the image in-camera, but I preferred to get more details from the highlights anyway. Digital cameras in general tend to render details from shadows better than highlights.
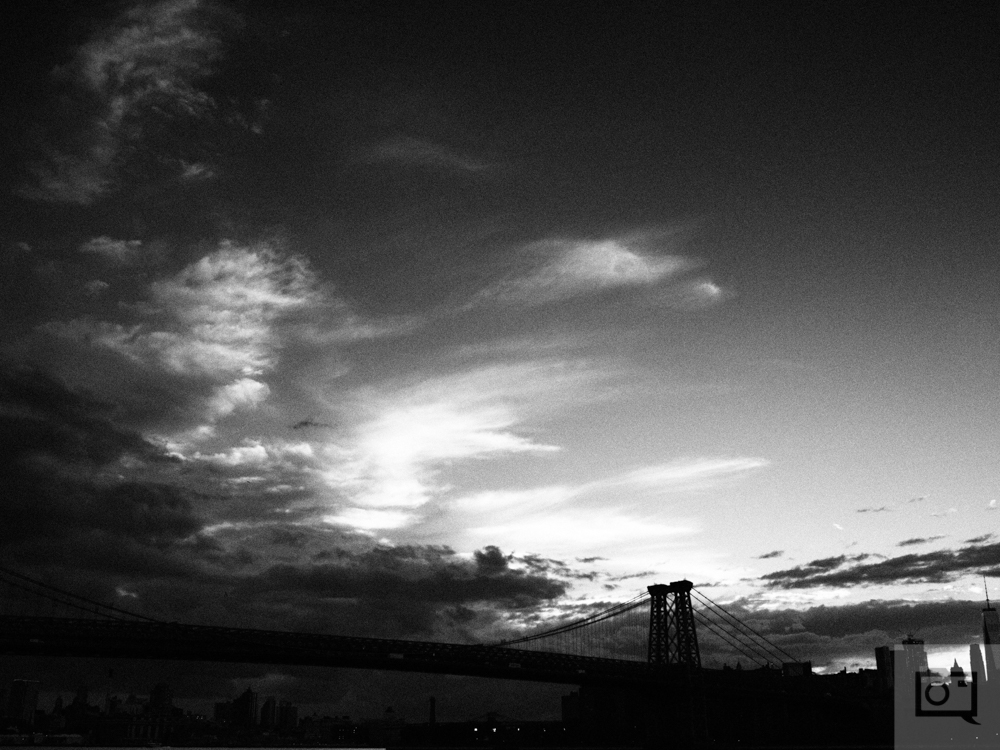
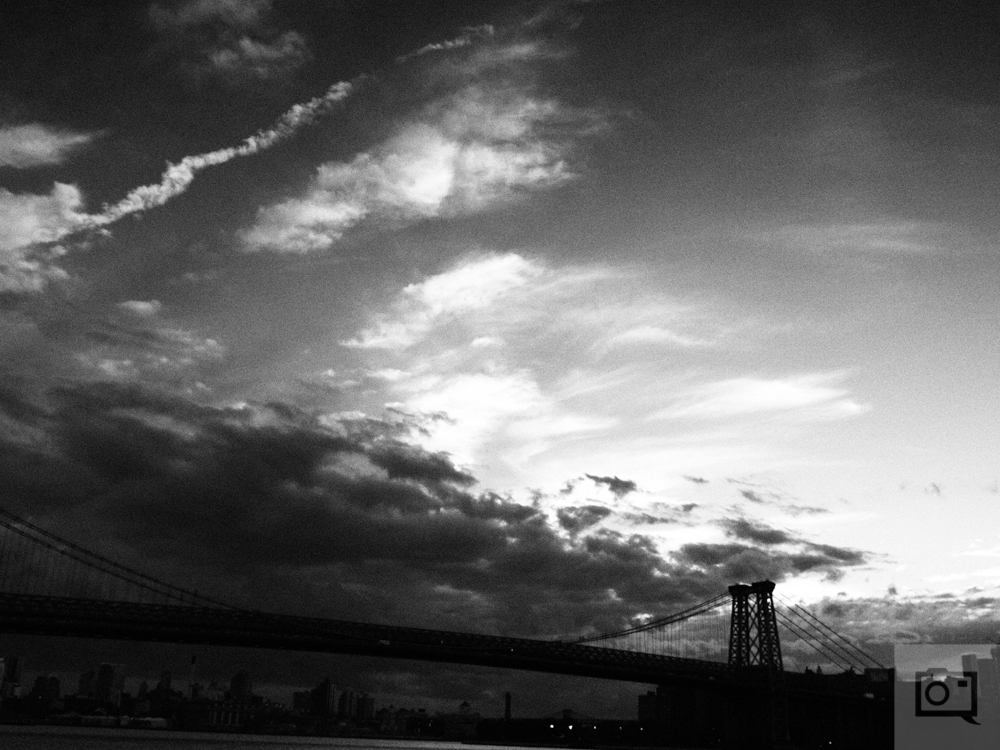
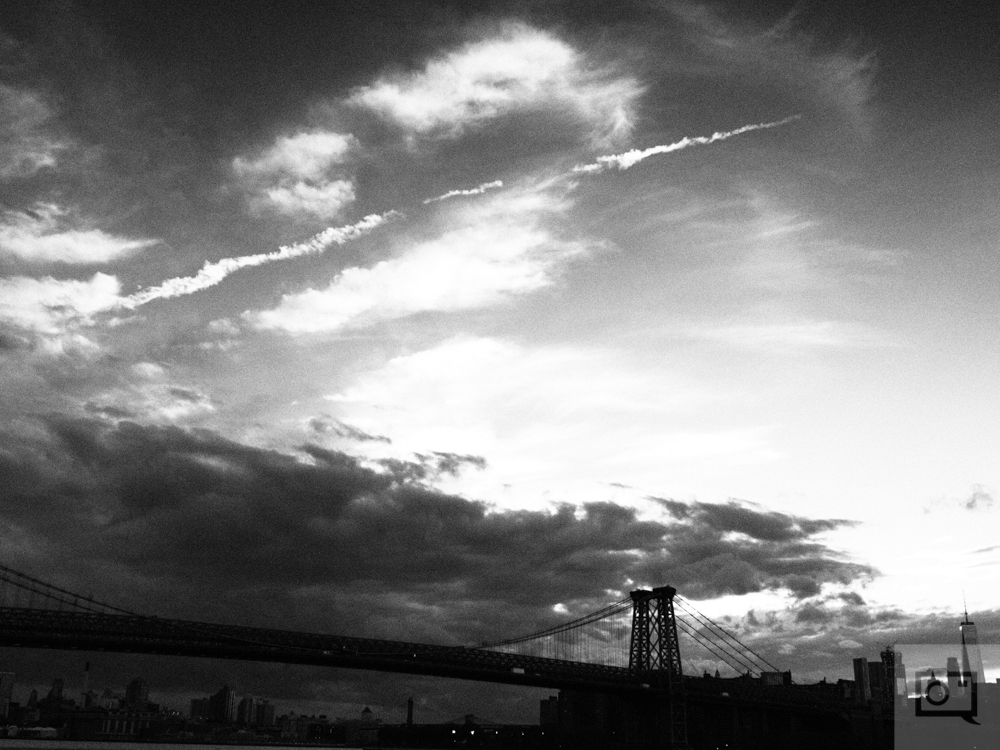
Where the true and amazing image quality came from though is when I used Olympus’ art filters. Grainy black and white, cross process and dramatic tone work out pretty well overall and they’re very fun.
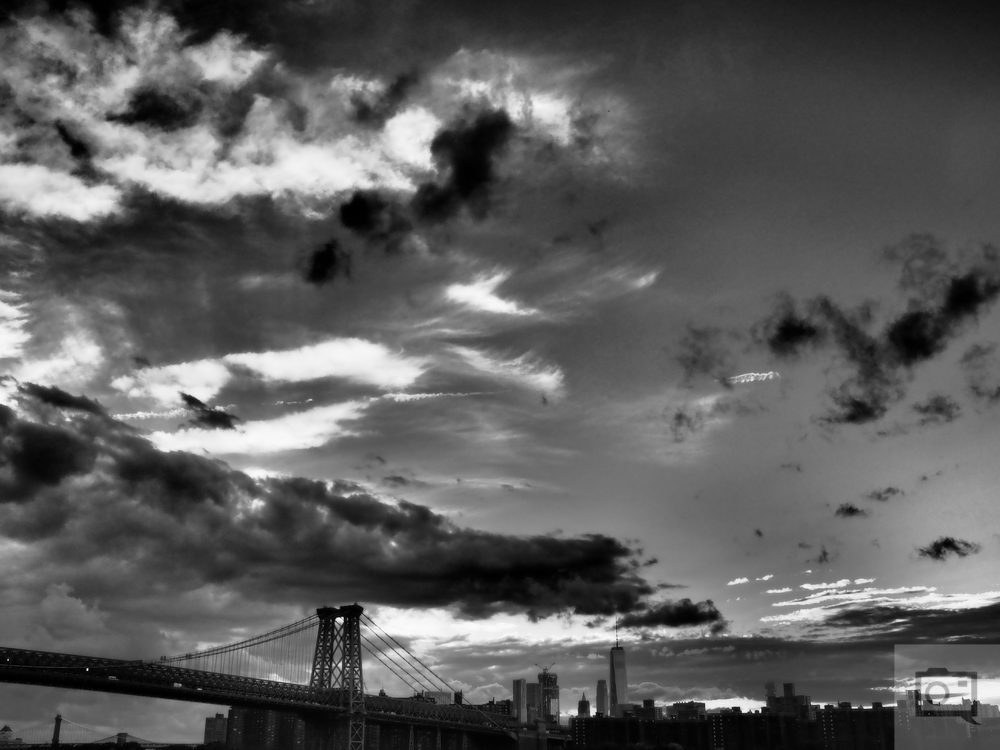
When these are applied to the JPEGs overall, the images embrace the artistic uses that photography embraces to begin with. It’s fun. In fact, it’s addicting overall and you probably won’t want to shoot in any other mode. If you’re a fan of the Pen F and combine it with the black and white mode that makes images look like Ilford Delta 400, then you’ll be in for even more of a treat.


Conclusions
I went out and actually bought this filter set. It’s fantastic for the price point. Plus, I know that modern camera RAW files can fix any major issues that I encounter otherwise, and there is always a chance to fix it in post if needed. But even so, you may only be a bit angry if you’re pixel peeping to 100%. I’m not the type to do that and I understand that most people resize their images anyway for the web. The only people that want to look at an image at 100% are generally just photographers. Otherwise, everyone looks at the whole and realizes how beautiful the moment is.
That’s what graduated ND filters are about anyway–capturing moments.

I simply cannot hate on something that I spent $20 on and get fantastic results out of that I really dig. The filter kit deserves the 5 out of 5 star rating I’m awarding it.
Get rid of the ads!
Did you enjoy reading this article as much as we enjoyed writing it? There's a way to support us and our reporting, getting ad-free navigation and more as a bonus. Subscribe to us for less than a coffee per month —just $3.99— or take advantage of our yearly subscription with a hefty discount for only $25.- An ad-free experience
- A free mystery box for Lightroom or Capture One
- All the books in our store
- 20% discount on Capture One
- 30% discount on Imalume Photo Theft Protection
- 20% off Herbs and Kettle Tea Company.
- 20% off your order from MPIX printing services.
- 5% off Viltrox Products via their eCommerce store.
- 10% off all film developing, printing and scanning services from Blue Moon Camera and Machine
- 15% off 7Artisans products: The lens and accessory maker is offering a sweet discount for Phoblographer's readers.