
Last Updated on 06/20/2016 by Chris Gampat
Creating the Photograph is an original series where photographers teach you about how they concepted an image, shot it, and edited it. The series has a heavy emphasis on teaching readers how to light. Want to be featured? Email chrisgampat[at]thephoblographer[dot]com.
Photographer Alexander C. Dela Cruz, Jr. is a Strobist Events Photographer based in Manila, Philippines. You name it: he’s probably done it even though he’s only been shooting since 2012. Alex has done what photographers really should do: make a minimal investment in gear and really focus on just creating awesome images with what you have.
“I got literally hooked with photography back when I had my hands on my first camera ever – a Chinese-manufactured MP4 player with a VGA camera.” he tells us. “I then upgraded to a GE Point-and-Shoot, and eventually wanted better images and total control over them. I’m a self taught photographer and a proud one, getting inspiration daily from your site.”
That inspiration has translated into a number of awesome portraits. And to that end, Alex is very much a true creative.
Here’s his story on how he created the photo “Blue Diamonds.” Be sure to also follow him on Facebook.
The Concept
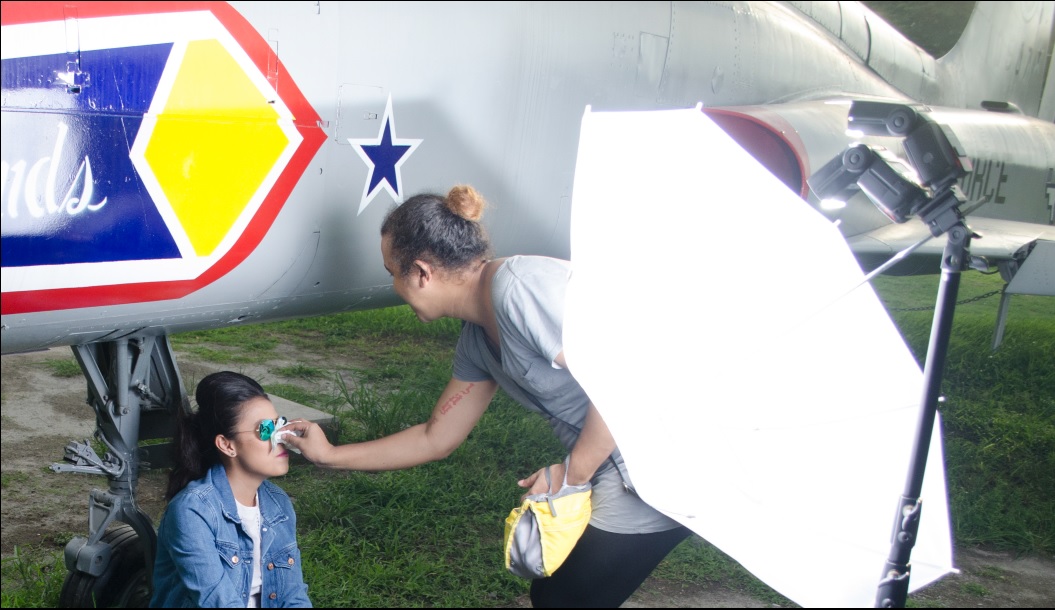
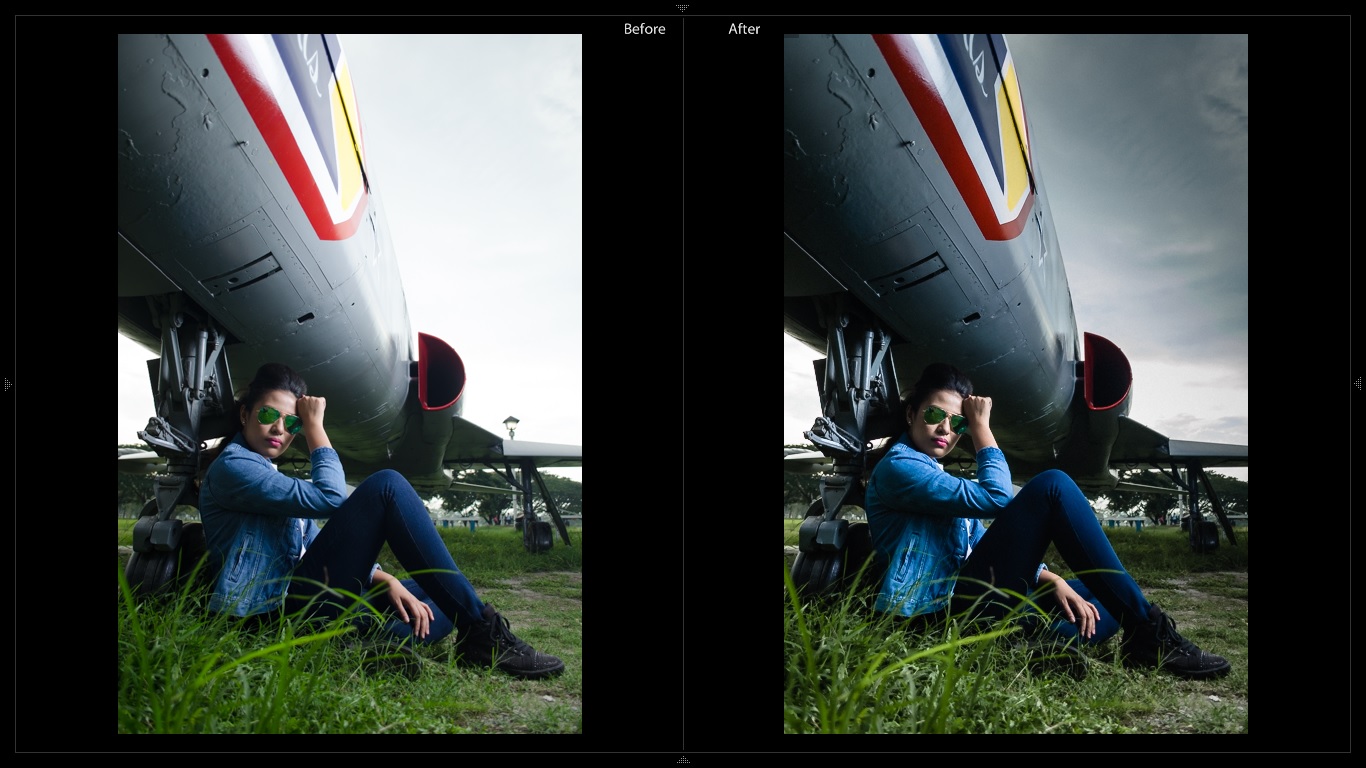
We were making travel-themed photos for our very pretty debutante, Nicolle. We visited the Air Force City, located in Clark, Pampanga, Philippines. Timelines, we were already done with the “safe” shots, and I wanted a “Top Gun-Fighter Jet” photo, so we decided to use one of the fighter jet models in the park.
The Gear
- Nikon D5100 with 18-55mm f/4.5-5.6G Lens
- Hoya Circular ND8 3-stop Neutral Density Filter
- 2x Yongnuo 560-IV Speedlight, Both mounted on the same 9-ft. Lightstand
- Shoot-through Umbrella as Lighting Modifier
The Shoot
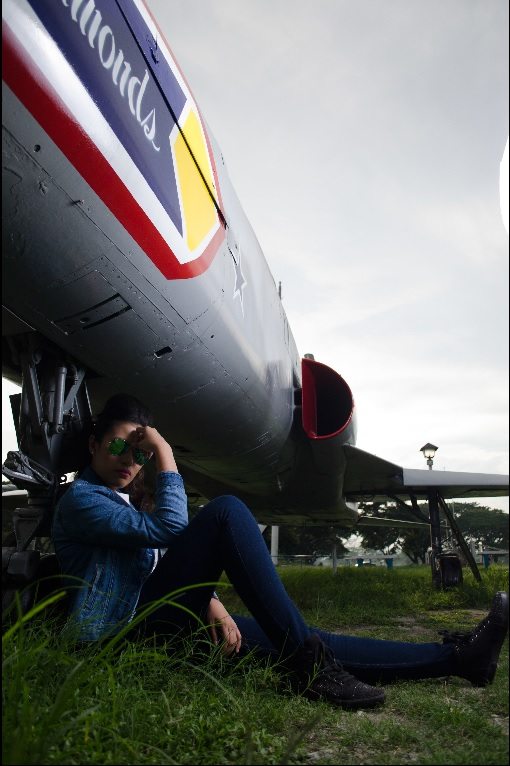
EXIF data for the photo: 1/160-secs., f/4, ISO 400, 18mm
Flash Settings: Both flashes set at 1/16 Power, at 24mm zoom.

When we saw the fighter jet, it was pretty massive! It was an actual Philippine Air force Fighter Jet named “Blue Diamonds”. We decided to eliminate the size difference between the plane and our debutante, thus using 18mm as the focal length. With the wide angle, we were able to achieve this, pulling things closer into the compositional frame.
The lighting approach for this was full side light for extreme contrast and pop, even though the light was diffused all over by the shoot-through umbrella. Me and my lighting assistant made sure that the light source was much higher then Nicolle, so that we could tilt the light source at 45 degrees downward. With this lighting setup, we were able to illuminate Nicolle and the green grass beside her (by the flash directly-diffused by the umbrella), and a part of the fighter jet (by the other flash directly-pointed towards the jet’s body). Once everything was set-up, we posed Nicolle with one of the recommended sit-down poses from the Posing Guide Android App, and the photo was made!
Post-Production
We use Lightroom 98% of the time for post-production, and if we can get away with that, then we almost don’t use Photoshop. The stand-alone LR5’s currently what we are using. We have developed a “Generic” preset which is our starting point for building-up the post-production that we do. Here are the particular parameters and their starting values:
Basic Panel
Clarity: +25
Vibrance: +25
Saturation: -10
Tone Curve Panel
Medium Contrast Curve
Lights: +25
Darks: -25
Detail Panel
Sharpening
Amount: 50
Radius: 1.5
Detail: 50
Noise Reduction
Luminance: 50
Color: 50
Lens Corrections Panel
Profile correction enabled
Chromatic Aberrations Removed
Effects Panel
Grain
Lightroom’s Light Grain Preset
Camera Calibration Panel
Process: 2012 (Current)
Profile: Camera Neutral
Tweaks are then applied, usually in the basic panel for shadow and highlight recovery, the tone curve for the preferred contrast control, and the detail panel for additional sharpening and masking.
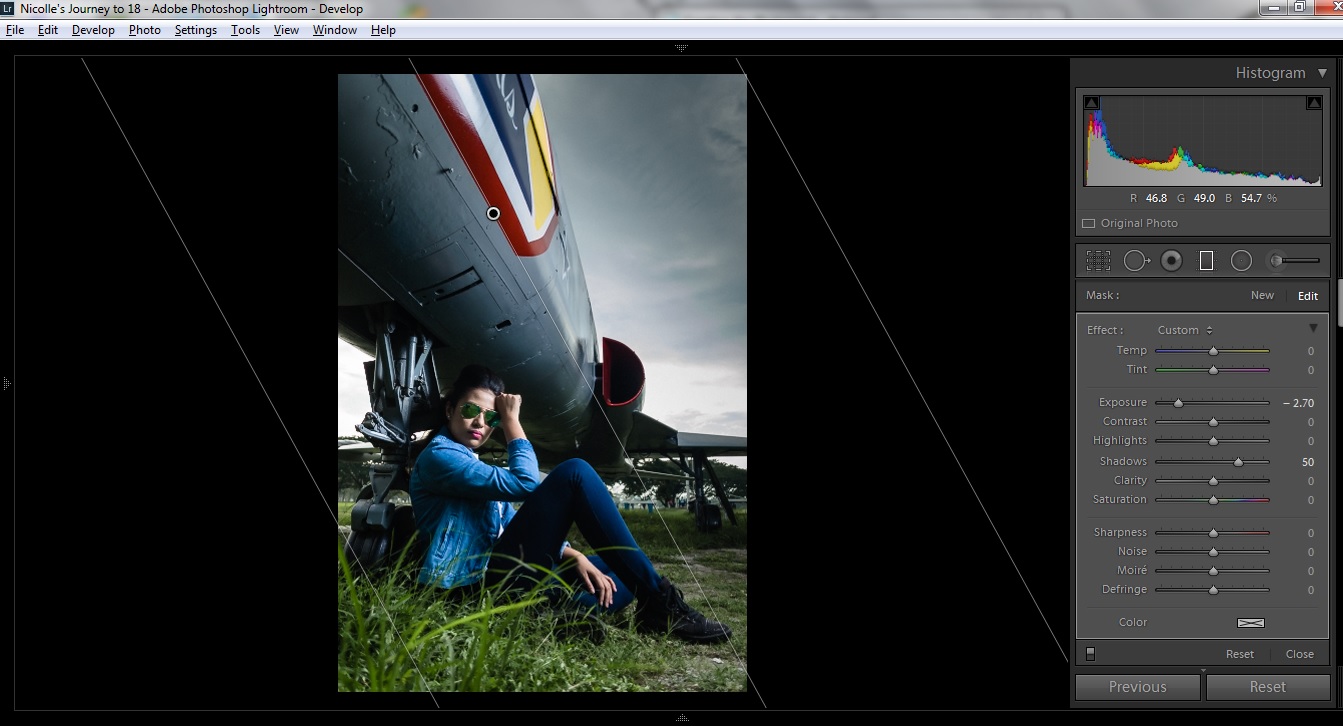
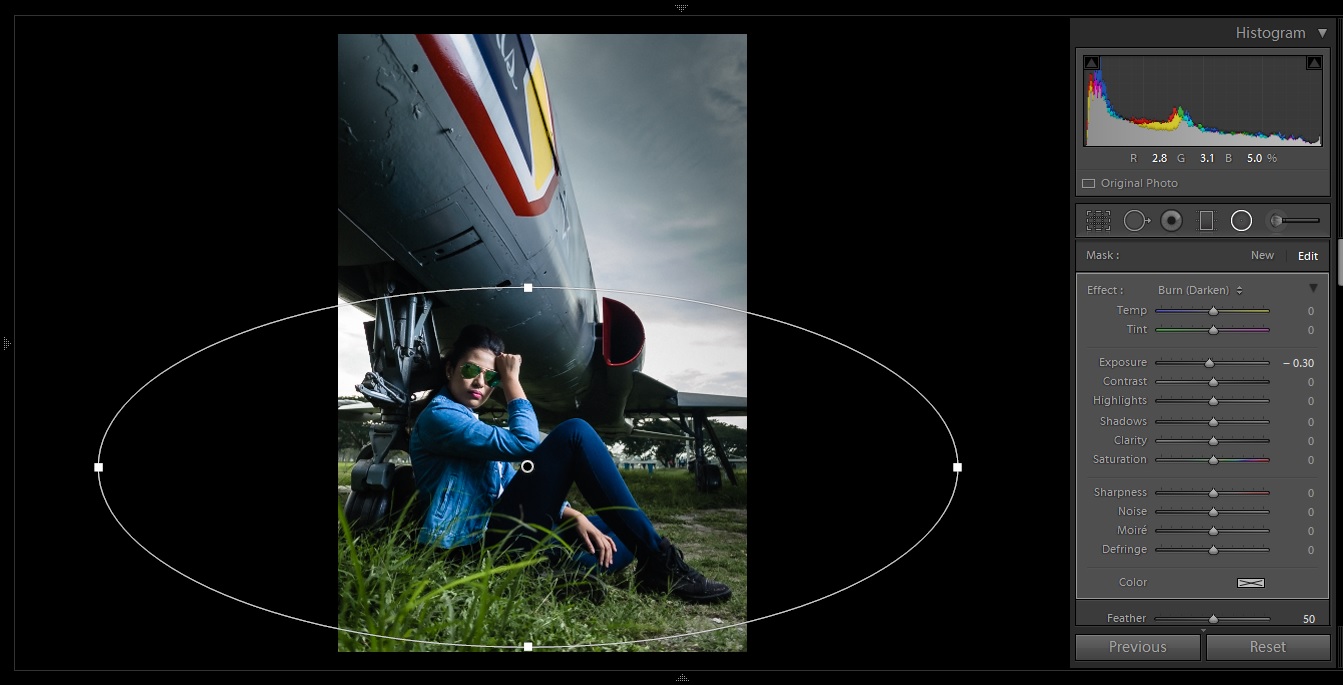
For this photo, we added a graduated filter to darken the sky, a radial filter to separate the subject and the HSL panel to desaturate plus illuminate the skin tone (Orange + Yellow Channels), and to desaturate the grass (Green Channel). Screenshots have been provided for these tweaks.
Before/After
Get rid of the ads!
Did you enjoy reading this article as much as we enjoyed writing it? There's a way to support us and our reporting, getting ad-free navigation and more as a bonus. Subscribe to us for less than a coffee per month —just $3.99— or take advantage of our yearly subscription with a hefty discount for only $25.- An ad-free experience
- A free mystery box for Lightroom or Capture One
- All the books in our store
- 20% discount on Capture One
- 30% discount on Imalume Photo Theft Protection
- 20% off Herbs and Kettle Tea Company.