Creating the Photograph is an original series where photographers teach you about how they concepted an image, shot it, and edited it. The series has a heavy emphasis on teaching readers how to light. Want to be featured? Email chrisgampat[at]thephoblographer[dot]com.
Photographer Aliaume Souchier is a 29 year old French photographer. “I started photography in the late 2000s, first as a hobby while I was studying the environment at the university. After my graduation and theses several years as a hobbyist, I decided to turn my passion into a job and had my first contracts.” he tells us. It’s been his full time job since 2013.
What Aliaume really understands is that you always need to do personal projects. That’s exactly what he did with this self portrait. What really makes it is the lighting and specific use of smoke to create the scene.
The Concept
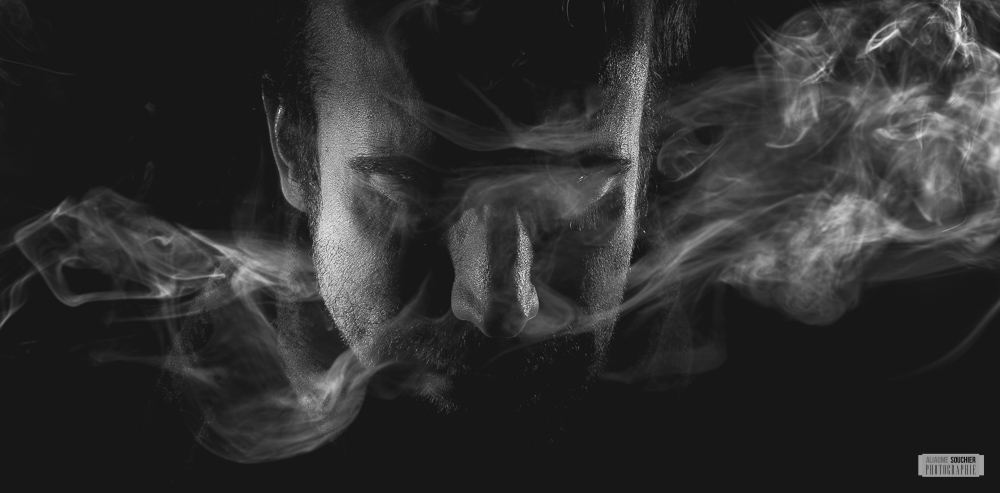
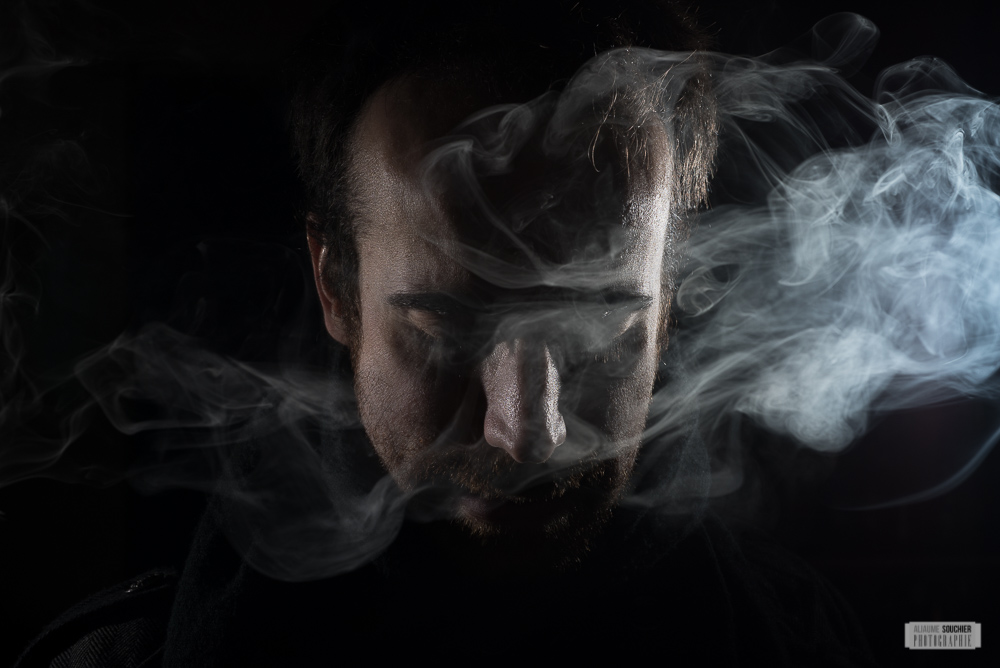
I sometimes shoot in the studio. I like deep black backdrops, simple lights and simple composition; and I love working on fluids (water, smoke, powder). For this picture, I wanted to take some self portraits with my face hidden by the smoke. So I tried to find the good set up of lights to make my face appear almost like a silhouette BUT at the same time succeed to enlighten the smoke, even in front of my face if possible.
The Gear
– Nikon D750
– 60mm micro nikkor af-d f/2.8
– 3 Yongnuo RF-603NII transmitters
– Phottix WXD-188 trigger
– 2 cigarettes
The Shoot

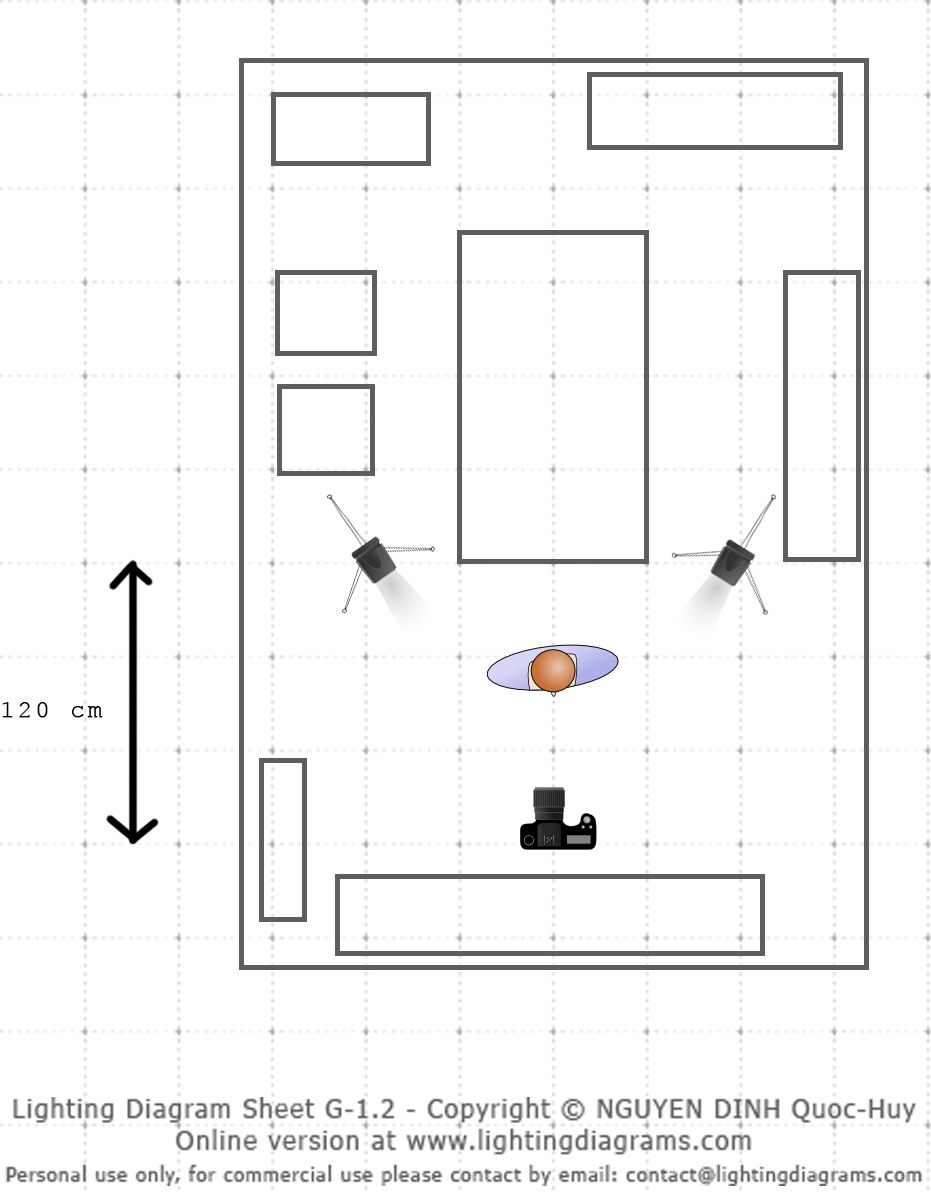
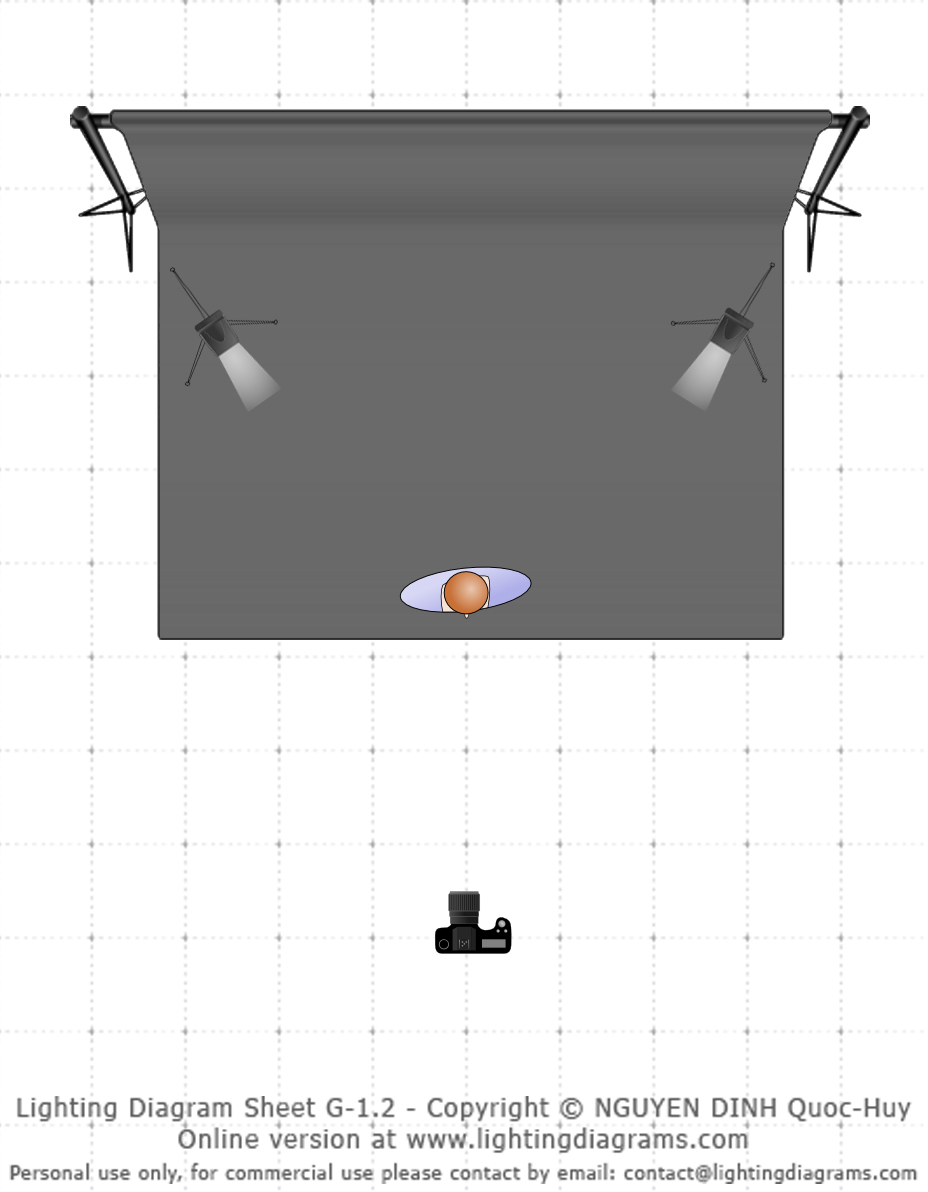
At the beginning, it was just a test. This day, I had no black backdrop with me, I was in a small room with white walls all around and a lot of pieces of furniture. I had to put the two flashes near me to decrease their power in order to avoid the reflections on the walls.
I couldn’t use any umbrella or softbox, they would have been too big and visible on the final picture because of the proximity of the 2 flashes.
This lack of space is also the reason why I used a 60mm focal length, which is unusual for a facial portrait.

The main problem when your subject is very close to your lights is that any move from him changes a lot the balance between the two lights. And this is exactly what happened with this shot. Despite my identical flashes being set to the same power, I was undoubtedly closer to the right one. It’s also possible that the denser smoke on the right side created its own reflection on my face.
I spent some time adjusting my position, the position and the direction of the flashes and I had a lot of more balanced shots.
But I never succeeded to produce a more convincing smoke. I liked this shots because the smoke was on the both sides of my face, and it’s not so easy. Besides, I liked the expression and the position of the head.
What I used: In fact, this is an extremely simple set up of lights. The only difficulty is to find the perfect angle to enlighten the smoke, even in front of the face, and at the same time, avoid to enlighten too much the face itself.
What I would recommend for someone who would like to try the same kind of shot :
– Use a real black backdrop in a larger room, it will allow you to put the flash further behind your subject, to use umbrellas or softbox and to avoid unbalanced light every time your subject slightly moves his head. It will make the blacks deeper straight out of the camera, with softer transitions, and no need to torture the raw
– Use an electronic cigarette or any device producing smoke 😉 It will allow you far more attempts! This kind of smoke implies to take big breathing in and big breathing out, and despite being a smoker, I cannot smoke 3 cigarettes in a row this way without feeling a little bit sick…
Post Production
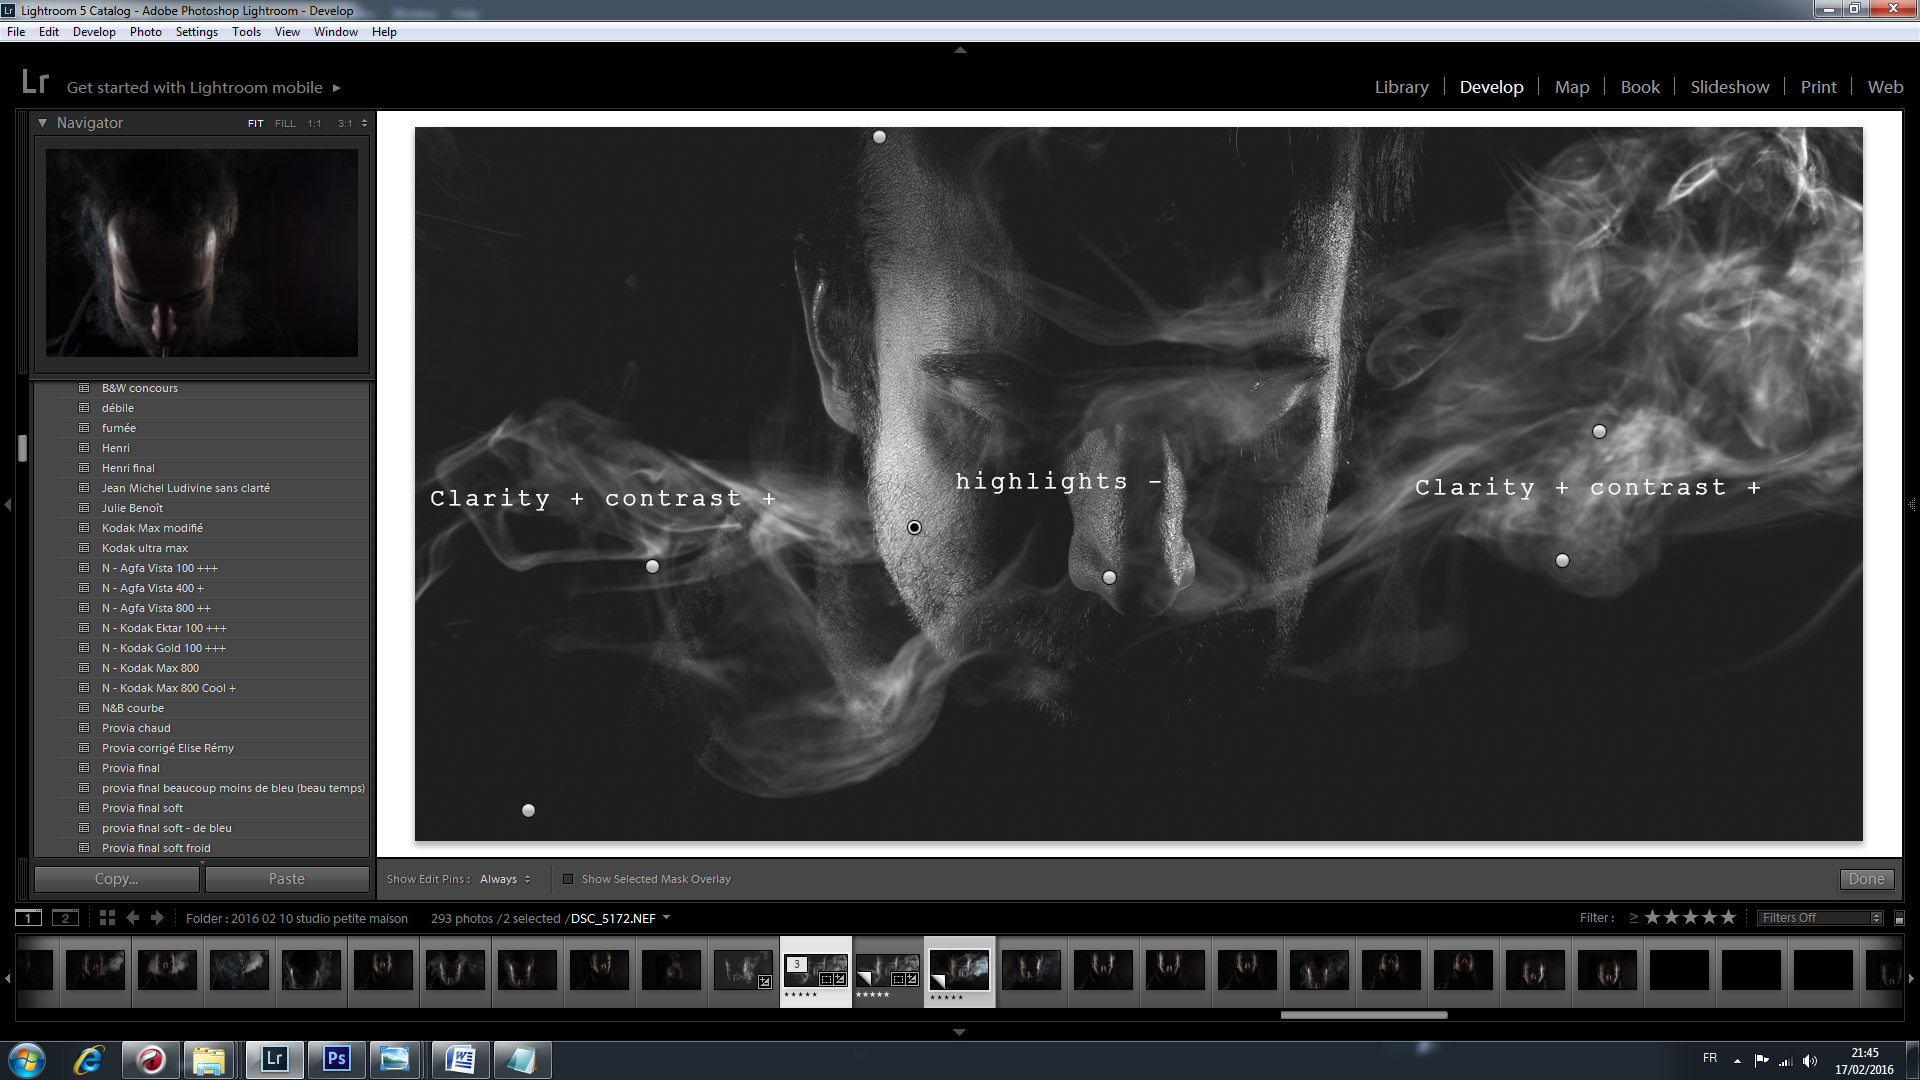
As you can see, the left part of my face was severely underexposed, and without enough contrast. In the same time, the right of the picture was a little bit overexposed and too harsh. Fortunately, I could compensate this mistakes with graduated filter and local adjustments in Lightroom.
Graduated filters : -0.30 exposure on the right, + 1.42 (yes it’s huge) on the left. The + 1.42 was necessary to retrieve a decent smoke on the left side.
Local adjustments :
– adding contrast and clarity to the smoke
– removing at the end highlights and clarity on the face which had to be softer, almost hidden by the smoke.

The general preset was very simple. A B&W conversion, a little curve adjustment, and the blacks pushed on the negative side of the slider (my darkness wasn’t really dark). I cropped the final picture in a very panoramic ratio, because the top of the head and the bottom of the picture were useless to me and I find it more dynamic like that.
At the beginning, it was just a personal test taken in far from perfect conditions. But despite the room and lighting, I liked the result, so finally I kept this picture in my portfolio.
Before/After
Get rid of the ads!
Did you enjoy reading this article as much as we enjoyed writing it? There's a way to support us and our reporting, getting ad-free navigation and more as a bonus. Subscribe to us for less than a coffee per month —just $3.99— or take advantage of our yearly subscription with a hefty discount for only $25.- An ad-free experience
- A free mystery box for Lightroom or Capture One
- All the books in our store
- 20% discount on Capture One
- 30% discount on Imalume Photo Theft Protection
- 20% off Herbs and Kettle Tea Company.
- 20% off your order from MPIX printing services.
- 5% off Viltrox Products via their eCommerce store.
- 10% off all film developing, printing and scanning services from Blue Moon Camera and Machine
- 15% off 7Artisans products: The lens and accessory maker is offering a sweet discount for Phoblographer's readers.