Creating the Photograph is an original series where we interview photographers about a photo that they shot and how it was achieved. The results are some knowledge passed on to you. Want to be featured? Email chrisgampat[at]thephoblographer[dot]com.
Photographer Rich Harley works for TriggerTrap, and his work is a demonstration that sometimes the simplest ideas can work effectively. He’s been a pro photographer for the last seven and a half years, and he specializes in aviation and commercial work with a bit of Sports and high-speed too. “I’ve been working at Triggertrap for just over a year, where I’m the Head of Product. I love trying to get an element of magic in my still life photos, and nothing helps more than being able to put lights in unusual places, and plenty of fishing line.” he tells us.
But most recently, he was tasked with the tough task of making a box look interesting. With what seems like a bit of inspiration from Pulp Fiction, Rich got to work.
Here’s his story.
The Concept
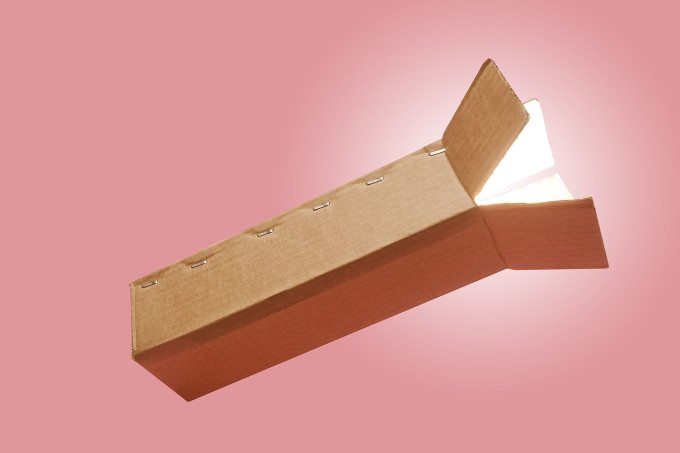
As an audition for a shoot for a box-making company, they sent out a selection of cardboard boxes to several photographers, with the requirement of getting back a couple of clean, editorial style photographs. I’d been working on the picture desk of a magazine that had been doing a lot of floating still life photos, and so I used that as a starting point. I’d also recently watched Pulp Fiction, and so the two things combined – a floating box full of light! It also felt quite fitting – boxes are designed to deliver goods in good shape, so the idea of transporting light was pretty cool.
The Gear
– 2 x Canon 580 EX Flashes
– Triggertrap Flash Adapter
– iPhone 4 and an iPhone 5
– Electrical wire, pink paper and a clothes horse.
The Shoot
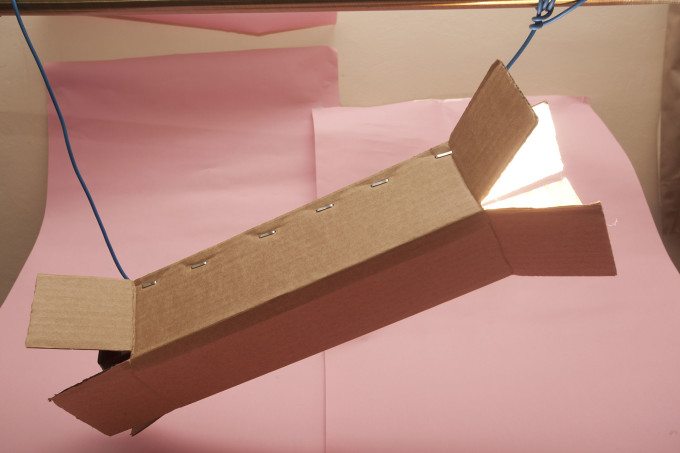
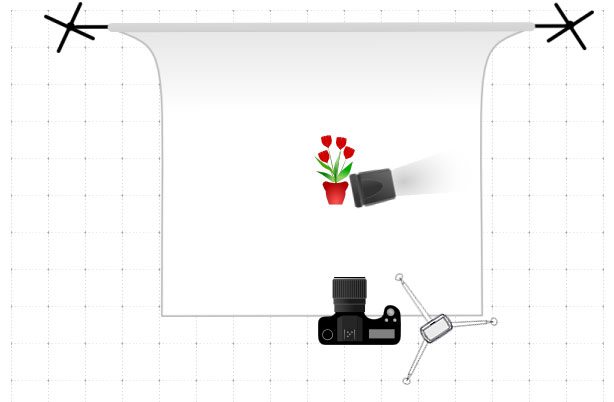
With no time or budget for a studio, I had to get a bit inventive. I was staying with a friend, and we turned his living room upside down to make some space for the setup. I popped out to the shop and got a roll of pink paper – I was planning on removing the background, but still wanted the pink light to bounce up onto the box. I ended up balancing the camera on a pile of books as I didn’t have my tripod on me.
Using a clothes drying rack, I taped the pink backdrop in place, then used some electrical wire to hold the box in place. This is where using a clothes rack was actually quite handy – lots of places to tie off the wire!
I used a 5D Mk II with a Canon 17-40mm F4 on the front – not an ideal lens for this, but it was all I had with me. I set the camera to 1/200th at 160ISO, with the lens stopped down to F10 for sharpness. To trigger the camera I used an iPhone 5 with a Triggertrap Mobile kit so I could eliminate camera shake by using it as a cable release to give me the sharpest possible RAW frame, and the iPhone 5 was also sending a signal to the iPhone 4 over Wi-Fi, which was inside the box with another Triggertrap kit hooked up to the flash. The second flash next to the camera pointing directly up at the white ceiling to provide most of the light, this would’ve probably been on full power.
Post-Production
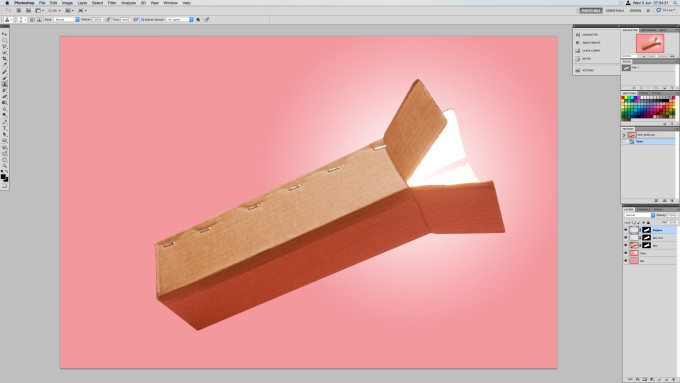
Post production for this nice and easy, simple and pretty fast. I drew a path around the box and cut it out to have it floating on the background, and cutting off the open end of the box to make it look neatly closed, but keeping in a bit of the boxes imperfections. Then I took a sample of the pink background and used that colour with the Fill tool on a new layer to create a solid pink background, adding a bit of noise to make it look less Photoshopped. A quick bit of tidying up of some staples, and the end of the box, and it was all done.
On a new layer I used the Gradiant tool to create a glowing circle, which was under the Box layer, and above the pink layer. This took some trial and error to get it to closely match the highlight tone on the cardboard itself. Once this was done, I sharpened up the box using a High-Pass filter and a bit of Unsharp Mask too (sharpening layers aren’t in this file). Then that was that!
I was pretty pleased with this, I had very little time to put this together, and without any light modifiers it made getting the lighting looking decent trickier, but a little imagination goes a long way! It was all worth it in the end, off the back of this shot I ended up getting the shoot.
Before/After


