Creating the Photograph is an original series where we interview photographers about a photo that they shot and how it was achieved. The results are some knowledge passed on to you. Want to be featured? Email chrisgampat[at]thephoblographer[dot]com.
I LOVE umbrellas–they’re so incredibly versatile and can be used creatively in images with the right ideas. After reading the words of many great photographers, I’ve started to feel that it’s about time for me to step my own photography game up with new ideas and concepts. And so when I called model Bec Fordyce over to shoot image concepts involving umbrellas with a light hidden inside, she was excited about it.
So was I obviously–as the EIC of this site, I don’t get to shoot often for myself. Testing cameras and lenses involves finding a way to not be too creative but still achieving a lovely image at the same time. The site’s philosophy though is to embrace creativity and to not worry too much about what’s done in a lab. Real photographers afterall don’t shoot in a lab. They shoot in real life.
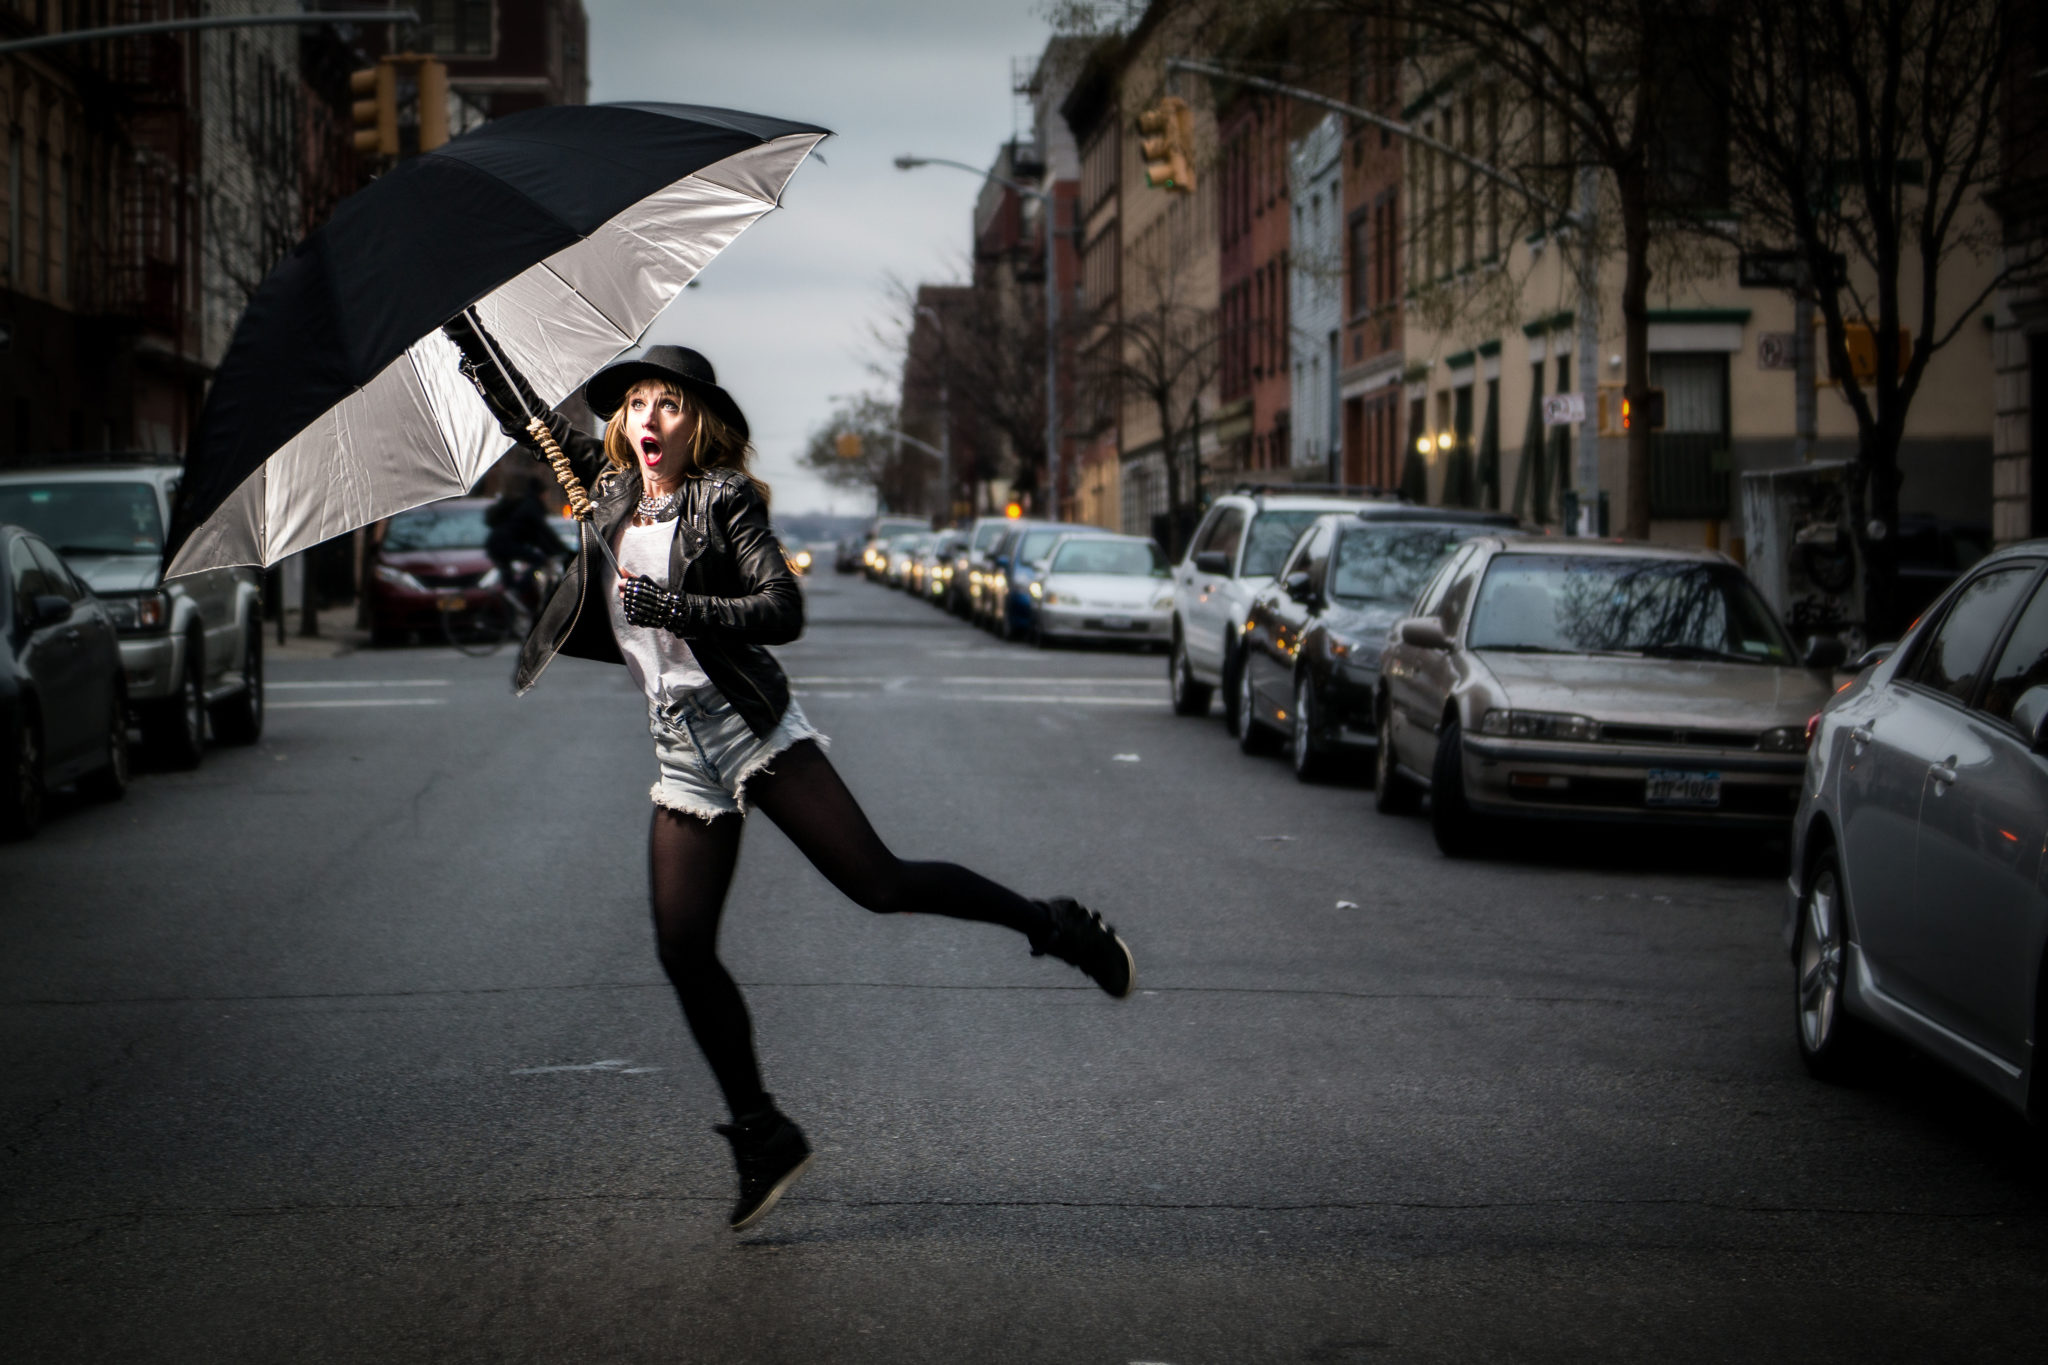
And that’s how the story of “the Windy Umbrella” began.
The Concept
I did the original Creating the Photograph piece that opened up this series, and it involved shooting someone with an umbrella in a similar situation. But then photographer Corey Boland also did it, and it further inspired me to take my umbrella shots even further. I absolutely love what you can do when put a flash in an umbrella and incorporate it into a scene.
This image was originally supposed to be an ode to a Bresson photo, but it turned into something that became more of a nod and a wink to Mary Poppins with modern elements. Originally, when I called model Bec Fordyce over to shoot, I explained to her that one of my ideas was to emulate the Mary Poppins look, the Bresson photo, and one for Singing in the Rain.
So with the concept ideas down, we got to work. But the particular image that this post is focusing on took lots and lots of work.
The Gear
– Samsung NX30
– Samsung 50-150mm f2.8 OIS
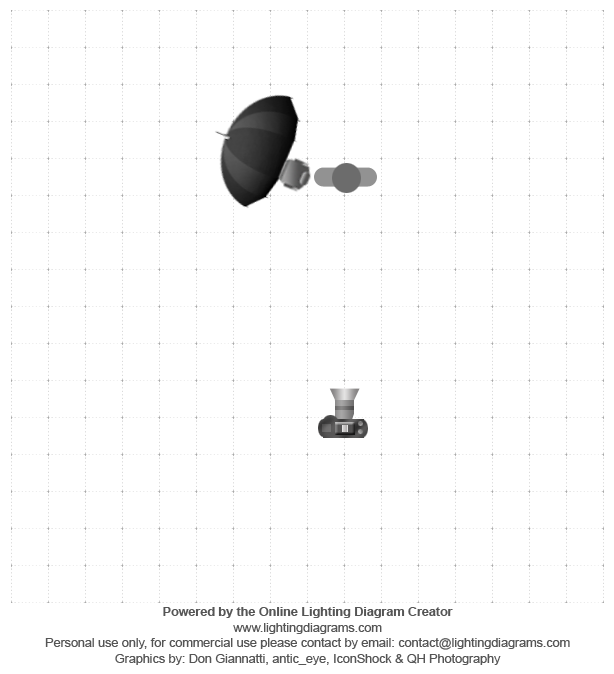
– Impact Three in One umbrella
– PocketWizard Plus III Transceivers
– Lumopro LP-180 flash
– Adobe Lightroom 5 and Photoshop Elements
The Shoot
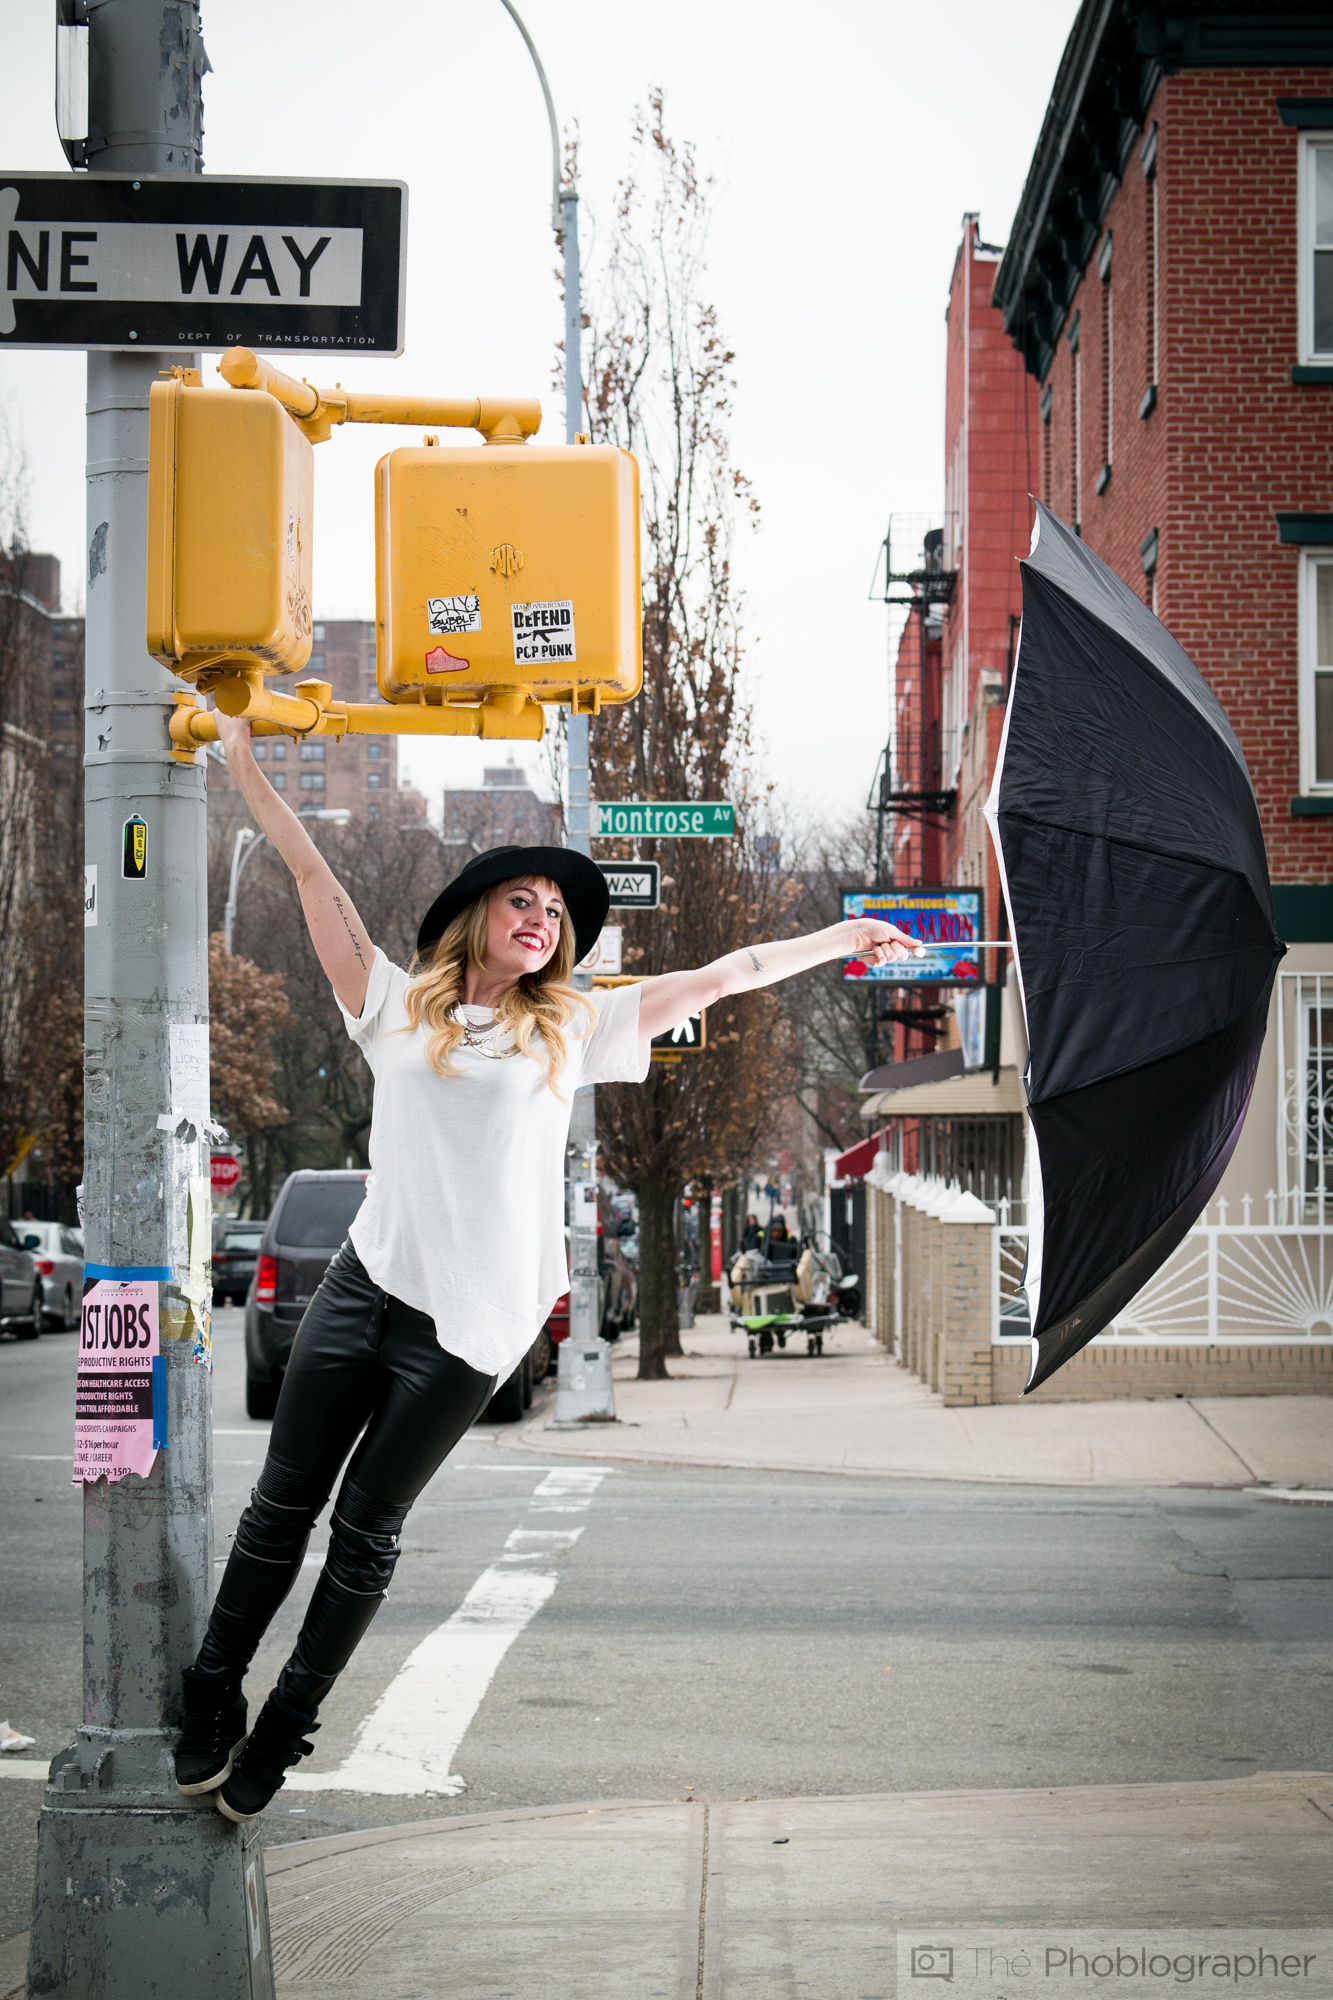
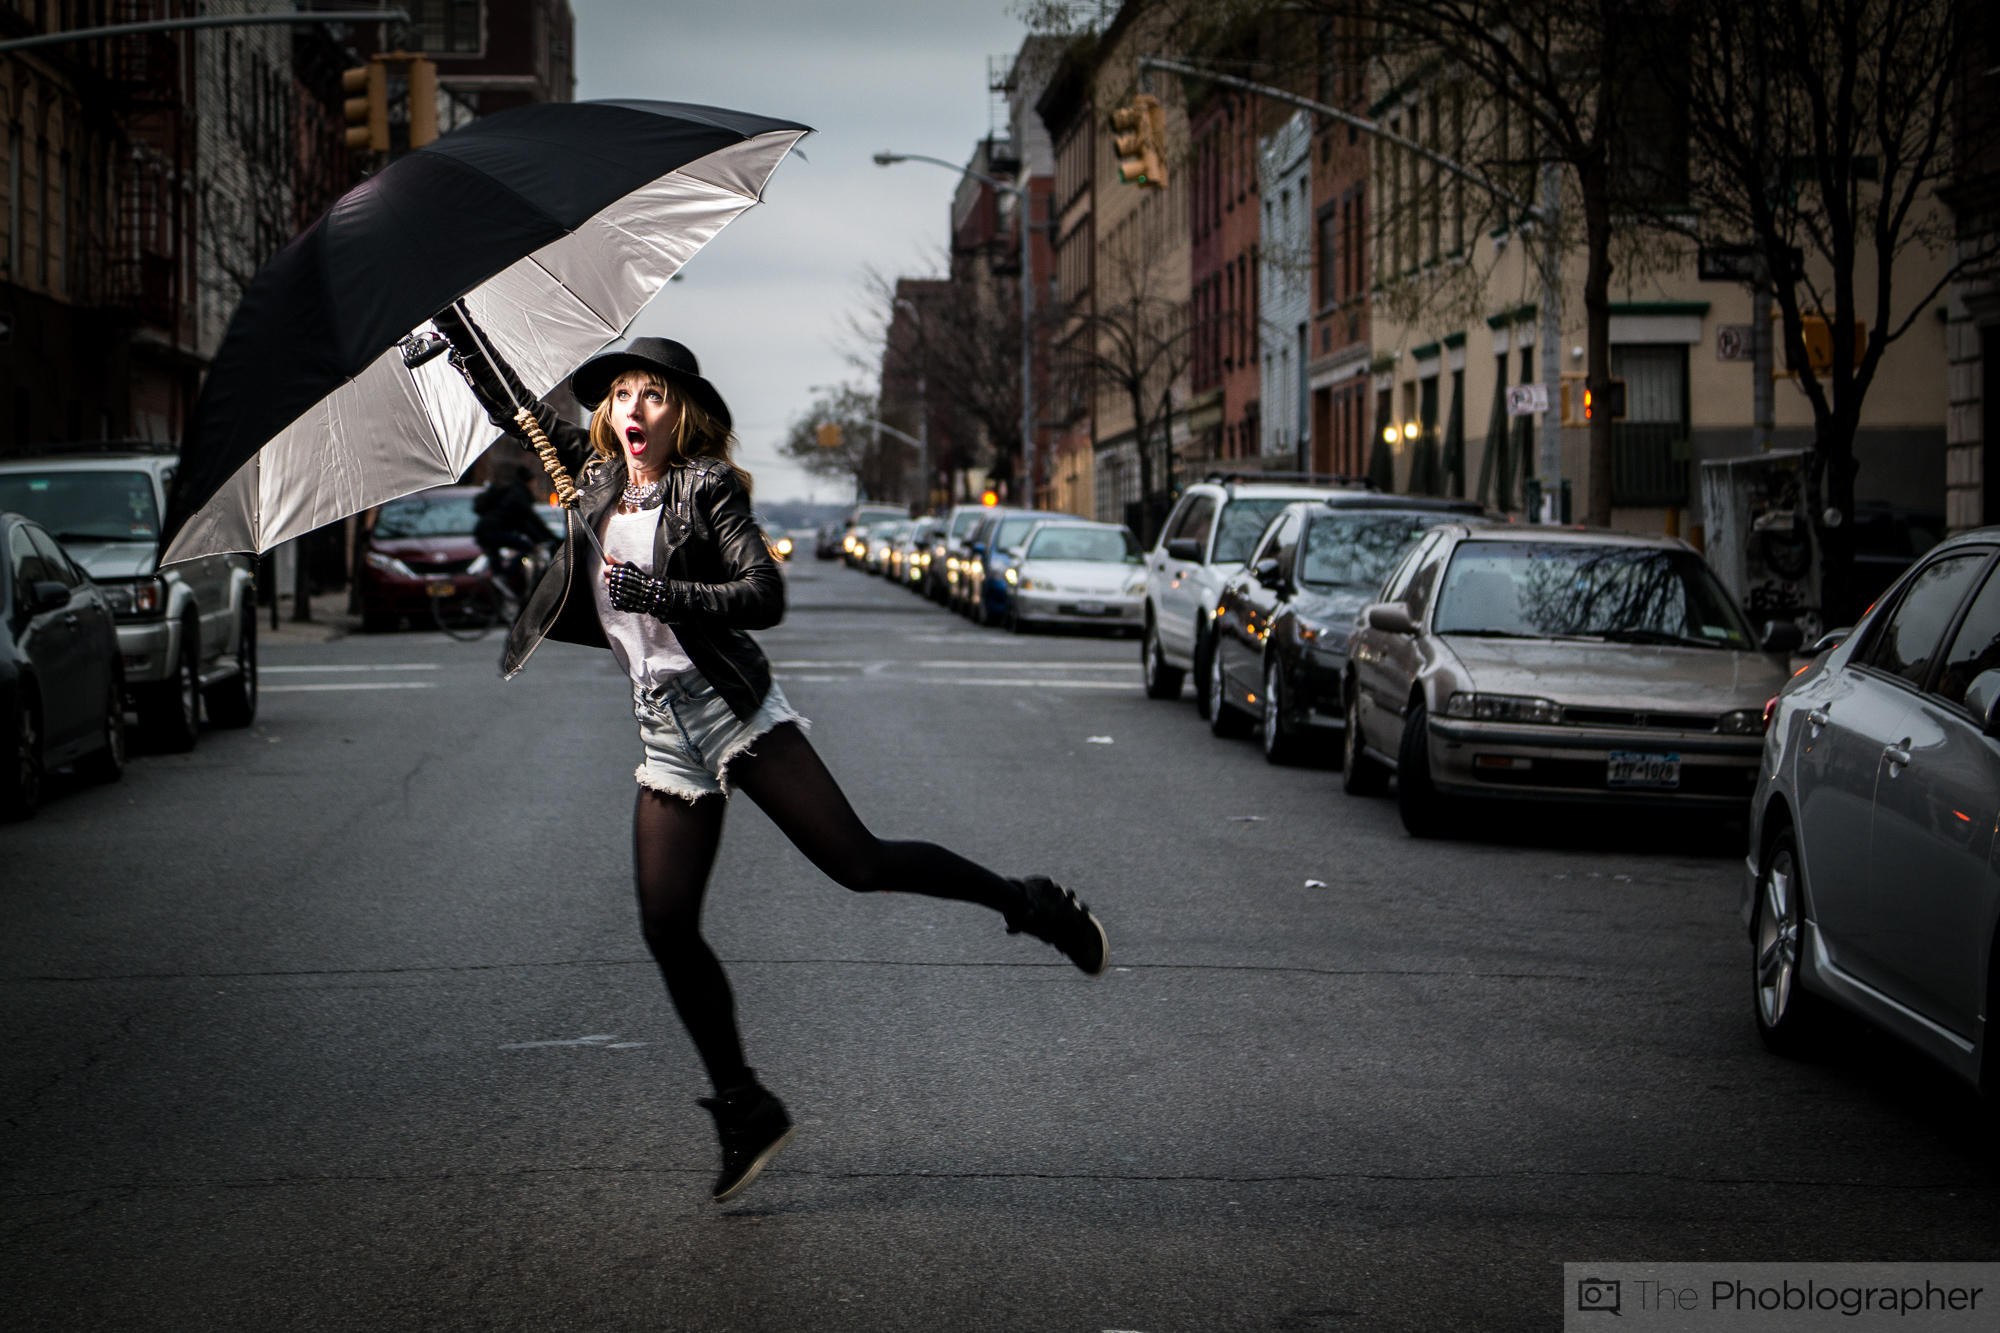
The shoot involved shooting three different looks. One involved the outfit that you see in the lead image, another was a beautiful evening wear gown, while the other were fairly normal clothes.
We shot the other two looks first but during the shoot, it became apparent at one point that traffic in the streets of East Williamsburg, Brooklyn was picking up. So in order to get some of these images, Bec and I would need to try to get the pose, umbrella positioning, lighting, focusing, etc right in a very short amount of time–maybe around 10 seconds at a time until we would have to move away for cars to come through. At the same time, there were also onlookers, guys cat-calling Bec, and adjustments that we would have to make.
It was really, really difficult to pull off on both our parts. One of the things that I try to do when I work with models is explain to them exactly what I want and need. It tends to make them much more comfortable, but it can also be tough to do when both of you need to pull off the exact right moment in a split second.

When we did the second look, I started to realize that it was very difficult for Bec to hold the umbrella out combined with wind and due to the fact that photographic umbrellas have a very smooth rod. So to fix that, we added rope and wrapped it around then tied it off at two different ends.
This helped a bit ergonomically, but it still wasn’t stable for Bec. She ended up grabbing the umbrella at two different locations which still worked perfectly fine for the photo in the end. The image was shot with the Samsung NX30 and 50-150mm f2.8 OIS due to the fact that we’re reviewing the lens. All the lighting was my own–and I usually use lots of my own lighting to create the images on the site. But it was a great test for the lens because it involved working with the NX30 to track her fast enough across a street and still produce a great image.
The work done to get the photo was intensive and Bec and I were both running low on time. I made a decision to shoot this photo down my street because of just how beautiful is can sometimes look at night due to how the street slopes.
My instructions to Bec? “So to get this image, what I’m going to have to do is have you run across the street. Then when you’re around the middle, leap across and I’ll shoot you.”
Simple enough, right? Well, not really. Considering that she’s holding a large umbrella with a flash and PocketWizard inside and I need to ensure that I get the image in focus with dwindling light in the area. It’s pretty tough for both of us to do.
I’m very used to getting a photo in a single shot, but after a while I had to rely on continuous shooting mode. Luckily, the Lumopro LP-180 was recycling fast enough and I was able to get my settings perfectly right to get the image that I wanted.
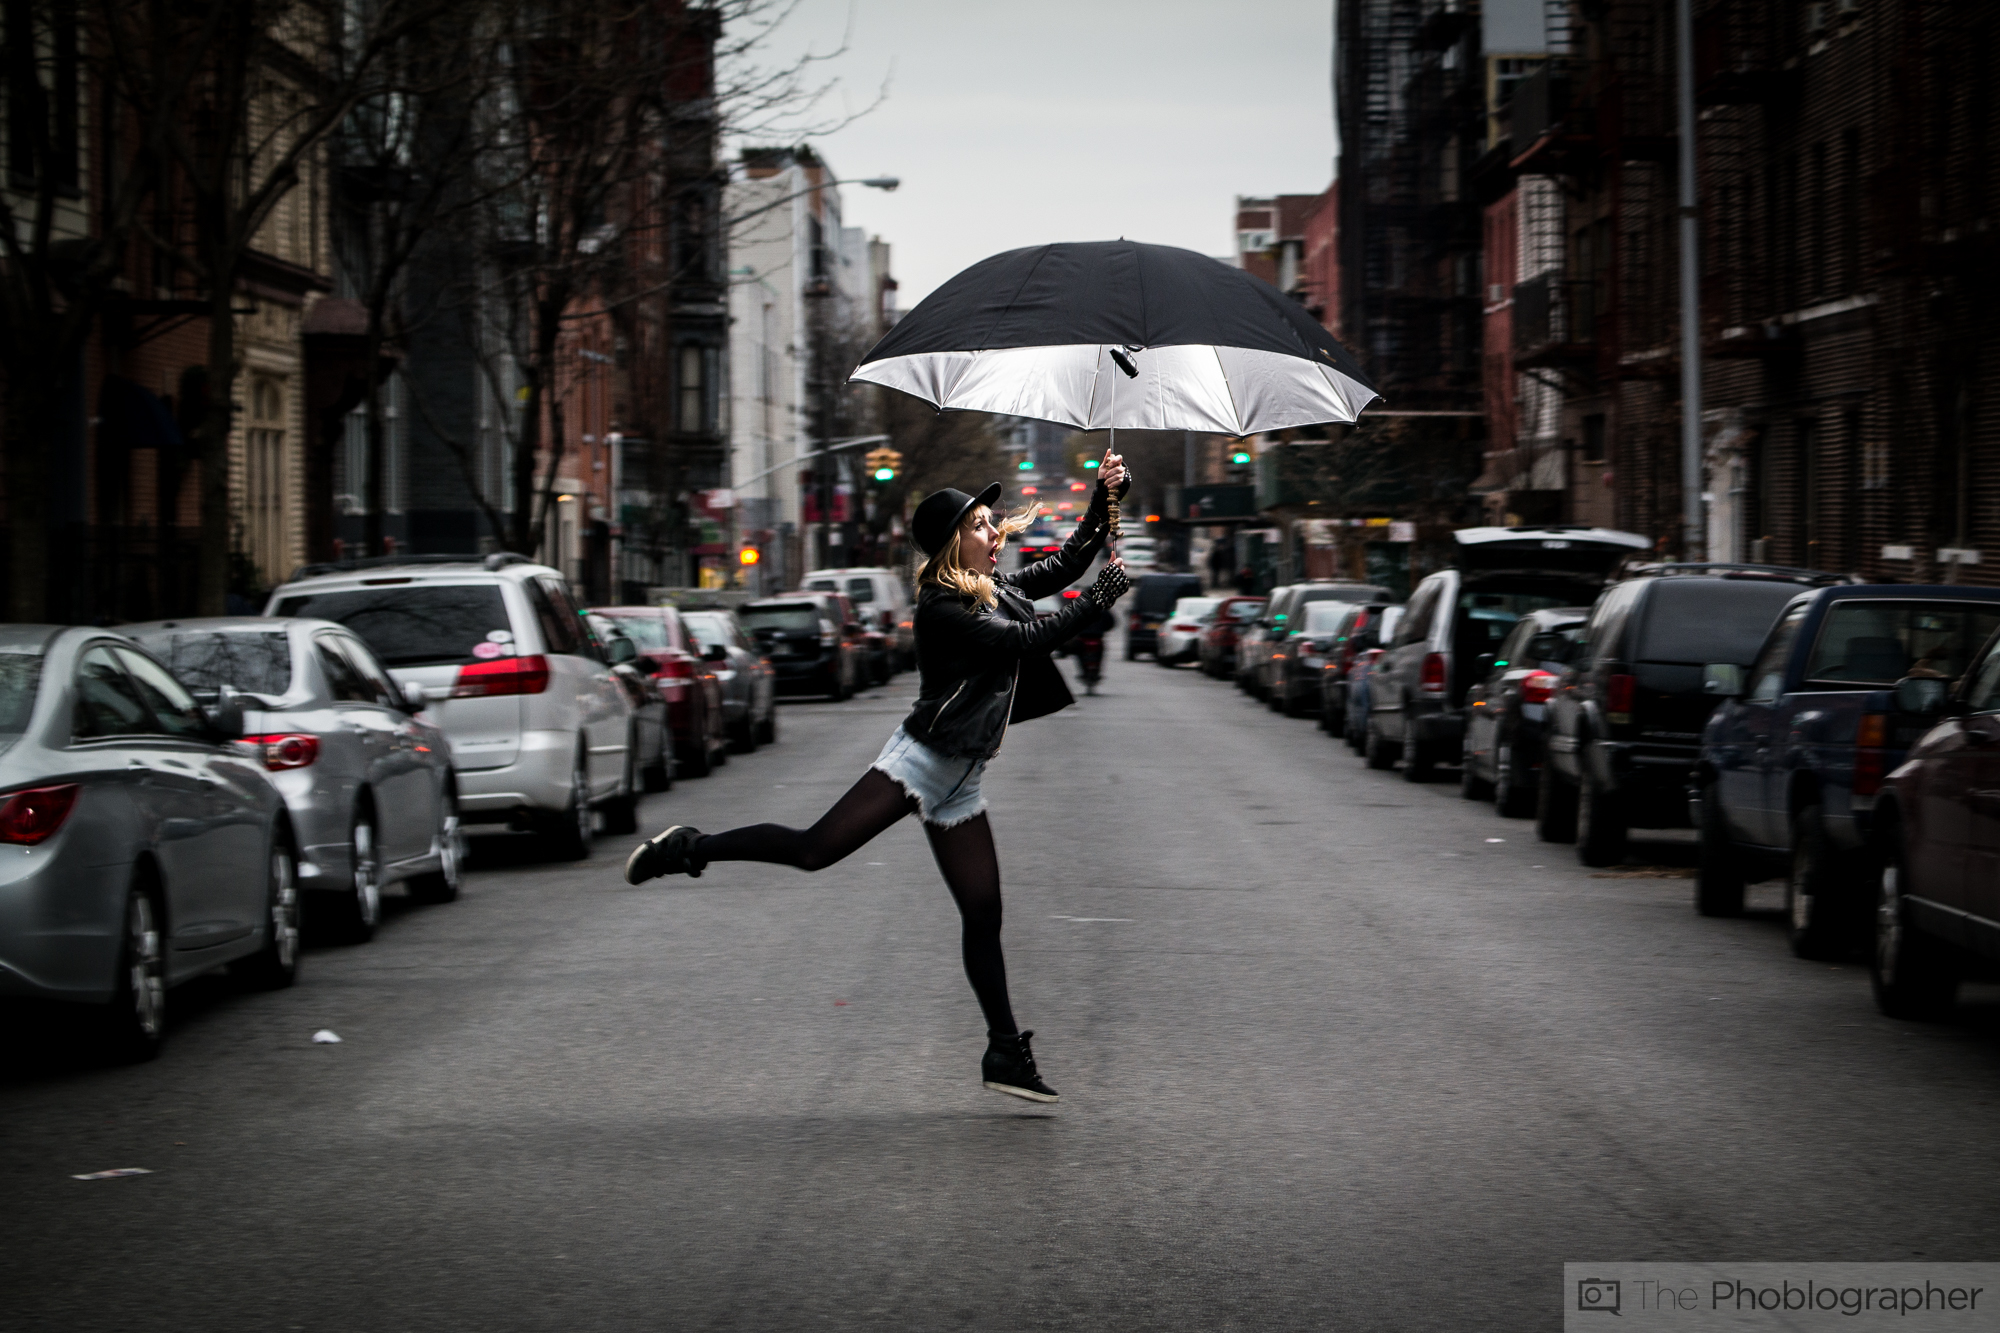
My settings were around ISO 400, F4, and 1/100th. I didn’t think that it would be enough to stop fast motion but considering that the Lumopro LP-180 has a pretty fast flash duration, it wasn’t too much of a problem.
We had to do this over and over again with breaks in between because of streams of cars. That’s when I would look at the images that we shot and make corrections. Eventually, we came back with images we were happy with and even overshot just a bit more just in case.
Post-Production

Getting the images just the way that I wanted them to be required work in Lightroom and Photoshop Elements. Much of the color correction, vignetting, cropping, contrast adjustment, exposure adjustment and minor corrections were done in Lightroom. But more intensive work needed to be done in Photoshop. I didn’t like the fact that background wasn’t blurred enough, so I needed to bring the photo into Photoshop Elements to do that.
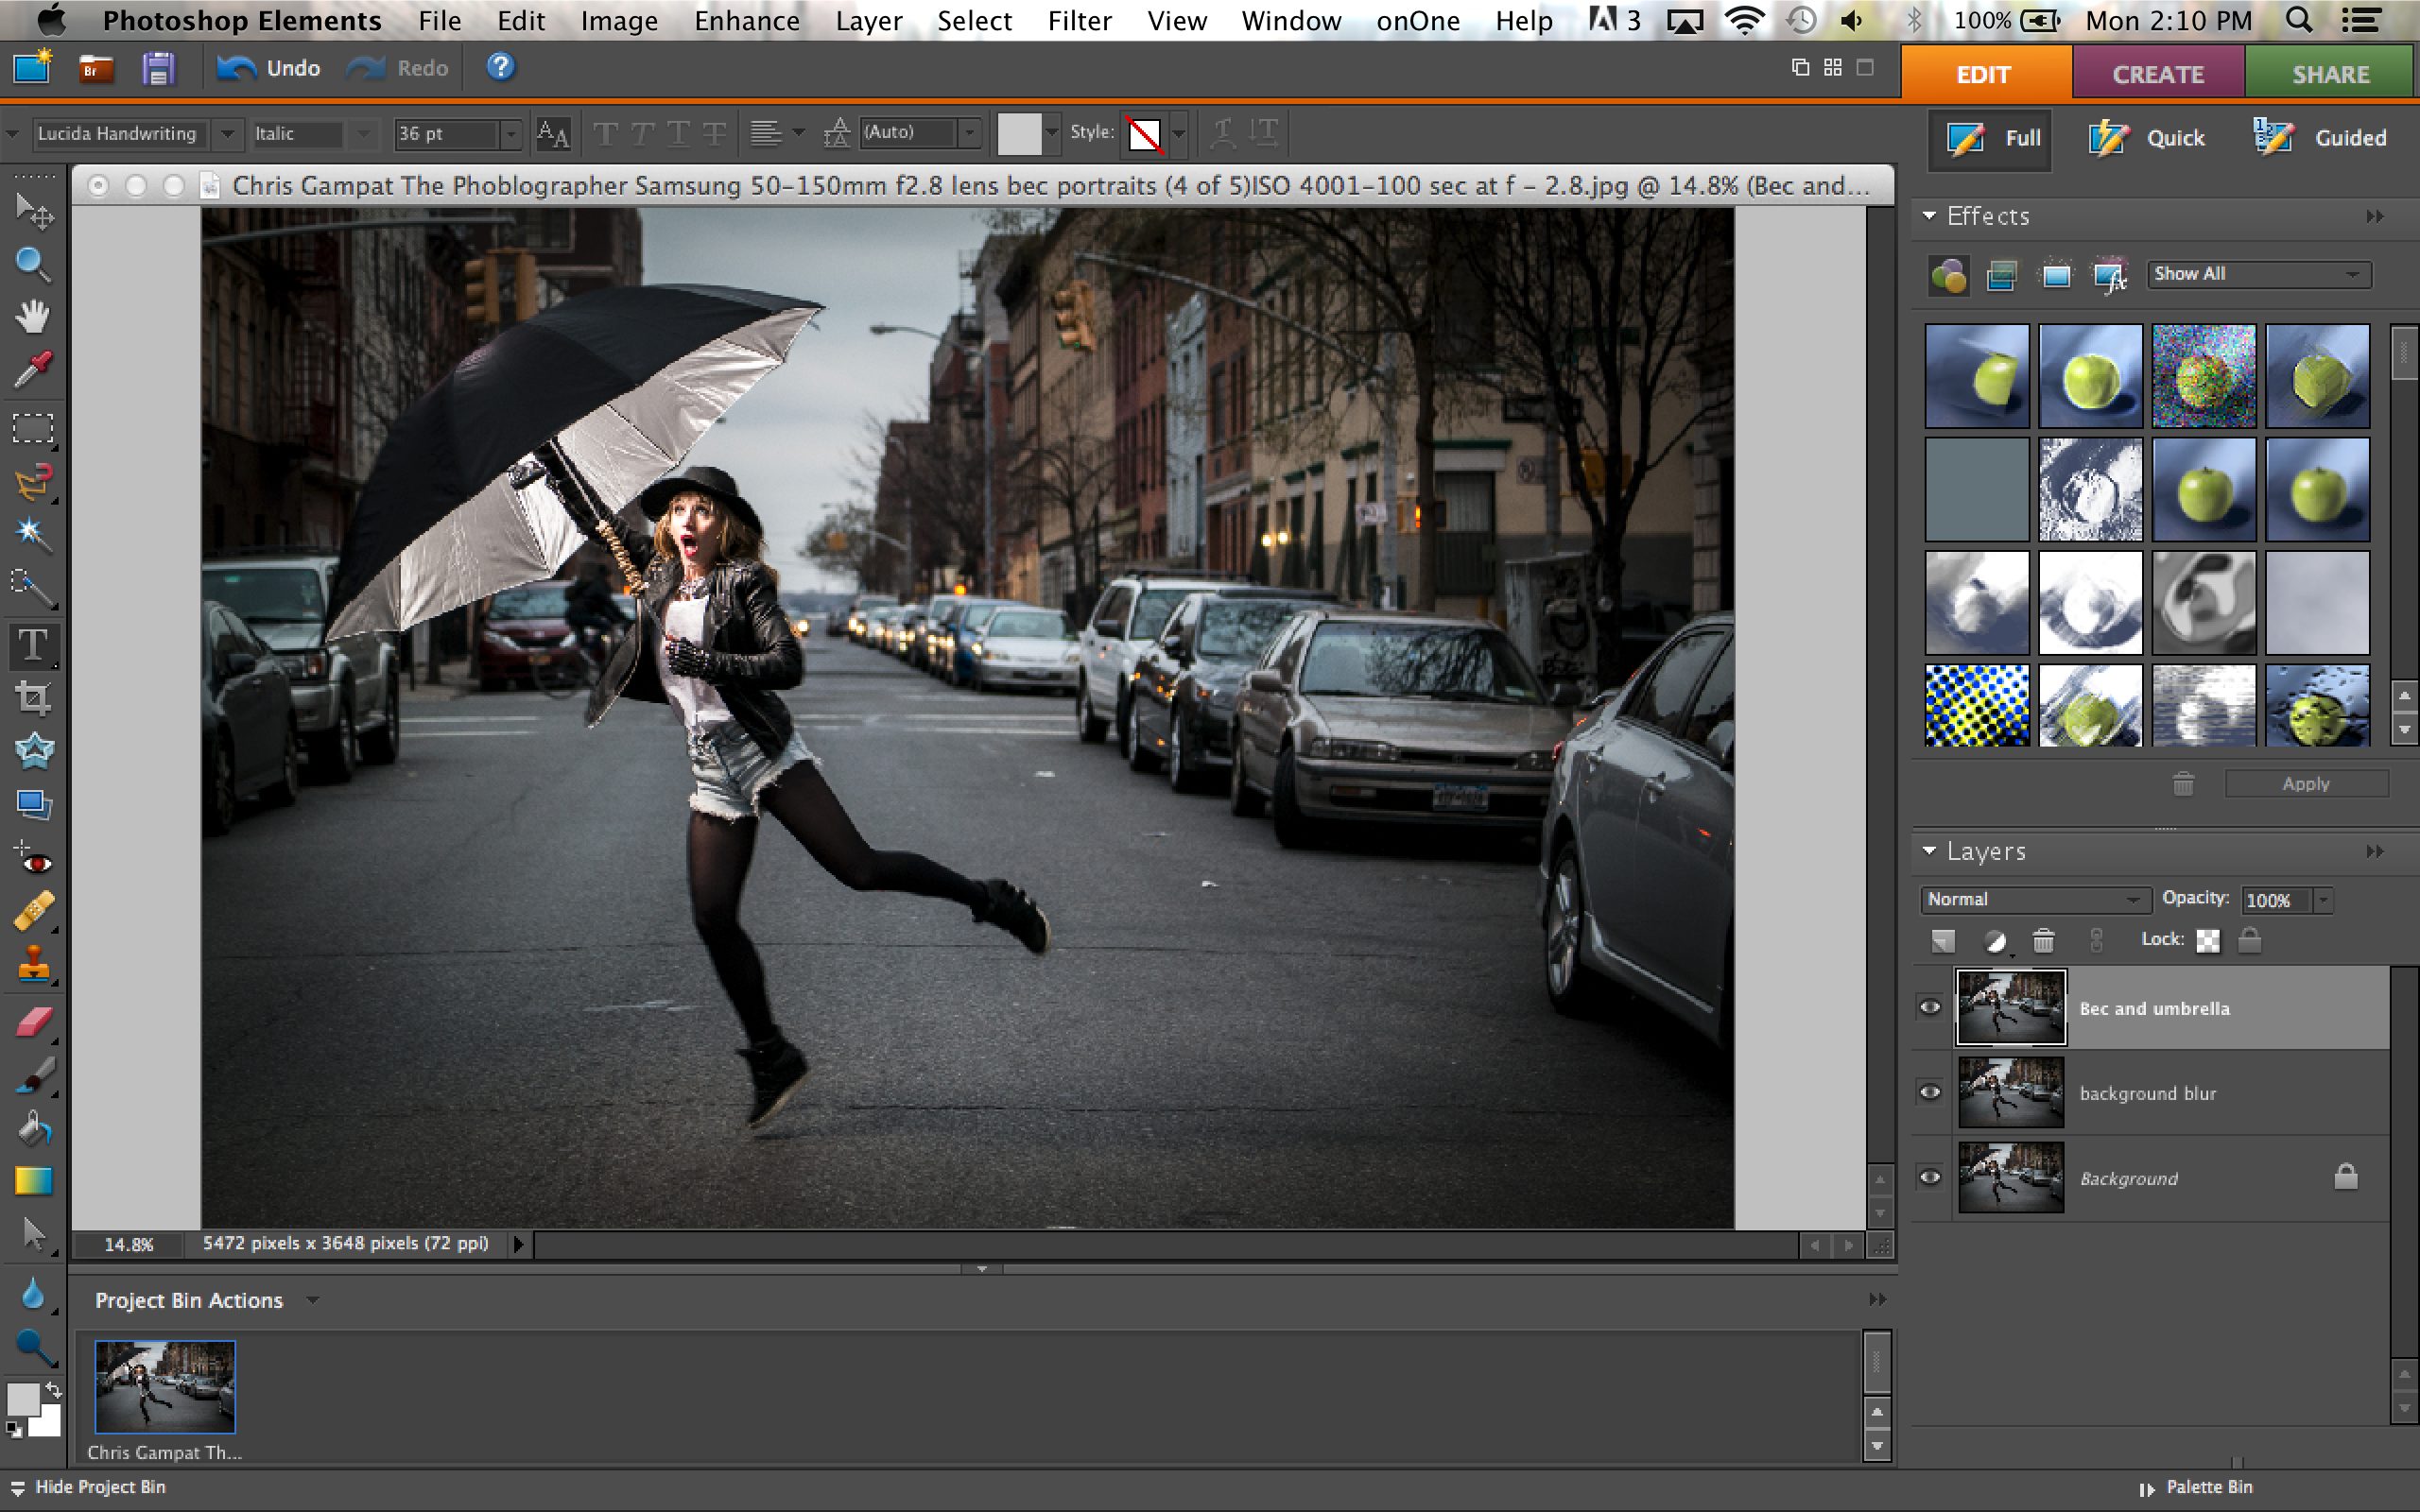
To get the final image, I created three layers: a background, one for blurring the background and one specifically for Bec. I applied lots of Gaussian blur to the middle layer, but not an overwhelming amount that would make it look overpowering. This was tough to do and I needed to ask for the input of my roommate to ensure it looked natural and not overdone.
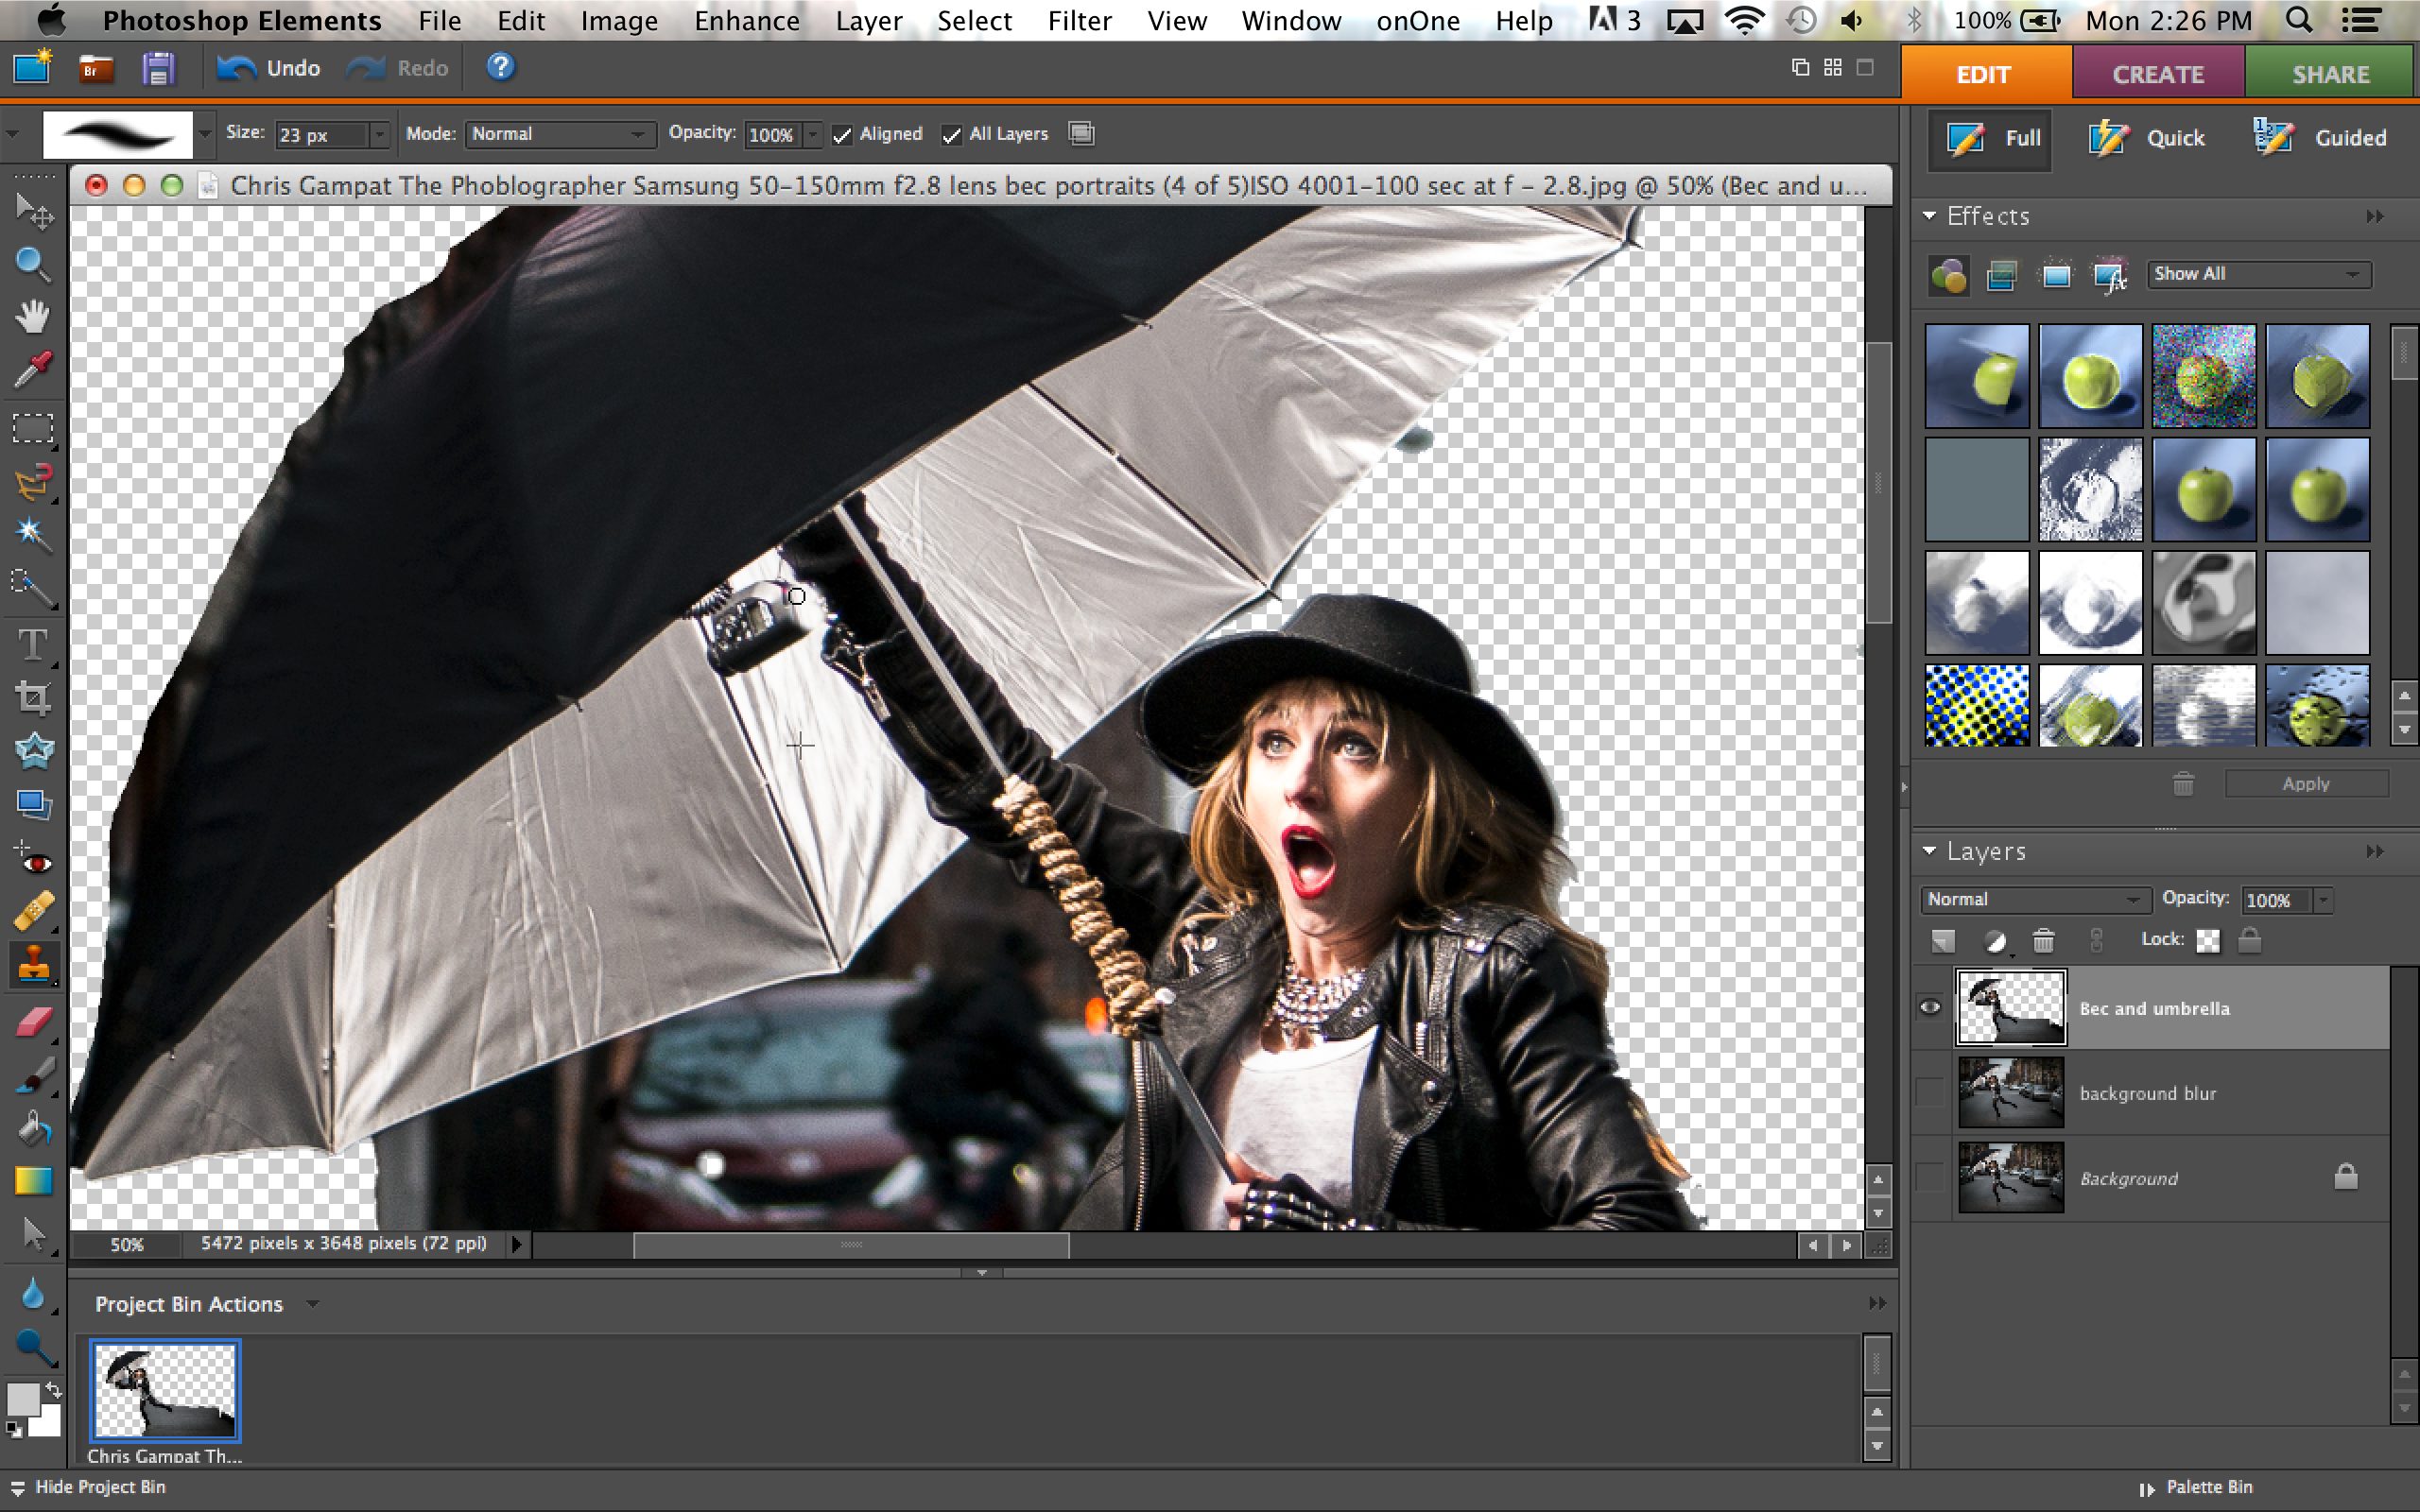
The top layer involved getting Bec cut out and stripping out all of the unnecessary parts of the image. I also needed to clone out the PocketWizard and the top of the light shining through the umbrella.
The three were placed on top of one another and adjusted accordingly to make sure that one didn’t overwhelm the other. This was very challenging due to Bec being so specular and contrasty against such a large background. It’s easy to believe that she wasn’t real but indeed, she is in the same spot as she was in the original image.
After this was tinkered with, I flattened the image and exported it. I still believe that there are some things that I can possibly do better, but i believe that about all of my work.
Before/After
Get rid of the ads!
Did you enjoy reading this article as much as we enjoyed writing it? There's a way to support us and our reporting, getting ad-free navigation and more as a bonus. Subscribe to us for less than a coffee per month —just $3.99— or take advantage of our yearly subscription with a hefty discount for only $25.- An ad-free experience
- A free mystery box for Lightroom or Capture One
- All the books in our store
- 20% discount on Capture One
- 30% discount on Imalume Photo Theft Protection
- 20% off Herbs and Kettle Tea Company.
- 20% off your order from MPIX printing services.
- 5% off Viltrox Products via their eCommerce store.
- 10% off all film developing, printing and scanning services from Blue Moon Camera and Machine
- 15% off 7Artisans products: The lens and accessory maker is offering a sweet discount for Phoblographer's readers.