Creating the Photograph is an original series where we interview photographers about a photo that they shot and how it was achieved. The results are some knowledge passed on to you. Want to be featured? Email chrisgampat[at]thephoblographer[dot]com.
Fernando Gallegos is a photographer that hails from San Jose, California and operates Lemurian Grove Studio. He’s also quite well travelled and enjoys photographing all manner of things. Mr. Gallegos tells us that his aim is to capture people with unique traits and who create their own style, no matter how different or bizarre. “As of recently I’ve been experimenting more with artistic photography using Photoshop/Lightroom manipulation and enhancements to create atmospheric, historic, and mystical interpretations.” says Fernando.
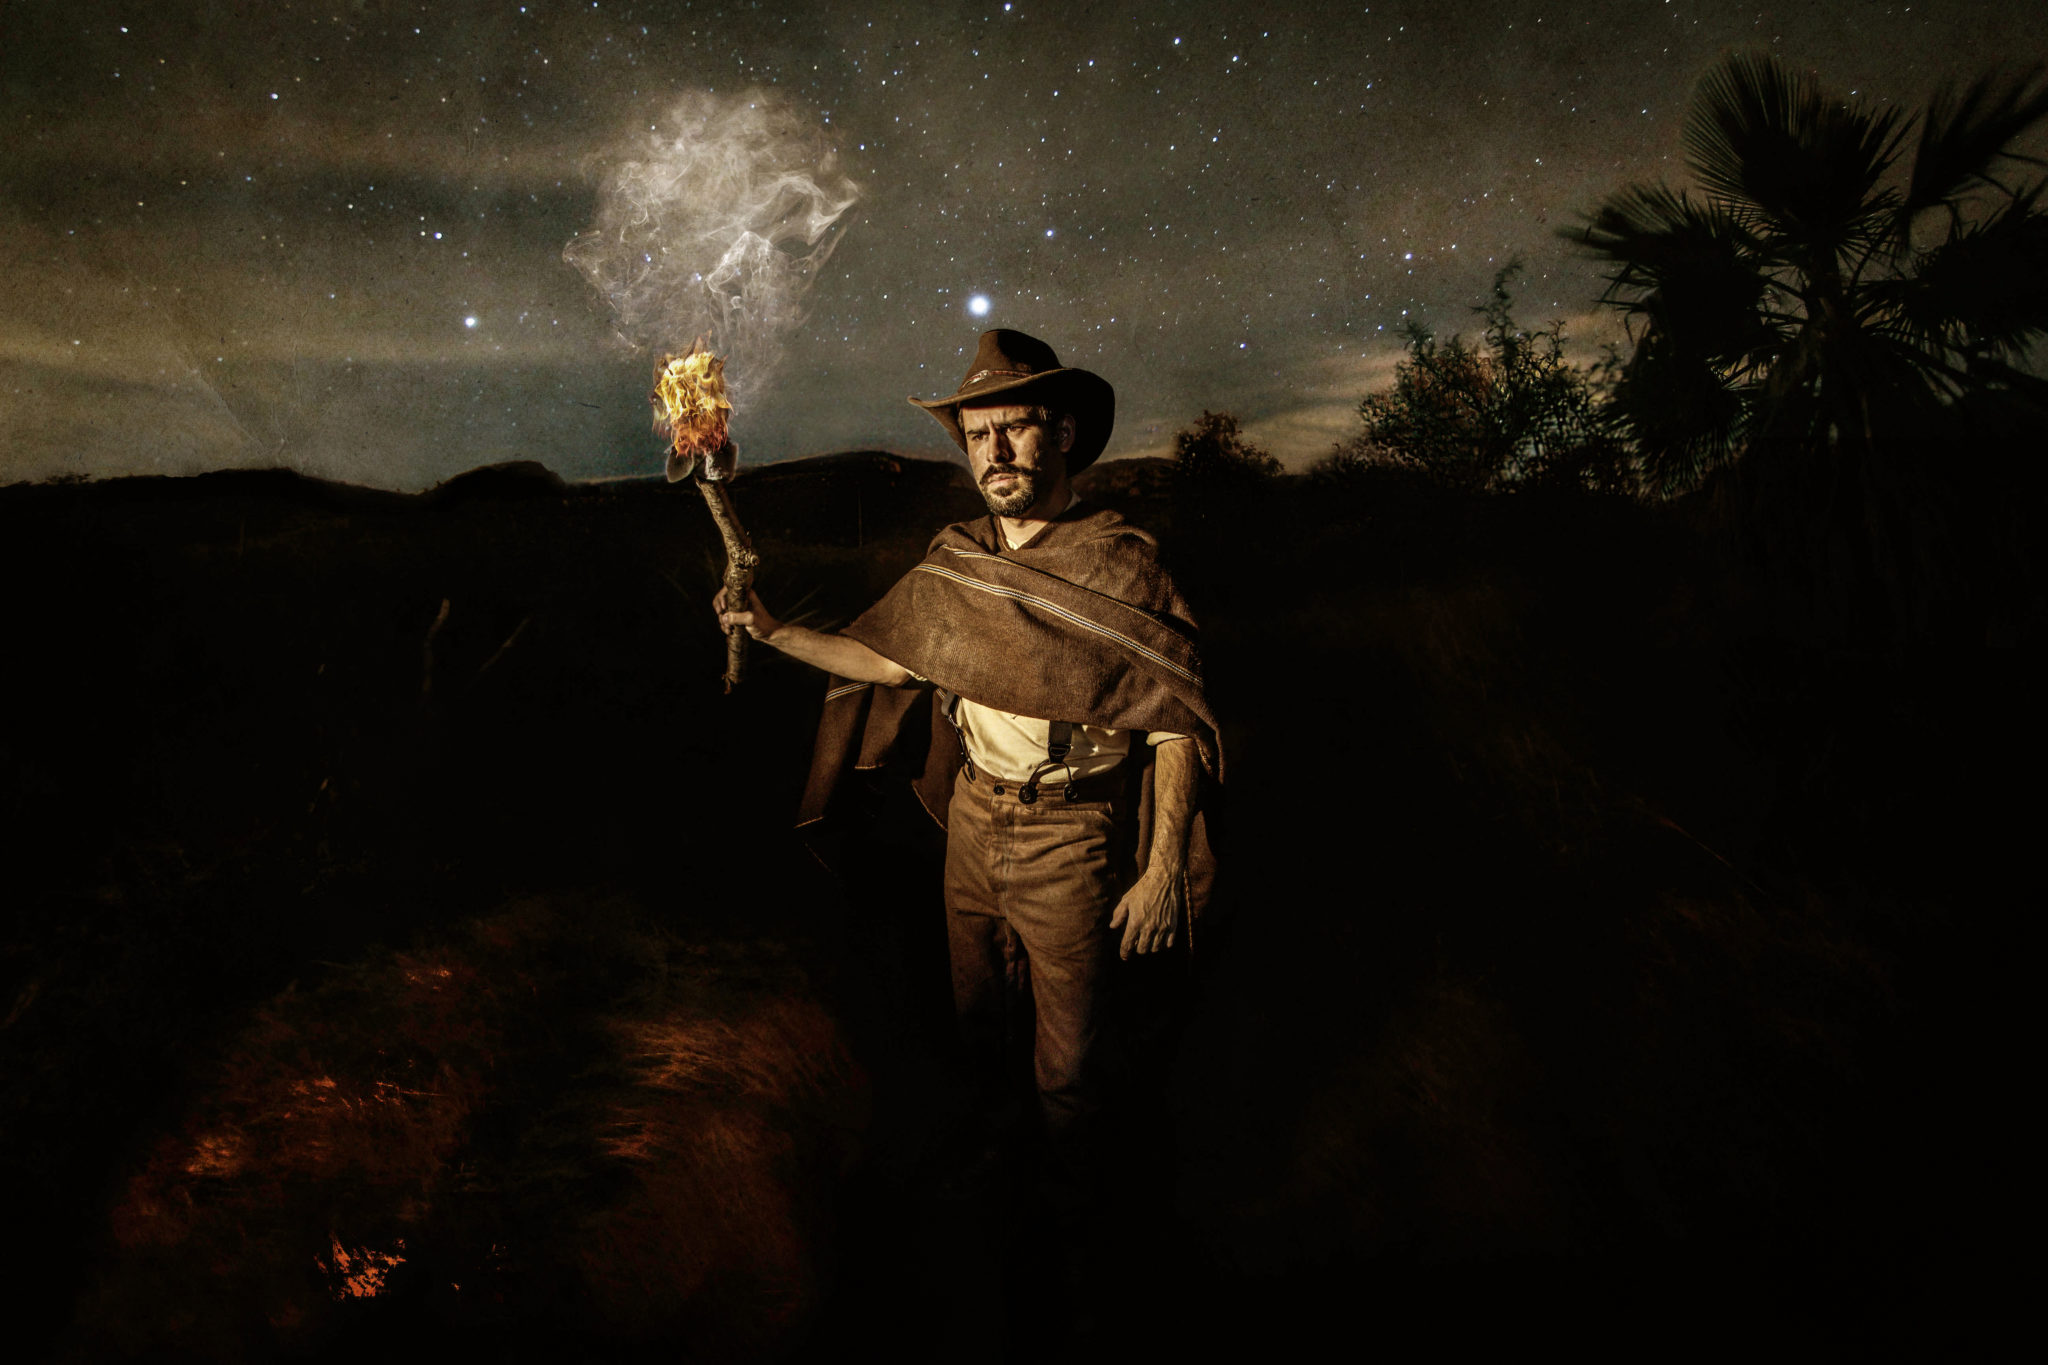
When we found his image “Night Sky Over the Chaparral” on Reddit, we were completely fascinated by the amount of compositing and work that he put in to create it. The image otherwise looks lit with a combination of a slow shutter speed and a softbox. But that wasn’t how it was created.
Here’s his story.
The Concept
Some time ago, I wanted to conceptualize something from my own heritage and background that tried to illustrate a simpler life. I wanted to take my photography skills to the next level by integrating what I knew about photography with completely new unchartered territory, at least for me. I wanted to show the rural lifestyle of a Mexican campesino, or peasant farm laborer, from the late 1800’s to early 1900’s. My father’s side of the family comes from a long line of hard-working farm workers having the same ranch passed down through generations they in turn lived off what they maintained on this plot of land. I would often hear the stories of working the fields late at night and the struggle it must have been to combat the elements.
Originally I had planned to shoot some photos of myself down near a creek near where I live, but due to rain, I had to improvise my shoot. All the clothing is time-authentic reproductions, except the poncho and hat. Because traditional hand woven ponchos are almost non-existent in Mexico today, I had to use a hand woven poncho from the indigenous Q’ero in Peru (which closely resembles those from Mexico at the time).
The Gear

Source 4 Par with ND filter (Rosco .6 gel) and barn doors
Canon t4i (650D) w/18-55mm
Black panel of drape as backdrop
Tokina 11-16mm
Photoshop & Lightroom
The Shoot
I had experimented with various lighting techniques and felt that just a single Source 4 Par would act as a decent stage wash over my upper torso area to resemble that of a torch (seeing as I did not own a flash or softbox). Because of the intensity I placed a Neutral Density gel filter on the Par Can to reduce the amount of light while maintaining the colors. I positioned the camera directly in front, while the light was at a 45 degree angle from me slightly above my head. The hardest task was to focus on myself without being in front of the camera, to which I simply used my hat on a microphone stand and used it to focus on.
With a 10 second self-timer I set the camera to the three exposure bracket at 1/60, 1/250, and 1/15 sec at RAW + JPEG.
Post Production
Combined RAW image
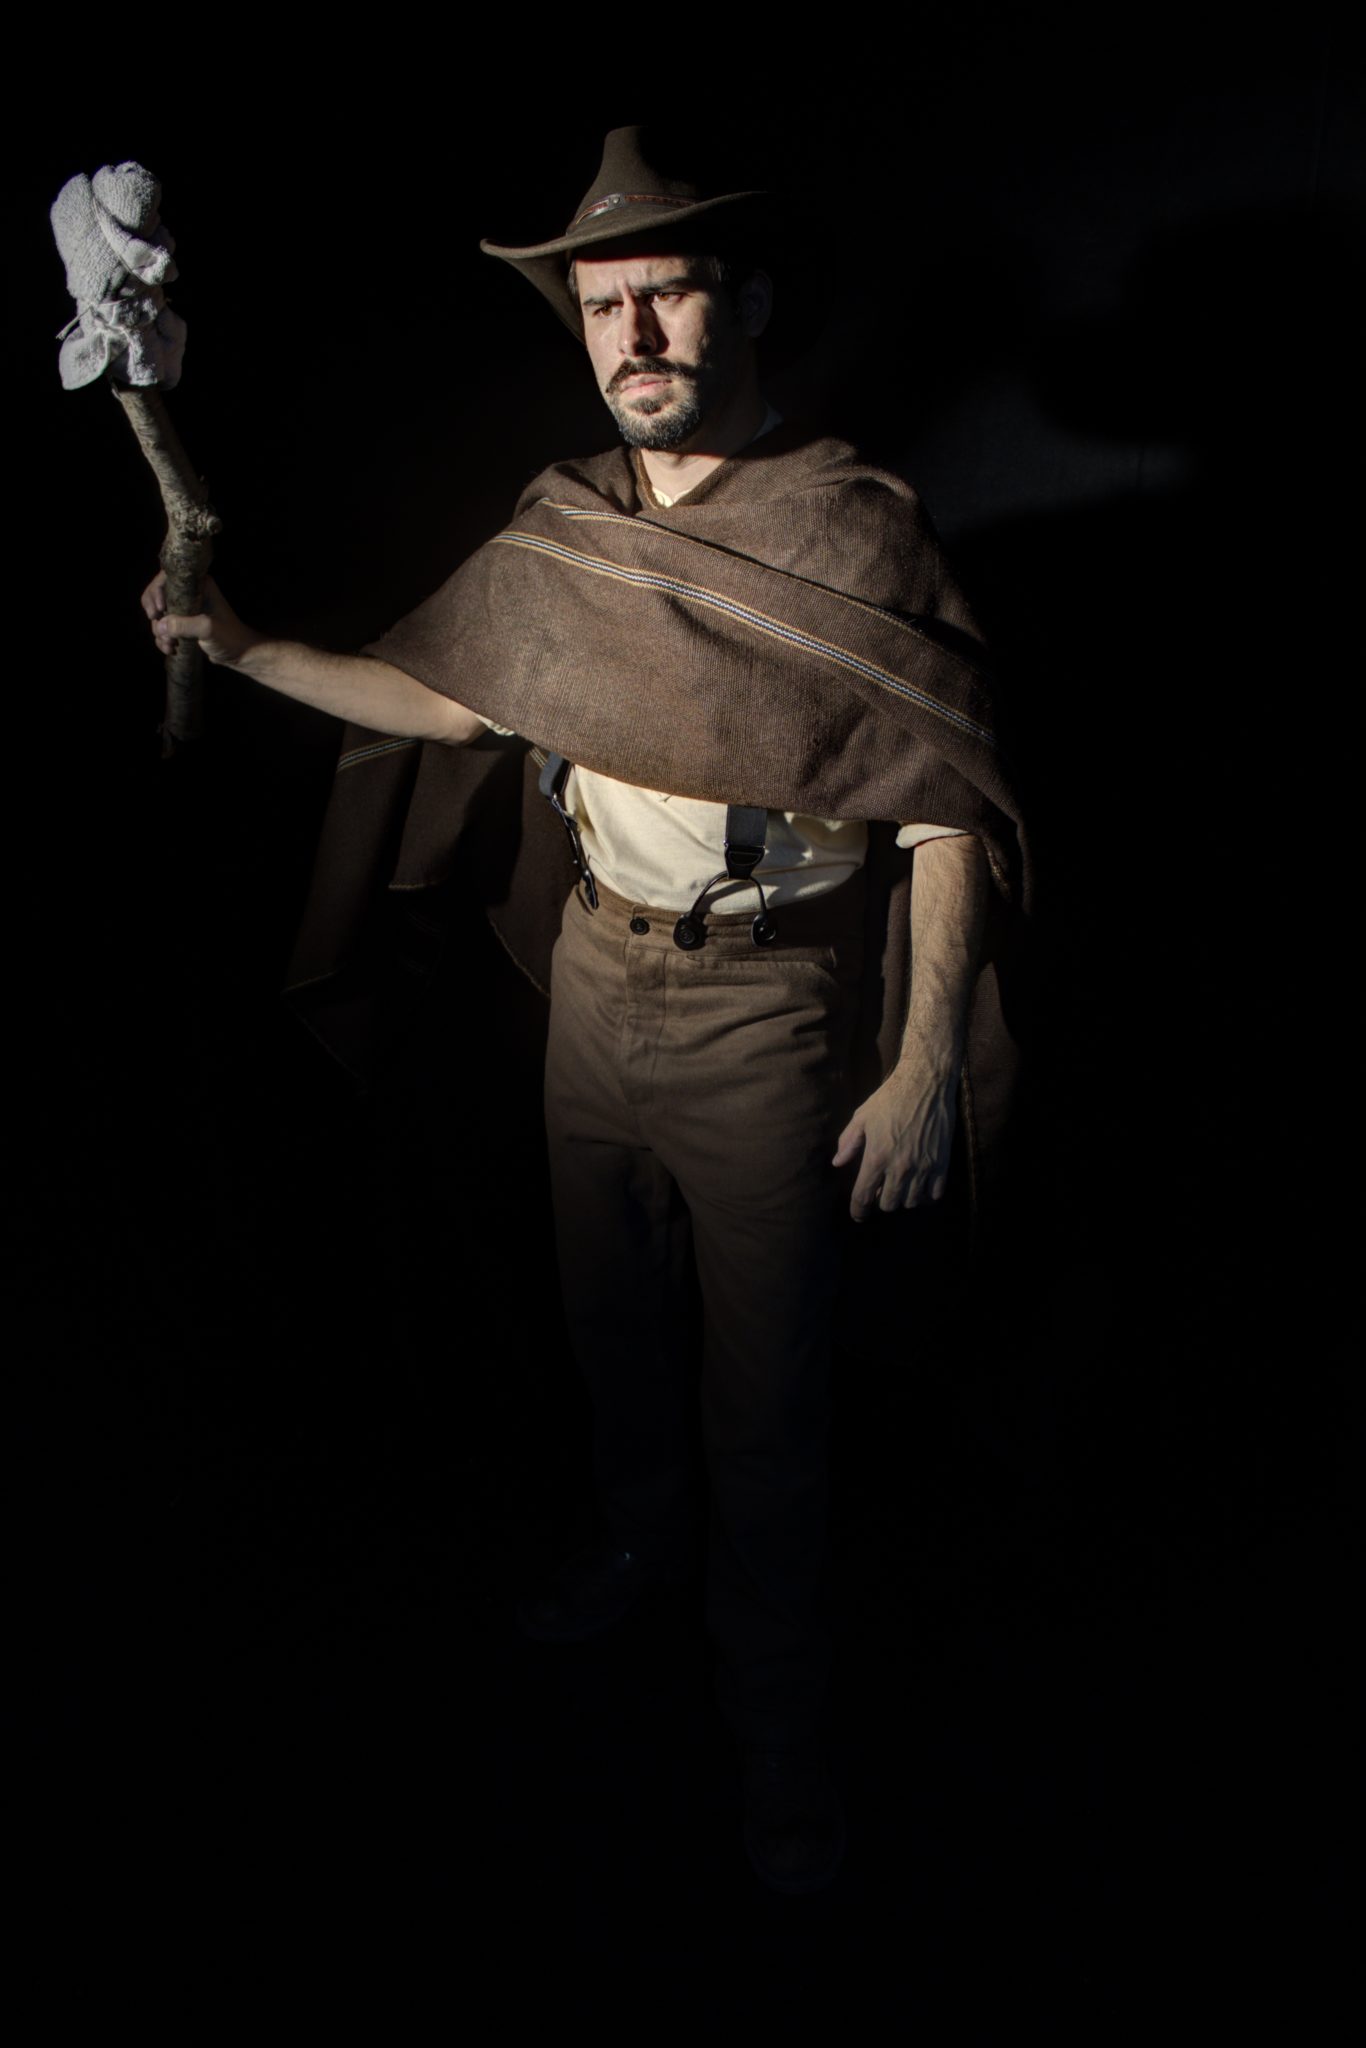
Next, I cutout the image using the Lasso tool in Photoshop and lightly edited some details using both Photoshop (adding the flame and adjusting levels) and Lightroom to boost the Vibrancy and Clarity.
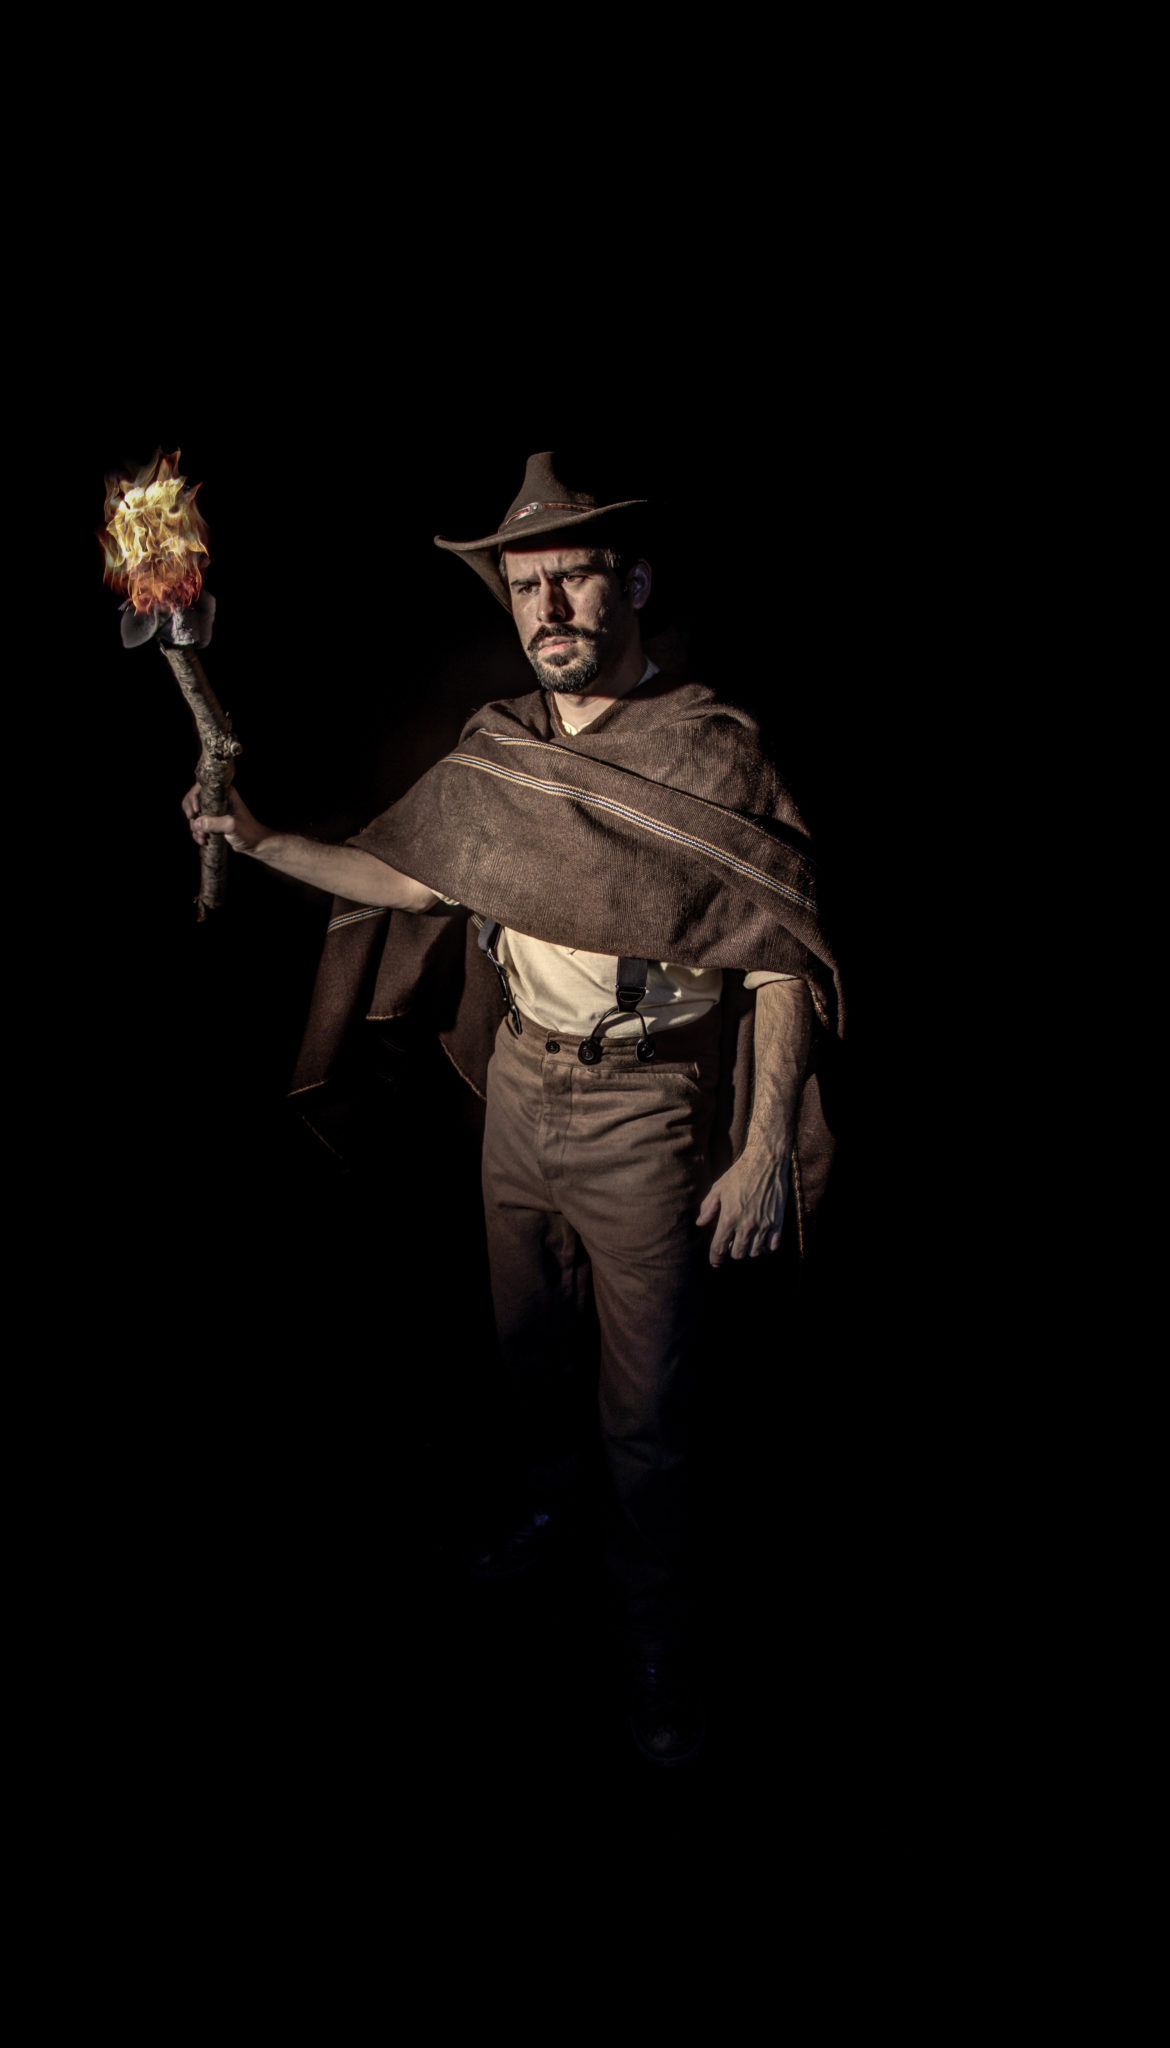
Then I combined the RAW image with smoke after Photoshop and Lightroom
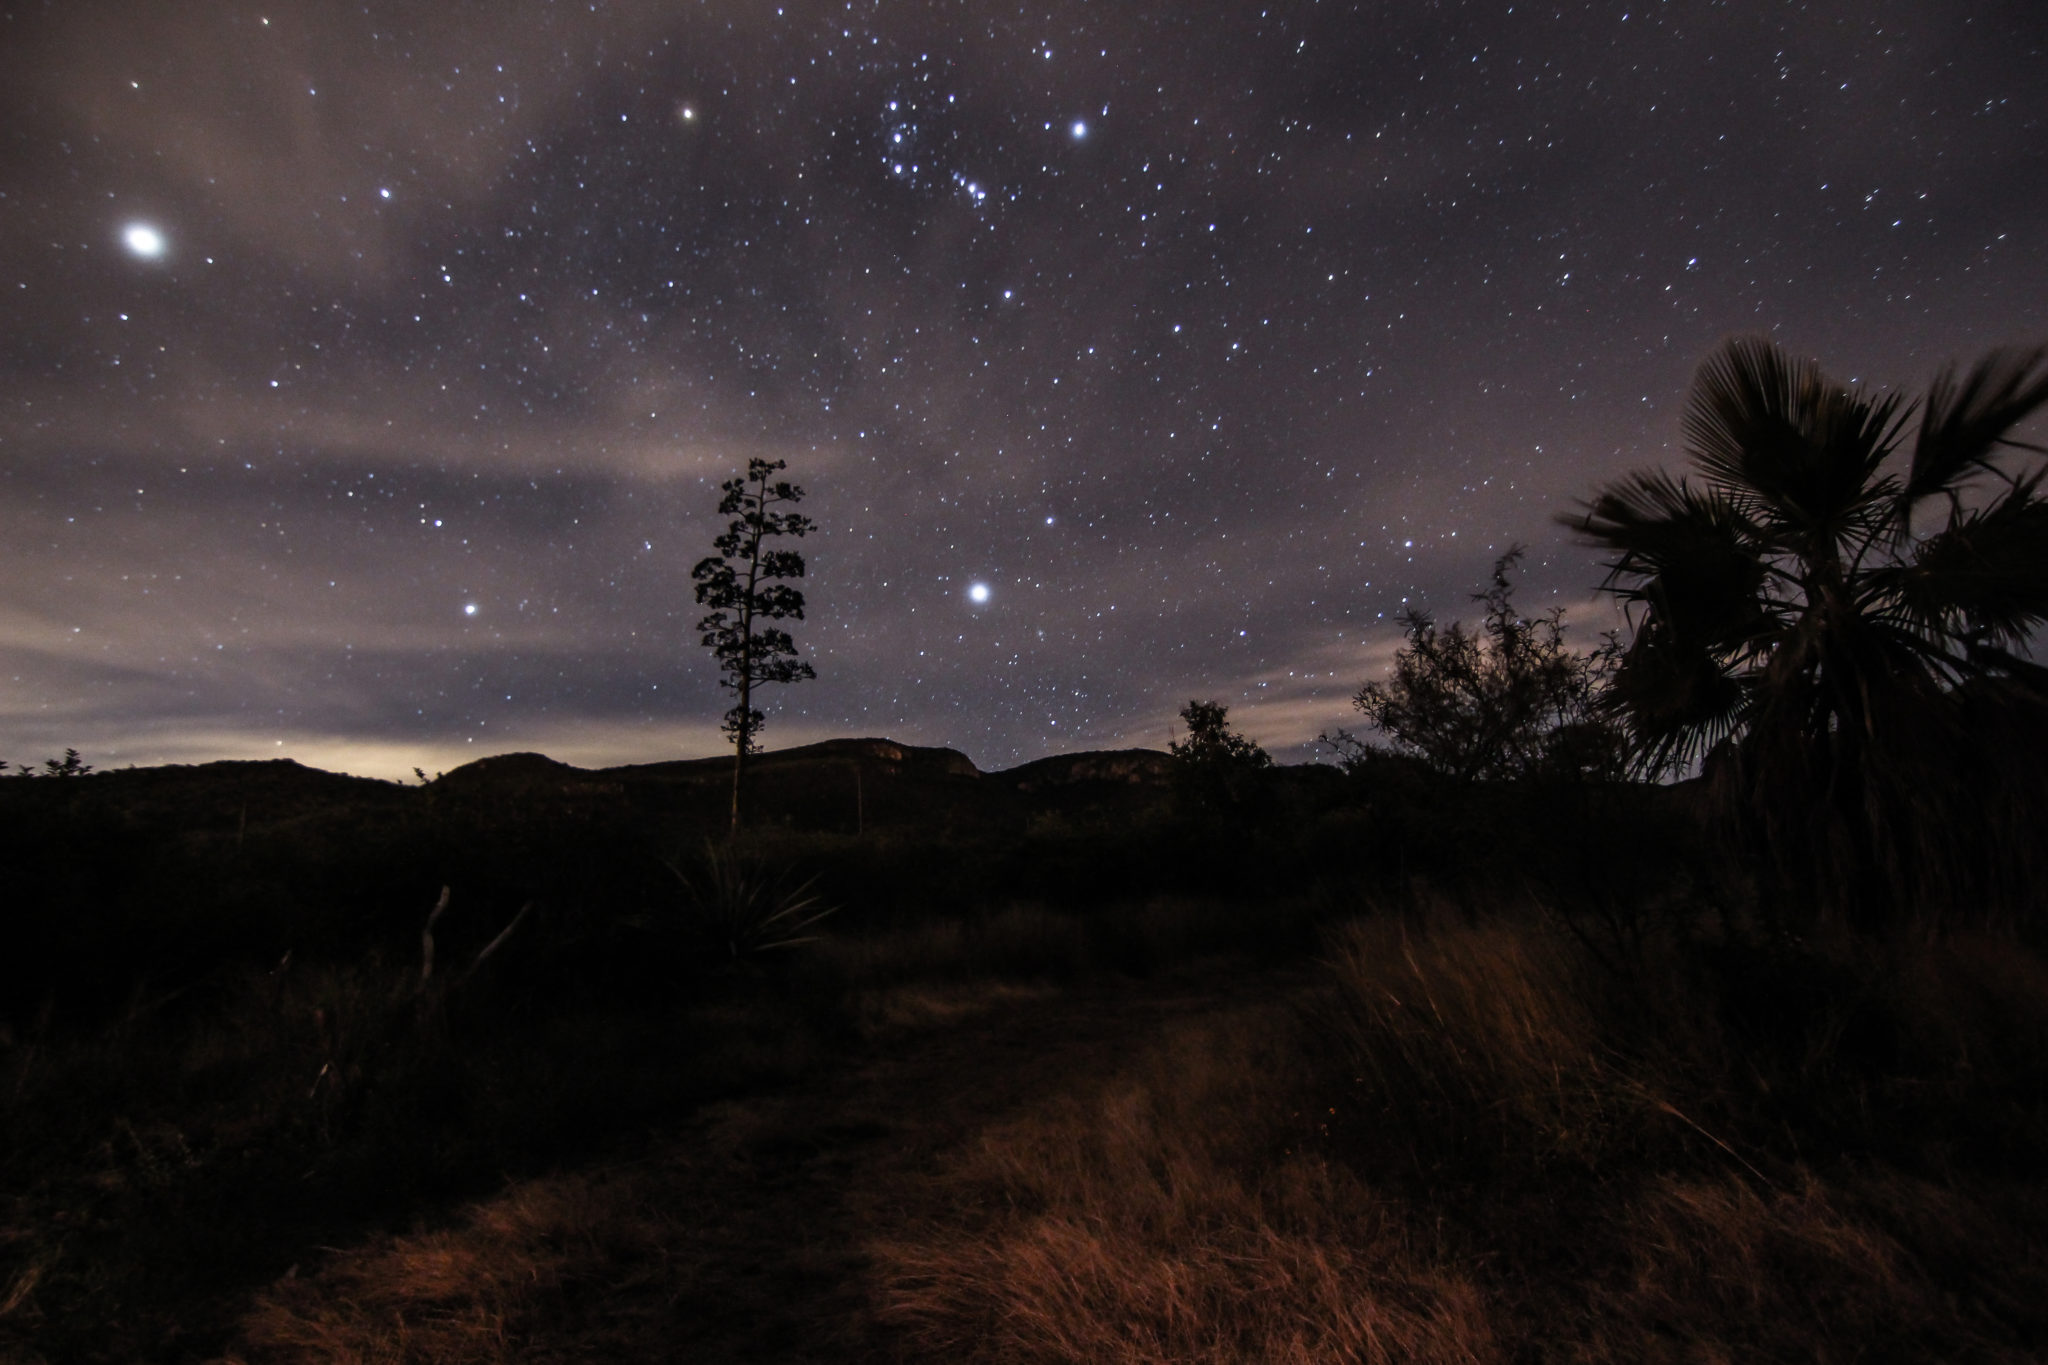
Night sky over Mexico
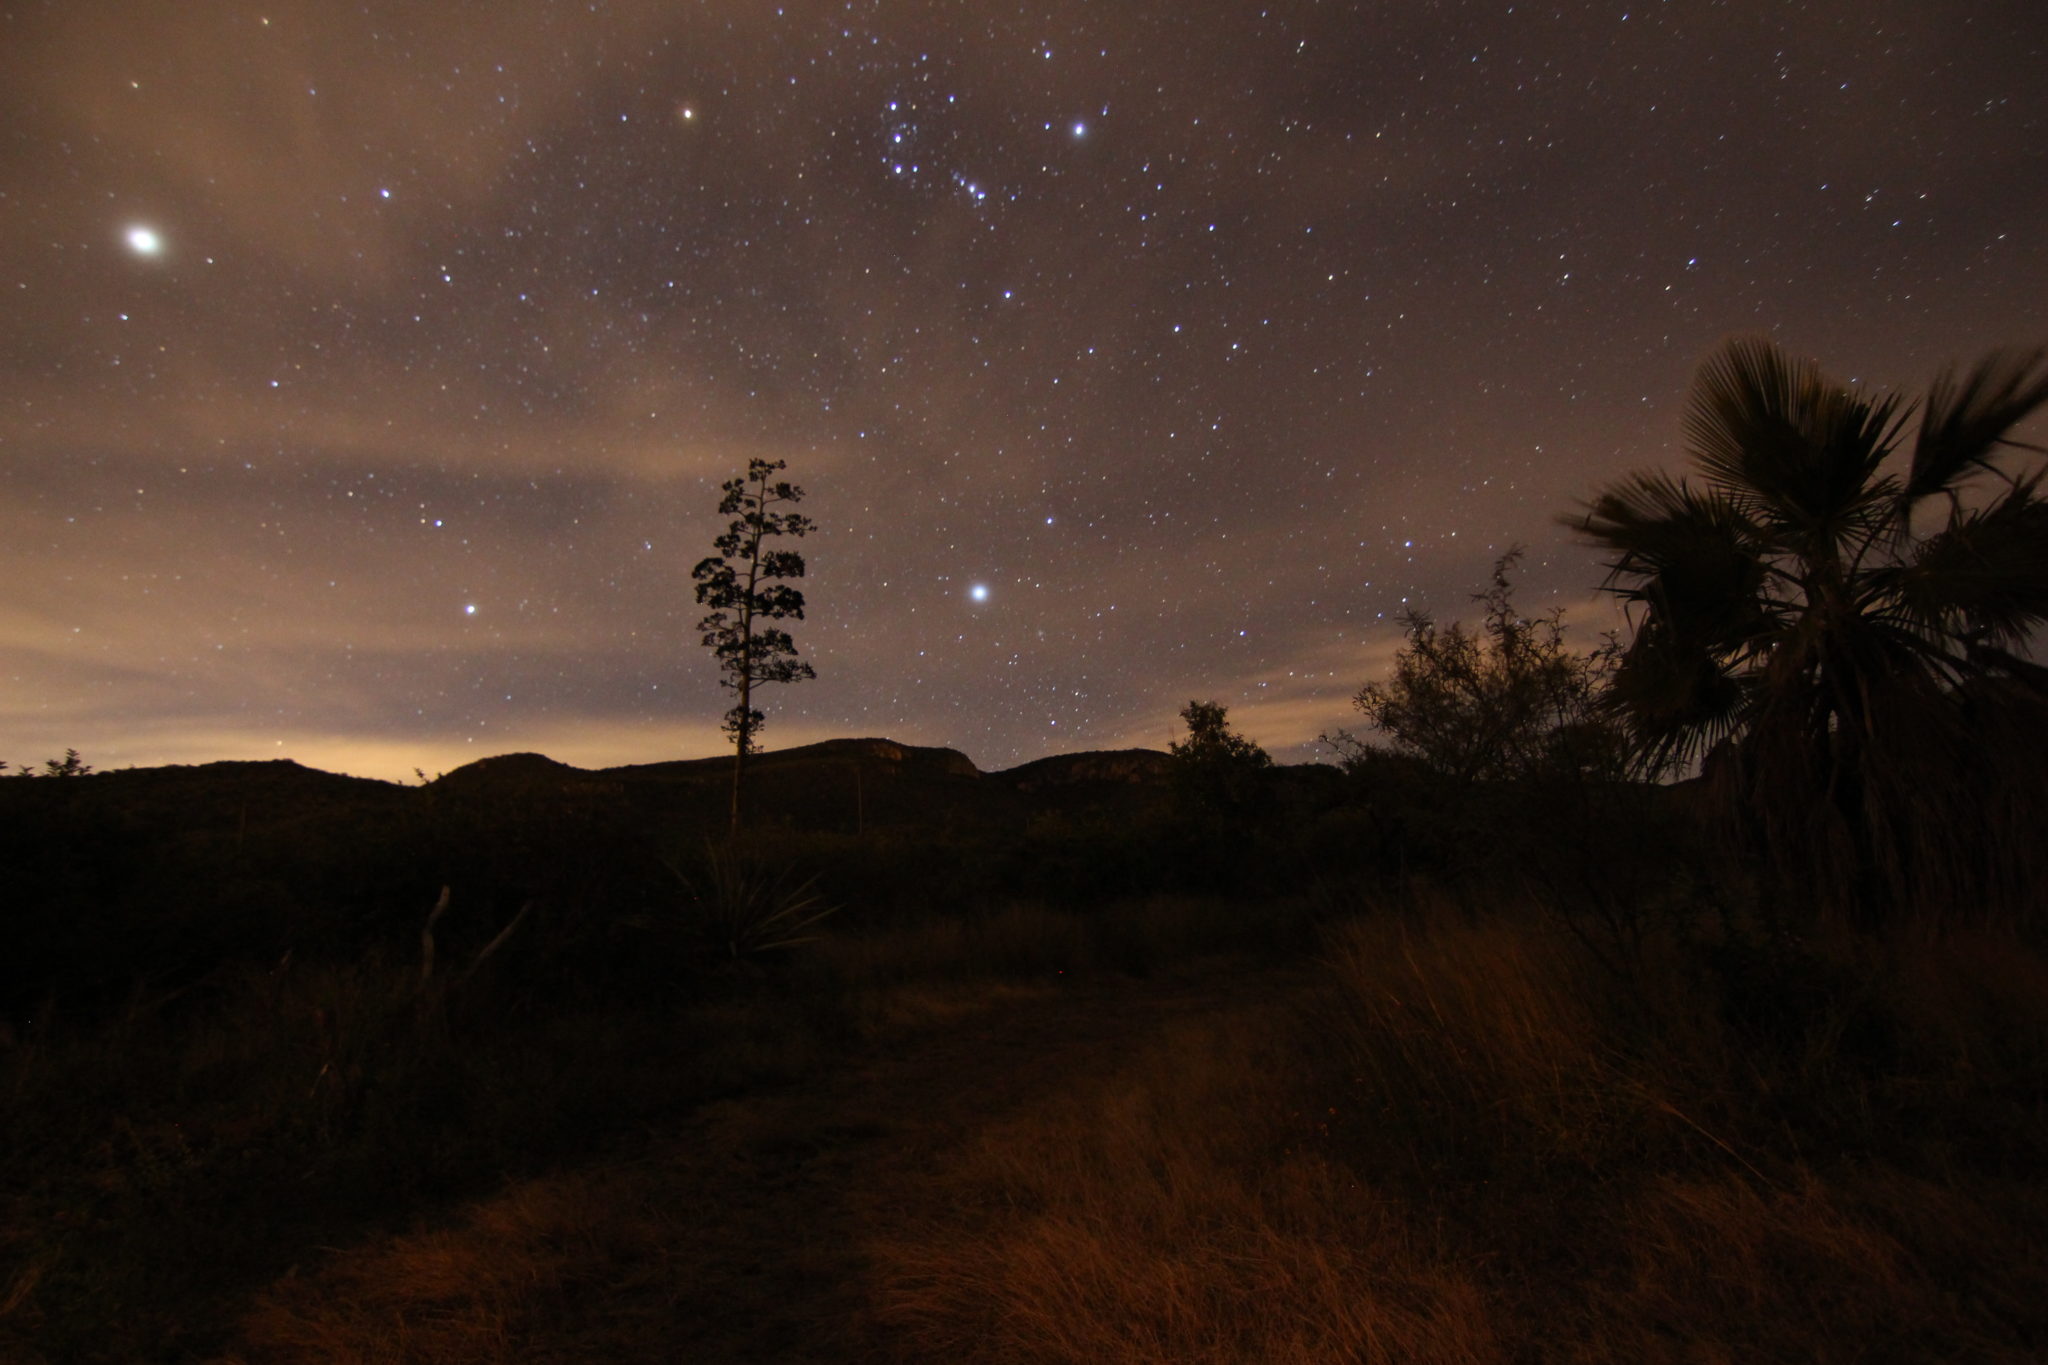
This photo was taken at f/2.8, 30 seconds, ISO 1600.
Lastly, using the photo I took in Mexico on our isolated ranch I adjusted the angle to match the perspective of my pose and edited the foreground along with the mountain range in the background. Once adjusting the photo using the curves tool to match the new photograph I lightly edited it in Lightroom.
Then came combining the two photos: the cutout of me and overlapping that image with the adjusted photo taken previously in Mexico and lastly, adding smoke details.
Adding the smoke and blending together
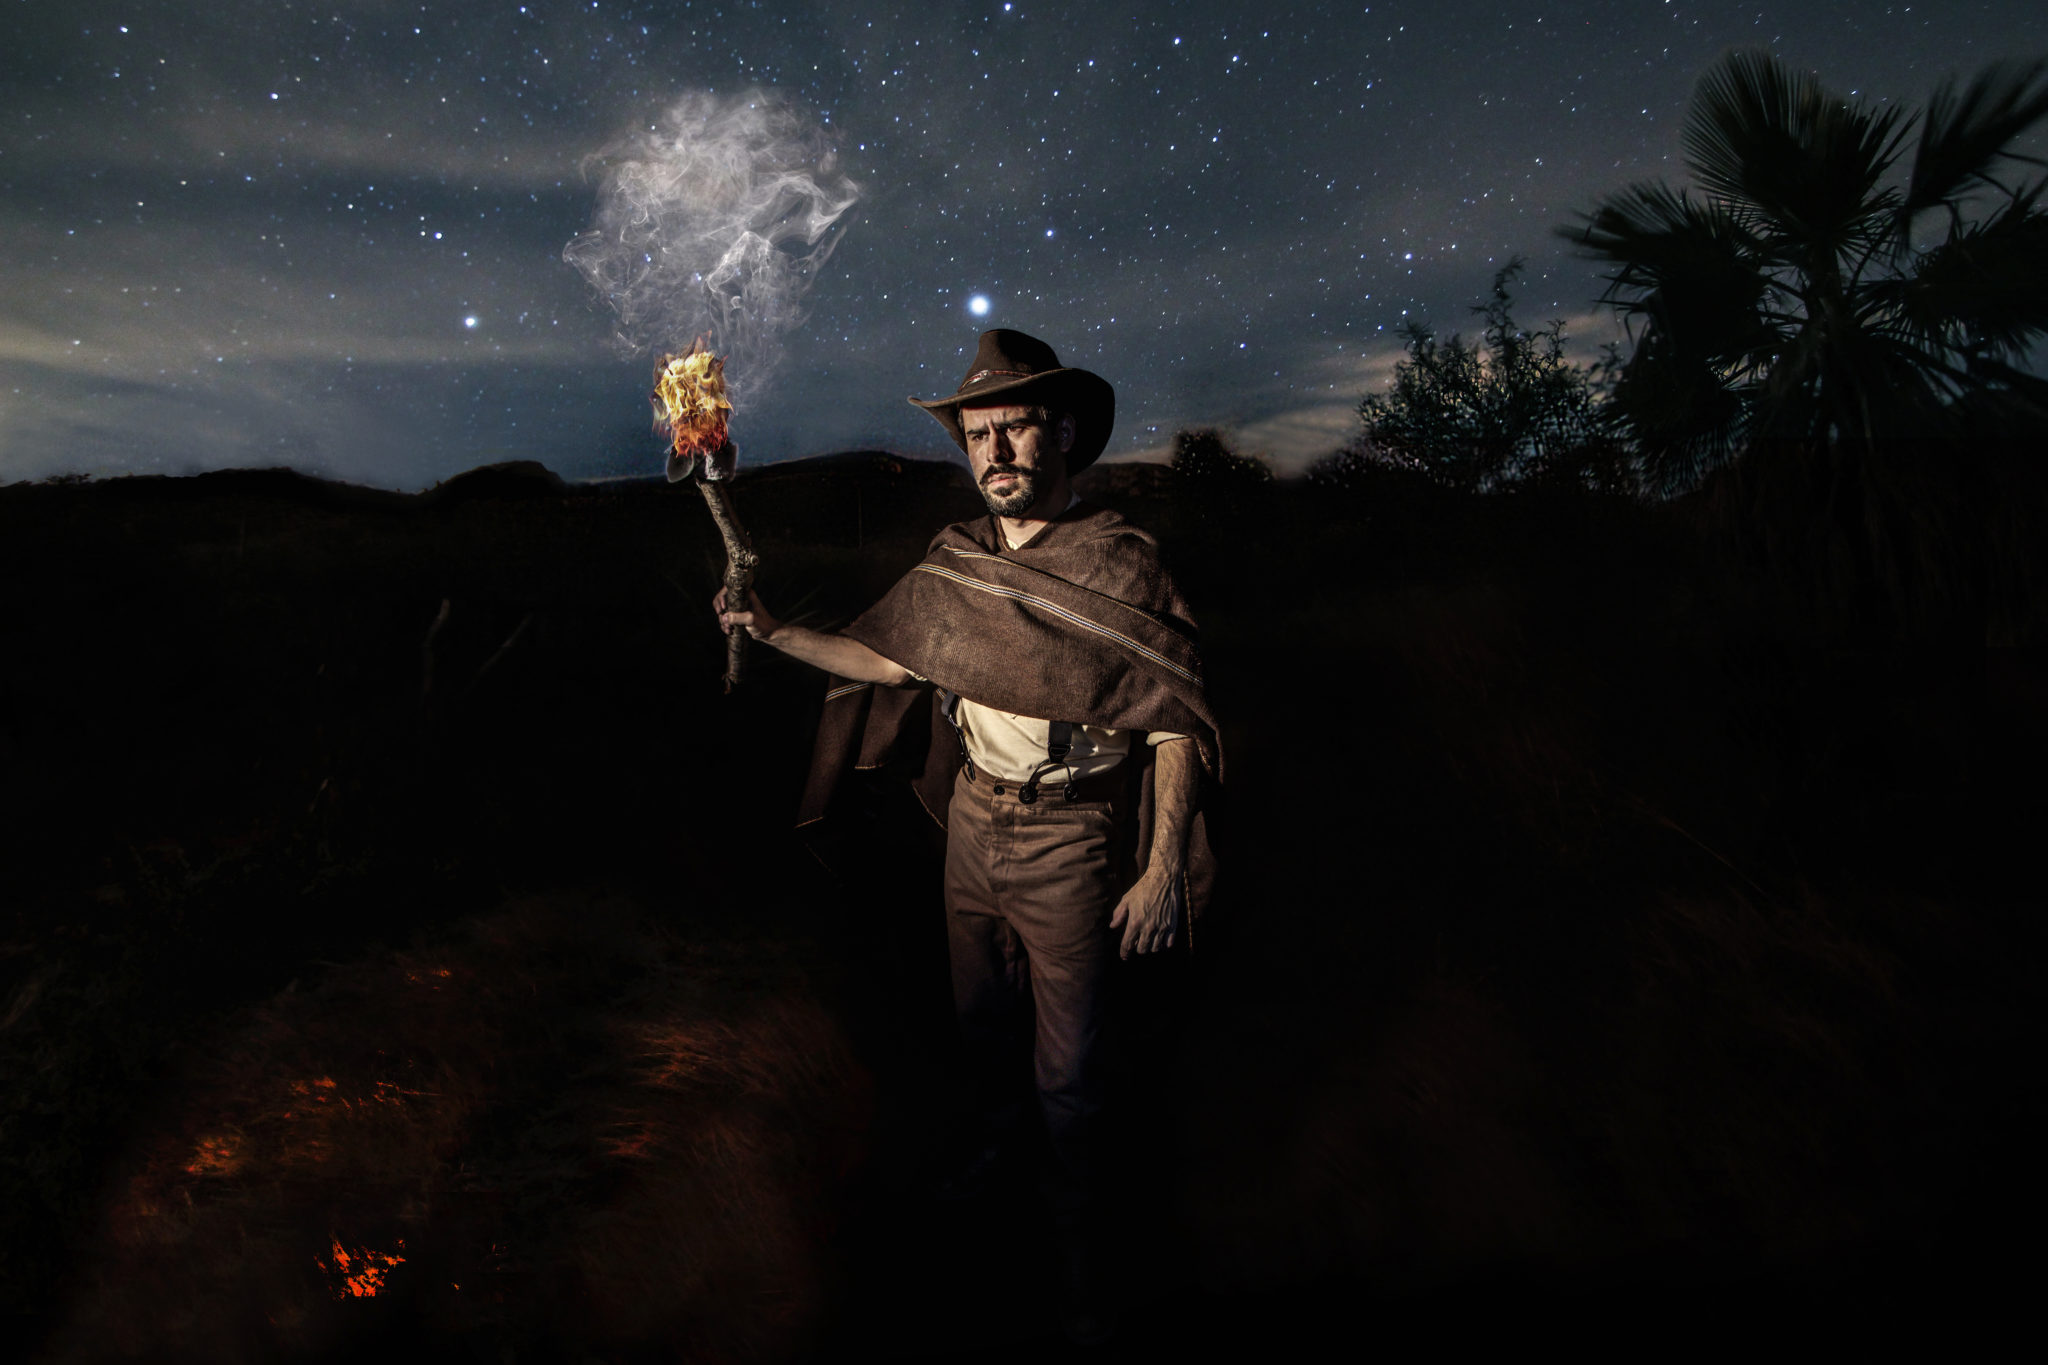
I finished it off by adjusted the coloring of both combined images (once flattened) and adding a soft-overlay texture of paper to give it a more antique look.
And this is the final image.
Before/After
Get rid of the ads!
Did you enjoy reading this article as much as we enjoyed writing it? There's a way to support us and our reporting, getting ad-free navigation and more as a bonus. Subscribe to us for less than a coffee per month —just $3.99— or take advantage of our yearly subscription with a hefty discount for only $25.- An ad-free experience
- A free mystery box for Lightroom or Capture One
- All the books in our store
- 20% discount on Capture One
- 30% discount on Imalume Photo Theft Protection
- 20% off Herbs and Kettle Tea Company.
- 20% off your order from MPIX printing services.
- 5% off Viltrox Products via their eCommerce store.
- 10% off all film developing, printing and scanning services from Blue Moon Camera and Machine
- 15% off 7Artisans products: The lens and accessory maker is offering a sweet discount for Phoblographer's readers.