Last Updated on 11/19/2014 by Chris Gampat
All images by Pete Taylor. Used with permission.
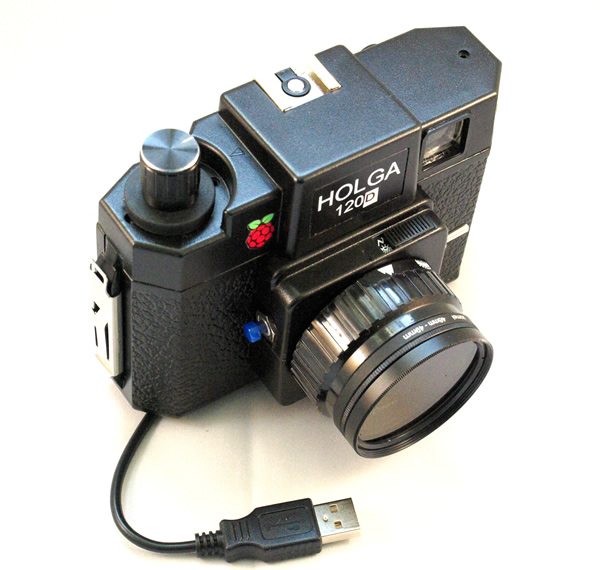
While the Holga is a camera that has been subject to many hacks, not many have put a Raspberry Pi camera in it. But Peter Taylor has done such a thing. But not only did he create the camera using Raspberry Pi, but he also modified the lens a bit and the camera overall to be a bit more accommodating to its digital overlord. By adding in a module and sensor similar to what you see in mobile phones, he was able to bring this classical camera to life in the digital world.
Phoblographer: Tell us about how you first got into photography.

Pete: I originally learned to develop and print black and white photos whilst at school. I still have a number of film cameras – ranging from a 1923 box brownie to a Lomo LCA which I occasionally shoot film on – although I think the whole ‘lomography’ movement is as much about the marketing as it is about the content, I think they’ve done a lot to keep traditional film based photography alive. I do mostly take pictures on digital now – for the sheer convenience – I have a venerable Pentax K10d which is able to accept a wide range of pre-digital lenses, including some that pre-date the widespread use of colour film. One of the things I was trying to recapture with this project was the unpredictable nature of photography – back in the film days you took the picture and hoped for the best, often seeing the final result days or weeks later; with digital everyone spends almost as much time looking at the preview image on the LCD than they do at the actual subject.
Phoblographer: Why choose the Holga?
Pete: The Holga was the cheapest camera available that was large enough to accommodate the Raspberry Pi (I was outbid on a broken Diana which was my first choice!). This was a fairly destructive project and I didn’t want to cut up an existing medium format camera to serve my purposes. The whole case is plastic which makes it an easy material to work with. I did most of the modifications to the camera with a craft knife, with a Dremel for when I needed to drill holes. The Holga also has a pleasing hipster chunkiness about it and there was plenty of room to add the buttons and switches to the camera.
Phoblographer: Tell us about the mods that you did to the lens.
Pete: I removed the Holga lens (which is a plastic single element) completely – although I did consider using it as a complementary lens over the Raspberry Pi camera module, it was too tight a fit. However I was able to add a filter ring adapter to the front of the lens using a 46 to 49mm adapter. At the moment I have a circular polariser which adds somewhat to the random element of the pictures taken. The standard Pi module is a fixed focus lens – there is also an Infra-red camera available which is suited to low light photography.
Phoblographer: We know that the camera is Raspberry Pi based, but talk to us about what you did to make it function like an actual digital camera.
Pete: I used a Raspberry Pi model A with the camera module as the basis for the project. The Raspberry Pi is a small, cheap single board computer with about the same computing power as a desktop PC from about 10 years ago, and the camera module is similar to the type you get in mobile phones with a resolution of 5 megapixels. Once I’d found out how to fit the Pi into the Holga I added a power switch, as well as a controller board which connects the controls on the camera to the General Purpose Input Output (GPIO) pins on the Pi. There’s a 3 position rotary switch on the top of the camera which selects the camera mode, a shutter button on the front and a shutter trigger input on the bottom which accepts a 3.5mm plug and enables the use of a remote trigger. To the viewfinder I added a couple of LEDs to enable the camera to give some feedback to indicate the mode it’s in, and when it’s taking a picture.
The whole setup is powered by a USB battery – its possible to get a whole days use using a typical mobile phone charging battery. To get the pictures off the camera I can connect to it using wifi when it’s in range of my home network. I also added a real time clock module which has a battery backup – the Raspberry Pi normally uses the internet to set its internal clock and this is to ensure the images are saved in the correct order when it’s out of internet range.
The whole setup is quite practical – I can power up the camera and take photos knowing that they’re being saved on the internal memory from the feedback I get from the LEDs which are positioned in the viewfinder. As the Pi isn’t driving an LCD screen it uses a comparatively small amount of battery charge.
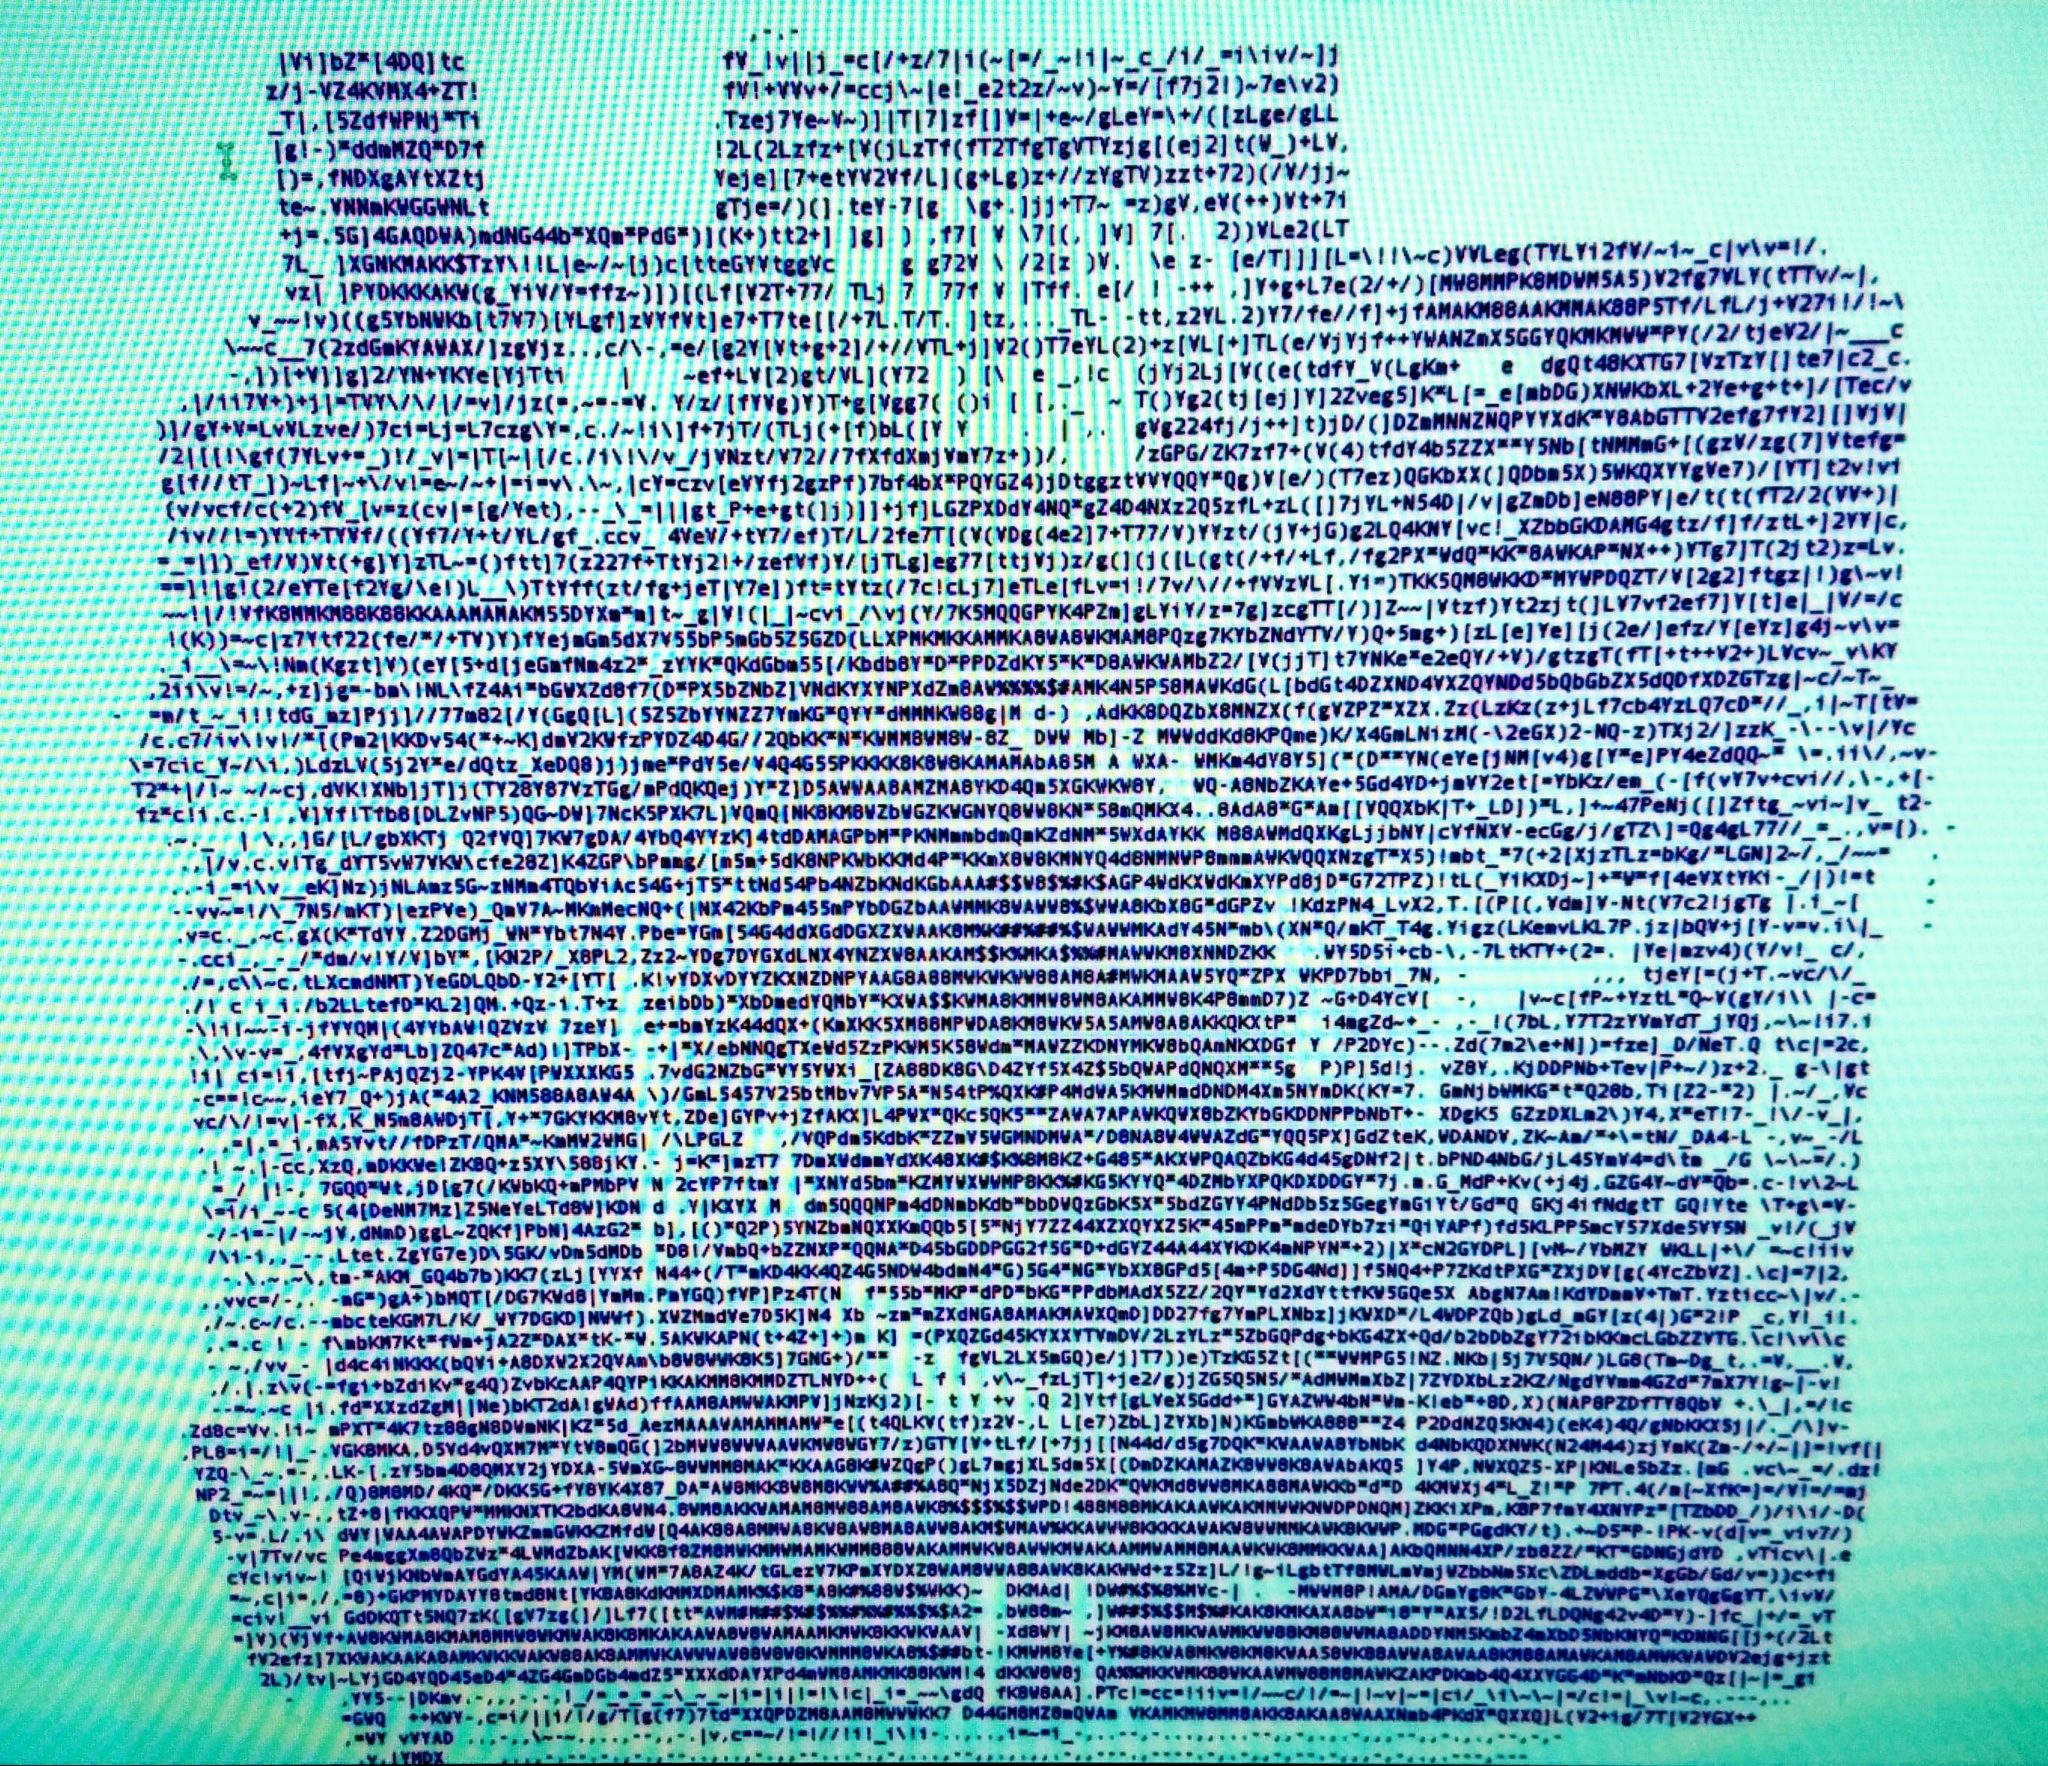
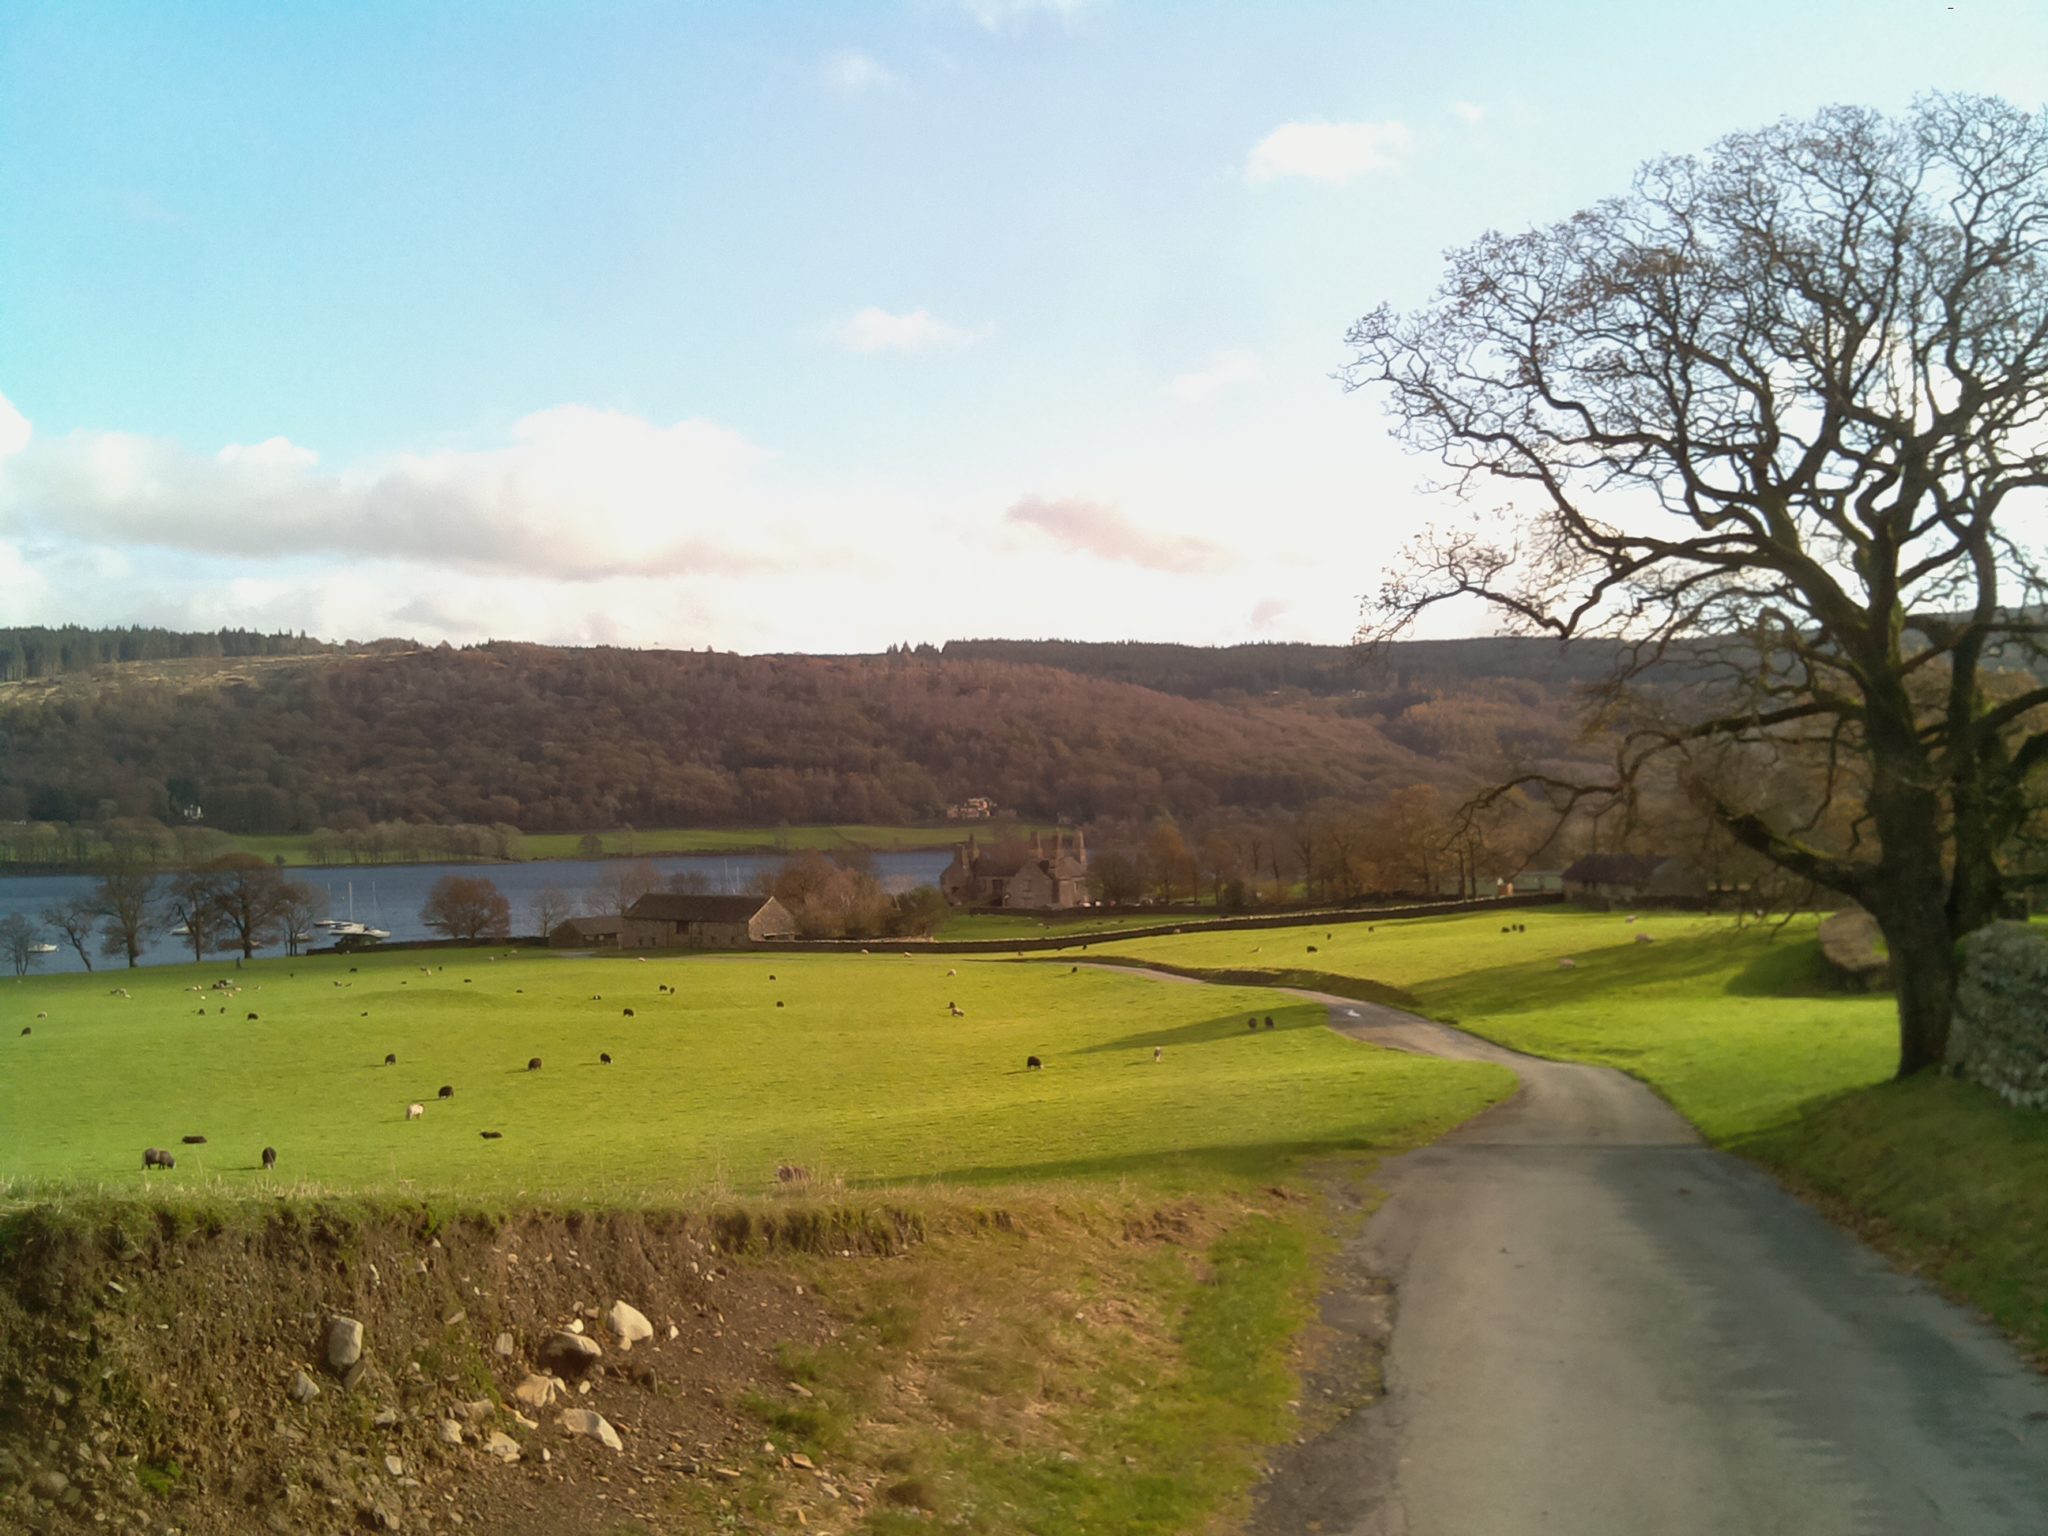
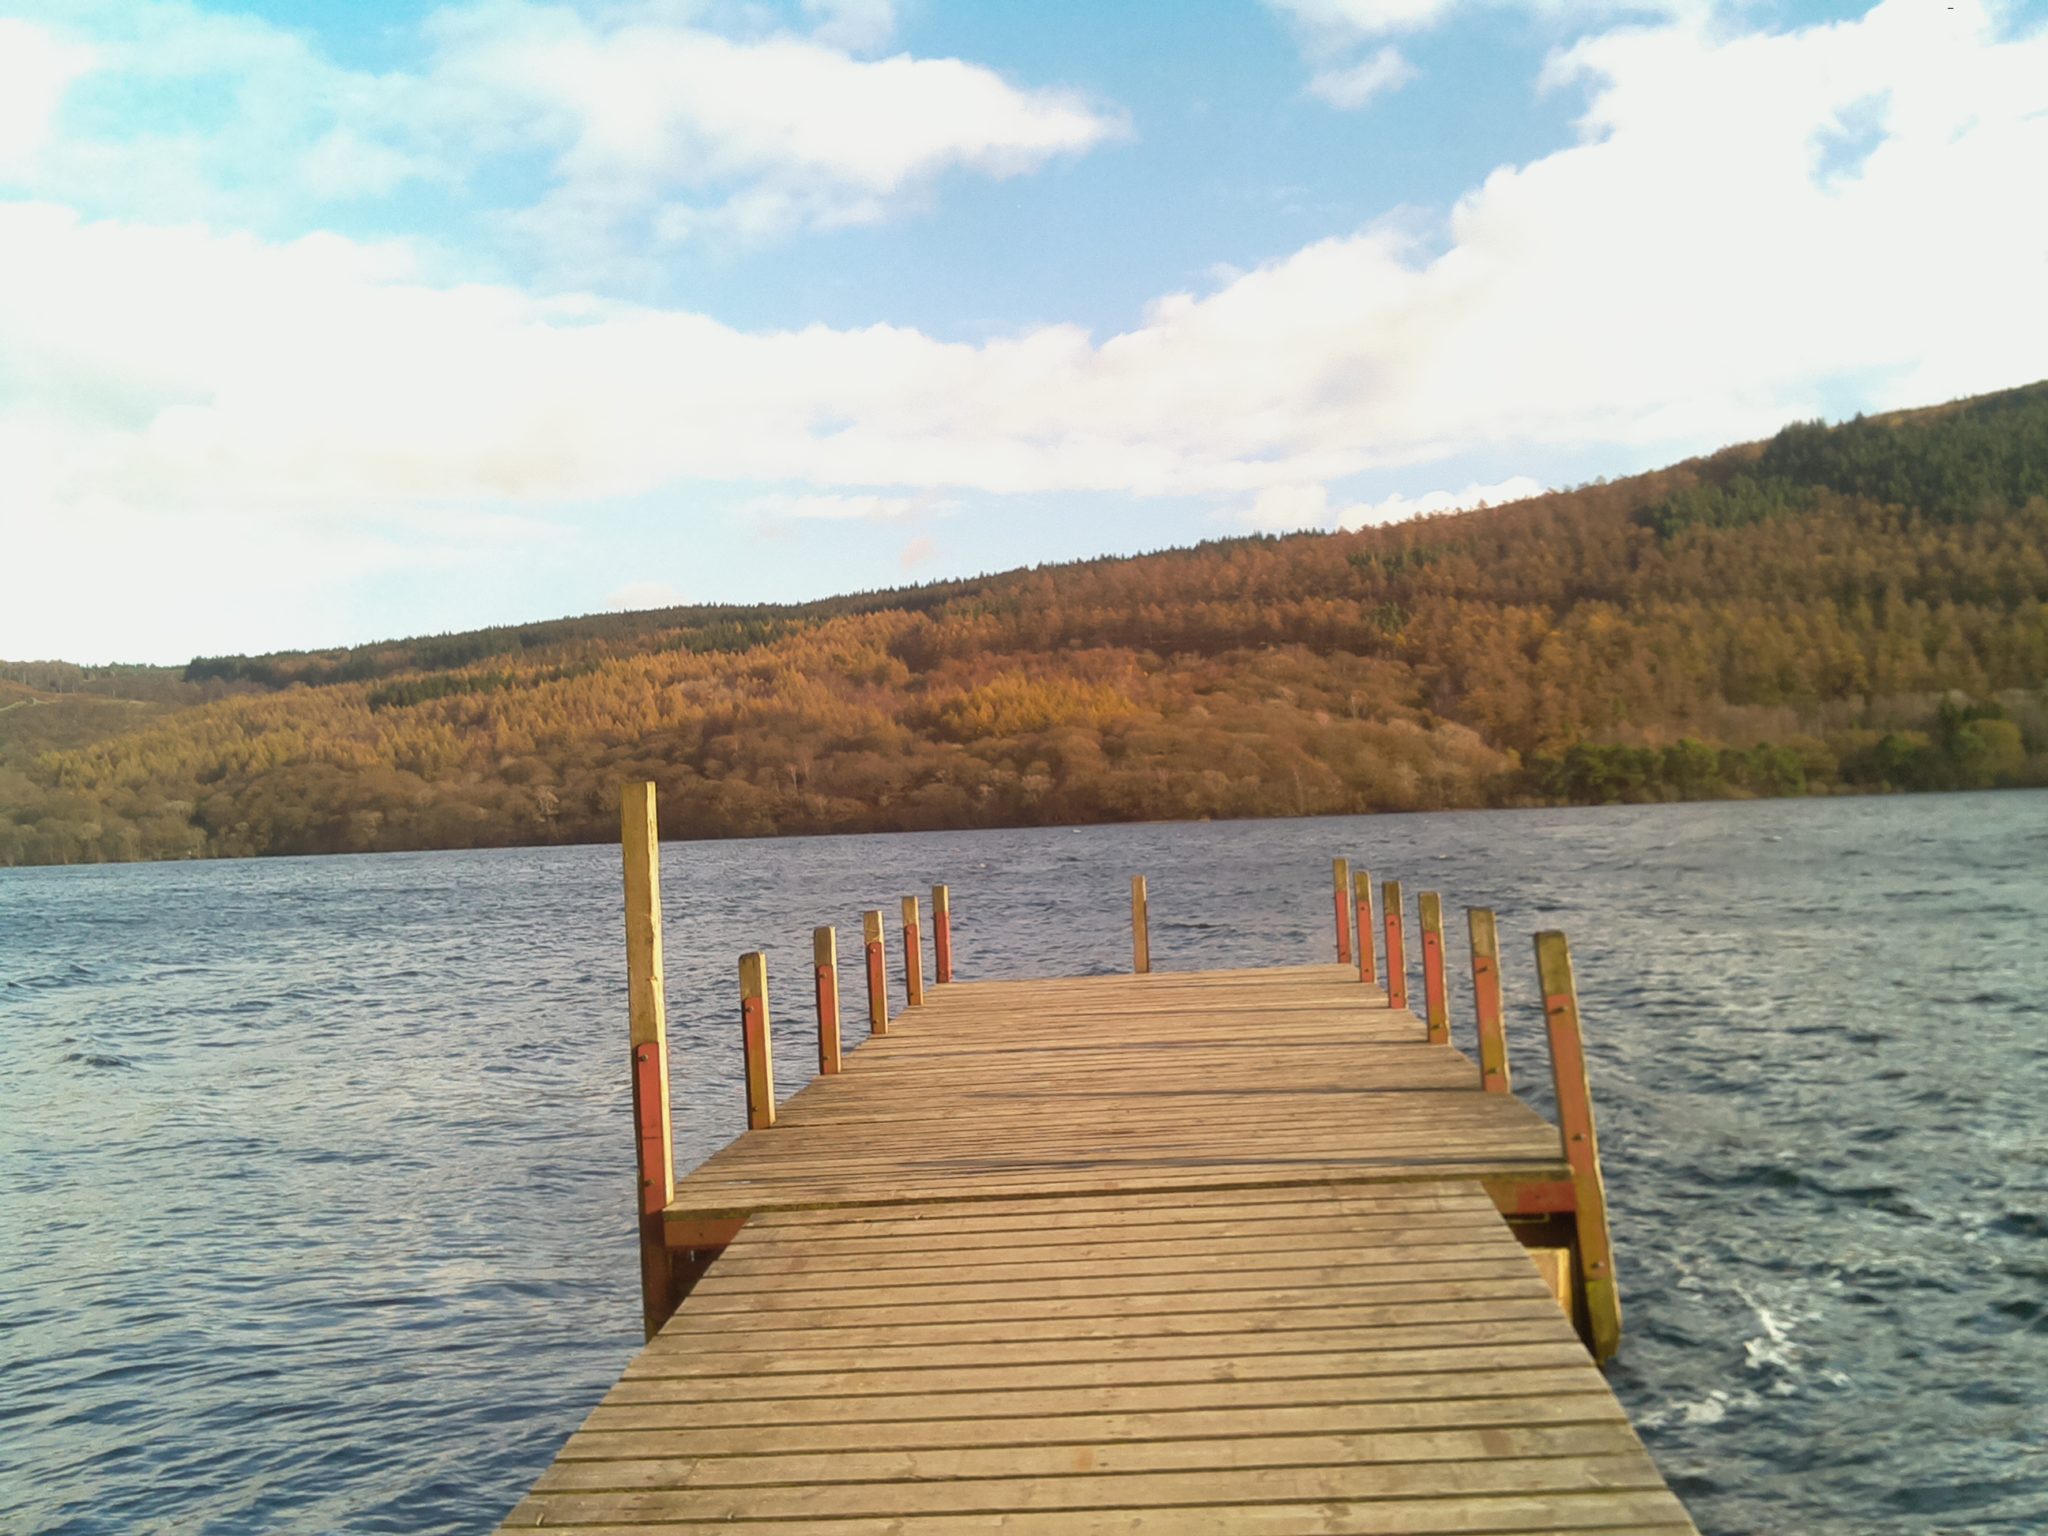
At the moment the 3 ‘modes’ I’m using in the camera are still photos (with the default settings), a photo which is converted into ASCII text, and a simple shutdown mode to ensure that the memory card isn’t corrupted when the camera is switched off. Its possible to redefine what these modes do by altering the code that’s running on the Raspberry Pi.
Phoblographer: What made you want to go digital vs something like a Holgaroid?
Pete: In a lot of ways, building a digital camera is a lot easier. My aim was to build something that removed the immediate feedback preview and made taking digital photos a bit more like using a film camera – but without the cost that ensues. It’s also possible – because of the open nature of the Pi, and the large support community that’s built up around it to hack and alter the options for taking photos.
Get rid of the ads!
Did you enjoy reading this article as much as we enjoyed writing it? There's a way to support us and our reporting, getting ad-free navigation and more as a bonus. Subscribe to us for less than a coffee per month —just $3.99— or take advantage of our yearly subscription with a hefty discount for only $25.- An ad-free experience
- A free mystery box for Lightroom or Capture One
- All the books in our store
- 20% discount on Capture One
- 30% discount on Imalume Photo Theft Protection
- 20% off Herbs and Kettle Tea Company.
- 20% off your order from MPIX printing services.
- 5% off Viltrox Products via their eCommerce store.
- 10% off all film developing, printing and scanning services from Blue Moon Camera and Machine
- 15% off 7Artisans products: The lens and accessory maker is offering a sweet discount for Phoblographer's readers.