
The Gura Gear line of camera backpacks has generated quite a fan-base since their initial Kiboko and follow-up Bataflae bags. They weren’t the first on the scene, but what they came up with was a reasonably sized backpack that could haul far more than its size would have you believe. The Uinta is the latest in their line of Adventure packs (Uinta, if you’re wondering, is the name of a mountain range in Utah, a state which also happens to be Gura Gear’s Home-Base) and it is designed to be lightweight and very nimble for quick day-hikes or outdoor shoots. The focus behind the design is a modular system, and Gura Gear was pretty excited to share this new bag with us. I’ve had a chance to spend some quality time with the Uinta Adventure Pack, and I’m here to share my thoughts. Head on past the break for our full review.
Pros and Cons
Pros
– Totally comfortable on your back when it’s fully loaded
– Gear is accessible from the front or rear depending on module orientation.
– Not too heavy of a backpack, thanks to light weight, durable and weather proof materials.
– Able to carry a very respectable amount of equipment depending on your configuration.
Cons
-The front opening would benefit from a wider opening, it’s a bit difficult to pull things out of the very bottom of the module.
-Included velcro dividers seem to be just a bit too narrow (based on how I’m trying to configure the layout)
-If you decide to use only the Medium Pro insert, it leaves the bottom of the bag empty, which is kind of weird spacing-wise.
-If you load up on all of the accessories, this becomes a mighty expensive backpack.
Gear Used
For the review, Gura Gear sent me a fully loaded Uinta pack with both available inserts and the tripod sleeve / hydration pouch. I decided to see what kind of kits I could fit into each module, and while both will fit in the bag simultaneously, it does consume the entirety of the internal space.
In Medium Pro Module:
In Small Pro Module:
Features
Copied from Adorama’s Product Page
- 30L interior capacity
- Single access point on front
- Upper and lower access points on back
- Padded laptop sleeve on inside of main front flap, fits up 17″ laptop
- Zippered and gusseted outer front pocket with organization pockets and zippered mesh pouch
- Zippered mesh pouches on rear flaps
- Wide backpack straps with hydration system hose loops
- Waist belt with snap-closure and dual adjustment points
- Adjustable sternum strap with vertical sliding adjustment for proper placement
- Ripstop and water-resistant X-Pac nylon body
- 500D CORDURA nylon reinforcement on high-wear and high-contact areas
- YKK PU water-resistant zippers
- Removable padding to reduce weight and increase capacity when needed
- Removable and stowable waterproof raincover
- Four exterior compression straps to restrain contents and keep them tight to the back
- Back, harness and belt are ventilated for comfort
- Carry-On Compliant: Fits in most overhead compartments
| Material | 420D square nylon with PU backing X-Pac water-resistant ripstop nylon on body with PU padded backing 500D CORDURA nylon on high-wear areas N/500D Spandura reinforcement Woojin (WJ) hardware and pullers Padded air mesh on back and straps |
| Type of Closure | YKK PU zippers, water resistant |
| Volume | 30 L (1830.7 cu/in) |
| Tripod Holder | (Optional) |
| Waist Belt | Yes |
| Carrying/Transport Options | Backpack straps/waist belt Top grab handle |
| Dimensions | Exterior: 20.5 x 12.5 x 10.5″ (52.07 x 31.75 x 26.67cm) Interior: 20 x 12 x 8″ (50.8 x 30.48 x 20.32 cm) |
| Weight | 2.7 lbs (1.2 kg) |
Ergonomics

The Uinta pack possesses a great balance in size to carrying capacity, which means that this is not a tiny backpack, nor is it positively gargantuan; it’s the perfect size for an “all-day” pack. It also has an optional attachment system for tripods or hydration pouches. (See opening image for how a tripod is held in place).
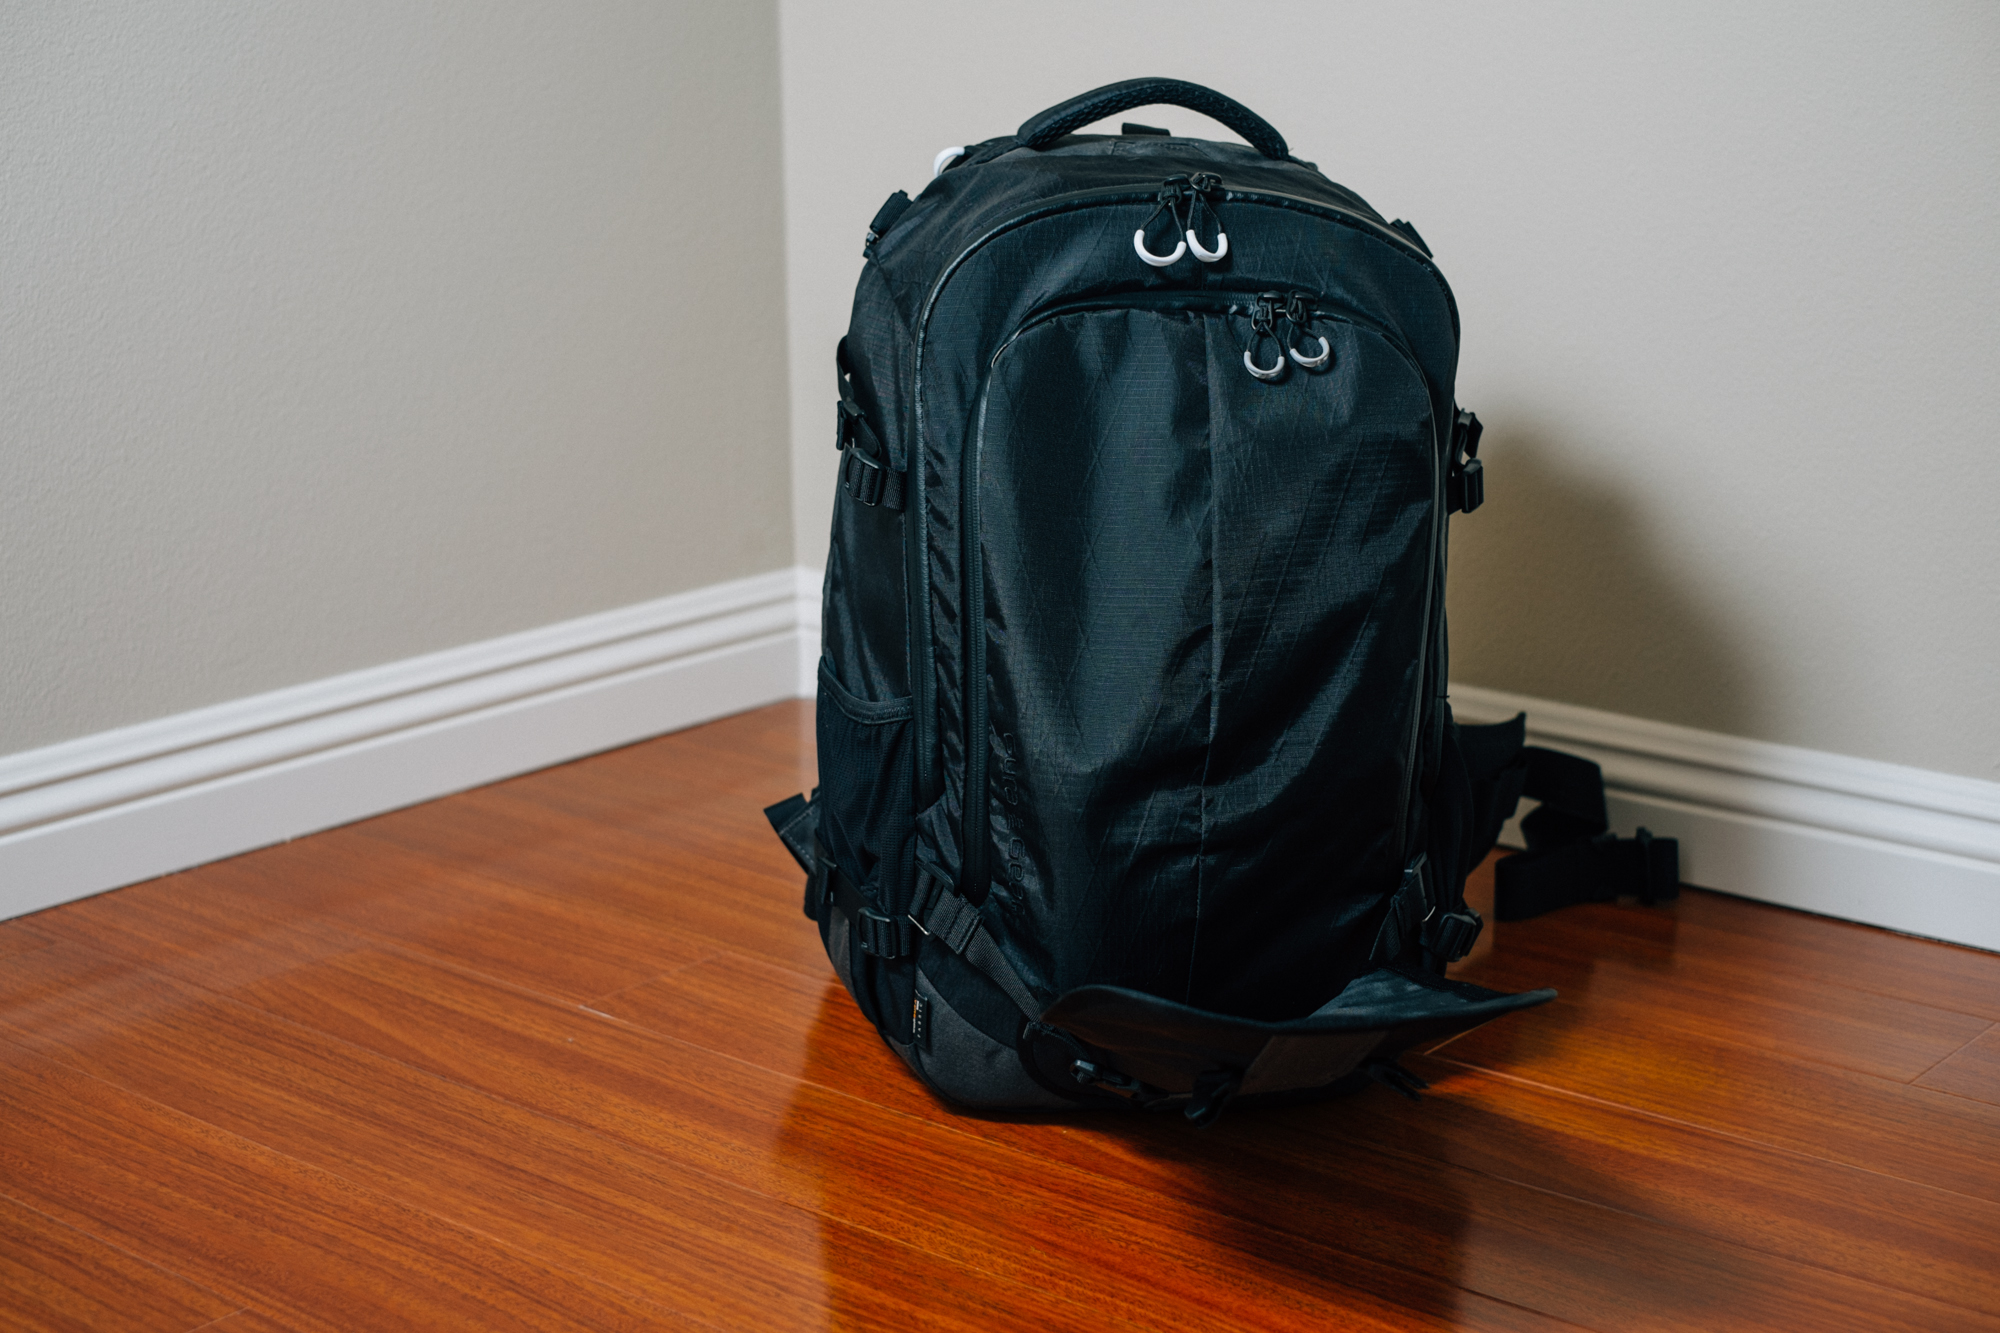
With a couple quick snaps, you can release the tripod holder and access the cavernous front pocket of the backpack, it’s worth noting that the buckles are very easy to manipulate, even with gloves on. (Yes, even though I live in California, I put on some hand toasters in the 90-Degree heat just to test that out for you readers in colder climates.)
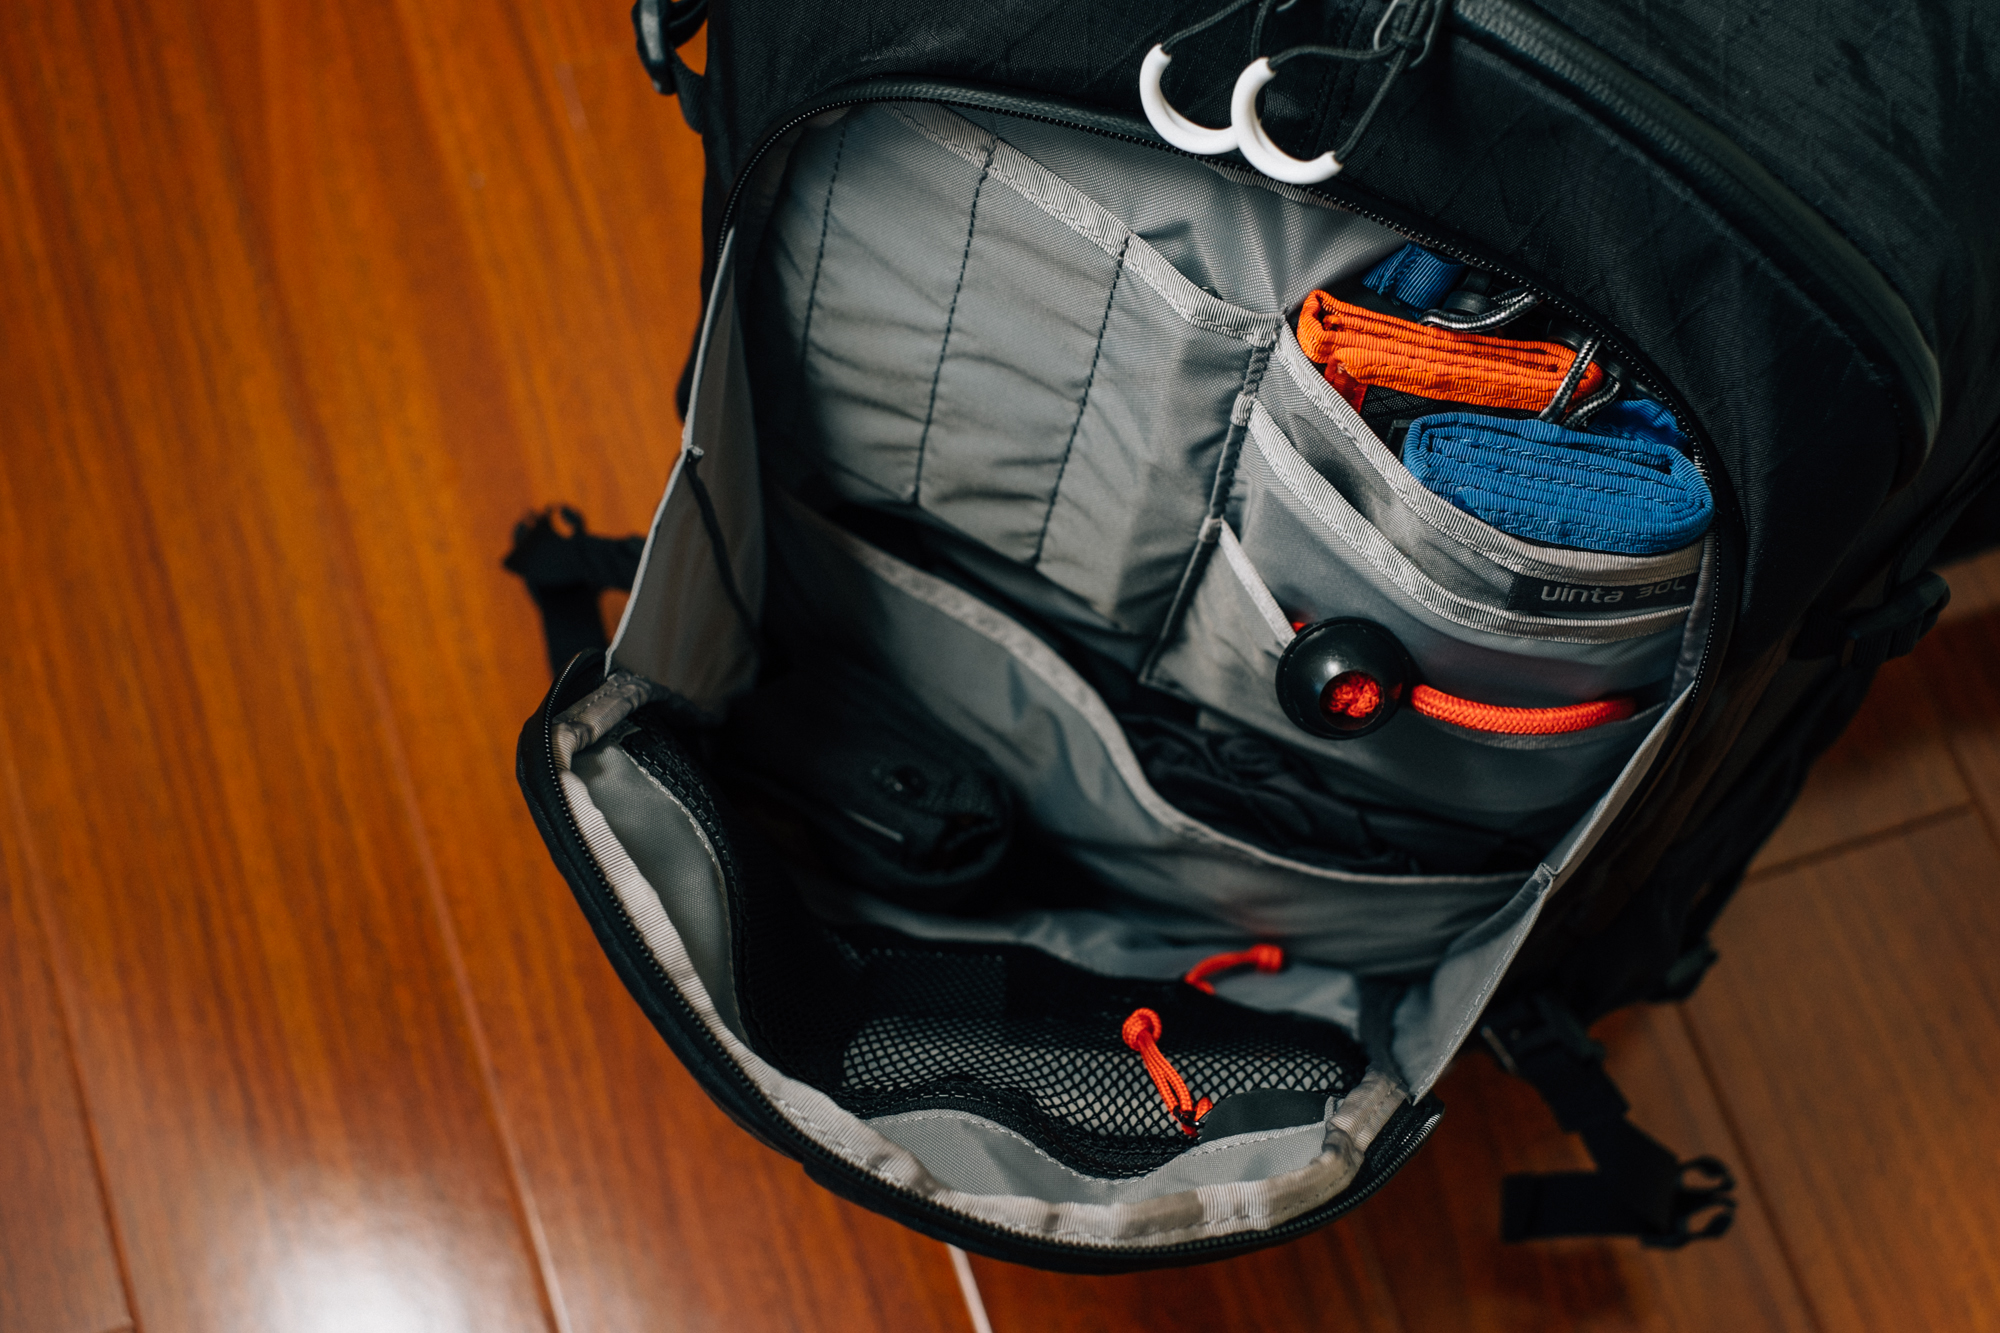
Once you’ve opened the front pouch you will see what I meant by cavernous; you can fit a ton of stuff inside of here and there are two zipper pouches for organizing smaller items. There is also a key-clip in the upper most pocket, but I always use these clips for my memory card wallets (which you can see I have a lot of memory cards). Inside this pocket you will also find the included rain-fly, a most welcome attachment for the times you’re caught outside in some serious rain or snow.
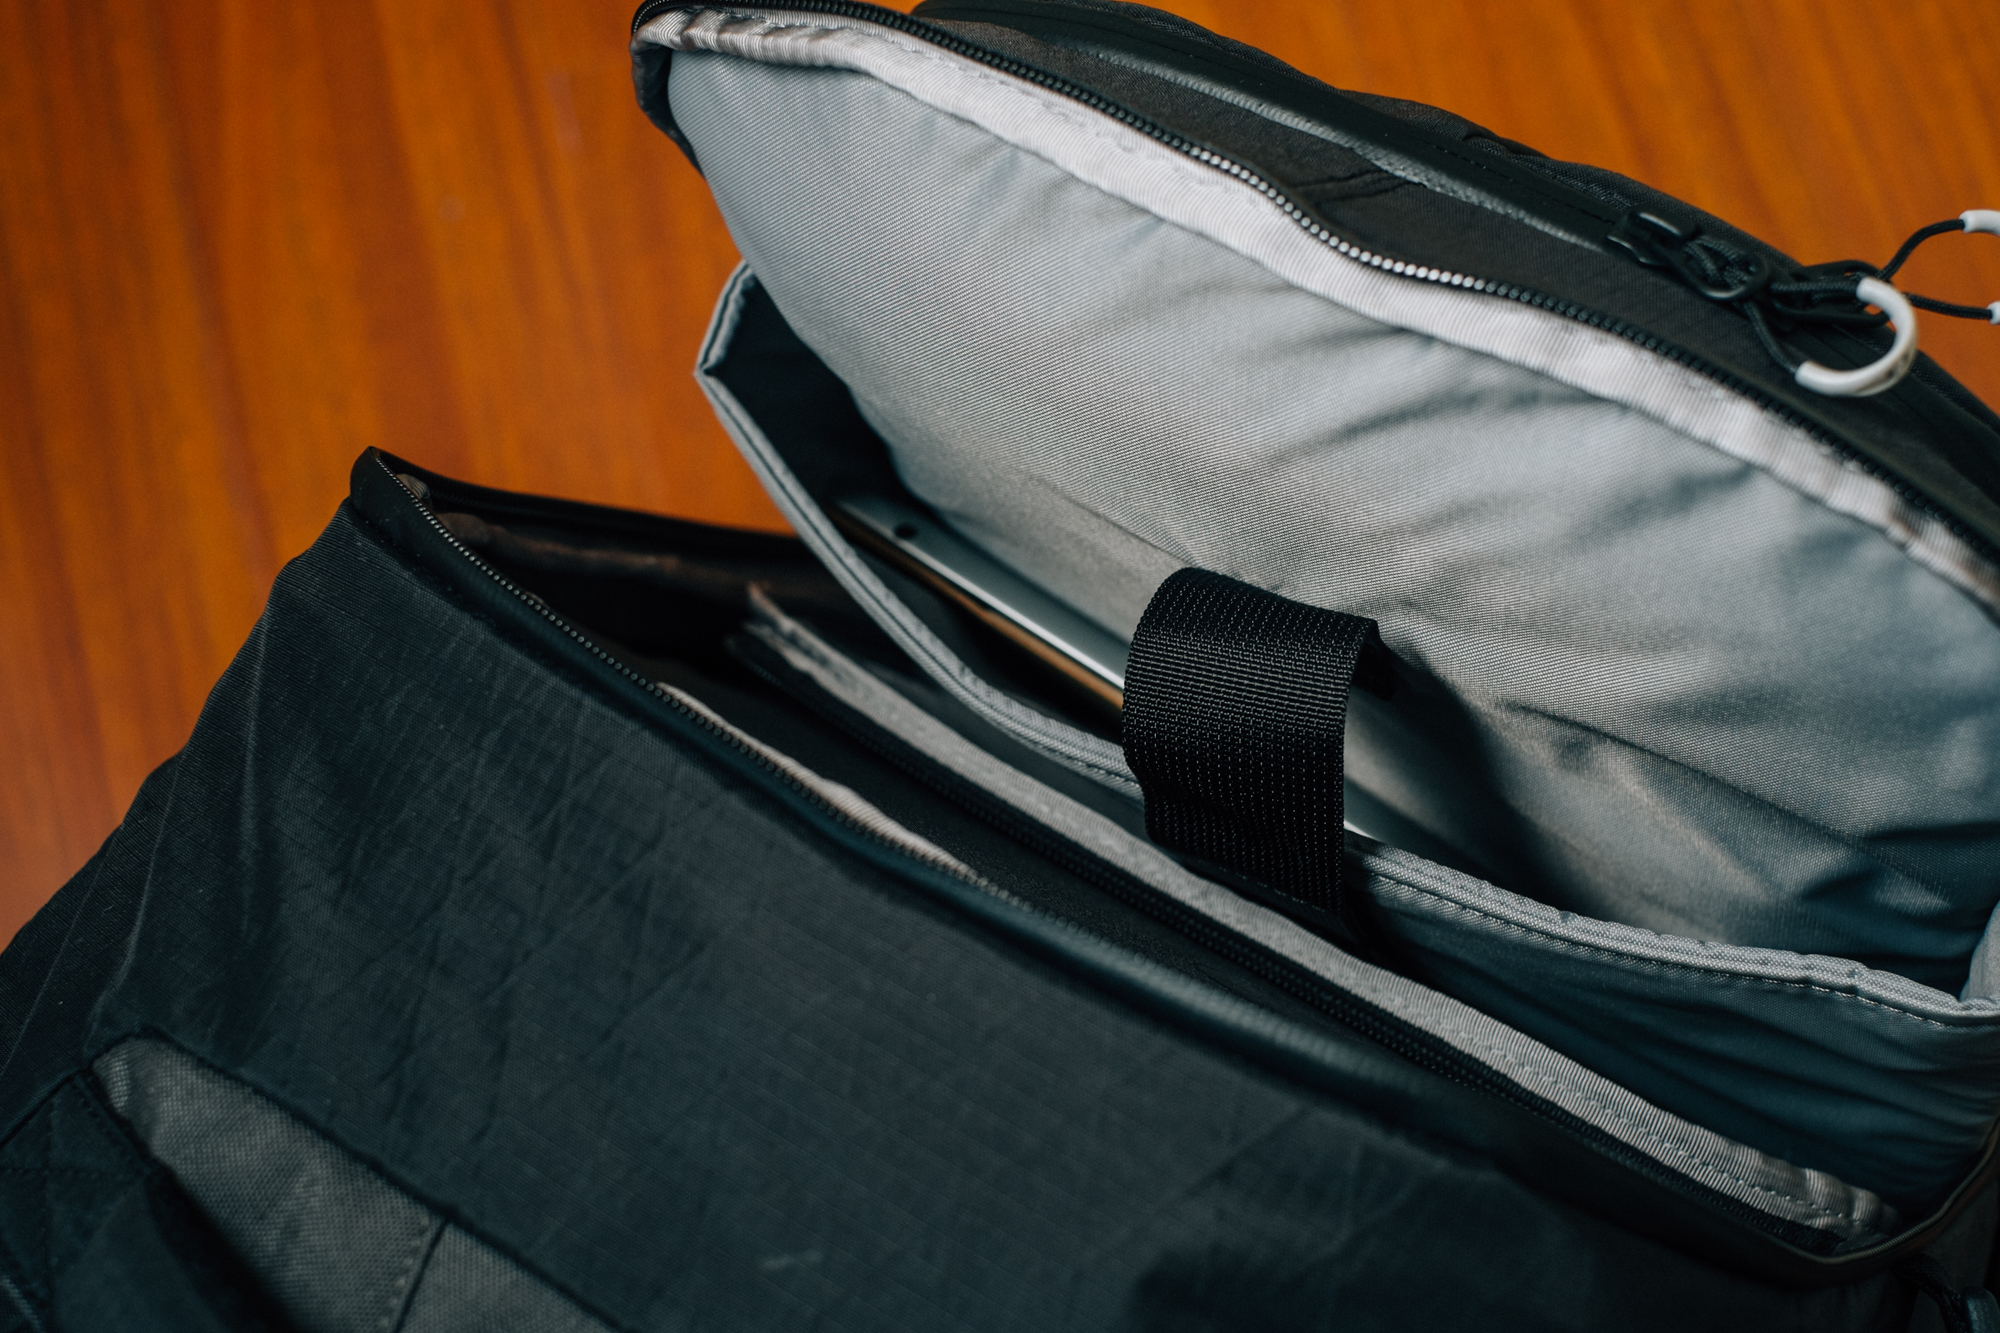
Directly behind the front pocket is the main access compartment, however, while you can technically access the camera module from both sides, it’s typically best to pick one side and use that, personally I choose to access my gear from the back side so I can place the back down in whatever environment I’m shooting in to grab my gear and I know that when I put the bag back on, those elements won’t find there way onto me. This compartment is also where you can store up to a 17″ Macbook Pro (or PC equivalent) if you need to bring a computer with you while traveling. I’ve just been tossing my iPad in that pocket and while it swims around a bit it never manages to slide out of the pocket. (As a side-note: In this shot you can see the texture of their custom “X-Pac” rip-stop material, I’ve found it to be very durable indeed.)

Heading back out to the exterior of the bag there isn’t much to mention here on the sides save for two specific features. You will note the upper and lower compression straps which will allow you to literally “shrink” the bag if you aren’t using both camera modules as I am in this image. In my preferred setup, I use the small pro module at the bottom of the bag, and I compress the top section a little bit depending on what other essentials I am carrying with me that day. The other feature I wanted to mention are the ever-useful mesh side pockets, certainly nothing new as bags have had these for years, but they are just so handy for throwing gloves, or water bottles, or sweat rags, or whatever other odd items you need access to quickly. I’m glad they’re there and usably deep.
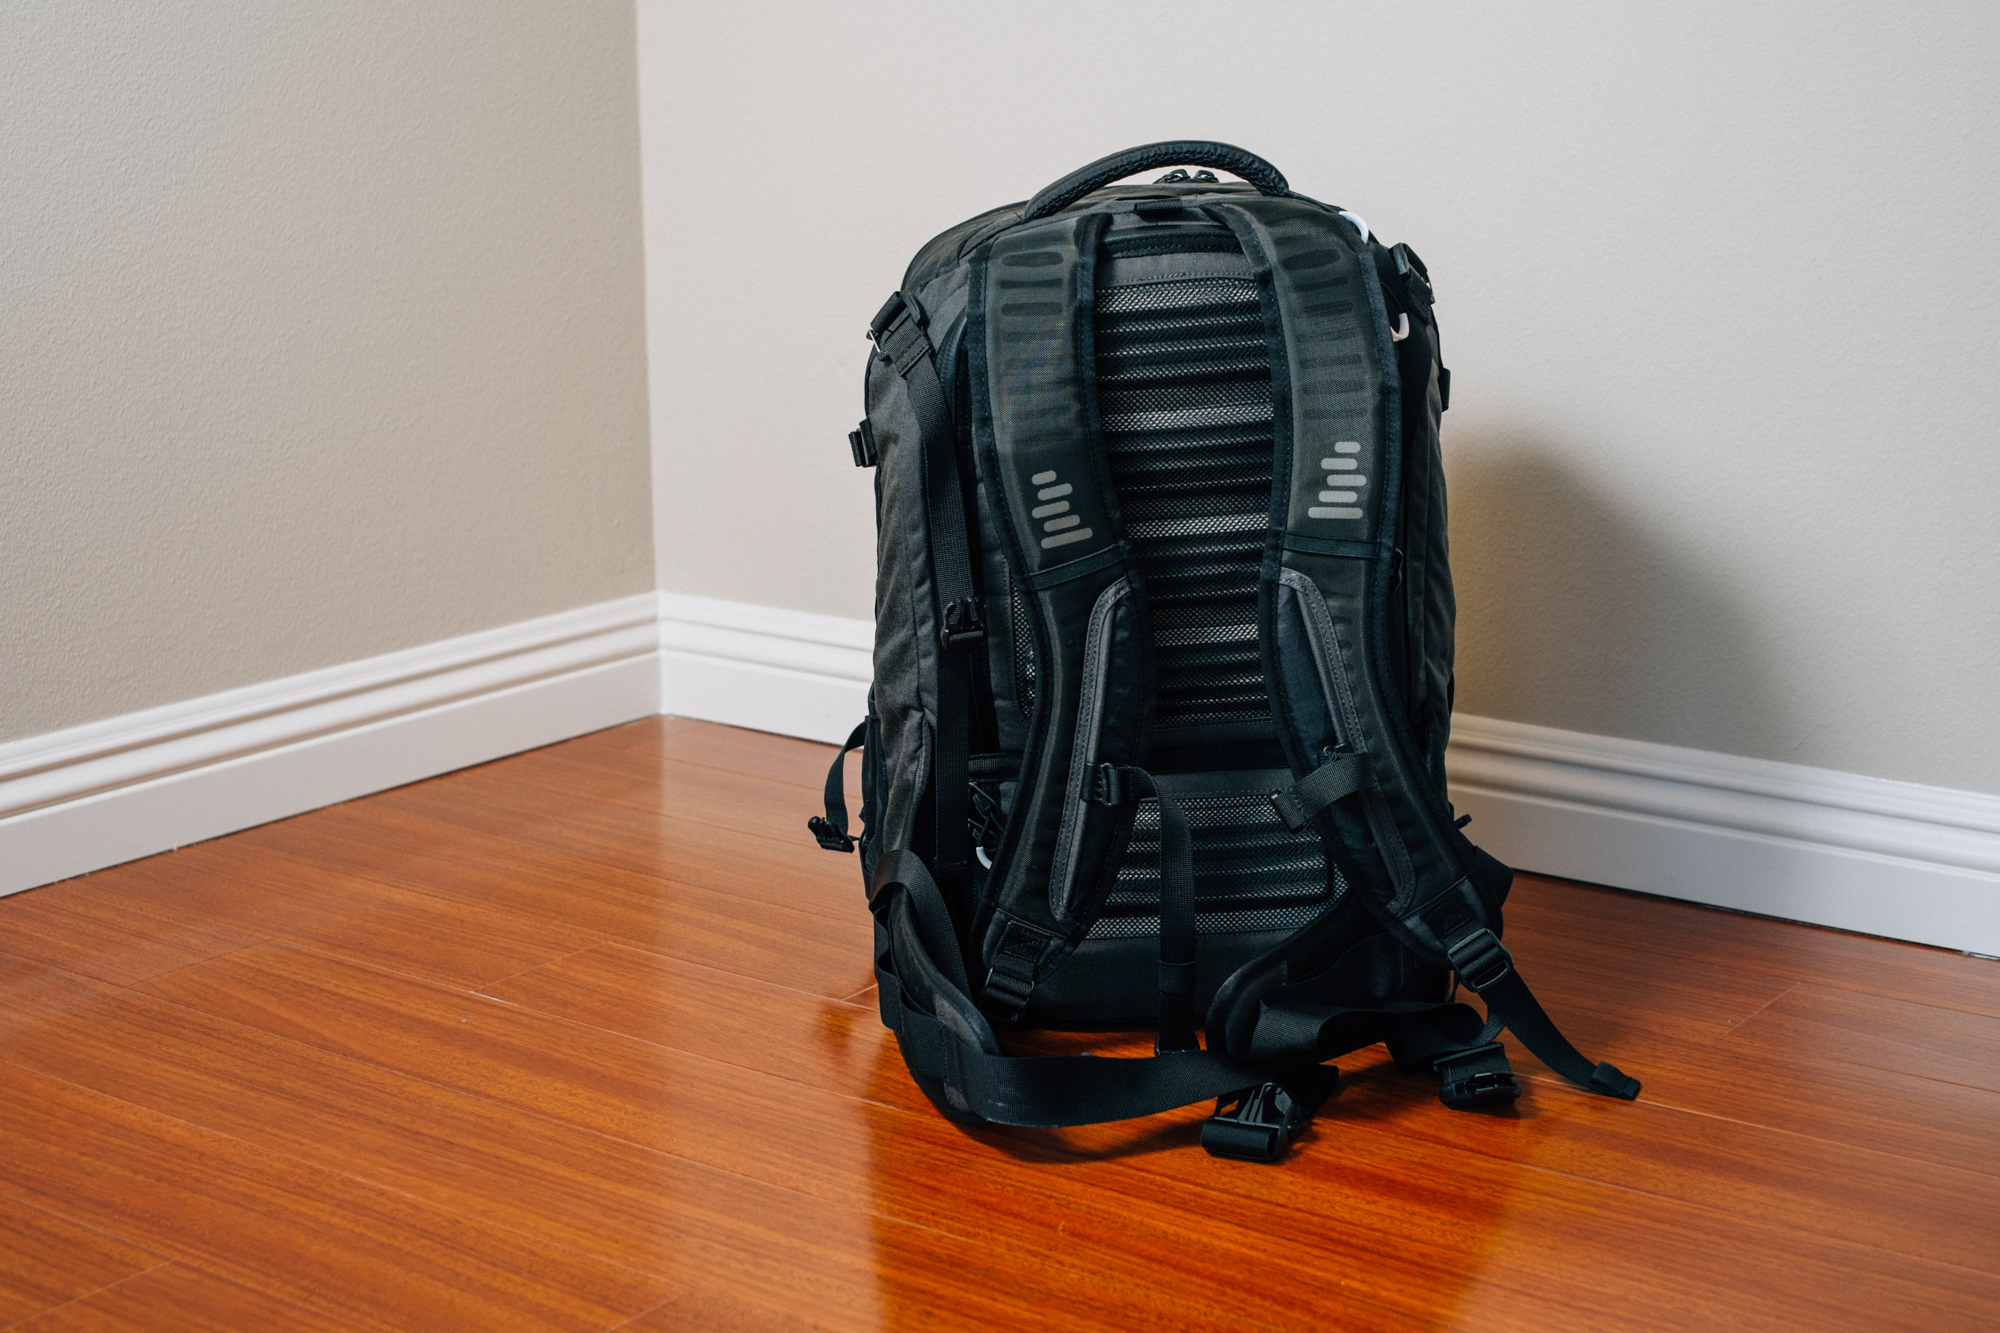
Onwards to the back of the bag! As you can see there was definitely some thought put into the design of the back panel and materials used; let’s take a closer look at them.

The entire panel is lined with these raised ridges covered in a very breathable mesh. At first glance this looks like it would be uncomfortable, but I assure you that is most definitely not the case. The raised sections keep the backpack from actually making complete contact with your back which help keeps you cool so you don’t turn into a disgusting, sweaty mess. (Though this is unavoidable when you’re hiking in California.)
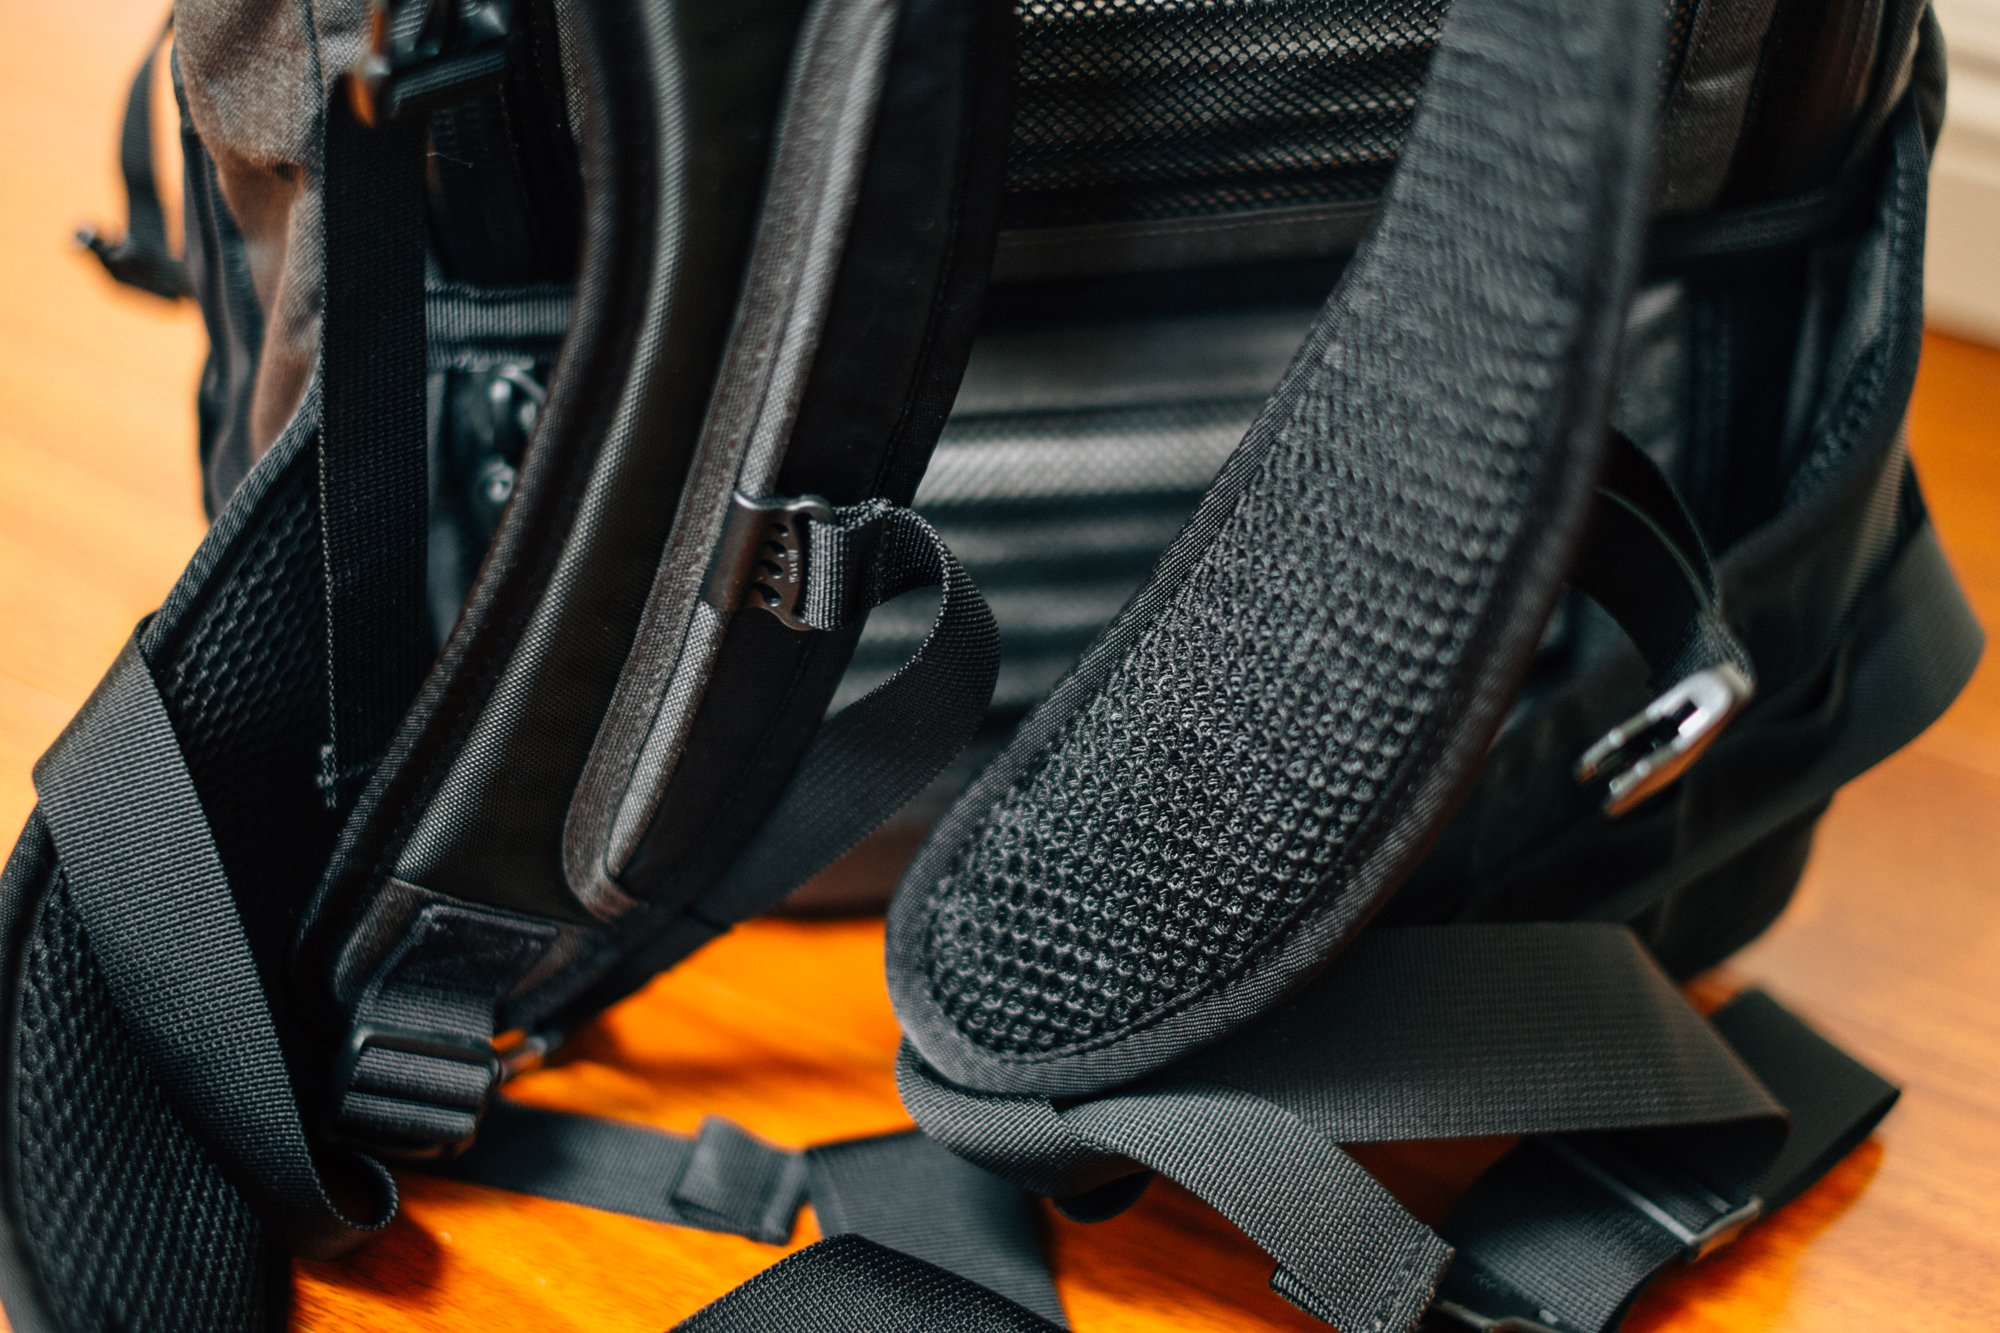
Both the shoulder straps and the waist strap are also lined with very breathable material so they will remain comfortable all day. A neat bonus feature of the waist strap as well is that you can unbuckle the chest strap and take the shoulder straps off and swivel the entire backpack around to the front of your body and access the gear compartment without even taking the bag off or having to put it on the ground.

Every single zipper on this bag is totally weather sealed, and they all have these really handy pull tabs which make the bag very easy to open to get to your gear. I really appreciate good zippers, I can’t tell you guys how many bags I have tried where the zipper snags or gets caught or will only open easily if you stretch the bag a certain way; suffice it to say, Gura Gear has blessed this bag with great zippers.
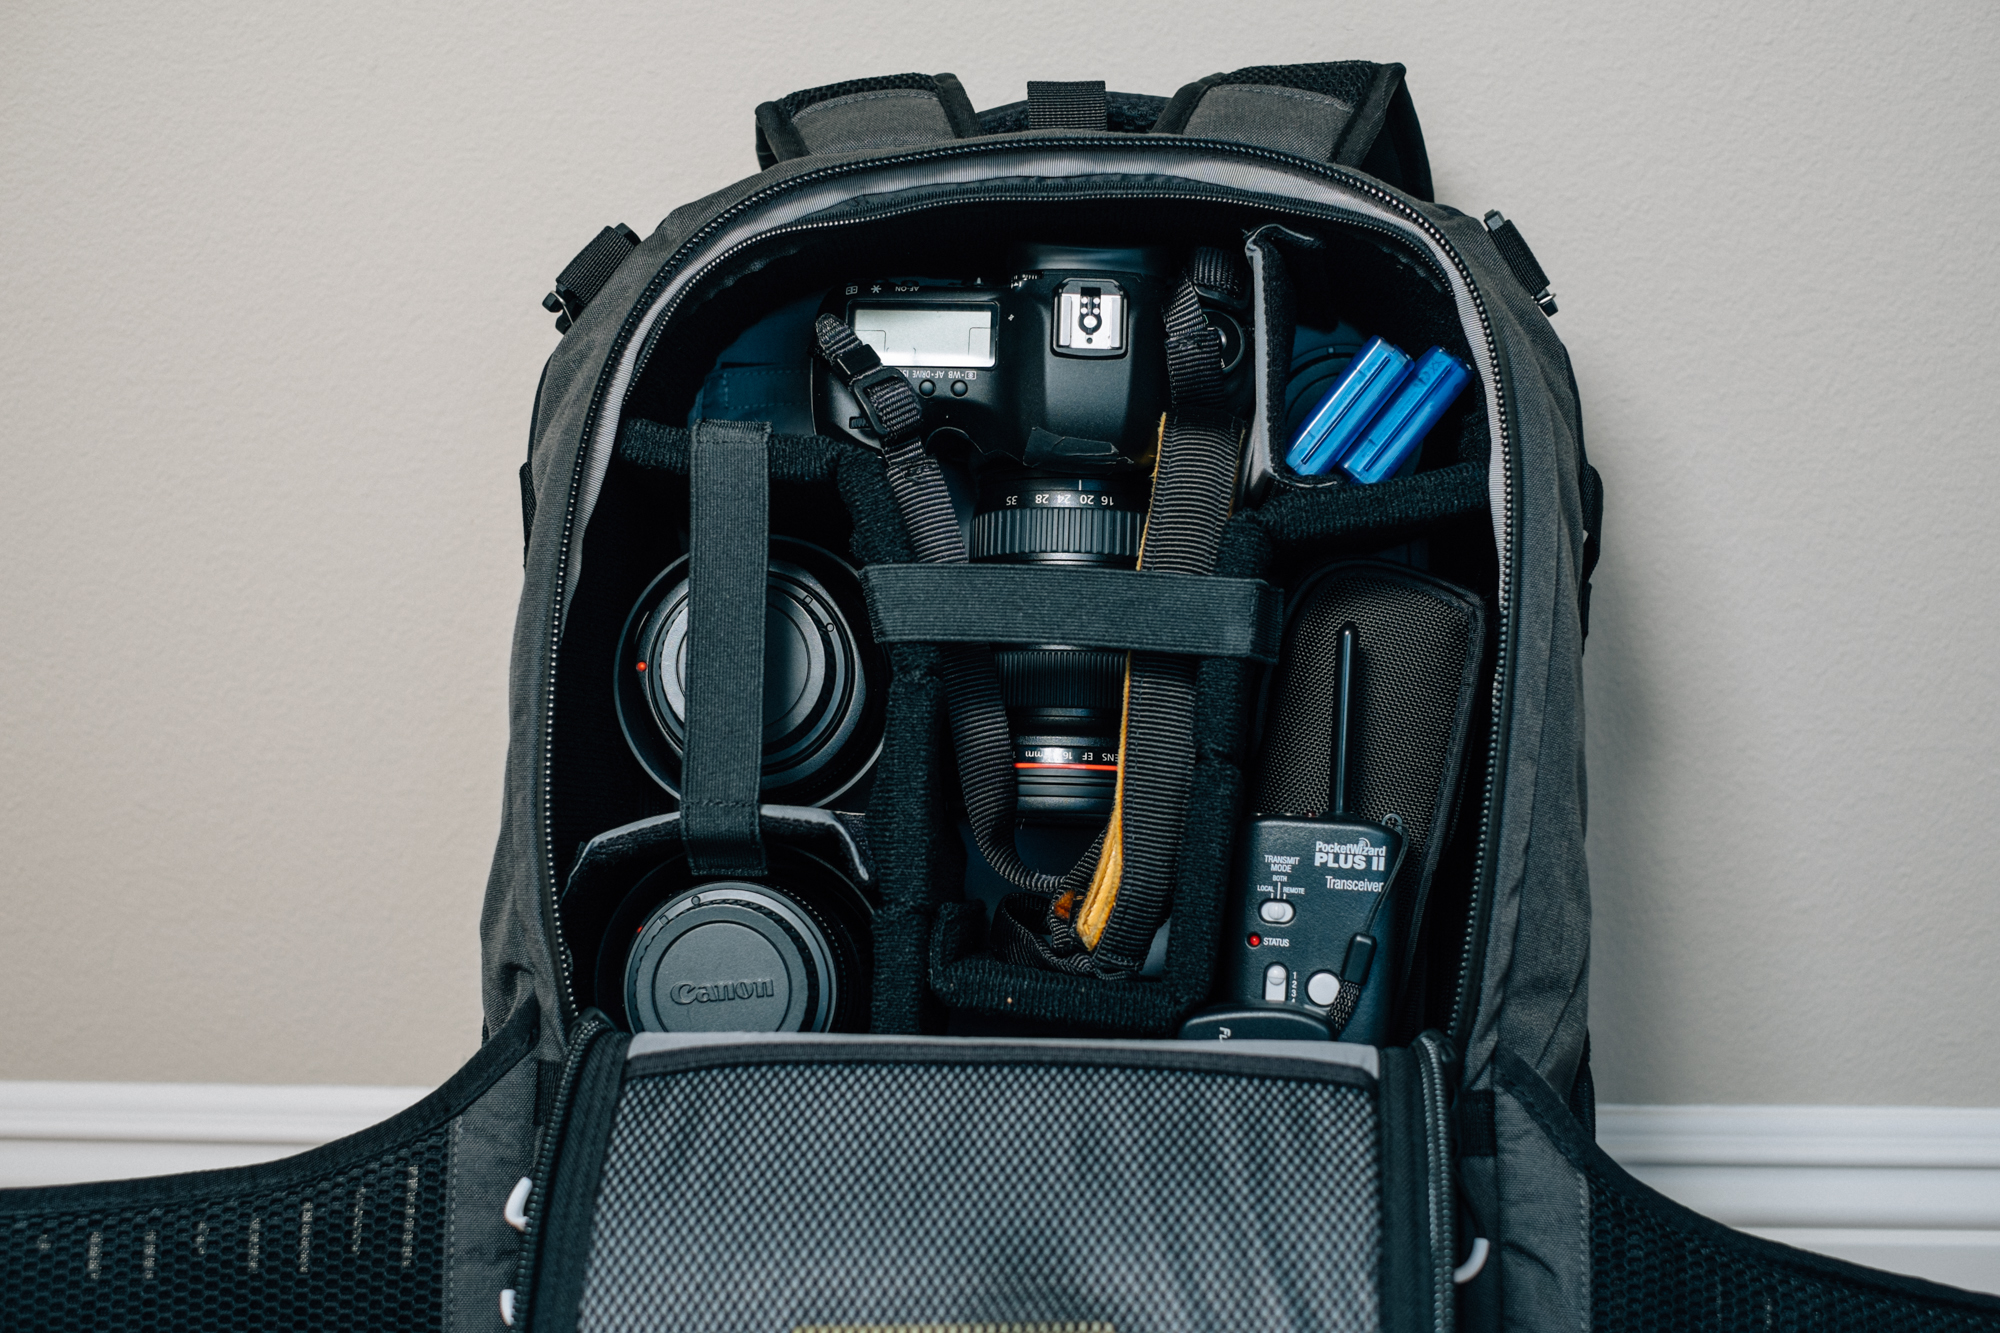
Now for the important parts! When you open the back panel (using those wonderful zippers) you will immediately have access to the main compartment. What you’re looking at here is the inside of the “Medium Pro Module” which is loaded up with the gear I mentioned previously. There are a ton of additional dividers included so you could easily configure this bag a different way, in-fact, I keep changing the layout myself, it’s just so easy!
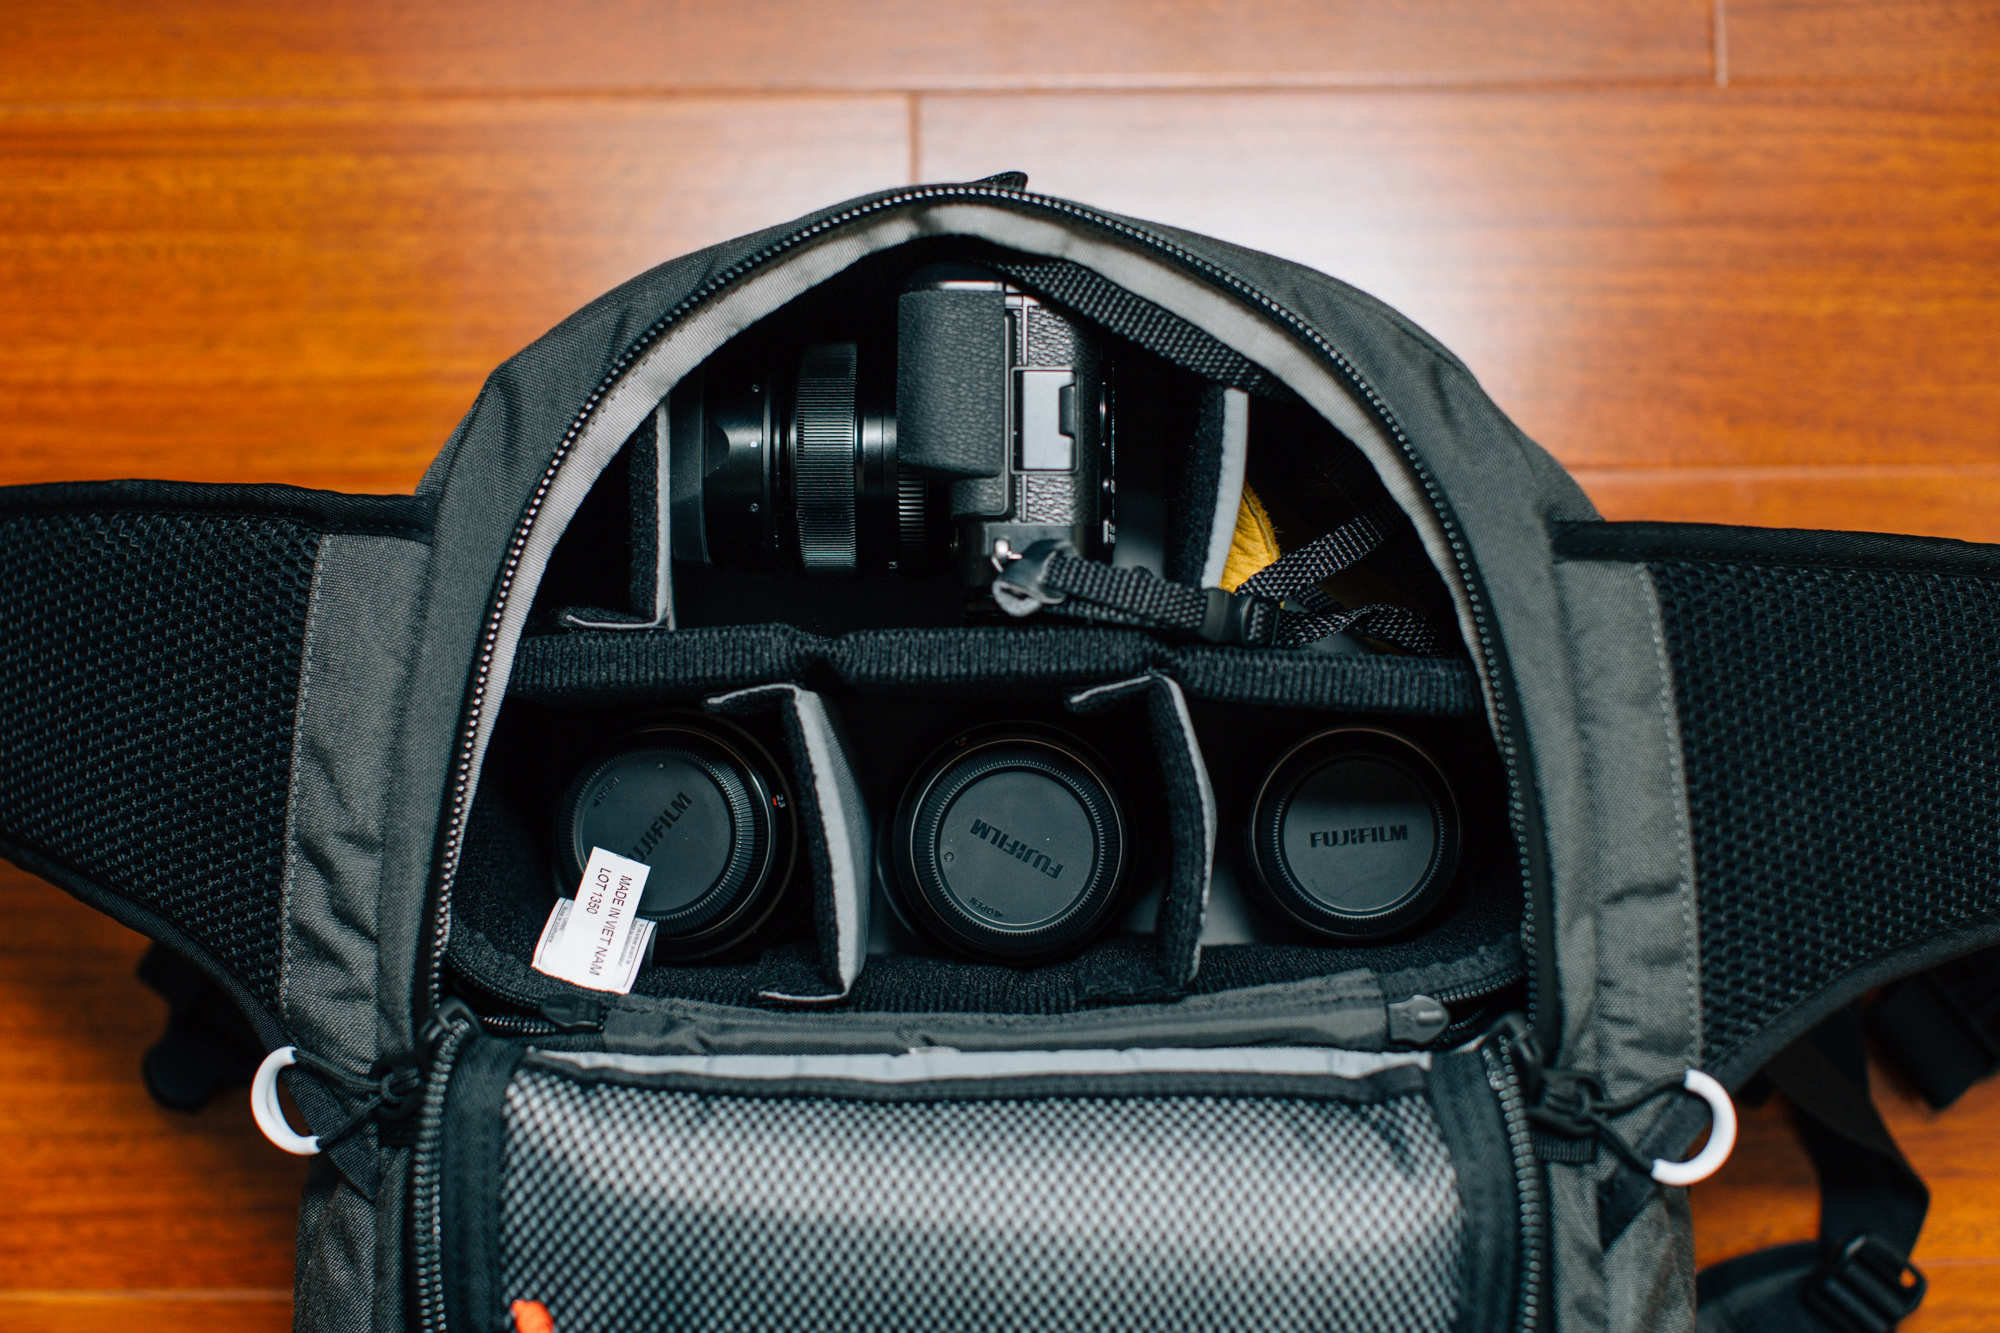
Then if you scoot down a bit further you will have access to the Small Pro Module through a separate smaller zippered panel. As you can see with my Fuji mirrorless kit here, you can carry a pretty sufficient amount of stuff and without the larger module above you can take plenty of other non-camera related things with you on your adventures.
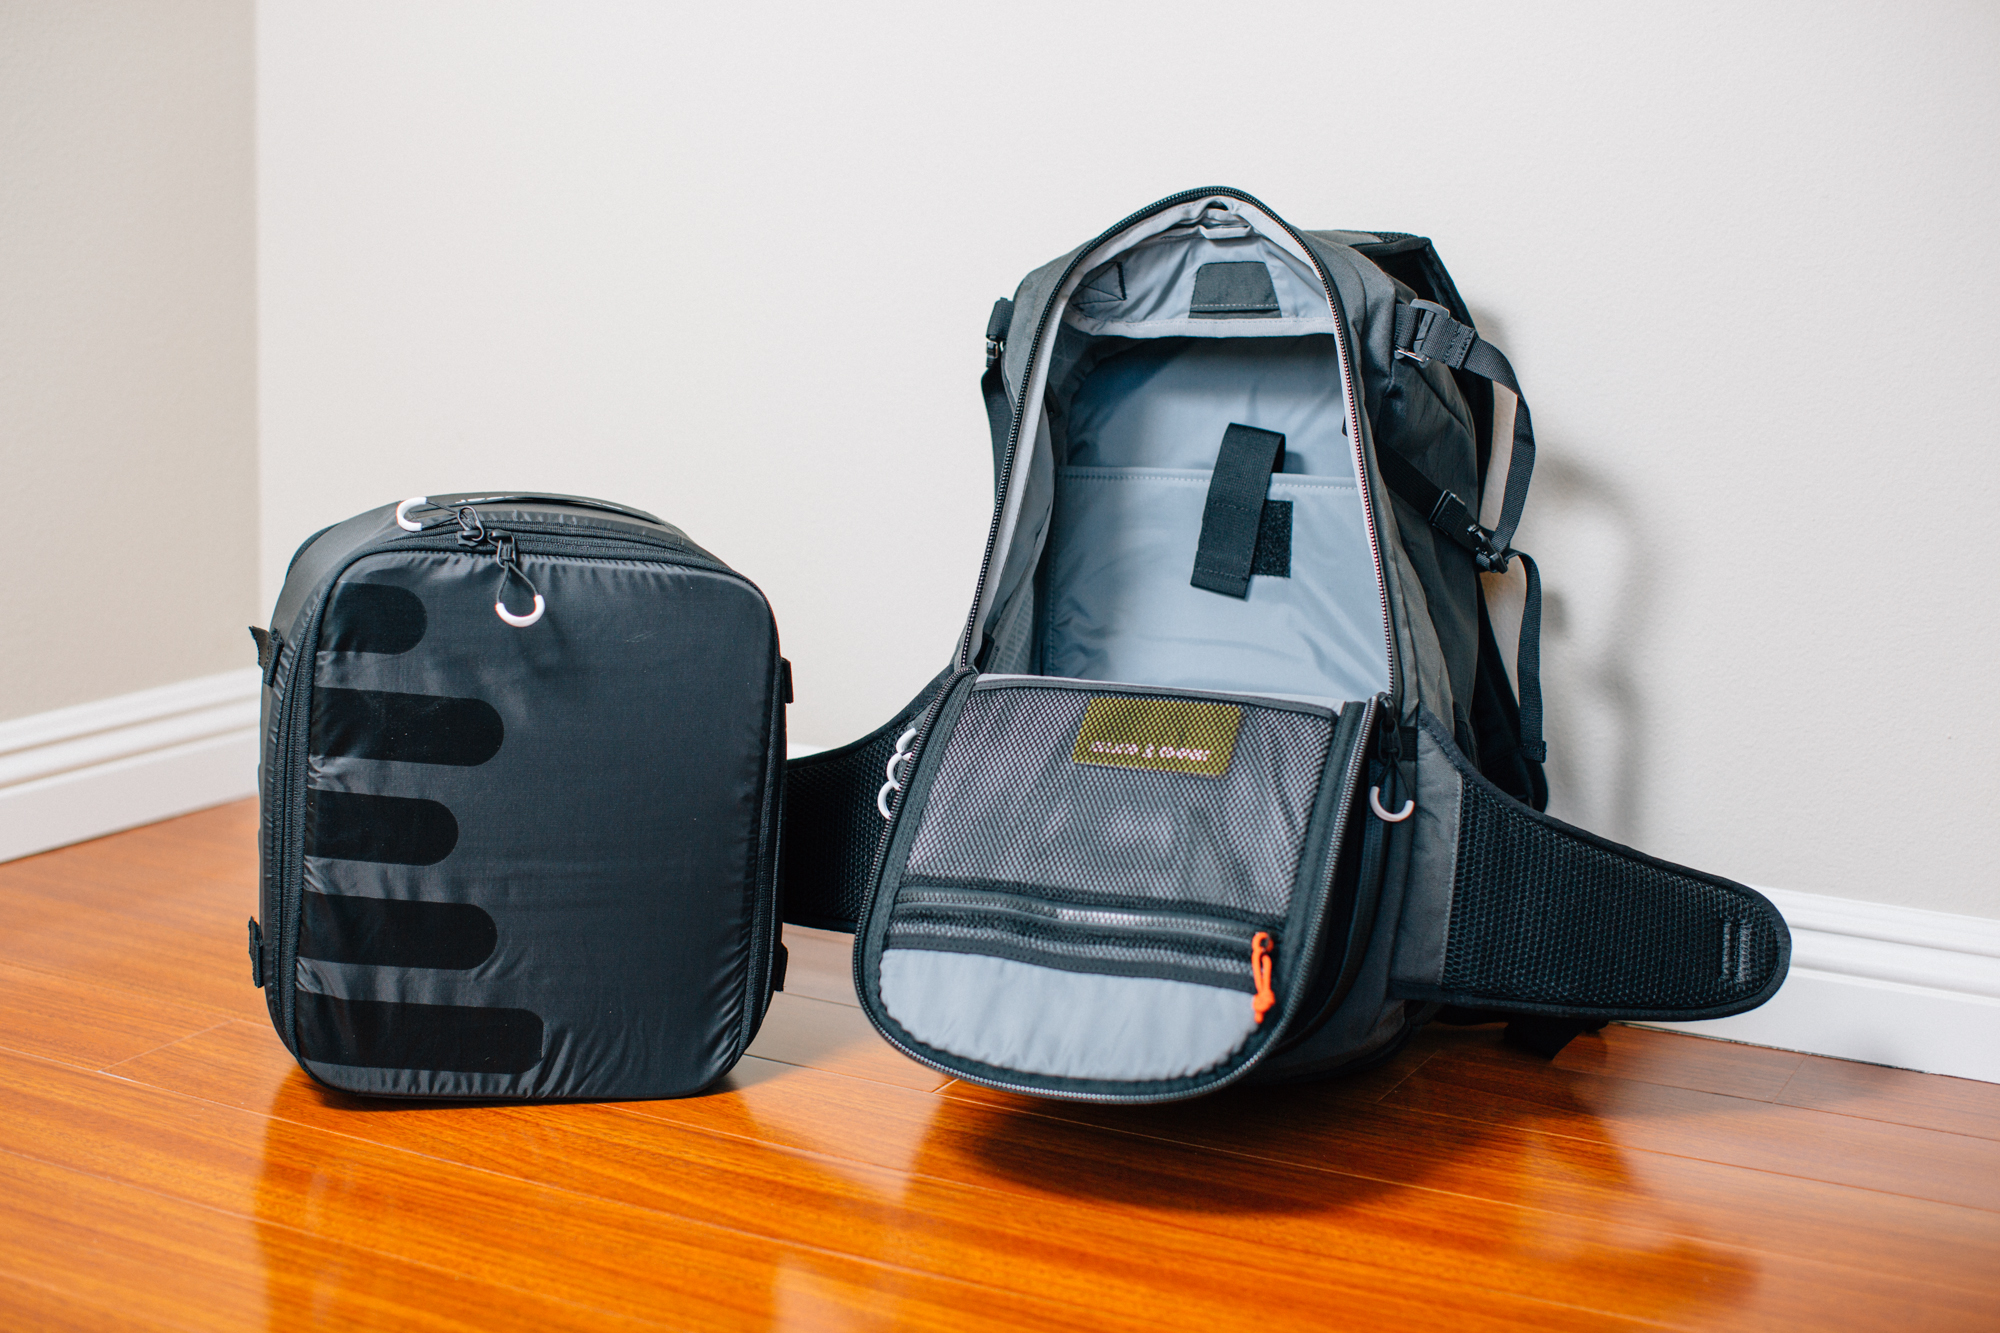
With the medium module removed (note how you can completely zip the unit up for convenient storage outside of the bag) you have a lot of very usable space in the main compartment (and it’s now totally accessible from both the front and the back of the bag). I really like the whole modular bag system, and while it is really essentially the same system that F-Stop Gear uses with their ICUs (another bag system that I adore) it is one that works very well for this kind of equipment bag.
Build Quality
Gura Gear packs have earned the reputation of being incredibly durable and long-lasting, which is a good thing considering the cost of the bag itself. The Uinta Adventure Pack is no different, with its extensive use of Cordura throughout the pack’s design and a custom rip-stop material called X-Pac, as well as fully weather sealed YKK zippers, this bag is designed to weather the elements and keep your equipment safe and secure. When I am testing a camera bag for the purpose of a review I am typically a little more abusive than I would be with other bags. Not outright destructive mind you, but merely wanting to discover any potential weak points or early wear spots on bags that are designed to be tough. In my experience so far, the tough construction of the Uinta pack has laughed in the face of my feeble attempts at even scuffing the exterior. It’s been rained on, dropped in the dirt, scraped against rocks whilst climbing, snagged on branches (and by snagged I mean it ripped the branches off the tree), and just generally used as a proper outdoors bag. Through all that, you’d swear I just pulled it out of the original packaging.
In Use
Backpacks are a popular container for hauling around lots of camera gear (because let’s be honest, we all have too much and have to take it all with us). I find them to be invaluable for hiking and outdoors photography, and the Uinta Adventure Pack is no different. This is a bag designed expressly for being used in the great outdoors, and no, strolling through a park does not count as the great outdoors. I’m typically somewhat hesitant when it comes to backpacks, but that is almost always (and by that I mean 99.9% of the time) due to the fact that the straps just often aren’t comfortable for a 6’3″ fellow like myself. Suffice it to say, I was very pleased to discover that not only were the shoulder straps adequately sized for a man of my stature, the chest and waist compression straps were too! Hooray! It doesn’t sound like much, but let me impress upon you the reality that this almost never happens with backpacks for me. Anyways, onto the rest of my experience; the modular insert system was decidedly familiar to me being a strong advocate for F-Stop Gear’s Mountain backpacks and their removable ICU system, and all I can say is, when an idea works well, use it. As mentioned previously, there are two module inserts currently available (more in the future?) a Medium and Small “Pro” size. They are able to hold pro-sized DSLR equipment without too much hassle, and the kits I assembled for each one fit quite easily. It is also really nice to have the option of which one you want to use depending on how much you want to carry with you. If you use both inserts together it will fill every nanometer of space inside the main compartment; my setup of choice was to carry my Fujifilm X-Pro 1 kit inside of the small insert and have the rest of the bag open for travel essentials and my laptop gear. This of course is just one of many ways to use the bag, and you can decide how much or how little you want to actually take with you.
Conclusions
At this point in the game, Gura Gear has established a reputation for being able to build top-notch weather-proof and borderline indestructible camera packs that have become quite popular with Adventure, Sports and Safari / Wildlife Photographers. Up to this point though, the original Kiboko and follow-up Bataflae lines of bags catered only to hauling a lot of gear to locations; now with the Uinta Adventure Pack you can take the gear that you need as well as other essentials like food, water, outerwear, or even a day’s worth of clothing (as well as your computer and the things that go along with that). To me, this bag is very versatile for short-duration trips or day-hikes and excursions, I’m pretty sure I will never be able to destroy the bag itself, and if I somehow manage to find a flaw, Gura Gear stands behind their products with a strong warranty. The only real “downside” to this bag is the price in my opinion (my other Cons can easily be overlooked), I am a firm believer in “buying once” when you know you want something, and that means buying the best that you can afford, but the fully loaded Uinta backpack that I have in front of me comes in a couple bucks shy of $400, and that ladies and gentlemen is one expensive camera bag. You can option it out to bring the cost down by only getting what you need, but bear in mind, you are paying for an extremely well-designed product, and those tend to be expensive ;). If the price doesn’t deter you, and you are looking for a day-pack to haul your gear and other essentials, as well as a pack that will quite possibly last you a lifetime, then it would be a grave mistake to ignore the Gura Gear Uinta.
For more, please follow us on Facebook, Google+, Flickr and Twitter.
Get rid of the ads!
Did you enjoy reading this article as much as we enjoyed writing it? There's a way to support us and our reporting, getting ad-free navigation and more as a bonus. Subscribe to us for less than a coffee per month —just $3.99— or take advantage of our yearly subscription with a hefty discount for only $25.- An ad-free experience
- A free mystery box for Lightroom or Capture One
- All the books in our store
- 20% discount on Capture One
- 30% discount on Imalume Photo Theft Protection
- 20% off Herbs and Kettle Tea Company.
- 20% off your order from MPIX printing services.
- 5% off Viltrox Products via their eCommerce store.
- 10% off all film developing, printing and scanning services from Blue Moon Camera and Machine
- 15% off 7Artisans products: The lens and accessory maker is offering a sweet discount for Phoblographer's readers.