Editor’s Note: Creating the Photograph is a new series that we’re starting where we interview photographers all about the photo that they shot and talk to them about how it was achieved. The results are some knowledge passed onto you. Want to be featured? Email chrisgampat[at]thephoblographer[dot]com
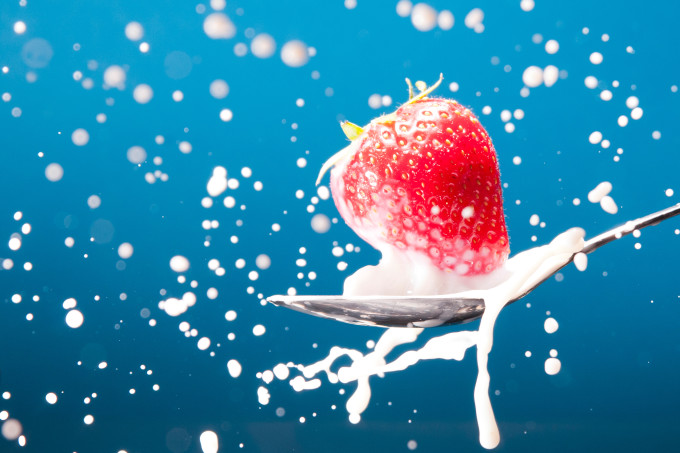
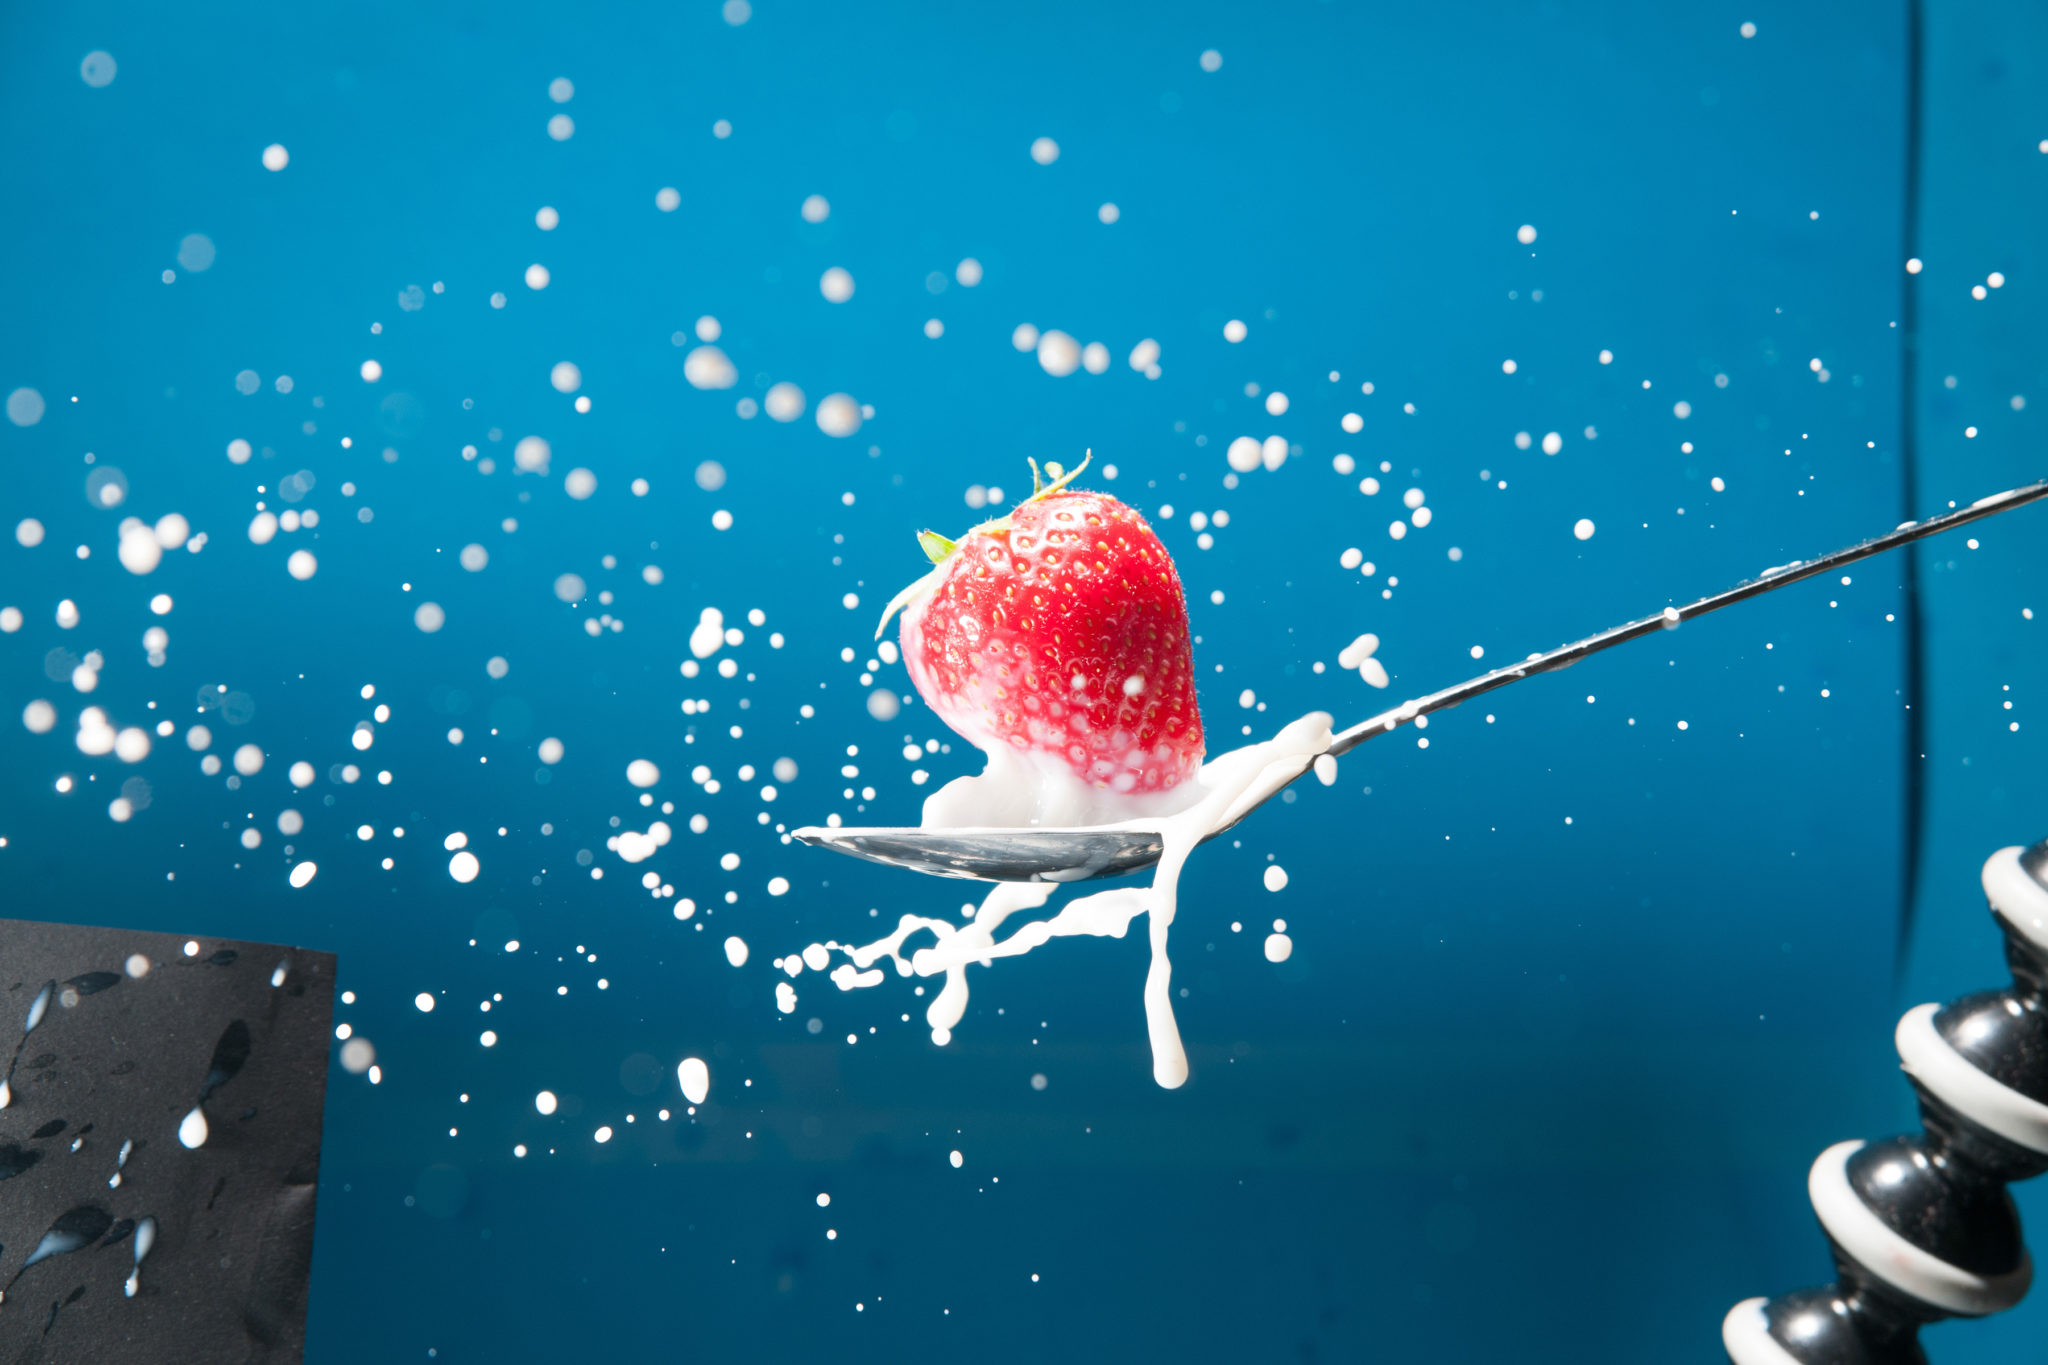
Splash images are always fun to do and when combined with food, an already delectable morsel can become even more mouth watering. When we found the work of Michiel Tersteege, we were quite taken by how much his “Strawberry Splash” image reminded us of a cool bowl of cereal or strawberries and cream. Tersteege used some strobism to create the image above and also does a lot of it for much of his personal work. He has been an amateur photographer for about six years now and lives in The Netherlands with his wife and two children. Michiel is fixated on always getting the perfect shot that gives him satisfaction. He can spend hours a day to setup a nice lighting to create it–and that’s what he did for this one.
Here’s his story. And if you’re interested check out more in our Creating the Photograph series.
The Concept
It was May of 2012. A couple of days before I took the picture that I saw a similar picture on the internet. My goal was to make a picture like that. It wasn’t easy to do. It took about two of hours and almost a full box of strawberries.
Gear Used
Joby GorillaPod
Vanguard tripod
iMac 27″ with Adobe CS5
Strawberries and milk
The Shoot
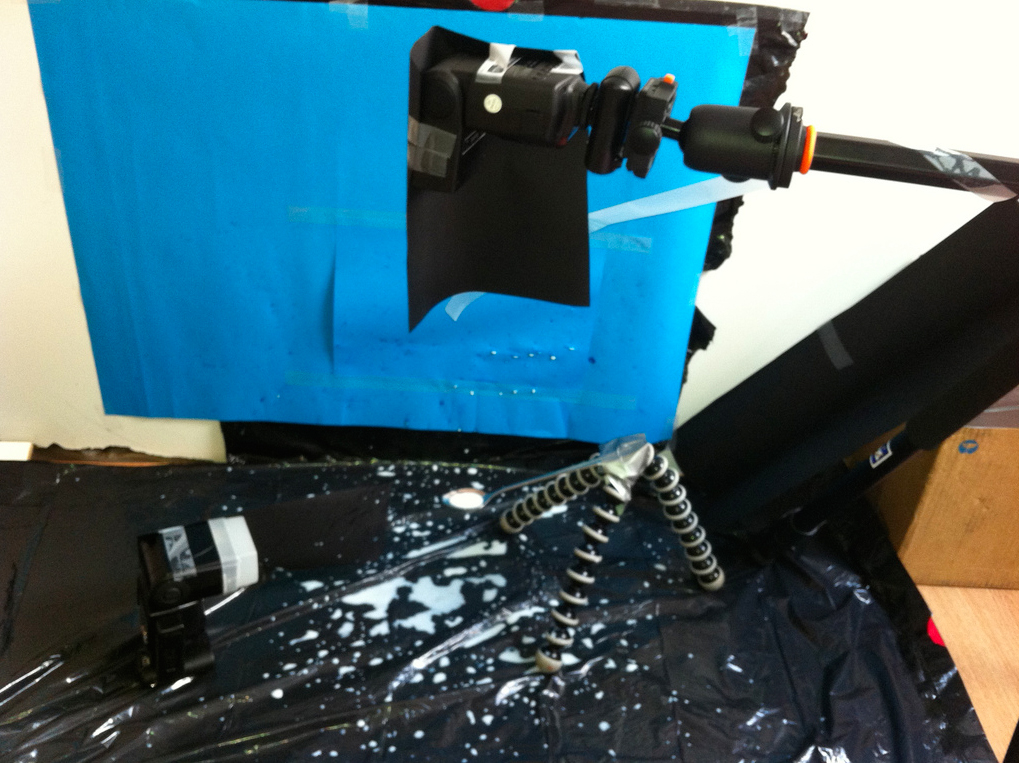
First was the background. I wanted a blue background so that the white milk and the red from the strawberry formed a nice contrast with the blue. So I taped some blue paper to the wall and then the experiment began. I took my Joby mini tripod and taped a spoon to it. I filled the spoon completely with milk.
I knew that the wall and floor would become soaked with milk, so I placed garbage bags everywhere I expected the splatter to reach.
Light Setup
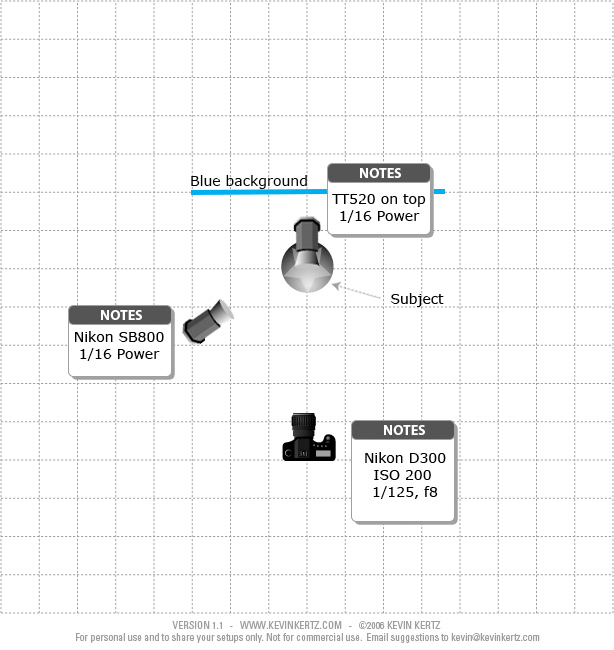
I placed a strawberry in the spoon so that I could first setup the lighting. On the left was a Nikon SB800 at 1/16 power so that the side of the strawberry has nice lighting. Because the background got too much light from the flash, I made a snoot out of black paper so that only the strawberry would get some light. The top of the strawberry was too dark, so I put another flash light (TT520) to light the top, also at 1/16 power. To avoid too much light in the background I put a piece of paper at the side of the flash to block that.
Camara Setup
The camera was on the floor with the Sigma 17 -70mm lens on it. Because I used flash I didn’t want a shutter speed higher than 1/125 of a second due to sync reasons. This gave me an aperture of f8.0. The strawberry is frozen in the picture and the milk has some movement in it. I also didn’t want the camera to become wet, so i’ve used it at 70mm, so that the camera was safe. The camera was in continue setting, so that I could take several pictures in a second. To trigger the flash I used a Cactus V4 set.
Shooting
This was difficult. I had to drop the strawberry and push the shutter button (I didn’t have a remote shutter cable at that time). It is difficult to aim the strawberry exactly straight above the spoon. After a couple of photos I knew this wasn’t going to work. Luckily my wife wanted to help. She dropped the strawberry and I took the photo. Sometimes the strawberry wasn’t visible at all in a sequence of photos. They drop faster than you think. Also, after a couple of drops a strawberry couldn’t be used anymore, because it became bruised. After a while I had a number of good photos to load into the computer. I picked the best one and edited that.
Post Production
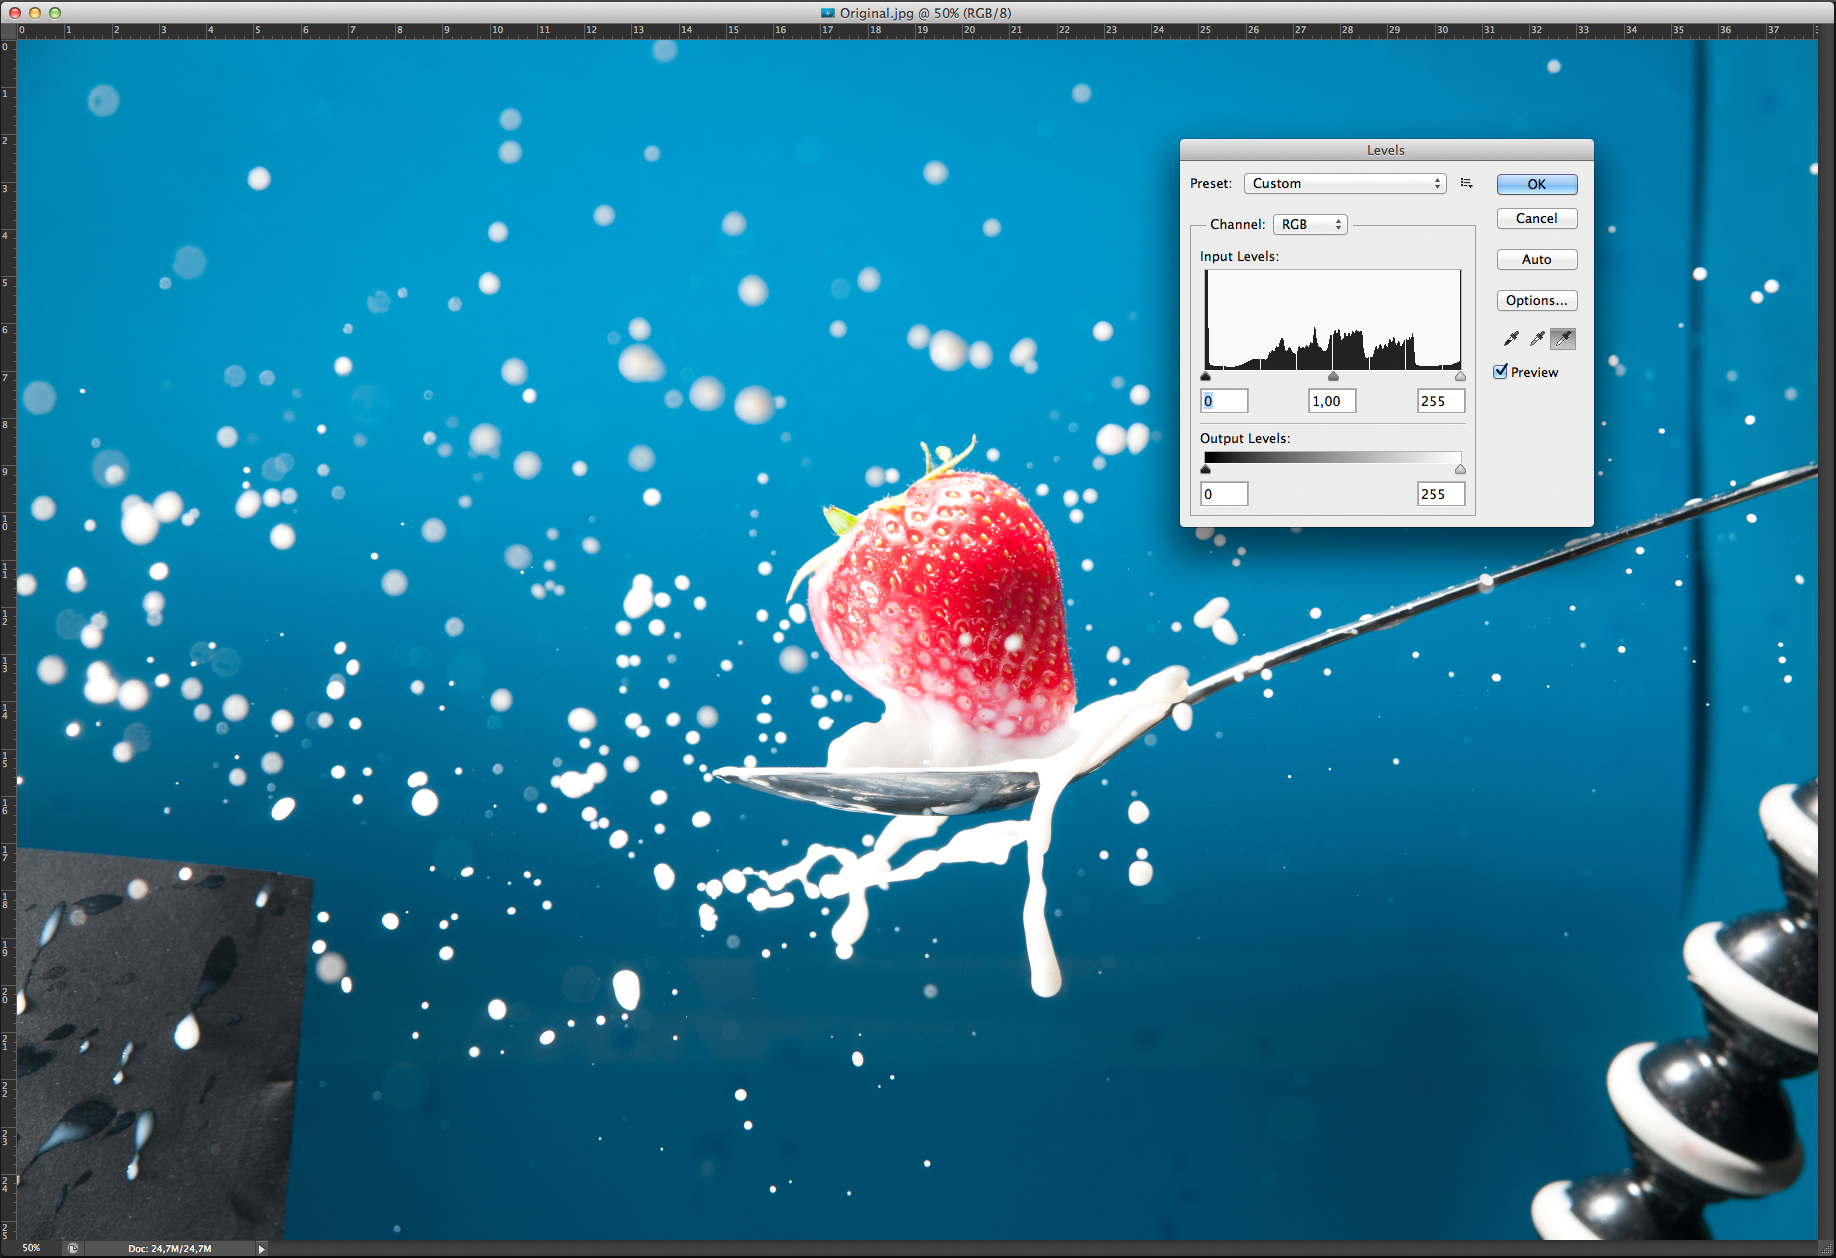
The photo was out of the camera already good. I opened the photo and changed only the white balance. After that I set the guides to see what area I wanted to keep and finally cropped the photo.
If you make your light setup good, you don’t have to do a lot of post production.
Before and After
For more, be sure to visit Michiel’s personal website, flickr, 500px, and twitter.
Please Support The Phoblographer
We love to bring you guys the latest and greatest news and gear related stuff. However, we can’t keep doing that unless we have your continued support. If you would like to purchase any of the items mentioned, please do so by clicking our links first and then purchasing the items as we then get a small portion of the sale to help run the website.
Also, please follow us on Facebook, Flickr and Twitter.
Get rid of the ads!
Did you enjoy reading this article as much as we enjoyed writing it? There's a way to support us and our reporting, getting ad-free navigation and more as a bonus. Subscribe to us for less than a coffee per month —just $3.99— or take advantage of our yearly subscription with a hefty discount for only $25.- An ad-free experience
- A free mystery box for Lightroom or Capture One
- All the books in our store
- 20% discount on Capture One
- 30% discount on Imalume Photo Theft Protection
- 20% off Herbs and Kettle Tea Company.
- 20% off your order from MPIX printing services.
- 5% off Viltrox Products via their eCommerce store.
- 10% off all film developing, printing and scanning services from Blue Moon Camera and Machine
- 15% off 7Artisans products: The lens and accessory maker is offering a sweet discount for Phoblographer's readers.